
:max_bytes(150000):strip_icc():format(webp)/6-things-to-consider-before-buying-a-gaming-pc-5221042-8a79710a1e4549edbc357125123fb04e.jpg)
Updated What Is Anime? Anime VS Manga VS Cartoon for 2024
What Is Anime? [Anime VS Manga VS Cartoon]
What is Anime? [Anime VS Manga VS Cartoon]

Shanoon Cox
Mar 27, 2024• Proven solutions
You may have heard of Anime. What is Anime? Anime, Manga, and Cartoons all are the exquisite openings of little portals into the other worlds that will entertain, delight, and educate you at the same time. They are the forms of art and words creating a unique medium for sharing the realities of the world, spirituality, and ideas.
The digital world has grown so immensely, and then Amine, Manga, and Cartoon have become popular in the whole world that people often confuse these terms. To understand them better and to decode the myth of anime, manga, and cartoon, we’ll go deeper into each and see what anime is, and show the differences in anime, manga, and cartoon.
- Part 1: What is Anime?
- Part 2: What is Manga?
- Part 3: What is Cartoon?
- Part 4: Differences between Anime, Manga, and Cartoon
Part 1: What is Anime?
Anime is the Japanese form of animation – word for word. This scrupulous style and form of animation originated in Japan characterized by its vivid imagination and bright color usage. The thematic elements of fantasy and fiction combined with science give this style its unique look and feel. This meticulously thought and designed animation is nowadays produced all around the world intending its huge fanbase not just in the Japanese but all over the world.
The story is behind the word anime is interesting – the Japanese animēshiyon is a loanword from English animation, which then made its journey back to English as anime. So, the Japanese borrowed it from English and the English took it back modified. This modified version of animation became the basis of many popular TV shows and movies that excite people to know more about anime.
Note
Subbed Anime and Dubbed Anime
There are two common ways to enjoy the anime world, subbed anime and dubbed anime. A “sub” is an anime-type that is shown in its original Japanese voice with subtitles of another language (mostly English). While the “dub” anime is the one that is released with a new re-scripted voice – voice actors speaking another language recorded as voiceover to make it suitable for a worldwide audience.
Though the topic is often a debatable topic among anime fandom. I’ll just highlight my thoughts on both versions. As anime is mostly Japanese creation and watching them in the western world required either an English subtitle or dubbed over by English-speaking voice actors.
Anime hardcore fans or purists argue the original voice and theme of the anime should not be altered to keep the original imaginative flair and theme of the series. While the dubbed anime released with a re-scripted voice track translated into English or any other language for that matter to allow a larger audience to enjoy the anime series without the hassle of reading through the subtitles.
Part 2: What is Manga?
Manga, on the other hand, is the Japanese version of comic books and graphic novels. It has the same detailed and amplified facial features with a vivid and bright color combination. The Japanese word manga came from man-, meaning aimless, while, -ga, means pictures. So, it means aimless pictures.
Manga is unlike the usual superhero comics such as Marvel Comics or D.C. Comics written by many writers and editorial boards. Manga is more detailed and complete like novels that often are the vision of a single author. Mostly following the lives of seemingly ordinary people to develop an interesting and engaging experience – a cliffhanger.
Part 3: What is Cartoon?
The word cartoon comes from the Italian word cartoon meaning a large sheet of card or paper. The word cartoon generally signifies a visual art as animation or a funny drawing while in a historical perspective it can refer to a preparatory drawing for an oil painting, fresco, or tapestry. A cartoon in literal meaning is a caricature intended as satire or a one-dimensional non-realistic or semi-realistic portrayal.
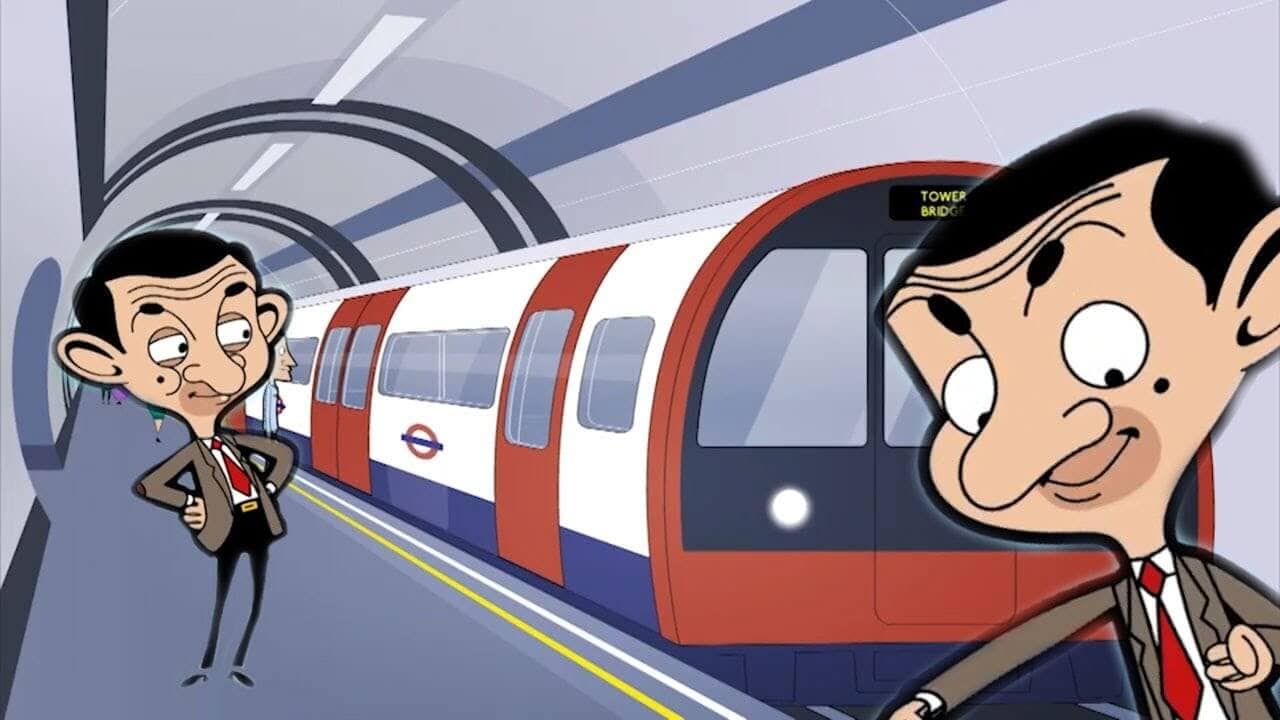
Image resource: Mr. Bean Cartoon World
Did you see Mr Bean Cartoon? A cartoon can be animated, a motion picture of a sequence of illustrations causing it to feel like a moving caricature. In the 19th century, cartoons were humorous illustrations in magazines and newspapers transforming into comic strips and animated films in the early 20th century, as we know them now.
Part 4: Differences between Anime, Manga, and Cartoon
Here we will talk about the differences between anime, manga, and cartoon from the following three aspects:
1. Relation
To effectively understand the difference between anime and manga you need to remember this little trick for anime vs manga,
- Most manga can be never converted to an anime series. But numerous manga serves as a basis for anime. Put in another way – anime is mostly, but not always, is the animated form of manga.
- Anime and manga are character-oriented where characters have goals in life that play a large thematic role in their life and the stories revolve around that.
- However, the cartoon vs manga and anime is another story altogether,
- In the western world comics and novels became animated cartoons with the advent of the digital age. In Japanese and wider Asia, the manga which is the Japanese version of comics and print cartoons turned into animated cartoons – anime.
2. Content
- Anime is a distinctive art form with diverse production techniques, it amalgamates graphic art, cinematography, characterization, and other imaginative techniques. Anime is hand-drawn, which separates it from reality into the fiction realm that provides an ideal path for the fantasy world.
- Manga showcases an illuminative and vivid imagination of the creator in the form of magazines and publications. The content incites the reader to engage deep into the artistic world of the creator.
- A cartoon is also a form of art, including and not limited to humorous illustrations, political and satirical drawings, and animated films. From art to entertainment, and political commentary, cartoons play an essential role in influencing the world.
3. Style
- While the western design cartoon has its specific features and details and the Japanese manga and anime have their rich history and imaginative flair to them. On the whole, they are part of the same family of art and human illustration techniques developed to showcase the tingling visualization of the creator.
Conclusion
The Japanese storytelling is so rich and vibrant filled with dynamic characters and caricatures which serve as the best entertaining setting for both children and adults. All of these art forms have their dedicated audience which reveres one or the other. Creators that depict their vivid imagination into eloquent and exquisite characters conveying some message and thought-provoking idea. So, altogether none is better than the other and there are millions and millions of people reading and watching all these forms of artistic mastery. Just pick the one you love!
You may also like: Best Anime Websites to Watch Anime for Free >>
Shanoon Cox
Shanoon Cox is a writer and a lover of all things video.
Follow @Shanoon Cox
Shanoon Cox
Mar 27, 2024• Proven solutions
You may have heard of Anime. What is Anime? Anime, Manga, and Cartoons all are the exquisite openings of little portals into the other worlds that will entertain, delight, and educate you at the same time. They are the forms of art and words creating a unique medium for sharing the realities of the world, spirituality, and ideas.
The digital world has grown so immensely, and then Amine, Manga, and Cartoon have become popular in the whole world that people often confuse these terms. To understand them better and to decode the myth of anime, manga, and cartoon, we’ll go deeper into each and see what anime is, and show the differences in anime, manga, and cartoon.
- Part 1: What is Anime?
- Part 2: What is Manga?
- Part 3: What is Cartoon?
- Part 4: Differences between Anime, Manga, and Cartoon
Part 1: What is Anime?
Anime is the Japanese form of animation – word for word. This scrupulous style and form of animation originated in Japan characterized by its vivid imagination and bright color usage. The thematic elements of fantasy and fiction combined with science give this style its unique look and feel. This meticulously thought and designed animation is nowadays produced all around the world intending its huge fanbase not just in the Japanese but all over the world.
The story is behind the word anime is interesting – the Japanese animēshiyon is a loanword from English animation, which then made its journey back to English as anime. So, the Japanese borrowed it from English and the English took it back modified. This modified version of animation became the basis of many popular TV shows and movies that excite people to know more about anime.
Note
Subbed Anime and Dubbed Anime
There are two common ways to enjoy the anime world, subbed anime and dubbed anime. A “sub” is an anime-type that is shown in its original Japanese voice with subtitles of another language (mostly English). While the “dub” anime is the one that is released with a new re-scripted voice – voice actors speaking another language recorded as voiceover to make it suitable for a worldwide audience.
Though the topic is often a debatable topic among anime fandom. I’ll just highlight my thoughts on both versions. As anime is mostly Japanese creation and watching them in the western world required either an English subtitle or dubbed over by English-speaking voice actors.
Anime hardcore fans or purists argue the original voice and theme of the anime should not be altered to keep the original imaginative flair and theme of the series. While the dubbed anime released with a re-scripted voice track translated into English or any other language for that matter to allow a larger audience to enjoy the anime series without the hassle of reading through the subtitles.
Part 2: What is Manga?
Manga, on the other hand, is the Japanese version of comic books and graphic novels. It has the same detailed and amplified facial features with a vivid and bright color combination. The Japanese word manga came from man-, meaning aimless, while, -ga, means pictures. So, it means aimless pictures.
Manga is unlike the usual superhero comics such as Marvel Comics or D.C. Comics written by many writers and editorial boards. Manga is more detailed and complete like novels that often are the vision of a single author. Mostly following the lives of seemingly ordinary people to develop an interesting and engaging experience – a cliffhanger.
Part 3: What is Cartoon?
The word cartoon comes from the Italian word cartoon meaning a large sheet of card or paper. The word cartoon generally signifies a visual art as animation or a funny drawing while in a historical perspective it can refer to a preparatory drawing for an oil painting, fresco, or tapestry. A cartoon in literal meaning is a caricature intended as satire or a one-dimensional non-realistic or semi-realistic portrayal.
Image resource: Mr. Bean Cartoon World
Did you see Mr Bean Cartoon? A cartoon can be animated, a motion picture of a sequence of illustrations causing it to feel like a moving caricature. In the 19th century, cartoons were humorous illustrations in magazines and newspapers transforming into comic strips and animated films in the early 20th century, as we know them now.
Part 4: Differences between Anime, Manga, and Cartoon
Here we will talk about the differences between anime, manga, and cartoon from the following three aspects:
1. Relation
To effectively understand the difference between anime and manga you need to remember this little trick for anime vs manga,
- Most manga can be never converted to an anime series. But numerous manga serves as a basis for anime. Put in another way – anime is mostly, but not always, is the animated form of manga.
- Anime and manga are character-oriented where characters have goals in life that play a large thematic role in their life and the stories revolve around that.
- However, the cartoon vs manga and anime is another story altogether,
- In the western world comics and novels became animated cartoons with the advent of the digital age. In Japanese and wider Asia, the manga which is the Japanese version of comics and print cartoons turned into animated cartoons – anime.
2. Content
- Anime is a distinctive art form with diverse production techniques, it amalgamates graphic art, cinematography, characterization, and other imaginative techniques. Anime is hand-drawn, which separates it from reality into the fiction realm that provides an ideal path for the fantasy world.
- Manga showcases an illuminative and vivid imagination of the creator in the form of magazines and publications. The content incites the reader to engage deep into the artistic world of the creator.
- A cartoon is also a form of art, including and not limited to humorous illustrations, political and satirical drawings, and animated films. From art to entertainment, and political commentary, cartoons play an essential role in influencing the world.
3. Style
- While the western design cartoon has its specific features and details and the Japanese manga and anime have their rich history and imaginative flair to them. On the whole, they are part of the same family of art and human illustration techniques developed to showcase the tingling visualization of the creator.
Conclusion
The Japanese storytelling is so rich and vibrant filled with dynamic characters and caricatures which serve as the best entertaining setting for both children and adults. All of these art forms have their dedicated audience which reveres one or the other. Creators that depict their vivid imagination into eloquent and exquisite characters conveying some message and thought-provoking idea. So, altogether none is better than the other and there are millions and millions of people reading and watching all these forms of artistic mastery. Just pick the one you love!
You may also like: Best Anime Websites to Watch Anime for Free >>
Shanoon Cox
Shanoon Cox is a writer and a lover of all things video.
Follow @Shanoon Cox
How to Make Animation Characters with the Best Character Creators
How-to Guide: Make Animation Characters with the Best Animated Character Creators
An easy yet powerful editor
Numerous effects to choose from
Detailed tutorials provided by the official channel
Are you a marketer and don’t know where to start? You can start with character animation?
This article will engage you with many software to create your own animated character. Plus, some easy ways too for those novices in this field with simple apps to create your own animated character.
In this article
01 [How to Choose the Right Character Animation Maker?](#Part 1)
02 [Top 8 Software to make Character Animation. ](#Part 2)
03 [3 Easy Ways to Make Your Own Cartoon Character (For Beginners/Non-Illustrators)](#Part 3)
Part 1 How to Choose the Right Character Animation Maker?
If you are concerned about which character animation maker to choose, be aware of the analysis and alternatives you need to know. After knowing the needs of the animation as going to be mentioned below, your chances of selecting the software correctly will increase.
At first, you need to know what are you creating, what kind of animation software you want to produce? What are the objectives of videos marketing or movies? By answering these questions, you can choose the correct software.
You need to decide the features you require in the software. You may not require all the advanced features. If you are doing a simple animated video, you require only simple features but enough to complete your project.
There is a separate type of software for 2D and 3D, and you need to choose your requirement to complete the project
Now that you have known all the features you need to consider before choosing software choose it wisely and enjoy creating character animation. We’ll go over a considerable number of animation software in this journal, and you can choose one of them.
Part 2 Top 8 software to Create Character Animation
Due to the difficulty in selecting character animation software, we have sorted out some of the most beneficial and user-friendly options.
01 Animaker
The best part of this software is its versatility and flexibility. Animaker is valuable software for every kind of business animation, and it involves multiple features. It is a feature-rich free animated character creator.
●You may create six different styles using Animaker: 2D, 2.5D, typography, infographic, whiteboard, and handcrafts.
●100 charts, 1000 icons, and 3000 maps are in the animated infographic.
●You can use advanced animation features like a record, multi-move, curve, transition effects, camera in and out, and enter/exit effects.
●Animaker supports audio features like text to speech, sound effects, voice recording, and creating custom sounds.
●Also, it comes along with pre-designed transition effects and supports HD videos.
This is free software for simple basic features, but in the case of professional uses, the price ranges from $12 - $99 based on the features required.
02Stop Motion Studio
If you are a beginner, this software would be helpful. After creating high-quality 2K stop motion animations videos, you can mix them with 2D drawings. The disadvantage does not have any free features.
●It runs on different operating systems like iOS, macOS, Android, and Windows.
●It has DSLR camera support.
●There is a green screen option to change the background of the video or animation.
●Other handy tools like paint tools, magic erasers, and sound effects.
●This is an effortless editing app.
The price of the Stop Motion Studio varies based on the operating system. For Windows, it is $1.99; for iOS and Android, the price is $4.99; and for Mac, the cost is $9.99.
03Vyond
With Vyond, you can create an array of handy and professional animated character creator videos. Users from pro to beginners can easily access this software for creating an explainer video and whiteboard animations using this feature-rich software.
●It offers a wide range of entering/exit effects for static images.
●Convenient drag and drop features for beginners to access quickly.
●One of the unique features here is automatic lip-syncing.
●There is a built-in library that you can customize.
●Vyond supports team collaboration and camera tools like camera angles and pan zooms.
Vyond offers a free trial of 14 days to check the features and friendliness. You can get the active features for a month or a year by paying $49 and $999 based on the specs you require.
04Wideo
This is an excellent online tool designed for beginners to develop animated videos. Here, you can create an animated character and use that in animated videos, presentations, and promotions with the animated character creator, the best tool for beginners.
●‘Wideo’ provides HD support for the users.
●You may use an extensive library of templates to make videos for various reasons.
●Add music and soundtracks to your videos.
●Publish the final animated videos directly to YouTube.
●The length of your videos and the amount of storage space depend on your plan.
The licensing plan of Wideo varies based on the expertise and features required. It ranges from $19 to $79 per month. Also, it has a free trial of 7 days.
05Blender
Blender is open-source software used to create animated characters online to create video games, models, renderings, etc. Blender has a rich animation feature, helping everyone to make all levels of animation.
●Blender is compatible with Mac OS X, Windows, and Linux.
●Advanced modeling, sculpting, and UV tools are included.
●Provided with rigging as well as animation in advanced mode.
●Enjoy other features like sculpt brush strokes, onion skinning, layers, and colors for the stroke and fill.
●It creates a very smooth animation video.
This is free animated character creator software. Thus, you need not pay to access any tools or features in Blender. It will be more beneficial for personal use without any investment.
06’Mango Animate’ Character Maker
‘Mango Animate’ Character Maker is the most excellent beginner character animating software available.
●It includes several action skeletons templates that make it simple to turn several PNG/PSD photos into realistic 2D animated creatures.
●Mango Animate CM comes with an extensive library of predefined motions, allowing users to animate their chosen character quickly and effortlessly.
●It may also personalize animated characters by changing their clothing or skin tone.
●Add facial expressions to tell fantastic stories.
●It can be operated by beginners also easily.
The ‘Mango Animate’ Character Maker price ranges from $ 4.08 to $16.58 per month based on the level of animation you are going to make (starter, pro, and enterprise).
01iClone
How about a character animation software whose name links to well-known companies like Ford and Microsoft?
●iClone is precisely that software with completely customizable 3D characters.
●And a wide range of lip-sync options.
●It’s a favorite among animators looking for a program that includes facial animation, motion key editing, and soft fabric physics simulation.
●Furthermore, thanks to its enhanced shadowing and lighting effects.
●Creating a realistic environment for characters has never been easier.
The price of iClone software is $398 for the character animation essential bundle and $199 for the standard package.
08Auto Desk Maya
Professional animation designers will find Autodesk Maya to be the ideal toolkit.
●It is a medium for channeling your technical and artistic abilities into fascinating 3D animations.
●Since it is a comprehensive program, it covers rendering, simulation, and modeling simultaneously.
●Clump modifier, MASH nodes, UV editor, and After Effects Live Link is significant characteristics worth highlighting in their innovative features.
●You can easily shape 3D objects and scenes with institutive modeling tools.
●It creates realistic effects from explosions to cloth simulation.
Auto Desk Maya is a costly software with a price of $215 per month and $4845 for three years.
Part 3 3 Easy Ways to Create Your Own Cartoon Character (For Beginners/Non-Illustrators)
Using the right yet easy tool is the right approach for those pretty new in creating their cartoon character. So, here we shall reveal about such easy ways to make your cartoon character.
01Online Avatar Builders
To create animated characters online, an avatar with avatar builders is a fun approach to a unique look for yourself. Because these tools are frequently online, you won’t need to install any software. In most circumstances, you won’t need to register to utilize the service. Online avatar generators have several advantages, including that they are either free or inexpensive to use. One significant disadvantage is that they can only acquire a hazy resemblance to you.
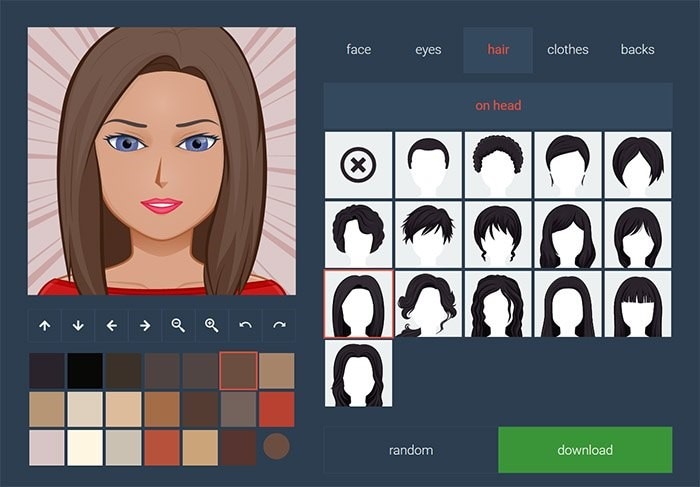
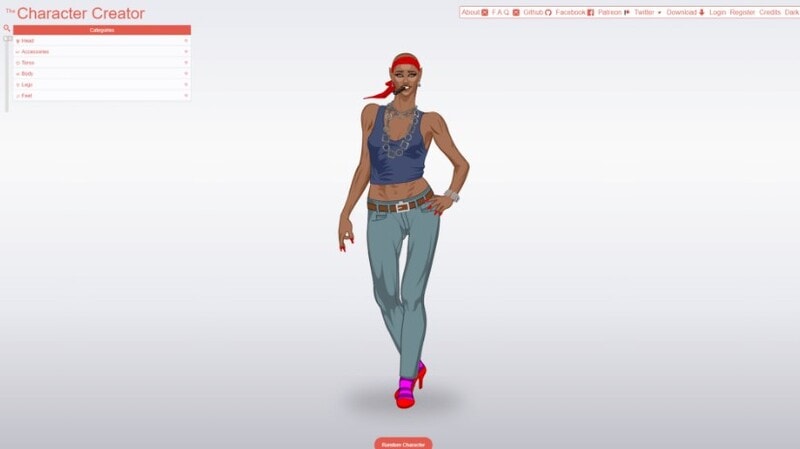
01Character Creator
With this online tool, create your own animated character, a custom female or male vector character. Aside from facial customization, you get access to a vast wardrobe of clothing, shoes, and body accessories. The character creator is ideal for generating a muscular, alternative “video game type” identity.
03Wondershare Wondershare Filmora Video Editor
Wondershare Wondershare Filmora Video Editor is an excellent option if you want simple but strong video editing tools. The keyframing tools will assist you in creating smooth and precise cartoon effects. With one click, you can quickly turn a photo into a comic. Additionally, you can choose from a variety of header templates and transitions. This is a free animated character creator.
For Win 7 or later (64-bit)
For macOS 10.12 or later
This YouTube tutorial will help you learn about keyframes and different templates. In comparison to the other ten ways listed above, we recommend Wondershare Filmora Video Editor .
● Key Takeaways from This Episode →
● Understanding how to choose the right character animator
● Eight software to create your own character animation
● Some of the simple ways to create cartoon characters.
Are you a marketer and don’t know where to start? You can start with character animation?
This article will engage you with many software to create your own animated character. Plus, some easy ways too for those novices in this field with simple apps to create your own animated character.
In this article
01 [How to Choose the Right Character Animation Maker?](#Part 1)
02 [Top 8 Software to make Character Animation. ](#Part 2)
03 [3 Easy Ways to Make Your Own Cartoon Character (For Beginners/Non-Illustrators)](#Part 3)
Part 1 How to Choose the Right Character Animation Maker?
If you are concerned about which character animation maker to choose, be aware of the analysis and alternatives you need to know. After knowing the needs of the animation as going to be mentioned below, your chances of selecting the software correctly will increase.
At first, you need to know what are you creating, what kind of animation software you want to produce? What are the objectives of videos marketing or movies? By answering these questions, you can choose the correct software.
You need to decide the features you require in the software. You may not require all the advanced features. If you are doing a simple animated video, you require only simple features but enough to complete your project.
There is a separate type of software for 2D and 3D, and you need to choose your requirement to complete the project
Now that you have known all the features you need to consider before choosing software choose it wisely and enjoy creating character animation. We’ll go over a considerable number of animation software in this journal, and you can choose one of them.
Part 2 Top 8 software to Create Character Animation
Due to the difficulty in selecting character animation software, we have sorted out some of the most beneficial and user-friendly options.
01 Animaker
The best part of this software is its versatility and flexibility. Animaker is valuable software for every kind of business animation, and it involves multiple features. It is a feature-rich free animated character creator.
●You may create six different styles using Animaker: 2D, 2.5D, typography, infographic, whiteboard, and handcrafts.
●100 charts, 1000 icons, and 3000 maps are in the animated infographic.
●You can use advanced animation features like a record, multi-move, curve, transition effects, camera in and out, and enter/exit effects.
●Animaker supports audio features like text to speech, sound effects, voice recording, and creating custom sounds.
●Also, it comes along with pre-designed transition effects and supports HD videos.
This is free software for simple basic features, but in the case of professional uses, the price ranges from $12 - $99 based on the features required.
02Stop Motion Studio
If you are a beginner, this software would be helpful. After creating high-quality 2K stop motion animations videos, you can mix them with 2D drawings. The disadvantage does not have any free features.
●It runs on different operating systems like iOS, macOS, Android, and Windows.
●It has DSLR camera support.
●There is a green screen option to change the background of the video or animation.
●Other handy tools like paint tools, magic erasers, and sound effects.
●This is an effortless editing app.
The price of the Stop Motion Studio varies based on the operating system. For Windows, it is $1.99; for iOS and Android, the price is $4.99; and for Mac, the cost is $9.99.
03Vyond
With Vyond, you can create an array of handy and professional animated character creator videos. Users from pro to beginners can easily access this software for creating an explainer video and whiteboard animations using this feature-rich software.
●It offers a wide range of entering/exit effects for static images.
●Convenient drag and drop features for beginners to access quickly.
●One of the unique features here is automatic lip-syncing.
●There is a built-in library that you can customize.
●Vyond supports team collaboration and camera tools like camera angles and pan zooms.
Vyond offers a free trial of 14 days to check the features and friendliness. You can get the active features for a month or a year by paying $49 and $999 based on the specs you require.
04Wideo
This is an excellent online tool designed for beginners to develop animated videos. Here, you can create an animated character and use that in animated videos, presentations, and promotions with the animated character creator, the best tool for beginners.
●‘Wideo’ provides HD support for the users.
●You may use an extensive library of templates to make videos for various reasons.
●Add music and soundtracks to your videos.
●Publish the final animated videos directly to YouTube.
●The length of your videos and the amount of storage space depend on your plan.
The licensing plan of Wideo varies based on the expertise and features required. It ranges from $19 to $79 per month. Also, it has a free trial of 7 days.
05Blender
Blender is open-source software used to create animated characters online to create video games, models, renderings, etc. Blender has a rich animation feature, helping everyone to make all levels of animation.
●Blender is compatible with Mac OS X, Windows, and Linux.
●Advanced modeling, sculpting, and UV tools are included.
●Provided with rigging as well as animation in advanced mode.
●Enjoy other features like sculpt brush strokes, onion skinning, layers, and colors for the stroke and fill.
●It creates a very smooth animation video.
This is free animated character creator software. Thus, you need not pay to access any tools or features in Blender. It will be more beneficial for personal use without any investment.
06’Mango Animate’ Character Maker
‘Mango Animate’ Character Maker is the most excellent beginner character animating software available.
●It includes several action skeletons templates that make it simple to turn several PNG/PSD photos into realistic 2D animated creatures.
●Mango Animate CM comes with an extensive library of predefined motions, allowing users to animate their chosen character quickly and effortlessly.
●It may also personalize animated characters by changing their clothing or skin tone.
●Add facial expressions to tell fantastic stories.
●It can be operated by beginners also easily.
The ‘Mango Animate’ Character Maker price ranges from $ 4.08 to $16.58 per month based on the level of animation you are going to make (starter, pro, and enterprise).
01iClone
How about a character animation software whose name links to well-known companies like Ford and Microsoft?
●iClone is precisely that software with completely customizable 3D characters.
●And a wide range of lip-sync options.
●It’s a favorite among animators looking for a program that includes facial animation, motion key editing, and soft fabric physics simulation.
●Furthermore, thanks to its enhanced shadowing and lighting effects.
●Creating a realistic environment for characters has never been easier.
The price of iClone software is $398 for the character animation essential bundle and $199 for the standard package.
08Auto Desk Maya
Professional animation designers will find Autodesk Maya to be the ideal toolkit.
●It is a medium for channeling your technical and artistic abilities into fascinating 3D animations.
●Since it is a comprehensive program, it covers rendering, simulation, and modeling simultaneously.
●Clump modifier, MASH nodes, UV editor, and After Effects Live Link is significant characteristics worth highlighting in their innovative features.
●You can easily shape 3D objects and scenes with institutive modeling tools.
●It creates realistic effects from explosions to cloth simulation.
Auto Desk Maya is a costly software with a price of $215 per month and $4845 for three years.
Part 3 3 Easy Ways to Create Your Own Cartoon Character (For Beginners/Non-Illustrators)
Using the right yet easy tool is the right approach for those pretty new in creating their cartoon character. So, here we shall reveal about such easy ways to make your cartoon character.
01Online Avatar Builders
To create animated characters online, an avatar with avatar builders is a fun approach to a unique look for yourself. Because these tools are frequently online, you won’t need to install any software. In most circumstances, you won’t need to register to utilize the service. Online avatar generators have several advantages, including that they are either free or inexpensive to use. One significant disadvantage is that they can only acquire a hazy resemblance to you.
01Character Creator
With this online tool, create your own animated character, a custom female or male vector character. Aside from facial customization, you get access to a vast wardrobe of clothing, shoes, and body accessories. The character creator is ideal for generating a muscular, alternative “video game type” identity.
03Wondershare Wondershare Filmora Video Editor
Wondershare Wondershare Filmora Video Editor is an excellent option if you want simple but strong video editing tools. The keyframing tools will assist you in creating smooth and precise cartoon effects. With one click, you can quickly turn a photo into a comic. Additionally, you can choose from a variety of header templates and transitions. This is a free animated character creator.
For Win 7 or later (64-bit)
For macOS 10.12 or later
This YouTube tutorial will help you learn about keyframes and different templates. In comparison to the other ten ways listed above, we recommend Wondershare Filmora Video Editor .
● Key Takeaways from This Episode →
● Understanding how to choose the right character animator
● Eight software to create your own character animation
● Some of the simple ways to create cartoon characters.
Learn How to Do Funny Cartoon Drawings
The Art of Comics - Learn How to Do Funny Cartoon Drawings
An easy yet powerful editor
Numerous effects to choose from
Detailed tutorials provided by the official channel
Whether you want to use a simple short video or an accessible online lesson, you will find everything that you need to learn how to create comic cartoon drawing on this website. This website article contains all the tutorials you need, ranging from your favorite wild animals, places, objects, farm animals, characters, vehicles, and food.

Do not forget that practicing is the key to success, so don’t hesitate to try several drawing lessons to help you improve your abilities. Start today to learn how to draw funny cartoons online at your own pace and comfort with this step-by-step tutorial.
In this article
01 [How to Draw Funny Cartoon Faces](#Part 1)
02 [How to Draw Your Own Cartoon Character](#Part 2)
Part 1 How to Draw Funny Cartoon Faces
Drawing funny faces in cartoons is very easy compared to other drawing styles or drawing complete parts of the comic. All that is need is practice and experiment with different combinations of shapes. This article will guide on how to draw funny cartoon faces of various types using six other steps:
Step 1: To begin, you need to first draw the face outline by drawing the following;
● Any Perfect type of round shape like a circle.
● Any pear shapes
● An upside-down triangle
● A quadrilateral like a trapezium, a square, or any of your choice

Step 2: To draw the nose in the middle of the face, draw somewhere any of the following;
● A round shape that is bulgy
● A U-shape
● A V-shape
● A small dash.

Step 3: Next is that you draw two round shapes for the eyes, and each of them should have a smaller round or dot (for the pupil), which is above the nose. This eye can be in the shape of any of the following;
● Two large circles
● An ovals
● A curvy “M,” like the one you can see in the “McDonalds” logo.

Step 4: You can draw the mouth just below the nose and draw any of the shapes from the list given below. In addition, to make the mouth funnier, you should then add teeth by either drawing a small square sticking out inside the mouth from the upper side, at the roof of the mouth, or a straight horizontal line which is across the mouth and several vertical lines used to form a grid having two rows and many columns.
● A U-shaped curve that is large
● A triangle like a right-angled one which is most preferred
● A circle or an oval shape
● A rectangle shapes
● A straight line shapes

Step 5: You can add any other “extra fittings” such as the ears (in cartoons, ears generally considered to be ‘extra’), wrinkles, collar, hat, hair, etc.

Step 6: Finally, your cartoon face drawing is ready! You can also add different colors to the picture with different funky shades to make it attractive.

Part 2 How to Draw Your Own Cartoon Character
Are you bored? Why not take up a pencil and draw your cartoon comic drawing character? Note that drawing will be a relief from boredom, and it also helps your creativity fly very high.
However, you can easily add some colors and designs or even animate your cartoon character using this free software known as Filmora. Wondershare Filmora Video Editor is the best software to make you cartoon your picture or animate your cartoon characters with tons of filters and effects and its keyframing feature, which allows this with ease.
For Win 7 or later (64-bit)
For macOS 10.12 or later
Read this article on how to draw the perfect cartoon character yourself:
Step 1: The first is to have an idea of what you want to draw, i.e., the picture you want to draw. You can pick any character to draw from your favorite website or WeeWorld.com.
● First, you draw the face but make sure you don’t add a nose but do a black outline.
● Next, you can draw the other features but make sure you don’t use colored pencils. Only use your main writing utensil.
● Then, remember to use your imagination to add the clothes and hairstyle.
● Finally, you can delete any unwanted lines and color with artist utensils, such as crayons, paintbrushes, colored pencils, etc. Also, remember that you can add some detail to your character to make it pop out and be beautiful.

Step 2: Now you have officially made your cartoon, how does it feel?

Step 3: Next, you want to go back and draw again, but this time, not an imitation.

Step 4: Pick up a new piece of paper to be used to draw another character. But this time, you need to change the features. You can decide to make the eyes bigger, neon skin, and maybe crazy hair. You can try clothes that you would love to wear, or ones you wish you could get. Also, try to change the size around to make the features look different and add a nose, and then you can finally color your creation.

Step 5: Now, you can compare the two drawings to notice the difference. You will realize that one is an imitation while the other is all you! Now, you can grab a new piece of notebook paper.

Step 6: Next is that you begin to jot down different ideas. For example, you may want to draw a cute little puppy or a cute baby. Sometimes you can decide that your cartoon could be about a talking apple or something different.

Step 7: Grab another piece of paper and draw any other character you can imagine. You can try using a Sharpie marker for the outline by carefully tracing the pencil. Then you can erase any stray marks on the piece of paper. Next, you can also use any writing utensils like markers, crayons, colored pencils, pastels, or even paint, as it also works well.

Step 8: You can grab your notebook sheet again and then jot down any idea of a comic series. Also, make a plot or funny lines that you could use or any other characters.

Step 9: Next, you fold the blank sheet of paper and make it into about four lines. And then you can draw your main character by just using a pencil first.

Step 10: You can then draw the other characters and all the basic outlines in the drawing.

Step 11: Next is that you can draw the furniture and background, such as trees or anything else, to beautify your drawing.

Step 12: You can go back and add details and outline with Sharpie or black marker and delete any stray marks. You can also color if wanted.

Step 13: Next is for you to add dialogue and actively work with your character drawing.

Step 14: Finally, and there you have it. Congratulation! You now have your perfect, awesome, beautiful, and YOUR cartoon.

● Ending Thoughts →
● This article explained all you need to know about learning how to do funny cartoon drawings very quickly. You can also use these methods to create funny cat cartoon drawings or any other drawing you want for cat lovers.
● However, you can decide to animate your graphic using the best software to carry it out quickly, i.e., Filmora.
Whether you want to use a simple short video or an accessible online lesson, you will find everything that you need to learn how to create comic cartoon drawing on this website. This website article contains all the tutorials you need, ranging from your favorite wild animals, places, objects, farm animals, characters, vehicles, and food.
Do not forget that practicing is the key to success, so don’t hesitate to try several drawing lessons to help you improve your abilities. Start today to learn how to draw funny cartoons online at your own pace and comfort with this step-by-step tutorial.
In this article
01 [How to Draw Funny Cartoon Faces](#Part 1)
02 [How to Draw Your Own Cartoon Character](#Part 2)
Part 1 How to Draw Funny Cartoon Faces
Drawing funny faces in cartoons is very easy compared to other drawing styles or drawing complete parts of the comic. All that is need is practice and experiment with different combinations of shapes. This article will guide on how to draw funny cartoon faces of various types using six other steps:
Step 1: To begin, you need to first draw the face outline by drawing the following;
● Any Perfect type of round shape like a circle.
● Any pear shapes
● An upside-down triangle
● A quadrilateral like a trapezium, a square, or any of your choice
Step 2: To draw the nose in the middle of the face, draw somewhere any of the following;
● A round shape that is bulgy
● A U-shape
● A V-shape
● A small dash.
Step 3: Next is that you draw two round shapes for the eyes, and each of them should have a smaller round or dot (for the pupil), which is above the nose. This eye can be in the shape of any of the following;
● Two large circles
● An ovals
● A curvy “M,” like the one you can see in the “McDonalds” logo.
Step 4: You can draw the mouth just below the nose and draw any of the shapes from the list given below. In addition, to make the mouth funnier, you should then add teeth by either drawing a small square sticking out inside the mouth from the upper side, at the roof of the mouth, or a straight horizontal line which is across the mouth and several vertical lines used to form a grid having two rows and many columns.
● A U-shaped curve that is large
● A triangle like a right-angled one which is most preferred
● A circle or an oval shape
● A rectangle shapes
● A straight line shapes
Step 5: You can add any other “extra fittings” such as the ears (in cartoons, ears generally considered to be ‘extra’), wrinkles, collar, hat, hair, etc.
Step 6: Finally, your cartoon face drawing is ready! You can also add different colors to the picture with different funky shades to make it attractive.
Part 2 How to Draw Your Own Cartoon Character
Are you bored? Why not take up a pencil and draw your cartoon comic drawing character? Note that drawing will be a relief from boredom, and it also helps your creativity fly very high.
However, you can easily add some colors and designs or even animate your cartoon character using this free software known as Filmora. Wondershare Filmora Video Editor is the best software to make you cartoon your picture or animate your cartoon characters with tons of filters and effects and its keyframing feature, which allows this with ease.
For Win 7 or later (64-bit)
For macOS 10.12 or later
Read this article on how to draw the perfect cartoon character yourself:
Step 1: The first is to have an idea of what you want to draw, i.e., the picture you want to draw. You can pick any character to draw from your favorite website or WeeWorld.com.
● First, you draw the face but make sure you don’t add a nose but do a black outline.
● Next, you can draw the other features but make sure you don’t use colored pencils. Only use your main writing utensil.
● Then, remember to use your imagination to add the clothes and hairstyle.
● Finally, you can delete any unwanted lines and color with artist utensils, such as crayons, paintbrushes, colored pencils, etc. Also, remember that you can add some detail to your character to make it pop out and be beautiful.
Step 2: Now you have officially made your cartoon, how does it feel?
Step 3: Next, you want to go back and draw again, but this time, not an imitation.
Step 4: Pick up a new piece of paper to be used to draw another character. But this time, you need to change the features. You can decide to make the eyes bigger, neon skin, and maybe crazy hair. You can try clothes that you would love to wear, or ones you wish you could get. Also, try to change the size around to make the features look different and add a nose, and then you can finally color your creation.
Step 5: Now, you can compare the two drawings to notice the difference. You will realize that one is an imitation while the other is all you! Now, you can grab a new piece of notebook paper.
Step 6: Next is that you begin to jot down different ideas. For example, you may want to draw a cute little puppy or a cute baby. Sometimes you can decide that your cartoon could be about a talking apple or something different.
Step 7: Grab another piece of paper and draw any other character you can imagine. You can try using a Sharpie marker for the outline by carefully tracing the pencil. Then you can erase any stray marks on the piece of paper. Next, you can also use any writing utensils like markers, crayons, colored pencils, pastels, or even paint, as it also works well.
Step 8: You can grab your notebook sheet again and then jot down any idea of a comic series. Also, make a plot or funny lines that you could use or any other characters.
Step 9: Next, you fold the blank sheet of paper and make it into about four lines. And then you can draw your main character by just using a pencil first.
Step 10: You can then draw the other characters and all the basic outlines in the drawing.
Step 11: Next is that you can draw the furniture and background, such as trees or anything else, to beautify your drawing.
Step 12: You can go back and add details and outline with Sharpie or black marker and delete any stray marks. You can also color if wanted.
Step 13: Next is for you to add dialogue and actively work with your character drawing.
Step 14: Finally, and there you have it. Congratulation! You now have your perfect, awesome, beautiful, and YOUR cartoon.
● Ending Thoughts →
● This article explained all you need to know about learning how to do funny cartoon drawings very quickly. You can also use these methods to create funny cat cartoon drawings or any other drawing you want for cat lovers.
● However, you can decide to animate your graphic using the best software to carry it out quickly, i.e., Filmora.
Ways to Create an Animated Sticky Navbar
How to Create an Animated Sticky Navbar
An easy yet powerful editor
Numerous effects to choose from
Detailed tutorials provided by the official channel
While there are different ways to enhance the overall user experience of a website, using an animated sticky navbar is the most ideal solution to get the job done.
In this article, we’ll walk you through some of the top benefits of animated sticky navbars and why you should incorporate them in your website’s design. So, without any further ado, let’s get started.
In this article
01 [What is an Animated Sticky Navbar?](#Part 1)
02 [What Are the Benefits of An Animated Sticky Navbar?](#Part 2)
03 [8 Fixed Sticky Navbars That’ll Grab Your Attention](#Part 3)
04 [Want To Create More Professional and Amazing Animations?](#Part 4)
Part 1 What is an Animated Sticky Navbar?
To put it in simple words, an animated sticky navbar is a dedicated header that stays fixed on the website, irrespective of the web page you’re accessing. Ideally, designers use a sticky navbar to allow website visitors to visit any web page within 2-3 clicks.
The animated navbar also incorporates a few animations that uplift the overall visual appearance of the website. It doesn’t matter if you are planning to design an e-commerce store or a simple service-based website, the animated navbar will allow you to make your website more user-friendly for the end-users.
Part 2 What Are the Benefits of An Animated Sticky Navbar?
Now, there are endless benefits of using an animated sticky navbar on your website. However, these are a few factors that make animated sticky navbars the most useful on-page element of a website.
01Quick Navigation
As we mentioned earlier, easy navigation is one of the key features of a sticky navbar. You can place links to all the other web pages within the navbar in the form of drop-down menus and ensure that users can visit any webpage within a single click. This will enhance the overall user experience and you’ll be able to encourage one-time visitors to spend more time on your website. Using the navbar will also improve your search engine rankings because the search engine crawler will be able to crawl all the web pages easily.
02Aesthetically Pleasing
The way your website looks has a huge impact on whether you’re going to retain the website visitors or not. An animated sticky navbar will make your website look aesthetically pleasing and captivate the visitors more effectively. You can add different animations and visual elements to the navbar and make them match your website’s overall color scheme.
03Better User Experience
Another reason why you would want to place an animated sticky navbar on your website is that it’ll uplift the overall user experience for the website visitors. From finding easy navigation to all the web pages to ensuring that all the web pages offer the same browsing experience, a navbar will make your website engaging and it’ll become easier to captivate the users.
Part 3 8 Fixed Sticky Navbars That’ll Grab Your Attention
So, now that you are familiar with the benefits of animated sticky navbars, here are the top examples that explain the best ways to use navigation bars on a website.
01Search Engine Journal
Search Engine Journal is an online knowledge hub where users can find every bit of information about digital marketing. The website publishes regular guides on SEO, PPC, Social Media Marketing, etc to help people get detailed insight into the benefits of digital marketing.
Since there are thousands of articles on the website, it could easily get chaotic for users to find the guide they are looking for. But, with an easy-to-navigate animated sticky navbar, Search Engine Journal has divided all the articles into their respective categories using simple drop-down menus
02AirBnB

Airbnb is one of the most popular platforms to find vacation homes in a different city/country to enjoy your holiday in complete comfort. One of the major reasons behind AirBnB’s immense success is its high-quality and easy-to-use website.
As you continue to scroll down the website, the sticky navbar stays fixed at the top with a dedicated search bar and a “Become a Host” Call-to-Action button. This way it doesn’t matter if a user is looking for a place to rent or simply wants to become a host, they’ll be able to get the job done within a few clicks.
03Graz Secrets
Graz Secrets is the perfect example of how you can use a sticky bar in the simplest manner and still grab users’ attention easily. The website uses a black-colored simple navigation bar with a “Download Now” button at the center. The button continues to illuminate due to the background animation even if you scroll to the end of the web page. The overall black design of the navbar adds more visual factors to the website and engages the visitors more effectively.
04Adobe
Adobe’s navigation bar is also a great example of how to use sticky navbars to uplift the overall user experience for website visitors. Even though the website doesn’t stay at its place when you scroll down, it immediately comes back as soon as you scroll up once.
Moreover, the navbar has links to all the Adobe products, which means users can visit any product page they want right away. It’s also worth understanding that Adobe has added a dedicated “Sign-in” button in the navigation bar to allow visitors to sign in to the Adobe cloud account straightaway.
05Daniel Filler
Daniel Filler’s website uses the navigation bar in the simplest way possible - yet manages to draw the viewers’ attention without any hassle. The designers have placed a pretty small navigation bar with links to all the important web pages.
The smaller size of the navigation bar doesn’t make the website look cluttered and still manages to do its job easily. In addition to this, the designers have also placed a dedicated logo and the “Up” button to allow users to directly go to the top of the web page with one click.
06Mind Inventory
Mind Inventory is an Indian software development company working towards designing high-quality websites and mobile applications. Their website is a perfect example of how one should use navigation bars in a website to improve the overall design scheme. In addition to placing links to all the important web pages, Mind Inventory has also introduced dedicated animations to make the drop-down menu appearance more pleasing.
07FHOKE
FHOKE’s navigation bar is one of the most aesthetically pleasing animated navbars that you can replicate on your website to maximize its performance. A white-colored navbar automatically turns gray as soon as you scroll down to maintain the contrast of the entire web page.
There are dedicated links to other web pages as well. However, you won’t find any drop-down menus. In case your website also has limited web pages, you can also replicate this animated sticky navbar to make it more appealing.
08H&M
Last but certainly not least, H&M is a clothing brand that’s popular across the globe. At first, H&M’s official website may look pretty basic, but its navigation bar is backed by a great marketing strategy. The bar contains all the product page categories that’ll direct you to any product page within a single click.
Key Takeaways from This Episode
● Animated sticky navbars are one of the most useful on-page elements that could help you grab user’s attention easily
● There are different ways to use animated navbars and it mainly depends on your website requirements.
● Like your website, you can also uplift the quality of your videos by adding animations and high-quality transitions
While there are different ways to enhance the overall user experience of a website, using an animated sticky navbar is the most ideal solution to get the job done.
In this article, we’ll walk you through some of the top benefits of animated sticky navbars and why you should incorporate them in your website’s design. So, without any further ado, let’s get started.
In this article
01 [What is an Animated Sticky Navbar?](#Part 1)
02 [What Are the Benefits of An Animated Sticky Navbar?](#Part 2)
03 [8 Fixed Sticky Navbars That’ll Grab Your Attention](#Part 3)
04 [Want To Create More Professional and Amazing Animations?](#Part 4)
Part 1 What is an Animated Sticky Navbar?
To put it in simple words, an animated sticky navbar is a dedicated header that stays fixed on the website, irrespective of the web page you’re accessing. Ideally, designers use a sticky navbar to allow website visitors to visit any web page within 2-3 clicks.
The animated navbar also incorporates a few animations that uplift the overall visual appearance of the website. It doesn’t matter if you are planning to design an e-commerce store or a simple service-based website, the animated navbar will allow you to make your website more user-friendly for the end-users.
Part 2 What Are the Benefits of An Animated Sticky Navbar?
Now, there are endless benefits of using an animated sticky navbar on your website. However, these are a few factors that make animated sticky navbars the most useful on-page element of a website.
01Quick Navigation
As we mentioned earlier, easy navigation is one of the key features of a sticky navbar. You can place links to all the other web pages within the navbar in the form of drop-down menus and ensure that users can visit any webpage within a single click. This will enhance the overall user experience and you’ll be able to encourage one-time visitors to spend more time on your website. Using the navbar will also improve your search engine rankings because the search engine crawler will be able to crawl all the web pages easily.
02Aesthetically Pleasing
The way your website looks has a huge impact on whether you’re going to retain the website visitors or not. An animated sticky navbar will make your website look aesthetically pleasing and captivate the visitors more effectively. You can add different animations and visual elements to the navbar and make them match your website’s overall color scheme.
03Better User Experience
Another reason why you would want to place an animated sticky navbar on your website is that it’ll uplift the overall user experience for the website visitors. From finding easy navigation to all the web pages to ensuring that all the web pages offer the same browsing experience, a navbar will make your website engaging and it’ll become easier to captivate the users.
Part 3 8 Fixed Sticky Navbars That’ll Grab Your Attention
So, now that you are familiar with the benefits of animated sticky navbars, here are the top examples that explain the best ways to use navigation bars on a website.
01Search Engine Journal
Search Engine Journal is an online knowledge hub where users can find every bit of information about digital marketing. The website publishes regular guides on SEO, PPC, Social Media Marketing, etc to help people get detailed insight into the benefits of digital marketing.
Since there are thousands of articles on the website, it could easily get chaotic for users to find the guide they are looking for. But, with an easy-to-navigate animated sticky navbar, Search Engine Journal has divided all the articles into their respective categories using simple drop-down menus
02AirBnB
Airbnb is one of the most popular platforms to find vacation homes in a different city/country to enjoy your holiday in complete comfort. One of the major reasons behind AirBnB’s immense success is its high-quality and easy-to-use website.
As you continue to scroll down the website, the sticky navbar stays fixed at the top with a dedicated search bar and a “Become a Host” Call-to-Action button. This way it doesn’t matter if a user is looking for a place to rent or simply wants to become a host, they’ll be able to get the job done within a few clicks.
03Graz Secrets
Graz Secrets is the perfect example of how you can use a sticky bar in the simplest manner and still grab users’ attention easily. The website uses a black-colored simple navigation bar with a “Download Now” button at the center. The button continues to illuminate due to the background animation even if you scroll to the end of the web page. The overall black design of the navbar adds more visual factors to the website and engages the visitors more effectively.
04Adobe
Adobe’s navigation bar is also a great example of how to use sticky navbars to uplift the overall user experience for website visitors. Even though the website doesn’t stay at its place when you scroll down, it immediately comes back as soon as you scroll up once.
Moreover, the navbar has links to all the Adobe products, which means users can visit any product page they want right away. It’s also worth understanding that Adobe has added a dedicated “Sign-in” button in the navigation bar to allow visitors to sign in to the Adobe cloud account straightaway.
05Daniel Filler
Daniel Filler’s website uses the navigation bar in the simplest way possible - yet manages to draw the viewers’ attention without any hassle. The designers have placed a pretty small navigation bar with links to all the important web pages.
The smaller size of the navigation bar doesn’t make the website look cluttered and still manages to do its job easily. In addition to this, the designers have also placed a dedicated logo and the “Up” button to allow users to directly go to the top of the web page with one click.
06Mind Inventory
Mind Inventory is an Indian software development company working towards designing high-quality websites and mobile applications. Their website is a perfect example of how one should use navigation bars in a website to improve the overall design scheme. In addition to placing links to all the important web pages, Mind Inventory has also introduced dedicated animations to make the drop-down menu appearance more pleasing.
07FHOKE
FHOKE’s navigation bar is one of the most aesthetically pleasing animated navbars that you can replicate on your website to maximize its performance. A white-colored navbar automatically turns gray as soon as you scroll down to maintain the contrast of the entire web page.
There are dedicated links to other web pages as well. However, you won’t find any drop-down menus. In case your website also has limited web pages, you can also replicate this animated sticky navbar to make it more appealing.
08H&M
Last but certainly not least, H&M is a clothing brand that’s popular across the globe. At first, H&M’s official website may look pretty basic, but its navigation bar is backed by a great marketing strategy. The bar contains all the product page categories that’ll direct you to any product page within a single click.
Key Takeaways from This Episode
● Animated sticky navbars are one of the most useful on-page elements that could help you grab user’s attention easily
● There are different ways to use animated navbars and it mainly depends on your website requirements.
● Like your website, you can also uplift the quality of your videos by adding animations and high-quality transitions
How To Turn Yourself Into Anime Character
How You Can Turn Yourself into Anime Character Using Anime Filter
An easy yet powerful editor
Numerous effects to choose from
Detailed tutorials provided by the official channel
Everyone is looking for the Anime Filter that allows you to turn yourself into an animated character. All in an effort to join in on the TikTok trend that’s been awakening the inner anime enthusiast in everyone.

In this post, we’ll be sharing with you all that we know about this elusive anime filter (along with some bonuses along the way)
In this article
01 [Let’s Figure out What’s Anime Filter First](#Part 1)
02 [More Tutorials on Anime Filter That You Should Not Miss](#Part 2)
Part 1 Let’s Figure out What’s Anime Filter First
01What is the Anime Filter on TikTok?
Okay, first off What even is this anime filter everyone is talking about and how can you use it to turn yourself into an animated character? We’ve attached a helpful YouTube Video below from @Kapwing who has a more comprehensive explanation for you.
But, as for the basics? It works just like most filters in that it can be used in both video and picture mode (allowing you to also make your own animated profile picture if you’d like). All you have to do is turn it on, and it’ll turn you into the most fitting anime character of your style immediately
02How to Get the TikTok Anime Filter?
Now to finally get down to business How exactly can you get the anime filter for your TikTok? Well, here’s the trick Despite having earned its popularity on TikTok, the Anime Style filter actually comes from Snapchat So, if you do want to animate yourself like you’ve seen all the other popular TikTok-ers do, you’ll need to record the video (or take the picture) on the Snapchat App first and then upload it to TikTok.
03A step-by-step breakdown of this process has been provided below (pictures included)
Step 1Download the Snapchat App
Alright, to start off with, you’ll need to download the Snapchat app on your smartphone (it’s available for both Android and iOS devices)

Step 2Open Snapchat App on your mobile device
Once you have the Snapchat app downloaded and installed on your device, open it

Step 3Search for the Anime Style Filter on Snapchat
Once you have the Snapchat app open, click on the search bar at the top of the interface, type ‘anime style’, and search
You might find that there are multiple versions of the filter (like as is shown in the image below), but the one that you need to select is the one titled Anime Style and created by Snapchat (it should appear first, as it does in the example)

Step 4Turn Yourself into an Animated Character
Finally You should be moved to the video recorder or the profile picture taker, where you can see yourself animated once and for all

Step 5Upload your anime filter-ed video to TikTok
Now, in order to get your Anime-fied self on TikTok, all you need to do is upload your video creation (either on your mobile device or your computer) We’ve provided a URL for you below that will take you directly to the TikTok upload page.

Part 2 More Tutorials on Anime Filter That You Should Not Miss
The Anime Style filter that we introduced in the previous section isn’t the only ‘animated’ filter available, of course It’s the one that caught the attention of a lot of people, thanks, in large part, to the participation of a couple of some of the bigger TikTok-ers on the platform. However, you can always expand your selection a bit by checking out some of the other interesting anime filters in the market:
0112 Anime Filters to Turn Yourself into an Anime Character
Anime Filter #1: Anime Style Realistic

In order to fix some of the more glaring issues with the regular Anime Style filter, Snapchat created a second filter, called Anime Style Realistic This one has a distinctively less anime style when it comes to looks. But it does allow for more skin colors, better hair integration, and accessories
Pros
FREE Snapchat lens that you can use at any time.
Works with most skin tones.
Better hair/accessory integration.
Cons
The style is more realistic than anime.
It is not available anywhere else; you’ll need to be on Snapchat to use it.
Not great at capturing motion.
This is a fun filter to use for those looking to spice up their timeline with something a little different (OR for those having a bad day and would like the almost-anonymity the filter can provide).
Anime Filter #2: Cartoon Style

Next, we have another Snapchat original lens called Cartoon Style This filter is more reminiscent of the older animated cartoon styles (think Pocahontas, Lilo & Stitch, etc.), but it doesn’t make it any less fun
Pros
FREE Snapchat lens.
Works with all skin tones.
Works with accessories.
Cons
More of a cartoon animated style than anime.
Not available anywhere else, you can only use it with Snapchat.
Not great at capturing motion.
Again, just like the Anime Filter, this is good for slapping on just to have fun or to sneakily erase a couple of blemishes
Anime Filter #3: Anime Filter

Now, although we mentioned that TikTok doesn’t have any anime-style filters, the Chinese version of it (surprisingly) does You can see it being used in the image above, rendering the user into an animated (albeit not classically Japanese animated) character.
Pros
Free Chinese TikTok filter.
Great at capturing motion.
Chinese animated drawing style.
Cons
Only available for the foreign version of the TikTok app.
Not the best with skin tones.
It doesn’t use the classic Japanese-animation style.
This has seen a popularity boost recently, with many TikTok users using it to show a ‘before’ and ‘after’ (like the image shown above), of their dance being animated.
Filter URL: https://www.douyin.com/
Anime Filter #4: Anime Eyes

This next filter is the first unofficial anime filter on this list. It was created by one of the users of Snapchat and can be found there if you want to use it This one doesn’t animate the whole face of the user, but it does apply a sticker of various ‘anime eyes’ that you can use as a semi-animated profile picture maker (free)
Pros
FREE Snapchat filter
Anime-eyes sticker to cover the eyes
Useful as an animated profile picture maker
Cons
Only available on the Snapchat app
Does not capture motion
Does not animate the entire face
This really is best used for profile pictures only You’ve probably seen it around as such, although some users also find it useful for hiding tired eyes
Anime Filter #5: Wondershare Filmora

If you’re looking to step up your game ‘editing-wise’ and give your pictures and videos an even more anime feel, then you can also consider the anime filters that the video editing tool, Wondershare Filmora Video Editor , offers. (You can also skip the pre-made filters altogether and create your own animated video with stickers and other effects.)
Pros
Variety of anime filters for videos
Comes with advanced video editing tools
Creates high-quality videos
Cons
Premium Software
No face animation
This particular option is for those looking for something a step above what everyone else is doing. All while allowing a more flexible experience
For Win 7 or later (64-bit)
For macOS 10.12 or later
Anime Filter #6: MHA Anime Filter (Instagram)

Continuing on from our trend of ‘out-there’ options, there’s also the MHA filter from Instagram This one has been especially popular with the anime fanbase as it offers plenty of opportunities for hilarious, pointed responses
Pros
FREE with Instagram
Anime-themed sticker
Trending on TikTok
Cons
Not a face animator filter
Not a profile picture animator
Limited anime options
It’s definitely not what you might have initially been looking for. But its popularity on TikTok is undeniable
Anime Filter #7: Anime Filter

Our second recommended anime-themed filter is the basic Anime Filter on Instagram This one flicks through dozens of some of the most popular animes to find out which one suits you best And, just like the previous, is currently trending on Tiktok
Pros
FREE with Instagram
Anime-themed sticker filter
Trending on TikTok
Cons
Sticker, not face animator
Available only on Instagram
Limited options
Anime Filter #8: Cartoon

This next animation filter pick of ours brings us back to Snapchat It’s called the Cartoon lens. And, just like our initial picks, it will change your pictures to that of a cartoon This one is closer to the cartoon-style popular around the 2000s (think Frozen & Tangled)
Pros
Available on Snapchat
Animated profile picture maker (free)
Works for various skin types
Cons
Not the best at motion capturing
Only available on Snapchat
Doesn’t use classic Japanese style
It’s not quite the anime filter that you’re probably looking for, but it does still work if all you want is a way of cartoon-ifying yourself to spice up your timeline It’ll clear up any blemishes too
Anime Filter #9: Comics Style

Again, we’re moving towards a different kind of animation style with this next filter from Snapchat, but the Comics Style filter does have its own promises of fun as well Especially for those who are long-time fans of American comics (or, even, your average modern-day Avengers fan)
Pros
FREE on Snapchat
Video face animator
Works with a variety of skin tones
Cons
Awkward with some face shapes
Does not work with all face accessories
Available only on Snapchat
Anime Filter #10: Cartoon 3D Style

Now, this might get confusing, but for our last picks, we actually have a set of filters all called Cartoon 3D Style But trust us They’re all different This first version is one you would probably relate more to the DreamWorks motion picture, Ratatouille
Pros
FREE profile picture animator on Snapchat
Compatible with a variety of face shapes
Compatible with a variety of skin tones
Cons
Set features (i.e., pointed nose)
Non-anime drawing style
Not compatible with some facial accessories
Anime Filter #11: Cartoon 3D Style

For our next Cartoon 3D Style lens from Snapchat, we have a face animator that can help you turn into something very close to another dreamwork’s motion picture (think the Despicable me or the Minions)
Pros
Cartoon style animator that is FREE to use
Great for motion capturing
Compatible with a variety of skin colors
Cons
Available only on Snapchat
Not compatible with certain face accessories
Limited face warping effect
Anime Filter #12: Cartoon 3D Style

And finally, for the last of our recommended anime filters, we have the Cartoon 3D Style lens from Snapchat that makes you look like your favorite Disney character (In this case, the obvious inspiration comes from Disney’s Frozen or Tangled)
Pros
Disney face animator that is FREE on Snapchat
Compatible with all skin tones
Trending on TikTok
Cons
It can only be used on Snapchat
Not great at capturing motion
02Steps to Download the Anime Filter App and Turn Yourself into an Anime Character
Now, if those filters weren’t enough for you, we’ve also included this next tutorial on how you can find apps on your mobile device that will allow you to get the same effect without having to use Snapchat, TikTok, or Instagram
Step 1Go to the App Store
The first step, of course, is to go to the app store on your mobile device.

Step 2Search for Anime Filter App
Next, search ‘Anime Filter’ on your phone’s app store.

Step 3Select Anime Filter App
There are multiple types of anime filter apps available in the market. Pick the one that you think will work best for you.

Step 4Install Anime Filter App
Finally, once you’ve found the anime filter app for you, install it.

Step 5Open Anime Filter App
The app that we used for our example, Anime Camera, offers several different animation styles However, this app does come with a subscription fee, so keep that in mind.

03Anime Filter Has a Sadly Unsurprising Problem
You might have noticed this while we were introducing all the different types of anime-style filters available, but the popular Anime Filter has its shortcomings. Which includes:
PROBLEM 1: Dark Skin Tones
The anime filter’s inability to capture darker skin tones accurately is one of the biggest issues users have with the filter.
PROBLEM 2: Hair Style
Hairstyle options are also very limited. And, as for black hairstyles? Well, the options are pretty much non-existent.
PROBLEM 3: Face Accessories
Do you wear glasses? How about piercings? Well, this won’t translate for you either, unfortunately
Key Takeaways from This Episode
● The Anime Filter is a hot, trending topic in platforms like Tiktok, Instagram, and Snapchat It’s also a fun way of engaging with the anime community
● There are other, similar face-animation filters available (The Cartoon 3D Styles, especially, were quite popular for a time)
● Unsurprisingly, the anime filter does have its problems… And it left a big chunk of the TikTok community pretty flabbergasted — and disappointed. But that didn’t stop them from joining in the fun to provide some empowering commentary
Everyone is looking for the Anime Filter that allows you to turn yourself into an animated character. All in an effort to join in on the TikTok trend that’s been awakening the inner anime enthusiast in everyone.
In this post, we’ll be sharing with you all that we know about this elusive anime filter (along with some bonuses along the way)
In this article
01 [Let’s Figure out What’s Anime Filter First](#Part 1)
02 [More Tutorials on Anime Filter That You Should Not Miss](#Part 2)
Part 1 Let’s Figure out What’s Anime Filter First
01What is the Anime Filter on TikTok?
Okay, first off What even is this anime filter everyone is talking about and how can you use it to turn yourself into an animated character? We’ve attached a helpful YouTube Video below from @Kapwing who has a more comprehensive explanation for you.
But, as for the basics? It works just like most filters in that it can be used in both video and picture mode (allowing you to also make your own animated profile picture if you’d like). All you have to do is turn it on, and it’ll turn you into the most fitting anime character of your style immediately
02How to Get the TikTok Anime Filter?
Now to finally get down to business How exactly can you get the anime filter for your TikTok? Well, here’s the trick Despite having earned its popularity on TikTok, the Anime Style filter actually comes from Snapchat So, if you do want to animate yourself like you’ve seen all the other popular TikTok-ers do, you’ll need to record the video (or take the picture) on the Snapchat App first and then upload it to TikTok.
03A step-by-step breakdown of this process has been provided below (pictures included)
Step 1Download the Snapchat App
Alright, to start off with, you’ll need to download the Snapchat app on your smartphone (it’s available for both Android and iOS devices)
Step 2Open Snapchat App on your mobile device
Once you have the Snapchat app downloaded and installed on your device, open it
Step 3Search for the Anime Style Filter on Snapchat
Once you have the Snapchat app open, click on the search bar at the top of the interface, type ‘anime style’, and search
You might find that there are multiple versions of the filter (like as is shown in the image below), but the one that you need to select is the one titled Anime Style and created by Snapchat (it should appear first, as it does in the example)
Step 4Turn Yourself into an Animated Character
Finally You should be moved to the video recorder or the profile picture taker, where you can see yourself animated once and for all
Step 5Upload your anime filter-ed video to TikTok
Now, in order to get your Anime-fied self on TikTok, all you need to do is upload your video creation (either on your mobile device or your computer) We’ve provided a URL for you below that will take you directly to the TikTok upload page.
Part 2 More Tutorials on Anime Filter That You Should Not Miss
The Anime Style filter that we introduced in the previous section isn’t the only ‘animated’ filter available, of course It’s the one that caught the attention of a lot of people, thanks, in large part, to the participation of a couple of some of the bigger TikTok-ers on the platform. However, you can always expand your selection a bit by checking out some of the other interesting anime filters in the market:
0112 Anime Filters to Turn Yourself into an Anime Character
Anime Filter #1: Anime Style Realistic
In order to fix some of the more glaring issues with the regular Anime Style filter, Snapchat created a second filter, called Anime Style Realistic This one has a distinctively less anime style when it comes to looks. But it does allow for more skin colors, better hair integration, and accessories
Pros
FREE Snapchat lens that you can use at any time.
Works with most skin tones.
Better hair/accessory integration.
Cons
The style is more realistic than anime.
It is not available anywhere else; you’ll need to be on Snapchat to use it.
Not great at capturing motion.
This is a fun filter to use for those looking to spice up their timeline with something a little different (OR for those having a bad day and would like the almost-anonymity the filter can provide).
Anime Filter #2: Cartoon Style
Next, we have another Snapchat original lens called Cartoon Style This filter is more reminiscent of the older animated cartoon styles (think Pocahontas, Lilo & Stitch, etc.), but it doesn’t make it any less fun
Pros
FREE Snapchat lens.
Works with all skin tones.
Works with accessories.
Cons
More of a cartoon animated style than anime.
Not available anywhere else, you can only use it with Snapchat.
Not great at capturing motion.
Again, just like the Anime Filter, this is good for slapping on just to have fun or to sneakily erase a couple of blemishes
Anime Filter #3: Anime Filter
Now, although we mentioned that TikTok doesn’t have any anime-style filters, the Chinese version of it (surprisingly) does You can see it being used in the image above, rendering the user into an animated (albeit not classically Japanese animated) character.
Pros
Free Chinese TikTok filter.
Great at capturing motion.
Chinese animated drawing style.
Cons
Only available for the foreign version of the TikTok app.
Not the best with skin tones.
It doesn’t use the classic Japanese-animation style.
This has seen a popularity boost recently, with many TikTok users using it to show a ‘before’ and ‘after’ (like the image shown above), of their dance being animated.
Filter URL: https://www.douyin.com/
Anime Filter #4: Anime Eyes
This next filter is the first unofficial anime filter on this list. It was created by one of the users of Snapchat and can be found there if you want to use it This one doesn’t animate the whole face of the user, but it does apply a sticker of various ‘anime eyes’ that you can use as a semi-animated profile picture maker (free)
Pros
FREE Snapchat filter
Anime-eyes sticker to cover the eyes
Useful as an animated profile picture maker
Cons
Only available on the Snapchat app
Does not capture motion
Does not animate the entire face
This really is best used for profile pictures only You’ve probably seen it around as such, although some users also find it useful for hiding tired eyes
Anime Filter #5: Wondershare Filmora
If you’re looking to step up your game ‘editing-wise’ and give your pictures and videos an even more anime feel, then you can also consider the anime filters that the video editing tool, Wondershare Filmora Video Editor , offers. (You can also skip the pre-made filters altogether and create your own animated video with stickers and other effects.)
Pros
Variety of anime filters for videos
Comes with advanced video editing tools
Creates high-quality videos
Cons
Premium Software
No face animation
This particular option is for those looking for something a step above what everyone else is doing. All while allowing a more flexible experience
For Win 7 or later (64-bit)
For macOS 10.12 or later
Anime Filter #6: MHA Anime Filter (Instagram)
Continuing on from our trend of ‘out-there’ options, there’s also the MHA filter from Instagram This one has been especially popular with the anime fanbase as it offers plenty of opportunities for hilarious, pointed responses
Pros
FREE with Instagram
Anime-themed sticker
Trending on TikTok
Cons
Not a face animator filter
Not a profile picture animator
Limited anime options
It’s definitely not what you might have initially been looking for. But its popularity on TikTok is undeniable
Anime Filter #7: Anime Filter
Our second recommended anime-themed filter is the basic Anime Filter on Instagram This one flicks through dozens of some of the most popular animes to find out which one suits you best And, just like the previous, is currently trending on Tiktok
Pros
FREE with Instagram
Anime-themed sticker filter
Trending on TikTok
Cons
Sticker, not face animator
Available only on Instagram
Limited options
Anime Filter #8: Cartoon
This next animation filter pick of ours brings us back to Snapchat It’s called the Cartoon lens. And, just like our initial picks, it will change your pictures to that of a cartoon This one is closer to the cartoon-style popular around the 2000s (think Frozen & Tangled)
Pros
Available on Snapchat
Animated profile picture maker (free)
Works for various skin types
Cons
Not the best at motion capturing
Only available on Snapchat
Doesn’t use classic Japanese style
It’s not quite the anime filter that you’re probably looking for, but it does still work if all you want is a way of cartoon-ifying yourself to spice up your timeline It’ll clear up any blemishes too
Anime Filter #9: Comics Style
Again, we’re moving towards a different kind of animation style with this next filter from Snapchat, but the Comics Style filter does have its own promises of fun as well Especially for those who are long-time fans of American comics (or, even, your average modern-day Avengers fan)
Pros
FREE on Snapchat
Video face animator
Works with a variety of skin tones
Cons
Awkward with some face shapes
Does not work with all face accessories
Available only on Snapchat
Anime Filter #10: Cartoon 3D Style
Now, this might get confusing, but for our last picks, we actually have a set of filters all called Cartoon 3D Style But trust us They’re all different This first version is one you would probably relate more to the DreamWorks motion picture, Ratatouille
Pros
FREE profile picture animator on Snapchat
Compatible with a variety of face shapes
Compatible with a variety of skin tones
Cons
Set features (i.e., pointed nose)
Non-anime drawing style
Not compatible with some facial accessories
Anime Filter #11: Cartoon 3D Style
For our next Cartoon 3D Style lens from Snapchat, we have a face animator that can help you turn into something very close to another dreamwork’s motion picture (think the Despicable me or the Minions)
Pros
Cartoon style animator that is FREE to use
Great for motion capturing
Compatible with a variety of skin colors
Cons
Available only on Snapchat
Not compatible with certain face accessories
Limited face warping effect
Anime Filter #12: Cartoon 3D Style
And finally, for the last of our recommended anime filters, we have the Cartoon 3D Style lens from Snapchat that makes you look like your favorite Disney character (In this case, the obvious inspiration comes from Disney’s Frozen or Tangled)
Pros
Disney face animator that is FREE on Snapchat
Compatible with all skin tones
Trending on TikTok
Cons
It can only be used on Snapchat
Not great at capturing motion
02Steps to Download the Anime Filter App and Turn Yourself into an Anime Character
Now, if those filters weren’t enough for you, we’ve also included this next tutorial on how you can find apps on your mobile device that will allow you to get the same effect without having to use Snapchat, TikTok, or Instagram
Step 1Go to the App Store
The first step, of course, is to go to the app store on your mobile device.
Step 2Search for Anime Filter App
Next, search ‘Anime Filter’ on your phone’s app store.
Step 3Select Anime Filter App
There are multiple types of anime filter apps available in the market. Pick the one that you think will work best for you.
Step 4Install Anime Filter App
Finally, once you’ve found the anime filter app for you, install it.
Step 5Open Anime Filter App
The app that we used for our example, Anime Camera, offers several different animation styles However, this app does come with a subscription fee, so keep that in mind.
03Anime Filter Has a Sadly Unsurprising Problem
You might have noticed this while we were introducing all the different types of anime-style filters available, but the popular Anime Filter has its shortcomings. Which includes:
PROBLEM 1: Dark Skin Tones
The anime filter’s inability to capture darker skin tones accurately is one of the biggest issues users have with the filter.
PROBLEM 2: Hair Style
Hairstyle options are also very limited. And, as for black hairstyles? Well, the options are pretty much non-existent.
PROBLEM 3: Face Accessories
Do you wear glasses? How about piercings? Well, this won’t translate for you either, unfortunately
Key Takeaways from This Episode
● The Anime Filter is a hot, trending topic in platforms like Tiktok, Instagram, and Snapchat It’s also a fun way of engaging with the anime community
● There are other, similar face-animation filters available (The Cartoon 3D Styles, especially, were quite popular for a time)
● Unsurprisingly, the anime filter does have its problems… And it left a big chunk of the TikTok community pretty flabbergasted — and disappointed. But that didn’t stop them from joining in the fun to provide some empowering commentary
Whiteboard Animation Services: Top 15 Animation Companies to Pick
Whiteboard Animation Services: Top 15 Animation Companies to Pick In 2022
An easy yet powerful editor
Numerous effects to choose from
Detailed tutorials provided by the official channel
When looking for a whiteboard animation company, Google will search you hundreds of them, but the question is which of them is the best when it comes to work, behavior with the client, or ranking?
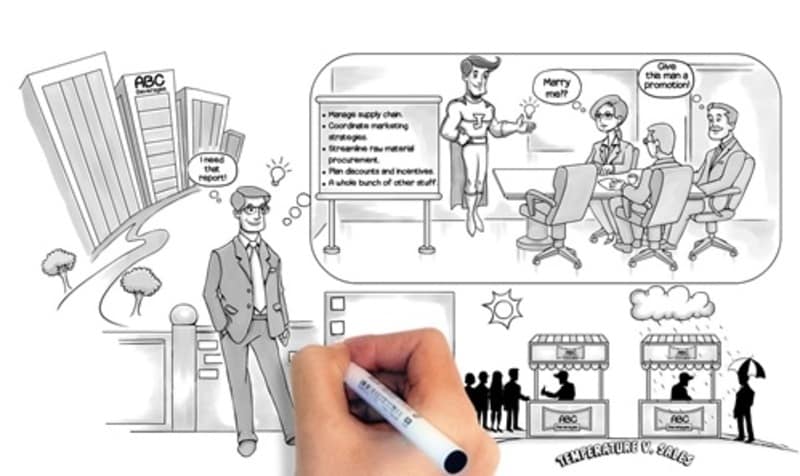
Also, the most critical question is will this company deliver the desired results in the given time, or will they be like every other company that consistently fail to fulfill their promises? Find out in this article.
In this article
01 [Why Custom Whiteboard Animation Videos Work](#Part 1)
02 [Key Aspects to Consider When Choosing a Whiteboard Animation Video Company](#Part 2)
03 [Top 15 Whiteboard Animation Studios Out There](#Part 3)
Part 1 Why Custom Whiteboard Animation Videos Work
The whiteboard animation video is an explainer video used to sell a product or describe a system. These animation videos are incredibly effective in communicating complex ideas and boosting attention and retention for your audience. A custom whiteboard animation video is a do-it-yourself video that does not require a template, but you need to start from scratch. Here are top reasons why you need a custom whiteboard animation video to work:
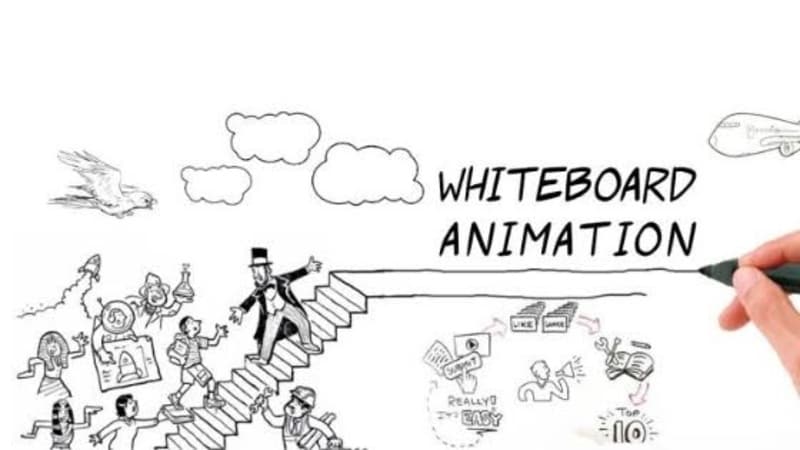
● When you want to describe a complex, highly technical, or intricate idea, product, or system, a custom whiteboard animated video will help you out. The more detailed an explanation is, the harder it is to focus, and people often get bored during the description. Therefore, sharing a new business process with a custom whiteboard animation with your team is more manageable. Getting your point across will maintain our interest as long as the video is playing.
● A custom whiteboard animation saves you the stress of hiring actors to play in your video and turn, saves costs and serious embarrassment by actors.
● Custom whiteboard animation videos are helpful when you want to use social media ads or YouTube for marketing as people like them, so, therefore, it is a good chance for you to get clicks, views, and more sales.
● A custom whiteboard animation helps you to tell the story of your brand.
● It helps to reuse old audio content lying around, for example, podcast episodes. You can create pre-existing audio with a custom whiteboard animation that will help you capitalize on content that has already been created and breathe in new life.
Part 2 Key Aspects to Consider When Choosing a Whiteboard Animation Video Company
A whiteboard animated video is ideal for sharing your brand on social media pages, hosting your website, and featuring on the internal company intranet. These whiteboard animated videos are tactically created to help you sell your services and products, improve internal communication, educate your customers, provide better user engagement, and convey complex or essential ideas. Choosing a whiteboard animation service you trust is crucial for creating a whiteboard animation video. The key elements to note when choosing a whiteboard animation video company is as follows:
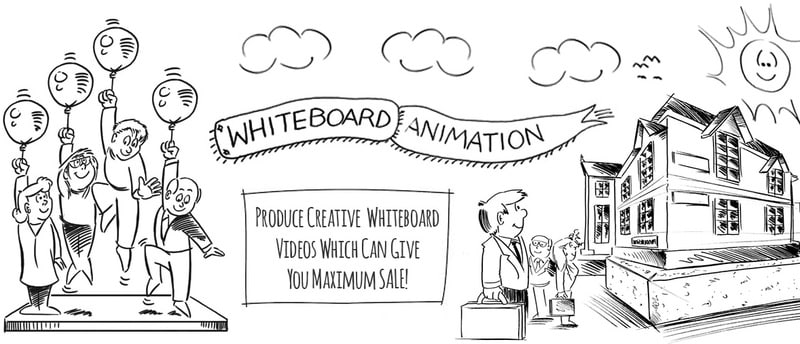
● When you work with a professional and reputable team, the process is smooth, and the final product created is more valuable.
● There is a solid understanding of what you should expect in terms of cost length and the process of creating the animated videos.
● Companies that do not use imagery and stop animation from creating the whiteboard animated video can manage a production schedule or experience in the field.
● Works on the combination of creativity, understanding, and accessibility.
● Well-versed with the digital platform and its functionality.
Part 3 Top Whiteboard Animation Studios Out There
Whiteboard animation is a video production method that uses illustrations and static images to explain to viewers the contents of the video. More so, whiteboard animation video’s production cost depends on various factors, including the animation time, the overall value, and the style of the characters. In this section, we have created a list of the best whiteboard animation studio for you to review:
01ExplainVisually.co
“Their fantastic flexibility as well as ability to prepare great visual synthesis.” - Former Operational Community Manager, General Merchandise Retailer
This is a visual thinking agency based in Warsaw, Poland, and founded in 201providing a graphic design and video production service with a team of more than 1This animation studio serves smaller companies and enterprises in the Financial Services, Telecommunications, IT, Healthcare and Medical, Utility Industry, and Energy Natural Resources.
Price: $1,000+
02Max curious productions
“They’re incredibly communicative and proactive, as well as deadline and budget-driven, which is great. They’re the kind of vendor that does what they need to do to make sure they deliver on time, working late nights or weekends if necessary.” - Creative Director, Television Network.
This is a video production company located in New York City and founded in 20has about two decades of experience in video production and has a production team of 6 employees.
Price: $5,000+
03Next Day Animations
“Direct feedback was very effective and helpful, making this collaboration go smoothly.” Development Director, Youth Non-Profit
This is an animation production company based in Baltimore and has additional offices in brace bridge, Canada; Madison, Wis, Minneapolis; Bend, Ore; and was founded in 201It provides marketing strategy, social media marketing, and video production with employees.
Price: $5,000+
04IdeaRocket
“They made me feel like I had the attention I needed whenever I needed it.” – CIO, Clothing Company
This is a production agency based in New York, founded in 201They provide services on video production to all sizes of clients and have a team of about ten employees.
Price: $10,000+
05MotionGility
“The promotional video was well received.” — Owner, Tech Company
This is an explainer video company with headquarters in Indore, India, founded in 2015, specializing in video production and some basics of graphic design and logo design with employees. Their clients range from enterprises mid-market and small businesses in various industries, including business services, consumer products and services, and advertising and marketing.
Price: $5,000+
06Rip media group
“Throughout the entire project, they were extremely responsive and always reachable.” — Co-Founder & CEO, Food Services Company.
This video production company located in Los Angeles was founded in 200They specialize in video production with a team of about employees to create motion graphics, motion, and live-action videos. Their claims are basically in the medical, IT, and business service industries.
Price: $1,000+
07Exaltus
They provided me with quality video for my marketing agency, and I think they are the best I’ve seen so far - the HR marketing department.
With its headquarter in Montreal and founded in 201this content marketing agency works with mid-market and enterprise companies in the entertainment, music, arts, education, and business service industry. It specializes in web development services and video production for clients.
Price: $5,000+
08Webdew
“The video was great, and it came at a really good price.” – Marketing Manager, Software Development Company.
This is a video production agency headquartered in Seattle and additional offices in London and Mohali, India, founded in 201It specializes in video production service to mid-market, small, and Enterprise businesses with a team of about specialists.
Price: $5,000+
09Switch video
“They’ve been very good at reaching out with questions, coming up with scripts and visual concepts, and letting my team focus on our responsibilities.” – Senior Solution Support Manager, IT Solutions Provider.
This is a video marketing company based in Collingwood, Canada, and founded in 200specializing in video production and other digital marketing services to meet market-level businesses with a team of members.
Price: $10,000+
10Alconost
“Alconost delivered the work on time, and the budget was what we agreed on. Whenever I requested a change, it was done quickly.” —Head of Marketing, Education App.
This information technology agency based in Alexandria, VA, with other Bolero offices, started in 200They specialize in advertisement translation video production for small businesses.
Price: $1,000+
11Cartoon Media
“[Cartoon Media’s] workflow was exceptional on their behalf. Their communication skills set them apart. “ - Employee, Electrical Company.
This is a digital production company located in Canterbury, UK, launched in 201They specialize in video production advertising, and broadcast production to their Enterprise mid-market and small businesses.
Price: $1,000+
12Ydraw
“All videos are in the process of being released, but everybody who has seen them so far has been impressed with the production quality. The concepts that are illustrated in the videos are clear to the viewer, which is what we struggled with.” - CEO, BTravel Software.
This animation and marketing firm in Saint George, Utah, founded in 201is Ydraw. They specialize in video production and works with clients of all sizes from business service, consumer products, and the advertising industry with employees.
Price: $5,000+
13Dream engine
“Everything surprised me in a lovely way.” – Communications Manager, Dementia Organization,
Dream engine is a video producing and marketing strategy firm based in St Kilda Melbourne, Australia, founded in 200They specialize in corporate video, motion graphics, and filming and serve clients in the education and advertising sector with a team of five.
Price: $5,000+
14Video Explainers
“The final product was exceptional. There was an increase in traffic from our social media to our website.” – CEO, Veterinary Staffing Company.
This is an external video and whiteboard animation company founded in 20and located in New York. He specializes in scriptwriting, storyboarding, illustrations, voice-over, animation, infographic, editing, and motion graphics with employees.
Price: $5,000+
15Wienot Films
“The excellence at Wienot sure makes us want to find ways to partner with them in the future as we grow, as we know we can trust any project to their capable hands and creative minds. We can’t thank them enough for such a professional and amazing final product. It was well worth the investment, and they have our highest recommendation.” – Co-owner, Healthcare Consulting Firm.
This is an explainer video and whiteboard animation company based in Austin and started in 201He specializes in creating a video that turns complex ideas into coin-sized memorable, easy-to-understand stories with teams.
Price: $5,000+
TipBest Whiteboard Animation Software
While we are busy discussing some of the best Whiteboard Animation companies, we cannot ignore the area that might benefit you the most while starting your venture with Whiteboard Animation. Here, the name comes under best whiteboard animation software lies with Wondershare Filmora Video Editor . That gives you an excellent interface to edit, modify and create whiteboard animation with the best support system.
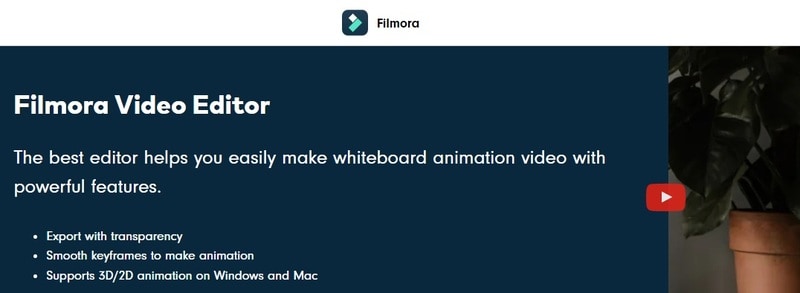
For Win 7 or later (64-bit)
For macOS 10.12 or later
● Key Takeaways from This Episode →
● This article has given a breakdown of the best white bond animation company.
● It also gives you top reasons you need a whiteboard animation company for your business growth.
● Additionally, to create a custom whiteboard animated video, Filmora has proven the best software with its keyframing feature and effects to create a smooth and perfect whiteboard animation video for your business growth.
● Therefore, if you need a whiteboard animation service, this article is for you.
When looking for a whiteboard animation company, Google will search you hundreds of them, but the question is which of them is the best when it comes to work, behavior with the client, or ranking?
Also, the most critical question is will this company deliver the desired results in the given time, or will they be like every other company that consistently fail to fulfill their promises? Find out in this article.
In this article
01 [Why Custom Whiteboard Animation Videos Work](#Part 1)
02 [Key Aspects to Consider When Choosing a Whiteboard Animation Video Company](#Part 2)
03 [Top 15 Whiteboard Animation Studios Out There](#Part 3)
Part 1 Why Custom Whiteboard Animation Videos Work
The whiteboard animation video is an explainer video used to sell a product or describe a system. These animation videos are incredibly effective in communicating complex ideas and boosting attention and retention for your audience. A custom whiteboard animation video is a do-it-yourself video that does not require a template, but you need to start from scratch. Here are top reasons why you need a custom whiteboard animation video to work:
● When you want to describe a complex, highly technical, or intricate idea, product, or system, a custom whiteboard animated video will help you out. The more detailed an explanation is, the harder it is to focus, and people often get bored during the description. Therefore, sharing a new business process with a custom whiteboard animation with your team is more manageable. Getting your point across will maintain our interest as long as the video is playing.
● A custom whiteboard animation saves you the stress of hiring actors to play in your video and turn, saves costs and serious embarrassment by actors.
● Custom whiteboard animation videos are helpful when you want to use social media ads or YouTube for marketing as people like them, so, therefore, it is a good chance for you to get clicks, views, and more sales.
● A custom whiteboard animation helps you to tell the story of your brand.
● It helps to reuse old audio content lying around, for example, podcast episodes. You can create pre-existing audio with a custom whiteboard animation that will help you capitalize on content that has already been created and breathe in new life.
Part 2 Key Aspects to Consider When Choosing a Whiteboard Animation Video Company
A whiteboard animated video is ideal for sharing your brand on social media pages, hosting your website, and featuring on the internal company intranet. These whiteboard animated videos are tactically created to help you sell your services and products, improve internal communication, educate your customers, provide better user engagement, and convey complex or essential ideas. Choosing a whiteboard animation service you trust is crucial for creating a whiteboard animation video. The key elements to note when choosing a whiteboard animation video company is as follows:
● When you work with a professional and reputable team, the process is smooth, and the final product created is more valuable.
● There is a solid understanding of what you should expect in terms of cost length and the process of creating the animated videos.
● Companies that do not use imagery and stop animation from creating the whiteboard animated video can manage a production schedule or experience in the field.
● Works on the combination of creativity, understanding, and accessibility.
● Well-versed with the digital platform and its functionality.
Part 3 Top Whiteboard Animation Studios Out There
Whiteboard animation is a video production method that uses illustrations and static images to explain to viewers the contents of the video. More so, whiteboard animation video’s production cost depends on various factors, including the animation time, the overall value, and the style of the characters. In this section, we have created a list of the best whiteboard animation studio for you to review:
01ExplainVisually.co
“Their fantastic flexibility as well as ability to prepare great visual synthesis.” - Former Operational Community Manager, General Merchandise Retailer
This is a visual thinking agency based in Warsaw, Poland, and founded in 201providing a graphic design and video production service with a team of more than 1This animation studio serves smaller companies and enterprises in the Financial Services, Telecommunications, IT, Healthcare and Medical, Utility Industry, and Energy Natural Resources.
Price: $1,000+
02Max curious productions
“They’re incredibly communicative and proactive, as well as deadline and budget-driven, which is great. They’re the kind of vendor that does what they need to do to make sure they deliver on time, working late nights or weekends if necessary.” - Creative Director, Television Network.
This is a video production company located in New York City and founded in 20has about two decades of experience in video production and has a production team of 6 employees.
Price: $5,000+
03Next Day Animations
“Direct feedback was very effective and helpful, making this collaboration go smoothly.” Development Director, Youth Non-Profit
This is an animation production company based in Baltimore and has additional offices in brace bridge, Canada; Madison, Wis, Minneapolis; Bend, Ore; and was founded in 201It provides marketing strategy, social media marketing, and video production with employees.
Price: $5,000+
04IdeaRocket
“They made me feel like I had the attention I needed whenever I needed it.” – CIO, Clothing Company
This is a production agency based in New York, founded in 201They provide services on video production to all sizes of clients and have a team of about ten employees.
Price: $10,000+
05MotionGility
“The promotional video was well received.” — Owner, Tech Company
This is an explainer video company with headquarters in Indore, India, founded in 2015, specializing in video production and some basics of graphic design and logo design with employees. Their clients range from enterprises mid-market and small businesses in various industries, including business services, consumer products and services, and advertising and marketing.
Price: $5,000+
06Rip media group
“Throughout the entire project, they were extremely responsive and always reachable.” — Co-Founder & CEO, Food Services Company.
This video production company located in Los Angeles was founded in 200They specialize in video production with a team of about employees to create motion graphics, motion, and live-action videos. Their claims are basically in the medical, IT, and business service industries.
Price: $1,000+
07Exaltus
They provided me with quality video for my marketing agency, and I think they are the best I’ve seen so far - the HR marketing department.
With its headquarter in Montreal and founded in 201this content marketing agency works with mid-market and enterprise companies in the entertainment, music, arts, education, and business service industry. It specializes in web development services and video production for clients.
Price: $5,000+
08Webdew
“The video was great, and it came at a really good price.” – Marketing Manager, Software Development Company.
This is a video production agency headquartered in Seattle and additional offices in London and Mohali, India, founded in 201It specializes in video production service to mid-market, small, and Enterprise businesses with a team of about specialists.
Price: $5,000+
09Switch video
“They’ve been very good at reaching out with questions, coming up with scripts and visual concepts, and letting my team focus on our responsibilities.” – Senior Solution Support Manager, IT Solutions Provider.
This is a video marketing company based in Collingwood, Canada, and founded in 200specializing in video production and other digital marketing services to meet market-level businesses with a team of members.
Price: $10,000+
10Alconost
“Alconost delivered the work on time, and the budget was what we agreed on. Whenever I requested a change, it was done quickly.” —Head of Marketing, Education App.
This information technology agency based in Alexandria, VA, with other Bolero offices, started in 200They specialize in advertisement translation video production for small businesses.
Price: $1,000+
11Cartoon Media
“[Cartoon Media’s] workflow was exceptional on their behalf. Their communication skills set them apart. “ - Employee, Electrical Company.
This is a digital production company located in Canterbury, UK, launched in 201They specialize in video production advertising, and broadcast production to their Enterprise mid-market and small businesses.
Price: $1,000+
12Ydraw
“All videos are in the process of being released, but everybody who has seen them so far has been impressed with the production quality. The concepts that are illustrated in the videos are clear to the viewer, which is what we struggled with.” - CEO, BTravel Software.
This animation and marketing firm in Saint George, Utah, founded in 201is Ydraw. They specialize in video production and works with clients of all sizes from business service, consumer products, and the advertising industry with employees.
Price: $5,000+
13Dream engine
“Everything surprised me in a lovely way.” – Communications Manager, Dementia Organization,
Dream engine is a video producing and marketing strategy firm based in St Kilda Melbourne, Australia, founded in 200They specialize in corporate video, motion graphics, and filming and serve clients in the education and advertising sector with a team of five.
Price: $5,000+
14Video Explainers
“The final product was exceptional. There was an increase in traffic from our social media to our website.” – CEO, Veterinary Staffing Company.
This is an external video and whiteboard animation company founded in 20and located in New York. He specializes in scriptwriting, storyboarding, illustrations, voice-over, animation, infographic, editing, and motion graphics with employees.
Price: $5,000+
15Wienot Films
“The excellence at Wienot sure makes us want to find ways to partner with them in the future as we grow, as we know we can trust any project to their capable hands and creative minds. We can’t thank them enough for such a professional and amazing final product. It was well worth the investment, and they have our highest recommendation.” – Co-owner, Healthcare Consulting Firm.
This is an explainer video and whiteboard animation company based in Austin and started in 201He specializes in creating a video that turns complex ideas into coin-sized memorable, easy-to-understand stories with teams.
Price: $5,000+
TipBest Whiteboard Animation Software
While we are busy discussing some of the best Whiteboard Animation companies, we cannot ignore the area that might benefit you the most while starting your venture with Whiteboard Animation. Here, the name comes under best whiteboard animation software lies with Wondershare Filmora Video Editor . That gives you an excellent interface to edit, modify and create whiteboard animation with the best support system.
For Win 7 or later (64-bit)
For macOS 10.12 or later
● Key Takeaways from This Episode →
● This article has given a breakdown of the best white bond animation company.
● It also gives you top reasons you need a whiteboard animation company for your business growth.
● Additionally, to create a custom whiteboard animated video, Filmora has proven the best software with its keyframing feature and effects to create a smooth and perfect whiteboard animation video for your business growth.
● Therefore, if you need a whiteboard animation service, this article is for you.
5 Ways You Never Heard of for Converting MP4 to GIF in Photoshop
5 Techniques You Never heard of for Converting MP4 to GIF in Photoshop
An easy yet powerful editor
Numerous effects to choose from
Detailed tutorials provided by the official channel
When someone mentions a GIF, what comes to your mind? Some people can picture what it means but wouldn’t describe that match. So, before we discuss how to convert mp4 to gif in Photoshop, it would be wise to define it briefly. First of all, GIF stands for Graphics Interchange Format. Its file format is a compressed image, and it is most suitable for animation. We all know that an animated GIF comprises a series of many still images. However, since these images play sequentially, it may appear as if they are in motion. It is that movement illusion that makes the animation effect come about.
When someone mentions a GIF, what comes to your mind? Some people can picture what it means but wouldn’t describe that match. So, before we discuss how to convert mp4 to gif in Photoshop, it would be wise to define it briefly. First of all, GIF stands for Graphics Interchange Format. Its file format is a compressed image, and it is most suitable for animation. We all know that an animated GIF comprises a series of many still images. However, since these images play sequentially, it may appear as if they are in motion. It is that movement illusion that makes the animation effect come about.
In this article
01 [How to Convert Video to GIF in Photoshop - Easy Way](#Part 1)
02 [How to Create Animated GIFs from Video without Photoshop](#Part 2)
Part 1 How to Convert Video to GIF in Photoshop - Easy Way
If you want to convert video to GIF in Photoshop, here is a discussion of the easy way to go about it.
Step 1: Ensure that the Dimensions are Right
When you start to convert mp4 to GIF using Photoshop, it is important to highlight some things that need to be done before anything else. Ensure that you set the resolution and dimensions right. Failure to do saw will see the size of your video determine that of your GIF. Beneath such occurrences, you may find yourself having a GIF that’s too large, and its quality leaves a lot to be desired.
The dimensions you choose will depend on what you are working on at any one particular time. For instance, a 720 x 300 layout is recommended for a banner ad GIF. If there is something that one can’t stress enough is the importance of ensuring that you use pixels. As for the resolution, keep in mind that a low resolution translates to a small file size. In this case, you are at privilege to choose between two units, pixels and inches.
Additionally, set the color mode. Since GIFs are meant for screens, ensure that you select the RGB color mode. Finally, click on Create, which opens a new document, and start following these steps to convert Mp4 to GIF Photoshop.
Step 2: Import the Video you want to convert from MP4 to GIF Photoshop
Remember that we already opened Photoshop by pressing Create. Now, the next thing would be to navigate to File followed by Import before selecting the Video Frames to Layers option.

Step 3: Set Up the Following Settings Accordingly
After choosing the video file, choose Open, and a dialogue box with several options and a preview of the video appears.

The radio buttons give you two options to choose from. The “From Beginning to End” is the ideal choice if you want the whole video to be converted to GIF. However, if you want to focus on a section of the video, select “Selected Range Only.” On the other hand, the checkbox allows you to limit the video to 2 frames. Simply tick it, and Photoshop will automatically ensure that only two frames of the video are left.
Last but not least, check the “Make Frame Animation” checkbox. Once all these settings are set as recommended and depending on preference, Photoshop will export your video as several frames. In the event that the program crashes, all is not lost. You can fix it by reducing the video’s quality and then try importing it.
Step 4: Edit the GIF
Photoshop also gives you several options to help you edit your frames to perfection. In most cases, these settings are ideal for manipulating the quality of your GIF. Interestingly, it is possible to preview how the GIF will look before committing to any change. So expect two panes, right and left. The left one allows you to see the preview, whereas its right counterpart helps you edit.

Alternatively, select one of the preset choices. If you do so, there is no requirement The bottom line is that the tool makes to make any changes. That doesn’t mean you can’t choose a Preset option and then edit it to your preferences. Expect the quality of the GIF to decrease and the size to be relatively small. Right below the Preset, don’t forget to confirm that the selected option is GIF.
Step 5: Save the GIF
Once satisfied by the GIF created, save these frames as animated GIFs. Go to File, then Export, followed by Save for Web (Legacy).

That’s how to convert Mp4 to GIF in simple steps.
Part 2 How to Create Animated GIFs from Video without Photoshop
Alternatively, you can opt to convert Mp4 to GIF using Wondershare Filmora Video Editor . It is yet another tool suitable for creating animated GIFs using videos and photos. It allows the user to customize GIF images using overlays, text, animation, and elements. When it is over, you are at liberty to export it to your computer or any other common portable storage device. The bottommost line is that the tool makes it easy to use whenever necessary. The icing on the cake is the fact that you don’t have to sign up or pay a premium. In case you are wondering, it is also easy to use. All you got to do is to follow these steps.

Wondershare Filmora - Best Video Editor for Mac/Windows
5,481,435 people have downloaded it.
Build unique custom animations without breaking a sweat.
Focus on creating epic stories and leave the details to Filmora’s auto features.
Start a creative adventure with drag & drop effects and endless possibilities.
Filmora simplifies advanced features to save you time and effort.
Filmora cuts out repetition so you can move on to your next creative breakthrough.
Step 1: Import the Videos
Ensure that the videos you import are editable lest that will be a waste of time. Its design makes it compatible with a wide range of formats, including wmv, mkv, mp4, wav, mpeg, avi, jpg, and png. Since it is among the compatible formats, don’t hesitate to use Filmora to convert GIF to mp4 and vice versa instead of Photoshop.
Step 2: Drag the videos to Filmora timeline
Keep in mind that Filmora has a long list of tools you can use to edit your videos. However, you can also use them on a video that’s on its timeline. To drop them there, all you have to do is drag them to the timeline.

Step 3: Edit the File
The list of ways of editing your videos is long. Some of your options are split, crop, combine, slow down, and speed up the GIFs, to mention a few. So, pick the options that fit your situation the best. Ensure that the end product is as good as possible by using these features to the best level.
Step 4: Add Various Text Effects
In most cases, images and videos aren’t enough. You may want to add text to enhance what you want to achieve with the GIF. To do so, you can always introduce text, and trust me, it never disappoints. In addition to text, you can also add sound at this stage. Again, it is something that does GIFs the justice they deserve.

Step 5: Save and Export the GIF
When all is stated and done, you will have to save and export the GIFs so that you can use them accordingly. For instance, you can share them with friends via social media. Ensure that the extension you use is the GIF.
● Key Takeaways from This Episode →
● Based on the above discussion, it is possible to convert mp4 to GIF. As a matter of fact, it is quite easy, and you don’t need to be an expert to get it done.
●Rest assured that the video will become a GIF with a few clicks. Then, you can go ahead and use it as you may wish.
●On one side, you can use Photoshop. It is a tool designed to perform such tasks.
●If you choose it, use the above guide and follow each of the steps. It is quite detailed to the extent that you won’t get stuck along the way.
●On the other hand, you can also use Wondershare Filmora. It is yet another application that converts MP4 to GIF excellently.
When someone mentions a GIF, what comes to your mind? Some people can picture what it means but wouldn’t describe that match. So, before we discuss how to convert mp4 to gif in Photoshop, it would be wise to define it briefly. First of all, GIF stands for Graphics Interchange Format. Its file format is a compressed image, and it is most suitable for animation. We all know that an animated GIF comprises a series of many still images. However, since these images play sequentially, it may appear as if they are in motion. It is that movement illusion that makes the animation effect come about.
When someone mentions a GIF, what comes to your mind? Some people can picture what it means but wouldn’t describe that match. So, before we discuss how to convert mp4 to gif in Photoshop, it would be wise to define it briefly. First of all, GIF stands for Graphics Interchange Format. Its file format is a compressed image, and it is most suitable for animation. We all know that an animated GIF comprises a series of many still images. However, since these images play sequentially, it may appear as if they are in motion. It is that movement illusion that makes the animation effect come about.
In this article
01 [How to Convert Video to GIF in Photoshop - Easy Way](#Part 1)
02 [How to Create Animated GIFs from Video without Photoshop](#Part 2)
Part 1 How to Convert Video to GIF in Photoshop - Easy Way
If you want to convert video to GIF in Photoshop, here is a discussion of the easy way to go about it.
Step 1: Ensure that the Dimensions are Right
When you start to convert mp4 to GIF using Photoshop, it is important to highlight some things that need to be done before anything else. Ensure that you set the resolution and dimensions right. Failure to do saw will see the size of your video determine that of your GIF. Beneath such occurrences, you may find yourself having a GIF that’s too large, and its quality leaves a lot to be desired.
The dimensions you choose will depend on what you are working on at any one particular time. For instance, a 720 x 300 layout is recommended for a banner ad GIF. If there is something that one can’t stress enough is the importance of ensuring that you use pixels. As for the resolution, keep in mind that a low resolution translates to a small file size. In this case, you are at privilege to choose between two units, pixels and inches.
Additionally, set the color mode. Since GIFs are meant for screens, ensure that you select the RGB color mode. Finally, click on Create, which opens a new document, and start following these steps to convert Mp4 to GIF Photoshop.
Step 2: Import the Video you want to convert from MP4 to GIF Photoshop
Remember that we already opened Photoshop by pressing Create. Now, the next thing would be to navigate to File followed by Import before selecting the Video Frames to Layers option.
Step 3: Set Up the Following Settings Accordingly
After choosing the video file, choose Open, and a dialogue box with several options and a preview of the video appears.
The radio buttons give you two options to choose from. The “From Beginning to End” is the ideal choice if you want the whole video to be converted to GIF. However, if you want to focus on a section of the video, select “Selected Range Only.” On the other hand, the checkbox allows you to limit the video to 2 frames. Simply tick it, and Photoshop will automatically ensure that only two frames of the video are left.
Last but not least, check the “Make Frame Animation” checkbox. Once all these settings are set as recommended and depending on preference, Photoshop will export your video as several frames. In the event that the program crashes, all is not lost. You can fix it by reducing the video’s quality and then try importing it.
Step 4: Edit the GIF
Photoshop also gives you several options to help you edit your frames to perfection. In most cases, these settings are ideal for manipulating the quality of your GIF. Interestingly, it is possible to preview how the GIF will look before committing to any change. So expect two panes, right and left. The left one allows you to see the preview, whereas its right counterpart helps you edit.
Alternatively, select one of the preset choices. If you do so, there is no requirement The bottom line is that the tool makes to make any changes. That doesn’t mean you can’t choose a Preset option and then edit it to your preferences. Expect the quality of the GIF to decrease and the size to be relatively small. Right below the Preset, don’t forget to confirm that the selected option is GIF.
Step 5: Save the GIF
Once satisfied by the GIF created, save these frames as animated GIFs. Go to File, then Export, followed by Save for Web (Legacy).
That’s how to convert Mp4 to GIF in simple steps.
Part 2 How to Create Animated GIFs from Video without Photoshop
Alternatively, you can opt to convert Mp4 to GIF using Wondershare Filmora Video Editor . It is yet another tool suitable for creating animated GIFs using videos and photos. It allows the user to customize GIF images using overlays, text, animation, and elements. When it is over, you are at liberty to export it to your computer or any other common portable storage device. The bottommost line is that the tool makes it easy to use whenever necessary. The icing on the cake is the fact that you don’t have to sign up or pay a premium. In case you are wondering, it is also easy to use. All you got to do is to follow these steps.
Wondershare Filmora - Best Video Editor for Mac/Windows
5,481,435 people have downloaded it.
Build unique custom animations without breaking a sweat.
Focus on creating epic stories and leave the details to Filmora’s auto features.
Start a creative adventure with drag & drop effects and endless possibilities.
Filmora simplifies advanced features to save you time and effort.
Filmora cuts out repetition so you can move on to your next creative breakthrough.
Step 1: Import the Videos
Ensure that the videos you import are editable lest that will be a waste of time. Its design makes it compatible with a wide range of formats, including wmv, mkv, mp4, wav, mpeg, avi, jpg, and png. Since it is among the compatible formats, don’t hesitate to use Filmora to convert GIF to mp4 and vice versa instead of Photoshop.
Step 2: Drag the videos to Filmora timeline
Keep in mind that Filmora has a long list of tools you can use to edit your videos. However, you can also use them on a video that’s on its timeline. To drop them there, all you have to do is drag them to the timeline.
Step 3: Edit the File
The list of ways of editing your videos is long. Some of your options are split, crop, combine, slow down, and speed up the GIFs, to mention a few. So, pick the options that fit your situation the best. Ensure that the end product is as good as possible by using these features to the best level.
Step 4: Add Various Text Effects
In most cases, images and videos aren’t enough. You may want to add text to enhance what you want to achieve with the GIF. To do so, you can always introduce text, and trust me, it never disappoints. In addition to text, you can also add sound at this stage. Again, it is something that does GIFs the justice they deserve.
Step 5: Save and Export the GIF
When all is stated and done, you will have to save and export the GIFs so that you can use them accordingly. For instance, you can share them with friends via social media. Ensure that the extension you use is the GIF.
● Key Takeaways from This Episode →
● Based on the above discussion, it is possible to convert mp4 to GIF. As a matter of fact, it is quite easy, and you don’t need to be an expert to get it done.
●Rest assured that the video will become a GIF with a few clicks. Then, you can go ahead and use it as you may wish.
●On one side, you can use Photoshop. It is a tool designed to perform such tasks.
●If you choose it, use the above guide and follow each of the steps. It is quite detailed to the extent that you won’t get stuck along the way.
●On the other hand, you can also use Wondershare Filmora. It is yet another application that converts MP4 to GIF excellently.
Also read:
- Updated 2024 Approved 10 of the Best Disney Animated Shows
- Updated How I Animate Discord Profile Pictures
- New In 2024, How to Make Your GIF on WhatsApp in Simple Ways
- 2024 Approved Secret Source to Make a Stop Motion Puppet
- Updated In 2024, How to Make a Video a Live Photo 2023
- In 2024, Best 15 Female Anime Characters-Who Is Your Favorite?
- New 2024 Approved Top 20+ Best Free GIF Makers Online to Quickly Edit GIF
- Updated In 2024, The Best 8 Places for High-Quality Royalty Free Gifs (Paid and Free)
- Updated Obtain and Create Animated GIF Icons
- Updated 2024 Approved Nurturing the Spirit Through the Top 10 Intellectual Anime Websites
- How to Make Your GIF on WhatsApp in Simple Ways for 2024
- Best 10 Popular Cartoons You Forgot Existed for 2024
- New In 2024, Amazing Techniques of Motion Graphics in Premiere Pro
- Updated 2024 Approved 15 Best Video to GIF App on iPhone and Android
- Updated How To Make Pinterest Slideshow in Simple Ways
- Tips for GIF to Animated PNG
- In 2024, How to Create Free Photo Collage Frame in Minutes?
- 10 Best Convert Video Between GIF Software High Quality
- How to Animate - Adobe Animate Tutorias for 2024
- New 5 Foolproof Amazing Anime Text to Speech Tips for Makers for 2024
- Updated 2024 Approved Finding The Best Animated Profile Picture Maker
- New In 2024, The Best 10 Sketch Animation Video Makers
- Updated In 2024, 10 Must-Use MP4 to GIF Converters to Get Perfect-Made GIF
- Updated The Secret Sauce for Making GIF Instagram Story More Stunning
- New Best 12 Illusion Gifs Top Picks
- Best 12 Illusion Gifs Top Picks
- New In 2024, Amazing Ideas About Creating Personalised WhatsApp GIF Sticker
- Amazing Ways to Find Suitable Animated Graphic Maker for 2024
- In 2024, How to Find & Make Animated Christmas GIFs?
- 10 Realistic Cartoon Characters You Would Run Away From if You Met in Real Life
- Updated Why These 10 Top Text Motion Templates Are Worth Your Attention
- Updated In 2024, Adobe Animate CC Everything You Need to Know
- Updated All About Types of Motion Graphics
- 2024 Approved 12 Animated Slideshow PowerPoint Templates
- New Best 8 Tools Tell You How to Make Slideshows for Instagram for 2024
- The Best Android SIM Unlock Code Generators Unlock Your Meizu Phone Hassle-Free
- In 2024, How PGSharp Save You from Ban While Spoofing Pokemon Go On Vivo G2? | Dr.fone
- 3 Ways to Fake GPS Without Root On Samsung Galaxy S23 Tactical Edition | Dr.fone
- In 2024, CatchEmAll Celebrate National Pokémon Day with Virtual Location On Realme GT 5 Pro | Dr.fone
- In 2024, Top 10 Telegram Spy Tools On Realme Narzo N53 for Parents | Dr.fone
- In 2024, Is Fake GPS Location Spoofer a Good Choice On Motorola Moto G14? | Dr.fone
- In 2024, How to Stream Apple iPhone 14 Plus Video to Computer? | Dr.fone
- How to Easily Hard reset my Infinix Smart 8 Plus | Dr.fone
- Full Tutorial to Bypass Your Vivo X90S Face Lock?
- In 2024, Unlock Your Vivo X Flip Phone with Ease The 3 Best Lock Screen Removal Tools
- Where Is the Best Place to Catch Dratini On Nokia 130 Music | Dr.fone
- 3 Ways to Unlock iPhone 15 Plus without Passcode or Face ID
- In 2024, Top 4 Ways to Trace Vivo X100 Location | Dr.fone
- In 2024, Network Locked SIM Card Inserted On Your Oppo Find X7 Phone? Unlock It Now
- In 2024, Things You Should Know When Unlocking Total Wireless Of Apple iPhone 7
- How To Update or Downgrade iPhone 6s Without Losing Anything? | Dr.fone
- Forgotten The Voicemail Password Of Realme C51? Try These Fixes
- 3 Ways for Android Pokemon Go Spoofing On Poco M6 Pro 4G | Dr.fone
- Does Xiaomi support MKV video files?
- In 2024, How to Remove and Reset Face ID on Apple iPhone 15 Pro Max | Dr.fone
- 8 Best Apps for Screen Mirroring Oppo A38 PC | Dr.fone
- How to Fix My Vivo V30 Location Is Wrong | Dr.fone
- Title: Updated What Is Anime? Anime VS Manga VS Cartoon for 2024
- Author: Elon
- Created at : 2024-05-19 03:05:56
- Updated at : 2024-05-20 03:05:56
- Link: https://animation-videos.techidaily.com/updated-what-is-anime-anime-vs-manga-vs-cartoon-for-2024/
- License: This work is licensed under CC BY-NC-SA 4.0.
