
:max_bytes(150000):strip_icc():format(webp)/GettyImages-151812569-ff7311e1de18461da9f8698205953384.jpg)
Updated Whats Music Video GIF & How to Add Music to GIF Files for 2024
What’s Music Video GIF & How to Add Music to GIF Files
What’s Music Video GIF & How to Add Music to Your GIF Files
An easy yet powerful editor
Numerous effects to choose from
Detailed tutorials provided by the official channel
Want to make your GIFs more catchy and interesting? Try adding music videos to multiply the fun!
In this article
01 [What’s Music Video GIF](#Part 1)
02 [How to Easily Add Music to Your GIF](#Part 2)
03 [How To Make a GIF With Music to Post on Instagram?](#Part 3)
Part 1 What’s Music Video GIF?
GIFs are essentially animated image files that already form an effective and interesting means of communication and media sharing. Your messages get additional spunk and appeal when you add relatable audios to your GIFs. A music video GIF is one that you create by adding sound to the originally mute GIF files. Additionally, creating music enabled GIFs is a fun activity on its own. You get to explore your editing creativity on different levels as you play with the exciting features that come with the latest editing tools available in the software market.
Whether create them casually or use them as a marketing tool, sound effects tend to considerably upgrade the utility of an animated or unmoving snap. If you are a social media freak and want to get your Instagram and Facebook stories be the talk among your friends on the internet, do consider trying these editing tricks to add that extra notch to your otherwise simple and soundless GIFs. After all, your creativity should never go unnoticed and get the attention it deserves!
If this gets you motivated and you have decided to level up your editing skills, do spare your valuable time to see through further sections of this article for quick and easy tools and methods to introduce audio and sound effects to those mute GIFs and never let your social media posts and stories miss a catch!

Part 2 How to Easily Add Music to Your GIF?
Musical GIF videos are quite interesting, no doubt on that, but what is noticeable here is that GIFs do not have inbuilt audio features. You need to add sound additionally to these files to create musical GIF videos. When trying to make your own music GIF video, you can take help of the following tools:
01Kapwing Editor
This one is a free online tool that helps you add audio to your GIFs. This application is free from issues of spam and watermark requirements. It assures you of a quality editing experience without supporting unnecessary and annoying advertisements.
Using this tool, you can create musical GIF videos in two different ways. Take the following steps to create musical GIF videos with this application:
● Using The Kapwing Studio:
Open the Studio and select the GIF and music files you want to merge. Upload the selected files in the tool.
Customize your audio in the Studio timeline to trim the sound file to the specific segment you wish to add to your GIF. You can also introduce volume adjustments and waveform effects to enhance your music video for GIF for an extra catch.
You can further add text and make size adjustments to your GIF using the sidebar controls.
Once you have finalized everything, click ‘Export’ to download the GIF music video in MP4 format. Note that if you download the GIF format, your video will lose the sound effect.
● Copy-Paste Method
You can also merge GIFs and music videos using the direct copy-paste method in the Kapwing Editor. To create one for yourself, here’s what you need to follow:
Step 1: GIF Upload
Select a GIF from your smartphone or PC gallery and upload it to the Kapwing Editor. You can even copy a GIF link from other apps like, YouTube, GIFHY, etc, and paste it in the editor timeline.
Step 2: Audio Upload
Next, you need to upload the audio file you want to get stitched with your GIF. Choose a file either from your system or copy-paste the YouTube URL of the selected video in the Kapwing timeline.
Step 3: Export Your Creation
That it! You are done with your creation. Click ‘Export’ to share your musical GIF video on different social platforms.

02VEED’S GIF Maker
Like the Kapwing Editor, this one is also a free online tool that you can use to add sound to your originally mute GIF files. What’s more interesting is, apart from adding music, you have the flexibility to draw over, add text and images to your GIFs before you proceed with adding sound to your selected GIF.
Follow the steps given below to start creating GIF music videos with this application:
Step 1: Upload GIF File
To begin, upload your selected GIF file to the application’s pop-up window using ‘Drag and Drop’ method. Alternatively, you can click on ‘Choose GIF File’ tab on the app’s welcome window. Select a file from your system’s gallery and click ‘Open’ to upload it.

Step 2: Add Music
To add audio files, select ‘Upload’ or tap the (+) sign at the bottom right to choose the desired music files. Drag them to VEED’s timeline to set them in the order of your preference.

Step 3: Download Your Creation
Your video gets created in MP4 format. Tap ‘Export’ to directly share it with your peers on Twitter, Facebook or other social platforms.
Part 3 How to Make a GIF With Music to Post on Instagram?
Exploring your creative skills is one thing, while attracting attention to your work is the other. You would definitely want your social media communities to notice and compliment your work. Instagram is one among the best media sharing apps you can use to share your creations.
To adhere to the concern of creating audio enabled GIFs compatible for sharing to your Instagram stories and feeds, you can any of the following editing tools:
01Filmora
Wondershare Filmora Video Editor is one of the best and most preferred editing software you can use to add sound to your GIFs and videos. You can play with your editing creativity to make exciting musical GIF videos with this software in just a few minutes.

Using this tool for your editing work promises you the following advantages:
Wondershare Filmora
Get started easily with Filmora’s powerful performance, intuitive interface, and countless effects!
Try It Free Try It Free Try It Free Learn More >

● Huge Audio Library
Filmora audio library exposes you with a diverse range of audio and music files and a variety of exciting and relatable sound effects to choose from. You can browse through this storehouse for that perfect music for your GIF absolutely free of cost. The library has an additional Filmstock Effect Store that further increases your audio choice bandwidth.
● Optimal Sync
Filmora allows you to establish the perfect sync between your GIF and audio. Its beat detection feature identifies audio hits to produce markers that you can use to obtain the ideal audio-GIF synchronization in your creations.
● Voiceover Applicable
Filmora gives you the flexibility to record and add you own voiceover using your microphone to make your creations more impactful.
Steps to Create Audio Enabled GIFs Using Filmora
Take the following steps to enhance your GIFs with music and sound effects:
● Select and import your GIF file to the Filmora timeline
● In the software’s audio library, select your desired music and sound effects to add them to the imported GIF file. You can even choose to add your own voiceover to the GIF.
● That’s it! You are now ready to share your work on your Instagram handle and other media sharing platforms. Just click ‘Export’ and your creation gets uploaded on social media in MP4 format. Make sure to adjust the resolution and bit settings for best results.

02Artwork
Like Filmora, Artwork is another application you can use to add sound to GIF files. This one is a browser tool that allows you to create sound enabled videos with static and animated images. Take up the following process to make your own musical GIF with Artwork:
● To begin, signup to Artwork’s free trial feature. Choose your desired sound file in MP3 format and trim it to a play duration of 1 minute. This is essential because Instagram doesn’t allow you to post longer GIFs.
● Add your selected GIF and trimmed MP3 files in Artwork’s pop-up window. Click ‘Save’ and wait till the process to finish.
● Your creation is ready. Download and share it on Instagram.
● Key Takeaways from This Episode →
● Adding music and sound to your GIF is both a fun and exciting activity and also has the potential to enhance the quality and reach of the message you desire to deliver through your GIF. Besides this, it enhances your editing creativity and skill, which is a complement in itself.
● A number of software and online tools available on the internet are ready to help you get through the task. You can rely on these tools to add audio to your GIFs within minutes absolutely free of cost and share them directly on social media.
● Filmora is one among the best GIF editing tools for sharing your creations on Instagram. You can access its huge audio library for selected sound effects, set a perfect sync between your GIF and its audio and even add your own voiceover to boost your creativity using this software.
Want to make your GIFs more catchy and interesting? Try adding music videos to multiply the fun!
In this article
01 [What’s Music Video GIF](#Part 1)
02 [How to Easily Add Music to Your GIF](#Part 2)
03 [How To Make a GIF With Music to Post on Instagram?](#Part 3)
Part 1 What’s Music Video GIF?
GIFs are essentially animated image files that already form an effective and interesting means of communication and media sharing. Your messages get additional spunk and appeal when you add relatable audios to your GIFs. A music video GIF is one that you create by adding sound to the originally mute GIF files. Additionally, creating music enabled GIFs is a fun activity on its own. You get to explore your editing creativity on different levels as you play with the exciting features that come with the latest editing tools available in the software market.
Whether create them casually or use them as a marketing tool, sound effects tend to considerably upgrade the utility of an animated or unmoving snap. If you are a social media freak and want to get your Instagram and Facebook stories be the talk among your friends on the internet, do consider trying these editing tricks to add that extra notch to your otherwise simple and soundless GIFs. After all, your creativity should never go unnoticed and get the attention it deserves!
If this gets you motivated and you have decided to level up your editing skills, do spare your valuable time to see through further sections of this article for quick and easy tools and methods to introduce audio and sound effects to those mute GIFs and never let your social media posts and stories miss a catch!
Part 2 How to Easily Add Music to Your GIF?
Musical GIF videos are quite interesting, no doubt on that, but what is noticeable here is that GIFs do not have inbuilt audio features. You need to add sound additionally to these files to create musical GIF videos. When trying to make your own music GIF video, you can take help of the following tools:
01Kapwing Editor
This one is a free online tool that helps you add audio to your GIFs. This application is free from issues of spam and watermark requirements. It assures you of a quality editing experience without supporting unnecessary and annoying advertisements.
Using this tool, you can create musical GIF videos in two different ways. Take the following steps to create musical GIF videos with this application:
● Using The Kapwing Studio:
Open the Studio and select the GIF and music files you want to merge. Upload the selected files in the tool.
Customize your audio in the Studio timeline to trim the sound file to the specific segment you wish to add to your GIF. You can also introduce volume adjustments and waveform effects to enhance your music video for GIF for an extra catch.
You can further add text and make size adjustments to your GIF using the sidebar controls.
Once you have finalized everything, click ‘Export’ to download the GIF music video in MP4 format. Note that if you download the GIF format, your video will lose the sound effect.
● Copy-Paste Method
You can also merge GIFs and music videos using the direct copy-paste method in the Kapwing Editor. To create one for yourself, here’s what you need to follow:
Step 1: GIF Upload
Select a GIF from your smartphone or PC gallery and upload it to the Kapwing Editor. You can even copy a GIF link from other apps like, YouTube, GIFHY, etc, and paste it in the editor timeline.
Step 2: Audio Upload
Next, you need to upload the audio file you want to get stitched with your GIF. Choose a file either from your system or copy-paste the YouTube URL of the selected video in the Kapwing timeline.
Step 3: Export Your Creation
That it! You are done with your creation. Click ‘Export’ to share your musical GIF video on different social platforms.
02VEED’S GIF Maker
Like the Kapwing Editor, this one is also a free online tool that you can use to add sound to your originally mute GIF files. What’s more interesting is, apart from adding music, you have the flexibility to draw over, add text and images to your GIFs before you proceed with adding sound to your selected GIF.
Follow the steps given below to start creating GIF music videos with this application:
Step 1: Upload GIF File
To begin, upload your selected GIF file to the application’s pop-up window using ‘Drag and Drop’ method. Alternatively, you can click on ‘Choose GIF File’ tab on the app’s welcome window. Select a file from your system’s gallery and click ‘Open’ to upload it.
Step 2: Add Music
To add audio files, select ‘Upload’ or tap the (+) sign at the bottom right to choose the desired music files. Drag them to VEED’s timeline to set them in the order of your preference.
Step 3: Download Your Creation
Your video gets created in MP4 format. Tap ‘Export’ to directly share it with your peers on Twitter, Facebook or other social platforms.
Part 3 How to Make a GIF With Music to Post on Instagram?
Exploring your creative skills is one thing, while attracting attention to your work is the other. You would definitely want your social media communities to notice and compliment your work. Instagram is one among the best media sharing apps you can use to share your creations.
To adhere to the concern of creating audio enabled GIFs compatible for sharing to your Instagram stories and feeds, you can any of the following editing tools:
01Filmora
Wondershare Filmora Video Editor is one of the best and most preferred editing software you can use to add sound to your GIFs and videos. You can play with your editing creativity to make exciting musical GIF videos with this software in just a few minutes.
Using this tool for your editing work promises you the following advantages:
Wondershare Filmora
Get started easily with Filmora’s powerful performance, intuitive interface, and countless effects!
Try It Free Try It Free Try It Free Learn More >
● Huge Audio Library
Filmora audio library exposes you with a diverse range of audio and music files and a variety of exciting and relatable sound effects to choose from. You can browse through this storehouse for that perfect music for your GIF absolutely free of cost. The library has an additional Filmstock Effect Store that further increases your audio choice bandwidth.
● Optimal Sync
Filmora allows you to establish the perfect sync between your GIF and audio. Its beat detection feature identifies audio hits to produce markers that you can use to obtain the ideal audio-GIF synchronization in your creations.
● Voiceover Applicable
Filmora gives you the flexibility to record and add you own voiceover using your microphone to make your creations more impactful.
Steps to Create Audio Enabled GIFs Using Filmora
Take the following steps to enhance your GIFs with music and sound effects:
● Select and import your GIF file to the Filmora timeline
● In the software’s audio library, select your desired music and sound effects to add them to the imported GIF file. You can even choose to add your own voiceover to the GIF.
● That’s it! You are now ready to share your work on your Instagram handle and other media sharing platforms. Just click ‘Export’ and your creation gets uploaded on social media in MP4 format. Make sure to adjust the resolution and bit settings for best results.
02Artwork
Like Filmora, Artwork is another application you can use to add sound to GIF files. This one is a browser tool that allows you to create sound enabled videos with static and animated images. Take up the following process to make your own musical GIF with Artwork:
● To begin, signup to Artwork’s free trial feature. Choose your desired sound file in MP3 format and trim it to a play duration of 1 minute. This is essential because Instagram doesn’t allow you to post longer GIFs.
● Add your selected GIF and trimmed MP3 files in Artwork’s pop-up window. Click ‘Save’ and wait till the process to finish.
● Your creation is ready. Download and share it on Instagram.
● Key Takeaways from This Episode →
● Adding music and sound to your GIF is both a fun and exciting activity and also has the potential to enhance the quality and reach of the message you desire to deliver through your GIF. Besides this, it enhances your editing creativity and skill, which is a complement in itself.
● A number of software and online tools available on the internet are ready to help you get through the task. You can rely on these tools to add audio to your GIFs within minutes absolutely free of cost and share them directly on social media.
● Filmora is one among the best GIF editing tools for sharing your creations on Instagram. You can access its huge audio library for selected sound effects, set a perfect sync between your GIF and its audio and even add your own voiceover to boost your creativity using this software.
Top 10 Online Animated Logo Makers Everyone Should Know
Top 10 Free Online Animated Logo Makers Everyone Should Know
An easy yet powerful editor
Numerous effects to choose from
Detailed tutorials provided by the official channel
And as we all know objects in motion are much more attractive than static visuals, logo animation is the latest trend that is gaining popularity at a fast pace.
![]()
If you too want to create some interesting 3D logo motion and other types of animated logos but are confused about how to start, we are here to help you.
In this article
01 [What are Animated Logos and their benefits](#Part 1)
02 [Top 10 online tools for creating animated logos ](#Part 2)
03 [The Best Alternative to Online Animated Logo Makers](#Part 3)
Part 1 What Are Animated Logos and Their Benefits
A logo can be termed as the first face of your brand or a business which gives it a visual identity. A logo works as the foundation of the brand that helps in its growth as well as reputation. The trend has shifted from basic static logos to animated ones which include interesting motion graphics. These logos are catchy and capable of getting the instant attention of the people.
![]()
There are several benefits associated with using logo animation and some of the key ones are enlisted below.
● Create brand awareness A well-designed animated logo can create brand awareness by grabbing the interest of the potential clients and also creating a strong connection with them.
● Goes well with the brand story Animated logos gives you the freedom to use images, sounds, and motion graphics to have a connect with the audience. Thus, using animations logos that match your brand story can be created efficiently.
● Add professionalism and create a modern look Moving ahead with the times is the best thing with its business or promotion. So, a good animated logo will not only add a professional touch to your brand or a business but will also give a modern touch.
Part 2 Top 10 Online Tools for Creating Animated Logos
If you are low on budget or do not want to risk initially with the paid animated logos, free online tools work best. These programs work from your browser, need no software download, and are simple to use. Some of these tools can also be used to create logo to 3D animation. To cut down on your research work, we have shortlisted some of the widely used online animated logo makers as below.
01 Renderforest
When it comes to branding and animations online, this is the top-rated tool in its category. The tool allows creating impressive animated logos in just a few minutes. Pre-set styles are available that can be used according to the brand type.
Key Features:
● Allows creating animated logos using the AI of the tool.
● Intuitive and user-friendly interface.
● Comes with pre-set styles and readymade templates to choose from like minimal, abstract, organic, and more.
● Fonts and icons can be customized.
● High-definition export.
![]()
02 Viddyoze
This is another popular cloud-based tool that helps create interesting animated logos in a few simple clicks. The created animations can be further customized by making changes in the color scheme and other parameters.
Key Features:
● Simple to use online tool for creating 3D animations.
● Offers live-action animation.
● Characters and logos can be mixed and combined in a video.
● Comes with multiple templates and movie filters.
![]()
03 Adobe Spark
Adobe needs no introduction when it comes to editing and animations. Adobe Spark is a feature-packed online tool that helps you perform multiple functions including animated logo creation. Several templates in different categories are available to match your brand or business.
Key Features:
● Cloud-based tool for creating creative animated logos.
● Designs and templates are available in multiple categories.
● Customizable icons, colors, texts, fonts, and others.
● Support a wide range of additional features.
![]()
04 Design Free Logo
This is a free online 3D animated logo maker that comes with several pre-designed samples and templates for creating a perfect animated logo for your company. Simple to use, the tool is apt even for beginners in designing.
Key Features:
● This is 3D animation logo online free tool.
● Comes with a wide range of templates in an array of categories like the abstract, alphabet, floral, food, 3D, and more.
● Logos can be created based on the industry type.
● Simple and user-friendly interface.
![]()
05 PixTeller
Using this browser-based tool, motion to your logo elements can be added to create an impressive animated logo. A wide range of logo shapes, templates, and designs are available and option for customization is also there.
Key Features:
● Create animated logos frame by frame for better editing and customization.
● Comes with more than 100,000 shapes for the logos and over 130 fonts for creating a logo of your choice.
● Multiple customizable templates and designs in different categories are available.
● Support multiple filters like shadow, warp, blur, spacing, height, pixelate, and more.
● Created animated logos can be downloaded in MP4 or GIF format.
![]()
06 Offeo
This online animation tool is apt for creating hi-tech animated logos and the simple interface makes it perfect even for beginners. The tool is known for the perfect blend of creativity and handcraft.
Key Features:
● Create animated logos for websites as well as other platforms easily and quickly.
● Multiple library functions and customizable options are available.
● Allows adjusting the speed of the animation.
● Comes with multiple templates and graphics to choose from.
● Option to choose the ready-made elements or add the local ones.
![]()
07 Animaker
This free online tool just requires free sign-up after which it is all set to help you create rich animated logos. You can choose from the wide range of supported built-in templates as well as characters to match your requirements.
Key Features:
● This free SaaS video animation online tool helps create impressive animated logos, cartoons, and others.
● Comes with multiple templates, designs, characters, icons, charts, maps, and bags to choose from.
● Icons, colors, and other parameters can be customized using this 3D animation logo online free tool**.**
● Allows viewing the logo in different styles using the board style.
● Comes with sound effects and an option for voice recording and text to speech.
● Easy drag and drop interface make functioning quick.
● Software is supported in 50 languages worldwide.
● Created animations can be uploaded to social media sites.
![]()
08 Quince Media
For creating different types of animated media including animated logos this is a decent tool to use. Being an online program, it works from your browser and is free to use. Images in PNG and vector format can be added to the tool for creating the choice of animation.
Key Features:
● Create animated logos and other animated media using this simple and quick online tool.
● Comes with multiple designs and templates.
● 3D animated logos can be created for social media, films, broadcasts, and other platforms.
● Simple and fast to use.
![]()
09 MotionDen
This is a simple and easy online tool that can help you create animated logos in a hassle-free manner. You can even create other animated projects like slideshows, intros, and others using the program.
Key Features:
● A simple online tool with a user-friendly interface for creating logos.
● Comes with multiple templates in different categories like serenity, dark smoke, fire red, and more.
● Support to a wide range of devices including desktop, smartphone, and tablets.
● Allows creating 3D logos.
● Templates can be customized as per the requirements.
![]()
10 Tube Arsenal
This online tool is mainly used for creating YouTube video intros but it supports other functions as well including animated logo creation. The 3D editor of the program will let you add animations as needed. The extensive collection of templates lets you choose the design that best matches your requirements.
Key Features:
● Create animated logos using the 3D editor of the tool.
● Comes with an array of templates to choose from.
● Allows customizing color, text, images, and other parameters.
● This 3D animation logo online free support unlimited quick previews.
● Simple and user-friendly interface.
![]()
Key Takeaways from This Episode
● Logos are an integral part of brands and businesses that helps create brand awareness among potential clients.
● Animated logos are the present-day trend where motion graphics are added to the logos. These logo animation are interesting and can reach a broader audience and leave more impact.
● Several online tools for creating animated logos for free are available. Check out the features of these tools and choose the most suitable one.
● Wondershare Filmoa works as the best online alternative that helps in creating rich animated logos with an option for customization.
Ultimate Guide to Animated Characters Drawings
Interesting Fundamentals and Ultimate Guide to Animated Characters Drawings
An easy yet powerful editor
Numerous effects to choose from
Detailed tutorials provided by the official channel
Cartoon character have stamped their faces in our hearts from childhood. A cartoon artist represents a cartoon or a natural person’s unique features with simple shapes accurately to recognize the person with the drawing and does not require a lot of patience to do this. The goal of the cartoon is to attract, and the child should get attracted when they see a cartoon image as well as adults. Though the sparkle may appear a little dull, it remains unaltered.
Let us grab a chance to recreate our cartoon characters with easy tutorials about animated characters to draw. In addition to that, you will learn about basic drawing exercises to lead into cool animated characters to draw through this guide in a step-by-step manner.
In this article
01 [What Do I Need to Start Learning Animated Characters Drawings? ](#Part 1)
02 [6 Cartoon Characters that Anyone Can Draw (Provided with Free Video Tutorials)](#Part 2)
03 [4 Best Drawing Exercises for Creating Cartoon Characters](#Part 3)
Part 1 What Do I Need to Start Learning Animated Characters Drawings?
There are many software’s available, and anyone can create an animated character drawing, but still, the art of creating a perfect character needs a master. You don’t have to be a Disney-grade animator to make it; start with simple minor characters. Animation is the art of bringing a 3D illustrated cartoon into life. It is created by projecting a sequence of images one after the other immediately. Let us discuss the essential things you need to note before animating characters.
●Timeline is the most important for animation. Depending on the software, you have various options to change the duration and add effects.
●Animation is generally preferable in 24 frames per second, which means the total number of people in the frame for one second.
●There are two types of working they are one’s and two’s. 2D Animation is usually done in two’s, whereas 3D Animation is in one’s.
●In hand-drawn animations, keyframes are more critical to maintain. The keyframe is the position for the cartoon as per animator has decided.
●Breakdowns combine one or two keyframes, which decide the motion in between the keys.
●In-betweens are all the frames that come between to smooth the motion—automatically generated by the computer to move from key to key.
●Composting is creating or joining two or more images to create a single cartoon frame.
Part 2 6 Cartoon Characters that Anyone can Draw (With free Video Tutorials)
We will discuss animated characters to draw in hand. There are many cartoon characters, but we will look into six cartoon character drawings with their tutorial videos.
01 Smurfette
Smurfette stands out as the lone female Smurf in the entire bunch of blue critters around the village area. One of the rare designs with long hair and a dress is hers. Her design is a lot of fun to sketch.
So, in general, it’s best to work through the lesson as is, then turn it into Brainy, Papa, Joker, or even Smurf.
01Angelica Pickles
Angelica Pickles is one of the most challenging characters to depict from The Rugrats. But her design is so intricate that getting it proper will give you a true sense of accomplishment. Her pigtails, like her leggings, might be challenging to master, so keep practicing.
03Yogi Bear
Yogi Bear is a cartoon character on the sweeter side of the comic animal variety. Yogi Bear is a beloved character from Jellystone Park. As long as you get his tie and collar just right, this guy is a breeze to draw.
04Magilla Gorilla
Magilla Gorilla is another bizarre creature from Hanna-catalog. Barbera’s Because he comes with a bow tie, a little cap, and suspenders, this design is a little more complicated. Not to mention his enormous clown shoes. These small details can be a pain to draw, but Magilla is a very charming gorilla.
05Top Cat
Even further back in time, in the 1960s, there was the ever-popular Top Cat. He’s wearing a cap and a button-down vest, and he’s making some reasonably fancy dances. Give Top Cat a shot if you like The Flintstones’ basic Hanna-Barbera art style.
<
06Helga. G. Pataki
Helga is another character with some wacky hair. There’s a lot that’s bizarre about her. And half the fun of drawing her is figuring out how to do it. Just keep an eye on her head since getting it correct, especially with her rectangle hairdo, can be a little odd.
These are some of the cool animated characters to draw.
Part 3 4 Best Drawing Exercise for Creating Cartoon Characters
You’ll learn how to create cartoon characters individually, including their faces, hair, and facial expressions.
01How to Draw Cartoon Characters
We’ll go through the fundamentals of human perception before getting into cartoon face drawing. Humans have a unique ability to synthesize the details that make up a structure or object in highly complicated ways into fundamental and simple ones. We can express everything with a few curves and geometric forms in this way. In cartoon face, we need to identify the character just by looking like looking at the below picture a girl and a boy.
02Here, you will learn How to Draw a Cartoon Face
Let us begin with a sketch of a cartoon face. A circle is a basic cartoon shape. All you need is a circle. As seen in the image below, draw a vertical and horizontal line intersecting at the center.
Let us have a look at how to make cartoon eyeballs. Draw an oval shape with a slight lean to the side at the top for the eyes. Repeat on the other side.
Slightly thicken the characteristic to represent our character eyelashes at the top of the circle, place the brows above the eyelashes to create a shocking appearance, draw both pupils to the center in the same direction.
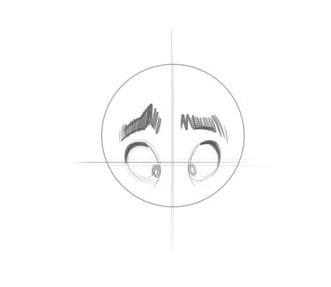
When creating a nose from the front, it’s typical to leave off many details. Even if you merely sketch its tip, it will likely provide a convincing impact. Drawing only one side of the nose is also quite frequent. Children’s mouths are extremely simple in cartoon style, regardless of gender.
The ears are viewed from the front; therefore, the internal holes are not visible. The circle has already established the shape of our head.
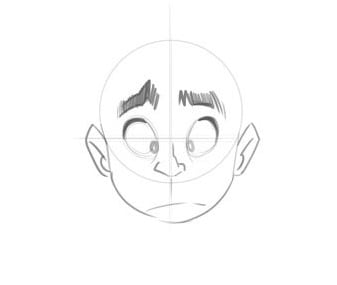
03Let’s learn about How to Draw a Cartoon Hair
Keep in mind that our characters’ hair is essential for identifying their personalities, and it can also indicate their age. So, all we need is an effortless and playful haircut to bring our boy to life. Because there is no particular method for drawing hair, you’ll have to experiment until you find the perfect look. Look for photo references on the internet! Take a look at a magazine shoot or a Google search.
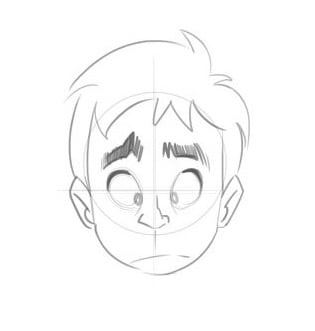
03How to Draw Characters with different Facial Expressions
By simply following the instructions below, you’ll notice that you can completely transform his expression: Lowering one brow and raising the other, eyelashes are used to cut the eyes in half, putting a smile on the face one side is higher.
To stay under the eyelashes, move the eye pupils up. That’s all there is to it! With just a few tweaks, we achieved the desired result. The circular form of the eyes, hair, ears, nose, chin and the circular shape of the ears are all the same! It’s that simple!
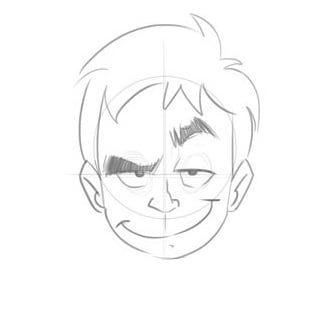
While working in cartooning or video making, Wondershare Wondershare Filmora Video Editor comes out with pros in mind, which can effortlessly convert conventional films into cartoon videos. If you want greater control over your cartoon video, you may also use keyframing to create it. You can fine-tune the parameters in Effects to achieve the best results. You can even change the Animation color after it has been created. It also allows you to use different text themes to showcase your videos.
We propose Wondershare Filmora Video Editor , in this case, to create animation videos by adding keyframes, resulting in a smooth and natural animation. To get started with Animation, all you need is a white plane. Aside from that, color correction and an audio mixer will take your animation video to the next level.
For Win 7 or later (64-bit)
For macOS 10.12 or later
● Key Takeaways from This Episode →
● Learn what are the key elements to make animation videos using software
● Tutorial on how to draw a cartoon character accurately
● In comparison, Wondershare Wondershare Filmora Video Editor is superior in making animation videos.
Cartoon character have stamped their faces in our hearts from childhood. A cartoon artist represents a cartoon or a natural person’s unique features with simple shapes accurately to recognize the person with the drawing and does not require a lot of patience to do this. The goal of the cartoon is to attract, and the child should get attracted when they see a cartoon image as well as adults. Though the sparkle may appear a little dull, it remains unaltered.
Let us grab a chance to recreate our cartoon characters with easy tutorials about animated characters to draw. In addition to that, you will learn about basic drawing exercises to lead into cool animated characters to draw through this guide in a step-by-step manner.
In this article
01 [What Do I Need to Start Learning Animated Characters Drawings? ](#Part 1)
02 [6 Cartoon Characters that Anyone Can Draw (Provided with Free Video Tutorials)](#Part 2)
03 [4 Best Drawing Exercises for Creating Cartoon Characters](#Part 3)
Part 1 What Do I Need to Start Learning Animated Characters Drawings?
There are many software’s available, and anyone can create an animated character drawing, but still, the art of creating a perfect character needs a master. You don’t have to be a Disney-grade animator to make it; start with simple minor characters. Animation is the art of bringing a 3D illustrated cartoon into life. It is created by projecting a sequence of images one after the other immediately. Let us discuss the essential things you need to note before animating characters.
●Timeline is the most important for animation. Depending on the software, you have various options to change the duration and add effects.
●Animation is generally preferable in 24 frames per second, which means the total number of people in the frame for one second.
●There are two types of working they are one’s and two’s. 2D Animation is usually done in two’s, whereas 3D Animation is in one’s.
●In hand-drawn animations, keyframes are more critical to maintain. The keyframe is the position for the cartoon as per animator has decided.
●Breakdowns combine one or two keyframes, which decide the motion in between the keys.
●In-betweens are all the frames that come between to smooth the motion—automatically generated by the computer to move from key to key.
●Composting is creating or joining two or more images to create a single cartoon frame.
Part 2 6 Cartoon Characters that Anyone can Draw (With free Video Tutorials)
We will discuss animated characters to draw in hand. There are many cartoon characters, but we will look into six cartoon character drawings with their tutorial videos.
01 Smurfette
Smurfette stands out as the lone female Smurf in the entire bunch of blue critters around the village area. One of the rare designs with long hair and a dress is hers. Her design is a lot of fun to sketch.
So, in general, it’s best to work through the lesson as is, then turn it into Brainy, Papa, Joker, or even Smurf.
01Angelica Pickles
Angelica Pickles is one of the most challenging characters to depict from The Rugrats. But her design is so intricate that getting it proper will give you a true sense of accomplishment. Her pigtails, like her leggings, might be challenging to master, so keep practicing.
03Yogi Bear
Yogi Bear is a cartoon character on the sweeter side of the comic animal variety. Yogi Bear is a beloved character from Jellystone Park. As long as you get his tie and collar just right, this guy is a breeze to draw.
04Magilla Gorilla
Magilla Gorilla is another bizarre creature from Hanna-catalog. Barbera’s Because he comes with a bow tie, a little cap, and suspenders, this design is a little more complicated. Not to mention his enormous clown shoes. These small details can be a pain to draw, but Magilla is a very charming gorilla.
05Top Cat
Even further back in time, in the 1960s, there was the ever-popular Top Cat. He’s wearing a cap and a button-down vest, and he’s making some reasonably fancy dances. Give Top Cat a shot if you like The Flintstones’ basic Hanna-Barbera art style.
<
06Helga. G. Pataki
Helga is another character with some wacky hair. There’s a lot that’s bizarre about her. And half the fun of drawing her is figuring out how to do it. Just keep an eye on her head since getting it correct, especially with her rectangle hairdo, can be a little odd.
These are some of the cool animated characters to draw.
Part 3 4 Best Drawing Exercise for Creating Cartoon Characters
You’ll learn how to create cartoon characters individually, including their faces, hair, and facial expressions.
01How to Draw Cartoon Characters
We’ll go through the fundamentals of human perception before getting into cartoon face drawing. Humans have a unique ability to synthesize the details that make up a structure or object in highly complicated ways into fundamental and simple ones. We can express everything with a few curves and geometric forms in this way. In cartoon face, we need to identify the character just by looking like looking at the below picture a girl and a boy.
02Here, you will learn How to Draw a Cartoon Face
Let us begin with a sketch of a cartoon face. A circle is a basic cartoon shape. All you need is a circle. As seen in the image below, draw a vertical and horizontal line intersecting at the center.
Let us have a look at how to make cartoon eyeballs. Draw an oval shape with a slight lean to the side at the top for the eyes. Repeat on the other side.
Slightly thicken the characteristic to represent our character eyelashes at the top of the circle, place the brows above the eyelashes to create a shocking appearance, draw both pupils to the center in the same direction.
When creating a nose from the front, it’s typical to leave off many details. Even if you merely sketch its tip, it will likely provide a convincing impact. Drawing only one side of the nose is also quite frequent. Children’s mouths are extremely simple in cartoon style, regardless of gender.
The ears are viewed from the front; therefore, the internal holes are not visible. The circle has already established the shape of our head.
03Let’s learn about How to Draw a Cartoon Hair
Keep in mind that our characters’ hair is essential for identifying their personalities, and it can also indicate their age. So, all we need is an effortless and playful haircut to bring our boy to life. Because there is no particular method for drawing hair, you’ll have to experiment until you find the perfect look. Look for photo references on the internet! Take a look at a magazine shoot or a Google search.
03How to Draw Characters with different Facial Expressions
By simply following the instructions below, you’ll notice that you can completely transform his expression: Lowering one brow and raising the other, eyelashes are used to cut the eyes in half, putting a smile on the face one side is higher.
To stay under the eyelashes, move the eye pupils up. That’s all there is to it! With just a few tweaks, we achieved the desired result. The circular form of the eyes, hair, ears, nose, chin and the circular shape of the ears are all the same! It’s that simple!
While working in cartooning or video making, Wondershare Wondershare Filmora Video Editor comes out with pros in mind, which can effortlessly convert conventional films into cartoon videos. If you want greater control over your cartoon video, you may also use keyframing to create it. You can fine-tune the parameters in Effects to achieve the best results. You can even change the Animation color after it has been created. It also allows you to use different text themes to showcase your videos.
We propose Wondershare Filmora Video Editor , in this case, to create animation videos by adding keyframes, resulting in a smooth and natural animation. To get started with Animation, all you need is a white plane. Aside from that, color correction and an audio mixer will take your animation video to the next level.
For Win 7 or later (64-bit)
For macOS 10.12 or later
● Key Takeaways from This Episode →
● Learn what are the key elements to make animation videos using software
● Tutorial on how to draw a cartoon character accurately
● In comparison, Wondershare Wondershare Filmora Video Editor is superior in making animation videos.
Popular Tips on Learning Animate Rigging
Most Popular Tips on Learning Animate Rigging
An easy yet powerful editor
Numerous effects to choose from
Detailed tutorials provided by the official channel
This was a question one of my friends asked me recently on the subject of animate rigging
To help them out (as well as other animation rigging beginners) I decided to compile some of the most popular tips on the subject in this article!
In this article
01 [The Only Guide You’ll Ever Need to Know About Rigging in Animation](#Part 1)
02 [How Do You Animate Rigging?](#Part 2)
Part 1 The Only Guide You’ll Ever Need to Know About Rigging in Animation
Before anything else, we’ve prepared a bit of an OVERVIEW on rigging in animation. This will cover most of the basic, need-to-know stuff to nudge you in the right direction and help the tips we’ve prepared to settle in more easily.
01What is Rigging in Animation
Rigging in animation is a technique used by animators to—quite literally—‘rig’ up a statistic digital character to act or move.
Even more simply, it’s a way of bringing literal life to your character models by introducing them to motion. The ‘rig’ in this case, is usually made as a sort of one-size-fits-all kind of tool, which you can use in order to create pre-made skeletal animations that replicate motions like walking, running, jumping, etc., and apply onto static characters. You can use animation software, like Maya in order to get this done!

02An Introduction to 2D Animation Rigging
2D animation is a more back-breaking kind of process. It’s what you see in a lot of older animations — where every frame needs to be drawn in order to allow for the illusion of motion in characters. This is how classics, like Mickey Mouse, are usually produced!
03An Introduction to 3D Animation Rigging
3D animation, as you can probably guess, is a more modern animation style. You see it in a lot of big blockbuster animated movies these days! Even Disney has since moved onto this style, whereas they were staunch supporters of 2D animation in previous decades. Now, a lot of their major productions, including titles such as “Tangled”, “Frozen”, and “Moana” are 3D animated.
In any case, this is more like what we described earlier — where skeletal ‘rigs’ are applied to static 3D character models to make them move.
04Key 3D Rigging Terms to Get You Moving
Finally, to make sure that you’re headed in the right direction, here’s a list of some of the more important 3D rigging terms that you’ll need to know:
Joints|Bones: This is pretty straightforward, but the Joints or the Bones, in this case, refers to the pieces of the skeletal rig that is used to create movement.
Driven Keys: Driven keys are there to help rigging artists make the movement appear more natural faster. It consists of two parts, the driver (which controls the animation) and the driven (the parts controlled by the driver).
Blend Shapes: This is an animation tool that riggers used mainly for facial animation (like lip-syncing). Basically, it allows them to blend or morph an existing shape to give it motion.
Inverse Kinematics: This is a method of animation that separates a part from the whole. Like how an animator can create motion in the wrist, for example, as a separate entity from the arm.
Forward Kinematics: Opposite of the previous style, this one is a method that follows a hierarchical progression.
Control Curves: This is a way of manipulating multiple joins in a rig in order to create one flowing movement.
Constraint: A way of limiting the positioning of a model or a joint.
Deformers: A way of enhancing rigs to produce a more organic model.
Skinning: This is the process of adding the 3D mesh to the joints.
Weight Planning: This is the process of planning how the weight of an object will affect its 3D mesh and the movement of its joints.
Facial Rigging: This is the process of setting up facial animation, similar to how you set up skeletal animation, but far more complex.
Part 2 How Do You Animate Rigging?
Now, onto actually talking about how you can start animate rigging. This section will guide you through the process in a way that should hopefully help you while in the process of learning about animation in general.
01How to Rig a Simple Character
This has been broken down into four distinct stages to make things as simple as possible! It won’t be discussing the tools you use, as there are plenty of tools you can use for animation, just the general process:
Step 1: Design Your Character

Before you even think about animation, you should start with designing your character (or characters.) This will give you a good basis on what kind of animation rigging you’ll need to work on for that character.
For example, for a humanoid character, a general skeletal rigging might be okay. However, for a creature or monster, their joints might be in different areas or they might even have additional joints regular human rigs don’t have!
So, start with a foundation that you can work from to make things easier on yourself.
Step 2: Start With Rigging Points!

When you have your character design ready, it’s time to start rigging joints! It’s best to start with the joints and leave the more finicky parts later. Basically, it’s always easier to start with the parts that can create big movements first!
Working on things layer by layer should help make things easier for you as well.
Step 3: Connect The Layers!
It’s time to put everything together to create smooth movement! Depending on what tool you’re using, this is usually just as easy as dragging things into place.
Step 4: Timing Your Animation

With the rig in place, the next thing you have to worry about is frame timing. Timing is important for ensuring that there is no break in character motions
02Beginners Tutorial on Shape Rigging
This one is a little more complicated, and should be improved more by trial and error, but here are a couple of tips that you can follow along with while exploring blend shapes in animation:
Master your sculpting tools first and foremost! The more familiar you are with the shapes that your tools can create, the better!
Symmetrical modeling is one way of making the process go a lot faster! Take advantage of this option to highlight components that you need to be affected in the same way and at the same time.
If symmetrical modeling is not working for you, independent modeling is a great way of making things appear more organic.

03How Auto Rig Mapping Works
Auto-rigging is the use of pre-made rigs in order to simplify the process. The tool automatically maps the areas where the characters and the rig are given the same symbol names and snaps them together to create joints for a motion to be applied.
04How Visual Rig Mapping Works
Visual mapping is a lot more complicated the auto-rig mapping, so it’s not something you want to jump into immediately. However, it is a must for animation riggers that work with unique character models. The process usually goes as follows:
Manually make connections starting with the joints.
Applying the skeleton to the rig to complete bones and connections.
Motion can then be added to the timeline.

05Finalizing Your Animated Rig
To finish us off, let’s talk about how you go about publishing your finished product! Of course, even after you have your complex rig completed, there are still other matters to think about in terms of making sure that the video is of quality!
Key Takeaways from This Episode
● Start off on the right footing by learning the basics of animation! These days, there are more options than ever, with the modern 3D animation rigging style now just as popular as the more classic 2D animation style.
● The best way to learn animation rigging is to practice! Structured guides can help you get to the point of almost mastery, but it’s not until you start playing with the tools of your craft that you can truly learn how to create beautiful animations!
● Some of the more complex functions of rigging require a lot of patience, so make sure that you always go into your projects with a level-head. And, just to be sure, invest in tools that will help rather than hinder your progress! There are many advanced software out there that can help you improve more easily.
This was a question one of my friends asked me recently on the subject of animate rigging
To help them out (as well as other animation rigging beginners) I decided to compile some of the most popular tips on the subject in this article!
In this article
01 [The Only Guide You’ll Ever Need to Know About Rigging in Animation](#Part 1)
02 [How Do You Animate Rigging?](#Part 2)
Part 1 The Only Guide You’ll Ever Need to Know About Rigging in Animation
Before anything else, we’ve prepared a bit of an OVERVIEW on rigging in animation. This will cover most of the basic, need-to-know stuff to nudge you in the right direction and help the tips we’ve prepared to settle in more easily.
01What is Rigging in Animation
Rigging in animation is a technique used by animators to—quite literally—‘rig’ up a statistic digital character to act or move.
Even more simply, it’s a way of bringing literal life to your character models by introducing them to motion. The ‘rig’ in this case, is usually made as a sort of one-size-fits-all kind of tool, which you can use in order to create pre-made skeletal animations that replicate motions like walking, running, jumping, etc., and apply onto static characters. You can use animation software, like Maya in order to get this done!
02An Introduction to 2D Animation Rigging
2D animation is a more back-breaking kind of process. It’s what you see in a lot of older animations — where every frame needs to be drawn in order to allow for the illusion of motion in characters. This is how classics, like Mickey Mouse, are usually produced!
03An Introduction to 3D Animation Rigging
3D animation, as you can probably guess, is a more modern animation style. You see it in a lot of big blockbuster animated movies these days! Even Disney has since moved onto this style, whereas they were staunch supporters of 2D animation in previous decades. Now, a lot of their major productions, including titles such as “Tangled”, “Frozen”, and “Moana” are 3D animated.
In any case, this is more like what we described earlier — where skeletal ‘rigs’ are applied to static 3D character models to make them move.
04Key 3D Rigging Terms to Get You Moving
Finally, to make sure that you’re headed in the right direction, here’s a list of some of the more important 3D rigging terms that you’ll need to know:
Joints|Bones: This is pretty straightforward, but the Joints or the Bones, in this case, refers to the pieces of the skeletal rig that is used to create movement.
Driven Keys: Driven keys are there to help rigging artists make the movement appear more natural faster. It consists of two parts, the driver (which controls the animation) and the driven (the parts controlled by the driver).
Blend Shapes: This is an animation tool that riggers used mainly for facial animation (like lip-syncing). Basically, it allows them to blend or morph an existing shape to give it motion.
Inverse Kinematics: This is a method of animation that separates a part from the whole. Like how an animator can create motion in the wrist, for example, as a separate entity from the arm.
Forward Kinematics: Opposite of the previous style, this one is a method that follows a hierarchical progression.
Control Curves: This is a way of manipulating multiple joins in a rig in order to create one flowing movement.
Constraint: A way of limiting the positioning of a model or a joint.
Deformers: A way of enhancing rigs to produce a more organic model.
Skinning: This is the process of adding the 3D mesh to the joints.
Weight Planning: This is the process of planning how the weight of an object will affect its 3D mesh and the movement of its joints.
Facial Rigging: This is the process of setting up facial animation, similar to how you set up skeletal animation, but far more complex.
Part 2 How Do You Animate Rigging?
Now, onto actually talking about how you can start animate rigging. This section will guide you through the process in a way that should hopefully help you while in the process of learning about animation in general.
01How to Rig a Simple Character
This has been broken down into four distinct stages to make things as simple as possible! It won’t be discussing the tools you use, as there are plenty of tools you can use for animation, just the general process:
Step 1: Design Your Character
Before you even think about animation, you should start with designing your character (or characters.) This will give you a good basis on what kind of animation rigging you’ll need to work on for that character.
For example, for a humanoid character, a general skeletal rigging might be okay. However, for a creature or monster, their joints might be in different areas or they might even have additional joints regular human rigs don’t have!
So, start with a foundation that you can work from to make things easier on yourself.
Step 2: Start With Rigging Points!
When you have your character design ready, it’s time to start rigging joints! It’s best to start with the joints and leave the more finicky parts later. Basically, it’s always easier to start with the parts that can create big movements first!
Working on things layer by layer should help make things easier for you as well.
Step 3: Connect The Layers!
It’s time to put everything together to create smooth movement! Depending on what tool you’re using, this is usually just as easy as dragging things into place.
Step 4: Timing Your Animation
With the rig in place, the next thing you have to worry about is frame timing. Timing is important for ensuring that there is no break in character motions
02Beginners Tutorial on Shape Rigging
This one is a little more complicated, and should be improved more by trial and error, but here are a couple of tips that you can follow along with while exploring blend shapes in animation:
Master your sculpting tools first and foremost! The more familiar you are with the shapes that your tools can create, the better!
Symmetrical modeling is one way of making the process go a lot faster! Take advantage of this option to highlight components that you need to be affected in the same way and at the same time.
If symmetrical modeling is not working for you, independent modeling is a great way of making things appear more organic.
03How Auto Rig Mapping Works
Auto-rigging is the use of pre-made rigs in order to simplify the process. The tool automatically maps the areas where the characters and the rig are given the same symbol names and snaps them together to create joints for a motion to be applied.
04How Visual Rig Mapping Works
Visual mapping is a lot more complicated the auto-rig mapping, so it’s not something you want to jump into immediately. However, it is a must for animation riggers that work with unique character models. The process usually goes as follows:
Manually make connections starting with the joints.
Applying the skeleton to the rig to complete bones and connections.
Motion can then be added to the timeline.
05Finalizing Your Animated Rig
To finish us off, let’s talk about how you go about publishing your finished product! Of course, even after you have your complex rig completed, there are still other matters to think about in terms of making sure that the video is of quality!
Key Takeaways from This Episode
● Start off on the right footing by learning the basics of animation! These days, there are more options than ever, with the modern 3D animation rigging style now just as popular as the more classic 2D animation style.
● The best way to learn animation rigging is to practice! Structured guides can help you get to the point of almost mastery, but it’s not until you start playing with the tools of your craft that you can truly learn how to create beautiful animations!
● Some of the more complex functions of rigging require a lot of patience, so make sure that you always go into your projects with a level-head. And, just to be sure, invest in tools that will help rather than hinder your progress! There are many advanced software out there that can help you improve more easily.
Ways You Can Master to Find 10 Best Free Animated Text Generator
Ways You Can Master to Find 10 Best Free Animated Text Generator
An easy yet powerful editor
Numerous effects to choose from
Detailed tutorials provided by the official channel
We’ve compiled a list of some of the best text animation software and tools out there!
One for general, animated text generators, and the other for online text gif maker tools. Pick whichever suits your project and start working on a more professional look today.
In this article
01 [10 Best Animated Text Generators for 2021](#Part 1)
02 [8 Best Online Text GIF Generators to Make Animated Word GIFs](#Part 2)
03 [How to Use an Animated Text Generator to Make Stunning Videos?](#Part 3)
Part 1 10 Best Animated Text Generators for 2021
For our first list, as promised, we’ve compiled a list of some of the best-animated text generators for 2021. This is a general list of text animation software that you have to either download or install to use! If you want the online text animation maker list, that would be the one after this!
01Aurora: 3D Text Logo Maker
PRICE: FREE!
RATING: 4.5/5
The first animated text generator on our list is Aurora 3D. Aurora offers several different products, but the one that we’re focusing on today is their 3D Text & Logo maker, which you can use to create some pretty advanced text animations with no sweat (as well as logos, of course, as the name implies)! The software is available for both Mac and Windows OS computers and desktops.
02Animaker
PRICE: Basic Plan = $10 per month!
RATING: 4.9/5
If you’re looking for a more modern text animation maker, then Animaker might just be the one that you want! With this, you can create your 3D text animations from scratch, or choose from the dozens of templates and presets that they have for text, animated characters, icons, and other properties. This is more of a video editor than a strict text tool, but we thought it was important to give you a good variety. It’s also not FREE, but you can try it for free for a time so that you can check if it’s the one for you.

03OpenToonz
PRICE: Free
RATING: 4/5
OpenToonz is a free text animation software that you can use for both basic and advanced 2D animation. It comes in several different languages (including Spanish and Japanese) and is very useful for creating simple text animation from scratch — no complicated tools. Just create and go! (It is also available in both Mac and Windows!)
04Reallusion
PRICE: Free
RATING: 4/5
Reallusion is another open-source text gif maker that you can use if you’re looking for something quick-and-easy. It supports a ton of different fonts, as well as ways to control the width, height, dimension, and style of every single object inside of their 3D properties gallery — giving you a lot of options for customization without any added cost!
05Express Animate
PRICE: $60 (full license)
RATING: 4/5
Express Animate, just like Open Toonz, it is more of an animation tool than one strictly created for text animation. However, it does work for that purpose as well. So, if you’re willing to pay for the full license (which will cost $60), it could be a fairly good tool for you. Especially if you’re interested in trying out more complex animations in the future.
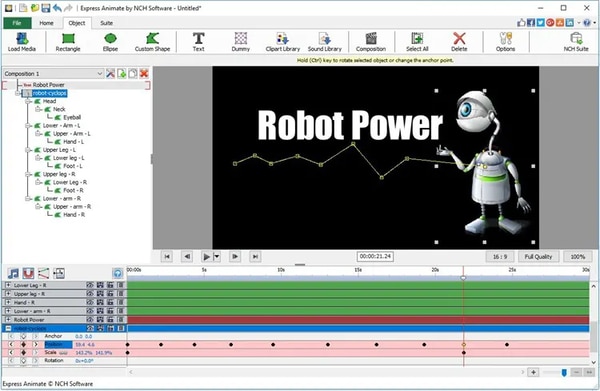
06Motion
PRICE: $47
RATING: 3.9/5
Motion is a Mac-only software. It is, just like some of the other options on this list, a great option for those looking for a tool that can help them with general animations (not just text animation — although it provides tools for that as well). The best part of Motion is undoubtedly its graphic library, where you have access to a ton of different presets and templates that you can use to simplify your text-animation-making.
07Xara 3D Maker
PRICE: $39.99
RATING: 3.9/5
Xara is another one of our paid options. It also comes complete with a range of different templates and presets that you can use in order to simplify your animation-generating. And, if you end up disliking the product after you try it, they do offer a 30-day money-back guarantee that you can take advantage of to make sure that you get the most out of your purchase.
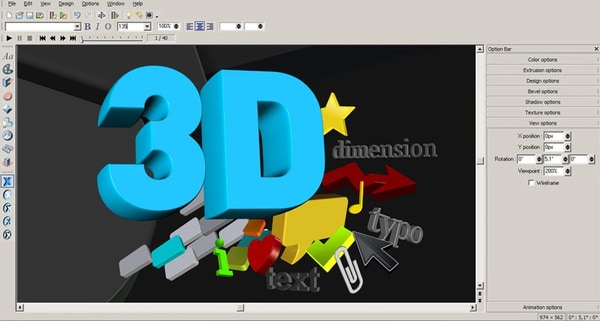
08Easy Banner
PRICE: FREE
RATING: 3.5/5
Easy Banner is a free animated text-banner-making software. It’s only available in Windows, and its uses are limited to created banners. However, if that’s what you’re looking for? Then there’s no reason not to try it out! Especially since it’s free, and it comes with some pretty advanced customization options for getting the exact look that you want on your text banners.
09Falco GIF Animator
PRICE: FREE
RATING: 3.5/5
Falco Gif Animator is from the same creators of the previous item on this list (Softpedia!) The two offer similar tools, but for different purposes. Whilst the previous tool was for the creation of animated-text banners, this one is a GIF maker for icons, cursors, logos, etc. It’s also FREE! So, if the project you’re working on is applicable to its available features? Then you should definitely try it!

10TISFAT
PRICE: Free
RATING: 3/5
TISFAT is the last of the tools that we have for you. It’s an open-source stick animation tool that you can use to create text animations in whatever style or format that you desire. Making it more customizable than some of the other Softpedia options we just introduced, but still, one to consider based on your own circumstances.
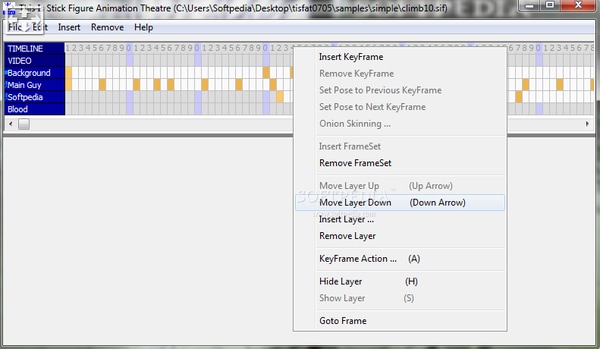
Part 2 8 Best Online Text GIF Generators to Make Animated Word GIFs
And so, we move on to our next list! Here’s where we introduce online solutions for animated text generation needs! So, all the tools on this list will not require any downloading, but they will require that you have internet while working!
01MotionDen
| PROS | CONS |
|---|---|
| ● FREE version available● Large resources library● Easy-to-use video templates | ● Must upgrade to the premium version to export high-quality projects without a watermark.● The FREE version has a 5-video limit (you cannot work on any more projects than that).● Difficult to use for creating text animation from scratch. |
RATING: 4.8/5
MotionDen is a good entry point for text animation online solutions! It comes with tons of different templates that you can choose from to start working on your project immediately. MotionDen also offers a free version that you can test out for a limited number of times (one that gives you access to all their tools and their large resource library). So, you can decide to upgrade to their premium version whenever you want to (which will cost you around $29 per month!)
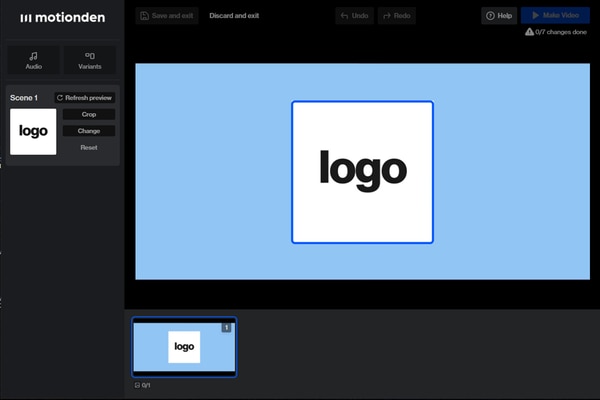
02Wave.Video
| PROS | CONS |
|---|---|
| ● FREE version is available for trying out its tools.● Vast library of animation properties for you to play around with.● Vast library of animation properties for you to play around with. | ● FREE version limits the length of your projects to 15 seconds.● You can also only create five video projects with the free version.● You can also only create five video projects with the free version. |
RATING: 4.5/5
Wave.Video, just like MotionDen, is a freemium software. You can try it out for free and start using their online video editing tools immediately to create short promos, logos, text gifs, etc. If you want access to some of its more advanced tools, however, you’ll need to pay the premium price ($24-48), which, to you, may or may not be worth the vast library of polished animation properties.
03MakerMoon
| PROS | CONS |
|---|---|
| ● Easy-to-use, and comes with templates and presets!● Advanced video editing tools that you can use to personalize your projects.● FREE plan is available. | ● The FREE version is limited in use.● You also cannot download high-quality projects without a watermark with the free version.● Basic animations only. |
RATING: 4.3/5
If you want to keep things simple, then MakerMoon might be your preferred choice for text animation. It is, like the previous picks, an online video maker, but one with the focus on creating text-centric projects, which you can personalize in a number of ways to create logos, banners, short videos, gifs, etc.
04Textanim
| PROS | CONS |
|---|---|
| ● FREE online GIF maker● A variety of different font style options● Animated Effects options | ● Output is GIF only.● Limited animations options.● Limited resource library. |
RATING: 4/5
Textanim is a very bubbly and glittery kind of gif-maker, made for a more specific kind of project. But, if it works, it works! Plus, it’s also the first completely FREE online gif maker on this list. So, you can test it out without having to make any commitments and use it literally anytime you feel like it. Unfortunately, though, it should be said that the animations here are mainly for effects (i.e., glowing, sparkling, etc.). The text won’t actually move. So, if that’s not what you’re looking for? Then it might not be for you.
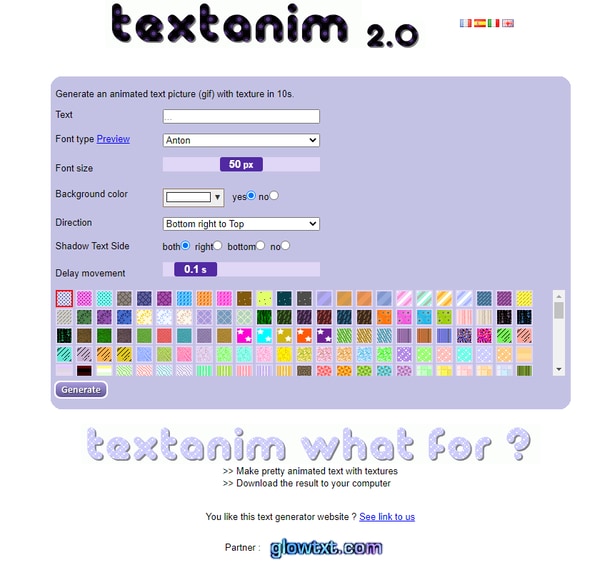
05SnackThis
| PROS | CONS |
|---|---|
| ● FREE version for testing its tools and resources is available.● Lots of modern templates are available.● Editing tools for polishing projects. | ● If you’re using the FREE version, you will not be able to actually download your project.● You will also need to register to use it.● The customization options are limited. |
RATING: 4/5
SnackThis, unlike Textanim, is the type to cater to a wider array of users. Its templates are all very modern and professional-looking. So, if what you’re looking for is to create text banners, logos, icons, etc. for your business? Then this definitely is an option that you may want to consider. It’s pretty easy to use too! All you have to do is select the template that you want to use, and then edit it to match what you need.
06Animatron Studio
| PROS | CONS |
|---|---|
| ● More customizable functions.● Advanced video editing options.● Pre-made templates are available for easier animating. | ● FREE Version is limited.● Might be difficult for inexperienced animators.● Output formats are MP4 and GIF only. |
RATING: 3.9/5
Animatron Studio is the tool to use if what you’re looking for is customization. This tool is really better described as animation software, rather than a simple text generator. That means that you have more options than what you might see from other online text animation tools, but it also means that you’ll need to put in more effort to come up with a polished-looking end-product.

07Cool Text
| PROS | CONS |
|---|---|
| ● Easy and quick to use.● Various font customization options.● FREE to use. | ● Limited customizability.● Old-fashioned fonts. |
RATING: 3.5/5
As a departure from the previous pick, we have Cool Text, which is its complete opposite! This is an older software and is definitely best described strictly as an animated text generator. With Cool Text, you can make logos or icons very easily. The options are, of course, more limited because of that, but it may very well be all you need based on the kind of project you’re working on.
08Loading.io
| PROS | CONS |
|---|---|
| ● Lots of fonts customization options.● Three different output formats (svg., png., and gif).● Also pre-set animations to choose from. | ● The FREE version is limited.● It isn’t as advanced as some of the other tools on this list. |
RATING: 3.5/5
For our last online text animator, we have Loading.io. This one is a very simple, and very straightforward kind of tool. It’s also a freemium one, so you’ll have to pay in order to unlock some of its features, but it’s a solid contender for its customization tools, which gives a lot more options to choose from.
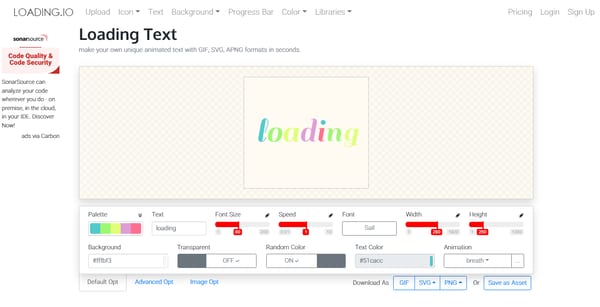
Part 3 How to Use an Animated Text Generator to Make Stunning Videos?
Now, if you need help making use of your finished animated text, icons, etc. Then you’ll probably need a video editor like Wondershare Filmora !
For Win 7 or later (64-bit)
For macOS 10.14 or later
As you can see from the image shown above, Wondershare Filmora is a very sleek video editing software. It’s used by all sorts of professionals as well, as it comes with all kinds of resources and tools that you can use in order to create stunning videos (including, believe it or not, templates for animated text! So, if you want, you can even skip the animated text maker altogether and just get straight to using Filmora.)
Key Takeaways from This Episode
● There are various text animation generators in the market! Some of which you can download straight to your desktop or computer!
● There are also online GIF makers that you can use straight from your browser, leaving out all the hassle of having to download or install anything and helping you get straight to work!
● If you want to polish up your project some more, then consider using an advanced video editor like Filmora Pro to make sure that your work is sparkly clean!
We’ve compiled a list of some of the best text animation software and tools out there!
One for general, animated text generators, and the other for online text gif maker tools. Pick whichever suits your project and start working on a more professional look today.
In this article
01 [10 Best Animated Text Generators for 2021](#Part 1)
02 [8 Best Online Text GIF Generators to Make Animated Word GIFs](#Part 2)
03 [How to Use an Animated Text Generator to Make Stunning Videos?](#Part 3)
Part 1 10 Best Animated Text Generators for 2021
For our first list, as promised, we’ve compiled a list of some of the best-animated text generators for 2021. This is a general list of text animation software that you have to either download or install to use! If you want the online text animation maker list, that would be the one after this!
01Aurora: 3D Text Logo Maker
PRICE: FREE!
RATING: 4.5/5
The first animated text generator on our list is Aurora 3D. Aurora offers several different products, but the one that we’re focusing on today is their 3D Text & Logo maker, which you can use to create some pretty advanced text animations with no sweat (as well as logos, of course, as the name implies)! The software is available for both Mac and Windows OS computers and desktops.
02Animaker
PRICE: Basic Plan = $10 per month!
RATING: 4.9/5
If you’re looking for a more modern text animation maker, then Animaker might just be the one that you want! With this, you can create your 3D text animations from scratch, or choose from the dozens of templates and presets that they have for text, animated characters, icons, and other properties. This is more of a video editor than a strict text tool, but we thought it was important to give you a good variety. It’s also not FREE, but you can try it for free for a time so that you can check if it’s the one for you.
03OpenToonz
PRICE: Free
RATING: 4/5
OpenToonz is a free text animation software that you can use for both basic and advanced 2D animation. It comes in several different languages (including Spanish and Japanese) and is very useful for creating simple text animation from scratch — no complicated tools. Just create and go! (It is also available in both Mac and Windows!)
04Reallusion
PRICE: Free
RATING: 4/5
Reallusion is another open-source text gif maker that you can use if you’re looking for something quick-and-easy. It supports a ton of different fonts, as well as ways to control the width, height, dimension, and style of every single object inside of their 3D properties gallery — giving you a lot of options for customization without any added cost!
05Express Animate
PRICE: $60 (full license)
RATING: 4/5
Express Animate, just like Open Toonz, it is more of an animation tool than one strictly created for text animation. However, it does work for that purpose as well. So, if you’re willing to pay for the full license (which will cost $60), it could be a fairly good tool for you. Especially if you’re interested in trying out more complex animations in the future.
06Motion
PRICE: $47
RATING: 3.9/5
Motion is a Mac-only software. It is, just like some of the other options on this list, a great option for those looking for a tool that can help them with general animations (not just text animation — although it provides tools for that as well). The best part of Motion is undoubtedly its graphic library, where you have access to a ton of different presets and templates that you can use to simplify your text-animation-making.
07Xara 3D Maker
PRICE: $39.99
RATING: 3.9/5
Xara is another one of our paid options. It also comes complete with a range of different templates and presets that you can use in order to simplify your animation-generating. And, if you end up disliking the product after you try it, they do offer a 30-day money-back guarantee that you can take advantage of to make sure that you get the most out of your purchase.
08Easy Banner
PRICE: FREE
RATING: 3.5/5
Easy Banner is a free animated text-banner-making software. It’s only available in Windows, and its uses are limited to created banners. However, if that’s what you’re looking for? Then there’s no reason not to try it out! Especially since it’s free, and it comes with some pretty advanced customization options for getting the exact look that you want on your text banners.
09Falco GIF Animator
PRICE: FREE
RATING: 3.5/5
Falco Gif Animator is from the same creators of the previous item on this list (Softpedia!) The two offer similar tools, but for different purposes. Whilst the previous tool was for the creation of animated-text banners, this one is a GIF maker for icons, cursors, logos, etc. It’s also FREE! So, if the project you’re working on is applicable to its available features? Then you should definitely try it!
10TISFAT
PRICE: Free
RATING: 3/5
TISFAT is the last of the tools that we have for you. It’s an open-source stick animation tool that you can use to create text animations in whatever style or format that you desire. Making it more customizable than some of the other Softpedia options we just introduced, but still, one to consider based on your own circumstances.
Part 2 8 Best Online Text GIF Generators to Make Animated Word GIFs
And so, we move on to our next list! Here’s where we introduce online solutions for animated text generation needs! So, all the tools on this list will not require any downloading, but they will require that you have internet while working!
01MotionDen
| PROS | CONS |
|---|---|
| ● FREE version available● Large resources library● Easy-to-use video templates | ● Must upgrade to the premium version to export high-quality projects without a watermark.● The FREE version has a 5-video limit (you cannot work on any more projects than that).● Difficult to use for creating text animation from scratch. |
RATING: 4.8/5
MotionDen is a good entry point for text animation online solutions! It comes with tons of different templates that you can choose from to start working on your project immediately. MotionDen also offers a free version that you can test out for a limited number of times (one that gives you access to all their tools and their large resource library). So, you can decide to upgrade to their premium version whenever you want to (which will cost you around $29 per month!)
02Wave.Video
| PROS | CONS |
|---|---|
| ● FREE version is available for trying out its tools.● Vast library of animation properties for you to play around with.● Vast library of animation properties for you to play around with. | ● FREE version limits the length of your projects to 15 seconds.● You can also only create five video projects with the free version.● You can also only create five video projects with the free version. |
RATING: 4.5/5
Wave.Video, just like MotionDen, is a freemium software. You can try it out for free and start using their online video editing tools immediately to create short promos, logos, text gifs, etc. If you want access to some of its more advanced tools, however, you’ll need to pay the premium price ($24-48), which, to you, may or may not be worth the vast library of polished animation properties.
03MakerMoon
| PROS | CONS |
|---|---|
| ● Easy-to-use, and comes with templates and presets!● Advanced video editing tools that you can use to personalize your projects.● FREE plan is available. | ● The FREE version is limited in use.● You also cannot download high-quality projects without a watermark with the free version.● Basic animations only. |
RATING: 4.3/5
If you want to keep things simple, then MakerMoon might be your preferred choice for text animation. It is, like the previous picks, an online video maker, but one with the focus on creating text-centric projects, which you can personalize in a number of ways to create logos, banners, short videos, gifs, etc.
04Textanim
| PROS | CONS |
|---|---|
| ● FREE online GIF maker● A variety of different font style options● Animated Effects options | ● Output is GIF only.● Limited animations options.● Limited resource library. |
RATING: 4/5
Textanim is a very bubbly and glittery kind of gif-maker, made for a more specific kind of project. But, if it works, it works! Plus, it’s also the first completely FREE online gif maker on this list. So, you can test it out without having to make any commitments and use it literally anytime you feel like it. Unfortunately, though, it should be said that the animations here are mainly for effects (i.e., glowing, sparkling, etc.). The text won’t actually move. So, if that’s not what you’re looking for? Then it might not be for you.
05SnackThis
| PROS | CONS |
|---|---|
| ● FREE version for testing its tools and resources is available.● Lots of modern templates are available.● Editing tools for polishing projects. | ● If you’re using the FREE version, you will not be able to actually download your project.● You will also need to register to use it.● The customization options are limited. |
RATING: 4/5
SnackThis, unlike Textanim, is the type to cater to a wider array of users. Its templates are all very modern and professional-looking. So, if what you’re looking for is to create text banners, logos, icons, etc. for your business? Then this definitely is an option that you may want to consider. It’s pretty easy to use too! All you have to do is select the template that you want to use, and then edit it to match what you need.
06Animatron Studio
| PROS | CONS |
|---|---|
| ● More customizable functions.● Advanced video editing options.● Pre-made templates are available for easier animating. | ● FREE Version is limited.● Might be difficult for inexperienced animators.● Output formats are MP4 and GIF only. |
RATING: 3.9/5
Animatron Studio is the tool to use if what you’re looking for is customization. This tool is really better described as animation software, rather than a simple text generator. That means that you have more options than what you might see from other online text animation tools, but it also means that you’ll need to put in more effort to come up with a polished-looking end-product.
07Cool Text
| PROS | CONS |
|---|---|
| ● Easy and quick to use.● Various font customization options.● FREE to use. | ● Limited customizability.● Old-fashioned fonts. |
RATING: 3.5/5
As a departure from the previous pick, we have Cool Text, which is its complete opposite! This is an older software and is definitely best described strictly as an animated text generator. With Cool Text, you can make logos or icons very easily. The options are, of course, more limited because of that, but it may very well be all you need based on the kind of project you’re working on.
08Loading.io
| PROS | CONS |
|---|---|
| ● Lots of fonts customization options.● Three different output formats (svg., png., and gif).● Also pre-set animations to choose from. | ● The FREE version is limited.● It isn’t as advanced as some of the other tools on this list. |
RATING: 3.5/5
For our last online text animator, we have Loading.io. This one is a very simple, and very straightforward kind of tool. It’s also a freemium one, so you’ll have to pay in order to unlock some of its features, but it’s a solid contender for its customization tools, which gives a lot more options to choose from.
Part 3 How to Use an Animated Text Generator to Make Stunning Videos?
Now, if you need help making use of your finished animated text, icons, etc. Then you’ll probably need a video editor like Wondershare Filmora !
For Win 7 or later (64-bit)
For macOS 10.14 or later
As you can see from the image shown above, Wondershare Filmora is a very sleek video editing software. It’s used by all sorts of professionals as well, as it comes with all kinds of resources and tools that you can use in order to create stunning videos (including, believe it or not, templates for animated text! So, if you want, you can even skip the animated text maker altogether and just get straight to using Filmora.)
Key Takeaways from This Episode
● There are various text animation generators in the market! Some of which you can download straight to your desktop or computer!
● There are also online GIF makers that you can use straight from your browser, leaving out all the hassle of having to download or install anything and helping you get straight to work!
● If you want to polish up your project some more, then consider using an advanced video editor like Filmora Pro to make sure that your work is sparkly clean!
5 Photoshop Alternatives to Animate Logo
5 Photoshop Alternatives to Animate Logo
An easy yet powerful editor
Numerous effects to choose from
Detailed tutorials provided by the official channel
Photoshop offers everything that you can use to create a high-quality animated logo and use it to maximize your brand visibility.
![]()
How can you animate your logo in Photoshop? For people who are not familiar with the photo editing tool, it’s always a bit challenging to get started with logo animation.
In this article
01 [Why Do You Need a Gif Logo](#Part 1)
02 [A Step-by-step Guide to Logo Animation in Photoshop](#Part 2)
03 [Most Effective Tactics to Animate Logo with These 5 Photoshop Alternatives](#Part 3)
Part 1 Why Do You Need a Gif Logo
Now, before we start with the guide to animate your logo in Photoshop, let’s first understand how an animation logo can help your brand. The truth is an animated logo has the desired uniqueness factor that’ll help your brand establish a strong digital presence. An animated logo will also set you apart in the crowd, considering other companies will be using simple one-dimensional logos.
Not to mention, you can also use an animated logo in your promotional videos and apply visual effects to enhance the overall production quality of the videos. In a nutshell, there are endless possibilities of using animated logos - all you have to do is unleash your creativity and animate a logo without any hassle.
Part 2 A Step-by-step Guide to Logo Animation in Photoshop
So, now that you know the top reasons why it’s important to use an animated logo, let’s start with the step-by-step guide to animate your logo in Photoshop. It’s worth understanding that animating a logo in Photoshop is not a challenging process. However, it may take a few minutes for you to get the job done because the process is quite time-consuming.
Step 1Open Adobe Photoshop
Open Adobe Photoshop on your computer. Click “File > Scripts” and then tap “Load Files into Stack”.
![]()
Step 2Browse
On the next screen, click “Browse” and load all the JPEG files that you want to use to animate the logo.
![]()
Step 3Timeline
Wait for pictures to load into Photoshop’s timeline. Then, click “Windows” and select “Timeline” from the drop-down menu.
![]()
Step 4Make Frames from Layers
Select all the layers and tap the little “Animation” icon. Click “Make Frames from Layers” to proceed further.
![]()
Step 5Adjust the time span
Select all the frames to adjust the time span for the animation.
Step 6Select looping options
Click on “Select Looping Options” and specify the number of times you want the animation to play itself in the loop.
![]()
Step 7Final export
Your GIF animation is ready for the final export. Simply click “File>Save for Web” and then choose the final output format to export the logo in GIF format.
Part 3 Most Effective Tactics to Animate Logo with These 4 Photoshop Alternatives
Even though Photoshop is a great software to create animated logos, it’s no secret that its complex UI might seem overwhelming for some users. If that’s the case, you can look for Photoshop alternatives and use them to animate your logo online. Here we have shared five of the best alternatives to Photoshop that offer all the essential tools to animate a logo with fewer complications. All these tools have an intuitive interface and allow users to create animated logos within a few minutes.
These Photoshop alternatives include:
01 Figma
![]()
Figma is undoubtedly one of the best editing tools that you can use to animate your logos for free. Even though the tool isn’t as feature-loaded as Photoshop, it’s still one of the best Photoshop alternatives you can use to create animated logos. The tool offers a user-friendly interface where everything you need is right on your screen. Since there aren’t too many hidden menus, you’ll find it quite easier to animate your logos in Figma. There are pre-installed animation templates and transitions that you can customize to meet your business requirements and accelerate the entire designing process.
Key Features:
● Intuitive User Interface
● Support for Team Collaboration
● Can be used for UX/UI designing too
Pros
Dedicated free version for one-time users
Perfect for Novice Designers
Can be used within a professional organization for advanced editing
Cons
You will not get all the features with the free model
If you are looking to design animated logos with keyframes, Figma may not be the right choice for the job
02 Canva
![]()
Canva is another popular online editing tool that’s designed to help users fulfill different editing needs right on their browsers. Whether you want to create a banner for an event or an animated logo for your website, Canva will help you get the job done in every situation.
Being a web-based tool, Canva supports cross-platform compatibility, which means you can access it on any device you want. There are even dedicated iOS and Android apps for Canva that’ll allow you to edit logos right on your smartphone. Basically, if you want to animate your logos online free, Canva is the most suitable solution. You can also use Canva if you are looking for a long-term logo maker.
Key Features:
●Cross-Platform Compatibility
●Thousands of built-in templates with customization support
●The media library gets updated regularly
Pros
All the basic features are available in the free version
One-account to access Canva on any device you want
Ideal for one-time use as well
Cons
When it comes to customization, Canva has limited features
You won’t find advanced editing options like Photoshop
03 Luminar
![]()
Luminar is a paid editing tool that comes with built-in AI support for high-quality editing. Basically, its AI feature can automatically analyze the pictures and suggest you with the best animation templates accordingly. While many users are skeptical about the AI-support, stay assured that it’ll prove to be helpful in 80% of the situations. And, even if you don’t like the suggested templates, you can always go back to the media library and pick a template by yourself.
With AI coming into the picture, Luminar instantly speeds up the entire editing process. You won’t have to spend several hours browsing through the template options. Simply select one of the suggested templates and you’ll be able to initiate the editing process instantly.
Key Features:
●An extensive built-in media library
●Dedicated AI support for precise editing
●Edit your RAW images and add logos easily
Pros
Luminar is an ideal choice for long-time users
Available for both Windows and macOS
Apply templates to multiple images with one click
Cons
With $99 price tag, Luminar is certainly expensive
In the beginning, you may find the user interface a bit overwhelming
04 Fotor
![]()
Fotor is also an online editing tool that can be used to animate your logos online for free. Being a simple online editor, you can’t expect Fotor to offer advanced editing features like some of the other tools we have mentioned in the list.
However, stay assured that when it comes to animating logos, Fotor has everything you’ll need to get the job done. The web-based tool offers 100,000 templates that are designed for different industries. You can choose any of these templates, customize them, and create bespoke animated logos for your brand.
Key Features:
● Different templates to choose from
● Easy drag-&-drop compatibility
● Ideal for first-time as well as professional users
Pros
Available for free
Perfect for social media managers
Customizable templates
Cons
Lacks advanced editing support
The premium version doesn’t have too many useful features
Key Takeaways from This Episode
● Animate your logo in Photoshop and make it visually appealing with 5-easy steps
● If you want to integrate your animated logo into a video, you can use Wondershare Filmora Pro to get the job done within a few minutes
● If you are a beginner, you can also use web-based editing tools to animate your logo online for free.
How to Combine Two/More GIFs Into One [GIF Mergers Offered]
How to Combine Multiple GIFs into One with GIF Combiner

Shanoon Cox
Mar 27, 2024• Proven solutions
Are you looking for a software tool to create animated GIFs? Go online, you will easily find so many with impressive editing abilities. There are so many interesting things that you can do with a collection of GIFs. Many professionals these days are trying new tricks to make classic small duration animated movies with interactive GIF creator tools .
The article below will provide you step by step guidance about how to merge or combine animated GIFs together.
We are going to discuss two methods where one GIF combiner can assist you to play GIFs side by side, whereas the other will tell you about playing another GIF in continuation after first. In the end, we will also let you know the three best GIF combiners you can use.
Keep reading.
If you are not able to use Photoshop due to its complicated interface and Ezgif is not a suitable tool for your device, then the best recommendation for your animated GIF creation needs is Wondershare Filmora .
This tool is designed with a user-friendly interface and it can easily assist you in the development of high-quality gifs. There are so many customization options associated with each design like color correction, speed adjustments, and overlays, etc.
Filmora offers compatibility over Windows as well as Mac devices so you can easily access it anywhere. Further, it can process more than 150 file formats so you need not worry about your selection. Simply download Wondershare Filmora for your desktop and get started with impressive GIF editing.
Download it now to have a try!
See how to make a cool GIF from a video with Wondershare Filmora.
 Download Mac Version ](https://tools.techidaily.com/wondershare/filmora/download/ )
Part 1: How to Combine/Merge Animated GIFs Into One
Method 1: Merge GIFs into one with Photoshop
Adobe Photoshop is one of the top-rated photo editing software tools and nowadays it is popularly being used for GIF combining. Using Photoshop, you can easily play multiple GIF images side by side on the screen. Here are a few simple to follow steps to accomplish this task:
Step 1: Import GIFs to combine
First of all, users need to launch Adobe Photoshop on their device and then import both GIF images to individual tabs. This task can be easily done using Drag and Drop tools. Resize both tabs so that you can view both images at a time on screen.
Step 2: Save GIF with name
Go to the Window menu and ensure that the Timeline option is marked in the drop-down menu.

Now open one empty file with height same as that of already imported GIF files. Save this file with any suitable name, for example Z.

Note: If you need a transparent view of your imported GIF images then go to Layer and select New and finally hit Layer option. You can now hide its bottom layer.
Step 3: Copy frames

Now move to the tab of the first GIF file and then to the timeline toolbar. On the top right corner of your screen, you will find the menu icon. Here you need to select and copy all frames.
Step 4: Paste your copy
It is time to move to GIF Z file, move to its timeline toolbar, and then select the menu icon from the top right corner of your screen. Paste your recently copied selection over here. Never forget to choose Paste Over selection option from Pop up Dialogue Box.
Step 5: Copy and paste
Simply repeat the process explained in Step 3 and 4 for the 2nd GIF image. After execution of these steps, your GIF Z file will be containing all layers of your imported GIF files but as you have pasted them one over another so it is important to separate their elements now.
Step 6: To make separation
To do this separation, go to GIF Z tab and then select layers of second GIF file and simply move them below the first GIF layer files. Users can now have a preview of both GIFs in the timeline window.

Step 7: Change image settings
After finalizing the best preview for your edited files, you can hit the file menu option and then save your project for device or web option. It will immediately open a dialogue box where users can easily specify their image quality and loop count details. Never forget to have one more preview before saving the final results.

Step 8: Save your project
As now you are done with all the editing tasks so it is time to hit the “Save” option and then provide your destination address to the modified file. Your animated GIF file is now ready to get uploaded on the internet.
Check this video to learn more on how to combine gifs with Photoshop
Method 2: Combine GIFs and Play one After Another
Many youngsters love to create impressive stories by just combining a few GIF images one after another in sequence. If you are also one of them then you should follow these steps discussed in the second method.
We are recommending Ezgif.com to complete this task with the easy to follow steps as discussed below:
You may also like: Top 26 Best Free GIF Makers Online >>
Step 1: Upload GIFs files
First of all, you need to upload your desired GIF files to the Ezgif.com platform. For fast selection of multiple files simply follow Ctrl key-based selection.
This tool also allows users to create a mixture of animated GIF files with simple still images even if they are of different file formats. The conversion process will be carried out automatically by this tool.
Step 2: Adjust frame
As soon as these files will get uploaded, you will find all frames on the editor window. Here you can easily adjust frame delays as well as their order. Note that, GIFs are often ordered in alphabetic order so while reorganizing your files, never forget to rename them accurately. Now hit the “Animate It” button and it will immediately prepare a small preview window on the screen.

Step 3: Optimize your GIFs
Ezgif.com provides a wide range of optimization options to users after this preview. You can easily adjust features as per your requirement by setting desired values for text, speed, effects, rotate, resize and crop, etc. If you do not want to make such changes then you can directly hit the save button. This software tool will take a few seconds to process your project and then a new GIF image with all defined frames will be generated. It will be containing all source images with your preferred ordered sequence. You can easily find it at your destination folder and use it further for entertainment.
Part 2: 3 Best GIF Combiners You Can Make GIFs
1. Filmora Meme Maker - Online GIF Combiner
If you want to combine GIFs online, the Filmora meme maker is your ultimate solution.
It helps you make images, GIFs and video memes directly without watermark. It is totally FREE to use and no signup. You can change text size, color and position to create caption when you are editing. You can also put text inside or outside in GIF.
Just with a few clicks, your GIF is done . Try Now!

2. GIPHY
GIPHY is a GIF combiner where you can find various GIF files to combine. All of the GIFs are funny and interesting to use for people who love to combine GIFs. There are some examples in this site, so you can have the inspiration to combine GIFs if you don’t know where to start. You also can find different styles: reaction, sports, artists and more.

3. PIXEL
If you don’t want to use Photoshop to combine GIFs, here we recommend using PIXEL. You can use it to make GIFs easily online. You can add more than one GIF at one time. Besides, this GIF combiner can also change the GIF size to fit your needs. After the editing is made, you need to click create animation to export GIFs. You should know that GIF size is 32×32 for PIXEL, and 64×64 for SUPER PIXEL.
![]()
Frequently Asked Questions About Combing GIFs
1. Can I Combine A Few Gifs?
Yes, you can. Any photo or video editing software that supports GIF file format allows you to combine one or more GIFs. For instance, Adobe Photoshop users can combine several GIF files and play them simultaneously next to each other, but this task can be overwhelming if you are not familiar with this photo editing software.
An online GIF combiner like Ezgif enables you to combine multiple GIFs from your web browser for free, which makes it a great option for anyone who doesn’t have access to a professional photo or video editing software.
2. How To Merge Several Animated GIFs?
Playing two or more GIFs one after another in a single file is easy, as you just have to arrange them in a way you want them to appear in the final version of the GIF on the editor’s timeline and then export your project as a GIF file.
What’s more, you will be able to remove the frames of the GIFs you don’t want to include in the output file or apply different filters and effects. However, the options you are going to have at your disposal depending on the GIF maker or video editing software you are using to merge several animated GIFs into a single file.
Shanoon Cox
Shanoon Cox is a writer and a lover of all things video.
Follow @Shanoon Cox
Shanoon Cox
Mar 27, 2024• Proven solutions
Are you looking for a software tool to create animated GIFs? Go online, you will easily find so many with impressive editing abilities. There are so many interesting things that you can do with a collection of GIFs. Many professionals these days are trying new tricks to make classic small duration animated movies with interactive GIF creator tools .
The article below will provide you step by step guidance about how to merge or combine animated GIFs together.
We are going to discuss two methods where one GIF combiner can assist you to play GIFs side by side, whereas the other will tell you about playing another GIF in continuation after first. In the end, we will also let you know the three best GIF combiners you can use.
Keep reading.
If you are not able to use Photoshop due to its complicated interface and Ezgif is not a suitable tool for your device, then the best recommendation for your animated GIF creation needs is Wondershare Filmora .
This tool is designed with a user-friendly interface and it can easily assist you in the development of high-quality gifs. There are so many customization options associated with each design like color correction, speed adjustments, and overlays, etc.
Filmora offers compatibility over Windows as well as Mac devices so you can easily access it anywhere. Further, it can process more than 150 file formats so you need not worry about your selection. Simply download Wondershare Filmora for your desktop and get started with impressive GIF editing.
Download it now to have a try!
See how to make a cool GIF from a video with Wondershare Filmora.
Download Mac Version ](https://tools.techidaily.com/wondershare/filmora/download/ )
Part 1: How to Combine/Merge Animated GIFs Into One
Method 1: Merge GIFs into one with Photoshop
Adobe Photoshop is one of the top-rated photo editing software tools and nowadays it is popularly being used for GIF combining. Using Photoshop, you can easily play multiple GIF images side by side on the screen. Here are a few simple to follow steps to accomplish this task:
Step 1: Import GIFs to combine
First of all, users need to launch Adobe Photoshop on their device and then import both GIF images to individual tabs. This task can be easily done using Drag and Drop tools. Resize both tabs so that you can view both images at a time on screen.
Step 2: Save GIF with name
Go to the Window menu and ensure that the Timeline option is marked in the drop-down menu.
Now open one empty file with height same as that of already imported GIF files. Save this file with any suitable name, for example Z.
Note: If you need a transparent view of your imported GIF images then go to Layer and select New and finally hit Layer option. You can now hide its bottom layer.
Step 3: Copy frames
Now move to the tab of the first GIF file and then to the timeline toolbar. On the top right corner of your screen, you will find the menu icon. Here you need to select and copy all frames.
Step 4: Paste your copy
It is time to move to GIF Z file, move to its timeline toolbar, and then select the menu icon from the top right corner of your screen. Paste your recently copied selection over here. Never forget to choose Paste Over selection option from Pop up Dialogue Box.
Step 5: Copy and paste
Simply repeat the process explained in Step 3 and 4 for the 2nd GIF image. After execution of these steps, your GIF Z file will be containing all layers of your imported GIF files but as you have pasted them one over another so it is important to separate their elements now.
Step 6: To make separation
To do this separation, go to GIF Z tab and then select layers of second GIF file and simply move them below the first GIF layer files. Users can now have a preview of both GIFs in the timeline window.
Step 7: Change image settings
After finalizing the best preview for your edited files, you can hit the file menu option and then save your project for device or web option. It will immediately open a dialogue box where users can easily specify their image quality and loop count details. Never forget to have one more preview before saving the final results.
Step 8: Save your project
As now you are done with all the editing tasks so it is time to hit the “Save” option and then provide your destination address to the modified file. Your animated GIF file is now ready to get uploaded on the internet.
Check this video to learn more on how to combine gifs with Photoshop
Method 2: Combine GIFs and Play one After Another
Many youngsters love to create impressive stories by just combining a few GIF images one after another in sequence. If you are also one of them then you should follow these steps discussed in the second method.
We are recommending Ezgif.com to complete this task with the easy to follow steps as discussed below:
You may also like: Top 26 Best Free GIF Makers Online >>
Step 1: Upload GIFs files
First of all, you need to upload your desired GIF files to the Ezgif.com platform. For fast selection of multiple files simply follow Ctrl key-based selection.
This tool also allows users to create a mixture of animated GIF files with simple still images even if they are of different file formats. The conversion process will be carried out automatically by this tool.
Step 2: Adjust frame
As soon as these files will get uploaded, you will find all frames on the editor window. Here you can easily adjust frame delays as well as their order. Note that, GIFs are often ordered in alphabetic order so while reorganizing your files, never forget to rename them accurately. Now hit the “Animate It” button and it will immediately prepare a small preview window on the screen.
Step 3: Optimize your GIFs
Ezgif.com provides a wide range of optimization options to users after this preview. You can easily adjust features as per your requirement by setting desired values for text, speed, effects, rotate, resize and crop, etc. If you do not want to make such changes then you can directly hit the save button. This software tool will take a few seconds to process your project and then a new GIF image with all defined frames will be generated. It will be containing all source images with your preferred ordered sequence. You can easily find it at your destination folder and use it further for entertainment.
Part 2: 3 Best GIF Combiners You Can Make GIFs
1. Filmora Meme Maker - Online GIF Combiner
If you want to combine GIFs online, the Filmora meme maker is your ultimate solution.
It helps you make images, GIFs and video memes directly without watermark. It is totally FREE to use and no signup. You can change text size, color and position to create caption when you are editing. You can also put text inside or outside in GIF.
Just with a few clicks, your GIF is done . Try Now!
2. GIPHY
GIPHY is a GIF combiner where you can find various GIF files to combine. All of the GIFs are funny and interesting to use for people who love to combine GIFs. There are some examples in this site, so you can have the inspiration to combine GIFs if you don’t know where to start. You also can find different styles: reaction, sports, artists and more.
3. PIXEL
If you don’t want to use Photoshop to combine GIFs, here we recommend using PIXEL. You can use it to make GIFs easily online. You can add more than one GIF at one time. Besides, this GIF combiner can also change the GIF size to fit your needs. After the editing is made, you need to click create animation to export GIFs. You should know that GIF size is 32×32 for PIXEL, and 64×64 for SUPER PIXEL.
![]()
Frequently Asked Questions About Combing GIFs
1. Can I Combine A Few Gifs?
Yes, you can. Any photo or video editing software that supports GIF file format allows you to combine one or more GIFs. For instance, Adobe Photoshop users can combine several GIF files and play them simultaneously next to each other, but this task can be overwhelming if you are not familiar with this photo editing software.
An online GIF combiner like Ezgif enables you to combine multiple GIFs from your web browser for free, which makes it a great option for anyone who doesn’t have access to a professional photo or video editing software.
2. How To Merge Several Animated GIFs?
Playing two or more GIFs one after another in a single file is easy, as you just have to arrange them in a way you want them to appear in the final version of the GIF on the editor’s timeline and then export your project as a GIF file.
What’s more, you will be able to remove the frames of the GIFs you don’t want to include in the output file or apply different filters and effects. However, the options you are going to have at your disposal depending on the GIF maker or video editing software you are using to merge several animated GIFs into a single file.
Shanoon Cox
Shanoon Cox is a writer and a lover of all things video.
Follow @Shanoon Cox
Also read:
- New In 2024, 12 Websites with Triggered Animate on Scroll Examples
- 10 Most Memorable Japanese Cat Cartoons for 2024
- Updated How to Cartoonize Photo Photoshop in Easy Steps
- Updated 6 Unexpected Ways Gif Animation Maker That Affect Your Marketing for 2024
- Updated 8 Top Motion Graphics Online Tools for Your Inspiration
- In-Depth Study of Cartoon Painting Starts From Learning to Draw It for 2024
- Best GIF Resizers to Reduce GIF Size for 2024
- New How to Create Free Photo Collage Frame in Minutes, In 2024
- New How to Turn Yourself Into WhatsApp Cartoon
- Updated 2024 Approved How to Create Your Own Avatar Free
- 2024 Approved Top 10 Cartoon Canvas Painting Ideas for Total Beginners
- New In 2024, Top 8 Anime Name & Title Generators Online-Get Cool Anime Names
- New The Only Guide Youll Ever Need to Learn That Make 2D Rigging Clear to You for 2024
- Updated Best GIF Croppers How to Crop an Animated GIF
- Updated 18 Best Tools and Services to Create Animated Videos for Business 2023
- 2024 Approved Easy Cartoon Characters Drawing Tutorials for You Beginners
- Updated How to Create Your Avatar Free
- New 10 Must-Use MP4 to GIF Converters to Get Perfect-Made GIF
- Updated In 2024, A Beginners Guide for Learning 3D Animation
- New 20 Free After Effects Logo Reveal Templates You Will Want to Know
- New In 2024, How to Make a Video a Live Photo 2023
- New In 2024, How to Draw Cartoons Step by Step with This Guide
- New 12 Best Stop Motion Studios Worth Recommending
- New 2024 Approved What Is Anime? Anime VS Manga VS Cartoon
- Updated In 2024, 12 Captivating Websites with Triggered Animate on Scroll Examples
- 2024 Approved How to Create Free Photo Collage Frame in Minutes?
- 2024 Approved The Top 20 Motion Graphics Companies & Studios
- In 2024, 10 Must Watch Netflix Cartoon Series For You
- 2024 Approved The Most Efficient Techniques for You to Make 3D Animation Character
- How to Create Slideshow in LinkedIn for 2024
- 5 Must Try Ways to Add GIF in Text Message on Android for 2024
- Updated In 2024, The Coolest Anime Characters Ever| List of Top Favorites
- New What Make Aesthetic Cartoon Drawing More Understandable
- New In 2024, The 10 Most Adorable Aesthetic Cartoon Characters
- New 2024 Approved Tutorial Guide to Animate Pictures in Canva
- New In 2024, Tips for GIF to Animated PNG
- 2024 Approved Can I Still Do Animated Logo Design Without Design Skills?
- 2024 Approved Ways on How to Liven Up Your Animate Website on Scroll
- 15 Best Video to GIF App on iPhone and Android
- Updated Want to Make a Meme GIF for 2024
- New In 2024, Most Popular Tips on Learning Animate Rigging
- 3 Effective Ways to Unlock iCloud Account Without Password On iPhone 14 Pro
- Full Guide to Hard Reset Your Realme C33 2023 | Dr.fone
- Is GSM Flasher ADB Legit? Full Review To Bypass Your Motorola Edge 40 ProFRP Lock
- Top 7 Phone Number Locators To Track Vivo Y200 Location | Dr.fone
- The Best Android SIM Unlock Code Generators Unlock Your Vivo S18e Phone Hassle-Free
- In 2024, The 6 Best SIM Unlock Services That Actually Work On Your Lava Yuva 2 Pro Device
- This is how you can recover deleted pictures from Motorola Edge 40 Pro.
- In 2024, What You Want To Know About Two-Factor Authentication for iCloud From your Apple iPhone XR
- Additional Tips About Sinnoh Stone For Lava Storm 5G | Dr.fone
- Forgot Pattern Lock? Heres How You Can Unlock Xiaomi Redmi Note 12 Pro 5G Pattern Lock Screen
- In 2024, How To Unlock The Apple iPhone 13 Pro SIM Lock 4 Easy Methods
- How To Upgrade or Downgrade iPhone X Without Losing Data? | Dr.fone
- In 2024, A Working Guide For Pachirisu Pokemon Go Map On Lava Agni 2 5G | Dr.fone
- In 2024, How To Delete iCloud Account Remove Your Apple ID Permanently On Apple iPhone 14
- In 2024, How To Bypass iCloud By Checkra1n Even On iPhone 14 Pro If Youve Tried Everything
- In 2024, Fake the Location to Get Around the MLB Blackouts on Vivo S17 | Dr.fone
- In 2024, How I Transferred Messages from Oppo Reno 11 Pro 5G to iPhone 12/XS (Max) in Seconds | Dr.fone
- In 2024, How to Share/Fake Location on WhatsApp for Poco X6 | Dr.fone
- All Things You Need to Know about Wipe Data/Factory Reset For Sony Xperia 1 V | Dr.fone
- Itel support - Forgotten screen lock.
- How To Unlock Stolen Apple iPhone SE In Different Conditionsin
- What is Geo-Blocking and How to Bypass it On Honor Magic 5 Pro? | Dr.fone
- In 2024, Unlocking the Power of Smart Lock A Beginners Guide for Infinix Smart 8 Users
- Easy Ways to Manage Your Motorola Razr 40 Ultra Location Settings | Dr.fone
- How to Simulate GPS Movement in AR games On Vivo Y17s? | Dr.fone
- How to play MOV files on Moto G34 5G ?
- In 2024, How to Send and Fake Live Location on Facebook Messenger Of your Motorola Edge 40 Pro | Dr.fone
- Title: Updated Whats Music Video GIF & How to Add Music to GIF Files for 2024
- Author: Elon
- Created at : 2024-05-19 03:05:45
- Updated at : 2024-05-20 03:05:45
- Link: https://animation-videos.techidaily.com/updated-whats-music-video-gif-and-how-to-add-music-to-gif-files-for-2024/
- License: This work is licensed under CC BY-NC-SA 4.0.
