

Updated Whats Rigging Animation
What’s Rigging Animation
What’s Rigging Animation and Why It Matters
An easy yet powerful editor
Numerous effects to choose from
Detailed tutorials provided by the official channel
Today there is a lot pre-made skeletons you can use and reuse as many times as you want, making only a few minor adjustments to the base design. If your creativity is sparking like firecrackers, then a rig can make it look more defined and/or realistic.
Not convinced? Let’s talk more about Rigging Animation.
In this article
01 [What is Rigging Animation](#Part 1)
02 [The Ultimate Collection for Free Maya Rigs [2022]](#Part 2)
Part 1 What is Rigging Animation
01Why Your Animators Need to Know How to Rig
Walk into any professional animation studio toady, you would notice unfamiliar skeleton figures in at least one of the screens.
This is called skeleton animation and is a major technique used in creating animated models that give us that 36vibe of the character in movies. It helps animators in controlling its movement just like a puppet. Hidden call back to the Matrix.
What you see in most movies or games, are characters and models who supported by a network of digital mechanical skeletons all rigged to move in a certain way.
02How Does Rigging Work?
The process of rigging is usually the second step in a long line of other methods applied after creating a model.
There is a series of interdependent bones that need to be constructed which is representation of the skeletal structure which is the basic goal in rigging animation.
With the right digital animation software you can reposition, repurpose and scale these bones in more ways than one.
The next step would involve recording the different movements of these bones on a timeline. This part of the process is called keyframing in animation.
These simple steps are actually more intricate than they actually are. Each movement acts as trigger to another set of movements like how the shoulder bone is connected to the forearm of our body.
This movement of the model becomes even more realistic once its weight scale has been determined. Painting weight can be considered to be the most unnerving challenge in the entire process.
Which is where Inverse Kinematics can help in making things 5easier by just reversing forward kinematic movements.
All of these aspects of rigging makes it possible to help animation mimic real life movements.
03How is Rigging Used?
Rigging is a technique which has only started gaining more prominence in recent times due to how crucial it is to the gaming and animation movie industry.
Not only is it used on characters but all mechanical objects in animations can also be rigged. With the help of a computerized program physicality is added to the bone structure and is recorded through a series of frames. These recording are then played back.
There are other applications to the and modelling process which goes beyond the entertainment industry such as giving virtual medical demonstrations or modeling a product.
This entire process can get much more repetitive and complex when it comes to rigging something as dynamic as the human face.
04Intro to Rigging Software
You might already be aware by now that there are some major animation software on the market that can provide you with just about every tool you need to make jaw dropping rigger animations.
Software like Blender, Cinema 4D, Maya and Houdini employs fantastic Skeletal Animation and digital motion capturing techniques. They open the doors to more realistic animations that can be used to create far more interactive and personalized digital worlds.
Maya and 3Ds Max is used to do real time animation rigging and is considered by most to be the industry standard by most animators.
Blender on the other hand is a free to use software. Though not quite as strong as Maya, it is an open source software which is equipped with everything you need to rig and animate models.
You can import completed animated files onto game engines and all types of other applications. The most common format for importing animated files is .fbx.
Part 2 The Ultimate Collection for Free Maya Rigs [2022]
01How’s Maya Rigs?
To tell the truth, every year you have spent on learning animation would come into great use in making your imagination come to life. Maya is probably the one software which gives you credit for just knowing it.
Maya has several levels of features you need to practice before you can call yourself a Maya master.
The best way to get your hands practiced on animating on Maya is by becoming well versed with all the stats and proportions while working with rigs. You would surely need to get your hands on high quality rig packages that makes the learning experience even more worth it.
With time, you would get better at understanding of the specifics of building a structure you would be showing in the final result. However getting stuck with the wrong type of rig can end up making your animating experience counterintuitive.
Here is a list of Maya Rigs you can start on right away;
02Best Free Maya Rigs of 2022
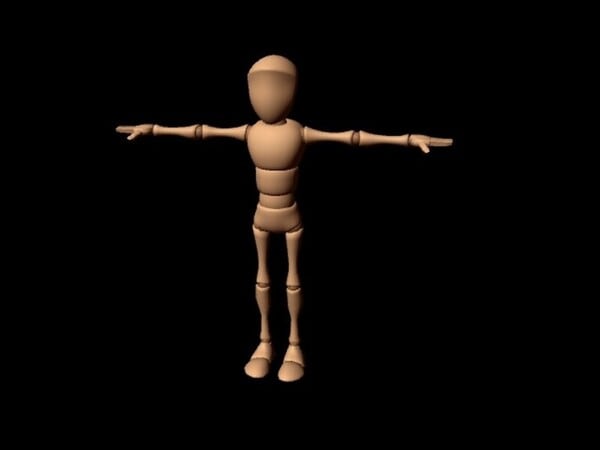
● Basic Rigs

Understanding the Basic Functionality of inanimate objects is a clear place to start in animation rigging. It helps you get a strong grasp over animation principals like bouncing a ball, before moving on to more challenging rigging packages.
● Ultimate Rigs
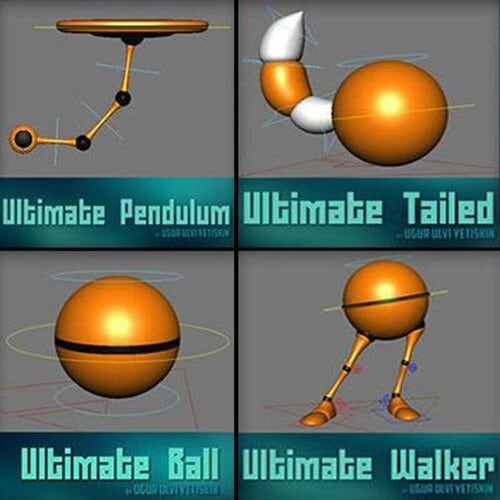
As you keep trying out different basic rigging functionalities, you eventually would need an ultimate rigging pack which is a complete set of all basic rigs. It is a great option to download and have this as a backup.
● Flour Sack

The Flour Sack free Rig is old school trainer pack. It simplifies your understanding character emotions by applying posing and adding weight to an object with a whimsical undefined structure.
● Wall E

If you are easily familiar with this character then you should remember how beautifully Wall-E was able express himself. It certainly is a step up on your journey to improving motion capture techniques. Try making your own Dreamworks style animation with Filmora from Wondershare where you can pair your animations with a few amazing film editing tools.
● JuiceBox
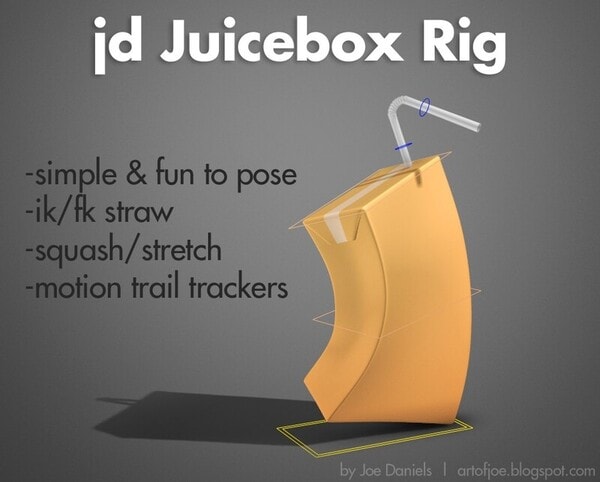
Another favored animation teaching prop is the Juice Box. It follows similar principals like the Flour Sack but the straw adds a different dimension to it. This is where an animator can try out more ways to get creative without a simple straw getting in their way.
● The Walking Egg
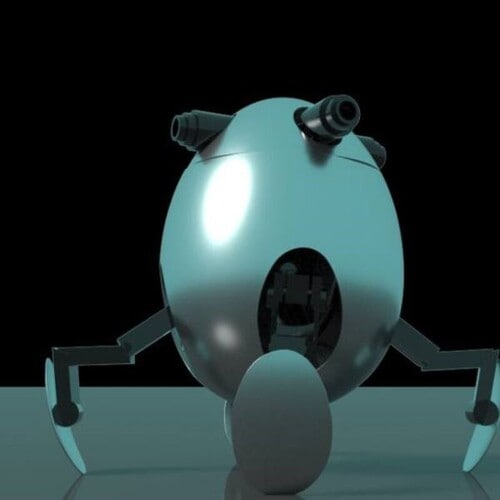
An egg shaped mechanical quadruped robot who has the ability to contract its legs into its body. Its legs are probably its best feature since it is lockable at then joints. A fun part of this robot is that its screen eyes can turn into guns.
● Cartoon Chameleon
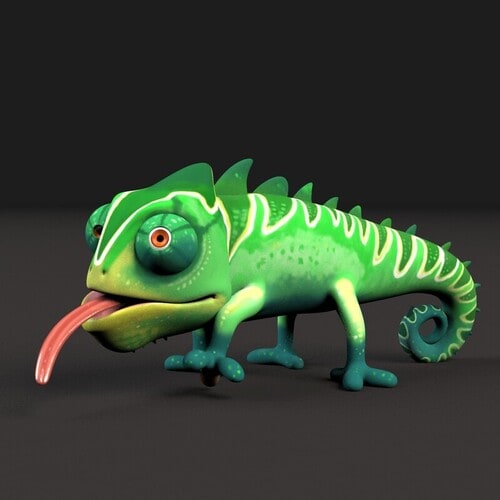
This chameleon has all basic body and facial functions needed by a quadruped. It is a funny whimsical character similar to ‘Pasacal’ from the movie “Tangled” which you can play with. Its tongue is a special feature although you may need to work on its control.
● Judy Hopps
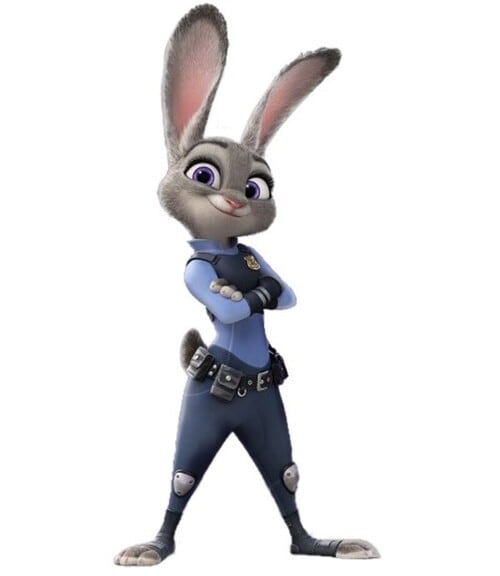
Time to master the art of animating emotions and Judy with her amazing big round eyes can easily be adjusted with the help of floating controllers. The dynamic features of this rig has micro facial controls which you practice with.
● Roboter 2.0.1
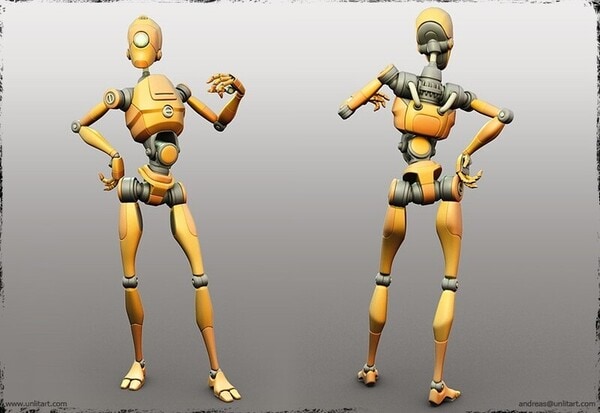
Interested in Robots? Try playing with this humanoid figure but be warned that it might not feel as easy to replicate natural human body motion. It might take some practice but you can try taking on the initial steps by practicing on a robot rig. At least you can excuse any minor imperfections.
● Bony and Beefy
The next challenge would be to master this incredibly advanced rig. There are various different body specifications which you will need to be familiar with. This rig gives you a fair advantage by already toggling all visibility controls.
● Key Takeaways from This Episode →
● Rigging is a fantastic way to learn the foundations of animations and how it all ties into the final result. It involves creating skeletal animations of bones that share parental relationship with each other; one bone moves an entire set. You can record these movements and then play them over timeline.
● You can practice rigging with both simple and advanced animations. Complex rigging structures like facial features may require separate project of its own. There are various rigging software like Blender and Maya which provides you with everything you need to carry out a successful rigging process.
● Get started with rigging animation by practicing on free Maya Rigs. Find out which rig suits you best according to your skills level.
Today there is a lot pre-made skeletons you can use and reuse as many times as you want, making only a few minor adjustments to the base design. If your creativity is sparking like firecrackers, then a rig can make it look more defined and/or realistic.
Not convinced? Let’s talk more about Rigging Animation.
In this article
01 [What is Rigging Animation](#Part 1)
02 [The Ultimate Collection for Free Maya Rigs [2022]](#Part 2)
Part 1 What is Rigging Animation
01Why Your Animators Need to Know How to Rig
Walk into any professional animation studio toady, you would notice unfamiliar skeleton figures in at least one of the screens.
This is called skeleton animation and is a major technique used in creating animated models that give us that 36vibe of the character in movies. It helps animators in controlling its movement just like a puppet. Hidden call back to the Matrix.
What you see in most movies or games, are characters and models who supported by a network of digital mechanical skeletons all rigged to move in a certain way.
02How Does Rigging Work?
The process of rigging is usually the second step in a long line of other methods applied after creating a model.
There is a series of interdependent bones that need to be constructed which is representation of the skeletal structure which is the basic goal in rigging animation.
With the right digital animation software you can reposition, repurpose and scale these bones in more ways than one.
The next step would involve recording the different movements of these bones on a timeline. This part of the process is called keyframing in animation.
These simple steps are actually more intricate than they actually are. Each movement acts as trigger to another set of movements like how the shoulder bone is connected to the forearm of our body.
This movement of the model becomes even more realistic once its weight scale has been determined. Painting weight can be considered to be the most unnerving challenge in the entire process.
Which is where Inverse Kinematics can help in making things 5easier by just reversing forward kinematic movements.
All of these aspects of rigging makes it possible to help animation mimic real life movements.
03How is Rigging Used?
Rigging is a technique which has only started gaining more prominence in recent times due to how crucial it is to the gaming and animation movie industry.
Not only is it used on characters but all mechanical objects in animations can also be rigged. With the help of a computerized program physicality is added to the bone structure and is recorded through a series of frames. These recording are then played back.
There are other applications to the and modelling process which goes beyond the entertainment industry such as giving virtual medical demonstrations or modeling a product.
This entire process can get much more repetitive and complex when it comes to rigging something as dynamic as the human face.
04Intro to Rigging Software
You might already be aware by now that there are some major animation software on the market that can provide you with just about every tool you need to make jaw dropping rigger animations.
Software like Blender, Cinema 4D, Maya and Houdini employs fantastic Skeletal Animation and digital motion capturing techniques. They open the doors to more realistic animations that can be used to create far more interactive and personalized digital worlds.
Maya and 3Ds Max is used to do real time animation rigging and is considered by most to be the industry standard by most animators.
Blender on the other hand is a free to use software. Though not quite as strong as Maya, it is an open source software which is equipped with everything you need to rig and animate models.
You can import completed animated files onto game engines and all types of other applications. The most common format for importing animated files is .fbx.
Part 2 The Ultimate Collection for Free Maya Rigs [2022]
01How’s Maya Rigs?
To tell the truth, every year you have spent on learning animation would come into great use in making your imagination come to life. Maya is probably the one software which gives you credit for just knowing it.
Maya has several levels of features you need to practice before you can call yourself a Maya master.
The best way to get your hands practiced on animating on Maya is by becoming well versed with all the stats and proportions while working with rigs. You would surely need to get your hands on high quality rig packages that makes the learning experience even more worth it.
With time, you would get better at understanding of the specifics of building a structure you would be showing in the final result. However getting stuck with the wrong type of rig can end up making your animating experience counterintuitive.
Here is a list of Maya Rigs you can start on right away;
02Best Free Maya Rigs of 2022
● Basic Rigs
Understanding the Basic Functionality of inanimate objects is a clear place to start in animation rigging. It helps you get a strong grasp over animation principals like bouncing a ball, before moving on to more challenging rigging packages.
● Ultimate Rigs
As you keep trying out different basic rigging functionalities, you eventually would need an ultimate rigging pack which is a complete set of all basic rigs. It is a great option to download and have this as a backup.
● Flour Sack
The Flour Sack free Rig is old school trainer pack. It simplifies your understanding character emotions by applying posing and adding weight to an object with a whimsical undefined structure.
● Wall E
If you are easily familiar with this character then you should remember how beautifully Wall-E was able express himself. It certainly is a step up on your journey to improving motion capture techniques. Try making your own Dreamworks style animation with Filmora from Wondershare where you can pair your animations with a few amazing film editing tools.
● JuiceBox
Another favored animation teaching prop is the Juice Box. It follows similar principals like the Flour Sack but the straw adds a different dimension to it. This is where an animator can try out more ways to get creative without a simple straw getting in their way.
● The Walking Egg
An egg shaped mechanical quadruped robot who has the ability to contract its legs into its body. Its legs are probably its best feature since it is lockable at then joints. A fun part of this robot is that its screen eyes can turn into guns.
● Cartoon Chameleon
This chameleon has all basic body and facial functions needed by a quadruped. It is a funny whimsical character similar to ‘Pasacal’ from the movie “Tangled” which you can play with. Its tongue is a special feature although you may need to work on its control.
● Judy Hopps
Time to master the art of animating emotions and Judy with her amazing big round eyes can easily be adjusted with the help of floating controllers. The dynamic features of this rig has micro facial controls which you practice with.
● Roboter 2.0.1
Interested in Robots? Try playing with this humanoid figure but be warned that it might not feel as easy to replicate natural human body motion. It might take some practice but you can try taking on the initial steps by practicing on a robot rig. At least you can excuse any minor imperfections.
● Bony and Beefy
The next challenge would be to master this incredibly advanced rig. There are various different body specifications which you will need to be familiar with. This rig gives you a fair advantage by already toggling all visibility controls.
● Key Takeaways from This Episode →
● Rigging is a fantastic way to learn the foundations of animations and how it all ties into the final result. It involves creating skeletal animations of bones that share parental relationship with each other; one bone moves an entire set. You can record these movements and then play them over timeline.
● You can practice rigging with both simple and advanced animations. Complex rigging structures like facial features may require separate project of its own. There are various rigging software like Blender and Maya which provides you with everything you need to carry out a successful rigging process.
● Get started with rigging animation by practicing on free Maya Rigs. Find out which rig suits you best according to your skills level.
5 Photoshop Alternatives to Animate Logo
5 Photoshop Alternatives to Animate Logo
An easy yet powerful editor
Numerous effects to choose from
Detailed tutorials provided by the official channel
Photoshop offers everything that you can use to create a high-quality animated logo and use it to maximize your brand visibility.
![]()
How can you animate your logo in Photoshop? For people who are not familiar with the photo editing tool, it’s always a bit challenging to get started with logo animation.
In this article
01 [Why Do You Need a Gif Logo](#Part 1)
02 [A Step-by-step Guide to Logo Animation in Photoshop](#Part 2)
03 [Most Effective Tactics to Animate Logo with These 5 Photoshop Alternatives](#Part 3)
Part 1 Why Do You Need a Gif Logo
Now, before we start with the guide to animate your logo in Photoshop, let’s first understand how an animation logo can help your brand. The truth is an animated logo has the desired uniqueness factor that’ll help your brand establish a strong digital presence. An animated logo will also set you apart in the crowd, considering other companies will be using simple one-dimensional logos.
Not to mention, you can also use an animated logo in your promotional videos and apply visual effects to enhance the overall production quality of the videos. In a nutshell, there are endless possibilities of using animated logos - all you have to do is unleash your creativity and animate a logo without any hassle.
Part 2 A Step-by-step Guide to Logo Animation in Photoshop
So, now that you know the top reasons why it’s important to use an animated logo, let’s start with the step-by-step guide to animate your logo in Photoshop. It’s worth understanding that animating a logo in Photoshop is not a challenging process. However, it may take a few minutes for you to get the job done because the process is quite time-consuming.
Step 1Open Adobe Photoshop
Open Adobe Photoshop on your computer. Click “File > Scripts” and then tap “Load Files into Stack”.
![]()
Step 2Browse
On the next screen, click “Browse” and load all the JPEG files that you want to use to animate the logo.
![]()
Step 3Timeline
Wait for pictures to load into Photoshop’s timeline. Then, click “Windows” and select “Timeline” from the drop-down menu.
![]()
Step 4Make Frames from Layers
Select all the layers and tap the little “Animation” icon. Click “Make Frames from Layers” to proceed further.
![]()
Step 5Adjust the time span
Select all the frames to adjust the time span for the animation.
Step 6Select looping options
Click on “Select Looping Options” and specify the number of times you want the animation to play itself in the loop.
![]()
Step 7Final export
Your GIF animation is ready for the final export. Simply click “File>Save for Web” and then choose the final output format to export the logo in GIF format.
Part 3 Most Effective Tactics to Animate Logo with These 4 Photoshop Alternatives
Even though Photoshop is a great software to create animated logos, it’s no secret that its complex UI might seem overwhelming for some users. If that’s the case, you can look for Photoshop alternatives and use them to animate your logo online. Here we have shared five of the best alternatives to Photoshop that offer all the essential tools to animate a logo with fewer complications. All these tools have an intuitive interface and allow users to create animated logos within a few minutes.
These Photoshop alternatives include:
01 Figma
![]()
Figma is undoubtedly one of the best editing tools that you can use to animate your logos for free. Even though the tool isn’t as feature-loaded as Photoshop, it’s still one of the best Photoshop alternatives you can use to create animated logos. The tool offers a user-friendly interface where everything you need is right on your screen. Since there aren’t too many hidden menus, you’ll find it quite easier to animate your logos in Figma. There are pre-installed animation templates and transitions that you can customize to meet your business requirements and accelerate the entire designing process.
Key Features:
● Intuitive User Interface
● Support for Team Collaboration
● Can be used for UX/UI designing too
Pros
Dedicated free version for one-time users
Perfect for Novice Designers
Can be used within a professional organization for advanced editing
Cons
You will not get all the features with the free model
If you are looking to design animated logos with keyframes, Figma may not be the right choice for the job
02 Canva
![]()
Canva is another popular online editing tool that’s designed to help users fulfill different editing needs right on their browsers. Whether you want to create a banner for an event or an animated logo for your website, Canva will help you get the job done in every situation.
Being a web-based tool, Canva supports cross-platform compatibility, which means you can access it on any device you want. There are even dedicated iOS and Android apps for Canva that’ll allow you to edit logos right on your smartphone. Basically, if you want to animate your logos online free, Canva is the most suitable solution. You can also use Canva if you are looking for a long-term logo maker.
Key Features:
●Cross-Platform Compatibility
●Thousands of built-in templates with customization support
●The media library gets updated regularly
Pros
All the basic features are available in the free version
One-account to access Canva on any device you want
Ideal for one-time use as well
Cons
When it comes to customization, Canva has limited features
You won’t find advanced editing options like Photoshop
03 Luminar
![]()
Luminar is a paid editing tool that comes with built-in AI support for high-quality editing. Basically, its AI feature can automatically analyze the pictures and suggest you with the best animation templates accordingly. While many users are skeptical about the AI-support, stay assured that it’ll prove to be helpful in 80% of the situations. And, even if you don’t like the suggested templates, you can always go back to the media library and pick a template by yourself.
With AI coming into the picture, Luminar instantly speeds up the entire editing process. You won’t have to spend several hours browsing through the template options. Simply select one of the suggested templates and you’ll be able to initiate the editing process instantly.
Key Features:
●An extensive built-in media library
●Dedicated AI support for precise editing
●Edit your RAW images and add logos easily
Pros
Luminar is an ideal choice for long-time users
Available for both Windows and macOS
Apply templates to multiple images with one click
Cons
With $99 price tag, Luminar is certainly expensive
In the beginning, you may find the user interface a bit overwhelming
04 Fotor
![]()
Fotor is also an online editing tool that can be used to animate your logos online for free. Being a simple online editor, you can’t expect Fotor to offer advanced editing features like some of the other tools we have mentioned in the list.
However, stay assured that when it comes to animating logos, Fotor has everything you’ll need to get the job done. The web-based tool offers 100,000 templates that are designed for different industries. You can choose any of these templates, customize them, and create bespoke animated logos for your brand.
Key Features:
● Different templates to choose from
● Easy drag-&-drop compatibility
● Ideal for first-time as well as professional users
Pros
Available for free
Perfect for social media managers
Customizable templates
Cons
Lacks advanced editing support
The premium version doesn’t have too many useful features
Key Takeaways from This Episode
● Animate your logo in Photoshop and make it visually appealing with 5-easy steps
● If you want to integrate your animated logo into a video, you can use Wondershare Filmora Pro to get the job done within a few minutes
● If you are a beginner, you can also use web-based editing tools to animate your logo online for free.
Best 15 Anime Fonts-Find Your Favorite One
Best 15 Anime Fonts-Find Your Favorite One

Shanoon Cox
Mar 27, 2024• Proven solutions
Anime is basically a fancy name for Japanese cartoons and is a trending genre for a long time. The popularity of these anime series has led fans to create characteristic font styles based on the logo or title of these series. A font such as this is commonly regarded as an anime font.
Since the anime font has a very distinct typeface and usually represents a theme, it is now widely used in video making, titles, posters, and also in games. The anime font can depict fun or thrill depending on which one you choose.
In this article, we have listed the best anime fonts of all time.
- Best 15 Anime Fonts You Can Choose
- Bonus Tip-Add Subtitle to an Anime Movie with Wondershare Filmora
Best 15 Anime Fonts You Can Choose
As anime is a trendy genre and you are likely to find a huge variety of anime font online. However, some of these fonts, based on the best-selling anime series, are sought after more than others. Therefore, we have rounded the ultimate anime font list for your ease.
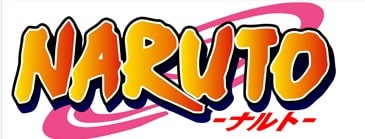
1. Naruto Font
As we all know the popular Japanese Manga series Naruto, this anime font is based on the logo of that series. It is a very simple brush stroke anime font but is designed very artistically. This free anime font is perfect for adding elegant yet animated fonts to various kinds of videos or content.
2. Anime Ace Font
Anime Ace is a free anime font that is part of Blambot’s Dialogue Collection by Nate Piekos. It is a cartoonish font that is perfect for use in comic books. This is designed to be used as the font for the character’s speech bubbles. Using this anime font can give a very comic-esque vibe to your creations, making them very attractive.

3. Death Note Font
The famous thrilling action series Death Note has a very characteristic font used. This has come to be known as the Death Note Font. As its origin is from a thriller series, this anime font is best for complementing horror and scary themes. An anime font like this one has a hair-rising and dramatic appeal to it.

4. Evangelion Font
Another famed television series released back in the 90s, Neon Genesis Evangelion, has been trending, and so is the anime font used in its titles. This bold and tightly packed anime font is very conventional and artistic. It can be used to complement some serious themes with a stylish anime font like this one. This anime font also gives a dramatic outlook and hence can be used for engaging titles.
5. Sailor Moon Font
Sailor Moon is a best-selling Manga series, and its distinctive fonts are also quite loved. There are total 3 fonts used in this series. The unique feature of these fonts is that they are all very stylish with a visually attractive appeal. This particular anime font is thus best suited for brand titles, posters, shopping bags, etc. As a free anime font, you can use it for various purposes, including utilizing it for making beautiful invitation cards.

6. Haikyuu Font
This anime font from the sports-based Manga series resembles Japanese calligraphy. It has a dramatic vibe that is well-suited for short titles for serious shows and content. You can also use this free anime font to give your content a striking introduction. Plus, this anime font is available as Regular as well Shadowed. So, you can choose the style that best fits the theme of your content.

7. Danganronpa font
A captivating anime font is featured in the Japanese video game, Danganronpa. This anime font has gained popularity as it is stylishly distinct with a thriller vibe linked to it. Since it is a free anime font and is easily available, it can help you craft very engaging and stunning content. It will serve to give your content a unique touch as this anime font has a very characteristic style.

8. My Hero Academia Font
My Hero Academia is a highly acclaimed superhero Manga series, and its font has also been used extensively. It presents a very attractive anime font that can be utilized in banners and posters since it has a very clean and simple typeface. This anime font is also well-suited for use in logos.
9. Pet Fonts
As the name suggests, this anime font is based on different animals. Cats, dogs, bunnies, and many other animals are used creatively as fonts. Using this cute and creative anime font gives a very crafty and artful effect to the content it is utilized in. So, Pets font is great to create a light-hearted and cartoonish outlook.
10. Otaku Rant Anime Font Family
The Otaku Rant Anime Font Family consists of 3 types i.e., Regular, Italic, and Bold. All these comic fonts are very simple yet elegant. This anime font family can be perfectly used for designing posters and covers, owing to its stylish appeal. Thus, it is a great anime font for making interesting content that wows the viewers.

11. Squealer Anime Font
The Squealer Anime Font is very artistic. It has a gothic calligraphic appeal to it. This unique and riveting anime font can be employed in designing posters to impress the audience. As this free anime font is very stylish, it can also be used commercially in crafting cards or posters.

12. Porky’s Font Comic Font
As the name suggests, this anime font is based on the 1980’s Classic movie ‘Porky.’ It presents a very fancy and artistic style. Therefore, it is widely used for blogs or fashion magazines, giving an attractive outlook. It is a fusion of ancient and conventional typography. This free anime font can help you give a beautiful look to your content.

13. Anime Inept
Anime Inept gives the look of a handwritten font, which makes the text more personalized. Since this anime font gives a distinct look, it makes any text stand out of the ordinary. Given the simplicity of this font, it is an excellent choice for comic texts or titles.

14. Pokemon Anime Font
We all know the world-famous Pokemon that has been a popular game and animated series. Its even catchier anime font has also been extensively used for various purposes. Since the Pokemon anime font has a clear and fun typeface, it is perfect for creating attractive stickers, advertisements, and similar titles.
15. Saiyan Sans Anime Font
Dragon Ball Z or Saiyan Sans is a fan-favorite anime series. This anime font is based on the fancy logo used in the Dragon Ball Z title. It is a very catchy and curvy anime font that adds a stylish appeal to the text. Owing to its fancy style, it is also suitable for use as overlay text on an image.
Bonus Tip-Add Subtitle to an Anime Movie with Wondershare Filmora
Wondershare Filmora is a very intuitive and easy-to-use video editor. It has powerful one-click tools to enable users to craft professional-grade videos effortlessly. In Filmora, you will find a wide array of catchy text templates that can be customized and animated to add further effects.


Here is a guide to add anime font to your videos using Filmora.
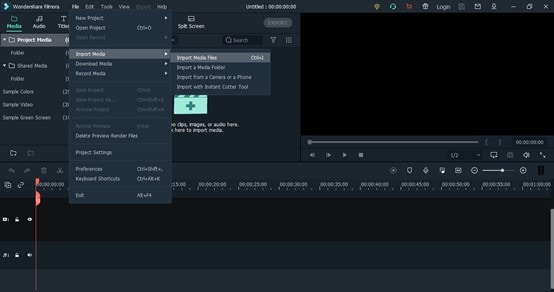
1. Download and install Filmora on your PC. To import your anime video, go to File and select Import Media Files or drag and drop it to Filmora.
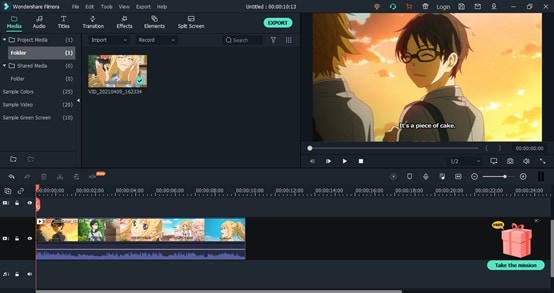
2. After importing, drag and drop the video to the timeline.
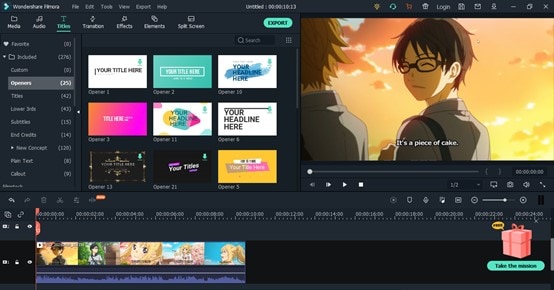
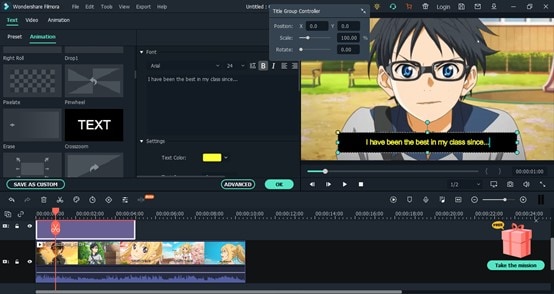
3. In the Titles tab, you can find a variety of text templates from different categories like Openers, Subtitles, Titles, etc. Double-click a title to it to the timeline. Drag and adjust the duration of the text. Double-click on the title in the timeline to customize it.
4. Here you can adjust the size, position, font, and other aspects of the text. Use the scale to change the size of the text.
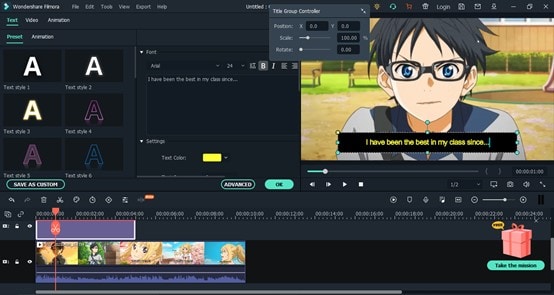
5. In the Animation tab, you can also add a special effect to the text, making it catchy and dynamic. Just double-click the animation to add it.
6. Click on Export. Select the resolution and export it to your device or share it to social media.

Conclusion
Now, you have the best 15 anime font list to help you craft exciting videos. Whether you wish to create a stylish fashion video with an elegant anime font, or a short horror clip with anime font from Death Note, you will find a free anime font for every theme here.
Since fonts play a significant role in any content, they must be chosen with care. So, give our list a read and find out which anime font complements your video the best. Don’t forget to try and add anime font subtitles to your video using the Filmora video editor.
Good luck!
Shanoon Cox
Shanoon Cox is a writer and a lover of all things video.
Follow @Shanoon Cox
Shanoon Cox
Mar 27, 2024• Proven solutions
Anime is basically a fancy name for Japanese cartoons and is a trending genre for a long time. The popularity of these anime series has led fans to create characteristic font styles based on the logo or title of these series. A font such as this is commonly regarded as an anime font.
Since the anime font has a very distinct typeface and usually represents a theme, it is now widely used in video making, titles, posters, and also in games. The anime font can depict fun or thrill depending on which one you choose.
In this article, we have listed the best anime fonts of all time.
- Best 15 Anime Fonts You Can Choose
- Bonus Tip-Add Subtitle to an Anime Movie with Wondershare Filmora
Best 15 Anime Fonts You Can Choose
As anime is a trendy genre and you are likely to find a huge variety of anime font online. However, some of these fonts, based on the best-selling anime series, are sought after more than others. Therefore, we have rounded the ultimate anime font list for your ease.
1. Naruto Font
As we all know the popular Japanese Manga series Naruto, this anime font is based on the logo of that series. It is a very simple brush stroke anime font but is designed very artistically. This free anime font is perfect for adding elegant yet animated fonts to various kinds of videos or content.
2. Anime Ace Font
Anime Ace is a free anime font that is part of Blambot’s Dialogue Collection by Nate Piekos. It is a cartoonish font that is perfect for use in comic books. This is designed to be used as the font for the character’s speech bubbles. Using this anime font can give a very comic-esque vibe to your creations, making them very attractive.
3. Death Note Font
The famous thrilling action series Death Note has a very characteristic font used. This has come to be known as the Death Note Font. As its origin is from a thriller series, this anime font is best for complementing horror and scary themes. An anime font like this one has a hair-rising and dramatic appeal to it.
4. Evangelion Font
Another famed television series released back in the 90s, Neon Genesis Evangelion, has been trending, and so is the anime font used in its titles. This bold and tightly packed anime font is very conventional and artistic. It can be used to complement some serious themes with a stylish anime font like this one. This anime font also gives a dramatic outlook and hence can be used for engaging titles.
5. Sailor Moon Font
Sailor Moon is a best-selling Manga series, and its distinctive fonts are also quite loved. There are total 3 fonts used in this series. The unique feature of these fonts is that they are all very stylish with a visually attractive appeal. This particular anime font is thus best suited for brand titles, posters, shopping bags, etc. As a free anime font, you can use it for various purposes, including utilizing it for making beautiful invitation cards.
6. Haikyuu Font
This anime font from the sports-based Manga series resembles Japanese calligraphy. It has a dramatic vibe that is well-suited for short titles for serious shows and content. You can also use this free anime font to give your content a striking introduction. Plus, this anime font is available as Regular as well Shadowed. So, you can choose the style that best fits the theme of your content.
7. Danganronpa font
A captivating anime font is featured in the Japanese video game, Danganronpa. This anime font has gained popularity as it is stylishly distinct with a thriller vibe linked to it. Since it is a free anime font and is easily available, it can help you craft very engaging and stunning content. It will serve to give your content a unique touch as this anime font has a very characteristic style.
8. My Hero Academia Font
My Hero Academia is a highly acclaimed superhero Manga series, and its font has also been used extensively. It presents a very attractive anime font that can be utilized in banners and posters since it has a very clean and simple typeface. This anime font is also well-suited for use in logos.
9. Pet Fonts
As the name suggests, this anime font is based on different animals. Cats, dogs, bunnies, and many other animals are used creatively as fonts. Using this cute and creative anime font gives a very crafty and artful effect to the content it is utilized in. So, Pets font is great to create a light-hearted and cartoonish outlook.
10. Otaku Rant Anime Font Family
The Otaku Rant Anime Font Family consists of 3 types i.e., Regular, Italic, and Bold. All these comic fonts are very simple yet elegant. This anime font family can be perfectly used for designing posters and covers, owing to its stylish appeal. Thus, it is a great anime font for making interesting content that wows the viewers.
11. Squealer Anime Font
The Squealer Anime Font is very artistic. It has a gothic calligraphic appeal to it. This unique and riveting anime font can be employed in designing posters to impress the audience. As this free anime font is very stylish, it can also be used commercially in crafting cards or posters.
12. Porky’s Font Comic Font
As the name suggests, this anime font is based on the 1980’s Classic movie ‘Porky.’ It presents a very fancy and artistic style. Therefore, it is widely used for blogs or fashion magazines, giving an attractive outlook. It is a fusion of ancient and conventional typography. This free anime font can help you give a beautiful look to your content.
13. Anime Inept
Anime Inept gives the look of a handwritten font, which makes the text more personalized. Since this anime font gives a distinct look, it makes any text stand out of the ordinary. Given the simplicity of this font, it is an excellent choice for comic texts or titles.
14. Pokemon Anime Font
We all know the world-famous Pokemon that has been a popular game and animated series. Its even catchier anime font has also been extensively used for various purposes. Since the Pokemon anime font has a clear and fun typeface, it is perfect for creating attractive stickers, advertisements, and similar titles.
15. Saiyan Sans Anime Font
Dragon Ball Z or Saiyan Sans is a fan-favorite anime series. This anime font is based on the fancy logo used in the Dragon Ball Z title. It is a very catchy and curvy anime font that adds a stylish appeal to the text. Owing to its fancy style, it is also suitable for use as overlay text on an image.
Bonus Tip-Add Subtitle to an Anime Movie with Wondershare Filmora
Wondershare Filmora is a very intuitive and easy-to-use video editor. It has powerful one-click tools to enable users to craft professional-grade videos effortlessly. In Filmora, you will find a wide array of catchy text templates that can be customized and animated to add further effects.
Here is a guide to add anime font to your videos using Filmora.
1. Download and install Filmora on your PC. To import your anime video, go to File and select Import Media Files or drag and drop it to Filmora.
2. After importing, drag and drop the video to the timeline.
3. In the Titles tab, you can find a variety of text templates from different categories like Openers, Subtitles, Titles, etc. Double-click a title to it to the timeline. Drag and adjust the duration of the text. Double-click on the title in the timeline to customize it.
4. Here you can adjust the size, position, font, and other aspects of the text. Use the scale to change the size of the text.
5. In the Animation tab, you can also add a special effect to the text, making it catchy and dynamic. Just double-click the animation to add it.
6. Click on Export. Select the resolution and export it to your device or share it to social media.
Conclusion
Now, you have the best 15 anime font list to help you craft exciting videos. Whether you wish to create a stylish fashion video with an elegant anime font, or a short horror clip with anime font from Death Note, you will find a free anime font for every theme here.
Since fonts play a significant role in any content, they must be chosen with care. So, give our list a read and find out which anime font complements your video the best. Don’t forget to try and add anime font subtitles to your video using the Filmora video editor.
Good luck!
Shanoon Cox
Shanoon Cox is a writer and a lover of all things video.
Follow @Shanoon Cox
Best 12 Video to GIF Converters [High Quality] to Check Out
Top 12 Video to GIF Converters [High Quality] to Check Out
An easy yet powerful editor
Numerous effects to choose from
Detailed tutorials provided by the official channel
GIFs are images with looping animations for a few seconds and are used a lot over social media sites and other online platforms. There are several sites from where you can download readymade GIFs.
Alternatively, there are countless tools using which customized GIFs can be created from videos. So, if you too are looking for video to GIF converter high quality keep reading.
In this article
01 [The Difference Between A Video And A Gif](#Part 1)
02 [Top 12 Video to GIF Converters](#Part 2)
Part 1 The Difference Between A Video And A Gif
A GIF is a lot in use these days over social media platforms, and other online sites. Standing for Graphics Interchange Format, a GIF is basically a looping animation or a video that has a sequence of frames or images.
Though a lot of people can consider a GIF as a short video, there are a few key differences between the two. The first one lies in the name extension. A GIF file is saved as .gif while a video can be saved into several formats like .mp4, .mov, and more.
A video contains visual information having good quality frames as well as sound while a GIF is a short animation that uses some specific information created from a sequence of frames. Moreover, a GIF does not have a sound and the size is also very small.
Part 2 Top 12 Video to GIF Converters
An array of online and desktop tools is available to convert video to GIF high quality. We have shortlisted the top ones as below.
01** Wondershare Filmora Video Editor
If you are looking for software that lets you create an excellent GIF in a hassle-free manner, Wondershare Filmora is the best choice. This professional software comes with multiple editing and customization capabilities for creating a desired animated file. You can not only create GIFs, but perform a host of additional functions using the tool like video editing, music editing, and more. Once downloaded on your Windows or Mac systems, the software is all set to work as desired without any limitations.
Wondershare Filmora
Get started easily with Filmora’s powerful performance, intuitive interface, and countless effects Try It Free Try It Free Learn More >

Pros:
● Support to almost all media formats for high quality video to GIF conversion.
● A wide range of editing and customization options are supported.
● Works as a complete video editing tool.
Cons:
● Paid software
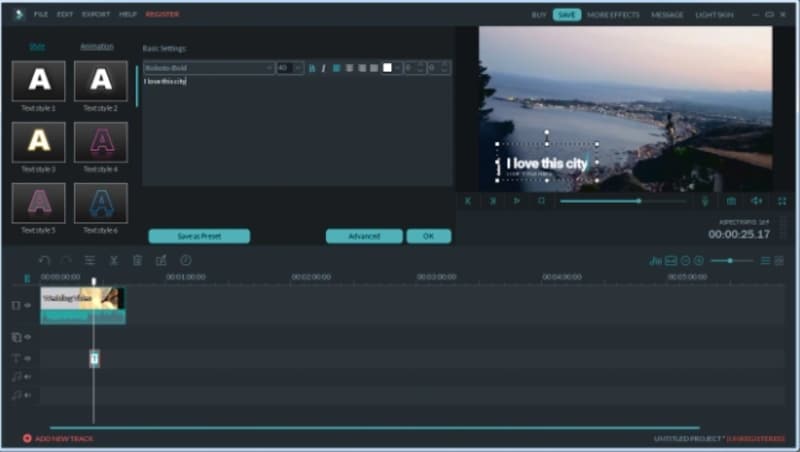
02Giphy
When it comes to GIFs, GIPHY is one of the most widely used tools. The tool allows you to create GIFs not only from the locally saved videos but also from YouTube, Vimeo, and other third-party platforms. There are multiple features for creating GIFs using this tool like selecting the length of the GIF, adding captions, text, frame of the GIF, and more. Not only videos, but the software also allows creating GIFs using multiple static photos.
Pros:
● Create GIFs from local as well as online videos
● User-friendly interface
● Support to multiple platforms and OS
Cons:
● The searching function is not very effective.
● Need to sign-up to use the tool.
03Adobe Creative Cloud Express
This is a free video conversion tool that allows creating a GIF from videos in an array of formats. The tool gives you the freedom to choose your GIF size option that includes square, portrait, and landscape. Additionally, you can also select the quality of the GIF. Tools for adjusting and editing several parameters of the GIF are also supported by the software.
Pros:
● Allows creating GIFs in 3 size and multiple quality
● Created GIFs can be shared directly to social networking sites.
● Several editing options are available.
Cons:
● Issues of lags and bugs occasionally
● There are no guides
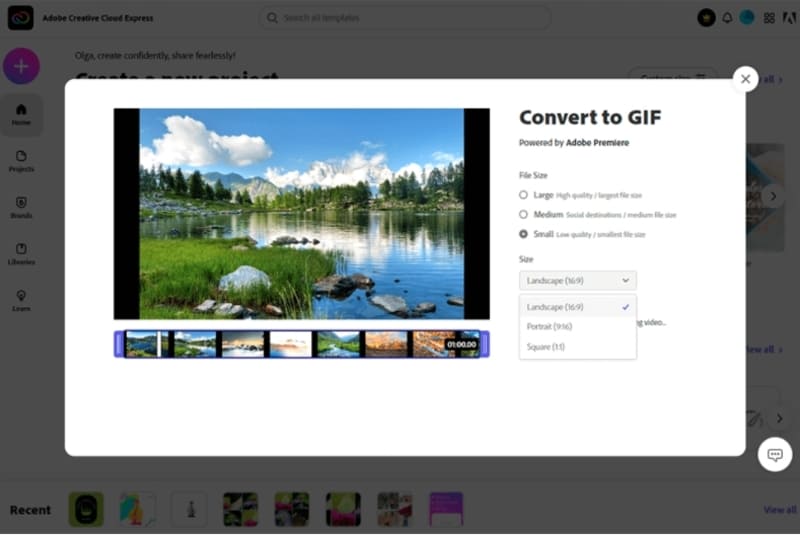
04Movavi
This is a reliable and widely used video editing tool that supports multiple functions including video to GIF conversion. Several useful functions are supported by the software like batch file processing, easy and quick GIF creation, editing options, and more. The tool is available for multiple platforms as well as for different OS.
Pros:
● Support to a wide range of formats
● Multiple editing options
● Available for different platforms and OS
Cons:
● Need to purchase the software after the limited trial period expires.
● The rendering is slow.
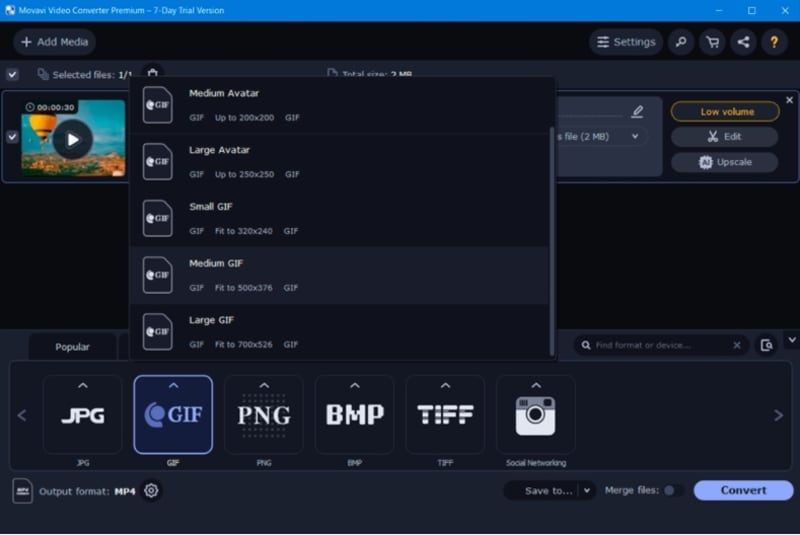
05MakeAGIF
As the name suggests this software is a GIF-making tool that not only converts your videos into a GIF but virtually anything like a collection of pictures, YouTube clips, Facebook clips, and much more. Using the tool you can add captions, stickers, and a lot of other filters to the created GIF. You can even adjust the speed of the GIF and also select the start and the stop time.
Pros:
● Allows creating a GIF from videos, images, URLs, clips, and others.
● Multiple options for GIF customization are available.
● Offers a huge library of GIFs as well.
Cons:
● The free version processes files with a watermark.
● The site has annoying ads.
06Freemore Video to GIF Converter
Using this software, videos can be converted into GIFs in a few simple steps. You can also select the frames and also adjust the height and the width of the frames as needed. All key video formats like MP4, MOV, MPEG, and others are supported by the tool. The interface of the tool is simple and the process of creating a GIF is fast.
Pros:
● Free to use software
● Support to multiple video formats
● Allows selecting the exact frames and the width and height of the GIF.
Cons:
● No support for Mac systems.
● Limited customization options as compared to other sites.
07VideoSolo Video Converter Ultimate
Multiple options for creating a GIF are supported by this software that also lets you convert your videos as well as edit them. Using the editing options, you can choose a specific part of the clip, trim a longer video, or can also join multiple clips for creating a GIF. Using the software you can adjust the color grading, saturation, contrast, and other parameters. Also, you can add a picture or text to the GIF to make it look interesting.
Pros:
● Support to a wide range of formats
● Multiple editing options.
● Fast processing speed.
Cons:
● Locating features can be a complicated task.
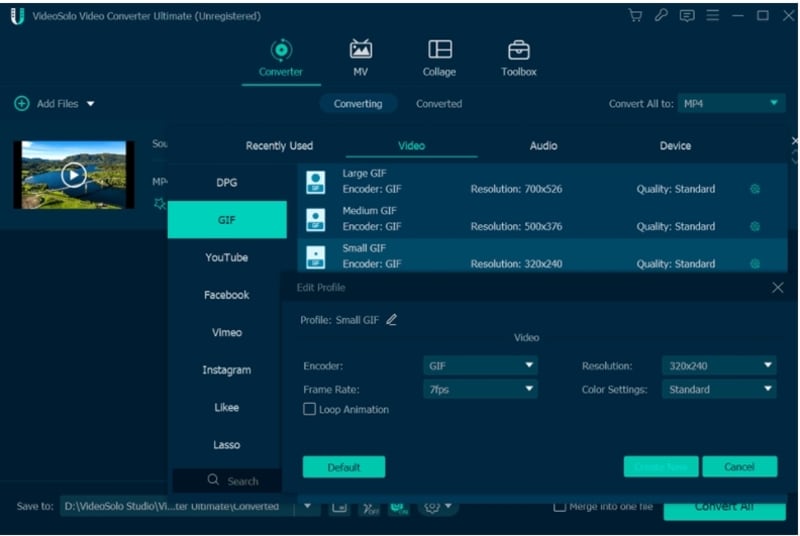
08Ezgif
This is a free online tool for creating GIFs and needs no software download or installation. Simple to use, the program allows adding videos in key formats like MP4, MOV, 3GP, and others for creating a GIF. Local video as well as its URL can be added. The tool allows to trim the unnecessary parts of the video and if not specified the GIF is created using the first 5 seconds of the file.
Pros:
● Free to use online tool.
● Add local videos or online URLs for creating a GIF.
● Allows to trim and crop the added files.
Cons:
● Internet dependency
● The maximum supported file size is 100MB.
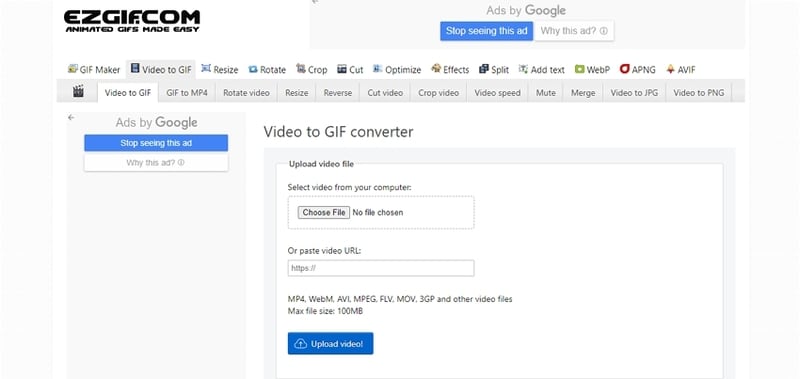
09FlexClip GIF Maker
Using this browser-based tool, videos and images can be quickly converted to GIFs. All the popular media formats are supported by the tool for processing and the interface is user-friendly. Transitions and captions can also be added to GIFs to make them eye-catchy. Other customization options include adjusting the frame, speed, and other parameters.
● No software download or installation is needed.
● Support a wide range of formats.
● Multiple customization options are supported.
Cons:
● Limitation to the video size that can be added.
● Dependency on internet connectivity.
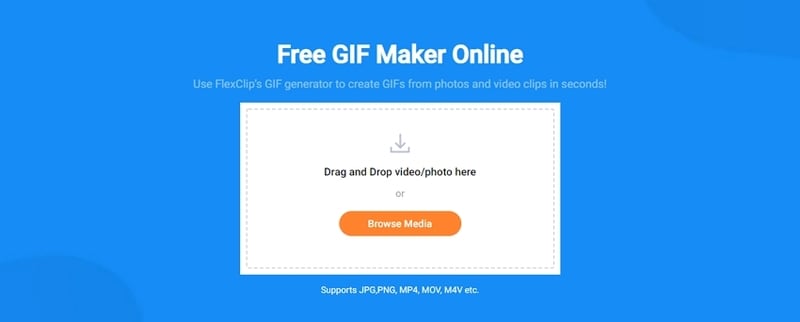
10Convertio
This is a popular online tool that supports video conversion to an array of formats including GIF. Not only local, videos from Google Drive as well as Dropbox can also be added to the interface for processing. If you want a simple tool to create a GIF without much customization and editing, Convertio is the best. The processed files can be saved to the local device or cloud storage.
Pros:
● Add videos from the local device, Google Drive, as well as Dropbox.
● Simple user-interface.
● Processed files can be downloaded and saved to the system as well as the cloud.
Cons:
● The file size limitation of 100MB.
● No option to edit or choose any file specification.
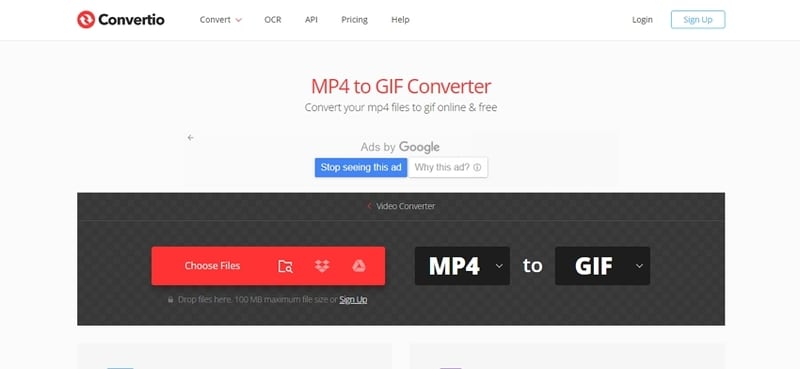
11Zamzar
For a free and quick conversion of videos to GIF, this is an excellent online tool to consider. The process is user-friendly where you just have to add the video or its link and choose GIF as the target format. The tool will automatically convert the added video to a GIF that can be downloaded to the system or can also be sent through an email.
Pros:
● Free and simple to use the tool.
● Support to multiple video formats.
● Processed GIFs can be saved locally or the link can be sent through an email.
Cons:
● Maximum file size support is 50MB.
● No option for selecting any file parameters.
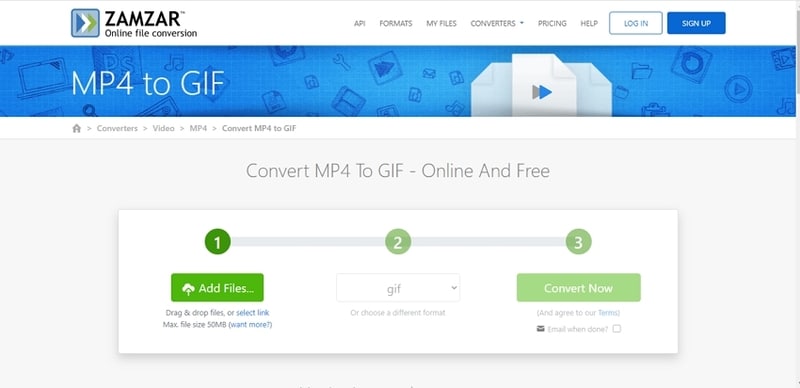
12ImgFlip
Using this online tool, videos and images can be converted to a GIF file quickly. You can either add the media files from your system or also use their link. The tool supports multiple editing and customization options like selecting the size, trimming the video, selecting FPS, adding titles, rotating, and more. You can also save the template of the created file for future use.
Pros:
● GIFs can be created from videos and images.
● Multiple file customization and editing options are supported.
● Multiple options to save, download, and share the created GIF.
Cons:
● The file size limitation of 100MB.
● Internet dependency.
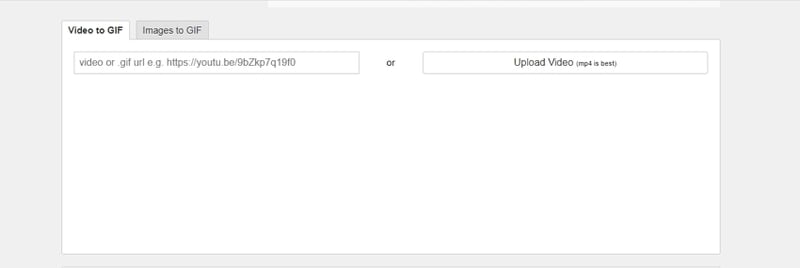
● Key Takeaways from This Episode →
●GIFs are a lot in use these days to express emotion, feelings, or a situation.
●There are several online as well as desktop tools available to convert video to GIF without losing quality.
●Wondershare Filmora is one of the best tools in the category that is simple yet functional and results in high-quality GIF files.
GIFs are images with looping animations for a few seconds and are used a lot over social media sites and other online platforms. There are several sites from where you can download readymade GIFs.
Alternatively, there are countless tools using which customized GIFs can be created from videos. So, if you too are looking for video to GIF converter high quality keep reading.
In this article
01 [The Difference Between A Video And A Gif](#Part 1)
02 [Top 12 Video to GIF Converters](#Part 2)
Part 1 The Difference Between A Video And A Gif
A GIF is a lot in use these days over social media platforms, and other online sites. Standing for Graphics Interchange Format, a GIF is basically a looping animation or a video that has a sequence of frames or images.
Though a lot of people can consider a GIF as a short video, there are a few key differences between the two. The first one lies in the name extension. A GIF file is saved as .gif while a video can be saved into several formats like .mp4, .mov, and more.
A video contains visual information having good quality frames as well as sound while a GIF is a short animation that uses some specific information created from a sequence of frames. Moreover, a GIF does not have a sound and the size is also very small.
Part 2 Top 12 Video to GIF Converters
An array of online and desktop tools is available to convert video to GIF high quality. We have shortlisted the top ones as below.
01** Wondershare Filmora Video Editor
If you are looking for software that lets you create an excellent GIF in a hassle-free manner, Wondershare Filmora is the best choice. This professional software comes with multiple editing and customization capabilities for creating a desired animated file. You can not only create GIFs, but perform a host of additional functions using the tool like video editing, music editing, and more. Once downloaded on your Windows or Mac systems, the software is all set to work as desired without any limitations.
Wondershare Filmora
Get started easily with Filmora’s powerful performance, intuitive interface, and countless effects Try It Free Try It Free Learn More >
Pros:
● Support to almost all media formats for high quality video to GIF conversion.
● A wide range of editing and customization options are supported.
● Works as a complete video editing tool.
Cons:
● Paid software
02Giphy
When it comes to GIFs, GIPHY is one of the most widely used tools. The tool allows you to create GIFs not only from the locally saved videos but also from YouTube, Vimeo, and other third-party platforms. There are multiple features for creating GIFs using this tool like selecting the length of the GIF, adding captions, text, frame of the GIF, and more. Not only videos, but the software also allows creating GIFs using multiple static photos.
Pros:
● Create GIFs from local as well as online videos
● User-friendly interface
● Support to multiple platforms and OS
Cons:
● The searching function is not very effective.
● Need to sign-up to use the tool.
03Adobe Creative Cloud Express
This is a free video conversion tool that allows creating a GIF from videos in an array of formats. The tool gives you the freedom to choose your GIF size option that includes square, portrait, and landscape. Additionally, you can also select the quality of the GIF. Tools for adjusting and editing several parameters of the GIF are also supported by the software.
Pros:
● Allows creating GIFs in 3 size and multiple quality
● Created GIFs can be shared directly to social networking sites.
● Several editing options are available.
Cons:
● Issues of lags and bugs occasionally
● There are no guides
04Movavi
This is a reliable and widely used video editing tool that supports multiple functions including video to GIF conversion. Several useful functions are supported by the software like batch file processing, easy and quick GIF creation, editing options, and more. The tool is available for multiple platforms as well as for different OS.
Pros:
● Support to a wide range of formats
● Multiple editing options
● Available for different platforms and OS
Cons:
● Need to purchase the software after the limited trial period expires.
● The rendering is slow.
05MakeAGIF
As the name suggests this software is a GIF-making tool that not only converts your videos into a GIF but virtually anything like a collection of pictures, YouTube clips, Facebook clips, and much more. Using the tool you can add captions, stickers, and a lot of other filters to the created GIF. You can even adjust the speed of the GIF and also select the start and the stop time.
Pros:
● Allows creating a GIF from videos, images, URLs, clips, and others.
● Multiple options for GIF customization are available.
● Offers a huge library of GIFs as well.
Cons:
● The free version processes files with a watermark.
● The site has annoying ads.
06Freemore Video to GIF Converter
Using this software, videos can be converted into GIFs in a few simple steps. You can also select the frames and also adjust the height and the width of the frames as needed. All key video formats like MP4, MOV, MPEG, and others are supported by the tool. The interface of the tool is simple and the process of creating a GIF is fast.
Pros:
● Free to use software
● Support to multiple video formats
● Allows selecting the exact frames and the width and height of the GIF.
Cons:
● No support for Mac systems.
● Limited customization options as compared to other sites.
07VideoSolo Video Converter Ultimate
Multiple options for creating a GIF are supported by this software that also lets you convert your videos as well as edit them. Using the editing options, you can choose a specific part of the clip, trim a longer video, or can also join multiple clips for creating a GIF. Using the software you can adjust the color grading, saturation, contrast, and other parameters. Also, you can add a picture or text to the GIF to make it look interesting.
Pros:
● Support to a wide range of formats
● Multiple editing options.
● Fast processing speed.
Cons:
● Locating features can be a complicated task.
08Ezgif
This is a free online tool for creating GIFs and needs no software download or installation. Simple to use, the program allows adding videos in key formats like MP4, MOV, 3GP, and others for creating a GIF. Local video as well as its URL can be added. The tool allows to trim the unnecessary parts of the video and if not specified the GIF is created using the first 5 seconds of the file.
Pros:
● Free to use online tool.
● Add local videos or online URLs for creating a GIF.
● Allows to trim and crop the added files.
Cons:
● Internet dependency
● The maximum supported file size is 100MB.
09FlexClip GIF Maker
Using this browser-based tool, videos and images can be quickly converted to GIFs. All the popular media formats are supported by the tool for processing and the interface is user-friendly. Transitions and captions can also be added to GIFs to make them eye-catchy. Other customization options include adjusting the frame, speed, and other parameters.
● No software download or installation is needed.
● Support a wide range of formats.
● Multiple customization options are supported.
Cons:
● Limitation to the video size that can be added.
● Dependency on internet connectivity.
10Convertio
This is a popular online tool that supports video conversion to an array of formats including GIF. Not only local, videos from Google Drive as well as Dropbox can also be added to the interface for processing. If you want a simple tool to create a GIF without much customization and editing, Convertio is the best. The processed files can be saved to the local device or cloud storage.
Pros:
● Add videos from the local device, Google Drive, as well as Dropbox.
● Simple user-interface.
● Processed files can be downloaded and saved to the system as well as the cloud.
Cons:
● The file size limitation of 100MB.
● No option to edit or choose any file specification.
11Zamzar
For a free and quick conversion of videos to GIF, this is an excellent online tool to consider. The process is user-friendly where you just have to add the video or its link and choose GIF as the target format. The tool will automatically convert the added video to a GIF that can be downloaded to the system or can also be sent through an email.
Pros:
● Free and simple to use the tool.
● Support to multiple video formats.
● Processed GIFs can be saved locally or the link can be sent through an email.
Cons:
● Maximum file size support is 50MB.
● No option for selecting any file parameters.
12ImgFlip
Using this online tool, videos and images can be converted to a GIF file quickly. You can either add the media files from your system or also use their link. The tool supports multiple editing and customization options like selecting the size, trimming the video, selecting FPS, adding titles, rotating, and more. You can also save the template of the created file for future use.
Pros:
● GIFs can be created from videos and images.
● Multiple file customization and editing options are supported.
● Multiple options to save, download, and share the created GIF.
Cons:
● The file size limitation of 100MB.
● Internet dependency.
● Key Takeaways from This Episode →
●GIFs are a lot in use these days to express emotion, feelings, or a situation.
●There are several online as well as desktop tools available to convert video to GIF without losing quality.
●Wondershare Filmora is one of the best tools in the category that is simple yet functional and results in high-quality GIF files.
Ultimate Guide to Animated Characters Drawings
Interesting Fundamentals and Ultimate Guide to Animated Characters Drawings
An easy yet powerful editor
Numerous effects to choose from
Detailed tutorials provided by the official channel
Cartoon character have stamped their faces in our hearts from childhood. A cartoon artist represents a cartoon or a natural person’s unique features with simple shapes accurately to recognize the person with the drawing and does not require a lot of patience to do this. The goal of the cartoon is to attract, and the child should get attracted when they see a cartoon image as well as adults. Though the sparkle may appear a little dull, it remains unaltered.
Let us grab a chance to recreate our cartoon characters with easy tutorials about animated characters to draw. In addition to that, you will learn about basic drawing exercises to lead into cool animated characters to draw through this guide in a step-by-step manner.
In this article
01 [What Do I Need to Start Learning Animated Characters Drawings?](#Part 1)
02 [6 Cartoon Characters that Anyone Can Draw (Provided with Free Video Tutorials)](#Part 2)
03 [4 Best Drawing Exercises for Creating Cartoon Characters](#Part 3)
Part 1 What Do I Need to Start Learning Animated Characters Drawings?
There are many software’s available, and anyone can create an animated character drawing, but still, the art of creating a perfect character needs a master. You don’t have to be a Disney-grade animator to make it; start with simple minor characters. Animation is the art of bringing a 3D illustrated cartoon into life. It is created by projecting a sequence of images one after the other immediately. Let us discuss the essential things you need to note before animating characters.
●Timeline is the most important for animation. Depending on the software, you have various options to change the duration and add effects.
●Animation is generally preferable in 24 frames per second, which means the total number of people in the frame for one second.
●There are two types of working they are one’s and two’s. 2D Animation is usually done in two’s, whereas 3D Animation is in one’s.
●In hand-drawn animations, keyframes are more critical to maintain. The keyframe is the position for the cartoon as per animator has decided.
●Breakdowns combine one or two keyframes, which decide the motion in between the keys.
●In-betweens are all the frames that come between to smooth the motion—automatically generated by the computer to move from key to key.
●Composting is creating or joining two or more images to create a single cartoon frame.
Part 2 6 Cartoon Characters that Anyone can Draw (With free Video Tutorials)
We will discuss animated characters to draw in hand. There are many cartoon characters, but we will look into six cartoon character drawings with their tutorial videos.
01 Smurfette
Smurfette stands out as the lone female Smurf in the entire bunch of blue critters around the village area. One of the rare designs with long hair and a dress is hers. Her design is a lot of fun to sketch.
So, in general, it’s best to work through the lesson as is, then turn it into Brainy, Papa, Joker, or even Smurf.
01Angelica Pickles
Angelica Pickles is one of the most challenging characters to depict from The Rugrats. But her design is so intricate that getting it proper will give you a true sense of accomplishment. Her pigtails, like her leggings, might be challenging to master, so keep practicing.
03Yogi Bear
Yogi Bear is a cartoon character on the sweeter side of the comic animal variety. Yogi Bear is a beloved character from Jellystone Park. As long as you get his tie and collar just right, this guy is a breeze to draw.
04Magilla Gorilla
Magilla Gorilla is another bizarre creature from Hanna-catalog. Barbera’s Because he comes with a bow tie, a little cap, and suspenders, this design is a little more complicated. Not to mention his enormous clown shoes. These small details can be a pain to draw, but Magilla is a very charming gorilla.
05Top Cat
Even further back in time, in the 1960s, there was the ever-popular Top Cat. He’s wearing a cap and a button-down vest, and he’s making some reasonably fancy dances. Give Top Cat a shot if you like The Flintstones’ basic Hanna-Barbera art style.
<
06Helga. G. Pataki
Helga is another character with some wacky hair. There’s a lot that’s bizarre about her. And half the fun of drawing her is figuring out how to do it. Just keep an eye on her head since getting it correct, especially with her rectangle hairdo, can be a little odd.
These are some of the cool animated characters to draw.
Part 3 4 Best Drawing Exercise for Creating Cartoon Characters
You’ll learn how to create cartoon characters individually, including their faces, hair, and facial expressions.
01How to Draw Cartoon Characters
We’ll go through the fundamentals of human perception before getting into cartoon face drawing. Humans have a unique ability to synthesize the details that make up a structure or object in highly complicated ways into fundamental and simple ones. We can express everything with a few curves and geometric forms in this way. In cartoon face, we need to identify the character just by looking like looking at the below picture a girl and a boy.
02Here, you will learn How to Draw a Cartoon Face
Let us begin with a sketch of a cartoon face. A circle is a basic cartoon shape. All you need is a circle. As seen in the image below, draw a vertical and horizontal line intersecting at the center.
Let us have a look at how to make cartoon eyeballs. Draw an oval shape with a slight lean to the side at the top for the eyes. Repeat on the other side.
Slightly thicken the characteristic to represent our character eyelashes at the top of the circle, place the brows above the eyelashes to create a shocking appearance, draw both pupils to the center in the same direction.
When creating a nose from the front, it’s typical to leave off many details. Even if you merely sketch its tip, it will likely provide a convincing impact. Drawing only one side of the nose is also quite frequent. Children’s mouths are extremely simple in cartoon style, regardless of gender.
The ears are viewed from the front; therefore, the internal holes are not visible. The circle has already established the shape of our head.
03Let’s learn about How to Draw a Cartoon Hair
Keep in mind that our characters’ hair is essential for identifying their personalities, and it can also indicate their age. So, all we need is an effortless and playful haircut to bring our boy to life. Because there is no particular method for drawing hair, you’ll have to experiment until you find the perfect look. Look for photo references on the internet! Take a look at a magazine shoot or a Google search.
03How to Draw Characters with different Facial Expressions
By simply following the instructions below, you’ll notice that you can completely transform his expression: Lowering one brow and raising the other, eyelashes are used to cut the eyes in half, putting a smile on the face one side is higher.
To stay under the eyelashes, move the eye pupils up. That’s all there is to it! With just a few tweaks, we achieved the desired result. The circular form of the eyes, hair, ears, nose, chin and the circular shape of the ears are all the same! It’s that simple!
While working in cartooning or video making, Wondershare Wondershare Filmora Video Editor comes out with pros in mind, which can effortlessly convert conventional films into cartoon videos. If you want greater control over your cartoon video, you may also use keyframing to create it. You can fine-tune the parameters in Effects to achieve the best results. You can even change the Animation color after it has been created. It also allows you to use different text themes to showcase your videos.
We propose Wondershare Filmora Video Editor , in this case, to create animation videos by adding keyframes, resulting in a smooth and natural animation. To get started with Animation, all you need is a white plane. Aside from that, color correction and an audio mixer will take your animation video to the next level.
For Win 7 or later (64-bit)
For macOS 10.12 or later
● Key Takeaways from This Episode →
● Learn what are the key elements to make animation videos using software
● Tutorial on how to draw a cartoon character accurately
● In comparison, Wondershare Wondershare Filmora Video Editor is superior in making animation videos.
10 Top Tools to Make Pic Collage for Windows
10 Best Tools to Make Pic Collage for Windows
An easy yet powerful editor
Numerous effects to choose from
Detailed tutorials provided by the official channel
Collages are a great way to assemble all your favorite pictures in one place. You can share these collages with your friends, relatives, and dear ones or can also use them for posting on social media sites and other online platforms. Though creating a collage may sound simple, a lot of considerations need to be taken for creating an interesting and eye-catchy collage, and for this, a help of a professional tool can be taken. In the following parts of the topic, you can learn about the best tools for photo collage Windows 10 and other OS.

In the following parts of the topic, you can learn about the best tools for photo collage Windows 10 and other OS.
In this article
01 [Top 10 Pic Collage for Windows Tools](#Part 1)
02 [The Best Tool to Get Stock Images for Creating Collages](#Part 2)
Part 1 Top 10 Pic Collage for Windows Tools
Checkout the best collage for Windows below.
01PhotoPad Photo Editing Software
This is a complete photo editing tool supporting an array of features including the creation of a photo collage. This software from NCH software can let you add the desired images manually and also support using the auto grid to add an unlimited number of pictures. The tool also lets you choose the collage orientation size and set the background as needed.
Pros:
● Create collage Windows manually or automatically.
● Allows adding a background color, image, or from the available background options.
● Spacing and corners between the images can be selected.
● The size of the tool is small.
Cons:
● Stickers and filters to individual images cannot be added.
● Cannot choose a custom collage size.

02PhotoScapeX
Available for download on Windows 10 and higher versions this is another widely used photo editing tool that can also let you create collages manually as well as automatically. Multiple frames are available that can be selected as desired and there are additional features like adding filters, and also edit them in multiple ways.
Pros:
● Allows creating collage manually and automatically.
● Multiple editing tools for customization like filters, crop, zoom, doodle, and more.
● Picture alignment can be done in 3 modes- vertical, horizontal, and tile.
● Option to change and customize image size, spacing, margin, and others.
Cons:
● Limited photos can be added.
● The size of the tool is large in comparison to other tools.

03Phototastic Collage
This is free to use Windows-based tool that can create impressive collages in no time. Multiple designs, frames, and other options are available to create a customized collage as needed.
Pros:
● Multiple customization options are available for creating the desired collage.
● User-friendly and simple interface.
● An array of templates is available.
Cons:
● The free version has limited features.
● Limitation to the number of images that can be added.
● Ads in the app.

04PicCollage
Unleash your creativity by creating an interesting collage using this excellent collage-making app. There are multiple templates and customization options supports.
Pros
● Create collage manually or automatically
● The earlier created collage can be edited.
● Allows creating a collage in 3 options- grid, template, freestyle.
Cons
● Watermark on the created collage.
● The image size cannot be customized.

05Collage Maker-Photo Grid and Montage
Using this free Windows tool, you can create an interesting photo collage or a free-styled montage as needed. A wide range of layouts and templates are available that can be further customized to get the desired collage.
Pros:
● Free Windows software.
● Come with multiple filters, layout, and editing tools.
● The user interface is easy.
● Preview option available.
Cons:
● Performance glitches due to bugs.
● Custom collage size cannot be set.
● Watermark on the collage.

06Fotor
If you are looking for a simple and basic collage-making tool, Fotor is the right choice. Collage in the grid, freestyle, and photo-stitch style can be created and basic customization features are supported.
Pros:
● Simple to use tool that is apt for beginners.
● Border can be changed from a solid color to a background.
Cons:
● Customization options are limited.
● Border and the image size cannot be changed.

07El Collagero
Just like its name, this is an interesting Windows-based tool for creating a collage of your choice. A wide range of options for customization is available that can let you edit the images, choose a template and then also edit the file.
Pros:
● A wide range of templates and designs for collages is available.
● Allows adding text, symbols, and other elements.
● Created collage can be shared on social media sites.
Cons:
● In comparison to other professional tools, the functions are limited.

08Atlantas Photo Collage Studio
This Windows-based tool will let you create collages of all types and for all occasions. You can choose from over 100 templates that best match your collage theme and image content.
Pros:
● More than 100 templates for collage designs are available.
● The size of the layout can be changed.
● Multiple editing and customization options are supported like zoom, opacity selection, and more.
Cons:
● Limitation of adding 45 images.
● For the advanced functions, need to subscribe to the paid version.

09PhotoJoiner
Using this Windows tool, pick up your favorite images and turn them into a beautiful collage with customized design and style.
Pros:
● A simple and basic tool for creating a collage.
● Created collage can be saved or shared to the social media site.
● Change the order of the images, margins, and other aspects.
Cons
● Collage templates are limited.
● Advanced features are missing.

1010. Blend Photo
To create a collage of images with a blending effect, this is the right tool to use. Available for download on the Windows system this tool lets you create collages telling interesting stories.
Pros:
● Simple and easy collage-making tool.
● Add blending effect to your collages.
● Over 50 custom shapes for image cropping are available along with the option for free-hand cropping.
● Multiple filters can be added.
Cons:
● Limited Editing and customization options.

Part 2 The Best Tool to Get Stock Images for Creating Collages
Several times, the captured and stored images may not fit in the collage theme you wish to create and, in such situations, you can use the stock images available online at several sites. One of the best tools where you can check out the images in different categories is Wondershare Filmora. This versatile software from Wondershare Filmora Video Editor is an advanced video editing tool that also has a huge collection of stock media including images.
Additionally, the split-screen feature of the software can be used for creating a video collage. Available for Windows and Mac systems, Wondershare Filmora will look after all your advanced video editing and customized requirements.

Wondershare Filmora - Best Video Editor for Mac/Windows
5,481,435 people have downloaded it.
Build unique custom animations without breaking a sweat.
Focus on creating epic stories and leave the details to Filmora’s auto features.
Start a creative adventure with drag & drop effects and endless possibilities.
Filmora simplifies advanced features to save you time and effort.
Filmora cuts out repetition so you can move on to your next creative breakthrough.
● Key Takeaways from This Episode →
● Collage-making tools help in creating an interesting and eye-catchy collage in a hassle-free manner.
●Several Windows-based tools are available for quick download.
●Wondershare Filmora is a great software to find a collection of stock images in different categories.
Collages are a great way to assemble all your favorite pictures in one place. You can share these collages with your friends, relatives, and dear ones or can also use them for posting on social media sites and other online platforms. Though creating a collage may sound simple, a lot of considerations need to be taken for creating an interesting and eye-catchy collage, and for this, a help of a professional tool can be taken. In the following parts of the topic, you can learn about the best tools for photo collage Windows 10 and other OS.
In the following parts of the topic, you can learn about the best tools for photo collage Windows 10 and other OS.
In this article
01 [Top 10 Pic Collage for Windows Tools](#Part 1)
02 [The Best Tool to Get Stock Images for Creating Collages](#Part 2)
Part 1 Top 10 Pic Collage for Windows Tools
Checkout the best collage for Windows below.
01PhotoPad Photo Editing Software
This is a complete photo editing tool supporting an array of features including the creation of a photo collage. This software from NCH software can let you add the desired images manually and also support using the auto grid to add an unlimited number of pictures. The tool also lets you choose the collage orientation size and set the background as needed.
Pros:
● Create collage Windows manually or automatically.
● Allows adding a background color, image, or from the available background options.
● Spacing and corners between the images can be selected.
● The size of the tool is small.
Cons:
● Stickers and filters to individual images cannot be added.
● Cannot choose a custom collage size.
02PhotoScapeX
Available for download on Windows 10 and higher versions this is another widely used photo editing tool that can also let you create collages manually as well as automatically. Multiple frames are available that can be selected as desired and there are additional features like adding filters, and also edit them in multiple ways.
Pros:
● Allows creating collage manually and automatically.
● Multiple editing tools for customization like filters, crop, zoom, doodle, and more.
● Picture alignment can be done in 3 modes- vertical, horizontal, and tile.
● Option to change and customize image size, spacing, margin, and others.
Cons:
● Limited photos can be added.
● The size of the tool is large in comparison to other tools.
03Phototastic Collage
This is free to use Windows-based tool that can create impressive collages in no time. Multiple designs, frames, and other options are available to create a customized collage as needed.
Pros:
● Multiple customization options are available for creating the desired collage.
● User-friendly and simple interface.
● An array of templates is available.
Cons:
● The free version has limited features.
● Limitation to the number of images that can be added.
● Ads in the app.
04PicCollage
Unleash your creativity by creating an interesting collage using this excellent collage-making app. There are multiple templates and customization options supports.
Pros
● Create collage manually or automatically
● The earlier created collage can be edited.
● Allows creating a collage in 3 options- grid, template, freestyle.
Cons
● Watermark on the created collage.
● The image size cannot be customized.
05Collage Maker-Photo Grid and Montage
Using this free Windows tool, you can create an interesting photo collage or a free-styled montage as needed. A wide range of layouts and templates are available that can be further customized to get the desired collage.
Pros:
● Free Windows software.
● Come with multiple filters, layout, and editing tools.
● The user interface is easy.
● Preview option available.
Cons:
● Performance glitches due to bugs.
● Custom collage size cannot be set.
● Watermark on the collage.
06Fotor
If you are looking for a simple and basic collage-making tool, Fotor is the right choice. Collage in the grid, freestyle, and photo-stitch style can be created and basic customization features are supported.
Pros:
● Simple to use tool that is apt for beginners.
● Border can be changed from a solid color to a background.
Cons:
● Customization options are limited.
● Border and the image size cannot be changed.
07El Collagero
Just like its name, this is an interesting Windows-based tool for creating a collage of your choice. A wide range of options for customization is available that can let you edit the images, choose a template and then also edit the file.
Pros:
● A wide range of templates and designs for collages is available.
● Allows adding text, symbols, and other elements.
● Created collage can be shared on social media sites.
Cons:
● In comparison to other professional tools, the functions are limited.
08Atlantas Photo Collage Studio
This Windows-based tool will let you create collages of all types and for all occasions. You can choose from over 100 templates that best match your collage theme and image content.
Pros:
● More than 100 templates for collage designs are available.
● The size of the layout can be changed.
● Multiple editing and customization options are supported like zoom, opacity selection, and more.
Cons:
● Limitation of adding 45 images.
● For the advanced functions, need to subscribe to the paid version.
09PhotoJoiner
Using this Windows tool, pick up your favorite images and turn them into a beautiful collage with customized design and style.
Pros:
● A simple and basic tool for creating a collage.
● Created collage can be saved or shared to the social media site.
● Change the order of the images, margins, and other aspects.
Cons
● Collage templates are limited.
● Advanced features are missing.
1010. Blend Photo
To create a collage of images with a blending effect, this is the right tool to use. Available for download on the Windows system this tool lets you create collages telling interesting stories.
Pros:
● Simple and easy collage-making tool.
● Add blending effect to your collages.
● Over 50 custom shapes for image cropping are available along with the option for free-hand cropping.
● Multiple filters can be added.
Cons:
● Limited Editing and customization options.
Part 2 The Best Tool to Get Stock Images for Creating Collages
Several times, the captured and stored images may not fit in the collage theme you wish to create and, in such situations, you can use the stock images available online at several sites. One of the best tools where you can check out the images in different categories is Wondershare Filmora. This versatile software from Wondershare Filmora Video Editor is an advanced video editing tool that also has a huge collection of stock media including images.
Additionally, the split-screen feature of the software can be used for creating a video collage. Available for Windows and Mac systems, Wondershare Filmora will look after all your advanced video editing and customized requirements.
Wondershare Filmora - Best Video Editor for Mac/Windows
5,481,435 people have downloaded it.
Build unique custom animations without breaking a sweat.
Focus on creating epic stories and leave the details to Filmora’s auto features.
Start a creative adventure with drag & drop effects and endless possibilities.
Filmora simplifies advanced features to save you time and effort.
Filmora cuts out repetition so you can move on to your next creative breakthrough.
● Key Takeaways from This Episode →
● Collage-making tools help in creating an interesting and eye-catchy collage in a hassle-free manner.
●Several Windows-based tools are available for quick download.
●Wondershare Filmora is a great software to find a collection of stock images in different categories.
How to Make Slideshow in LinkedIn
How to Create Slideshow in LinkedIn
An easy yet powerful editor
Numerous effects to choose from
Detailed tutorials provided by the official channel
LinkedIn slideshows are interesting means of professional content presentations in an elusive and catchy style. Stay tuned to learn everything about LinkedIn slideshows!
In this article
01 [Why Should You Care LinkedIn Slideshow?](#Part 1)
02 [What Are the Specs & Dimensions of LinkedIn Slideshow?](#Part 2)
03 [Examples of LinkedIn Slideshow](#Part 3)
04 [How to Create Slideshow in LinkedIn?](#Part 4)
Part 1 Why Should You Care LinkedIn Slideshow?
Today’s IT revolutionized era has a technology infused solution to everything and employment is no exception. Defining the platform, LinkedIn is a professional social networking site that allows you to put forward your qualifications, education, skills, expertise and experience to address your job oriented concerns. The platform is a market leader in hiring professionals to a diversity of work profiles, while increasing the number of potential audiences.
The social media platform essentially works to keep the job realm informed about you with the most detailed aspects. This is why, creating a LinkedIn profile turns out to be a significant step in the professional world. Let us get into understanding some more beneficial aspects of a LinkedIn recognition in the following section:
01Establishing Professional Connections
Making yourself available on the professional front through a LinkedIn profile lets you know about the diversities of recruitment prerequisites, connect with professionals belonging to different domains, backgrounds and industries, while getting numerous opportunities to meet people who share a similar work perspective as yours.
02Being Informed About Job Postings
A LinkedIn profile caters most effectively to your concern of getting regular updates about employment opportunities in a diverse range of industrial and business corporations, companies and recruiting agencies. You can use the platform to create a professional account and follow the respective company pages that match with your qualifications and expertise, to get the latest updates of their job postings and vacancy announcements.
03Recruiter’s Search Visibility
Having a LinkedIn profile affordably means that you are entitled to a recognition in the recruiter’s search results on Google, thus giving a considerable boost to your chances of being viewed and hired. This is additionally beneficial for the recruiting agencies as well, who get the maximum fruit with the least effort.
04Globalization
Creating a comprehensive LinkedIn profile with the correct choice of keywords and exact content opens up employment opportunities beyond the cross country borders, thanks to the platform’s global reach and credibility. This in turn, causes your professional integrity to be presented in front of a large scale audience diversity.
05Personal Branding
Being active on LinkedIn lets you become a brand for yourself through its endorsement and recommendation features. Seeing your LinkedIn profile, your akin, coworkers and professionally senior acquaintances of the past can write a positive testimonial on your expertise, thus increasing your chances of being hired to a new job post.
06A Valuable Asset
You can conveniently regard a LinkedIn profile as your professional diary, where you can update your latest corporate or industrial achievements, awards, project undertakings and voluntary activities. This will facilitate your recruiter with the latest and exact information about your corporate capabilities, which would further aid the latter to consider on hiring you.
07Real and Trustworthy Platform
Creating a LinkedIn profile essentially requires furnishing real and authentic details of education, skills and professional backgrounds for getting relevant opportunities in their respective fields. Uploading false information and fake details will anyway result in beating around the bush, without any significant gain and hence, this practice is essentially avoided by LinkedIn users.
08Active Job Search
Instead of following the conventional passive job seeker pattern of sending resume and waiting for the HR response, LinkedIn allows you to be in regular touch with the recruiter of your chosen company for latest updates on the hiring process. If you are worried of getting the ‘desperate’ tag, rest assured as the platform will rather present you as a proactive professional.
Part 2 What Are the Specs & Dimensions of LinkedIn Slideshow?
Now that you are familiar with the credibility of a LinkedIn carousel post in the professional world, let us get into some more details of the utility with proceeding towards a discussion of the different specifications and dimensions of a LinkedIn slideshow and the professional aspects of the same in the following section:
● Take Care of the File Size
The credibility of LinkedIn carousel posts lies in the engaging presentation of your static and monotonous text to make them stand out of the crowded newsfeed. True that your creative skills are sufficient enough to design a graphic masterpiece, yet you should take care to remain within an affordable limit, lest you would end up with a large file that gets difficult to upload and process. Most reliably, a 100 MB file size would easily fit into the bill.
● Restrict Your Slide Count
When creating a slideshow LinkedIn presentation, it is normal to get a bit over the line while including the most exemplary and comprehensive details about your professional qualifications, skills and background. Relax, that’s nothing wrong! However, all you need to care about is limiting the slide count of your slideshow to a maximum of 300 pages. As a genuine approach, no one would bother going beyond that to read about you anyway!
● Use a Commendable File Format
You would ideally want the documents and media files in your slideshow to have the finest quality. LinkedIn allows you to create and share your graphic presentations in the PDF, DOCX, DOC, PPTX and PPT file formats. If you want the assurance of your slideshows having the highest resolution and appreciable output quality, it is recommended to save them in the PDF file format.
● Make a Careful Upload
When you are ready to upload your presentation, consider taking a close preview of its contents to make sure that you have not missed out on anything. This becomes all the more necessary, owing to the fact that, you are not allowed to edit your post in anyway after it gets uploaded on your LinkedIn profile.
● Bonus Tip
To include the latest and up-to-date information within your presentation, consider visiting the LinkedIn official webpage directly from your platform account.
Part 3 Examples of LinkedIn Slideshow
Creating a LinkedIn slide show can be both, exciting as well as advantageous on the professional front. After having an insight of the significance, dimensions and specifications, let us now move towards browsing through some of the most excellent examples of LinkedIn slideshow presentations in the following section:
● Share Numbers, Infographics and Statistics
The utility of the LinkedIn platform to share documents has been worked upon by Brian Wallace, an infographic agency owner, to present his professional excellence in front of the target audiences through useful statistics and examples. Opening his work profile, you would firstly get to see an infographic PDF export, which are later uploaded as document files on a LinkedIn post that speaks in favor of the statistics.
● Share Action Oriented Business Modules
Travis Lachner, the CEO of a renowned business enterprise, has worked upon the clever idea of designing appealing, call to action presentations to encourage the participation of his potential audiences in the business module through a graphical arrow desisgn, asking them to share their opinions via relatable comments.
● Stepwise Instructions and Design Frameworks
This LinkedIn feature is utilized by Demodesk to present a stepwise demonstration of its newly launched ‘One Feature Framework’ through a slideshow presentation. You can work with the facility to share documents comprising of market oriented case studies, business reports, frameworks, etc., from your company’s official webpage.
● Conference Presentations and Event Contents
LinkedIn slideshows are indeed the most expressive means of sharing conference essentials and event marketing. Such presentations have been perfectly put to use by Jens Hilgers, the eSports creator and entrepreneur, to help viewers and players in navigating through his game landscapes. You can also choose a simple task of creating a buzz of your upcoming event among your audience, like Garter did to inform about the CFO & Executive Conference.
● Content Promotion
You can use a LinkedIn slideshow post to effectively promote your content among a global audience like Matheos Simou, a graphic designer cum recruitment strategist, who utilized LinkedIn presentations to educate his target audience about the significance of graphic desisgn and product branding outsources through his slideshow post titled ‘Flipping Pointless Brand Identity’.
Part 4 How to Create Slideshow in LinkedIn?
Having talked enough about LinkedIn slideshows and their market credibility, let us now make an attempt to try hands at creating professionally useful LinkedIn presentations. The following section describes a detailed, stepwise tutorial to adhere to the aforesaid purpose within a quick time span and utmost ease:
● User’s Guide to Create a LinkedIn Slideshow
Step 1: Open Your LinkedIn Profile
Start with logging in to your LinkedIn profile in any preferred device.
Step 2: Create a Google Slide Deck
Launch Google Slides in your device and proceed to design a slide deck on the same.

Step 3: Add Content to the Inaugural Slide
Populate the first slide of your presentation with the opening content, like the titles and subtitles of slideshow creation objective, company name, profile and expertise, etc.

As far as designing the subsequent slides is concerned, it would be a smart idea to clone the first slide to maintain an overall homogeneity.

Step 4: Save Your Work
When you are done with creating the presentation, choose to save it on your profile in the PDF file format for ensuring a high output quality.

Step 5: Sharing Your Creation
Create a document post on your profile to share the slideshow presentation with fellow LinkedIn users.

Step 6: Describe Your Post
The last step is to supplement your post with a suitable description and a few catchy hashtags. When you are happy with your work, navigate to the bottom right of the profile screen and tap ‘Post’.

● Creating LinkedIn Slideshows with Wondershare Filmora
When looking for a convenient and easy to use slideshow creator to design your LinkedIn presentations, you can rely on the Wondershare Filmora Video Editor Slideshow Creator software program to make high end, professional quality slide shows in a commendable resolution, and supplement them with a diversity of cohesive graphic effects.
For Win 7 or later (64-bit)
For macOS 10.12 or later
● Ending Thoughts →
● LinkedIn slideshows are highly useful in creating a notable impact of your professional skills and capabilities in front of job recruiters.
● There are some essential aspects of LinkedIn slideshows, which you should consider while designing your presentation.
● Wondershare Filmora is certainly one among the best software solutions to create LinkedIn slideshows with high end professional excellence.
LinkedIn slideshows are interesting means of professional content presentations in an elusive and catchy style. Stay tuned to learn everything about LinkedIn slideshows!
In this article
01 [Why Should You Care LinkedIn Slideshow?](#Part 1)
02 [What Are the Specs & Dimensions of LinkedIn Slideshow?](#Part 2)
03 [Examples of LinkedIn Slideshow](#Part 3)
04 [How to Create Slideshow in LinkedIn?](#Part 4)
Part 1 Why Should You Care LinkedIn Slideshow?
Today’s IT revolutionized era has a technology infused solution to everything and employment is no exception. Defining the platform, LinkedIn is a professional social networking site that allows you to put forward your qualifications, education, skills, expertise and experience to address your job oriented concerns. The platform is a market leader in hiring professionals to a diversity of work profiles, while increasing the number of potential audiences.
The social media platform essentially works to keep the job realm informed about you with the most detailed aspects. This is why, creating a LinkedIn profile turns out to be a significant step in the professional world. Let us get into understanding some more beneficial aspects of a LinkedIn recognition in the following section:
01Establishing Professional Connections
Making yourself available on the professional front through a LinkedIn profile lets you know about the diversities of recruitment prerequisites, connect with professionals belonging to different domains, backgrounds and industries, while getting numerous opportunities to meet people who share a similar work perspective as yours.
02Being Informed About Job Postings
A LinkedIn profile caters most effectively to your concern of getting regular updates about employment opportunities in a diverse range of industrial and business corporations, companies and recruiting agencies. You can use the platform to create a professional account and follow the respective company pages that match with your qualifications and expertise, to get the latest updates of their job postings and vacancy announcements.
03Recruiter’s Search Visibility
Having a LinkedIn profile affordably means that you are entitled to a recognition in the recruiter’s search results on Google, thus giving a considerable boost to your chances of being viewed and hired. This is additionally beneficial for the recruiting agencies as well, who get the maximum fruit with the least effort.
04Globalization
Creating a comprehensive LinkedIn profile with the correct choice of keywords and exact content opens up employment opportunities beyond the cross country borders, thanks to the platform’s global reach and credibility. This in turn, causes your professional integrity to be presented in front of a large scale audience diversity.
05Personal Branding
Being active on LinkedIn lets you become a brand for yourself through its endorsement and recommendation features. Seeing your LinkedIn profile, your akin, coworkers and professionally senior acquaintances of the past can write a positive testimonial on your expertise, thus increasing your chances of being hired to a new job post.
06A Valuable Asset
You can conveniently regard a LinkedIn profile as your professional diary, where you can update your latest corporate or industrial achievements, awards, project undertakings and voluntary activities. This will facilitate your recruiter with the latest and exact information about your corporate capabilities, which would further aid the latter to consider on hiring you.
07Real and Trustworthy Platform
Creating a LinkedIn profile essentially requires furnishing real and authentic details of education, skills and professional backgrounds for getting relevant opportunities in their respective fields. Uploading false information and fake details will anyway result in beating around the bush, without any significant gain and hence, this practice is essentially avoided by LinkedIn users.
08Active Job Search
Instead of following the conventional passive job seeker pattern of sending resume and waiting for the HR response, LinkedIn allows you to be in regular touch with the recruiter of your chosen company for latest updates on the hiring process. If you are worried of getting the ‘desperate’ tag, rest assured as the platform will rather present you as a proactive professional.
Part 2 What Are the Specs & Dimensions of LinkedIn Slideshow?
Now that you are familiar with the credibility of a LinkedIn carousel post in the professional world, let us get into some more details of the utility with proceeding towards a discussion of the different specifications and dimensions of a LinkedIn slideshow and the professional aspects of the same in the following section:
● Take Care of the File Size
The credibility of LinkedIn carousel posts lies in the engaging presentation of your static and monotonous text to make them stand out of the crowded newsfeed. True that your creative skills are sufficient enough to design a graphic masterpiece, yet you should take care to remain within an affordable limit, lest you would end up with a large file that gets difficult to upload and process. Most reliably, a 100 MB file size would easily fit into the bill.
● Restrict Your Slide Count
When creating a slideshow LinkedIn presentation, it is normal to get a bit over the line while including the most exemplary and comprehensive details about your professional qualifications, skills and background. Relax, that’s nothing wrong! However, all you need to care about is limiting the slide count of your slideshow to a maximum of 300 pages. As a genuine approach, no one would bother going beyond that to read about you anyway!
● Use a Commendable File Format
You would ideally want the documents and media files in your slideshow to have the finest quality. LinkedIn allows you to create and share your graphic presentations in the PDF, DOCX, DOC, PPTX and PPT file formats. If you want the assurance of your slideshows having the highest resolution and appreciable output quality, it is recommended to save them in the PDF file format.
● Make a Careful Upload
When you are ready to upload your presentation, consider taking a close preview of its contents to make sure that you have not missed out on anything. This becomes all the more necessary, owing to the fact that, you are not allowed to edit your post in anyway after it gets uploaded on your LinkedIn profile.
● Bonus Tip
To include the latest and up-to-date information within your presentation, consider visiting the LinkedIn official webpage directly from your platform account.
Part 3 Examples of LinkedIn Slideshow
Creating a LinkedIn slide show can be both, exciting as well as advantageous on the professional front. After having an insight of the significance, dimensions and specifications, let us now move towards browsing through some of the most excellent examples of LinkedIn slideshow presentations in the following section:
● Share Numbers, Infographics and Statistics
The utility of the LinkedIn platform to share documents has been worked upon by Brian Wallace, an infographic agency owner, to present his professional excellence in front of the target audiences through useful statistics and examples. Opening his work profile, you would firstly get to see an infographic PDF export, which are later uploaded as document files on a LinkedIn post that speaks in favor of the statistics.
● Share Action Oriented Business Modules
Travis Lachner, the CEO of a renowned business enterprise, has worked upon the clever idea of designing appealing, call to action presentations to encourage the participation of his potential audiences in the business module through a graphical arrow desisgn, asking them to share their opinions via relatable comments.
● Stepwise Instructions and Design Frameworks
This LinkedIn feature is utilized by Demodesk to present a stepwise demonstration of its newly launched ‘One Feature Framework’ through a slideshow presentation. You can work with the facility to share documents comprising of market oriented case studies, business reports, frameworks, etc., from your company’s official webpage.
● Conference Presentations and Event Contents
LinkedIn slideshows are indeed the most expressive means of sharing conference essentials and event marketing. Such presentations have been perfectly put to use by Jens Hilgers, the eSports creator and entrepreneur, to help viewers and players in navigating through his game landscapes. You can also choose a simple task of creating a buzz of your upcoming event among your audience, like Garter did to inform about the CFO & Executive Conference.
● Content Promotion
You can use a LinkedIn slideshow post to effectively promote your content among a global audience like Matheos Simou, a graphic designer cum recruitment strategist, who utilized LinkedIn presentations to educate his target audience about the significance of graphic desisgn and product branding outsources through his slideshow post titled ‘Flipping Pointless Brand Identity’.
Part 4 How to Create Slideshow in LinkedIn?
Having talked enough about LinkedIn slideshows and their market credibility, let us now make an attempt to try hands at creating professionally useful LinkedIn presentations. The following section describes a detailed, stepwise tutorial to adhere to the aforesaid purpose within a quick time span and utmost ease:
● User’s Guide to Create a LinkedIn Slideshow
Step 1: Open Your LinkedIn Profile
Start with logging in to your LinkedIn profile in any preferred device.
Step 2: Create a Google Slide Deck
Launch Google Slides in your device and proceed to design a slide deck on the same.
Step 3: Add Content to the Inaugural Slide
Populate the first slide of your presentation with the opening content, like the titles and subtitles of slideshow creation objective, company name, profile and expertise, etc.
As far as designing the subsequent slides is concerned, it would be a smart idea to clone the first slide to maintain an overall homogeneity.
Step 4: Save Your Work
When you are done with creating the presentation, choose to save it on your profile in the PDF file format for ensuring a high output quality.
Step 5: Sharing Your Creation
Create a document post on your profile to share the slideshow presentation with fellow LinkedIn users.
Step 6: Describe Your Post
The last step is to supplement your post with a suitable description and a few catchy hashtags. When you are happy with your work, navigate to the bottom right of the profile screen and tap ‘Post’.
● Creating LinkedIn Slideshows with Wondershare Filmora
When looking for a convenient and easy to use slideshow creator to design your LinkedIn presentations, you can rely on the Wondershare Filmora Video Editor Slideshow Creator software program to make high end, professional quality slide shows in a commendable resolution, and supplement them with a diversity of cohesive graphic effects.
For Win 7 or later (64-bit)
For macOS 10.12 or later
● Ending Thoughts →
● LinkedIn slideshows are highly useful in creating a notable impact of your professional skills and capabilities in front of job recruiters.
● There are some essential aspects of LinkedIn slideshows, which you should consider while designing your presentation.
● Wondershare Filmora is certainly one among the best software solutions to create LinkedIn slideshows with high end professional excellence.
Also read:
- Updated In 2024, How to Combine Multiple GIFs Into One with GIF Combiner
- New 2024 Approved Learn 3D Logo Animation and Templates
- Updated 2024 Approved How to Create Animated Video on Canva?
- New In 2024, 6 Unexpected Ways Gif Animation Maker That Affect Your Marketing
- Updated What Wikipedia Cant Tell You About the 10 Best Batman Cartoons
- Updated How to Make an Animated Travel Map Video, In 2024
- Updated 10 Photoshop Cartoon Effects For Creatives
- Before You Learn Facebook Slideshow 5 Things You Should Know How-TOS
- In 2024, How to Convert Animated GIF From Video
- New Top 10 Sketch Animation Video Makers
- Updated 2024 Approved The Art of Comics - Learn How to Do Funny Cartoon Drawings
- New A Roster of 15 Top Disney Channel Cartoons
- Updated 2024 Approved Most Effective Ways to Set WhatsApp Status
- New How to Make a Photoshop Collage in Simple Steps for 2024
- New 2024 Approved Easy Cartoon Characters Drawing Tutorials for You Who Are Learning to Draw
- Updated 2024 Approved Best Guide for Beginners on 2D Animation Making
- 2024 Approved Beginner Tutorial on Making Unity 2D Animation
- Dead Simple Guide to Create New and Exciting Blackboard Animation
- Updated Best 12 Illusion Gifs Top Picks for 2024
- 2024 Approved 10 Trendy & Stylish Free Logo Animation Templates
- Updated 2024 Approved Christmas Is Coming! How to Find & Make Animated Christmas GIFs?
- Best Websites to Download Animated GIFs for Free-Free GIF Download
- Best 10 Animoji Apps You Can Use to Edit Animoji for 2024
- Updated Tutorial Guide to Animate Pictures in Canva for 2024
- Updated Finding Some Different Ways to Animated Cartoon of Yourself for 2024
- Updated How to Combine Multiple GIFs Into One with GIF Combiner for 2024
- Updated 5 Websites with Animated Logos That Can Catch Your Eyes for 2024
- How to Animate Image on Scroll and Text on Scroll for 2024
- Updated In 2024, Why These 10 Top Text Motion Templates Are Worth Your Attention
- New In 2024, The Only Guide Youll Need to Learn About GIF Video Downloader
- Updated In 2024, How to Find 3D Animation Studio Meeting All Your Inspiring Needs
- Updated What Make Aesthetic Cartoon Drawing More Understandable
- New Epic Formula to Animate Photos From These 10 Animate Pictures App
- New Little Known Techniques of Motion Graphics in Premiere Pro
- Updated 5 Photoshop Alternatives to Animate Logo
- Updated Best GIF Maker Software for Windows and Mac
- 2024 Approved How to Make a Video a Live Photo
- Updated 2024 Approved 10 Cartoon Photo Converters
- 2024 Approved How to Create a Whiteboard Video Step by Step
- New In 2024, Ways on How to Get Started in Stop Motion Claymation
- Updated In 2024, 5 Different Animation Styles A Simple but Comprehensive Guide
- Updated 2024 Approved How to Find Some Different Ways to Animated Cartoon of Yourself
- Forgot Locked Apple iPhone 15 Plus Password? Learn the Best Methods To Unlock | Dr.fone
- In 2024, What is the best Pokemon for pokemon pvp ranking On Realme 12 5G? | Dr.fone
- How To Transfer WhatsApp From iPhone 11 to other iPhone 11 Pro Max devices? | Dr.fone
- In 2024, Ultimate Guide from Oppo A78 5G FRP Bypass
- 5 Ways to Track Realme 10T 5G without App | Dr.fone
- In 2024, How to Unlock iPhone 11 Pro Max, Apples New iPhone | Dr.fone
- How to Remove Forgotten PIN Of Your Samsung Galaxy XCover 6 Pro Tactical Edition
- In 2024, Everything To Know About Apple ID Password Requirements For iPhone 12 Pro Max
- Two Ways to Track My Boyfriends Oppo K11x without Him Knowing | Dr.fone
- How to Mirror Your Itel A60s Screen to PC with Chromecast | Dr.fone
- In 2024, How To Unlock Vivo X100 Pro Phone Without Password?
- AVCHD on Samsung Galaxy Z Fold 5-convert MTS for Samsung Galaxy Z Fold 5
- How to Share Location in Messenger On Tecno Pova 6 Pro 5G? | Dr.fone
- Bypassing Google Account With vnROM Bypass For Honor Play 8T
- 8 Workable Fixes to the SIM not provisioned MM#2 Error on Motorola Edge 2023 | Dr.fone
- How to Fix My Samsung Galaxy M34 5G Location Is Wrong | Dr.fone
- How To Install the Latest iOS Beta Version on Apple iPhone XS Max? | Dr.fone
- How to Change Netflix Location to Get More Country Version On Realme V30T | Dr.fone
- In 2024, How to Transfer Data from Itel A70 to Samsung Phone | Dr.fone
- Change Location on Yik Yak For your Infinix Note 30 to Enjoy More Fun | Dr.fone
- A Quick Guide to Infinix Smart 7 FRP Bypass Instantly
- How to Mirror Your Poco X6 Screen to PC with Chromecast | Dr.fone
- How to Access Your Apple iPhone 11 Pro Max When You Forget the Passcode? | Dr.fone
- Which Pokémon can Evolve with a Moon Stone For Honor X9a? | Dr.fone
- How to Change Spotify Location After Moving to Another Country On Apple iPhone XS Max | Dr.fone
- How PGSharp Save You from Ban While Spoofing Pokemon Go On Apple iPhone 15 Plus? | Dr.fone
- Solutions to Spy on Samsung Galaxy Z Flip 5 with and without jailbreak | Dr.fone
- Full Guide to Fix iToolab AnyGO Not Working On Samsung Galaxy A24 | Dr.fone
- How to Fix Android.Process.Media Has Stopped on Samsung Galaxy A15 4G | Dr.fone
- How to Transfer Photos from Xiaomi Redmi Note 13 5G to New Android? | Dr.fone
- In 2024, What Is an AI Voice Generator?
- How to Change Credit Card from Your iPhone 13 Pro Max Apple ID and Apple Pay
- Unlock Your Apple iPhone 14 Plus in Minutes with ICCID Code Everything You Need to Know
- How to Remove a Previously Synced Google Account from Your Infinix Note 30i
- In 2024, 5 Ways to Move Contacts From Samsung Galaxy A05s to iPhone (13/14/15) | Dr.fone
- How to Change Location on TikTok to See More Content On your Apple iPhone XR | Dr.fone
- Three Solutions to Hard Reset Tecno Phantom V Fold? | Dr.fone
- Prevent Cross-Site Tracking on Oppo Find N3 and Browser | Dr.fone
- What Pokémon Evolve with A Dawn Stone For Tecno Spark 10 5G? | Dr.fone
- How to Screen Mirroring Honor 90? | Dr.fone
- Title: Updated Whats Rigging Animation
- Author: Elon
- Created at : 2024-06-23 02:09:11
- Updated at : 2024-06-24 02:09:11
- Link: https://animation-videos.techidaily.com/updated-whats-rigging-animation/
- License: This work is licensed under CC BY-NC-SA 4.0.
