

What Is Still Motion Animation and How Does It Work, In 2024
What Is Still Motion Animation and How Does It Work?
What is Still Motion Animation and How Does It Work?
An easy yet powerful editor
Numerous effects to choose from
Detailed tutorials provided by the official channel
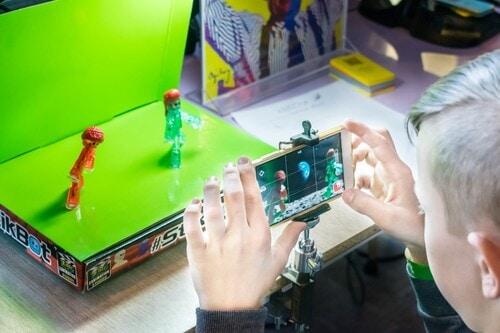
When we talk about motion, it makes us think about moves, but it refers to step motion when speaking about still-motion. So, in simple words, still motion animation refers to the animation that holds picture-to-picture motion animation.
This article covers all the relevant information related to still motion animation, paper motion animation, liquid motion animation. The name may vary, but such motions come under stop motion or still motion techniques to a great extent. That uses picture after picture or stopping camera process from reflecting animation to any inanimate objects or things. Under paper motion animation, images are adjusted in such a manner that results in continual animation reflection.
In this article
01 [Guide to Learn What is Still Motion Animation](#Part 1)
02 [6 Most Satisfying Still Motion Animation Examples](#Part 2)
03 [5 Inspiring Still Motion Animation Websites to Check Out](#Part 3)
04 [How Still Motion Are Animated at Filmora](#Part 4)
Part 1 Guide to Learn What is Still Motion Animation
Still motion animation is also known as walking motion animation and stalk motion animation used to boost a scene in animation. It comes in a frame-to-frame outlook. It can be a booster in horror movies, comedy, and thrillers. It used to express flashbacks, dreams, and summaries of a long scene. Sometimes it could be slower, faster, fade, blur or split frames to discover/show unconscious scenes.
Part 2 6 Most Satisfying Still Motion Animation examples
Before moving ahead with detailing how to process still motion animation, let’s try to understand it with some out-of-the-box examples to make you know what liquid motion animation is with the following criteria?
01Rudolph the Red-Nosed Reindeer

The famous, Rudolph, the Red-Nosed Reindeer, is a 19Christmas movie that shows stop motion animation first. The class one-hour program special mentions many people’s first exposure to the stop motion that Rudolph especially showed, Yukon Cornelius, Sam the snowman, etc. In everlasting memory of Rudolph, people still mention the Island of Misfit Toys and wonder what that seemingly-normal ragdoll is doing there.
02A town called Panic (2009)
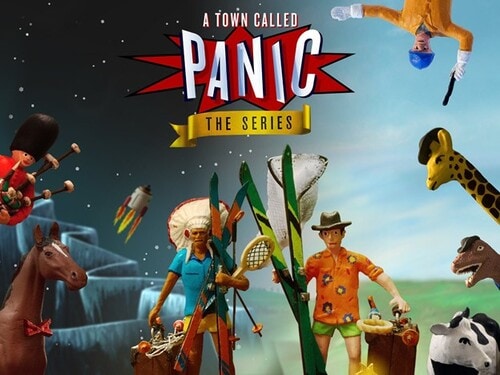
Based on the Belgian puppet on a series of identical names, this demented feature seems to star the playthings you would find packed away with an old model plaything. The plot illustrates how boyish Cowboy and Indian want to offer a birthday gift to their housemate and seemingly surrogate parent, Horse, resulting in mishaps at birthday parties, the frozen north, and also the bottom of the ocean. The persistently surreal feature includes equine music teachers, giant robotic penguins, and livestock used as cannon-fodder. Still, instead of becoming overwhelming annoying, a town called Panic sustains its gleefulness over the long run.
03Chicken Run (1994)
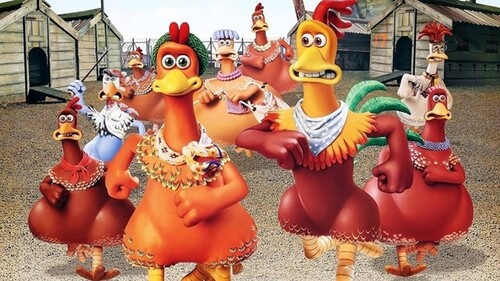
Chicken Run is a still/stop motion animation comedy film produced by Pathe Aardman and Dreamwork animations. It’s a 20stop-motion animated movie. The plot focuses on a group of chickens who see poultry named Rocky as their hope to vacate the farm when their owners prepare to show them chicken meat tarts. He manages to help them in an adventurous, funny way which makes the movie best. Its sequel started developing in 2020.
04Mary and Max (2009)

Mary and Max are again a still-motion animation adult comedy-drama film. It is an Australian film written and directed by Adam Elliot, which shows the lives and friendships of two unlikely people. Elliot’s relationship inspires the movie with his friend. He has been writing when his friend had started for over twenty years.
05The Nightmare Before Christmas (1993)

The Nightmare Before Christmas is also known as Tim Burton’s Nightmare before Christmas. It is an American stop-motion animation movie. It shows a musical dark fantasy Halloween film directed by Henry Selick.
It depicts the story of Jack Skellington, the king of “Halloween Town,” who stumbles upon “Christmas town.” He becomes obsessive about celebrating the vacation.
06Fantastic Mr. Fox (2009)

Fantastic Mr. Fox is a comedy film based on stop motion animation directed by Wes Anderson, who co-wrote the screenplay with Noah Baumbach. It is an American 20movie. The project is predicated on the 19children’s novel of the identical name by Roald Dahl. The plot is the titular character Mr. Fox (Clooney), as his spree of thefts leads to his family, and later his community, eventually hunted down by three farmers called Boggis (Robin Hurlstone), Bunce (Hugo Guinness), and Bean (Michael Gambon).
Part 3 5 Inspiring Still Motion Animation Websites to Check out
Here, with your journey of paper motion animation, let’s try to explore some inspiring websites that support still motion animation with the following information:
01Dragonframe Blog
Dragonframe makes a picture capture computer program for halt movement. So, they are kind of specialists on the matter. And they keep a charming web journal around the subject. It supports Still motion animation accurately.
Dragonframe highlights the most recent and most noteworthy halt movement recordings of all sorts in their web journal. They incorporate pictures, video, and a brief compose-up on each one. It’s a fantastic source of motivation and a great way to find out what’s trending within the world of halt movement liveliness.
02Stop MotionAnimation.com
Here’s a thought, if you’re searching for stop movement activity assets, why not see to StopMotionAnimation.com?
StopMotionAnimation.com may be a community location for all things related to the procedure and craftsmanship shape. They have free instructional exercises just like the “The Unique Halt Movement Handbook” in web page shape, recordings that serve as motivation, and a message board that clients can sign up for and take portion in.
They indeed have their claim list of assets to purchase apparatuses and supplies to make your claim’s halt movement liveliness.
03Into film
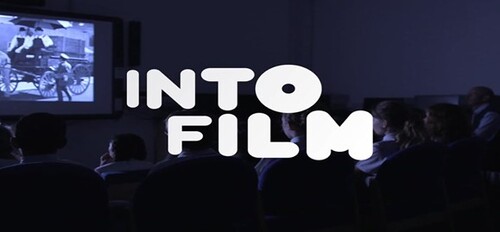
Into Film isn’t a halt movement liveliness location. It’s a location around filmmaking in common, but one specific asset worth checking out for any wannabe halt movement animator.
That’s the “Introduction to Halt Movement Animation” PDF accessible for gratis download. Unquestionably choose this one up on the off chance that you’re unused to the art.
And at that point, hang around Into Film to memorize more recommendations on object motion animation and the craftsmanship of filmmaking.
04Animation Resources.org
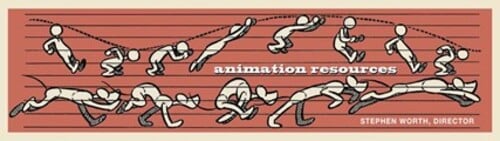
Movement Assets could be a location committed to all sorts of movement procedures. They talk about hypotheses and methods and have a community program through the site.
But they, too, conversation a parcel approximately halt movement and the history of the craftsmanship frame. By searching for “stop motion“ on the location, you’ll get a list of the broad web journal posts on the subject and learn more approximately the roots of halt motion.
05AnimateClay.com

Whereas there are many ways to make halt movement animation, clay is one of the foremost well-known, much obliged in massive portion to Aardman Animation and their motion pictures like Wallace & Gromit.
AnimateClay.com could be an asset, particularly for claymation. They have a vast instructional exercise segment, news, holdings for acquiring supplies, and a podcast devoted to animating with clay.
Part 4How Still Motion Are Animated at Filmora?
Wondershare Filmora Video Editor is by far one of the best video altering computer program with cool highlights that compares to other competing video altering Softwares. Numerous video-altering programs claimed to offer proficiency come about; Filmora is one of some consumer-level devices that convey.

Wondershare Filmora - Best Video Editor for Mac/Windows
5,481,435 people have downloaded it.
Build unique custom animations without breaking a sweat.
Focus on creating epic stories and leave the details to Filmora’s auto features.
Start a creative adventure with drag & drop effects and endless possibilities.
Filmora simplifies advanced features to save you time and effort.
Filmora cuts out repetition so you can move on to your next creative breakthrough.
01Step 1: Start your video project
However, if you’re not an Animoto client, sign up for a free account to induce begun. Log in and press Make to start a modern video. Select Begin from Scratch, choose a topic and a perspective ratio.
02Step 2: Add a photo burst block
Another step is to tap on the little additional sign symbol at the foot of your workspace. This will open up the Include a Square window. Tap Burst on the left-hand side of the window. Animoto recordings are built by blending and coordinating pieces. The Burst square permits you to include a fast arrangement of up to pictures in your video.
You’ll be inquired to select a move. We prescribe the Difficult Cut move for a clean-looking halt movement effect.
03Step 3: Add your photos in the right order
Another, transfer the photographs that you shot for your halt movement and drag and drop them into the Photo Burst square. Make beyond any doubt you include them in consecutive arrange, from to begin with to last.
If you’ve got more than photos—the most significant number a single Photo Burst square accepts—that’s not an issue. Add a modern Photo Burst after the primary and proceed including your pictures.
04Step 4: Adjust your speed
Once your photographs get included, it’s time to set the speed. Tap the stopwatch symbol within the Burst square, and you’ll discover three-speed options—Slower, Quicker, and Auto. Press through to choose the speed that feels best to you.
05Step 5: Now, finalize your video
Once that’s done, you’re able to place the final finishing touches on your video. You can also add Blocks, text, and music from the library.
● Key Takeaways from This Episode →
● What is meant by Stop motion or still motion animation
● Different examples of paper motion animation to explain the techniques
● Steps to apply walking motion animation with Filmora
When we talk about motion, it makes us think about moves, but it refers to step motion when speaking about still-motion. So, in simple words, still motion animation refers to the animation that holds picture-to-picture motion animation.
This article covers all the relevant information related to still motion animation, paper motion animation, liquid motion animation. The name may vary, but such motions come under stop motion or still motion techniques to a great extent. That uses picture after picture or stopping camera process from reflecting animation to any inanimate objects or things. Under paper motion animation, images are adjusted in such a manner that results in continual animation reflection.
In this article
01 [Guide to Learn What is Still Motion Animation](#Part 1)
02 [6 Most Satisfying Still Motion Animation Examples](#Part 2)
03 [5 Inspiring Still Motion Animation Websites to Check Out](#Part 3)
04 [How Still Motion Are Animated at Filmora](#Part 4)
Part 1 Guide to Learn What is Still Motion Animation
Still motion animation is also known as walking motion animation and stalk motion animation used to boost a scene in animation. It comes in a frame-to-frame outlook. It can be a booster in horror movies, comedy, and thrillers. It used to express flashbacks, dreams, and summaries of a long scene. Sometimes it could be slower, faster, fade, blur or split frames to discover/show unconscious scenes.
Part 2 6 Most Satisfying Still Motion Animation examples
Before moving ahead with detailing how to process still motion animation, let’s try to understand it with some out-of-the-box examples to make you know what liquid motion animation is with the following criteria?
01Rudolph the Red-Nosed Reindeer
The famous, Rudolph, the Red-Nosed Reindeer, is a 19Christmas movie that shows stop motion animation first. The class one-hour program special mentions many people’s first exposure to the stop motion that Rudolph especially showed, Yukon Cornelius, Sam the snowman, etc. In everlasting memory of Rudolph, people still mention the Island of Misfit Toys and wonder what that seemingly-normal ragdoll is doing there.
02A town called Panic (2009)
Based on the Belgian puppet on a series of identical names, this demented feature seems to star the playthings you would find packed away with an old model plaything. The plot illustrates how boyish Cowboy and Indian want to offer a birthday gift to their housemate and seemingly surrogate parent, Horse, resulting in mishaps at birthday parties, the frozen north, and also the bottom of the ocean. The persistently surreal feature includes equine music teachers, giant robotic penguins, and livestock used as cannon-fodder. Still, instead of becoming overwhelming annoying, a town called Panic sustains its gleefulness over the long run.
03Chicken Run (1994)
Chicken Run is a still/stop motion animation comedy film produced by Pathe Aardman and Dreamwork animations. It’s a 20stop-motion animated movie. The plot focuses on a group of chickens who see poultry named Rocky as their hope to vacate the farm when their owners prepare to show them chicken meat tarts. He manages to help them in an adventurous, funny way which makes the movie best. Its sequel started developing in 2020.
04Mary and Max (2009)
Mary and Max are again a still-motion animation adult comedy-drama film. It is an Australian film written and directed by Adam Elliot, which shows the lives and friendships of two unlikely people. Elliot’s relationship inspires the movie with his friend. He has been writing when his friend had started for over twenty years.
05The Nightmare Before Christmas (1993)
The Nightmare Before Christmas is also known as Tim Burton’s Nightmare before Christmas. It is an American stop-motion animation movie. It shows a musical dark fantasy Halloween film directed by Henry Selick.
It depicts the story of Jack Skellington, the king of “Halloween Town,” who stumbles upon “Christmas town.” He becomes obsessive about celebrating the vacation.
06Fantastic Mr. Fox (2009)
Fantastic Mr. Fox is a comedy film based on stop motion animation directed by Wes Anderson, who co-wrote the screenplay with Noah Baumbach. It is an American 20movie. The project is predicated on the 19children’s novel of the identical name by Roald Dahl. The plot is the titular character Mr. Fox (Clooney), as his spree of thefts leads to his family, and later his community, eventually hunted down by three farmers called Boggis (Robin Hurlstone), Bunce (Hugo Guinness), and Bean (Michael Gambon).
Part 3 5 Inspiring Still Motion Animation Websites to Check out
Here, with your journey of paper motion animation, let’s try to explore some inspiring websites that support still motion animation with the following information:
01Dragonframe Blog
Dragonframe makes a picture capture computer program for halt movement. So, they are kind of specialists on the matter. And they keep a charming web journal around the subject. It supports Still motion animation accurately.
Dragonframe highlights the most recent and most noteworthy halt movement recordings of all sorts in their web journal. They incorporate pictures, video, and a brief compose-up on each one. It’s a fantastic source of motivation and a great way to find out what’s trending within the world of halt movement liveliness.
02Stop MotionAnimation.com
Here’s a thought, if you’re searching for stop movement activity assets, why not see to StopMotionAnimation.com?
StopMotionAnimation.com may be a community location for all things related to the procedure and craftsmanship shape. They have free instructional exercises just like the “The Unique Halt Movement Handbook” in web page shape, recordings that serve as motivation, and a message board that clients can sign up for and take portion in.
They indeed have their claim list of assets to purchase apparatuses and supplies to make your claim’s halt movement liveliness.
03Into film
Into Film isn’t a halt movement liveliness location. It’s a location around filmmaking in common, but one specific asset worth checking out for any wannabe halt movement animator.
That’s the “Introduction to Halt Movement Animation” PDF accessible for gratis download. Unquestionably choose this one up on the off chance that you’re unused to the art.
And at that point, hang around Into Film to memorize more recommendations on object motion animation and the craftsmanship of filmmaking.
04Animation Resources.org
Movement Assets could be a location committed to all sorts of movement procedures. They talk about hypotheses and methods and have a community program through the site.
But they, too, conversation a parcel approximately halt movement and the history of the craftsmanship frame. By searching for “stop motion“ on the location, you’ll get a list of the broad web journal posts on the subject and learn more approximately the roots of halt motion.
05AnimateClay.com
Whereas there are many ways to make halt movement animation, clay is one of the foremost well-known, much obliged in massive portion to Aardman Animation and their motion pictures like Wallace & Gromit.
AnimateClay.com could be an asset, particularly for claymation. They have a vast instructional exercise segment, news, holdings for acquiring supplies, and a podcast devoted to animating with clay.
Part 4How Still Motion Are Animated at Filmora?
Wondershare Filmora Video Editor is by far one of the best video altering computer program with cool highlights that compares to other competing video altering Softwares. Numerous video-altering programs claimed to offer proficiency come about; Filmora is one of some consumer-level devices that convey.
Wondershare Filmora - Best Video Editor for Mac/Windows
5,481,435 people have downloaded it.
Build unique custom animations without breaking a sweat.
Focus on creating epic stories and leave the details to Filmora’s auto features.
Start a creative adventure with drag & drop effects and endless possibilities.
Filmora simplifies advanced features to save you time and effort.
Filmora cuts out repetition so you can move on to your next creative breakthrough.
01Step 1: Start your video project
However, if you’re not an Animoto client, sign up for a free account to induce begun. Log in and press Make to start a modern video. Select Begin from Scratch, choose a topic and a perspective ratio.
02Step 2: Add a photo burst block
Another step is to tap on the little additional sign symbol at the foot of your workspace. This will open up the Include a Square window. Tap Burst on the left-hand side of the window. Animoto recordings are built by blending and coordinating pieces. The Burst square permits you to include a fast arrangement of up to pictures in your video.
You’ll be inquired to select a move. We prescribe the Difficult Cut move for a clean-looking halt movement effect.
03Step 3: Add your photos in the right order
Another, transfer the photographs that you shot for your halt movement and drag and drop them into the Photo Burst square. Make beyond any doubt you include them in consecutive arrange, from to begin with to last.
If you’ve got more than photos—the most significant number a single Photo Burst square accepts—that’s not an issue. Add a modern Photo Burst after the primary and proceed including your pictures.
04Step 4: Adjust your speed
Once your photographs get included, it’s time to set the speed. Tap the stopwatch symbol within the Burst square, and you’ll discover three-speed options—Slower, Quicker, and Auto. Press through to choose the speed that feels best to you.
05Step 5: Now, finalize your video
Once that’s done, you’re able to place the final finishing touches on your video. You can also add Blocks, text, and music from the library.
● Key Takeaways from This Episode →
● What is meant by Stop motion or still motion animation
● Different examples of paper motion animation to explain the techniques
● Steps to apply walking motion animation with Filmora
10 Top Tools to Make Pic Collage for Windows
10 Best Tools to Make Pic Collage for Windows
An easy yet powerful editor
Numerous effects to choose from
Detailed tutorials provided by the official channel
Collages are a great way to assemble all your favorite pictures in one place. You can share these collages with your friends, relatives, and dear ones or can also use them for posting on social media sites and other online platforms. Though creating a collage may sound simple, a lot of considerations need to be taken for creating an interesting and eye-catchy collage, and for this, a help of a professional tool can be taken. In the following parts of the topic, you can learn about the best tools for photo collage Windows 10 and other OS.

In the following parts of the topic, you can learn about the best tools for photo collage Windows 10 and other OS.
In this article
01 [Top 10 Pic Collage for Windows Tools](#Part 1)
02 [The Best Tool to Get Stock Images for Creating Collages](#Part 2)
Part 1 Top 10 Pic Collage for Windows Tools
Checkout the best collage for Windows below.
01PhotoPad Photo Editing Software
This is a complete photo editing tool supporting an array of features including the creation of a photo collage. This software from NCH software can let you add the desired images manually and also support using the auto grid to add an unlimited number of pictures. The tool also lets you choose the collage orientation size and set the background as needed.
Pros:
● Create collage Windows manually or automatically.
● Allows adding a background color, image, or from the available background options.
● Spacing and corners between the images can be selected.
● The size of the tool is small.
Cons:
● Stickers and filters to individual images cannot be added.
● Cannot choose a custom collage size.

02PhotoScapeX
Available for download on Windows 10 and higher versions this is another widely used photo editing tool that can also let you create collages manually as well as automatically. Multiple frames are available that can be selected as desired and there are additional features like adding filters, and also edit them in multiple ways.
Pros:
● Allows creating collage manually and automatically.
● Multiple editing tools for customization like filters, crop, zoom, doodle, and more.
● Picture alignment can be done in 3 modes- vertical, horizontal, and tile.
● Option to change and customize image size, spacing, margin, and others.
Cons:
● Limited photos can be added.
● The size of the tool is large in comparison to other tools.

03Phototastic Collage
This is free to use Windows-based tool that can create impressive collages in no time. Multiple designs, frames, and other options are available to create a customized collage as needed.
Pros:
● Multiple customization options are available for creating the desired collage.
● User-friendly and simple interface.
● An array of templates is available.
Cons:
● The free version has limited features.
● Limitation to the number of images that can be added.
● Ads in the app.

04PicCollage
Unleash your creativity by creating an interesting collage using this excellent collage-making app. There are multiple templates and customization options supports.
Pros
● Create collage manually or automatically
● The earlier created collage can be edited.
● Allows creating a collage in 3 options- grid, template, freestyle.
Cons
● Watermark on the created collage.
● The image size cannot be customized.

05Collage Maker-Photo Grid and Montage
Using this free Windows tool, you can create an interesting photo collage or a free-styled montage as needed. A wide range of layouts and templates are available that can be further customized to get the desired collage.
Pros:
● Free Windows software.
● Come with multiple filters, layout, and editing tools.
● The user interface is easy.
● Preview option available.
Cons:
● Performance glitches due to bugs.
● Custom collage size cannot be set.
● Watermark on the collage.

06Fotor
If you are looking for a simple and basic collage-making tool, Fotor is the right choice. Collage in the grid, freestyle, and photo-stitch style can be created and basic customization features are supported.
Pros:
● Simple to use tool that is apt for beginners.
● Border can be changed from a solid color to a background.
Cons:
● Customization options are limited.
● Border and the image size cannot be changed.

07El Collagero
Just like its name, this is an interesting Windows-based tool for creating a collage of your choice. A wide range of options for customization is available that can let you edit the images, choose a template and then also edit the file.
Pros:
● A wide range of templates and designs for collages is available.
● Allows adding text, symbols, and other elements.
● Created collage can be shared on social media sites.
Cons:
● In comparison to other professional tools, the functions are limited.

08Atlantas Photo Collage Studio
This Windows-based tool will let you create collages of all types and for all occasions. You can choose from over 100 templates that best match your collage theme and image content.
Pros:
● More than 100 templates for collage designs are available.
● The size of the layout can be changed.
● Multiple editing and customization options are supported like zoom, opacity selection, and more.
Cons:
● Limitation of adding 45 images.
● For the advanced functions, need to subscribe to the paid version.

09PhotoJoiner
Using this Windows tool, pick up your favorite images and turn them into a beautiful collage with customized design and style.
Pros:
● A simple and basic tool for creating a collage.
● Created collage can be saved or shared to the social media site.
● Change the order of the images, margins, and other aspects.
Cons
● Collage templates are limited.
● Advanced features are missing.

1010. Blend Photo
To create a collage of images with a blending effect, this is the right tool to use. Available for download on the Windows system this tool lets you create collages telling interesting stories.
Pros:
● Simple and easy collage-making tool.
● Add blending effect to your collages.
● Over 50 custom shapes for image cropping are available along with the option for free-hand cropping.
● Multiple filters can be added.
Cons:
● Limited Editing and customization options.

Part 2 The Best Tool to Get Stock Images for Creating Collages
Several times, the captured and stored images may not fit in the collage theme you wish to create and, in such situations, you can use the stock images available online at several sites. One of the best tools where you can check out the images in different categories is Wondershare Filmora. This versatile software from Wondershare Filmora Video Editor is an advanced video editing tool that also has a huge collection of stock media including images.
Additionally, the split-screen feature of the software can be used for creating a video collage. Available for Windows and Mac systems, Wondershare Filmora will look after all your advanced video editing and customized requirements.
Wondershare Filmora - Best Video Editor for Mac/Windows
5,481,435 people have downloaded it.
Build unique custom animations without breaking a sweat.
Focus on creating epic stories and leave the details to Filmora’s auto features.
Start a creative adventure with drag & drop effects and endless possibilities.
Filmora simplifies advanced features to save you time and effort.
Filmora cuts out repetition so you can move on to your next creative breakthrough.
● Key Takeaways from This Episode →
● Collage-making tools help in creating an interesting and eye-catchy collage in a hassle-free manner.
●Several Windows-based tools are available for quick download.
●Wondershare Filmora is a great software to find a collection of stock images in different categories.
Collages are a great way to assemble all your favorite pictures in one place. You can share these collages with your friends, relatives, and dear ones or can also use them for posting on social media sites and other online platforms. Though creating a collage may sound simple, a lot of considerations need to be taken for creating an interesting and eye-catchy collage, and for this, a help of a professional tool can be taken. In the following parts of the topic, you can learn about the best tools for photo collage Windows 10 and other OS.
In the following parts of the topic, you can learn about the best tools for photo collage Windows 10 and other OS.
In this article
01 [Top 10 Pic Collage for Windows Tools](#Part 1)
02 [The Best Tool to Get Stock Images for Creating Collages](#Part 2)
Part 1 Top 10 Pic Collage for Windows Tools
Checkout the best collage for Windows below.
01PhotoPad Photo Editing Software
This is a complete photo editing tool supporting an array of features including the creation of a photo collage. This software from NCH software can let you add the desired images manually and also support using the auto grid to add an unlimited number of pictures. The tool also lets you choose the collage orientation size and set the background as needed.
Pros:
● Create collage Windows manually or automatically.
● Allows adding a background color, image, or from the available background options.
● Spacing and corners between the images can be selected.
● The size of the tool is small.
Cons:
● Stickers and filters to individual images cannot be added.
● Cannot choose a custom collage size.
02PhotoScapeX
Available for download on Windows 10 and higher versions this is another widely used photo editing tool that can also let you create collages manually as well as automatically. Multiple frames are available that can be selected as desired and there are additional features like adding filters, and also edit them in multiple ways.
Pros:
● Allows creating collage manually and automatically.
● Multiple editing tools for customization like filters, crop, zoom, doodle, and more.
● Picture alignment can be done in 3 modes- vertical, horizontal, and tile.
● Option to change and customize image size, spacing, margin, and others.
Cons:
● Limited photos can be added.
● The size of the tool is large in comparison to other tools.
03Phototastic Collage
This is free to use Windows-based tool that can create impressive collages in no time. Multiple designs, frames, and other options are available to create a customized collage as needed.
Pros:
● Multiple customization options are available for creating the desired collage.
● User-friendly and simple interface.
● An array of templates is available.
Cons:
● The free version has limited features.
● Limitation to the number of images that can be added.
● Ads in the app.
04PicCollage
Unleash your creativity by creating an interesting collage using this excellent collage-making app. There are multiple templates and customization options supports.
Pros
● Create collage manually or automatically
● The earlier created collage can be edited.
● Allows creating a collage in 3 options- grid, template, freestyle.
Cons
● Watermark on the created collage.
● The image size cannot be customized.
05Collage Maker-Photo Grid and Montage
Using this free Windows tool, you can create an interesting photo collage or a free-styled montage as needed. A wide range of layouts and templates are available that can be further customized to get the desired collage.
Pros:
● Free Windows software.
● Come with multiple filters, layout, and editing tools.
● The user interface is easy.
● Preview option available.
Cons:
● Performance glitches due to bugs.
● Custom collage size cannot be set.
● Watermark on the collage.
06Fotor
If you are looking for a simple and basic collage-making tool, Fotor is the right choice. Collage in the grid, freestyle, and photo-stitch style can be created and basic customization features are supported.
Pros:
● Simple to use tool that is apt for beginners.
● Border can be changed from a solid color to a background.
Cons:
● Customization options are limited.
● Border and the image size cannot be changed.
07El Collagero
Just like its name, this is an interesting Windows-based tool for creating a collage of your choice. A wide range of options for customization is available that can let you edit the images, choose a template and then also edit the file.
Pros:
● A wide range of templates and designs for collages is available.
● Allows adding text, symbols, and other elements.
● Created collage can be shared on social media sites.
Cons:
● In comparison to other professional tools, the functions are limited.
08Atlantas Photo Collage Studio
This Windows-based tool will let you create collages of all types and for all occasions. You can choose from over 100 templates that best match your collage theme and image content.
Pros:
● More than 100 templates for collage designs are available.
● The size of the layout can be changed.
● Multiple editing and customization options are supported like zoom, opacity selection, and more.
Cons:
● Limitation of adding 45 images.
● For the advanced functions, need to subscribe to the paid version.
09PhotoJoiner
Using this Windows tool, pick up your favorite images and turn them into a beautiful collage with customized design and style.
Pros:
● A simple and basic tool for creating a collage.
● Created collage can be saved or shared to the social media site.
● Change the order of the images, margins, and other aspects.
Cons
● Collage templates are limited.
● Advanced features are missing.
1010. Blend Photo
To create a collage of images with a blending effect, this is the right tool to use. Available for download on the Windows system this tool lets you create collages telling interesting stories.
Pros:
● Simple and easy collage-making tool.
● Add blending effect to your collages.
● Over 50 custom shapes for image cropping are available along with the option for free-hand cropping.
● Multiple filters can be added.
Cons:
● Limited Editing and customization options.
Part 2 The Best Tool to Get Stock Images for Creating Collages
Several times, the captured and stored images may not fit in the collage theme you wish to create and, in such situations, you can use the stock images available online at several sites. One of the best tools where you can check out the images in different categories is Wondershare Filmora. This versatile software from Wondershare Filmora Video Editor is an advanced video editing tool that also has a huge collection of stock media including images.
Additionally, the split-screen feature of the software can be used for creating a video collage. Available for Windows and Mac systems, Wondershare Filmora will look after all your advanced video editing and customized requirements.
Wondershare Filmora - Best Video Editor for Mac/Windows
5,481,435 people have downloaded it.
Build unique custom animations without breaking a sweat.
Focus on creating epic stories and leave the details to Filmora’s auto features.
Start a creative adventure with drag & drop effects and endless possibilities.
Filmora simplifies advanced features to save you time and effort.
Filmora cuts out repetition so you can move on to your next creative breakthrough.
● Key Takeaways from This Episode →
● Collage-making tools help in creating an interesting and eye-catchy collage in a hassle-free manner.
●Several Windows-based tools are available for quick download.
●Wondershare Filmora is a great software to find a collection of stock images in different categories.
Pencil2D Animation Tutorial Overview
Animation is one of the trendiest technologies. The basics of animation were formulated in the 2000s from the moving page trick. The first few animators learned that animation is nothing but continuous switching of frames from one to another. One animated still is switched to another and then another in a quick sequence such that it makes a sequential moving frame. Today, animation has come a long way from where it started and today it is used for several commercials, tutorials, and even educational lecture videos. Pencil2D animation is an amazing animation tool that can be used by even neophytes. Want to learn more about 2d pencil animation and its super cool features? Well, you’re at the perfect place. Today we’ll be telling you more about pencil 2d animation and giving you a small overview of its usage.
In this article
01 [What is Pencil2D and How to Install?](#Part 1)
02 [Overview of the Application Interface](#Part 2)
03 [How to Create Animations with Pencil2D?](#Part 3)
Part 1 What is Pencil2D and How to Install?
2d pencil animation is popular open-source animation software. The software is pretty cool for those who are newly starting off with animation. The open-source software is available on all major operating systems including Windows, Mac OS, and Unix. Using this amazing software, we can make amazing cartoon characters using traditional cartoon-making techniques such as tracing drawing, skinning. Using this software, you can save animations in the native animation formats or extract the animation to PNG, JPG, or other formats. Wish to explore more about pencil 2d animation software? Follow the steps listed below in order to download the pencil2d animation software.
● Firstly, you need to ensure that your device has ample space on it.
● Next, you need to head to the official website of pencil2d.
● Further, you need to select your operating system. You can find different versions of the software, namely windows 7/8/10, windows XP/ Vista, Mac OS, and Linux
● Once downloaded, you need to start the installation setup. Note that this may take a while to download.
● Once downloaded, you can start familiarizing yourself with the software.
Part 2 Overview of the Application Interface
1. The brush tool
The brush tool must have reminded you of paint software in windows. The brush tool is a popular and highly utilitarian basic tool in Pencil2D animation software. You can either access it via the user interface or quickly access it by using the B key on your keyboard. As the name suggests, the brush tool is literally just a brush that allows you to draw and paint any sort of drawings of different shades, colors, and thickness. If you wish to change the color, you can find a color palette on the left side of the interface.

2. The eraser tool
You’ve a brush tool; it’s almost common sense that there’d be an eraser. The eraser tool has an eraser as its icon. If you wish to use the eraser, click on the eraser tool or simply click the E button on your keyboard. Once you’ve selected the tool, you need to simply hover over the parts you wish to erase.

3. Bucket tool
The bucket tool is another useful tool that you can find in the left tool pane of pencil 2d animation. The tool icon looks like a bucket and it is used to fill an entire area with a particular color. You can choose the color you’d like to fill from the color pallet available on the left side. Alternatively, you can also access the bucket tool by pressing the “K” key on your keyboard.

4. Custom colors
A cool feature that you can find on pencil 2d animation software is the custom color one. You can merge and mix colors according to your choice and create your own color. To do so, you need to click on the small color box that you’ll find at the top right of your screen. By doing so, a huge color wheel will appear on your screen. Now you can either enter values of the R, G, and B if you wish to merge different colors and make a new one or select a particular color from the huge color wheel that appears in front of you. These colors vary in gradient, shade, and a lot of different factors.

5. The Undo button
The Undo button is a highly useful functionality for the lazy ones who do not wish to erase the mistake they made. By undoing, the previous step gets reverted and you can start over again. The traditional undo shortcut, Ctrl+Z does work in the pencil 2d animation. Alternatively, you can also use the undo feature via the user interface. You can do so by heading over to the edit option in the topmost bar. The first option in the drop-down menu would be undo.

Part 3 How to Create Animations with Pencil2D?
Creating animations in pencil 2d is slightly sophisticated and certainly needs minimal practice. Follow the steps listed below in order to learn how to animate through pencil 2d to make your first animation.
1. Ensure that you’ve turned on your bitmap on the first frame
Animation works through quick switching of frame which makes it appear as though the object is in motion. By turning on the bitmap, pencil 2d animation ensures that you’ve no blank frames at the start of your animation.

2. Draw your animated character
Since you’re trying to animate, you need to have an animated character or object. Hence, the first step to making your first animation is by drawing the object or character that you wish to animate. Try to make the character as realistic as possible. To start with, maybe you can try animating just a stick figure; this is because animating a complex character is rather difficult for beginners.

3.The three circular buttons
Once you’re satisfied with the character you draw, you need to spot the 3 circular buttons which are arranged in the “+”,”-“,”+” order. By pressing the first “+” button, you can add an empty slide. If you click on the “-“ button, it will delete the most recent slide and if you click on the next “+” button, it will duplicate the current slide.

4.Repeat until you get an animation
Now that you know how to deal with multiple frames, you can continue creating frames and making the animated characters move by tweaking with the drawing in every frame. For instance, if you wish to show that the animated character is running, in one of the frames the left leg should be forward and in the next one, the right leg should be forward. Keep repeating this process of tweaking with frames until you’ve your desired animated video.

Now that we’ve seen the process of animation via Pencil2D, you must have realized that it’s pretty orthodox and complicated. Moreover, you cannot carry out rigging and other newer animation techniques. Hence, we introduce you to Wondershare Filmora Video Editor , your all in one animation making platform. Here you can animate without any hassle. Wondershare Filmora makes your job easier with multiple animation features, you needn’t even draw your animated character. You can simply import a custom-made character and rig the character. Further, you need not deal with multiple frames and personally pay attention to each frame. All in all, Filmora makes your job simple and your animations much more seamless.
For Win 7 or later (64-bit)
For macOS 10.12 or later
Key Takeaways from This Episode
● Animation is actively being used for multiple purposes.
● Today we took a look at one of the orthodox yet popular animation tools, Pencil2D.
● The Pencil2D animation tool offers you multiple functionalities and allows you to make animations.
● Next, we also took a look at Wondershare Filmora Pro, your one-stop shop for all animation needs. You can find multiple animation features here and it’s all so simple.
● What are you waiting for? Your next animation is just one click away.
02 [Overview of the Application Interface](#Part 2)
03 [How to Create Animations with Pencil2D?](#Part 3)
Part 1 What is Pencil2D and How to Install?
2d pencil animation is popular open-source animation software. The software is pretty cool for those who are newly starting off with animation. The open-source software is available on all major operating systems including Windows, Mac OS, and Unix. Using this amazing software, we can make amazing cartoon characters using traditional cartoon-making techniques such as tracing drawing, skinning. Using this software, you can save animations in the native animation formats or extract the animation to PNG, JPG, or other formats. Wish to explore more about pencil 2d animation software? Follow the steps listed below in order to download the pencil2d animation software.
● Firstly, you need to ensure that your device has ample space on it.
● Next, you need to head to the official website of pencil2d.
● Further, you need to select your operating system. You can find different versions of the software, namely windows 7/8/10, windows XP/ Vista, Mac OS, and Linux
● Once downloaded, you need to start the installation setup. Note that this may take a while to download.
● Once downloaded, you can start familiarizing yourself with the software.
Part 2 Overview of the Application Interface
1. The brush tool
The brush tool must have reminded you of paint software in windows. The brush tool is a popular and highly utilitarian basic tool in Pencil2D animation software. You can either access it via the user interface or quickly access it by using the B key on your keyboard. As the name suggests, the brush tool is literally just a brush that allows you to draw and paint any sort of drawings of different shades, colors, and thickness. If you wish to change the color, you can find a color palette on the left side of the interface.
2. The eraser tool
You’ve a brush tool; it’s almost common sense that there’d be an eraser. The eraser tool has an eraser as its icon. If you wish to use the eraser, click on the eraser tool or simply click the E button on your keyboard. Once you’ve selected the tool, you need to simply hover over the parts you wish to erase.
3. Bucket tool
The bucket tool is another useful tool that you can find in the left tool pane of pencil 2d animation. The tool icon looks like a bucket and it is used to fill an entire area with a particular color. You can choose the color you’d like to fill from the color pallet available on the left side. Alternatively, you can also access the bucket tool by pressing the “K” key on your keyboard.
4. Custom colors
A cool feature that you can find on pencil 2d animation software is the custom color one. You can merge and mix colors according to your choice and create your own color. To do so, you need to click on the small color box that you’ll find at the top right of your screen. By doing so, a huge color wheel will appear on your screen. Now you can either enter values of the R, G, and B if you wish to merge different colors and make a new one or select a particular color from the huge color wheel that appears in front of you. These colors vary in gradient, shade, and a lot of different factors.
5. The Undo button
The Undo button is a highly useful functionality for the lazy ones who do not wish to erase the mistake they made. By undoing, the previous step gets reverted and you can start over again. The traditional undo shortcut, Ctrl+Z does work in the pencil 2d animation. Alternatively, you can also use the undo feature via the user interface. You can do so by heading over to the edit option in the topmost bar. The first option in the drop-down menu would be undo.
Part 3 How to Create Animations with Pencil2D?
Creating animations in pencil 2d is slightly sophisticated and certainly needs minimal practice. Follow the steps listed below in order to learn how to animate through pencil 2d to make your first animation.
1. Ensure that you’ve turned on your bitmap on the first frame
Animation works through quick switching of frame which makes it appear as though the object is in motion. By turning on the bitmap, pencil 2d animation ensures that you’ve no blank frames at the start of your animation.
2. Draw your animated character
Since you’re trying to animate, you need to have an animated character or object. Hence, the first step to making your first animation is by drawing the object or character that you wish to animate. Try to make the character as realistic as possible. To start with, maybe you can try animating just a stick figure; this is because animating a complex character is rather difficult for beginners.
3.The three circular buttons
Once you’re satisfied with the character you draw, you need to spot the 3 circular buttons which are arranged in the “+”,”-“,”+” order. By pressing the first “+” button, you can add an empty slide. If you click on the “-“ button, it will delete the most recent slide and if you click on the next “+” button, it will duplicate the current slide.
4.Repeat until you get an animation
Now that you know how to deal with multiple frames, you can continue creating frames and making the animated characters move by tweaking with the drawing in every frame. For instance, if you wish to show that the animated character is running, in one of the frames the left leg should be forward and in the next one, the right leg should be forward. Keep repeating this process of tweaking with frames until you’ve your desired animated video.
Now that we’ve seen the process of animation via Pencil2D, you must have realized that it’s pretty orthodox and complicated. Moreover, you cannot carry out rigging and other newer animation techniques. Hence, we introduce you to Wondershare Filmora Video Editor , your all in one animation making platform. Here you can animate without any hassle. Wondershare Filmora makes your job easier with multiple animation features, you needn’t even draw your animated character. You can simply import a custom-made character and rig the character. Further, you need not deal with multiple frames and personally pay attention to each frame. All in all, Filmora makes your job simple and your animations much more seamless.
For Win 7 or later (64-bit)
For macOS 10.12 or later
Key Takeaways from This Episode
● Animation is actively being used for multiple purposes.
● Today we took a look at one of the orthodox yet popular animation tools, Pencil2D.
● The Pencil2D animation tool offers you multiple functionalities and allows you to make animations.
● Next, we also took a look at Wondershare Filmora Pro, your one-stop shop for all animation needs. You can find multiple animation features here and it’s all so simple.
● What are you waiting for? Your next animation is just one click away.
How to Create Free Photo Collage Frame in Minutes?
How to Create Photo Collage Frame for Free in Minutes?
An easy yet powerful editor
Numerous effects to choose from
Detailed tutorials provided by the official channel
Decoration of pictures and collages can be done by making beautiful and stylish frames. A family picture or collage can be beautified by adding an attractive frame to it. Know about Best App for Photo Frames Online so you can create photo collages easily in minutes.
In this article
01 [How Do You Make a Collage Picture Frame?](#Part 1)
02 [What is the Best App for Photo Frames?](#Part 2)
Part 1 How Do You Make a Collage Picture Frame?
A beautiful collage without a stylish frame will not be attractive. When a family collage is accompanied by an artistic frame, it adds beauty to it and will be an attraction point for the visitors in the home. Wondering where to get it from? You can do it easily through some most popular apps. Yes, you can get your photo collage framed by yourself.

A wall can be decorated with collage picture frames by following just a few simple steps. Let’s begin with!!!
● Selection of the place where the collage frame is required to be hung: The place should be selected based on certain factors such as being easily approachable, proper lighting, and matching with the theme of the home. The place should be sufficient to add on some more picture frames in the future. The wall picture collage frames shall be created based on the room themes like kid’s room, living room, or bedroom. The position of the frames should be marked with tape so that the exact dimension can be known.
● 2. Select the online application to create frames: There are many applications available online that offer pictures collage frames. Choose one application as per the interest and explore it over the phone or desktop. There are various collage picture frame templates available at the application.
● 3. Uploading the pictures: Select the frame that is best for the picture. The frames shall be selected as per the size of the collage. Several pictures can be selected to make a collage and fix the frame. The frame style can be changed that suits best to the picture or collage. A family picture can be uploaded to create a beautiful and perfect size family photo frame collage.
● 4. Customization: The Photo Collage Frame can be even made better with customization over online applications. Text and style can be included in the frames to give it a better look. Grid frame for picture collage is also available which can be created that fits perfectly to the pictures.
● 5. A collage photo frame is ready to hang on the wall & share: The photo collage with frame can be downloaded from the application. A beautiful picture frame collage wall can be hung in the living room or can be shared online with family and friends to print the same. More frames can be added in the future by choosing the same theme and customization.
Part 2 Part2 what is the Best App for Photo Frames?
Selecting the best App for a photo frame enhances the appearance of any ordinary picture. Some of the top Applications used for frame collage wall are as mentioned:

02 PhotoDirector
This app is popular due to its great AI tools, attractive picture effects, and advanced color control. It has a massive collection of frames that fits perfectly for a single picture as well as a collage. The style options of frames available on the app are classic, modern, and whimsical. Animation and glitch effects add an extra feature to this app.
Pros:
1. Wide range of frames is available.
2. It is easy to use as it can work on Android, iOS, macOS, and Windows devices.
3. Free version is available and photo frames can be shared over social media platforms.
Cons:
1. a Large number of editing options makes it confusing.
2. Fewer features are available.
3. Difficulty in finding plug-in features.

03PicsArt-Our Choice
PicsArt-Our Choice app is having a good combination best photo frames and multi-functional photo editing tools. Clip art, text option, frame editing, and making attractive collages make this app a masterpiece. This app can be used over smartphones and the pictures can be easily shared over social media platforms.
Pros:
1. Availability of tools to make clipart and collages.
2. Option to edit frames and objects.
3. Fully packed with a lot of stickers, frames, and filter options.
Cons:
1. The processing of images is slower.
2. Frequent ads disturb the process of editing and frame creation.
3. The application requires more space on downloading over the phone

04 PicFrame
This application has features to combine multiple pictures in one frame and the created frames can be easily shared over social media platforms. A great artwork can be done by using advanced tools such as filters, attractive frames, and drawing tools. The adjustable photo effects, background patterns and fully customized frames allow creating some attractive pictures and collage frame design.
Pros:
1. Option to save pictures in different resolutions.
2. Great tools for reshaping pictures and wide frame patterns
3. Work also on iPhone and iPad.
Cons:
1. With more new and advanced apps, it has become slightly outdated.
2. It closes very frequently, so sometimes work done on the application is lost.
3. Time to create frames is longer.

05Photo Grid
Photo Grid is an App that offers great photo editing features with more than three hundred layouts to give an attractive look to a picture. The users can transform their various pictures into beautiful collages. Filters, stickers, makeup tools, animated emoticons, and customized background features have made this app a bit popular. Extra pages can be added and the Lightbox feature makes it good for presentation.
Pros:
1. Massive collection of photo frames with customized features
2. Easy to use.
3. Various photo editing option
Cons:
1. It comes with various ads that trouble making frames and collages.
2. Lot of flexibility is not there regarding making videos with pictures.
3. Own frames cannot be created.

06ImgLabs
ImgLabs is one of the best applications to decorate photos and add creativity to them. Easy editing, beautify and stickers can be done over pictures and can be easily shared over Instagram and Facebook. More than twenty images can be added along with beautiful frames through this app. Cool photo filters, drawing tools, collage photo frame design tools, and texture effects make it a great photo frame application.
Pros:
1. The Android and iOS versions of the app are easy to use.
2. Attractive blurring and background effects give an attractive look to the images and picture frames.
3. Well-developed photo editing tools are available.
Cons:
1. The frames available are less as compared to other photo & frame editing applications.
2. Difference in functions is noticed in iOS and Android apps.
3. Installation issues in photo edit and stickers

So, these were some of the applications that offer to make some creative photo edits, collages, and frames. Turning to high definition of pictures and frames, most of the applications are coming up with new and advanced features to give the best picture experience to people. One of the applications which any creative person loves to use is Filmora.
****Wondershare Filmora Video Editor ** that creates attractive and professional quality videos for both business and personal purposes. It transforms the video by adding various stylish effects. One can edit the clips, add watermarks, and can adjust the brightness of the videos in simple steps. A wide range of stickers, animated texts, sound effects, filters, and inserting colorful borders over videos make it a great app.
For Win 7 or later (64-bit)
For macOS 10.12 or later
The videos can be made in different file formats such as mp4, wmv, avi, gif, and mp3 and can be easily shared over social media platforms. This app has great importance for business as it offers various facilities such as Multi-channel marketing, social advertising, and social promotion. It is good for user and brand management also.
So, making any video from pictures or movies through Filmora app will be an amazing idea. With advanced texting, color tuning, and 3D effects, one can be so creative. Even Filmora can be used to create video projects.
● Key Takeaways from This Episode →
● Simple pictures or collages can be taken to next level by adding alluring frames to them. With advanced drawing tools, pictures, and light effects, a stylish collage photo frame design can be created online. It allows bringing so many memories of people in one beautiful frame.
● Photo frame collage wall can be created over many applications. There are Android applications that offer many advanced features required to give a fine touch to the pictures, collages, and frames. They can be used and frames for family pictures can be made easily by following simple steps.
● he selection of the application should be made based on the several options available with the app. For example, an app that has easy to use, is good for all devices, has great editing features, eye-catching eye work and mesmerizing effect shall be preferred.
● So, try some amazing and advanced online Apps to create beautiful picture frames for you and your family now!!!
Decoration of pictures and collages can be done by making beautiful and stylish frames. A family picture or collage can be beautified by adding an attractive frame to it. Know about Best App for Photo Frames Online so you can create photo collages easily in minutes.
In this article
01 [How Do You Make a Collage Picture Frame?](#Part 1)
02 [What is the Best App for Photo Frames?](#Part 2)
Part 1 How Do You Make a Collage Picture Frame?
A beautiful collage without a stylish frame will not be attractive. When a family collage is accompanied by an artistic frame, it adds beauty to it and will be an attraction point for the visitors in the home. Wondering where to get it from? You can do it easily through some most popular apps. Yes, you can get your photo collage framed by yourself.
A wall can be decorated with collage picture frames by following just a few simple steps. Let’s begin with!!!
● Selection of the place where the collage frame is required to be hung: The place should be selected based on certain factors such as being easily approachable, proper lighting, and matching with the theme of the home. The place should be sufficient to add on some more picture frames in the future. The wall picture collage frames shall be created based on the room themes like kid’s room, living room, or bedroom. The position of the frames should be marked with tape so that the exact dimension can be known.
● 2. Select the online application to create frames: There are many applications available online that offer pictures collage frames. Choose one application as per the interest and explore it over the phone or desktop. There are various collage picture frame templates available at the application.
● 3. Uploading the pictures: Select the frame that is best for the picture. The frames shall be selected as per the size of the collage. Several pictures can be selected to make a collage and fix the frame. The frame style can be changed that suits best to the picture or collage. A family picture can be uploaded to create a beautiful and perfect size family photo frame collage.
● 4. Customization: The Photo Collage Frame can be even made better with customization over online applications. Text and style can be included in the frames to give it a better look. Grid frame for picture collage is also available which can be created that fits perfectly to the pictures.
● 5. A collage photo frame is ready to hang on the wall & share: The photo collage with frame can be downloaded from the application. A beautiful picture frame collage wall can be hung in the living room or can be shared online with family and friends to print the same. More frames can be added in the future by choosing the same theme and customization.
Part 2 Part2 what is the Best App for Photo Frames?
Selecting the best App for a photo frame enhances the appearance of any ordinary picture. Some of the top Applications used for frame collage wall are as mentioned:
02 PhotoDirector
This app is popular due to its great AI tools, attractive picture effects, and advanced color control. It has a massive collection of frames that fits perfectly for a single picture as well as a collage. The style options of frames available on the app are classic, modern, and whimsical. Animation and glitch effects add an extra feature to this app.
Pros:
1. Wide range of frames is available.
2. It is easy to use as it can work on Android, iOS, macOS, and Windows devices.
3. Free version is available and photo frames can be shared over social media platforms.
Cons:
1. a Large number of editing options makes it confusing.
2. Fewer features are available.
3. Difficulty in finding plug-in features.
03PicsArt-Our Choice
PicsArt-Our Choice app is having a good combination best photo frames and multi-functional photo editing tools. Clip art, text option, frame editing, and making attractive collages make this app a masterpiece. This app can be used over smartphones and the pictures can be easily shared over social media platforms.
Pros:
1. Availability of tools to make clipart and collages.
2. Option to edit frames and objects.
3. Fully packed with a lot of stickers, frames, and filter options.
Cons:
1. The processing of images is slower.
2. Frequent ads disturb the process of editing and frame creation.
3. The application requires more space on downloading over the phone
04 PicFrame
This application has features to combine multiple pictures in one frame and the created frames can be easily shared over social media platforms. A great artwork can be done by using advanced tools such as filters, attractive frames, and drawing tools. The adjustable photo effects, background patterns and fully customized frames allow creating some attractive pictures and collage frame design.
Pros:
1. Option to save pictures in different resolutions.
2. Great tools for reshaping pictures and wide frame patterns
3. Work also on iPhone and iPad.
Cons:
1. With more new and advanced apps, it has become slightly outdated.
2. It closes very frequently, so sometimes work done on the application is lost.
3. Time to create frames is longer.
05Photo Grid
Photo Grid is an App that offers great photo editing features with more than three hundred layouts to give an attractive look to a picture. The users can transform their various pictures into beautiful collages. Filters, stickers, makeup tools, animated emoticons, and customized background features have made this app a bit popular. Extra pages can be added and the Lightbox feature makes it good for presentation.
Pros:
1. Massive collection of photo frames with customized features
2. Easy to use.
3. Various photo editing option
Cons:
1. It comes with various ads that trouble making frames and collages.
2. Lot of flexibility is not there regarding making videos with pictures.
3. Own frames cannot be created.
06ImgLabs
ImgLabs is one of the best applications to decorate photos and add creativity to them. Easy editing, beautify and stickers can be done over pictures and can be easily shared over Instagram and Facebook. More than twenty images can be added along with beautiful frames through this app. Cool photo filters, drawing tools, collage photo frame design tools, and texture effects make it a great photo frame application.
Pros:
1. The Android and iOS versions of the app are easy to use.
2. Attractive blurring and background effects give an attractive look to the images and picture frames.
3. Well-developed photo editing tools are available.
Cons:
1. The frames available are less as compared to other photo & frame editing applications.
2. Difference in functions is noticed in iOS and Android apps.
3. Installation issues in photo edit and stickers
So, these were some of the applications that offer to make some creative photo edits, collages, and frames. Turning to high definition of pictures and frames, most of the applications are coming up with new and advanced features to give the best picture experience to people. One of the applications which any creative person loves to use is Filmora.
****Wondershare Filmora Video Editor ** that creates attractive and professional quality videos for both business and personal purposes. It transforms the video by adding various stylish effects. One can edit the clips, add watermarks, and can adjust the brightness of the videos in simple steps. A wide range of stickers, animated texts, sound effects, filters, and inserting colorful borders over videos make it a great app.
For Win 7 or later (64-bit)
For macOS 10.12 or later
The videos can be made in different file formats such as mp4, wmv, avi, gif, and mp3 and can be easily shared over social media platforms. This app has great importance for business as it offers various facilities such as Multi-channel marketing, social advertising, and social promotion. It is good for user and brand management also.
So, making any video from pictures or movies through Filmora app will be an amazing idea. With advanced texting, color tuning, and 3D effects, one can be so creative. Even Filmora can be used to create video projects.
● Key Takeaways from This Episode →
● Simple pictures or collages can be taken to next level by adding alluring frames to them. With advanced drawing tools, pictures, and light effects, a stylish collage photo frame design can be created online. It allows bringing so many memories of people in one beautiful frame.
● Photo frame collage wall can be created over many applications. There are Android applications that offer many advanced features required to give a fine touch to the pictures, collages, and frames. They can be used and frames for family pictures can be made easily by following simple steps.
● he selection of the application should be made based on the several options available with the app. For example, an app that has easy to use, is good for all devices, has great editing features, eye-catching eye work and mesmerizing effect shall be preferred.
● So, try some amazing and advanced online Apps to create beautiful picture frames for you and your family now!!!
10 Great Moving Animation PowerPoint Techniques
10 Awesome Moving Animation PowerPoint Techniques
An easy yet powerful editor
Numerous effects to choose from
Detailed tutorials provided by the official channel
PowerPoints can be quite dull without anything to spice it up. So, this question is more than 100% warranted. Fortunately, we were able to pull together a tutorial on creating moving animation PowerPoint presentations.
Complete with some templates that you can start off with (if you’d prefer to make it as simple as possible for yourself.)
In this article
01 [6 Animated Powerpoint Templates with Interactive Features](#Part 1)
02 [How to Create a Moving Animation in Powerpoint](#Part 2)
03 [10 Moving Animation Powerpoint Techniques](#Part 3)
Part 1 6 Animated PowerPoint Templates with Interactive Features
The default people tend to-go-to when it comes to presentations are videos. As they tend to be more engaging on their own. For that, you’ll see people gravitating towards software like Filmora, which can create beautiful, eye-catching presentations that you can easily and quickly share. Not just to an immediate audience, but also on social media and the like.
However, of course, sometimes a personal touch is important in a presentation — important to have a ‘voice’ attached to the image on the screen. But just because this is the case, doesn’t mean that you shouldn’t go all out on your presentation. Hence, why moving animation PowerPoint templates are such a big deal:
01Company Presentation PowerPoint Template
For the first of the Moving Animation PowerPoint templates that we have to introduce, we chose the ‘Company Presentation PowerPoint Template.’ As you can perhaps guess from the name, it’s a very professional template. It comes with a total of 500 sample slides that you can choose from (50 of which are unique), and it’s set up with professional animations that can spice up your presentation without making it look gaudy or over-the-top.

02Move Animated PowerPoint Template
Next is the modern, minimalistic template called “Move Animated.” This one is a lot more versatile, with every single one of the 144 unique slides available suitably animated. The best part of it is definitely the easy way in which it can be used. With the modern, minimalistic style, it’s easy enough to remove the presets and replace them with suitable company or product images to promote your content, idea, or project.

0340 Animated Conceptual Slides for PowerPoint
Again, we have another modern and minimalistic kind of PowerPoint template with ‘40 Animated Conceptual Slides for PowerPoint.’ It comes with 40 modern slides, all of which come fully animated are easy enough to customize with your own branding or content.

04UNIGRAPH - Animated & Creative Template (PPTX)
For a bit more fun, our next template is “UNIGRAPH.” This still definitely fits the description ‘minimalistic’ but the pop of color and effects that it brings to the table gives it a different kind of vibe from all the others. No less professional, but certainly more fun. Of course, most importantly, perhaps, is the fact that each slide is smoothly animated.

05Graph & Charts PowerPoint Presentation
For this next one, we introduce a template set called “Graphs & Charts” for those who may want to present their products, projects, ideas, etc. in the shape of graphs and charts. It’s perfect for professionals, certainly. Especially with its clean look, brightened only by occasional pops of color that can be seen from the graphs and charts that it comes with.

06Laststyle - PowerPoint Template
This next PowerPoint template is most suited for businesses looking to promote their products. The creator of the template has provided five different colored versions of the template, each with 30 unique slides that were carefully sectioned with suitable animations.

Part 2 How to Create a Moving Animation in PowerPoint
Now we come to the point of the article where we speak directly to those who may want to experiment more by personally creating a moving animation PowerPoint. For this example, we’ll be teaching you how to create a path animation PowerPoint with the available tools that the software offers under ‘Animation.’ Stick around if you want to learn more.
01Step 1. Open Project.
First things first, of course. Start a new project. When you’ve started, move on to the Animation tab (which we’ve pointed out in the image below.)

02Step 2. Add Animation.
Then, make sure to select the object or model that you want to animate (in this case, we’ve inserted a 2D model of a businessman), and then click the ‘Add Animation’ button (shown in the image below.)

03Step 3. Choose Animation.
Under ‘Add Animation’ you’ll find several different options for animations that you can choose from. Of course, since our goal is to create a PowerPoint Motion Path Animation, we have selected one of the ‘Motion Path’ options.

04Step 4. Choose Motion Path Animation
In order to make motion animation in PowerPoint, you must select one of the offered ‘Motion Paths’ (i.e., Bounce, Line, Arcs, etc.) and then use the motion path tool that appears to control the direction you wish to make your character move.
In this example, we chose the ‘Lines’ motion path (1) and then used the line tool to create a path for our businessman model. To walk from the right side of the screen towards the left.

05Step 5. Adjust Animation.
With path animation PowerPoint complete, you can adjust as needed with the tools provided. For example, you can have the character start moving as soon as the slide opens, or wait until a minute has passed, you can extend the animation by changing duration, etc.

Part 3 10 Moving Animation PowerPoint Techniques
For this last step, we break down some important PowerPoint 3D Animation need-to-knows. Including the specifics provided by each of the options made available to you and why it’s important to explore every single one to create better and more professional-looking presentations.
01Transitions
When it comes to PowerPoint presentations, most people are no doubt the most familiar with ‘Transitions’ when talking in terms of adding animation into a presentation. This one decides whether you want to shift from one slide to another smoothly, or if you want the previous slide to break into splinters, or rotate into the next slide, and so on and so forth. It’s an ‘in-between’ animation that signals where one ends and the other begins.

02Animations
Now, for the ‘Animations’ tab, we focus on animations that occur in the slide (not in-between like transitions). This can include a wide array of things. Whether it be characters moving (like shown in the tutorial we provided), text boxes appearing and disappearing in short order, images bouncing into view in dramatic fashion, and so on and so forth. There’s lots of potential here.

03Animation - Start
We mentioned this previously in the tutorial, but PowerPoint (which does not offer the more advanced 3D customization options), does still give you the freedom to choose how you want certain animations to work.
In the case of the ‘Animations-Start’ option, the goal is to decide when an animation starts playing. Do you want it to start after a click? Or maybe you want it to start up immediately? Whatever the case may be, this function will let you choose the specifics.

044. Animation - Duration
Next, we decide how long you want the animation to last. For example, if you chose to add a PowerPoint 3D rotation animation into a character, how long do you want it to spin before it settles into place? Perhaps only a second? Perhaps more? Whatever you chose, this is the option that will let you finalize that.

05Animation - Delay
This one is self-explanatory as well. But suffice to say, the ‘Delay’ option is for deciding how much an animation is delayed before starting. For example, if you chose to start it ‘On Click’ you can increase the delay to keep it from playing immediately on click.

06Break Up Presentation into Sections
A lot of PowerPoint templates, you’ll find, are naturally broken into sections. This is because it is easier to consume it in that way. It’s also a good signal to your audience as to what point of the presentation you are on. Are you in the beginning? The middle? Near the end? Etc. In this case, the best option for showing it is transitions that separate the sections from one another.

07Add Animation - Entrance
As promised earlier, we’ll be going through each type of animation is available under the ‘Add Animation’ option. The first is “Entrance” animations. This one is pretty easy to guess. It makes up a variety of animations that serve as its entrance animation. Here are some examples:
● Appear: To have objects appear without any other effect.
● Fade: To have objects fade into view.
● Bounce: To have objects bounce into view.
● Swivel: To have objects swivel into view.

08Add Animation - Emphasis
This next animation style is to give emphasis to an already-present object. For example, at a click, you can have a text box ‘Pulse’ and become the center of attention. You can change ‘Object Color’ to make it stand out. And so on.

099. Add Animation - Exit
Opposite of the ‘Entrance’ animations are the ‘Exit’ animations. You’ll notice that the style of animations is the same here. The only difference is that the animations occur to exit the project out of the presentation. For example, an image exiting to reveal text. Or text flying out to be replaced with more text, etc.

10Add Animation - Motion Path
We’ve already mentioned the PowerPoint Motion Path animation style previously, but just to reiterate some things, this is the most customizable animation feature on PowerPoint. One that allows you to move objects across the slide in whatever way you wish. In our example, we created a motion path animation that took the character from the center of the screen to the left of the screen.

● Key Takeaways from This Episode →
● While videos are the most popular way to share information, there are some presentations that require a heavier guiding hand.
● In these situations, a PowerPoint presentation, carefully animated, can serve in place of an edited video.
● There are templates available that you can take advantage of if you’d prefer to start with something to work from. We introduced some in this article that we think were particularly notable.
● But, of course, more careful personalization is sometimes necessary. In that case, we hope that you find our tutorial and our list of PowerPoint techniques helpful.
PowerPoints can be quite dull without anything to spice it up. So, this question is more than 100% warranted. Fortunately, we were able to pull together a tutorial on creating moving animation PowerPoint presentations.
Complete with some templates that you can start off with (if you’d prefer to make it as simple as possible for yourself.)
In this article
01 [6 Animated Powerpoint Templates with Interactive Features](#Part 1)
02 [How to Create a Moving Animation in Powerpoint](#Part 2)
03 [10 Moving Animation Powerpoint Techniques](#Part 3)
Part 1 6 Animated PowerPoint Templates with Interactive Features
The default people tend to-go-to when it comes to presentations are videos. As they tend to be more engaging on their own. For that, you’ll see people gravitating towards software like Filmora, which can create beautiful, eye-catching presentations that you can easily and quickly share. Not just to an immediate audience, but also on social media and the like.
However, of course, sometimes a personal touch is important in a presentation — important to have a ‘voice’ attached to the image on the screen. But just because this is the case, doesn’t mean that you shouldn’t go all out on your presentation. Hence, why moving animation PowerPoint templates are such a big deal:
01Company Presentation PowerPoint Template
For the first of the Moving Animation PowerPoint templates that we have to introduce, we chose the ‘Company Presentation PowerPoint Template.’ As you can perhaps guess from the name, it’s a very professional template. It comes with a total of 500 sample slides that you can choose from (50 of which are unique), and it’s set up with professional animations that can spice up your presentation without making it look gaudy or over-the-top.
02Move Animated PowerPoint Template
Next is the modern, minimalistic template called “Move Animated.” This one is a lot more versatile, with every single one of the 144 unique slides available suitably animated. The best part of it is definitely the easy way in which it can be used. With the modern, minimalistic style, it’s easy enough to remove the presets and replace them with suitable company or product images to promote your content, idea, or project.
0340 Animated Conceptual Slides for PowerPoint
Again, we have another modern and minimalistic kind of PowerPoint template with ‘40 Animated Conceptual Slides for PowerPoint.’ It comes with 40 modern slides, all of which come fully animated are easy enough to customize with your own branding or content.
04UNIGRAPH - Animated & Creative Template (PPTX)
For a bit more fun, our next template is “UNIGRAPH.” This still definitely fits the description ‘minimalistic’ but the pop of color and effects that it brings to the table gives it a different kind of vibe from all the others. No less professional, but certainly more fun. Of course, most importantly, perhaps, is the fact that each slide is smoothly animated.
05Graph & Charts PowerPoint Presentation
For this next one, we introduce a template set called “Graphs & Charts” for those who may want to present their products, projects, ideas, etc. in the shape of graphs and charts. It’s perfect for professionals, certainly. Especially with its clean look, brightened only by occasional pops of color that can be seen from the graphs and charts that it comes with.
06Laststyle - PowerPoint Template
This next PowerPoint template is most suited for businesses looking to promote their products. The creator of the template has provided five different colored versions of the template, each with 30 unique slides that were carefully sectioned with suitable animations.
Part 2 How to Create a Moving Animation in PowerPoint
Now we come to the point of the article where we speak directly to those who may want to experiment more by personally creating a moving animation PowerPoint. For this example, we’ll be teaching you how to create a path animation PowerPoint with the available tools that the software offers under ‘Animation.’ Stick around if you want to learn more.
01Step 1. Open Project.
First things first, of course. Start a new project. When you’ve started, move on to the Animation tab (which we’ve pointed out in the image below.)
02Step 2. Add Animation.
Then, make sure to select the object or model that you want to animate (in this case, we’ve inserted a 2D model of a businessman), and then click the ‘Add Animation’ button (shown in the image below.)
03Step 3. Choose Animation.
Under ‘Add Animation’ you’ll find several different options for animations that you can choose from. Of course, since our goal is to create a PowerPoint Motion Path Animation, we have selected one of the ‘Motion Path’ options.
04Step 4. Choose Motion Path Animation
In order to make motion animation in PowerPoint, you must select one of the offered ‘Motion Paths’ (i.e., Bounce, Line, Arcs, etc.) and then use the motion path tool that appears to control the direction you wish to make your character move.
In this example, we chose the ‘Lines’ motion path (1) and then used the line tool to create a path for our businessman model. To walk from the right side of the screen towards the left.
05Step 5. Adjust Animation.
With path animation PowerPoint complete, you can adjust as needed with the tools provided. For example, you can have the character start moving as soon as the slide opens, or wait until a minute has passed, you can extend the animation by changing duration, etc.
Part 3 10 Moving Animation PowerPoint Techniques
For this last step, we break down some important PowerPoint 3D Animation need-to-knows. Including the specifics provided by each of the options made available to you and why it’s important to explore every single one to create better and more professional-looking presentations.
01Transitions
When it comes to PowerPoint presentations, most people are no doubt the most familiar with ‘Transitions’ when talking in terms of adding animation into a presentation. This one decides whether you want to shift from one slide to another smoothly, or if you want the previous slide to break into splinters, or rotate into the next slide, and so on and so forth. It’s an ‘in-between’ animation that signals where one ends and the other begins.
02Animations
Now, for the ‘Animations’ tab, we focus on animations that occur in the slide (not in-between like transitions). This can include a wide array of things. Whether it be characters moving (like shown in the tutorial we provided), text boxes appearing and disappearing in short order, images bouncing into view in dramatic fashion, and so on and so forth. There’s lots of potential here.
03Animation - Start
We mentioned this previously in the tutorial, but PowerPoint (which does not offer the more advanced 3D customization options), does still give you the freedom to choose how you want certain animations to work.
In the case of the ‘Animations-Start’ option, the goal is to decide when an animation starts playing. Do you want it to start after a click? Or maybe you want it to start up immediately? Whatever the case may be, this function will let you choose the specifics.
044. Animation - Duration
Next, we decide how long you want the animation to last. For example, if you chose to add a PowerPoint 3D rotation animation into a character, how long do you want it to spin before it settles into place? Perhaps only a second? Perhaps more? Whatever you chose, this is the option that will let you finalize that.
05Animation - Delay
This one is self-explanatory as well. But suffice to say, the ‘Delay’ option is for deciding how much an animation is delayed before starting. For example, if you chose to start it ‘On Click’ you can increase the delay to keep it from playing immediately on click.
06Break Up Presentation into Sections
A lot of PowerPoint templates, you’ll find, are naturally broken into sections. This is because it is easier to consume it in that way. It’s also a good signal to your audience as to what point of the presentation you are on. Are you in the beginning? The middle? Near the end? Etc. In this case, the best option for showing it is transitions that separate the sections from one another.
07Add Animation - Entrance
As promised earlier, we’ll be going through each type of animation is available under the ‘Add Animation’ option. The first is “Entrance” animations. This one is pretty easy to guess. It makes up a variety of animations that serve as its entrance animation. Here are some examples:
● Appear: To have objects appear without any other effect.
● Fade: To have objects fade into view.
● Bounce: To have objects bounce into view.
● Swivel: To have objects swivel into view.
08Add Animation - Emphasis
This next animation style is to give emphasis to an already-present object. For example, at a click, you can have a text box ‘Pulse’ and become the center of attention. You can change ‘Object Color’ to make it stand out. And so on.
099. Add Animation - Exit
Opposite of the ‘Entrance’ animations are the ‘Exit’ animations. You’ll notice that the style of animations is the same here. The only difference is that the animations occur to exit the project out of the presentation. For example, an image exiting to reveal text. Or text flying out to be replaced with more text, etc.
10Add Animation - Motion Path
We’ve already mentioned the PowerPoint Motion Path animation style previously, but just to reiterate some things, this is the most customizable animation feature on PowerPoint. One that allows you to move objects across the slide in whatever way you wish. In our example, we created a motion path animation that took the character from the center of the screen to the left of the screen.
● Key Takeaways from This Episode →
● While videos are the most popular way to share information, there are some presentations that require a heavier guiding hand.
● In these situations, a PowerPoint presentation, carefully animated, can serve in place of an edited video.
● There are templates available that you can take advantage of if you’d prefer to start with something to work from. We introduced some in this article that we think were particularly notable.
● But, of course, more careful personalization is sometimes necessary. In that case, we hope that you find our tutorial and our list of PowerPoint techniques helpful.
Some Must-Know Useful Lego Animation Ideas for You
Some Must-know Useful Lego Animation ideas for you
An easy yet powerful editor
Numerous effects to choose from
Detailed tutorials provided by the official channel
There are so many things to learn in creating a LEGO movie, including the software and stop motion animation. There are tons of Lego animation software data for beginners and professionals. Many beginners make classic mistakes in brickfilming, and as a result, they don’t get the most out of their effort.
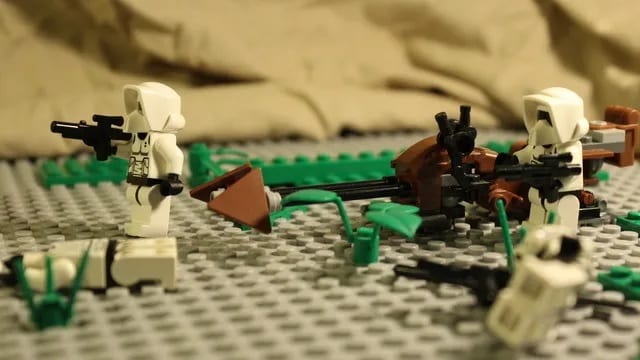
Do you want to create a stop motion LEGO movie and determine the kind of tool you will have to apply to Lego city animation? Worry not, as this Lego animation tutorial will guide you through some more useful LEGO animation ideas for beginners and professionals. And, you will get to know how Lego animation videos and Lego ww2 animation goes hand in hand with the help of different Lego Animation Makers here under Lego animation class. In addition to that, some excellent Lego animation movie examples will give you a better idea of how Lego Animation works in reality.
In this article
01 [Best LEGO Animation Makers in 2022](#Part 1)
02 [Three Sharing of LEGO Animation Examples worth Learning from](#Part 2)
03 [Advanced LEGO Animation Tips for You](#Part 3)
Part 1 LEGO Animation Makers for Windows/Mac
01**Wondershare Filmora Video Editor **
Wondershare Filmora - Best Video Editor for Mac/Windows
5,481,435 people have downloaded it.
Build unique custom animations without breaking a sweat.
Focus on creating epic stories and leave the details to Filmora’s auto features.
Start a creative adventure with drag & drop effects and endless possibilities.
Filmora simplifies advanced features to save you time and effort.
Filmora cuts out repetition so you can move on to your next creative breakthrough.
Filmora Video Editor is the best LEGO stop motion movie maker available for windows and Mac and highly recommended video editing software. This software is suitable for making LEGO among us animation because of its exclusive features:
● LEGO stop-motion movies are done quickly on this software
● It uses the editing tools like cropping, trimming, combing, rotating, and splitting videos.
● It has various effects that you can use to style your video and make a masterpiece.
● It supports Windows (bits), and MacOs 10.(High Sierra), Mac OS 10.(Sierra), OS X 10.(El Capitan), OS X 10.(Yosemite)
● Your LEGO stop-motion movie can be directly online using this software.
02FrameByFrame
FrameByFrame is a free LEGO mouth animation maker available for Mac users. It is an introductory video creation program that uses a webcam to create stop motion. It is elementary to use, and you need to have cameras such as i-sight connected with your Mac device to take shots by pressing the camera button. This software displays what you took by the camera and the frame superimposed to create the stop motion movie. It is light, easy to use, and you can trim the unwanted parts if needed.
03Boinx iStopMotion
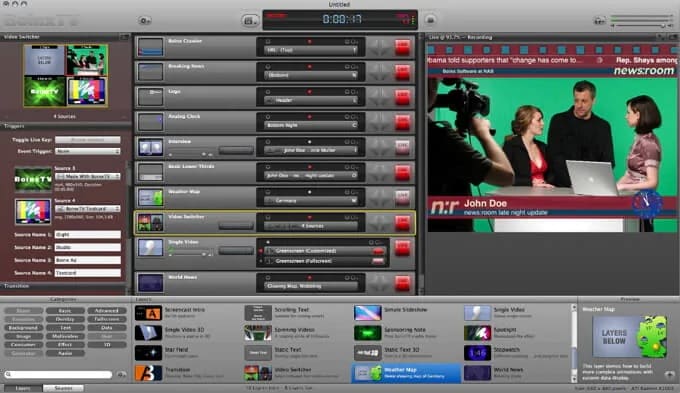
Boinx iStopMotion is a paid LEGO stop-motion movie-maker ideal for higher-level Mac devices. It can create a shot-by-shot sequence using stop motion and time-lapse. With the help of the menu, it is perfect for kids and features onion skinning. It allows you to create a LEGO movie from your imagination and creativity, which features overlay, zooming, blinking to make movement more visible, etc. After creating or using this software, you can export your video and enjoy it on your movie player.
04Stop Motion Pro Eclipse
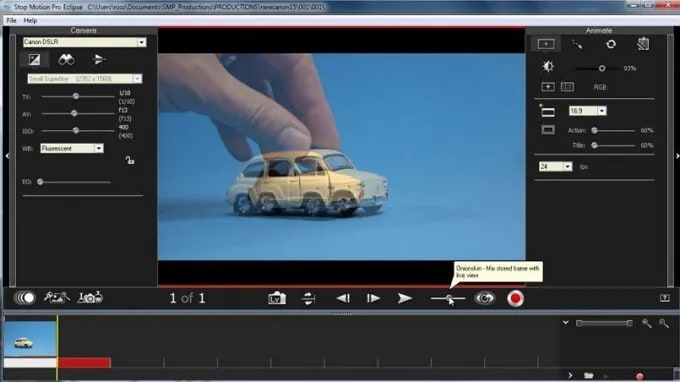
Stop Motion Pro Eclipse is a paid video creation software available for Windows to help you create LEGO stop motion animation movies. It is highly compatible with many popular video webcams and cameras that can capture and paste pictures and turn them into lovely stories with animated characters. It allows you to play up to frames per second, and while you can lay back to stop moving animation, you can also record audio. It also allows you to plan and track the movement of the movie characters and Lego friends animation.
05IKITMovie
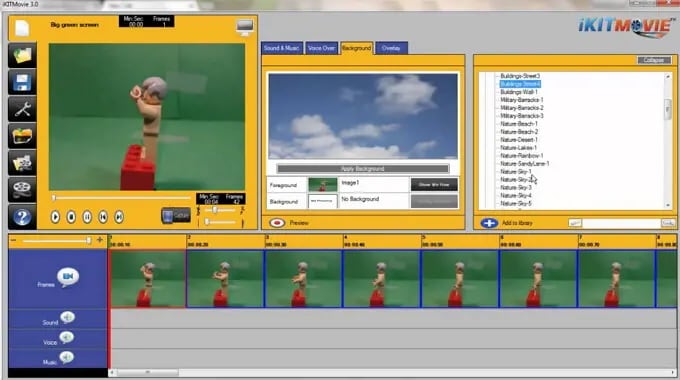
IKITMovie is a paid Lego animations 63movie maker for Windows devices that helps solve the problem of making good LEGO stop motion animation videos. It is easy to use in any age range and has thousands of background audio tracks. It is perfect for creating LEGO animation or clay motion by using the green screen feature to replace the original background of the video with still or moving images.
Part 2 LEGO Animation Makers for Android and iPhone
01Stop Motion Studio
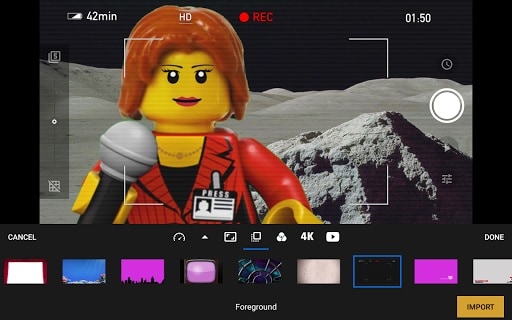
Stop Motion Studio is best for iOS and Android devices equipped with a versatile set of animated stop-motion tools and Grant complete control over all camera settings. It allows you to create LEGO stop-motion animated movies instantly and anywhere using your mobile phone free of charge but requires in-app purchases if you would want to export your project in resolution or import pics into the app.
02Clayframes
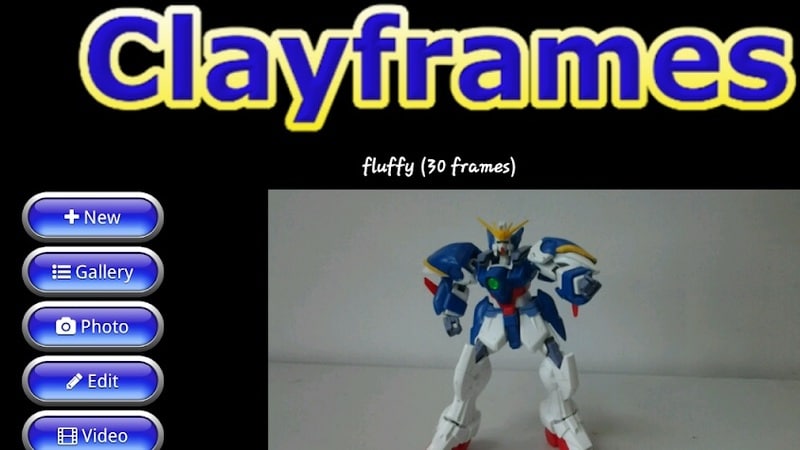
Clayframes is the best LEGO stop motion app 4 Android devices to capture new footage or import images you want to use and arrange them the way you want. The eraser tool in the app allows you to remove objects you don’t want to keep in the shot and Rigs.
03iMotion
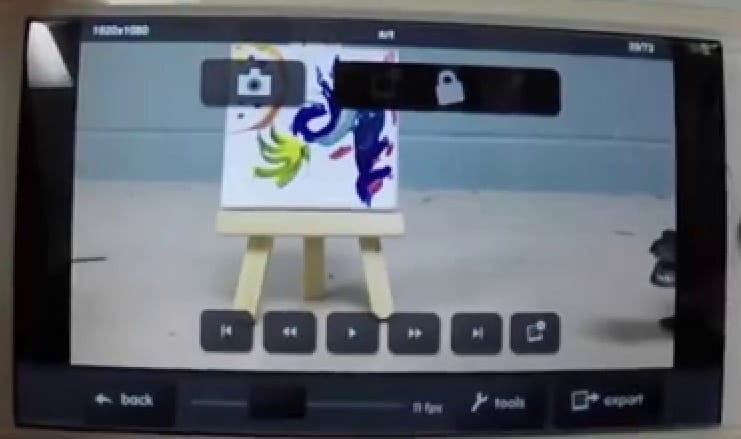
iMotion is available for iPad and iPhone users to create LEGO stop motion videos from an app. It’s has a Wi-Fi remote, photo library import mods, and time-lapse that you can choose the best to meet the demand of your project.
04Life Lapse Stop Motion Maker

Life Lapse Stop Motion Maker offers an all-in-one tool you need to edit and shoot a LEGO stop motion animation available on Android and iPhone devices. While shooting in LEGO stop motion video, you can focus on white balance and exposure lock ghosted image overlay, or time intervals.
05I Can Animate
I Can Animate is a straightforward app to create a LEGO stop motion video within a few steps and is available for Android and iOS devices. Post launching the app, you can click on Design, and a device camera will open to start creating your video.
Part 3 Three Sharing of LEGO Animation Examples worth Learning from
This section of the article will share three LEGO animation examples that are worth learning from:
01Minecraft LEGO Animation
Minecraft LEGO brings one of the most popular lego Minecraft animation video games into the real world with authentic characters and features. Minecraft Lego animation videos are a limitless possibility to build play and display, and the perfect way to expand play is creative fun.
02Ninjago LEGO Animation
Ninjago LEGO is a cartoon Network series inspired by Japanese and Chinese culture and myths in a fictional world. The Lego Ninjago animation theme enjoyed popularity and success in the first and two years before planned discontinuation in 2013.
03Blender LEGO Animation

Blender LEGO is an add-on known as a bricker to convert a mesh into a real photo brick model. Bricker is a fun and stylish plugin for Lego blender animation with specific tools for designing alternative LEGO sets.
Part 4 Advanced LEGO Animation Tips for You
This section provides the top LEGO animation movies ranked in 20and also offer a guide on how to make a Lego star wars animation:
LEGO Animation Movies Ranked in 2022
01Battle of the Brick

This LEGO animation video follows the epic battle between blue and red and a recreation of the Zanzibar map of the halo franchise
02Lego Thriller

This video is from Berlin in Germany and uses LEGO as pixel instead of stop motion characters in the creation of fantastic effects
03Adventure Time Title in LEGO
This is a LEGO recreation of cartoon series that comprises stunning detail and complexity.
04Lego Cl!ck
This LEGO stop motion video shows what happens when ideas click and integrate human and non-human elements.
05Lego Arcade

This is a LEGO stop motion video that recreation classic arcade games.
Part 5 How to Make a LEGO Animation
Once the production stage is complete, it is time to move to the post-production stage in Filmora, where your LEGO animated stop motion video will get to its final form:
For Win 7 or later (64-bit)
For macOS 10.12 or later
01Step Arrange images
The first thing is to place all the images you want to use in the final production of the video into a folder. Then arrange them accordingly in the same ways they should appear in the video.
02Step Launch Software
Launch Filmora and click on create a new project and add the project you made to the Filmora media tab. Also, import all audio files you want to use in your project before doing any actual editing.
03Step Edit Media
Move to the File menu, click on the preferred option, and go to the edit tab to set the maximum duration of a photo in the video you are creating. The value you are inserting into the photo duration box is determined by the number of frames in your video.
Please note that Filmora does not allow you to reduce a video frame rate below 23.97FPS. Therefore if you want your LEGO animation to have frame-per-second, you should send the photo duration value to 00:00:04.
04Step Preview
After that, you can add your media access to the timeline and click on the Play button to preview the results. When satisfied with the results, you can export your LEGO animated video from Filmora.
● Key Takeaways from This Episode →
● Some of the best LEGO Animation makers
● LEGO animation maker for different devices
● Some of the critical tips for creating LEGO animation videos
● If you are a beginner in LEGO animation, this article completely breaks down everything. You learned about LEGO animation and the best LEGO animation software that you can use effectively. Some parts of the report also give ideas on some LEGO animation that you can copy while working on yours.
There are so many things to learn in creating a LEGO movie, including the software and stop motion animation. There are tons of Lego animation software data for beginners and professionals. Many beginners make classic mistakes in brickfilming, and as a result, they don’t get the most out of their effort.
Do you want to create a stop motion LEGO movie and determine the kind of tool you will have to apply to Lego city animation? Worry not, as this Lego animation tutorial will guide you through some more useful LEGO animation ideas for beginners and professionals. And, you will get to know how Lego animation videos and Lego ww2 animation goes hand in hand with the help of different Lego Animation Makers here under Lego animation class. In addition to that, some excellent Lego animation movie examples will give you a better idea of how Lego Animation works in reality.
In this article
01 [Best LEGO Animation Makers in 2022](#Part 1)
02 [Three Sharing of LEGO Animation Examples worth Learning from](#Part 2)
03 [Advanced LEGO Animation Tips for You](#Part 3)
Part 1 LEGO Animation Makers for Windows/Mac
01**Wondershare Filmora Video Editor **
Wondershare Filmora - Best Video Editor for Mac/Windows
5,481,435 people have downloaded it.
Build unique custom animations without breaking a sweat.
Focus on creating epic stories and leave the details to Filmora’s auto features.
Start a creative adventure with drag & drop effects and endless possibilities.
Filmora simplifies advanced features to save you time and effort.
Filmora cuts out repetition so you can move on to your next creative breakthrough.
Filmora Video Editor is the best LEGO stop motion movie maker available for windows and Mac and highly recommended video editing software. This software is suitable for making LEGO among us animation because of its exclusive features:
● LEGO stop-motion movies are done quickly on this software
● It uses the editing tools like cropping, trimming, combing, rotating, and splitting videos.
● It has various effects that you can use to style your video and make a masterpiece.
● It supports Windows (bits), and MacOs 10.(High Sierra), Mac OS 10.(Sierra), OS X 10.(El Capitan), OS X 10.(Yosemite)
● Your LEGO stop-motion movie can be directly online using this software.
02FrameByFrame
FrameByFrame is a free LEGO mouth animation maker available for Mac users. It is an introductory video creation program that uses a webcam to create stop motion. It is elementary to use, and you need to have cameras such as i-sight connected with your Mac device to take shots by pressing the camera button. This software displays what you took by the camera and the frame superimposed to create the stop motion movie. It is light, easy to use, and you can trim the unwanted parts if needed.
03Boinx iStopMotion
Boinx iStopMotion is a paid LEGO stop-motion movie-maker ideal for higher-level Mac devices. It can create a shot-by-shot sequence using stop motion and time-lapse. With the help of the menu, it is perfect for kids and features onion skinning. It allows you to create a LEGO movie from your imagination and creativity, which features overlay, zooming, blinking to make movement more visible, etc. After creating or using this software, you can export your video and enjoy it on your movie player.
04Stop Motion Pro Eclipse
Stop Motion Pro Eclipse is a paid video creation software available for Windows to help you create LEGO stop motion animation movies. It is highly compatible with many popular video webcams and cameras that can capture and paste pictures and turn them into lovely stories with animated characters. It allows you to play up to frames per second, and while you can lay back to stop moving animation, you can also record audio. It also allows you to plan and track the movement of the movie characters and Lego friends animation.
05IKITMovie
IKITMovie is a paid Lego animations 63movie maker for Windows devices that helps solve the problem of making good LEGO stop motion animation videos. It is easy to use in any age range and has thousands of background audio tracks. It is perfect for creating LEGO animation or clay motion by using the green screen feature to replace the original background of the video with still or moving images.
Part 2 LEGO Animation Makers for Android and iPhone
01Stop Motion Studio
Stop Motion Studio is best for iOS and Android devices equipped with a versatile set of animated stop-motion tools and Grant complete control over all camera settings. It allows you to create LEGO stop-motion animated movies instantly and anywhere using your mobile phone free of charge but requires in-app purchases if you would want to export your project in resolution or import pics into the app.
02Clayframes
Clayframes is the best LEGO stop motion app 4 Android devices to capture new footage or import images you want to use and arrange them the way you want. The eraser tool in the app allows you to remove objects you don’t want to keep in the shot and Rigs.
03iMotion
iMotion is available for iPad and iPhone users to create LEGO stop motion videos from an app. It’s has a Wi-Fi remote, photo library import mods, and time-lapse that you can choose the best to meet the demand of your project.
04Life Lapse Stop Motion Maker
Life Lapse Stop Motion Maker offers an all-in-one tool you need to edit and shoot a LEGO stop motion animation available on Android and iPhone devices. While shooting in LEGO stop motion video, you can focus on white balance and exposure lock ghosted image overlay, or time intervals.
05I Can Animate
I Can Animate is a straightforward app to create a LEGO stop motion video within a few steps and is available for Android and iOS devices. Post launching the app, you can click on Design, and a device camera will open to start creating your video.
Part 3 Three Sharing of LEGO Animation Examples worth Learning from
This section of the article will share three LEGO animation examples that are worth learning from:
01Minecraft LEGO Animation
Minecraft LEGO brings one of the most popular lego Minecraft animation video games into the real world with authentic characters and features. Minecraft Lego animation videos are a limitless possibility to build play and display, and the perfect way to expand play is creative fun.
02Ninjago LEGO Animation
Ninjago LEGO is a cartoon Network series inspired by Japanese and Chinese culture and myths in a fictional world. The Lego Ninjago animation theme enjoyed popularity and success in the first and two years before planned discontinuation in 2013.
03Blender LEGO Animation
Blender LEGO is an add-on known as a bricker to convert a mesh into a real photo brick model. Bricker is a fun and stylish plugin for Lego blender animation with specific tools for designing alternative LEGO sets.
Part 4 Advanced LEGO Animation Tips for You
This section provides the top LEGO animation movies ranked in 20and also offer a guide on how to make a Lego star wars animation:
LEGO Animation Movies Ranked in 2022
01Battle of the Brick
This LEGO animation video follows the epic battle between blue and red and a recreation of the Zanzibar map of the halo franchise
02Lego Thriller
This video is from Berlin in Germany and uses LEGO as pixel instead of stop motion characters in the creation of fantastic effects
03Adventure Time Title in LEGO
This is a LEGO recreation of cartoon series that comprises stunning detail and complexity.
04Lego Cl!ck
This LEGO stop motion video shows what happens when ideas click and integrate human and non-human elements.
05Lego Arcade
This is a LEGO stop motion video that recreation classic arcade games.
Part 5 How to Make a LEGO Animation
Once the production stage is complete, it is time to move to the post-production stage in Filmora, where your LEGO animated stop motion video will get to its final form:
For Win 7 or later (64-bit)
For macOS 10.12 or later
01Step Arrange images
The first thing is to place all the images you want to use in the final production of the video into a folder. Then arrange them accordingly in the same ways they should appear in the video.
02Step Launch Software
Launch Filmora and click on create a new project and add the project you made to the Filmora media tab. Also, import all audio files you want to use in your project before doing any actual editing.
03Step Edit Media
Move to the File menu, click on the preferred option, and go to the edit tab to set the maximum duration of a photo in the video you are creating. The value you are inserting into the photo duration box is determined by the number of frames in your video.
Please note that Filmora does not allow you to reduce a video frame rate below 23.97FPS. Therefore if you want your LEGO animation to have frame-per-second, you should send the photo duration value to 00:00:04.
04Step Preview
After that, you can add your media access to the timeline and click on the Play button to preview the results. When satisfied with the results, you can export your LEGO animated video from Filmora.
● Key Takeaways from This Episode →
● Some of the best LEGO Animation makers
● LEGO animation maker for different devices
● Some of the critical tips for creating LEGO animation videos
● If you are a beginner in LEGO animation, this article completely breaks down everything. You learned about LEGO animation and the best LEGO animation software that you can use effectively. Some parts of the report also give ideas on some LEGO animation that you can copy while working on yours.
4 Things You Should Know About Pinterest GIF
4 Things You Should Know About Pinterest GIF
An easy yet powerful editor
Numerous effects to choose from
Detailed tutorials provided by the official channel
Emojis formerly reigned supreme, but GIFs and memes have since supplanted them. When you add a GIF to a conversation, it becomes more exciting. GIFs are considerably better at communicating our feelings, and they deserve credit for that. Pinterest, like other social networking sites and chat apps, enables GIFs. Pinterest is a photo-sharing website where you can find home decor ideas, recipes, fashion inspiration, DIY projects, and more.
Compared to a static image, adding a GIF to Pinterest conveys more information. You can make GIFs for your DIY projects or use them to display all sides of a cushion, which would typically require many images. But what if you like a GIF you found on Pinterest? What’s the best way to get it? That is what we will demonstrate here. This article will show how to download Pinterest GIFs to your computer and mobile device.
In this article
01 [Are There Gifs on Pinterest?](#Part 1)
02 [How to Get Pinterest GIF Downloader](#Part 2)
03 [How to Get an Animated GIF on Pinterest](#Part 3)
Part 1 Are There Gifs on Pinterest?
You can submit GIF and animated GIF images from your computer or the Internet to Pinterest. Because the pictures on your board aren’t animated, you might conclude that animated GIFs don’t work on Pinterest. When you click on the photos and open them on their respective Web pages, they become animated. Because images posted from websites do not save on Pinterest’s servers, they are not animated. You can’t do anything if Pinterest doesn’t animate a GIF.
Part 2 How to Get Pinterest GIF Downloader
Compared to a static image, adding a GIF to Pinterest conveys more information. You can make GIFs for your DIY projects or use them to display all sides of a cushion, which would typically require many images.
But what if you’re a Pinterest fan of a GIF? What’s the best way to get it? That is what we will demonstrate here. We’ll show you how to complete a Pinterest GIF video download to your computer and mobile device in this session.
Let’s get started.
01How to Download Pinterest Videos Using Mobile?
Here are simple steps to follow to achieve this:
Make use of the native download button
Step 1: Select GIF to download
Go to the selected GIF and click it.
Step 2: Download Image
Click the three-dot icon at the top from the menu and select Download image.

Step 3: Notification
After the image gets saved, you will receive a notification at the bottom. The freshly downloaded GIF will appear in your gallery or camera roll when you open it.
02How to Download Pinterest Videos by Computer?
Follow these simple step guides to achieve this:
Step 1: Open selected GIF
On your computer, open the GIF you want to use.
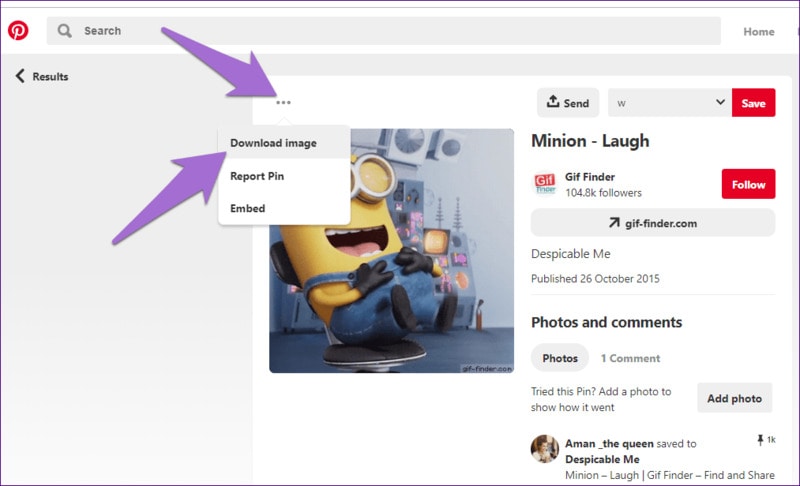
Step 2: Select Download
Select Download image from the menu by clicking on the three-dot icon above the GIF.
Step 3: Alternative
If the download option isn’t available for any reason, you’ll have to rely on the company’s
website. To do so, click on the GIF’s link.
You’ll reach the GIF’s host site. Right-click on the GIF and choose to Save image as… from the menu that appears. Ensure that the extension is . GIF. In some circumstances, you will have the opportunity to download the video.
Part 3 How to Get an Animated GIF on Pinterest
Save a picture from the Web to your hard drive before pinning it; GIFs pinned from Web pages are not animated. Open the Web page with the image you want to pin, then right-click the image and opt “Save as” to save it to a folder on your computer. You can save pictures off the Web in all major Web browsers, including Google Chrome, Mozilla Firefox, and Internet Explorer. Log in to Pinterest select “Upload a Pin” from the “+” menu. Select the animated GIF from your hard drive by clicking the “Choose Image” button. Click “Pin It” after selecting the board you wish to pin the image.
How to Upload a GIF to Pinterest
Now that you know how to download Pinterest GIFs, you may want to consider posting GIFs to Pinterest as well. Unfortunately, you cannot upload GIFs from mobile apps. To upload a GIF to your Pinterest account, you’ll need to utilize a computer.
If you have a GIF file on your computer, follow these instructions to add it.
Step 1: Log in to your Pinterest account
Log in to your Pinterest account, then go to the bottom of the page to the add icon. From the menu, choose to Create a Pin.
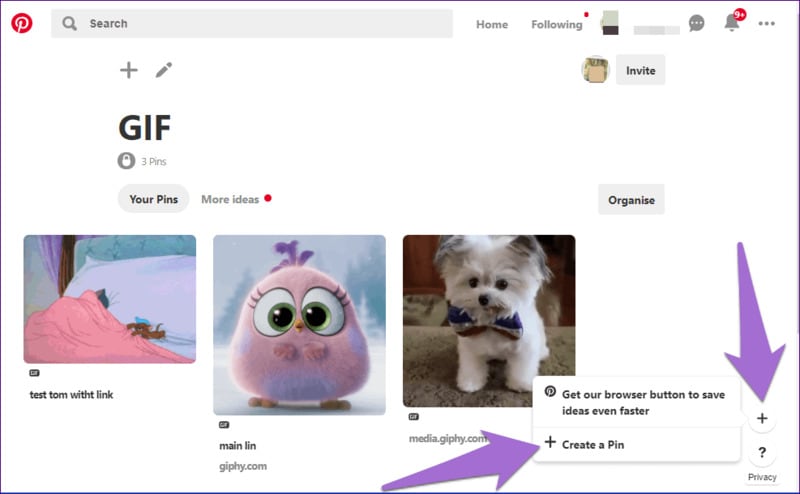
Step 2: Upload GIF
Drag and drop the GIF or upload it onto the pin creation screen from your computer.
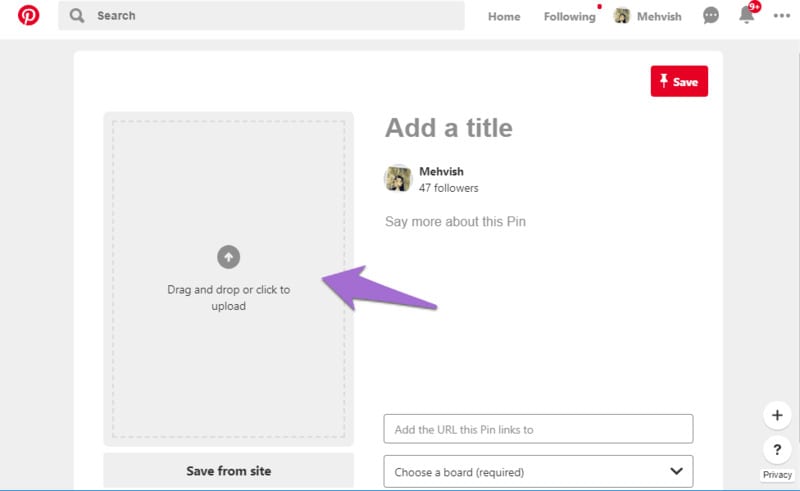
Step 3: Save GIF
When the GIF appears on the next screen, describe it and select a board for the pin. Finally, press the Save button.
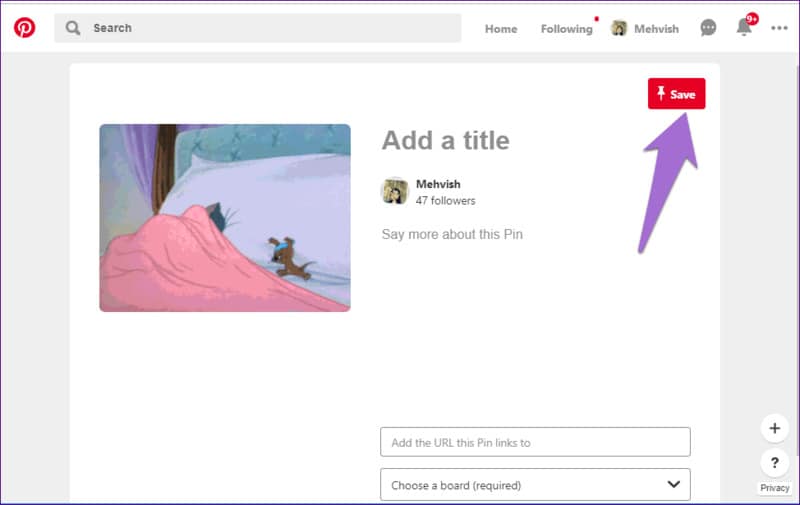
To save a file with the.GIF extension, you’ll need to use a GIF Pinterest downloader software or an application usable both online and offline. Wondershare Filmora is the most popular programs for this work because of the following benefits: it is elementary to use, and anyone can handle who isn’t technically inclined.
Wondershare Filmora Video Editor can convert Pinterest video to GIF from various video formats, including.wmv,.mp4,.mkv,.evo,.dat,.wav,.mpeg, and.avi, so you don’t have to worry about compatibility.
Wondershare Filmora
Get started easily with Filmora’s powerful performance, intuitive interface, and countless effects!
Try It Free Try It Free Try It Free Learn More >

The most important thing to know about Filmora video editing software is that it allows users to edit GIF files is one of the preferable programs for this task due to its advantages. It is elementary to use and is operational by any nontechnical person.
● Key Takeaways from This Episode →
● Now have learned how to easily download GIFs from Pinterest using Pinterest GIF downloader. By sincerely following the simple tips listed above, you can easily download video on GIF from Pinterest using any device on your mobile phone or your PC.
● However, Wondershare Filmora is one app that can meet all your needs to create a unique Pinterest GIF. And to top is all it is easy to use for none professionals
Emojis formerly reigned supreme, but GIFs and memes have since supplanted them. When you add a GIF to a conversation, it becomes more exciting. GIFs are considerably better at communicating our feelings, and they deserve credit for that. Pinterest, like other social networking sites and chat apps, enables GIFs. Pinterest is a photo-sharing website where you can find home decor ideas, recipes, fashion inspiration, DIY projects, and more.
Compared to a static image, adding a GIF to Pinterest conveys more information. You can make GIFs for your DIY projects or use them to display all sides of a cushion, which would typically require many images. But what if you like a GIF you found on Pinterest? What’s the best way to get it? That is what we will demonstrate here. This article will show how to download Pinterest GIFs to your computer and mobile device.
In this article
01 [Are There Gifs on Pinterest?](#Part 1)
02 [How to Get Pinterest GIF Downloader](#Part 2)
03 [How to Get an Animated GIF on Pinterest](#Part 3)
Part 1 Are There Gifs on Pinterest?
You can submit GIF and animated GIF images from your computer or the Internet to Pinterest. Because the pictures on your board aren’t animated, you might conclude that animated GIFs don’t work on Pinterest. When you click on the photos and open them on their respective Web pages, they become animated. Because images posted from websites do not save on Pinterest’s servers, they are not animated. You can’t do anything if Pinterest doesn’t animate a GIF.
Part 2 How to Get Pinterest GIF Downloader
Compared to a static image, adding a GIF to Pinterest conveys more information. You can make GIFs for your DIY projects or use them to display all sides of a cushion, which would typically require many images.
But what if you’re a Pinterest fan of a GIF? What’s the best way to get it? That is what we will demonstrate here. We’ll show you how to complete a Pinterest GIF video download to your computer and mobile device in this session.
Let’s get started.
01How to Download Pinterest Videos Using Mobile?
Here are simple steps to follow to achieve this:
Make use of the native download button
Step 1: Select GIF to download
Go to the selected GIF and click it.
Step 2: Download Image
Click the three-dot icon at the top from the menu and select Download image.
Step 3: Notification
After the image gets saved, you will receive a notification at the bottom. The freshly downloaded GIF will appear in your gallery or camera roll when you open it.
02How to Download Pinterest Videos by Computer?
Follow these simple step guides to achieve this:
Step 1: Open selected GIF
On your computer, open the GIF you want to use.
Step 2: Select Download
Select Download image from the menu by clicking on the three-dot icon above the GIF.
Step 3: Alternative
If the download option isn’t available for any reason, you’ll have to rely on the company’s
website. To do so, click on the GIF’s link.
You’ll reach the GIF’s host site. Right-click on the GIF and choose to Save image as… from the menu that appears. Ensure that the extension is . GIF. In some circumstances, you will have the opportunity to download the video.
Part 3 How to Get an Animated GIF on Pinterest
Save a picture from the Web to your hard drive before pinning it; GIFs pinned from Web pages are not animated. Open the Web page with the image you want to pin, then right-click the image and opt “Save as” to save it to a folder on your computer. You can save pictures off the Web in all major Web browsers, including Google Chrome, Mozilla Firefox, and Internet Explorer. Log in to Pinterest select “Upload a Pin” from the “+” menu. Select the animated GIF from your hard drive by clicking the “Choose Image” button. Click “Pin It” after selecting the board you wish to pin the image.
How to Upload a GIF to Pinterest
Now that you know how to download Pinterest GIFs, you may want to consider posting GIFs to Pinterest as well. Unfortunately, you cannot upload GIFs from mobile apps. To upload a GIF to your Pinterest account, you’ll need to utilize a computer.
If you have a GIF file on your computer, follow these instructions to add it.
Step 1: Log in to your Pinterest account
Log in to your Pinterest account, then go to the bottom of the page to the add icon. From the menu, choose to Create a Pin.
Step 2: Upload GIF
Drag and drop the GIF or upload it onto the pin creation screen from your computer.
Step 3: Save GIF
When the GIF appears on the next screen, describe it and select a board for the pin. Finally, press the Save button.
To save a file with the.GIF extension, you’ll need to use a GIF Pinterest downloader software or an application usable both online and offline. Wondershare Filmora is the most popular programs for this work because of the following benefits: it is elementary to use, and anyone can handle who isn’t technically inclined.
Wondershare Filmora Video Editor can convert Pinterest video to GIF from various video formats, including.wmv,.mp4,.mkv,.evo,.dat,.wav,.mpeg, and.avi, so you don’t have to worry about compatibility.
Wondershare Filmora
Get started easily with Filmora’s powerful performance, intuitive interface, and countless effects!
Try It Free Try It Free Try It Free Learn More >
The most important thing to know about Filmora video editing software is that it allows users to edit GIF files is one of the preferable programs for this task due to its advantages. It is elementary to use and is operational by any nontechnical person.
● Key Takeaways from This Episode →
● Now have learned how to easily download GIFs from Pinterest using Pinterest GIF downloader. By sincerely following the simple tips listed above, you can easily download video on GIF from Pinterest using any device on your mobile phone or your PC.
● However, Wondershare Filmora is one app that can meet all your needs to create a unique Pinterest GIF. And to top is all it is easy to use for none professionals
Also read:
- New Adobe Auto Rigger Is AWESOME for 2024
- New Learn How to Make Architecture Animation
- How to Insert a GIF Into Powerpoint
- New 2024 Approved Top 12 Video to GIF Converters High Quality to Check Out
- Updated 2024 Approved How to Create a Whiteboard Video Step by Step 2023 Updated
- Updated In 2024, 10 Must-Use MP4 to GIF Converters to Get Perfect-Made GIF
- New The Definitive Guide to Whiteboard Animation for 2024
- New A Roster of 15 Top Disney Channel Cartoons
- New 2024 Approved What Is Motion Graphics
- Updated 2024 Approved What Is the Meaning of Motion Graphics
- In 2024, How to Make an Animation With 7 Steps
- New How to Create YouTube Intro Animation Like a Pro
- 2024 Approved Ways to Get the Most up to Date Cartoon Character Design Tips
- New 10 Best Convert Video Between GIF Software High Quality
- Updated 2024 Approved 12 Aesthetic GIF Instagram for Marketers
- New 2024 Approved A Beginners Guide to Explain What 3D Animation Is
- New Some Must-Know Useful Lego Animation Ideas for 2024
- Pencil2D Animation Tutorial Overview for 2024
- New In 2024, 12+ Stunning Instagram GIF Stickers
- In 2024, 12 Animated Slideshow PowerPoint Templates
- Are You Head Over Heels With 3D Animation Design?
- 2024 Approved Types of Cartoon Styles You May Use for Your Next Marketing Project
- New Top 12 2D Animation Studios All Should Check Out
- New A Roster of 15 Best Disney Channel Cartoons for 2024
- In 2024, Top 8 Anime Name Generators Online-Get Cool Anime Names
- Updated How to Create a Whiteboard Animation Video for 2024
- New In 2024, How to Create Picsart Cartoon
- How to Make Well Done Animated GIF By Yourself, In 2024
- Updated In 2024, How to Make GIF Instagram | Quick Tips
- Updated 15 Types of Cartoon Drawing Styles Examples
- Updated In 2024, How to Create Benime Whiteboard Animation in Android
- 8 Top Motion Graphics Online Tools for Your Inspiration
- Updated 12+ Stunning Instagram GIF Stickers for 2024
- New 2024 Approved Learn Easy Blender Rigging in Only 2 Minutes
- In 2024, Everything You Need to Know About Becoming a Motion Graphic Designer
- Uncensored Top 10 + Free Streaming Sites for 2024
- Updated In 2024, How to Make Creative Animation Videos
- New 5 Websites with Animated Logos That Catch Your Eyes
- Updated 2024 Approved Best 10 Animated Photo Collage Apps
- Updated In 2024, 18 Best Tools and Services to Create Animated Videos for Your Business
- In 2024, 15 Best Video to GIF App on iPhone and Android
- 2024 Approved How to Create a Whiteboard Video Step by Step 2023 Updated
- How You Can Turn Yourself Into Anime Character Using Anime Filter
- How to Create Picsart Cartoon
- Updated In 2024, Top 3 Ways to Create Gif with Great 3D Gif Maker
- How to Perform Hard Reset on Motorola Defy 2? | Dr.fone
- Recover your music after Samsung Galaxy S24 has been deleted
- Top 11 Free Apps to Check IMEI on Vivo Y17s Phones
- In 2024, How to Use Google Assistant on Your Lock Screen Of Xiaomi Redmi Note 12 5G Phone
- In 2024, Heres Everything You Should Know About Pokemon Stops in Detail On Apple iPhone 8 | Dr.fone
- In 2024, Forgot Locked iPhone 12 mini Password? Learn the Best Methods To Unlock | Dr.fone
- In 2024, Why Your WhatsApp Live Location is Not Updating and How to Fix on your Nokia G42 5G | Dr.fone
- Sim Unlock OnePlus Ace 2 Pro Phones without Code 2 Ways to Remove Android Sim Lock
- Best 10 Mock Location Apps Worth Trying On Samsung Galaxy M14 4G | Dr.fone
- About Tecno Spark 20 FRP Bypass
- Fix App Not Available in Your Country Play Store Problem on Samsung Galaxy A23 5G | Dr.fone
- In 2024, Hassle-Free Ways to Remove FRP Lock from Oppo A58 4G Phones with/without a PC
- In 2024, 5 Ways to Transfer Music from Vivo S17t to Other Android Devices Easily | Dr.fone
- What are Location Permissions Life360 On Realme 12 5G? | Dr.fone
- How to Unlock the Lock Screen on my Galaxy F34 5G
- In 2024, Simple and Effective Ways to Change Your Country on YouTube App Of your Vivo Y02T | Dr.fone
- Unlocking the Power of Smart Lock A Beginners Guide for Xiaomi Civi 3 Disney 100th Anniversary Edition Users
- The Ultimate Guide to Bypassing iCloud Activation Lock on Apple iPhone 13 mini
- How to Transfer Data from Honor X50i to BlackBerry | Dr.fone
- Complete Fixes To Solve Apple iPhone XS Randomly Asking for Apple ID Password | Dr.fone
- In 2024, Things You Should Know When Unlocking Total Wireless Of iPhone 13
- Can I Bypass a Forgotten Phone Password Of Samsung Galaxy S23 Ultra?
- Best 3 Google Pixel 7a Emulator for Mac to Run Your Wanted Android Apps | Dr.fone
- In 2024, How to Track Vivo V29e Location by Number | Dr.fone
- Here are Some of the Best Pokemon Discord Servers to Join On Realme GT 5 | Dr.fone
- How to restore wiped messages on Oppo A1x 5G
- In 2024, How To Remove Flashlight From Apple iPhone 6 Plus Lock Screen
- 7 Solutions to Fix Error Code 963 on Google Play Of Gionee F3 Pro | Dr.fone
- How to Remove Find My iPhone without Apple ID On your Apple iPhone 12 mini?
- In 2024, AddROM Bypass An Android Tool to Unlock FRP Lock Screen For your OnePlus Nord N30 SE
- Additional Tips About Sinnoh Stone For Oppo A79 5G | Dr.fone
- 5 Ways to Restart Nokia 130 Music Without Power Button | Dr.fone
- A Step-by-Step Guide on Using ADB and Fastboot to Remove FRP Lock from your Nokia 130 Music
- Complete Tutorial for Lava Blaze 2 Hard Reset | Dr.fone
- Everything You Need To Know About Unlocked Apple iPhone 11 Pro
- How To Recover Data from Apple iPhone 7 Plus? | Dr.fone
- What is Fake GPS Location Pro and Is It Good On OnePlus Ace 2 Pro? | Dr.fone
- Why Is My Tecno Camon 30 Pro 5G Offline? Troubleshooting Guide | Dr.fone
- How to Perform Hard Reset on Tecno Spark 20 Pro+? | Dr.fone
- Unlock Apple ID without Phone Number On iPhone 6s Plus
- Hard Resetting an Realme 12 Pro+ 5G Device Made Easy | Dr.fone
- Title: What Is Still Motion Animation and How Does It Work, In 2024
- Author: Elon
- Created at : 2024-06-08 05:07:56
- Updated at : 2024-06-09 05:07:56
- Link: https://animation-videos.techidaily.com/what-is-still-motion-animation-and-how-does-it-work-in-2024/
- License: This work is licensed under CC BY-NC-SA 4.0.
