
:max_bytes(150000):strip_icc():format(webp)/GettyImages-758317893-3ab5c26f770448db8b4a58205fb549f1.jpg)
What Wikipedia Wont Tell You About Character Rigging
What Wikipedia Won’t Tell You About Character Rigging
What Wikipedia Won’t Tell You Specifically About Character Rigging
An easy yet powerful editor
Numerous effects to choose from
Detailed tutorials provided by the official channel
The function of character rigging can easily be compared to that of bones, muscles and joints. They act as skeletons to virtual animations. You can also imagine them as strings used on dolls. These digitalized bones function inter-connectedly in a 3D animation.
In this article
01 [Intro to Character Rigging](#Part 1)
02 [8 Tips for Character Rigging](#Part 2)
03 [10 Best Character Rigging Services to Buy Online](#Part 3)
04 [How to Make 3d Character Rig? Are There Any Plugins or Easy](#Part 4)
Part 1 Intro to Character Rigging
As you already know by now that the process of rigging a character can be quite a tedious task. It involves a lot of creative thinking, precision and a keen eye to notice all the small details.
Once you have a model character to work on, riggers set off to creating a skeleton to match the character. These skele-animations can be used to move the entire model as if tugging on strings (not literally).
The movement of the chain of skeletons or rigs is interdependent. Which means if you pull on any one bone, it moves all the other bones in the same sequence. Similar to how bones move within the human body.
Riggers use programs and tools to create a series of bone like structures that can deformed and animated freely according to the preference of the animators.
Movements like positioning, curving and rotation can be recorded and then played back in the animation.
This requires the rigger to constantly coordinate between modelers, animators till the end of the project. This entire process can take weeks or even months.
Amazingly enough, its 20and there are online tools and tutorials you can use to easily learn complex animations like they make in large scale movies and games.
Part 2 8 Tips for Character Rigging
01The Right Rig for the Job
Rigging is a skill all animators gets good at overtime. The more you practice the more familiar you are with the tools you are using. It will also help you understand that not all rigs are meant for the same set of movements.
You need to be able to discern what rig is it that you need and discard what you don’t. If the rig is being used in a game, then the focus will be more on the experience while for movies its attention.
02Deformers for Facial Rigging
Constructing a realistic facial rig can be quite a task but is indeed satisfying once finished. Human facial features require a great degree of flexibility which is why using a variety of deformers for different parts of the face. They are better suited for creating joints over the face and can be done more quickly.
03IK and FK
Though you can use one without the other, it is best to use both of them in an animation. You can’t work without both arms can you? Applying both Inverse and Forward Kinematics in your rig design can help it make more stylistic.
04Learn Python and Maya API: Learn Python and Maya API
If you wish to take your rigging skills to the next level then learning Maya API and Python are great millstones. This way, you can create high quality and sophisticated rigs with high intense flexibility on Maya. Also, Python allows you to write new scripts for PlugIns.
05Delegate to an Animator
After rigging for several hours it is easy to feel like you are only seeing from one perspective. Get in touch with an animator earlier on in the project can help you get feedback to stay consistent in the rigging process.
06Learn Web Technologies: Learn Web Technologies
To be a good animator or rigging specialist involves a lot of learning. Animation technology is constantly changing therefore it is highly recommended to stay up to date with the latest web technologies. Learning HTML, Java Script and CSS is becoming vital to being a part of the gaming world.
07Use Scalable Tools
Not all the characters or objects you rig are going to be of the same size. Selecting the right rigging software is crucial for you to be able to scale your animations. You won’t need to use everything, just the tools that serve your purpose.
08Use a Clean Interface
If you have ever heard of the phrase ‘clean workplace – cleaner work’ then you should know how an untidy interface can affect your workflow. This won’t necessarily change the results but can surely better your experience.
Part 3 Best Character Rigging Services to Buy Online
Don’t feel confused about where to begin. The first step to get into rigging is to master a software, any software, here are of the best ones you can choose from;
01Maya
Offers the best animation features on the market.

02Blender
Vast variety of tools for sculpting, rigging or VFX.

03Modo
Has a more simplified approach towards modelling and rigging.

043ds Max
Leverages high flexibility and ease of use to riggers.
05Sculptris
Excellentfor beginners who need a gateway software to start art.

06ZBrush
Lets you work on your sculpting skills with digital clay.

07Cheetah 3D
Developed by Macintosh to be an easy to learn modelling software.

08Rhinoceros 3D
Harbours a mathematical approach to modelling and modular design.

09Fusion 360
Offers a wide range of simulation tools.

10Cinema 4D
Recognized by professionals for well-equipped arsenal of digital rendering.

Part 4 How to Make Character Rig? Are There Any Plugins or Easy
How to Make Character Rig? Are There Any Plugins or Easy
When we imagine animation, most of the time we are baffled by the end product? But what really goes on behind the mesmerizing colors and whimsical characters.
The basic is of course building rigs to support the entire movement of the character and confine it to actual physical laws that makes it almost a mimic of reality. The entire process of rigging rather simplifies the path to achieve that goal.
In Cinema, character rigging has multiple layers that goes into creating the entire skeleton animation. Setting up a character rig can take anywhere between a few hours or a few days. It probably takes mainstream movies ten times that time.
Let us break down the process of making a rig so that it is simpler to understand.
The process;
Weight Painting: An integral part of the entire rigging process. Although, weight painting can be rendered automatically by the software that you are using, but that can end up making the animation look less realistic. You can instead fine tune the weight of each bone in the rig. You can also copy similar looking bones and apply them to different mesh and repurpose them to function differently.
Placing Bones: After designing a bone structure of character, you can copy the same and use it for similar characters. This is why in games and animation, you notice characters with similar features and traits.
Inverse Kinematics: Not all bones are meant to move in a forward direction. This is why inverses Kinematics are applied to certain bones like the legs, shoulders or even a dragon’s tail. Setting up the IK of your rig would keep specific bones pointed in the right direction so as to make the animation look more natural.
Applying Constraints: The physical realm is built with restrictions. There are things you can do or can’t do according to the natural order of things so as to make your character movement more naturalistic.
Simulation Skeletons: Now comes the part where the magic happens. After fully completing a skeletal animation you can now simulate the motion over the mesh and record the result of the simulation through a series of frames.
Create an animated movie: You can play back the simulation in an animation software such as Blender and then create your own animated movie with Filmora with its easy drag and drop interface. Movies are a collage of frames, so you need to animate according to the fps you want for your video.
Facial Rigs: Facial expressions are more complex than whole body movements. It requires the attention dedicated to a project of its own. Here is where you can play with deforming shapes together to replicate facial muscle movement.
● Key Takeaways from This Episode →
● Rigging has become science in its own right but that does not mean you can’t be artistic with it.
● What you should remember that creating skeletal animation is all about movement and applying physical restrictions to it.
● Start simple and practice until you master the most complex features of any of the top rigging software services raging in the market.
The function of character rigging can easily be compared to that of bones, muscles and joints. They act as skeletons to virtual animations. You can also imagine them as strings used on dolls. These digitalized bones function inter-connectedly in a 3D animation.
In this article
01 [Intro to Character Rigging](#Part 1)
02 [8 Tips for Character Rigging](#Part 2)
03 [10 Best Character Rigging Services to Buy Online](#Part 3)
04 [How to Make 3d Character Rig? Are There Any Plugins or Easy](#Part 4)
Part 1 Intro to Character Rigging
As you already know by now that the process of rigging a character can be quite a tedious task. It involves a lot of creative thinking, precision and a keen eye to notice all the small details.
Once you have a model character to work on, riggers set off to creating a skeleton to match the character. These skele-animations can be used to move the entire model as if tugging on strings (not literally).
The movement of the chain of skeletons or rigs is interdependent. Which means if you pull on any one bone, it moves all the other bones in the same sequence. Similar to how bones move within the human body.
Riggers use programs and tools to create a series of bone like structures that can deformed and animated freely according to the preference of the animators.
Movements like positioning, curving and rotation can be recorded and then played back in the animation.
This requires the rigger to constantly coordinate between modelers, animators till the end of the project. This entire process can take weeks or even months.
Amazingly enough, its 20and there are online tools and tutorials you can use to easily learn complex animations like they make in large scale movies and games.
Part 2 8 Tips for Character Rigging
01The Right Rig for the Job
Rigging is a skill all animators gets good at overtime. The more you practice the more familiar you are with the tools you are using. It will also help you understand that not all rigs are meant for the same set of movements.
You need to be able to discern what rig is it that you need and discard what you don’t. If the rig is being used in a game, then the focus will be more on the experience while for movies its attention.
02Deformers for Facial Rigging
Constructing a realistic facial rig can be quite a task but is indeed satisfying once finished. Human facial features require a great degree of flexibility which is why using a variety of deformers for different parts of the face. They are better suited for creating joints over the face and can be done more quickly.
03IK and FK
Though you can use one without the other, it is best to use both of them in an animation. You can’t work without both arms can you? Applying both Inverse and Forward Kinematics in your rig design can help it make more stylistic.
04Learn Python and Maya API: Learn Python and Maya API
If you wish to take your rigging skills to the next level then learning Maya API and Python are great millstones. This way, you can create high quality and sophisticated rigs with high intense flexibility on Maya. Also, Python allows you to write new scripts for PlugIns.
05Delegate to an Animator
After rigging for several hours it is easy to feel like you are only seeing from one perspective. Get in touch with an animator earlier on in the project can help you get feedback to stay consistent in the rigging process.
06Learn Web Technologies: Learn Web Technologies
To be a good animator or rigging specialist involves a lot of learning. Animation technology is constantly changing therefore it is highly recommended to stay up to date with the latest web technologies. Learning HTML, Java Script and CSS is becoming vital to being a part of the gaming world.
07Use Scalable Tools
Not all the characters or objects you rig are going to be of the same size. Selecting the right rigging software is crucial for you to be able to scale your animations. You won’t need to use everything, just the tools that serve your purpose.
08Use a Clean Interface
If you have ever heard of the phrase ‘clean workplace – cleaner work’ then you should know how an untidy interface can affect your workflow. This won’t necessarily change the results but can surely better your experience.
Part 3 Best Character Rigging Services to Buy Online
Don’t feel confused about where to begin. The first step to get into rigging is to master a software, any software, here are of the best ones you can choose from;
01Maya
Offers the best animation features on the market.
02Blender
Vast variety of tools for sculpting, rigging or VFX.
03Modo
Has a more simplified approach towards modelling and rigging.
043ds Max
Leverages high flexibility and ease of use to riggers.
05Sculptris
Excellentfor beginners who need a gateway software to start art.
06ZBrush
Lets you work on your sculpting skills with digital clay.
07Cheetah 3D
Developed by Macintosh to be an easy to learn modelling software.
08Rhinoceros 3D
Harbours a mathematical approach to modelling and modular design.
09Fusion 360
Offers a wide range of simulation tools.
10Cinema 4D
Recognized by professionals for well-equipped arsenal of digital rendering.
Part 4 How to Make Character Rig? Are There Any Plugins or Easy
How to Make Character Rig? Are There Any Plugins or Easy
When we imagine animation, most of the time we are baffled by the end product? But what really goes on behind the mesmerizing colors and whimsical characters.
The basic is of course building rigs to support the entire movement of the character and confine it to actual physical laws that makes it almost a mimic of reality. The entire process of rigging rather simplifies the path to achieve that goal.
In Cinema, character rigging has multiple layers that goes into creating the entire skeleton animation. Setting up a character rig can take anywhere between a few hours or a few days. It probably takes mainstream movies ten times that time.
Let us break down the process of making a rig so that it is simpler to understand.
The process;
Weight Painting: An integral part of the entire rigging process. Although, weight painting can be rendered automatically by the software that you are using, but that can end up making the animation look less realistic. You can instead fine tune the weight of each bone in the rig. You can also copy similar looking bones and apply them to different mesh and repurpose them to function differently.
Placing Bones: After designing a bone structure of character, you can copy the same and use it for similar characters. This is why in games and animation, you notice characters with similar features and traits.
Inverse Kinematics: Not all bones are meant to move in a forward direction. This is why inverses Kinematics are applied to certain bones like the legs, shoulders or even a dragon’s tail. Setting up the IK of your rig would keep specific bones pointed in the right direction so as to make the animation look more natural.
Applying Constraints: The physical realm is built with restrictions. There are things you can do or can’t do according to the natural order of things so as to make your character movement more naturalistic.
Simulation Skeletons: Now comes the part where the magic happens. After fully completing a skeletal animation you can now simulate the motion over the mesh and record the result of the simulation through a series of frames.
Create an animated movie: You can play back the simulation in an animation software such as Blender and then create your own animated movie with Filmora with its easy drag and drop interface. Movies are a collage of frames, so you need to animate according to the fps you want for your video.
Facial Rigs: Facial expressions are more complex than whole body movements. It requires the attention dedicated to a project of its own. Here is where you can play with deforming shapes together to replicate facial muscle movement.
● Key Takeaways from This Episode →
● Rigging has become science in its own right but that does not mean you can’t be artistic with it.
● What you should remember that creating skeletal animation is all about movement and applying physical restrictions to it.
● Start simple and practice until you master the most complex features of any of the top rigging software services raging in the market.
The 10 Best Batman Anime Movies- 2024 Updated
The 10 Best Batman Anime Movies- 2024 Updated

Shanoon Cox
Mar 27, 2024• Proven solutions
Batman is one of the most popular and long-lasting characters in DC animated movies. There can always be an argument on Marvel and DC movies. Although, DC remains the king regards to animated movies. DC animated movies are better coordinated with live-action scenes. Each story features different aspects of Gotham city and its issues.
Batman or “Bruce Wayne” is an orphan billionaire living a carefree life. Yet, he leads the gods and exceptional ones like they do not matter much. The technology and the will Batman demonstrates are peculiar. No wonder Batman animated movies are one of the bestselling of all time. I could even say, in the early 90s, Batman was the most favorite hero of DC animated movies.
10 Best Batman Anime Movies-2024 List
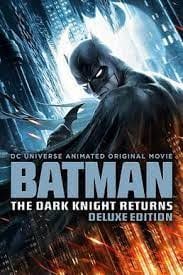
- 1. The Dark Knight Returns
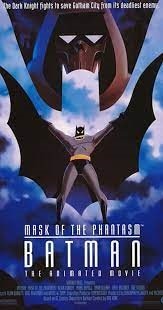
- 2. Batman: Mask of the Phantasm
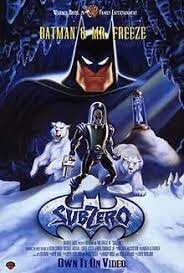
- 3. Batman: Subzero
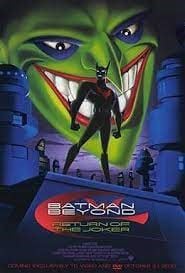
- 4. Batman Beyond: Return of the Joker
- 5. Batman Ninja
- 6. Batman: Under the Red Hood
- 7. Batman year one
- 8. Batman: Gotham Knight
- 9. The Batman vs. Dracula
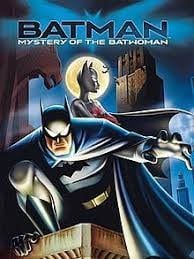
- 10. Batman: Mystery of the Batwoman
1. The Dark Knight Returns
The top of the list is Dark Knight Returns anime. What makes this animated Batman so exceptional are his rules and consciousness. Batman goes beyond his limits to save his beloved city. But on top of all, Batman avoids making a public appearance. The movie is entertaining and less dark scenes, mostly targeting the younger generation.
However, when Gotham becomes the prey of mafias, gang wars, and Joker, Batman comes out of retirement or what looked like a retirement. Although Batman was criticized by the public and even hunted by authorities, he still came back, making him the “Dark Knight.” However, in the end, it seems that Bruce Wayne dies, but still, the true fate of Batman is unknown.
2. Batman: Mask of the Phantasm
This animated movie is more or less about the journey of the orphan Bruce Wayne to Batman. It demonstrates his childhood life and how he plans to become a masked vigilante. Unable to make sense of the tragedy, Bruce tries to stop robberies and thefts. Thus, trying to control his anger but couldn’t make much impact. This dark, grim, and thrilling anime is one of the finest anime movies.
In the meantime, he becomes deeply attached to Andrea Beaumont, who could somewhat console him. However, she leaves Bruce all broken. Bruce mysteriously leaves his beloved home city in a quest to find the true purpose of his life and comebacks as a symbol of hope for his beloved city.
3. Batman: Subzero
Mr. Freeze, who is the ex-enemy of Batman, finds himself in a devastating position. A tragic accident puts his wife in a life-and-death situation. Being heartbroken, Mr. Freeze comes back to Gotham city only to find out that Barbara Gordan can only save his wife.
He kidnaps Barbara and on-bards her on the plan to save his wife. In the meantime, Batman and Robbin learn the whereabouts of Barbara. Batman rescues Barbara while pledging Mr. Freeze to save his dying wife. This demonstrates the perfect example of how high Batman holds justice and rules.
4. Batman Beyond: Return of the Joker
Joker is the most despised enemy of all. He knows Batman too well and even has some instincts about his identity. On top of that, Joker isn’t much afraid of Batman. Batman is so much fed-up by Joker doesn’t even want to believe that he is alive. Even after the Joker interrupts the live press conference.
Batman investigates and tries to join pieces to understand how it is possible? Meanwhile, the Joker equips himself with high-tech weapons and armed satellites. Joker devises a plan to kill Bruce and puts it into motion. Joker and Batman make one of the best duos of animated movies.
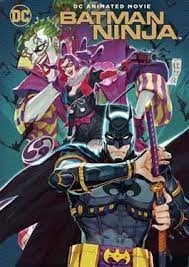
5. Batman Ninja
This animated movie demonstrates the courage of Batman. Even after being defeated multiple times, he still doesn’t back down from saving his beloved Gotham. Fortunately, In the end, he succeeds.
The movie’s plot is twisted with time travel through Grodd’s Quake Engine time, which sends Batman to feudal Japan. This animated Batman laearns ninja techniques to defeat his deadliest enemies. In Batman Ninja’s animated movie, Batman and bat-clan had to face multiple enemies all at once, making their positions vulnerable.
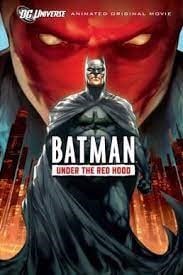
6. Batman: Under the Red Hood
Batman has pledged himself to his rules that he follows them with all his heart, even if it costs him his dear friend. Being confused about the identity of the red hood, Batman visits Joker in Arkham Asylum, who denies any involvement.
Red hood tries to kill Black Mask and damages his drug business. Joker promises Red hood for his freedom to the Black Mask. However, Joker tricks the Black Mask and destroys all the drug lords along with Black Mask. In all of this, Batman confronts Ra’s al Gul to know more about the Red Hood and who is underneath it.
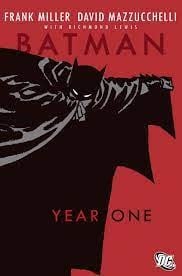
7. Batman year one
A lot of comic and anime fans started loving the batman character after this particular anime. Based on the first year of Bruce Wayne’s life as a batman, the serial shows his trouble with the police and public. The first episode starts with Jim Gordan and Batman walking down a street with all the crimes and robberies in the city.
Also, the plot revolves around Jim Gordan’s life and how he is trying so hard to make a difference in the police department. As police were involved in doing deals with monsters like Falcone and Fish Mooney.
As a lot of fans might already know, Jim and Batman were always friends from the beginning. Coming back from the training, Bruce still has to decide something that will scare his enemies. So, he comes up with the bat sign. The character of the Cat woman is also introduced in it, and it was amazing how dark and toned they made her. Not to forget, this dc animated movie is scripted by Frank Miller David Mazzucchelli, so it is connected to the Dark Knight rises.
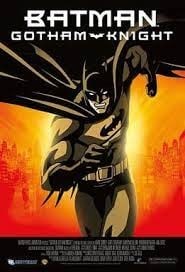
8. Batman: Gotham Knight
No, this is not Dark Knight; it is the sixth sequel of the batman anime series. An underrated DC animated movie. This anime itself is consisting of six chapters. The animation is very stylish and a little bit distracting. Like, Batman was a fat, healthy man. However, this shows him weirdly slim and fit. The first chapter is the most interesting with full of action and thrilling.
Chapters 2 and 3 are full of the mysterious part of Batman’s life. The entire island feels full of psychotic maniacs. Lucious Fox and Bruce Wayne are working together in this part, testing the new bat gear. The 4th and 5th sequel is all about how detective Gordan is convinced to believe Batman, yet cannot trust him. The 6th part contains the most positively animated scenes when Batman saves Jim Gordan’s life. Each sequel gives off the unique character and abilities of batman.
9. The Batman vs. Dracula
There is no age limit for batman animated movies. Even, adults enjoy super amuzing dance and stunts of joker in this anime. All he do is dancing around barefoot, laughing maniacally, and annoying batman with his tricks. Batman faces a strange supernatural villain in this anime. The storyline starts in Arkham Asylum, from where the Joker escapes. As soon as Batman gets a signal about it, he goes hunting for the Joker. The details in the Joker’s dressing and outfit are beyond amazing. Although, the show has some flaws, as the penguin meets Joker a little too early. In search of finding some hidden treasure, the penguin wakes up Dracula.

10. Batman: Mystery of the Batwoman
The Batwoman scene starts when she tries to stop a truck full of drugs and robbers with her excellent skills, and Batman arrives at the location. In this Batman animated movie, the penguin owns a toy factory. The animated batwoman has some extraordinary, unrealistic skills which successfully gain batman attention. The story lies in the secrecy of Batwoman and other corrupted Dons of Gotham city.
Bonus Tip-Record Batman Animated Movie and Share
In the older days, all the movies came on a CD or DVD. Luckily, now you can record and watch all the dc animated movies or batman anime movies and watch them later too or share with your friends. Wondershare Filmora is extraordinary software that allows you to screen record and edit videos.


You can download it for windows 7, 8, 10 also for iOS. Surely, it is an ideal replacement for windows movie maker. The features and tools are handy, anyone with simple computer-operating skills can learn it. Wondershare Filmora supports all kinds of audio, video, and photo formats. Either share your screen recorded videos directly on any social media platform or save them on your PC, Wondershare Filmora has made It super easy. Plus, you can burn a disk, make ISO files, download HD videos. Managing and accessing videos, along with editing is hassle-free. The interface is intuitive and user-friendly. Some of the top features are listed below.
Features:
- Record your PC screen
- Edit and trim videos
- Add effects to your video.
- Merge the saved videos.
- Noise removal feature.
- Music library.
- Thousands of filters.
Conclusion
No wonder, DC has made super exciting anime and characters like Wonder Woman and Superman but Batman remains the all-time favorite of millions of Dc fans. The action, detail, and thrill of animated movies are super thrilling.
The quality of animation and video varies significantly as some of these Batman animated movies were released in the early 90s. You can watch all the above-listed batman animated movies and record with wonder share Filmora.
Shanoon Cox
Shanoon Cox is a writer and a lover of all things video.
Follow @Shanoon Cox
Shanoon Cox
Mar 27, 2024• Proven solutions
Batman is one of the most popular and long-lasting characters in DC animated movies. There can always be an argument on Marvel and DC movies. Although, DC remains the king regards to animated movies. DC animated movies are better coordinated with live-action scenes. Each story features different aspects of Gotham city and its issues.
Batman or “Bruce Wayne” is an orphan billionaire living a carefree life. Yet, he leads the gods and exceptional ones like they do not matter much. The technology and the will Batman demonstrates are peculiar. No wonder Batman animated movies are one of the bestselling of all time. I could even say, in the early 90s, Batman was the most favorite hero of DC animated movies.
10 Best Batman Anime Movies-2024 List
- 1. The Dark Knight Returns
- 2. Batman: Mask of the Phantasm
- 3. Batman: Subzero
- 4. Batman Beyond: Return of the Joker
- 5. Batman Ninja
- 6. Batman: Under the Red Hood
- 7. Batman year one
- 8. Batman: Gotham Knight
- 9. The Batman vs. Dracula
- 10. Batman: Mystery of the Batwoman
1. The Dark Knight Returns
The top of the list is Dark Knight Returns anime. What makes this animated Batman so exceptional are his rules and consciousness. Batman goes beyond his limits to save his beloved city. But on top of all, Batman avoids making a public appearance. The movie is entertaining and less dark scenes, mostly targeting the younger generation.
However, when Gotham becomes the prey of mafias, gang wars, and Joker, Batman comes out of retirement or what looked like a retirement. Although Batman was criticized by the public and even hunted by authorities, he still came back, making him the “Dark Knight.” However, in the end, it seems that Bruce Wayne dies, but still, the true fate of Batman is unknown.
2. Batman: Mask of the Phantasm
This animated movie is more or less about the journey of the orphan Bruce Wayne to Batman. It demonstrates his childhood life and how he plans to become a masked vigilante. Unable to make sense of the tragedy, Bruce tries to stop robberies and thefts. Thus, trying to control his anger but couldn’t make much impact. This dark, grim, and thrilling anime is one of the finest anime movies.
In the meantime, he becomes deeply attached to Andrea Beaumont, who could somewhat console him. However, she leaves Bruce all broken. Bruce mysteriously leaves his beloved home city in a quest to find the true purpose of his life and comebacks as a symbol of hope for his beloved city.
3. Batman: Subzero
Mr. Freeze, who is the ex-enemy of Batman, finds himself in a devastating position. A tragic accident puts his wife in a life-and-death situation. Being heartbroken, Mr. Freeze comes back to Gotham city only to find out that Barbara Gordan can only save his wife.
He kidnaps Barbara and on-bards her on the plan to save his wife. In the meantime, Batman and Robbin learn the whereabouts of Barbara. Batman rescues Barbara while pledging Mr. Freeze to save his dying wife. This demonstrates the perfect example of how high Batman holds justice and rules.
4. Batman Beyond: Return of the Joker
Joker is the most despised enemy of all. He knows Batman too well and even has some instincts about his identity. On top of that, Joker isn’t much afraid of Batman. Batman is so much fed-up by Joker doesn’t even want to believe that he is alive. Even after the Joker interrupts the live press conference.
Batman investigates and tries to join pieces to understand how it is possible? Meanwhile, the Joker equips himself with high-tech weapons and armed satellites. Joker devises a plan to kill Bruce and puts it into motion. Joker and Batman make one of the best duos of animated movies.
5. Batman Ninja
This animated movie demonstrates the courage of Batman. Even after being defeated multiple times, he still doesn’t back down from saving his beloved Gotham. Fortunately, In the end, he succeeds.
The movie’s plot is twisted with time travel through Grodd’s Quake Engine time, which sends Batman to feudal Japan. This animated Batman laearns ninja techniques to defeat his deadliest enemies. In Batman Ninja’s animated movie, Batman and bat-clan had to face multiple enemies all at once, making their positions vulnerable.
6. Batman: Under the Red Hood
Batman has pledged himself to his rules that he follows them with all his heart, even if it costs him his dear friend. Being confused about the identity of the red hood, Batman visits Joker in Arkham Asylum, who denies any involvement.
Red hood tries to kill Black Mask and damages his drug business. Joker promises Red hood for his freedom to the Black Mask. However, Joker tricks the Black Mask and destroys all the drug lords along with Black Mask. In all of this, Batman confronts Ra’s al Gul to know more about the Red Hood and who is underneath it.
7. Batman year one
A lot of comic and anime fans started loving the batman character after this particular anime. Based on the first year of Bruce Wayne’s life as a batman, the serial shows his trouble with the police and public. The first episode starts with Jim Gordan and Batman walking down a street with all the crimes and robberies in the city.
Also, the plot revolves around Jim Gordan’s life and how he is trying so hard to make a difference in the police department. As police were involved in doing deals with monsters like Falcone and Fish Mooney.
As a lot of fans might already know, Jim and Batman were always friends from the beginning. Coming back from the training, Bruce still has to decide something that will scare his enemies. So, he comes up with the bat sign. The character of the Cat woman is also introduced in it, and it was amazing how dark and toned they made her. Not to forget, this dc animated movie is scripted by Frank Miller David Mazzucchelli, so it is connected to the Dark Knight rises.
8. Batman: Gotham Knight
No, this is not Dark Knight; it is the sixth sequel of the batman anime series. An underrated DC animated movie. This anime itself is consisting of six chapters. The animation is very stylish and a little bit distracting. Like, Batman was a fat, healthy man. However, this shows him weirdly slim and fit. The first chapter is the most interesting with full of action and thrilling.
Chapters 2 and 3 are full of the mysterious part of Batman’s life. The entire island feels full of psychotic maniacs. Lucious Fox and Bruce Wayne are working together in this part, testing the new bat gear. The 4th and 5th sequel is all about how detective Gordan is convinced to believe Batman, yet cannot trust him. The 6th part contains the most positively animated scenes when Batman saves Jim Gordan’s life. Each sequel gives off the unique character and abilities of batman.
9. The Batman vs. Dracula
There is no age limit for batman animated movies. Even, adults enjoy super amuzing dance and stunts of joker in this anime. All he do is dancing around barefoot, laughing maniacally, and annoying batman with his tricks. Batman faces a strange supernatural villain in this anime. The storyline starts in Arkham Asylum, from where the Joker escapes. As soon as Batman gets a signal about it, he goes hunting for the Joker. The details in the Joker’s dressing and outfit are beyond amazing. Although, the show has some flaws, as the penguin meets Joker a little too early. In search of finding some hidden treasure, the penguin wakes up Dracula.
10. Batman: Mystery of the Batwoman
The Batwoman scene starts when she tries to stop a truck full of drugs and robbers with her excellent skills, and Batman arrives at the location. In this Batman animated movie, the penguin owns a toy factory. The animated batwoman has some extraordinary, unrealistic skills which successfully gain batman attention. The story lies in the secrecy of Batwoman and other corrupted Dons of Gotham city.
Bonus Tip-Record Batman Animated Movie and Share
In the older days, all the movies came on a CD or DVD. Luckily, now you can record and watch all the dc animated movies or batman anime movies and watch them later too or share with your friends. Wondershare Filmora is extraordinary software that allows you to screen record and edit videos.
You can download it for windows 7, 8, 10 also for iOS. Surely, it is an ideal replacement for windows movie maker. The features and tools are handy, anyone with simple computer-operating skills can learn it. Wondershare Filmora supports all kinds of audio, video, and photo formats. Either share your screen recorded videos directly on any social media platform or save them on your PC, Wondershare Filmora has made It super easy. Plus, you can burn a disk, make ISO files, download HD videos. Managing and accessing videos, along with editing is hassle-free. The interface is intuitive and user-friendly. Some of the top features are listed below.
Features:
- Record your PC screen
- Edit and trim videos
- Add effects to your video.
- Merge the saved videos.
- Noise removal feature.
- Music library.
- Thousands of filters.
Conclusion
No wonder, DC has made super exciting anime and characters like Wonder Woman and Superman but Batman remains the all-time favorite of millions of Dc fans. The action, detail, and thrill of animated movies are super thrilling.
The quality of animation and video varies significantly as some of these Batman animated movies were released in the early 90s. You can watch all the above-listed batman animated movies and record with wonder share Filmora.
Shanoon Cox
Shanoon Cox is a writer and a lover of all things video.
Follow @Shanoon Cox
Stunning Ideas About Creating Personalised WhatsApp GIF Sticker
Stunning Ideas About Creating Personalised WhatsApp GIF Sticker
An easy yet powerful editor
Numerous effects to choose from
Detailed tutorials provided by the official channel
WhatsApp has become the most popularly and widely used medium for text conversation and with the reach of the platform increasing every day, new features are added from time to time to keep the users hooked. In the same line, WhatsApp now allows creating customized animated GIF stickers to be used in the chats.
Animated stickers will let you express your feeling and thoughts through animations which will surely make the conversation more interesting. These stickers can be created on your Android as well as iPhone. The article below will help you to know the detailed process to create GIF sticker WhatsApp and also how these stickers can be used in your videos to make the videos more entertaining.
In this article
01 [How to Create Custom Animated WhatsApp Stickers on Android and iPhone](#Part 1)
02 [How to Use Custom Stickers in Filmora?](#Part 2)
Part 1 How to Create Custom Animated WhatsApp Stickers on Android and iPhone
Animated third-party stickers cannot be added directly to WhatsApp and thus you can create a customized one. To create these GIF stickers for WhatsApp, you would need the help of third-party apps.
For Android devices, one such popular app is the Sticker Maker app. For iPhone, we suggest using Sticker Maker Studio app.
Once these apps are installed on your device, GIF stickers can be made in no time.
Steps to make sticker GIF WhatsApp on Android phone
Step 1. Download, install and open the Sticker maker app on your Android device.
Step 2. Tap on the “Create a new sticker pack” option on your app.
Step 3. Give the desired name to your sticker pack and click on the Create button.
Step 4. To add the animated stickers, click on the created sticker pack.
Step 5. Next, click on the first box, and then from the menu choose the Select file option.

Step 6. Next, choose the video from your phone from which you wish to create a sticker. You can even add a GIF file. After the media file is added, the app will compress it and will turn it into an animated sticker automatically.
Step 7. Now, you need to add 3 animated stickers to the other boxes of the sticker app (as mentioned in step 5).
Note: Multiple stickers can be added using the same process.
Step 8. Click on the “Add to WhatsApp” button after a minimum of 3 stickers are added to the pack.
Step 9. Now, your stickers are ready. Open the WhatsApp chat and launch the sticker panel where you can see your created GIF stickers. Choose the sticker you want, add it to your chat, and send it.

Steps to make WhatsApp Sticker GIF on iPhone
Step 1. On your iPhone, download, install and launch the Sticker Maker Studio app from the app store.
Step 2. Choose the sticker pack and also the name of the author at the respective boxes and then click on the Create button.
Step 3. Next, click on the new sticker pack that is created.

Step 4. Multiple boxes will now appear from which you need to choose the first one and then
select the Files option.
Step 5. Choose the desired Video from your device from which sticker has to be created. You can also create GIF to WhatsApp sticker. Other stickers to the pack can be added similarly. The app will automatically convert the added file to a sticker.
Step 6. After the stickers are added (at least 3), click on the Add to WhatsApp button at the generated Tray icon.

Note: If you see your tray icon to be blank, click on it else there will be issues adding the stickers to the WhatsApp chat later. A tray icon can be selected from the images.
Step 7. Next, you will be asked if you wish to open WhatsApp, click on Okay.
Step 8. Now, to add the animated GIF stickers to WhatsApp, you need to click on the Save button and your stickers are ready to be used in the chat.

Part 2 How to Use Custom Stickers in Wondershare Filmora Video Editor ?
For Win 7 or later (64-bit)
For macOS 10.12 or later
Why use your customized GIF stickers only in WhatsApp chats when they can be used in Videos as well? Yes, using Wondershare Filmora software you can use your customized animated stickers in your videos as well to make them more eye-catchy and interesting. Additionally, you can also add the effects to your videos using the software.
Wondershare Filmora is a feature-packed that allows creating stunning and professional-looking videos using its wide range of functions like motion tracking, adding effects, color matching, noise enhancement, keyframe animations, adding captions, and much more.
The user-friendly interface makes the tool apt even for beginners.
Steps to add GIF animations to videos using Wondershare Filmora
Step 1. On your Windows or Mac system, launch the software and choose Media > Import> Import Media Files on the main interface.

Step 2. Next, choose and add the created animated sticker to the software interface. Alternatively, you can also select the sticker from Elements. Drag and drop the added sticker to the video.

Step 3. To adjust the parameters like the size and the rotation of the sticker, you need to double-click on the sticker at the timeline. Additionally, color adjustments can also be made and if needed, you can also add 3D motion.

Step 4. To change the size and the location of the sticker, you need to drag it accordingly in
the viewer panel.
Step 5. Next, at the Local tab, choose the video format, resolution, and desktop folder. Finally, click on the Export button to start processing.
Note: The created video can also be saved to DVD or can be uploaded to YouTube and Vimeo directly using the software.

● Key Takeaways from This Episode →
●The latest GIF sticker feature of WhatsApp allows adding interesting animations to your chats.
●To create customized GIF stickers on Android and iPhone, third-party apps have to be used.
●The customized stickers can also be added to your videos using Wondershare Filmora.
WhatsApp has become the most popularly and widely used medium for text conversation and with the reach of the platform increasing every day, new features are added from time to time to keep the users hooked. In the same line, WhatsApp now allows creating customized animated GIF stickers to be used in the chats.
Animated stickers will let you express your feeling and thoughts through animations which will surely make the conversation more interesting. These stickers can be created on your Android as well as iPhone. The article below will help you to know the detailed process to create GIF sticker WhatsApp and also how these stickers can be used in your videos to make the videos more entertaining.
In this article
01 [How to Create Custom Animated WhatsApp Stickers on Android and iPhone](#Part 1)
02 [How to Use Custom Stickers in Filmora?](#Part 2)
Part 1 How to Create Custom Animated WhatsApp Stickers on Android and iPhone
Animated third-party stickers cannot be added directly to WhatsApp and thus you can create a customized one. To create these GIF stickers for WhatsApp, you would need the help of third-party apps.
For Android devices, one such popular app is the Sticker Maker app. For iPhone, we suggest using Sticker Maker Studio app.
Once these apps are installed on your device, GIF stickers can be made in no time.
Steps to make sticker GIF WhatsApp on Android phone
Step 1. Download, install and open the Sticker maker app on your Android device.
Step 2. Tap on the “Create a new sticker pack” option on your app.
Step 3. Give the desired name to your sticker pack and click on the Create button.
Step 4. To add the animated stickers, click on the created sticker pack.
Step 5. Next, click on the first box, and then from the menu choose the Select file option.
Step 6. Next, choose the video from your phone from which you wish to create a sticker. You can even add a GIF file. After the media file is added, the app will compress it and will turn it into an animated sticker automatically.
Step 7. Now, you need to add 3 animated stickers to the other boxes of the sticker app (as mentioned in step 5).
Note: Multiple stickers can be added using the same process.
Step 8. Click on the “Add to WhatsApp” button after a minimum of 3 stickers are added to the pack.
Step 9. Now, your stickers are ready. Open the WhatsApp chat and launch the sticker panel where you can see your created GIF stickers. Choose the sticker you want, add it to your chat, and send it.
Steps to make WhatsApp Sticker GIF on iPhone
Step 1. On your iPhone, download, install and launch the Sticker Maker Studio app from the app store.
Step 2. Choose the sticker pack and also the name of the author at the respective boxes and then click on the Create button.
Step 3. Next, click on the new sticker pack that is created.
Step 4. Multiple boxes will now appear from which you need to choose the first one and then
select the Files option.
Step 5. Choose the desired Video from your device from which sticker has to be created. You can also create GIF to WhatsApp sticker. Other stickers to the pack can be added similarly. The app will automatically convert the added file to a sticker.
Step 6. After the stickers are added (at least 3), click on the Add to WhatsApp button at the generated Tray icon.
Note: If you see your tray icon to be blank, click on it else there will be issues adding the stickers to the WhatsApp chat later. A tray icon can be selected from the images.
Step 7. Next, you will be asked if you wish to open WhatsApp, click on Okay.
Step 8. Now, to add the animated GIF stickers to WhatsApp, you need to click on the Save button and your stickers are ready to be used in the chat.
Part 2 How to Use Custom Stickers in Wondershare Filmora Video Editor ?
For Win 7 or later (64-bit)
For macOS 10.12 or later
Why use your customized GIF stickers only in WhatsApp chats when they can be used in Videos as well? Yes, using Wondershare Filmora software you can use your customized animated stickers in your videos as well to make them more eye-catchy and interesting. Additionally, you can also add the effects to your videos using the software.
Wondershare Filmora is a feature-packed that allows creating stunning and professional-looking videos using its wide range of functions like motion tracking, adding effects, color matching, noise enhancement, keyframe animations, adding captions, and much more.
The user-friendly interface makes the tool apt even for beginners.
Steps to add GIF animations to videos using Wondershare Filmora
Step 1. On your Windows or Mac system, launch the software and choose Media > Import> Import Media Files on the main interface.
Step 2. Next, choose and add the created animated sticker to the software interface. Alternatively, you can also select the sticker from Elements. Drag and drop the added sticker to the video.
Step 3. To adjust the parameters like the size and the rotation of the sticker, you need to double-click on the sticker at the timeline. Additionally, color adjustments can also be made and if needed, you can also add 3D motion.
Step 4. To change the size and the location of the sticker, you need to drag it accordingly in
the viewer panel.
Step 5. Next, at the Local tab, choose the video format, resolution, and desktop folder. Finally, click on the Export button to start processing.
Note: The created video can also be saved to DVD or can be uploaded to YouTube and Vimeo directly using the software.
● Key Takeaways from This Episode →
●The latest GIF sticker feature of WhatsApp allows adding interesting animations to your chats.
●To create customized GIF stickers on Android and iPhone, third-party apps have to be used.
●The customized stickers can also be added to your videos using Wondershare Filmora.
Apps to Animate Still Pictures Which Could Make Your Pictures Become Internet Sensation
Apps to Animate Still Pictures Which Could Make Your Pictures Become Internet Sensation
An easy yet powerful editor
Numerous effects to choose from
Detailed tutorials provided by the official channel
Now, it is a question of what to do with all those still photos lying in your phone. You can be pretty certain that you won’t be retiring from clicking images anytime soon. A tip to help make posting images more interesting would be using apps to animate your photos.
You can also find an app that animates your face specifically, which is great for instagram content and has a greater chance of getting reactions or comments. So without further to do let’s get animating.
In this article
01 [Review of General Methods: Can You Animate Still Pictures?](#Part 1)
02 [10 Best apps to animate still photos on Android & iOS](#Part 2)
03 [Additional Extension: 5 Apps to Animate Old Photos](#Part 3)
Part 1 Review of General Methods: Can You Animate Still Pictures?
It’s pretty obvious that you can! These days you can do whatever you want online so animating still pictures should be a piece of cake if you know-how.
A video is basically an entire collage of moving pictures. So if you can cut out pictures from a video why not turn still pictures into animations.
There are a number of ways you can use to animate still images →
● Videos are multiple pictures that move at a frame rate. Make short copies of a video by cutting out the essential moments and playing them in a loop.
● Add and play video animation elements over a picture. With the right software, this task is as easy as copy-pasting over another image.
● Apply an animated 3D image with a transparent background over another image. Remember, the bigger the element the closer it is. So size is directly translated as distance.
● You can use multiple filters and effects on an image with an animated portrait app. Find out what app you can use further on in this article.
● Turn an image into a GIF. No matter its small size and cartoonish style, GIF animation has a very wide appeal as online content.
Part 2 10 Best apps to animate still photos on Android & iOS
01GIPHY
Giphy is the largest internet catalog for GIF files, clips & stickers. No matter if it is a scene from a movie or an animation you have watched somewhere, using this application you can easily find, save & share or simply create something new.
Price: Free
Pros
● Quickly turns still photos into an animation.
● Easily share your work through all social media channels.
Cons
● Search tags are varied; you may need to search using unlikely words to get desired results.
Applicable System: Android
02GIPHY
One of the best ways to turn your photos & videos into GIFs is using ImgPlay. It has a clearer interface making it easy to use. Imgplay comes with paid- premium and non-paid version making it suitable for personal & professional application.
Price: Pro $4.99.
Pros
● It is not packed with unnecessary features.
Cons
● ImgPlay slaps a watermark on all its non-premium versions.
Applicable System: Android & iOS.
03Loopsie
The best Part is that Loopsie provides spectacular cinematographic effects to your animated stills. Stabilization algorithm efficiently removes shaking effects & blurs.
Price: Free.
Pros
● User friendly UI
● Easy to share on social media platforms.
Cons
● Paid version is a bit pricey.
Applicable System: Only on iOS.
04StoryZ
Looking for ways to create animated visuals form still images? This is where your quest ends. An advanced editing platform that offers overlays, movement & color filters. Banner Ads & watermarks can be removed by paying a small subscription fee.
Price: Free version available. Premium costs INR 789 a year.
Pros
● Double exposure effect combines video overlay & static imagery.
Cons
● Contains Ad & watermark.
Applicable System: Android.
05Animate Me
Animate Me offers you a package of postcards & greeting snapshots that you can animate according to your need. The paid subscription will get you updated sounds & effects every now & then.
Price: Free.
Pros
● Easy to use & beginners friendly.
Cons
● Editing features & tools are limited.
Applicable System: Windows**.**
06Movepic
Create animated stills, GIFs, live-wallpapers all with Movepic. It allows you to animate simply anything by drawing a path. You can also adjust the speed of animation manually.
Price: Free.
Pros
● Animate in a light motion.
● Easy to use.
Cons
● Free version leaves a watermark on images.
Applicable System: Android & iOS.
07Pixaloop
Pixaloop is a fun app packed with significant animation & editing features. 100% free to use software delivers live animated images in a few clicks. User friendly interface edits images using powerful & precise animation tools.
Price- Free.
Pros
● Offers all the necessary features & core tools.
● Provides accuracy & flexibility to the users.
Cons
● The animation process is a bit time consuming.
Applicable System: Android & iOS.
08Zoetropic
Zoetropic has a combination of 3D tools and Camera FX to animate your images. User friendly interface allows you to mask the still areas if you wish to keep it still.
Price: $199 (Pro)
Pros
● Easily customize motion areas.
● Apply overlays & audios.
Cons
● App price is higher than similar available apps.
Applicable System: Android & iOS.
9Motionleap
It is one of the most top reviewed apps on Playstore related to animating still photos. It has several features like programming directional cues, freeze portions of your photo or even apply filters.
Price: Free version. Pro version; $3.50/month, $18/year and $55 lifetime.
Pros
● Its free version does not apply watermark.
● Intuitive Interface.
Cons
● Best features are locked in Pro version.
Applicable System: Android & iOS.
Part 3 Additional Extension: 5 Apps to Animate Old Photos
It can be unanimously agreed upon that people have been storing photos for decades as a means of preserving memories. We don’t get much opportunity to meet familiar faces too often so why not just try and animate still images of relatives. Now we already know how we can start animating images on apps but restoring original images maybe a tad more complicated than that. This time a bit of the animation is dependent on the physical state of the picture so be sure it’s in mint condition.
These photos can be restored or manipulated digitally with the help of smart AI. We have listed down some of the apps to animate old photos and reconstruct faces;
01Photos Revive
You can add colour to old worn out photos and make them look more realistic in terms of tonal colorization using artificial intelligence. The app also asks you recollect any details of the photo that you might remember in terms of the image.
Applicable OS: iOS only.

02Remini
After going through several improvements and upgrades, you can use the app Remini to confidently restore low resolution images that are either pixelated, blurred or damaged into High Definition images. This app has already been used by users to process a hundred million photos.
Applicable OS: Android 1.7.2 or higher, & iOS 9.3 or higher.

03Colorize
Another app that uses AI to add colorization to your old images. It is a popular animate your family photo app which has amazing other tools and filters to try out.
Applicable OS: Android and iOS.

04Deep Nostalgia
Using this app which has been innovated by the geology platform MyHeritage uses ai to add gestures to still images to evoke nostalgia in the users.
Applicable OS: Online.

04Google Photoscan
Google scanner is a futuristic app for restoring photos of the past. The app uses a smart scanning technology that provides several scans of the same photo automatically.
Applicable OS: Android or iOS.

Key Takeaways from This Episode
● Animating photos are a new way of reimagining still images into moving live content. There are many methods and approaches you can choose to animate your images.
● Some of them being video animations, transparent background elements, Filters and effects and of course GIFs.
● There are dozens of apps with built in smart artificial intelligence to help restore old photos or make short animations out of them. Some of them are applicable for desktops while others available both on Android and iOS.
Now, it is a question of what to do with all those still photos lying in your phone. You can be pretty certain that you won’t be retiring from clicking images anytime soon. A tip to help make posting images more interesting would be using apps to animate your photos.
You can also find an app that animates your face specifically, which is great for instagram content and has a greater chance of getting reactions or comments. So without further to do let’s get animating.
In this article
01 [Review of General Methods: Can You Animate Still Pictures?](#Part 1)
02 [10 Best apps to animate still photos on Android & iOS](#Part 2)
03 [Additional Extension: 5 Apps to Animate Old Photos](#Part 3)
Part 1 Review of General Methods: Can You Animate Still Pictures?
It’s pretty obvious that you can! These days you can do whatever you want online so animating still pictures should be a piece of cake if you know-how.
A video is basically an entire collage of moving pictures. So if you can cut out pictures from a video why not turn still pictures into animations.
There are a number of ways you can use to animate still images →
● Videos are multiple pictures that move at a frame rate. Make short copies of a video by cutting out the essential moments and playing them in a loop.
● Add and play video animation elements over a picture. With the right software, this task is as easy as copy-pasting over another image.
● Apply an animated 3D image with a transparent background over another image. Remember, the bigger the element the closer it is. So size is directly translated as distance.
● You can use multiple filters and effects on an image with an animated portrait app. Find out what app you can use further on in this article.
● Turn an image into a GIF. No matter its small size and cartoonish style, GIF animation has a very wide appeal as online content.
Part 2 10 Best apps to animate still photos on Android & iOS
01GIPHY
Giphy is the largest internet catalog for GIF files, clips & stickers. No matter if it is a scene from a movie or an animation you have watched somewhere, using this application you can easily find, save & share or simply create something new.
Price: Free
Pros
● Quickly turns still photos into an animation.
● Easily share your work through all social media channels.
Cons
● Search tags are varied; you may need to search using unlikely words to get desired results.
Applicable System: Android
02GIPHY
One of the best ways to turn your photos & videos into GIFs is using ImgPlay. It has a clearer interface making it easy to use. Imgplay comes with paid- premium and non-paid version making it suitable for personal & professional application.
Price: Pro $4.99.
Pros
● It is not packed with unnecessary features.
Cons
● ImgPlay slaps a watermark on all its non-premium versions.
Applicable System: Android & iOS.
03Loopsie
The best Part is that Loopsie provides spectacular cinematographic effects to your animated stills. Stabilization algorithm efficiently removes shaking effects & blurs.
Price: Free.
Pros
● User friendly UI
● Easy to share on social media platforms.
Cons
● Paid version is a bit pricey.
Applicable System: Only on iOS.
04StoryZ
Looking for ways to create animated visuals form still images? This is where your quest ends. An advanced editing platform that offers overlays, movement & color filters. Banner Ads & watermarks can be removed by paying a small subscription fee.
Price: Free version available. Premium costs INR 789 a year.
Pros
● Double exposure effect combines video overlay & static imagery.
Cons
● Contains Ad & watermark.
Applicable System: Android.
05Animate Me
Animate Me offers you a package of postcards & greeting snapshots that you can animate according to your need. The paid subscription will get you updated sounds & effects every now & then.
Price: Free.
Pros
● Easy to use & beginners friendly.
Cons
● Editing features & tools are limited.
Applicable System: Windows**.**
06Movepic
Create animated stills, GIFs, live-wallpapers all with Movepic. It allows you to animate simply anything by drawing a path. You can also adjust the speed of animation manually.
Price: Free.
Pros
● Animate in a light motion.
● Easy to use.
Cons
● Free version leaves a watermark on images.
Applicable System: Android & iOS.
07Pixaloop
Pixaloop is a fun app packed with significant animation & editing features. 100% free to use software delivers live animated images in a few clicks. User friendly interface edits images using powerful & precise animation tools.
Price- Free.
Pros
● Offers all the necessary features & core tools.
● Provides accuracy & flexibility to the users.
Cons
● The animation process is a bit time consuming.
Applicable System: Android & iOS.
08Zoetropic
Zoetropic has a combination of 3D tools and Camera FX to animate your images. User friendly interface allows you to mask the still areas if you wish to keep it still.
Price: $199 (Pro)
Pros
● Easily customize motion areas.
● Apply overlays & audios.
Cons
● App price is higher than similar available apps.
Applicable System: Android & iOS.
9Motionleap
It is one of the most top reviewed apps on Playstore related to animating still photos. It has several features like programming directional cues, freeze portions of your photo or even apply filters.
Price: Free version. Pro version; $3.50/month, $18/year and $55 lifetime.
Pros
● Its free version does not apply watermark.
● Intuitive Interface.
Cons
● Best features are locked in Pro version.
Applicable System: Android & iOS.
Part 3 Additional Extension: 5 Apps to Animate Old Photos
It can be unanimously agreed upon that people have been storing photos for decades as a means of preserving memories. We don’t get much opportunity to meet familiar faces too often so why not just try and animate still images of relatives. Now we already know how we can start animating images on apps but restoring original images maybe a tad more complicated than that. This time a bit of the animation is dependent on the physical state of the picture so be sure it’s in mint condition.
These photos can be restored or manipulated digitally with the help of smart AI. We have listed down some of the apps to animate old photos and reconstruct faces;
01Photos Revive
You can add colour to old worn out photos and make them look more realistic in terms of tonal colorization using artificial intelligence. The app also asks you recollect any details of the photo that you might remember in terms of the image.
Applicable OS: iOS only.
02Remini
After going through several improvements and upgrades, you can use the app Remini to confidently restore low resolution images that are either pixelated, blurred or damaged into High Definition images. This app has already been used by users to process a hundred million photos.
Applicable OS: Android 1.7.2 or higher, & iOS 9.3 or higher.
03Colorize
Another app that uses AI to add colorization to your old images. It is a popular animate your family photo app which has amazing other tools and filters to try out.
Applicable OS: Android and iOS.
04Deep Nostalgia
Using this app which has been innovated by the geology platform MyHeritage uses ai to add gestures to still images to evoke nostalgia in the users.
Applicable OS: Online.
04Google Photoscan
Google scanner is a futuristic app for restoring photos of the past. The app uses a smart scanning technology that provides several scans of the same photo automatically.
Applicable OS: Android or iOS.
Key Takeaways from This Episode
● Animating photos are a new way of reimagining still images into moving live content. There are many methods and approaches you can choose to animate your images.
● Some of them being video animations, transparent background elements, Filters and effects and of course GIFs.
● There are dozens of apps with built in smart artificial intelligence to help restore old photos or make short animations out of them. Some of them are applicable for desktops while others available both on Android and iOS.
No. 1 Maker to Animate Your Logo Online Free
What’s Your No. 1 Maker to Animate Your Logo Online Free
An easy yet powerful editor
Numerous effects to choose from
Detailed tutorials provided by the official channel
A logo can be referred to as the heart of a brand or business. A logo presents the characteristics of a business or a product.
With the help of various applications and tools available online animated graphics can be created. And when we use the same, you can easily animate your logo online.
In this article
01 [Can an Animated Logo Help to Grow Brand?](#Part 1)
02 [What Kind of Animated Logo Maker Can Grab Attention at the Soonest?](#Part 2)
Part 1 Can an Animated Logo Help to Grow Brand?
01Where to Use Animated Logo?
The target of an animated logo is to draw attention to views in all the available digital spaces. The purpose is different for different cases. The following will give an idea of where you can use your animated logo:
● Company website
Websites are considered as a CV for an organization. So it is very important and necessary to see that the website is working effectively. An animated logo will help in improving the brand image website along with it will also boost Search Engine Optimization (SEO). Visitors or consumers are visiting the website or the page will get to see the animated logo whenever they visit the site and thus spend more time on the website. This will also bring an impact on the rank of the websites in regards to the search results.
![]()
● Promo Videos
Promo video acts as marketing tools for companies. Brands and companies make profits and earn revenue through Promo videos. So while promoting a brand’s promo video, you can include an animated logo with it. This combination of promo video and animated logo will certainly accomplish various marketing goals. You can animate your logo online for free if you don’t have one yet.
![]()
● Social Networks
Social networking platforms nowadays are considered to be one of the important platforms for various product promotions. Usually, people spend a lot of time online making communications through social networks such as Twitter, Instagram, Pinterest, and Facebook. We have already learned that video content can be used as a marketing tool. These videos with the animated logo are easy to share as well as access. Also, you can convert your animated logo into a GIF which can be used for a social posting. Thus they get shared all across the social networking platform.
![]()
● Presentations
Companies often hold various presentations from time to time. It can be a presentation at a business meeting or brand promotion or demonstration. While giving these presentations, you can always include your animated logo with the presentation. By doing this, you will also end up adding an element of creativity and originality to your presentation.
![]()
023 Reasons Why Animated Logos Help to Grow Brand
![]()
We all know why a logo is important for branding a product and the business. The logo symbolizes the brand and the product. It also helps the consumers to identify a specific brand. A logo is considered to be the face of the brand or the business. We have also learned the importance of an animated logo.
Tips:
● Animated Logos helps in Increasing Brand Awareness
● Animated Logos tells an engaging story about your brand
● Animated Logos captures the Viewers Attention
Part 2 What Kind of Animated Logo Maker Can Grab Attention at the Soonest?
011.5 Amazing Templates for Jaw-Dropping Logos
● Octopus
![]()
● LUX
![]()
● Giant Owl
![]()
● 500px
![]()
● Zoom
![]()
02These 8 Makers Make Animating Logos Easier Than Ever
When you consider animating your logo online, there are various logo makers in the industry, and you might question yourself that ‘How can I animate my logo online?’ Here is the list of the eight best logo makers who can help you to animate your logo online are:
● Renderforest
5 key features are:
● Amazing logo fonts
● Wide variety of logo styles
● Amazing layout designs
● Logos can be created on the cloud with built-in tools
● Logo can be edited anytime without any hassle
Rating: Renderforest rating is 10 out of 10
Review: I found Renderforest to be very fast and effective in making an animated logo. The amazing logo fonts are available with the vast logo style library. It made the work much easier and smoother. I found Renderforest to be the apt logo maker for my work. If I had assigned some logo artist to do the same, the cost would have been much higher.
![]()
● OFFEO’s Logo
5 key features are:
● Compatible and affordable with all existing programs
● Availability of a huge library
● Animation speed can be customized
● Availability of various color palettes for every single template
● No limitations regarding the length of animation one wish to create
Rating: OFFEO’s Logo rating is 4.7 out of 5
Review: I was looking for a good animation maker for my vlogging site when I came across OFFEO’s Logo. The best part of this maker is that it is very easy to use. And I have made a professional animated logo just with a click of a button. Now I don’t need a pro for any further animated videos.
![]()
● Animaker
5 key features are:
● One can customize the logo
● Availability of awesome sound effects
● Logos can be sketched with the Tetris style and others
● Exclusive library of logo styles
● Largest animation library
Rating: The rating is 4 out of 5
Review: I had a marvelous experience with Animaker. It has been a bag full of positive surprises. Animaker made it possible to create some unique content in a very short time and with very little operational costs.
![]()
● Viddyoze
5 key features are:
● Availability of live-action animation
● Multi rendering processing
● Availability of hundreds of unique templates
● Ready-made logo designs are available
● Logos and characters can be mixed to make one single video
Rating: The rating is 4.2 out of 5
Review: My experience with Viddyoze is amazing. I have made some amazing videos and logos by Viddyoze for my own personal use, as well as helping my friend with his business. I will always use Viddyoze for creating animated logos.
![]()
● Reallusion
5 key features are:
● Creative control features are present
● Modified interface control
● Material generation assistant help available
● Drag and drop for creating 2D motion effect
● Hundreds of ready-made logo designs are available
Rating: The rating is 3.5 out of 5
Review: I was amazed at the character animation and the rendering features available. It is a very user-friendly logo maker with straightforward features available in comparison to other 3D animation software.
![]()
● PixTeller
5 key features are:
● More than 100,000 logo shapes are available
● Unique Text Properties helps to create exclusive text for logos
● Logos created can be downloaded as GIF or MP4 format
● One can create frame by frame tailored logo animations
● Availability of a huge number of logo templates
Rating: The rating is 4.6 out of 5
Review: The best thing about PixTeller are its edit and create images in a simple and placid way. With PixTeller my job has been a smooth one, whereas previously, creating an animated logo with other makers was a headache.
![]()
● Quince MEDIA
5 key features are:
● Availability of Architectural 3D animation
● 2D animators can use this for commercial use
● Presence of 3D illustration and character
● Availability of Promo video motion graphics
● One can create characters with unbeatable graphics
Rating: The rating is 4.4 out of 5
Review: After using Quince MEDIA, I was just left awestruck. I was able to create some exquisite 3D animated logos with the available 3D illustration and characters. Also, I was able to create some unique graphics for my company’s animated logo.
![]()
● Biteable
5 key features are:
● Availability of a large color scheme
● One can share logos directly to Facebook, Instagram, YouTube, and others
● Drag and drop feature available
● Features are built for enterprise uses
● Fast interaction lets animated logos created in a few minutes
Rating: The rating is 4.4 out of 5
Review: After using Biteable, I was able to create videos and animated logos of high quality with a professional outlook. Earlier I used to spend days creating small videos, but now it can be done in an hour or so. Adding my own music is now easier.
![]()
Key Takeaways from This Episode
● At the end of this article, you have understood the importance of having an animated logo instead of a static image logo.
● Also, you got the view as to how an animated logo helps you in the growth of your brand and business.
● And finally, you got an idea that what are the various types of animated logos that grab the viewer’s attention the most.
● So, animate your logo online for your brand and make a mark in your business.
Top 10 Best and Fast Ways to Turn Image Into Gif
[Top 10] Best and Fast Ways to Turn Image into Gif
An easy yet powerful editor
Numerous effects to choose from
Detailed tutorials provided by the official channel
There are in fact ways to turn an image into GIF easily We’ll be showing off a couple of some of the easier ways below, including in-depth tutorials of some of the best methods so that you will no longer have to be troubled.
These tutorials, of course, will focus on teaching you how to create GIF from photos If that’s something you’re interested in, continue reading
In this article
01 [Why GIF?](#Part 1)
02 [How to Add an Image to a GIF?](#Part 2)
Part 1 Why GIF?
Before we move on to the tutorials, let’s do a brief account on GIF files We’ve also answered some of the more common questions regarding using a GIF image maker below for your edification
But, first: Why GIF? Well, it all comes down to what you’re looking for A lot of people use GIF files to create animated icons that they can use for their accounts. Some just genuinely want to create a GIF file that they can share with their friends and families (either for a laugh or something else) GIF files are a convenient vessel for doing this because they have a lot of flexibility and are accepted by most platforms
01Why Gif from My Images Are Blurry?
One of the biggest issues people tend to have when turning an image into GIF is that they come out of the process with a blurry end-product. No one wants that But, how are you supposed to avoid it? Well, it all depends on the tool that you’re using and your initial picture For the former, it’s best to review the upload requirements of your chosen GIF maker to get a better end result. For the latter, it’s best to pick a good, high-quality GIF creator for a better outcome
02There Are Jaggy Strokes Around Gif?
Another issue that you might suffer from while trying to create GIFs from photos is jaggy or raggedy strokes around the GIF when converted. These occur often with GIF makers that support transparency If you find these happening to you, adjust the transparency settings to get rid of the white pixel outline around your converted GIF.
Part 2 How to Add an Image to a GIF?
Now it’s finally time for the tutorials that we promised at the beginning of this article These tutorials will range from online to software solutions — so that you can get a clear idea of what you can expect from all these different GIF makers. To be more specific, we’ll be demonstrating with an online images to GIF converter, how to create animated GIF photoshop, and how to easily turn any image into GIF with the photo GIF creator, Wondershare Filmora Video Editor.
01Image to GIF: How to Turn Photos into Animated GIFs
For our first tutorial, we’re going to be demonstrating how to create GIF from photos with an online photo GIF creator More specifically, we’ll be demonstrating with Loading.IO, which is an online tool that you can use to create animated icons for your profiles or on your video content It comes with several animation options and other settings that you can use to quickly create GIFs from photos
**Step 1: Go to Loading.IO
Of course, we start off this tutorial by opening the GIF maker. In this case, since the tool is hosted online, that’s as easy as opening the link that we’ve provided below It will take you directly to the online GIF creator.
URL: https://loading.io/animation/icon/

**Step 2: Upload Photo
Once on-site, it’s time to upload the photo that you want to turn into a GIF As this is an icon creator, you should pick a photo with the proper parameters
To upload your icon for animating, select the ‘Upload’ button and browse your computer or your Google Drive for the image in question.

**Step 3: Choose animation Style
Next, choose how you want the uploaded photo to be animated Loading.IO offers a couple of animations that you can choose from Including the ‘beat’ animation, which is what we choose for our example

**Step 4: Adjust Settings
This step is technically optional, as there are default settings already prepared if you have no other specifications for your image-turned GIF. But, if you want, you can adjust certain settings for a better outcome
For example, you can speed up the animation with the ‘Speed’ slider. Or, you can increase the number of times the GIF loops by adjusting the ‘Repeat’ slider. Test out a couple of settings to get the best result

**Step 5: Download as GIF
To wrap things up, it’s time to download your finished animation Loading.IO gives several options for this. But, of course, in our case, we choose to ‘Download As: GIF’

02How to Make an Animated GIF in Photoshop [Tutorial]
For the next tutorial, we’ll be showing you how to use Photoshop to create and edit an animated GIF This process is fairly lengthy and is not recommended for beginners. But, it is a very professional method of creating an animated GIF — one that will allow you to control every step of the process (which may be exactly what you want)
**Step 1: Import Images into an Image Stack
First, starting on a new product, upload the images that you want to turn into a GIF into a photoshop ‘Image Stack’. This can be done by clicking the ‘File’ tab and selecting the ‘Scripts > Load Files into Stack…’ option
Afterward, a pop-up window will appear where you will be prompted to browse your computer for the aforementioned images Click ‘OK’ when done

**Step 2: Organize Layers
Check the ‘Layers’ panel for the images that you uploaded and organize them based on how you want them to appear for your animated GIF

**Step 3: (Optional) Import Video
If you want to work on a video to turn into a GIF instead, you can do such by selecting the ‘File’ tab and clicking on the ‘Import > Video Frames to Layers…’ option. This will get you to the same place shown in Step 2
Note: Just be careful that you do not transfer an image that is too long Photoshop may not be able to properly break it down, if so.

**Step 4: Open Timeline Then Create Frame Animation
Next, in order to start working on your animation, open the Timeline Window This can be done by clicking the ‘Window’ tab and selecting ‘Timeline’
With the ‘Timeline’ Window now open, select the ‘Create Frame Animation’ option to begin working

**Step 5: Make Frame from Layers
In order to transfer your uploaded images from the ‘Layers’ panel to your timeline, select the ‘Menu’ option on the top-right hand corner of the ‘Timeline’ window and select the ‘Make Frames From Layers’ option

**Step 6: Preview Animation and Adjust as Needed
To preview your animation, click the ‘Play’ button This is the best time to check that your frames have been organized correctly If they are not, you can adjust them by dragging and dropping them on the timeline.
OR, you can use the ‘Reverse Frames’ option if your animation has been completely flipped around

**Step 7: Create an Animation Loop
In order to be a proper looped GIF, the animation should repeat endlessly You can make sure of this by changing the ‘Repeat’ option to ‘Forever’ (as is shown in the image below).

**Step 8: Export Finished Animation to Gif
In order to finish turning your image into GIF, you’ll need to export it in the proper format This is possible by selecting the ‘File’ tab and then clicking the ‘Export > Save for Web (Legacy)…’ option
A pop-up window should appear where you can control export settings Do so in order to ensure that you have the best outcome

03How To Make an Animated GIF in Wondershare Filmora Video Editor (Fast & Easy)
For Win 7 or later (64-bit)
For macOS 10.12 or later
For our last tutorial, we’ll be showing you how to make an animated GIF with the use of Wondershare Wondershare Filmora Video Editor . Filmora is a video editor, one that is used by professionals all over to produce high-quality content And, of course, as a video editor, it works just as well as a GIF maker. One that you can use to create images into a GIF easily
**Step 1: Launch Filmora
First, download and install Filmora If you want to follow along with this demonstration, you can Wondershare offers a FREE trial where you can test out all of the software’s functions before making a commitment

Step 2: Upload Video to Turn into GIF
For this next step, we do something akin to what we did earlier with Photoshop. And that is to upload images or a video to fit into a timeline
This process is started by first uploading images, which you can do by clicking the ‘File’ tab and selecting the ‘Import Media > Import Media Files’ option

**Step 3: Drag Media to Timeline
With Filmora, the ‘Timeline’ window is already open Also, you won’t have to do anything complicated to get your media onto the said timeline. Just drag and drop it from the Media library (as is shown in the image below).

**Step 4: Edit or Adjust GIF
Before moving forward, you should take this chance to make adjustments to the media that you uploaded into your timeline There are many things that you can do at this stage so feel free to experiment
For our example, we cut down the video that we uploaded by using the ‘Trim’ option (which you can find by right-clicking on video media).

**Step 5: Export into GIF
Finally, to finish us off, we export our finished GIF This can be done by selecting the ‘Export’ tab and then clicking the ‘Create Video’ option A pop-up window will appear where you can adjust export settings

● Key Takeaways from This Episode →
● GIFs are fun and easy-to-share content It’s accepted by most platforms and can even be used to create professional, animated icons to be added to video content
● The process of turning an image into a GIF can be a bit tricky. But, don’t worry, so long as you start with high-quality media and use a reliable Photo-GIF Creator, then you should be fine
● If you’re struggling with turning your images into GIFs, check out one of the tutorials that we’ve offered We specifically chose the three GIF creators that we demonstrated to offer multiple methods that you can choose from
There are in fact ways to turn an image into GIF easily We’ll be showing off a couple of some of the easier ways below, including in-depth tutorials of some of the best methods so that you will no longer have to be troubled.
These tutorials, of course, will focus on teaching you how to create GIF from photos If that’s something you’re interested in, continue reading
In this article
01 [Why GIF?](#Part 1)
02 [How to Add an Image to a GIF?](#Part 2)
Part 1 Why GIF?
Before we move on to the tutorials, let’s do a brief account on GIF files We’ve also answered some of the more common questions regarding using a GIF image maker below for your edification
But, first: Why GIF? Well, it all comes down to what you’re looking for A lot of people use GIF files to create animated icons that they can use for their accounts. Some just genuinely want to create a GIF file that they can share with their friends and families (either for a laugh or something else) GIF files are a convenient vessel for doing this because they have a lot of flexibility and are accepted by most platforms
01Why Gif from My Images Are Blurry?
One of the biggest issues people tend to have when turning an image into GIF is that they come out of the process with a blurry end-product. No one wants that But, how are you supposed to avoid it? Well, it all depends on the tool that you’re using and your initial picture For the former, it’s best to review the upload requirements of your chosen GIF maker to get a better end result. For the latter, it’s best to pick a good, high-quality GIF creator for a better outcome
02There Are Jaggy Strokes Around Gif?
Another issue that you might suffer from while trying to create GIFs from photos is jaggy or raggedy strokes around the GIF when converted. These occur often with GIF makers that support transparency If you find these happening to you, adjust the transparency settings to get rid of the white pixel outline around your converted GIF.
Part 2 How to Add an Image to a GIF?
Now it’s finally time for the tutorials that we promised at the beginning of this article These tutorials will range from online to software solutions — so that you can get a clear idea of what you can expect from all these different GIF makers. To be more specific, we’ll be demonstrating with an online images to GIF converter, how to create animated GIF photoshop, and how to easily turn any image into GIF with the photo GIF creator, Wondershare Filmora Video Editor.
01Image to GIF: How to Turn Photos into Animated GIFs
For our first tutorial, we’re going to be demonstrating how to create GIF from photos with an online photo GIF creator More specifically, we’ll be demonstrating with Loading.IO, which is an online tool that you can use to create animated icons for your profiles or on your video content It comes with several animation options and other settings that you can use to quickly create GIFs from photos
**Step 1: Go to Loading.IO
Of course, we start off this tutorial by opening the GIF maker. In this case, since the tool is hosted online, that’s as easy as opening the link that we’ve provided below It will take you directly to the online GIF creator.
URL: https://loading.io/animation/icon/
**Step 2: Upload Photo
Once on-site, it’s time to upload the photo that you want to turn into a GIF As this is an icon creator, you should pick a photo with the proper parameters
To upload your icon for animating, select the ‘Upload’ button and browse your computer or your Google Drive for the image in question.
**Step 3: Choose animation Style
Next, choose how you want the uploaded photo to be animated Loading.IO offers a couple of animations that you can choose from Including the ‘beat’ animation, which is what we choose for our example
**Step 4: Adjust Settings
This step is technically optional, as there are default settings already prepared if you have no other specifications for your image-turned GIF. But, if you want, you can adjust certain settings for a better outcome
For example, you can speed up the animation with the ‘Speed’ slider. Or, you can increase the number of times the GIF loops by adjusting the ‘Repeat’ slider. Test out a couple of settings to get the best result
**Step 5: Download as GIF
To wrap things up, it’s time to download your finished animation Loading.IO gives several options for this. But, of course, in our case, we choose to ‘Download As: GIF’
02How to Make an Animated GIF in Photoshop [Tutorial]
For the next tutorial, we’ll be showing you how to use Photoshop to create and edit an animated GIF This process is fairly lengthy and is not recommended for beginners. But, it is a very professional method of creating an animated GIF — one that will allow you to control every step of the process (which may be exactly what you want)
**Step 1: Import Images into an Image Stack
First, starting on a new product, upload the images that you want to turn into a GIF into a photoshop ‘Image Stack’. This can be done by clicking the ‘File’ tab and selecting the ‘Scripts > Load Files into Stack…’ option
Afterward, a pop-up window will appear where you will be prompted to browse your computer for the aforementioned images Click ‘OK’ when done
**Step 2: Organize Layers
Check the ‘Layers’ panel for the images that you uploaded and organize them based on how you want them to appear for your animated GIF
**Step 3: (Optional) Import Video
If you want to work on a video to turn into a GIF instead, you can do such by selecting the ‘File’ tab and clicking on the ‘Import > Video Frames to Layers…’ option. This will get you to the same place shown in Step 2
Note: Just be careful that you do not transfer an image that is too long Photoshop may not be able to properly break it down, if so.
**Step 4: Open Timeline Then Create Frame Animation
Next, in order to start working on your animation, open the Timeline Window This can be done by clicking the ‘Window’ tab and selecting ‘Timeline’
With the ‘Timeline’ Window now open, select the ‘Create Frame Animation’ option to begin working
**Step 5: Make Frame from Layers
In order to transfer your uploaded images from the ‘Layers’ panel to your timeline, select the ‘Menu’ option on the top-right hand corner of the ‘Timeline’ window and select the ‘Make Frames From Layers’ option
**Step 6: Preview Animation and Adjust as Needed
To preview your animation, click the ‘Play’ button This is the best time to check that your frames have been organized correctly If they are not, you can adjust them by dragging and dropping them on the timeline.
OR, you can use the ‘Reverse Frames’ option if your animation has been completely flipped around
**Step 7: Create an Animation Loop
In order to be a proper looped GIF, the animation should repeat endlessly You can make sure of this by changing the ‘Repeat’ option to ‘Forever’ (as is shown in the image below).
**Step 8: Export Finished Animation to Gif
In order to finish turning your image into GIF, you’ll need to export it in the proper format This is possible by selecting the ‘File’ tab and then clicking the ‘Export > Save for Web (Legacy)…’ option
A pop-up window should appear where you can control export settings Do so in order to ensure that you have the best outcome
03How To Make an Animated GIF in Wondershare Filmora Video Editor (Fast & Easy)
For Win 7 or later (64-bit)
For macOS 10.12 or later
For our last tutorial, we’ll be showing you how to make an animated GIF with the use of Wondershare Wondershare Filmora Video Editor . Filmora is a video editor, one that is used by professionals all over to produce high-quality content And, of course, as a video editor, it works just as well as a GIF maker. One that you can use to create images into a GIF easily
**Step 1: Launch Filmora
First, download and install Filmora If you want to follow along with this demonstration, you can Wondershare offers a FREE trial where you can test out all of the software’s functions before making a commitment
Step 2: Upload Video to Turn into GIF
For this next step, we do something akin to what we did earlier with Photoshop. And that is to upload images or a video to fit into a timeline
This process is started by first uploading images, which you can do by clicking the ‘File’ tab and selecting the ‘Import Media > Import Media Files’ option
**Step 3: Drag Media to Timeline
With Filmora, the ‘Timeline’ window is already open Also, you won’t have to do anything complicated to get your media onto the said timeline. Just drag and drop it from the Media library (as is shown in the image below).
**Step 4: Edit or Adjust GIF
Before moving forward, you should take this chance to make adjustments to the media that you uploaded into your timeline There are many things that you can do at this stage so feel free to experiment
For our example, we cut down the video that we uploaded by using the ‘Trim’ option (which you can find by right-clicking on video media).
**Step 5: Export into GIF
Finally, to finish us off, we export our finished GIF This can be done by selecting the ‘Export’ tab and then clicking the ‘Create Video’ option A pop-up window will appear where you can adjust export settings
● Key Takeaways from This Episode →
● GIFs are fun and easy-to-share content It’s accepted by most platforms and can even be used to create professional, animated icons to be added to video content
● The process of turning an image into a GIF can be a bit tricky. But, don’t worry, so long as you start with high-quality media and use a reliable Photo-GIF Creator, then you should be fine
● If you’re struggling with turning your images into GIFs, check out one of the tutorials that we’ve offered We specifically chose the three GIF creators that we demonstrated to offer multiple methods that you can choose from
Animate Pictures in Canva
Versatile Video Editor - Wondershare Filmora
An easy yet powerful editor
Numerous effects to choose from
Detailed tutorials provided by the official channel
With the rapid rise of social media worldwide, animated posts (like GIFs) are becoming famous. They have become a replacement to other modes like JPEG and .Png
Famous designing tools like Canva introduced an animation feature in the light of its popularity. The feature allows you to step up your social media game and creates animated visuals in a blink! It is also efficient for both professional and amateur users.
Besides social media content, Canva is also useful to design birthday cards, event invites, inspirational quotes, and more! Let’s learn about how to animate pictures in Canva in detail.
In this article
01 What Canva Pictures Can Be Used For?
02 How to Animate Pictures in Canva?
03 Tips: Animate Pictures In Video
Part 1: What Canva Pictures Can Be Used For?
Be it for marketing campaigns or projects, Canva is the best tool for all designing work. It is a foolproof platform where you do not need prior designing experience. Canva is useful for

Social media/Instagram Posts: You can build your Instagram presence by creating posts through Canva. It has multiple templates and features to make alluring Instagram posts. It also has drag-and-drop free images to add customized designs to the template.
Facebook Covers: You can make Facebook covers on Canva by choosing a layout and adding other elements. You can include colors, fonts, and pictures on the cover. Canva has templates for all themes, moods, and styles!
Event Invites: Canva has hundreds of free layouts and libraries to create event invites. You can choose the appropriate template and incorporate party-oriented photos, icons, stickers, illustrations, and graphics. It also has a personalizing option to add personal pictures and artwork in the editor.
Inspirational Quotes: Canva allows you to curate inspirational quotes and dispense motivation in people. It has templates to modify the elements like font size, text size, borders, images, and more!
Collages: It helps create a collage where you can combine multiple pictures in one frame. Canva offers various grids with a capacity of 12 pictures and different sizes.
Part 2: How to Animate Pictures in Canva?
Canva helps you add instant animation in presentations, social media posts, and more. To know how to animate images in Canva, follow the below steps:

Step 1: Add Static Elements
Start by creating an image through static elements. To make the design attractive, you can add sample texts, illustrations, doodles, and other entities.
Try to stimulate your creativity and come up with a layout beforehand. If possible, sketch on paper and replicate the same.
Step 2: Animate Your Design
Take a final glance at the layout. Make sure it’s perfect. Once all the elements are placed as per your design, it’s time to animate them. For that:
- Click on the white background page
- Go to the “Toolbar” section
- Select the “Animate” button
Step 3: Select Page Animation Style
Canva offers six animation styles, where five are for free users, and one is for pro users. To access the five animation styles, follow these steps.
- Press the “Animate” Button
- Select “Page Animations”
- There you will find options like Block, Pan, Fade, Rise, and Tumble
- Select the style as per your design
Step 4: Preview and Download
After selecting a page animation style, it will preview the effect. If you find it good, move on to downloading the GIF. Here’s how to do so
- Go to the “Toolbar” option (present on your upper right hand)
- Choose GIF as the file type
- Check the page number and verify if it’s correct
- Press the “Done” button
Step 5: Final GIF
After clicking on the “Done” button, your GIF will be downloaded. You will be able to see a display for five seconds. If you want to edit the image after this, click on the time button (near the “Animate” button).
So, that was all about how to animate a photo in Canva.
Drawbacks of Canva
Despite efficient features and easy interface, there are certain areas where Canva lacks. This includes
- It does not have any local file storage.
- As too many people use Canva, your template may look the same as others.
- Some of its best features are not free to access.
- The mobile app version lacks certain elements and features.
Out of all these drawbacks, repetitions of templates are a big issue. That’s because everyone wants their posts to look unique and irreplaceable. However, common Canva templates may prevent that from happening.
Fortunately, there are ways to combat such issues. Let’s learn about them in the next section.
Tips: Animate Pictures In Video
You can also animate pictures in the video to make them more lively. For that, you can use Wondershare Filmora Pro Video Editor. It’s also efficient if you don’t know how to animate a picture in Canva:
Wondershare Filmora Video Editor
Filmora by Wondershare is a video editing software that helps you build custom animations easily. It has auto features to make epic stories and posts.
Wondershare Filmora
Get started easily with Filmora’s powerful performance, intuitive interface, and countless effects!
Try It Free Try It Free Try It Free Learn More about Filmora>

Its drag and drop effect makes designing simple and quick. Due to its outstanding attributes, options, and styles, Filmora has 77+ million happy users!
It’s a power-packed integration of functionality, performance, and more! In fact, it resolves the repeated template issue of Canva. The software has top-notch functions and innovative filters that add authenticity to the designs.
Till now, you learned about how to animate a picture on Canva. Now, let’s comprehend the right way to use Filmora for animating and adding images in the video.
Before using, make sure to update the software to its latest version. Follow separate methods for both Windows and Mac.
For Win
Step 1: Adding Image to Video Track
With Filmora, adding images to video is a matter of seconds! Start by:
- Identify the position where you want to add the image and place the Playhead there.
- Right-click on the picture from the media library. Click on the “Insert” option. Your image will be added. Select the “Append” option, if you want to add an image at the video end.

Note: How to Remove Black Bars around the Image?
- Go to “Settings” from the File section.
- Click on the “Editing” tab and select “Photo Placement.”
- Choose from the “Crop to Fit” or “Pan To Zoom” option. The black bars will be removed.
To add the image in between the video clip, split them. Now, add the image between the split parts.
Step 2: Add Images as Overlays
To add images as overlays, drag the image to a video track above the main track. The main track consists of your video.
Track 1 (or the track with a video clip) is the base of your video. If you add anything else, it will be displayed above this track as video track 2, 3, and so on. Overall, you can add 100 video tracks.
Step 3: Edit Your Image
If you know how to animate an image in Canva, editing images on Filmora is even easier. You can try the following methods:
Animate Your Images
- To add animation presets to the image, click on the image twice.
- Go to the “Animation Tab” and look for an animation preset.
- Drag the presets to the image for its effect

Make Image Color Adjustments
- Double-click on the image
- Go to the “Color” tab and then the “Color” section
- Customize the temperature, saturation, brightness, etc., as per your need.
- Press Ok.
Change Image Duration
You can increase the image duration to more than the default timing of 5 seconds. For that:
- Click on the image and select the “Duration” option.
- Go to the “Duration Setting” panel.
- Add the new duration timing.

Adjust Position, Rotate/Flip, and Opacity
- You can resize the image position through the circles and squares at the image edges.
- To flip or rotate the image, double-click on the picture. From the “Image Panel,” go to “Transform” and then click on “Rotate.” You can choose either “Horizontal Flip” or “Vertical Flip” to flip the images.
- Double-click on the image and click on the “Composting” option to add opacity. You can choose the blending mode or adjust the “Opacity” accordingly.

For Mac
Filmora for Mac comes with a drag and drop feature to add transitions, animated titles, and effects. You can start a new project from scratch by clicking on “New Project”. The entire process is the same as that for Windows users.
To apply animation in the images, use the motion effects option. For that,
- Click on the Image
- Go to Motion Tab
- Select a motion effect
- Double-click to apply the effect

Conclusion
So that’s how to animate photos in Canva. Hopefully, our steps will help you revamp your posts like a pro! If not Canva, you can use its alternative Filmora. It’s equally prominent, user-friendly, and feature-rich.
Versatile Video Editor - Wondershare Filmora
An easy yet powerful editor
Numerous effects to choose from
Detailed tutorials provided by the official channel
With the rapid rise of social media worldwide, animated posts (like GIFs) are becoming famous. They have become a replacement to other modes like JPEG and .Png
Famous designing tools like Canva introduced an animation feature in the light of its popularity. The feature allows you to step up your social media game and creates animated visuals in a blink! It is also efficient for both professional and amateur users.
Besides social media content, Canva is also useful to design birthday cards, event invites, inspirational quotes, and more! Let’s learn about how to animate pictures in Canva in detail.
In this article
01 What Canva Pictures Can Be Used For?
02 How to Animate Pictures in Canva?
03 Tips: Animate Pictures In Video
Part 1: What Canva Pictures Can Be Used For?
Be it for marketing campaigns or projects, Canva is the best tool for all designing work. It is a foolproof platform where you do not need prior designing experience. Canva is useful for
Social media/Instagram Posts: You can build your Instagram presence by creating posts through Canva. It has multiple templates and features to make alluring Instagram posts. It also has drag-and-drop free images to add customized designs to the template.
Facebook Covers: You can make Facebook covers on Canva by choosing a layout and adding other elements. You can include colors, fonts, and pictures on the cover. Canva has templates for all themes, moods, and styles!
Event Invites: Canva has hundreds of free layouts and libraries to create event invites. You can choose the appropriate template and incorporate party-oriented photos, icons, stickers, illustrations, and graphics. It also has a personalizing option to add personal pictures and artwork in the editor.
Inspirational Quotes: Canva allows you to curate inspirational quotes and dispense motivation in people. It has templates to modify the elements like font size, text size, borders, images, and more!
Collages: It helps create a collage where you can combine multiple pictures in one frame. Canva offers various grids with a capacity of 12 pictures and different sizes.
Part 2: How to Animate Pictures in Canva?
Canva helps you add instant animation in presentations, social media posts, and more. To know how to animate images in Canva, follow the below steps:
Step 1: Add Static Elements
Start by creating an image through static elements. To make the design attractive, you can add sample texts, illustrations, doodles, and other entities.
Try to stimulate your creativity and come up with a layout beforehand. If possible, sketch on paper and replicate the same.
Step 2: Animate Your Design
Take a final glance at the layout. Make sure it’s perfect. Once all the elements are placed as per your design, it’s time to animate them. For that:
- Click on the white background page
- Go to the “Toolbar” section
- Select the “Animate” button
Step 3: Select Page Animation Style
Canva offers six animation styles, where five are for free users, and one is for pro users. To access the five animation styles, follow these steps.
- Press the “Animate” Button
- Select “Page Animations”
- There you will find options like Block, Pan, Fade, Rise, and Tumble
- Select the style as per your design
Step 4: Preview and Download
After selecting a page animation style, it will preview the effect. If you find it good, move on to downloading the GIF. Here’s how to do so
- Go to the “Toolbar” option (present on your upper right hand)
- Choose GIF as the file type
- Check the page number and verify if it’s correct
- Press the “Done” button
Step 5: Final GIF
After clicking on the “Done” button, your GIF will be downloaded. You will be able to see a display for five seconds. If you want to edit the image after this, click on the time button (near the “Animate” button).
So, that was all about how to animate a photo in Canva.
Drawbacks of Canva
Despite efficient features and easy interface, there are certain areas where Canva lacks. This includes
- It does not have any local file storage.
- As too many people use Canva, your template may look the same as others.
- Some of its best features are not free to access.
- The mobile app version lacks certain elements and features.
Out of all these drawbacks, repetitions of templates are a big issue. That’s because everyone wants their posts to look unique and irreplaceable. However, common Canva templates may prevent that from happening.
Fortunately, there are ways to combat such issues. Let’s learn about them in the next section.
Tips: Animate Pictures In Video
You can also animate pictures in the video to make them more lively. For that, you can use Wondershare Filmora Pro Video Editor. It’s also efficient if you don’t know how to animate a picture in Canva:
Wondershare Filmora Video Editor
Filmora by Wondershare is a video editing software that helps you build custom animations easily. It has auto features to make epic stories and posts.
Wondershare Filmora
Get started easily with Filmora’s powerful performance, intuitive interface, and countless effects!
Try It Free Try It Free Try It Free Learn More about Filmora>
Its drag and drop effect makes designing simple and quick. Due to its outstanding attributes, options, and styles, Filmora has 77+ million happy users!
It’s a power-packed integration of functionality, performance, and more! In fact, it resolves the repeated template issue of Canva. The software has top-notch functions and innovative filters that add authenticity to the designs.
Till now, you learned about how to animate a picture on Canva. Now, let’s comprehend the right way to use Filmora for animating and adding images in the video.
Before using, make sure to update the software to its latest version. Follow separate methods for both Windows and Mac.
For Win
Step 1: Adding Image to Video Track
With Filmora, adding images to video is a matter of seconds! Start by:
- Identify the position where you want to add the image and place the Playhead there.
- Right-click on the picture from the media library. Click on the “Insert” option. Your image will be added. Select the “Append” option, if you want to add an image at the video end.
Note: How to Remove Black Bars around the Image?
- Go to “Settings” from the File section.
- Click on the “Editing” tab and select “Photo Placement.”
- Choose from the “Crop to Fit” or “Pan To Zoom” option. The black bars will be removed.
To add the image in between the video clip, split them. Now, add the image between the split parts.
Step 2: Add Images as Overlays
To add images as overlays, drag the image to a video track above the main track. The main track consists of your video.
Track 1 (or the track with a video clip) is the base of your video. If you add anything else, it will be displayed above this track as video track 2, 3, and so on. Overall, you can add 100 video tracks.
Step 3: Edit Your Image
If you know how to animate an image in Canva, editing images on Filmora is even easier. You can try the following methods:
Animate Your Images
- To add animation presets to the image, click on the image twice.
- Go to the “Animation Tab” and look for an animation preset.
- Drag the presets to the image for its effect
Make Image Color Adjustments
- Double-click on the image
- Go to the “Color” tab and then the “Color” section
- Customize the temperature, saturation, brightness, etc., as per your need.
- Press Ok.
Change Image Duration
You can increase the image duration to more than the default timing of 5 seconds. For that:
- Click on the image and select the “Duration” option.
- Go to the “Duration Setting” panel.
- Add the new duration timing.
Adjust Position, Rotate/Flip, and Opacity
- You can resize the image position through the circles and squares at the image edges.
- To flip or rotate the image, double-click on the picture. From the “Image Panel,” go to “Transform” and then click on “Rotate.” You can choose either “Horizontal Flip” or “Vertical Flip” to flip the images.
- Double-click on the image and click on the “Composting” option to add opacity. You can choose the blending mode or adjust the “Opacity” accordingly.
For Mac
Filmora for Mac comes with a drag and drop feature to add transitions, animated titles, and effects. You can start a new project from scratch by clicking on “New Project”. The entire process is the same as that for Windows users.
To apply animation in the images, use the motion effects option. For that,
- Click on the Image
- Go to Motion Tab
- Select a motion effect
- Double-click to apply the effect
Conclusion
So that’s how to animate photos in Canva. Hopefully, our steps will help you revamp your posts like a pro! If not Canva, you can use its alternative Filmora. It’s equally prominent, user-friendly, and feature-rich.
Versatile Video Editor - Wondershare Filmora
An easy yet powerful editor
Numerous effects to choose from
Detailed tutorials provided by the official channel
Also read:
- Updated In 2024, 8 Free GIF Animators to Make Your Own GIF
- New 2024 Approved 12 Best Stop Motion Studios Worth Recommending
- Updated In 2024, Some Techniques for Creating Animated Logo That Few People Know About
- New 12 Best Stop Motion Studios Worth Recommending
- Updated Animated Business Logos and Tools to Create
- Updated How to Turn Yourself Into WhatsApp Cartoon for 2024
- New In 2024, Top 10 Cartoon Canvas Painting Ideas for Total Beginners
- Updated In 2024, Interesting Fundamentals and Ultimate Guide to Animated Characters Drawings
- How to Make Photo 3D Cartoon Online for 2024
- New Ways to Master to Find 10 Best Free Animated Text Generator for 2024
- Updated Ready to Animate Game Character From Scratch?
- New Adobe Animate Riggings Tutorial for You for 2024
- Updated 2024 Approved Pencil2D Animation Tutorial Overview
- New 2024 Approved Learn All About 3D Logo Animation and Templates
- How to Create Your Avatar Free for 2024
- Updated In 2024, How to Draw Skeleton Cartoon – A Step by Step Guide
- Updated The Only Guide Youll Need to Learn About GIF Video Downloader
- New In 2024, Whats Rigging Animation
- Updated Most Effective Tactics to Set WhatsApp Status
- 2024 Approved Beginner Tutorial on Making Unity 2D Animation
- In 2024, Know All About Animated Business Logos and the Best Tools to Create One
- New 2024 Approved Guide on How to Create GIF in WhatsApp iPhone
- In 2024, Best 15 Anime Fonts-Find Your Favorite One
- Updated 2024 Approved Most Popular Tips on Learning Animate Rigging
- In 2024, Pattern Locks Are Unsafe Secure Your Samsung Galaxy A05 Phone Now with These Tips
- All You Need To Know About Mega Greninja For Lava Agni 2 5G | Dr.fone
- 3 Effective Ways to Unlock iCloud Account Without Password From iPhone 6
- Full Solutions to Fix Error Code 920 In Google Play on Itel P40+ | Dr.fone
- Can I use iTools gpx file to catch the rare Pokemon On Tecno Spark 20 Pro+ | Dr.fone
- How to Transfer Data from Oppo Reno 10 Pro+ 5G to Samsung Phone | Dr.fone
- Best Android Data Recovery - Retrieve Lost Contacts from Galaxy A15 4G.
- How to Make a Talking AI Avatar From Photos Easy Guide for 2024
- How To Repair iOS System of iPhone 8 Plus? | Dr.fone
- In 2024, How to Hide/Fake Snapchat Location on Your Motorola Edge 40 Pro | Dr.fone
- How to fix iCloud lock on your iPhone XS and iPad
- In 2024, How To Remove Passcode From Apple iPhone 6 Plus? Complete Guide | Dr.fone
- 4 Solutions to Fix Unfortunately Your App Has Stopped Error on Motorola G24 Power | Dr.fone
- 3 Methods to Mirror Vivo Y78+ (T1) Edition to Roku | Dr.fone
- In 2024, Top 11 Free Apps to Check IMEI on Apple iPhone 11 Pro Max
- Can I use iTools gpx file to catch the rare Pokemon On Tecno Spark Go (2024) | Dr.fone
- Title: What Wikipedia Wont Tell You About Character Rigging
- Author: Elon
- Created at : 2024-05-19 03:04:23
- Updated at : 2024-05-20 03:04:23
- Link: https://animation-videos.techidaily.com/what-wikipedia-wont-tell-you-about-character-rigging/
- License: This work is licensed under CC BY-NC-SA 4.0.
