
:max_bytes(150000):strip_icc():format(webp)/ArtificialIntelligence-Chatbot-6921166a1d9e447eb0251f52694d919a.jpg)
What Wikipedia Wont Tell You Specifically About Character Rigging
What Wikipedia Won’t Tell You Specifically About Character Rigging
What Wikipedia Won’t Tell You Specifically About Character Rigging
An easy yet powerful editor
Numerous effects to choose from
Detailed tutorials provided by the official channel
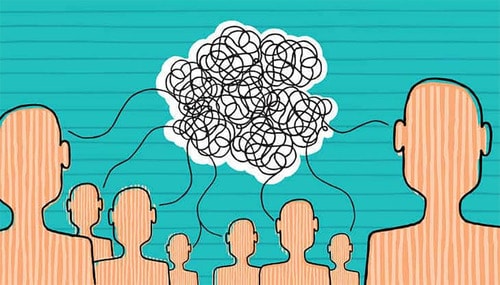
The function of character rigging can easily be compared to that of bones, muscles and joints. They act as skeletons to virtual animations. You can also imagine them as strings used on dolls. These digitalized bones function inter-connectedly in a 3D animation.
In this article
01 [Intro to Character Rigging](#Part 1)
02 [8 Tips for Character Rigging](#Part 2)
03 [10 Best Character Rigging Services to Buy Online](#Part 3)
04 [How to Make 3d Character Rig? Are There Any Plugins or Easy](#Part 4)
Part 1 Intro to Character Rigging
As you already know by now that the process of rigging a character can be quite a tedious task. It involves a lot of creative thinking, precision and a keen eye to notice all the small details.
Once you have a model character to work on, riggers set off to creating a skeleton to match the character. These skele-animations can be used to move the entire model as if tugging on strings (not literally).
The movement of the chain of skeletons or rigs is interdependent. Which means if you pull on any one bone, it moves all the other bones in the same sequence. Similar to how bones move within the human body.
Riggers use programs and tools to create a series of bone like structures that can deformed and animated freely according to the preference of the animators.
Movements like positioning, curving and rotation can be recorded and then played back in the animation.
This requires the rigger to constantly coordinate between modelers, animators till the end of the project. This entire process can take weeks or even months.
Amazingly enough, its 20and there are online tools and tutorials you can use to easily learn complex animations like they make in large scale movies and games.
Part 2 8 Tips for Character Rigging
01The Right Rig for the Job
Rigging is a skill all animators gets good at overtime. The more you practice the more familiar you are with the tools you are using. It will also help you understand that not all rigs are meant for the same set of movements.
You need to be able to discern what rig is it that you need and discard what you don’t. If the rig is being used in a game, then the focus will be more on the experience while for movies its attention.
02Deformers for Facial Rigging
Constructing a realistic facial rig can be quite a task but is indeed satisfying once finished. Human facial features require a great degree of flexibility which is why using a variety of deformers for different parts of the face. They are better suited for creating joints over the face and can be done more quickly.
03IK and FK
Though you can use one without the other, it is best to use both of them in an animation. You can’t work without both arms can you? Applying both Inverse and Forward Kinematics in your rig design can help it make more stylistic.
04Learn Python and Maya API: Learn Python and Maya API
If you wish to take your rigging skills to the next level then learning Maya API and Python are great millstones. This way, you can create high quality and sophisticated rigs with high intense flexibility on Maya. Also, Python allows you to write new scripts for PlugIns.
05Delegate to an Animator
After rigging for several hours it is easy to feel like you are only seeing from one perspective. Get in touch with an animator earlier on in the project can help you get feedback to stay consistent in the rigging process.
06Learn Web Technologies: Learn Web Technologies
To be a good animator or rigging specialist involves a lot of learning. Animation technology is constantly changing therefore it is highly recommended to stay up to date with the latest web technologies. Learning HTML, Java Script and CSS is becoming vital to being a part of the gaming world.
07Use Scalable Tools
Not all the characters or objects you rig are going to be of the same size. Selecting the right rigging software is crucial for you to be able to scale your animations. You won’t need to use everything, just the tools that serve your purpose.
08Use a Clean Interface
If you have ever heard of the phrase ‘clean workplace – cleaner work’ then you should know how an untidy interface can affect your workflow. This won’t necessarily change the results but can surely better your experience.
Part 3 Best Character Rigging Services to Buy Online
Don’t feel confused about where to begin. The first step to get into rigging is to master a software, any software, here are of the best ones you can choose from;
01Maya
Offers the best animation features on the market.

02Blender
Vast variety of tools for sculpting, rigging or VFX.

03Modo
Has a more simplified approach towards modelling and rigging.

043ds Max
Leverages high flexibility and ease of use to riggers.
05Sculptris
Excellentfor beginners who need a gateway software to start art.

06ZBrush
Lets you work on your sculpting skills with digital clay.

07Cheetah 3D
Developed by Macintosh to be an easy to learn modelling software.

08Rhinoceros 3D
Harbours a mathematical approach to modelling and modular design.

09Fusion 360
Offers a wide range of simulation tools.

10Cinema 4D
Recognized by professionals for well-equipped arsenal of digital rendering.

Part 4 How to Make Character Rig? Are There Any Plugins or Easy
How to Make Character Rig? Are There Any Plugins or Easy
When we imagine animation, most of the time we are baffled by the end product? But what really goes on behind the mesmerizing colors and whimsical characters.
The basic is of course building rigs to support the entire movement of the character and confine it to actual physical laws that makes it almost a mimic of reality. The entire process of rigging rather simplifies the path to achieve that goal.
In Cinema, character rigging has multiple layers that goes into creating the entire skeleton animation. Setting up a character rig can take anywhere between a few hours or a few days. It probably takes mainstream movies ten times that time.
Let us break down the process of making a rig so that it is simpler to understand.
The process;
Weight Painting: An integral part of the entire rigging process. Although, weight painting can be rendered automatically by the software that you are using, but that can end up making the animation look less realistic. You can instead fine tune the weight of each bone in the rig. You can also copy similar looking bones and apply them to different mesh and repurpose them to function differently.
Placing Bones: After designing a bone structure of character, you can copy the same and use it for similar characters. This is why in games and animation, you notice characters with similar features and traits.
Inverse Kinematics: Not all bones are meant to move in a forward direction. This is why inverses Kinematics are applied to certain bones like the legs, shoulders or even a dragon’s tail. Setting up the IK of your rig would keep specific bones pointed in the right direction so as to make the animation look more natural.
Applying Constraints: The physical realm is built with restrictions. There are things you can do or can’t do according to the natural order of things so as to make your character movement more naturalistic.
Simulation Skeletons: Now comes the part where the magic happens. After fully completing a skeletal animation you can now simulate the motion over the mesh and record the result of the simulation through a series of frames.
Create an animated movie: You can play back the simulation in an animation software such as Blender and then create your own animated movie with Filmora with its easy drag and drop interface. Movies are a collage of frames, so you need to animate according to the fps you want for your video.
Facial Rigs: Facial expressions are more complex than whole body movements. It requires the attention dedicated to a project of its own. Here is where you can play with deforming shapes together to replicate facial muscle movement.
● Key Takeaways from This Episode →
● Rigging has become science in its own right but that does not mean you can’t be artistic with it.
● What you should remember that creating skeletal animation is all about movement and applying physical restrictions to it.
● Start simple and practice until you master the most complex features of any of the top rigging software services raging in the market.
The function of character rigging can easily be compared to that of bones, muscles and joints. They act as skeletons to virtual animations. You can also imagine them as strings used on dolls. These digitalized bones function inter-connectedly in a 3D animation.
In this article
01 [Intro to Character Rigging](#Part 1)
02 [8 Tips for Character Rigging](#Part 2)
03 [10 Best Character Rigging Services to Buy Online](#Part 3)
04 [How to Make 3d Character Rig? Are There Any Plugins or Easy](#Part 4)
Part 1 Intro to Character Rigging
As you already know by now that the process of rigging a character can be quite a tedious task. It involves a lot of creative thinking, precision and a keen eye to notice all the small details.
Once you have a model character to work on, riggers set off to creating a skeleton to match the character. These skele-animations can be used to move the entire model as if tugging on strings (not literally).
The movement of the chain of skeletons or rigs is interdependent. Which means if you pull on any one bone, it moves all the other bones in the same sequence. Similar to how bones move within the human body.
Riggers use programs and tools to create a series of bone like structures that can deformed and animated freely according to the preference of the animators.
Movements like positioning, curving and rotation can be recorded and then played back in the animation.
This requires the rigger to constantly coordinate between modelers, animators till the end of the project. This entire process can take weeks or even months.
Amazingly enough, its 20and there are online tools and tutorials you can use to easily learn complex animations like they make in large scale movies and games.
Part 2 8 Tips for Character Rigging
01The Right Rig for the Job
Rigging is a skill all animators gets good at overtime. The more you practice the more familiar you are with the tools you are using. It will also help you understand that not all rigs are meant for the same set of movements.
You need to be able to discern what rig is it that you need and discard what you don’t. If the rig is being used in a game, then the focus will be more on the experience while for movies its attention.
02Deformers for Facial Rigging
Constructing a realistic facial rig can be quite a task but is indeed satisfying once finished. Human facial features require a great degree of flexibility which is why using a variety of deformers for different parts of the face. They are better suited for creating joints over the face and can be done more quickly.
03IK and FK
Though you can use one without the other, it is best to use both of them in an animation. You can’t work without both arms can you? Applying both Inverse and Forward Kinematics in your rig design can help it make more stylistic.
04Learn Python and Maya API: Learn Python and Maya API
If you wish to take your rigging skills to the next level then learning Maya API and Python are great millstones. This way, you can create high quality and sophisticated rigs with high intense flexibility on Maya. Also, Python allows you to write new scripts for PlugIns.
05Delegate to an Animator
After rigging for several hours it is easy to feel like you are only seeing from one perspective. Get in touch with an animator earlier on in the project can help you get feedback to stay consistent in the rigging process.
06Learn Web Technologies: Learn Web Technologies
To be a good animator or rigging specialist involves a lot of learning. Animation technology is constantly changing therefore it is highly recommended to stay up to date with the latest web technologies. Learning HTML, Java Script and CSS is becoming vital to being a part of the gaming world.
07Use Scalable Tools
Not all the characters or objects you rig are going to be of the same size. Selecting the right rigging software is crucial for you to be able to scale your animations. You won’t need to use everything, just the tools that serve your purpose.
08Use a Clean Interface
If you have ever heard of the phrase ‘clean workplace – cleaner work’ then you should know how an untidy interface can affect your workflow. This won’t necessarily change the results but can surely better your experience.
Part 3 Best Character Rigging Services to Buy Online
Don’t feel confused about where to begin. The first step to get into rigging is to master a software, any software, here are of the best ones you can choose from;
01Maya
Offers the best animation features on the market.
02Blender
Vast variety of tools for sculpting, rigging or VFX.
03Modo
Has a more simplified approach towards modelling and rigging.
043ds Max
Leverages high flexibility and ease of use to riggers.
05Sculptris
Excellentfor beginners who need a gateway software to start art.
06ZBrush
Lets you work on your sculpting skills with digital clay.
07Cheetah 3D
Developed by Macintosh to be an easy to learn modelling software.
08Rhinoceros 3D
Harbours a mathematical approach to modelling and modular design.
09Fusion 360
Offers a wide range of simulation tools.
10Cinema 4D
Recognized by professionals for well-equipped arsenal of digital rendering.
Part 4 How to Make Character Rig? Are There Any Plugins or Easy
How to Make Character Rig? Are There Any Plugins or Easy
When we imagine animation, most of the time we are baffled by the end product? But what really goes on behind the mesmerizing colors and whimsical characters.
The basic is of course building rigs to support the entire movement of the character and confine it to actual physical laws that makes it almost a mimic of reality. The entire process of rigging rather simplifies the path to achieve that goal.
In Cinema, character rigging has multiple layers that goes into creating the entire skeleton animation. Setting up a character rig can take anywhere between a few hours or a few days. It probably takes mainstream movies ten times that time.
Let us break down the process of making a rig so that it is simpler to understand.
The process;
Weight Painting: An integral part of the entire rigging process. Although, weight painting can be rendered automatically by the software that you are using, but that can end up making the animation look less realistic. You can instead fine tune the weight of each bone in the rig. You can also copy similar looking bones and apply them to different mesh and repurpose them to function differently.
Placing Bones: After designing a bone structure of character, you can copy the same and use it for similar characters. This is why in games and animation, you notice characters with similar features and traits.
Inverse Kinematics: Not all bones are meant to move in a forward direction. This is why inverses Kinematics are applied to certain bones like the legs, shoulders or even a dragon’s tail. Setting up the IK of your rig would keep specific bones pointed in the right direction so as to make the animation look more natural.
Applying Constraints: The physical realm is built with restrictions. There are things you can do or can’t do according to the natural order of things so as to make your character movement more naturalistic.
Simulation Skeletons: Now comes the part where the magic happens. After fully completing a skeletal animation you can now simulate the motion over the mesh and record the result of the simulation through a series of frames.
Create an animated movie: You can play back the simulation in an animation software such as Blender and then create your own animated movie with Filmora with its easy drag and drop interface. Movies are a collage of frames, so you need to animate according to the fps you want for your video.
Facial Rigs: Facial expressions are more complex than whole body movements. It requires the attention dedicated to a project of its own. Here is where you can play with deforming shapes together to replicate facial muscle movement.
● Key Takeaways from This Episode →
● Rigging has become science in its own right but that does not mean you can’t be artistic with it.
● What you should remember that creating skeletal animation is all about movement and applying physical restrictions to it.
● Start simple and practice until you master the most complex features of any of the top rigging software services raging in the market.
10 Best Animation Makers for Kids to Have Fun
10 Best Animation Makers for Kids to Have Fun

Shanoon Cox
Mar 27, 2024• Proven solutions
When you are trying to make funny cartoons, explainer videos, cartoon painting, or informative shorts to post online, 2D animation software can come in handy. With access to a 2D animation maker , you can create intricate and interesting animated cartoon types that will help you connect with your audience.
Whether you are teaching a group of kids, showing employees how to do their job, introducing a new product, or trying to elicit an emotional reaction from your audience, some free animation makers can be very useful.
If you are new to the world of 2D animation, you will be interested in our review of the top 8 2D animation software options that may prove useful to you.
- Part 1: Best 2D Animation Software
- Part 2: Best Open Source 2D Animation Software
- Part 3: FAQ about Animation Maker for Kids
You may also like: 11 Best Beginner/Waterproof/Vlogging Camera for Kids
If you are looking for an animation editor for kids, here we recommend using Filmora . The editing experience is fun and easy to use for kids. You can use it to make 3D animation or 2D animation by adding keyframes, so that the animation will be smooth and natural.
You just need to build a white plane to start making animation easily. Besides, color correction and audio mixer will raise your animation video to a new level. Download it to have a try (Free)!
 Download Mac Version ](https://tools.techidaily.com/wondershare/filmora/download/ )
Part1: Best 2D Animation Software
1. Toon Boom Harmony
Whether you are trying to create an art piece, showcase a story through 2D images, or craft a unique message for your audience, Toon Boom Harmony will help you immensely. The software has bitmap and vector tools for creating art, 3D imported models for hybrid productions, and the option to create multiplane scenes with Z-depth.
Features:
- Revolutionary vector and bitmap drawing technology - Brush Engine
- Advanced color palettes and paint options
- 2D and 3D integration
- Cut-out animation tools
- Traditional paperless animation.
Price: The first 21 days of using the product are free. After the 21 days are up, you will need to pay $109 per month.
2. CelAction2D
Want to create unique and complex 2D animations for your upcoming projects? CelAction2D is the type of product that is going to help you create wonderful animations. While getting a full license is a financial commitment, you are getting a product with all the features you could need.
You can create a palette using up to 16 million colors, and you will have a very easy time getting to grips with the way the software works. It is designed for beginners and intermediate users, but still has all the advanced features that a pro would want.
Features:
- Easy and fast to use
- Features ergonomic controls
- Easily handles complex projects with thousands of layers
- Works with all modern Windows machines - 32 and 64-bit Also work with Macs through Boot Camp
- Multiplane camera features.
Price: If you go with the Studio Edition, it costs $1,300 to obtain a single license to use it for a lifetime. Studio Edition is $1300 for one single license.

3. Moho (Anime Studio) Pro
Anime Studio Pro is a fantastic option for anyone who is looking to get into 2D animation creation. It is affordable and designed for Flash-style animations. While you cannot create frame-by-frame animations using this program, you will be able to create some fantastic videos nonetheless.
There is an Anime Studio Debut, which is targeted towards the beginner user. But if you want all the features of a high-end 2D animation software, you will want to go with the Pro version.
Features:
- Enhanced freehand drawing tools
- Beizer handles to make it easier for you to design your videos the way that you want
- Smart warp feature helps create custom meshes to bend and twist your animations
- Realistic motion blur
- Animation for multiple layers at the same time
Price: $399.99 for the full package.

4. Stop Motion Studio
Want to create fun, 2D animated videos? Hoping to impress your bosses with a 2D animated presentation to highlight a product’s features? Using Stop Motion Studio will help you achieve all that you want in the world of 2D animation.
You can capture content with ease, whether you change up the focus, exposure, or white balance. There is DSLR support so that you can use your high-end camera in conjunction with this software.
And with a unique, frame-by-frame editor, you will be able to get the result that you want for your 2D stop animation movie.
Features:
- Onionskin allows you to view previous frames through a transparent overlay, which helps you create your next frame
- Comes with Chroma key and audio recording to better narrate and add voice effects to your videos
- Easy one-click uploading to YouTube and Facebook
- DSLR camera support for creating perfect 1080p recordings
Price: $59.99 to download the software onto your PC.

Part2: Best Open Source 2D Animation Software
1. Synfig
Synfig Studio is an open-source 2D animation software that is the perfect place for beginners to learn about 2D animation. There are two versions available for download - stable and testing. The testing version has some experimental features if users want to try those ahead of their introduction into the stable release.
Features:
- Supports multiple layers of content
- The bone system allows for the creation of cutout animations from bitmap images
- Has sound support to allow for the addition and syncing of narration and/or music to the video
Price: Free

2. Opentoonz
Based on the Toonz software, Opentoonz is an open-source and free alternative that will help you create 2D animated content. Anyone can use the software, free of charge. And users can modify the source code to add specific features to the program.
Features:
- GTS scanning tool
- Ability to change picture styles
- Add distortion and light effects
- Compatible with black and white and colored scans
Price: Free
3. Tupi
The beauty of the Tupitube app is that you can use your Android or iOS tablet and smartphone to create 2D animated videos. There is no need to pay for expensive software if you just want to create some fun videos to show your friends.
Features:
- A downloadable app that works on smartphones and tablets
- Easy animation tutorials
- Intuitive interface that beginners can use with ease
Price: Free
4. Pencil 2D
Want an open-source and free 2D animation design software to help you create videos? Pencil2D animation is the type of program that can help beginners. You can get to grips with how 2D animation works, and you can create funny and interesting videos along the way.
Features:
- Minimalist design
- Raster and vector workflow switching
- Cross-platform compatibility
Price: Free

You may also like: Best Animation Makers Online >>
Part 3: FAQ about Animation Maker for Kids
1. How do you make animations for kids?
Despite popular belief, it isn’t too difficult to find animation makers for kids. There are even tools out there that will let kids create their animations if they are old enough.
Children nowadays can create and develop their characters – and even dream up storylines to put a motion. The School Run has lots of exciting ideas on how children can get into animation themselves.
For adults, however, a good animation maker for kids can help us submit high-end projects on a low-end pay scale, providing you use the correct software.
2. What is the best animation software for beginners?
Some best include Blender, Adobe Character Animator, and Filmora by Wondershare.
You can enter existing artwork or create new ones of your own in the virtual space, all of which can be done on a drag-and-drop basis.
3. What is the easiest animation software to use?
The easiest animation maker for kids that you can use as software for your own projects has to be Filmora. As well as having a ton of free features, it gives you everything you need to mask, edit, animate, and evolve all of your details. You can use it to create art if you haven’t already got something planned – or you can use it to input any file type that you like.
It has some wonderful animation-making features that let you go from high-end and professional (like logo making) to fun and playful (like animation making). Best out of all of the features is that it is easy enough for children to understand how to do it.
Conclusion
Creating a 2D animation video is a lot easier when you have the right software available to you. You already have a script and storyboard in mind, but now you can realize your vision in intricate and unique ways. Anyone of the products above will serve you well, but FimoraPro is the one you should consider. Just download it now to have a try!
Download Mac Version ](https://tools.techidaily.com/wondershare/filmora/download/ )
Shanoon Cox
Shanoon Cox is a writer and a lover of all things video.
Follow @Shanoon Cox
Shanoon Cox
Mar 27, 2024• Proven solutions
When you are trying to make funny cartoons, explainer videos, cartoon painting, or informative shorts to post online, 2D animation software can come in handy. With access to a 2D animation maker , you can create intricate and interesting animated cartoon types that will help you connect with your audience.
Whether you are teaching a group of kids, showing employees how to do their job, introducing a new product, or trying to elicit an emotional reaction from your audience, some free animation makers can be very useful.
If you are new to the world of 2D animation, you will be interested in our review of the top 8 2D animation software options that may prove useful to you.
- Part 1: Best 2D Animation Software
- Part 2: Best Open Source 2D Animation Software
- Part 3: FAQ about Animation Maker for Kids
You may also like: 11 Best Beginner/Waterproof/Vlogging Camera for Kids
If you are looking for an animation editor for kids, here we recommend using Filmora . The editing experience is fun and easy to use for kids. You can use it to make 3D animation or 2D animation by adding keyframes, so that the animation will be smooth and natural.
You just need to build a white plane to start making animation easily. Besides, color correction and audio mixer will raise your animation video to a new level. Download it to have a try (Free)!
Download Mac Version ](https://tools.techidaily.com/wondershare/filmora/download/ )
Part1: Best 2D Animation Software
1. Toon Boom Harmony
Whether you are trying to create an art piece, showcase a story through 2D images, or craft a unique message for your audience, Toon Boom Harmony will help you immensely. The software has bitmap and vector tools for creating art, 3D imported models for hybrid productions, and the option to create multiplane scenes with Z-depth.
Features:
- Revolutionary vector and bitmap drawing technology - Brush Engine
- Advanced color palettes and paint options
- 2D and 3D integration
- Cut-out animation tools
- Traditional paperless animation.
Price: The first 21 days of using the product are free. After the 21 days are up, you will need to pay $109 per month.
2. CelAction2D
Want to create unique and complex 2D animations for your upcoming projects? CelAction2D is the type of product that is going to help you create wonderful animations. While getting a full license is a financial commitment, you are getting a product with all the features you could need.
You can create a palette using up to 16 million colors, and you will have a very easy time getting to grips with the way the software works. It is designed for beginners and intermediate users, but still has all the advanced features that a pro would want.
Features:
- Easy and fast to use
- Features ergonomic controls
- Easily handles complex projects with thousands of layers
- Works with all modern Windows machines - 32 and 64-bit Also work with Macs through Boot Camp
- Multiplane camera features.
Price: If you go with the Studio Edition, it costs $1,300 to obtain a single license to use it for a lifetime. Studio Edition is $1300 for one single license.
3. Moho (Anime Studio) Pro
Anime Studio Pro is a fantastic option for anyone who is looking to get into 2D animation creation. It is affordable and designed for Flash-style animations. While you cannot create frame-by-frame animations using this program, you will be able to create some fantastic videos nonetheless.
There is an Anime Studio Debut, which is targeted towards the beginner user. But if you want all the features of a high-end 2D animation software, you will want to go with the Pro version.
Features:
- Enhanced freehand drawing tools
- Beizer handles to make it easier for you to design your videos the way that you want
- Smart warp feature helps create custom meshes to bend and twist your animations
- Realistic motion blur
- Animation for multiple layers at the same time
Price: $399.99 for the full package.
4. Stop Motion Studio
Want to create fun, 2D animated videos? Hoping to impress your bosses with a 2D animated presentation to highlight a product’s features? Using Stop Motion Studio will help you achieve all that you want in the world of 2D animation.
You can capture content with ease, whether you change up the focus, exposure, or white balance. There is DSLR support so that you can use your high-end camera in conjunction with this software.
And with a unique, frame-by-frame editor, you will be able to get the result that you want for your 2D stop animation movie.
Features:
- Onionskin allows you to view previous frames through a transparent overlay, which helps you create your next frame
- Comes with Chroma key and audio recording to better narrate and add voice effects to your videos
- Easy one-click uploading to YouTube and Facebook
- DSLR camera support for creating perfect 1080p recordings
Price: $59.99 to download the software onto your PC.
Part2: Best Open Source 2D Animation Software
1. Synfig
Synfig Studio is an open-source 2D animation software that is the perfect place for beginners to learn about 2D animation. There are two versions available for download - stable and testing. The testing version has some experimental features if users want to try those ahead of their introduction into the stable release.
Features:
- Supports multiple layers of content
- The bone system allows for the creation of cutout animations from bitmap images
- Has sound support to allow for the addition and syncing of narration and/or music to the video
Price: Free
2. Opentoonz
Based on the Toonz software, Opentoonz is an open-source and free alternative that will help you create 2D animated content. Anyone can use the software, free of charge. And users can modify the source code to add specific features to the program.
Features:
- GTS scanning tool
- Ability to change picture styles
- Add distortion and light effects
- Compatible with black and white and colored scans
Price: Free
3. Tupi
The beauty of the Tupitube app is that you can use your Android or iOS tablet and smartphone to create 2D animated videos. There is no need to pay for expensive software if you just want to create some fun videos to show your friends.
Features:
- A downloadable app that works on smartphones and tablets
- Easy animation tutorials
- Intuitive interface that beginners can use with ease
Price: Free
4. Pencil 2D
Want an open-source and free 2D animation design software to help you create videos? Pencil2D animation is the type of program that can help beginners. You can get to grips with how 2D animation works, and you can create funny and interesting videos along the way.
Features:
- Minimalist design
- Raster and vector workflow switching
- Cross-platform compatibility
Price: Free
You may also like: Best Animation Makers Online >>
Part 3: FAQ about Animation Maker for Kids
1. How do you make animations for kids?
Despite popular belief, it isn’t too difficult to find animation makers for kids. There are even tools out there that will let kids create their animations if they are old enough.
Children nowadays can create and develop their characters – and even dream up storylines to put a motion. The School Run has lots of exciting ideas on how children can get into animation themselves.
For adults, however, a good animation maker for kids can help us submit high-end projects on a low-end pay scale, providing you use the correct software.
2. What is the best animation software for beginners?
Some best include Blender, Adobe Character Animator, and Filmora by Wondershare.
You can enter existing artwork or create new ones of your own in the virtual space, all of which can be done on a drag-and-drop basis.
3. What is the easiest animation software to use?
The easiest animation maker for kids that you can use as software for your own projects has to be Filmora. As well as having a ton of free features, it gives you everything you need to mask, edit, animate, and evolve all of your details. You can use it to create art if you haven’t already got something planned – or you can use it to input any file type that you like.
It has some wonderful animation-making features that let you go from high-end and professional (like logo making) to fun and playful (like animation making). Best out of all of the features is that it is easy enough for children to understand how to do it.
Conclusion
Creating a 2D animation video is a lot easier when you have the right software available to you. You already have a script and storyboard in mind, but now you can realize your vision in intricate and unique ways. Anyone of the products above will serve you well, but FimoraPro is the one you should consider. Just download it now to have a try!
Download Mac Version ](https://tools.techidaily.com/wondershare/filmora/download/ )
Shanoon Cox
Shanoon Cox is a writer and a lover of all things video.
Follow @Shanoon Cox
5 Websites with Animated Logos That Can Catch Your Eyes
5 Websites with Animated Logos That Can Catch Your Eyes
An easy yet powerful editor
Numerous effects to choose from
Detailed tutorials provided by the official channel
Animated logos could be difficult to make for someone who has no experience with animation. That is why we are here to tell you how you can make an attractive animated logo.
Learn more about websites with animated logos through this article.
In this article
01 [Why You Should Use Logo Animation](#Part 1)
02 [5 Awesome Ways to Use Logo Animation](#Part 2)
03 [6 of the Best Animated Logos](#Part 3)
04 [8 Websites with Premium Animated Logo Templates](#Part 4)
Part 1 Why You Should Use Logo Animation
Those who make it big are known to brave the storm. The ones who follow the crowd just turn out to be ordinary. However, those who innovate, rise to a higher level. Here is why you should go for a website with animated logo!
01They grab viewers attraction
The human mind chooses to believe in the supremacy of what appeals to them visually. It is highly important to grab the user’s attention in order to make a mark. Animated logos help your website to visually appeal to the viewer and grab his/her attention. Potential customers will tend to remember the logo of your website and this would directly impact the conversion rates of your website.

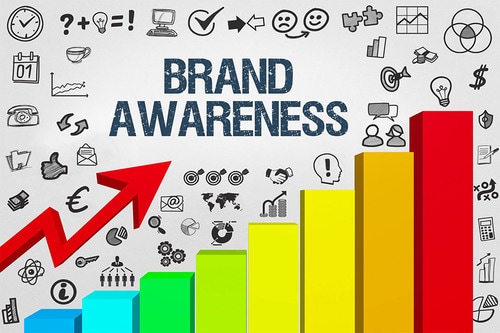
02Increase in brand awareness
Brand awareness is key to a website’s success. As we saw earlier, people often tend to remember brands by their logo and not name. An attractive animated logo will help you create a strong brand awareness among potential customers and help your brand gain popularity.
03Animated logos can convey more
A brand logo is supposed to be the identity of a brand. The logo should be capable enough of explaining your website’s understanding about the field. For instance, if your company is in the cyber security domain, the logo should be good enough to justify your company’s expertise. Animated logos help you establish trust by conveying more through the medium of a logo.
Part 2 4 Awesome Ways to Use Logo Animation
01They can serve as introductions to marketing videos
Video marketing is one of the most commonly used marketing techniques. Research suggested that about 99 percent of brands use video marketing in order to enhance their brand image. Starting of your video with an animated logo will not just look catchy but also make the video all the more professional.
02They can make great outros
Just like animated videos can serve as amazing introductory bits of the video, they can also be the perfect outros to videos. If you haven’t added your animated logo in the introduction of the video then they can be added at the end. This will lead to your viewers remembering your brand for a longer time.
03Look very attractive at trade shows
Trade shows are opportunities where websites and company owners can interact with investors and potential customers face to face. It’s an excellent opportunity to make your mark on the big stage. Logos of companies may be projected on the big screen in such events. At such events when you have just a few seconds to make a mark, you need your logo to grab the viewer’s attention. Hence, animated logos could be very useful.
04They could be a great addition to your company’s email signature
Emails are regarded as the 3rd largest information sources in the B2B industry. It is one of the largest means of communication and marketing. Email signatures have been around for years; however the traditional email signatures have now gone out of fashion. Contemporary email signatures include animated logos to leave a bigger impact on the receiver. Using animated logos, you can add grace to your email signatures and escape the ordinary.
Part 3 6 of the Best Animated Logos
01Mastercard
Mastercard is one of the first companies to use animated logos. The logo is simply fantastic due to the meaning it conveys without any complex animation. The animated logo involves the traditional venn diagram logo of mastercard morphing into several objects. These objects include everything from food to groceries to luxurious products. It basically includes the various kinds of commodities people buy using mastercards.
02Burger king
Another popular brand that uses animated logos is the american fast food giant, burger king. The logo is not highly flashy like we see in mastercard. However, the animated logo does obviously look more attention seeking than the conventional static logo. The logo shows the stacking of the different elements of the logo one by one over each other. This resembles the process of making a burger.
03Fedex
Another logo that would classify as a flashy animated logo is the fedex logo. Initially, fedex had experimented with several logos before sticking to the arrow logo which continues even today. The animated logo involves an arrow making the letter “Fedex” with its trajectory and then finally settling in between letters X and E. The logistics giant delivers couriers from one corner of the world to another, and the arrow symbolizes exactly that!
04Flickr
Flickr is a popular stock image and video hosting platform. Anyone can use the stock images and videos in their content. The logo starts with a blue and pink dot initially. These dots later expand in a whirlpool like motion. The logo starts off with the static logo before it expands. The idea is to show that the online stock image portal goes beyond limits and has every picture and video you’d need
05Bundle
Bundle is a popular app that offers its users rewards upon shopping from selected stores. These stores have an alliance with bundle and upon shopping from them, users seek reward points on the bundle app. The animated logo starts of with a pink screen which later converges to become a large “B” wrapped with a gifting ribbon. Although, the logo is pretty simple it does an amazing job at explaining the brand’s MSP and attracts customers.
06Google
The logo of google has evolved over the years. Google is almost synonymous to attractive logos and it comes up with attractive new logos every now and then. One of the newest logos, an animated one, is by far one of the most attractive animated logos. It aims to depict the numerous things users can search using “Google voice search”.
Part 4 5 Websites with Premium Animated Logo Templates
01RenderForest
There are several applications you can use for animating your next logo for your website. RenderForest is one such software that lets you explore multiple animated logo templates. The tool has an array of templates you can choose from. Each of the templates is unique in its own way and has its own charm. Additionally, the software also has a functionality using which you can animate your static logo using templates.
Developed and managed by Adobe, the editing application is a popular one. The software allows you to use several pre-made templates while animating. The animations that you can find on adobe spark are
02Adobe Spark
Adobe spark seamless and designed perfectly. Using adobe spark, you can give your animated logo a touch of class and perfection. Although the software is paid, it is worth every penny due to the numerous animation templates and video editing tools available.
03Design free logo
Another amazing tool for animation, design free logo is a complete animation tool that offers several animation templates. Additionally, the free software also lets users animate in 3 dimensions. The software is best suited for novice animators who have limited experience with animation. The software is very simple to use unlike its sophisticated counterparts.
04Logo maker plus
If you are looking for an android application that helps you create seamless animated logos, well logo maker plus is just the perfect application for you. The app has more than a 100 templates for animating your logo, hence making it the perfect app for those who want to perform basic animation. Additionally, the app also has multiple visual effects which would enable you to make catchy logos
05Animaker
The final software on this list of amazing softwares is animaker. The software works well to animate logos, presentations, and marketing videos. The software has more than 50 effects. Moreover, using this software you can add filters, effects and sound effects. The software also lets users upload the videos to facebook and youtube directly!
Final Thoughts
● Today, we took a look at a few of the best animated logos which you could idealize.
● Nowadays, even big brands are adopting animated logos.
● They help establish a brand image and take your brand to a higher level.
● We also saw a few softwares that could help you make an animated logo. Wish to make an animated logo? Head to any one of the websites and make your website with animated logos!
Animated logos could be difficult to make for someone who has no experience with animation. That is why we are here to tell you how you can make an attractive animated logo.
Learn more about websites with animated logos through this article.
In this article
01 [Why You Should Use Logo Animation](#Part 1)
02 [5 Awesome Ways to Use Logo Animation](#Part 2)
03 [6 of the Best Animated Logos](#Part 3)
04 [8 Websites with Premium Animated Logo Templates](#Part 4)
Part 1 Why You Should Use Logo Animation
Those who make it big are known to brave the storm. The ones who follow the crowd just turn out to be ordinary. However, those who innovate, rise to a higher level. Here is why you should go for a website with animated logo!
01They grab viewers attraction
The human mind chooses to believe in the supremacy of what appeals to them visually. It is highly important to grab the user’s attention in order to make a mark. Animated logos help your website to visually appeal to the viewer and grab his/her attention. Potential customers will tend to remember the logo of your website and this would directly impact the conversion rates of your website.
02Increase in brand awareness
Brand awareness is key to a website’s success. As we saw earlier, people often tend to remember brands by their logo and not name. An attractive animated logo will help you create a strong brand awareness among potential customers and help your brand gain popularity.
03Animated logos can convey more
A brand logo is supposed to be the identity of a brand. The logo should be capable enough of explaining your website’s understanding about the field. For instance, if your company is in the cyber security domain, the logo should be good enough to justify your company’s expertise. Animated logos help you establish trust by conveying more through the medium of a logo.
Part 2 4 Awesome Ways to Use Logo Animation
01They can serve as introductions to marketing videos
Video marketing is one of the most commonly used marketing techniques. Research suggested that about 99 percent of brands use video marketing in order to enhance their brand image. Starting of your video with an animated logo will not just look catchy but also make the video all the more professional.
02They can make great outros
Just like animated videos can serve as amazing introductory bits of the video, they can also be the perfect outros to videos. If you haven’t added your animated logo in the introduction of the video then they can be added at the end. This will lead to your viewers remembering your brand for a longer time.
03Look very attractive at trade shows
Trade shows are opportunities where websites and company owners can interact with investors and potential customers face to face. It’s an excellent opportunity to make your mark on the big stage. Logos of companies may be projected on the big screen in such events. At such events when you have just a few seconds to make a mark, you need your logo to grab the viewer’s attention. Hence, animated logos could be very useful.
04They could be a great addition to your company’s email signature
Emails are regarded as the 3rd largest information sources in the B2B industry. It is one of the largest means of communication and marketing. Email signatures have been around for years; however the traditional email signatures have now gone out of fashion. Contemporary email signatures include animated logos to leave a bigger impact on the receiver. Using animated logos, you can add grace to your email signatures and escape the ordinary.
Part 3 6 of the Best Animated Logos
01Mastercard
Mastercard is one of the first companies to use animated logos. The logo is simply fantastic due to the meaning it conveys without any complex animation. The animated logo involves the traditional venn diagram logo of mastercard morphing into several objects. These objects include everything from food to groceries to luxurious products. It basically includes the various kinds of commodities people buy using mastercards.
02Burger king
Another popular brand that uses animated logos is the american fast food giant, burger king. The logo is not highly flashy like we see in mastercard. However, the animated logo does obviously look more attention seeking than the conventional static logo. The logo shows the stacking of the different elements of the logo one by one over each other. This resembles the process of making a burger.
03Fedex
Another logo that would classify as a flashy animated logo is the fedex logo. Initially, fedex had experimented with several logos before sticking to the arrow logo which continues even today. The animated logo involves an arrow making the letter “Fedex” with its trajectory and then finally settling in between letters X and E. The logistics giant delivers couriers from one corner of the world to another, and the arrow symbolizes exactly that!
04Flickr
Flickr is a popular stock image and video hosting platform. Anyone can use the stock images and videos in their content. The logo starts with a blue and pink dot initially. These dots later expand in a whirlpool like motion. The logo starts off with the static logo before it expands. The idea is to show that the online stock image portal goes beyond limits and has every picture and video you’d need
05Bundle
Bundle is a popular app that offers its users rewards upon shopping from selected stores. These stores have an alliance with bundle and upon shopping from them, users seek reward points on the bundle app. The animated logo starts of with a pink screen which later converges to become a large “B” wrapped with a gifting ribbon. Although, the logo is pretty simple it does an amazing job at explaining the brand’s MSP and attracts customers.
06Google
The logo of google has evolved over the years. Google is almost synonymous to attractive logos and it comes up with attractive new logos every now and then. One of the newest logos, an animated one, is by far one of the most attractive animated logos. It aims to depict the numerous things users can search using “Google voice search”.
Part 4 5 Websites with Premium Animated Logo Templates
01RenderForest
There are several applications you can use for animating your next logo for your website. RenderForest is one such software that lets you explore multiple animated logo templates. The tool has an array of templates you can choose from. Each of the templates is unique in its own way and has its own charm. Additionally, the software also has a functionality using which you can animate your static logo using templates.
Developed and managed by Adobe, the editing application is a popular one. The software allows you to use several pre-made templates while animating. The animations that you can find on adobe spark are
02Adobe Spark
Adobe spark seamless and designed perfectly. Using adobe spark, you can give your animated logo a touch of class and perfection. Although the software is paid, it is worth every penny due to the numerous animation templates and video editing tools available.
03Design free logo
Another amazing tool for animation, design free logo is a complete animation tool that offers several animation templates. Additionally, the free software also lets users animate in 3 dimensions. The software is best suited for novice animators who have limited experience with animation. The software is very simple to use unlike its sophisticated counterparts.
04Logo maker plus
If you are looking for an android application that helps you create seamless animated logos, well logo maker plus is just the perfect application for you. The app has more than a 100 templates for animating your logo, hence making it the perfect app for those who want to perform basic animation. Additionally, the app also has multiple visual effects which would enable you to make catchy logos
05Animaker
The final software on this list of amazing softwares is animaker. The software works well to animate logos, presentations, and marketing videos. The software has more than 50 effects. Moreover, using this software you can add filters, effects and sound effects. The software also lets users upload the videos to facebook and youtube directly!
Final Thoughts
● Today, we took a look at a few of the best animated logos which you could idealize.
● Nowadays, even big brands are adopting animated logos.
● They help establish a brand image and take your brand to a higher level.
● We also saw a few softwares that could help you make an animated logo. Wish to make an animated logo? Head to any one of the websites and make your website with animated logos!
[Top 10] Best and Fast Ways to Turn Image Into Gif
[Top 10] Best and Fast Ways to Turn Image into Gif
An easy yet powerful editor
Numerous effects to choose from
Detailed tutorials provided by the official channel
There are in fact ways to turn an image into GIF easily We’ll be showing off a couple of some of the easier ways below, including in-depth tutorials of some of the best methods so that you will no longer have to be troubled.
These tutorials, of course, will focus on teaching you how to create GIF from photos If that’s something you’re interested in, continue reading
In this article
01 [Why GIF?](#Part 1)
02 [How to Add an Image to a GIF?](#Part 2)
Part 1 Why GIF?
Before we move on to the tutorials, let’s do a brief account on GIF files We’ve also answered some of the more common questions regarding using a GIF image maker below for your edification
But, first: Why GIF? Well, it all comes down to what you’re looking for A lot of people use GIF files to create animated icons that they can use for their accounts. Some just genuinely want to create a GIF file that they can share with their friends and families (either for a laugh or something else) GIF files are a convenient vessel for doing this because they have a lot of flexibility and are accepted by most platforms
01Why Gif from My Images Are Blurry?
One of the biggest issues people tend to have when turning an image into GIF is that they come out of the process with a blurry end-product. No one wants that But, how are you supposed to avoid it? Well, it all depends on the tool that you’re using and your initial picture For the former, it’s best to review the upload requirements of your chosen GIF maker to get a better end result. For the latter, it’s best to pick a good, high-quality GIF creator for a better outcome
02There Are Jaggy Strokes Around Gif?
Another issue that you might suffer from while trying to create GIFs from photos is jaggy or raggedy strokes around the GIF when converted. These occur often with GIF makers that support transparency If you find these happening to you, adjust the transparency settings to get rid of the white pixel outline around your converted GIF.
Part 2 How to Add an Image to a GIF?
Now it’s finally time for the tutorials that we promised at the beginning of this article These tutorials will range from online to software solutions — so that you can get a clear idea of what you can expect from all these different GIF makers. To be more specific, we’ll be demonstrating with an online images to GIF converter, how to create animated GIF photoshop, and how to easily turn any image into GIF with the photo GIF creator, Wondershare Filmora Video Editor.
01Image to GIF: How to Turn Photos into Animated GIFs
For our first tutorial, we’re going to be demonstrating how to create GIF from photos with an online photo GIF creator More specifically, we’ll be demonstrating with Loading.IO, which is an online tool that you can use to create animated icons for your profiles or on your video content It comes with several animation options and other settings that you can use to quickly create GIFs from photos
**Step 1: Go to Loading.IO
Of course, we start off this tutorial by opening the GIF maker. In this case, since the tool is hosted online, that’s as easy as opening the link that we’ve provided below It will take you directly to the online GIF creator.
URL: https://loading.io/animation/icon/

**Step 2: Upload Photo
Once on-site, it’s time to upload the photo that you want to turn into a GIF As this is an icon creator, you should pick a photo with the proper parameters
To upload your icon for animating, select the ‘Upload’ button and browse your computer or your Google Drive for the image in question.

**Step 3: Choose animation Style
Next, choose how you want the uploaded photo to be animated Loading.IO offers a couple of animations that you can choose from Including the ‘beat’ animation, which is what we choose for our example

**Step 4: Adjust Settings
This step is technically optional, as there are default settings already prepared if you have no other specifications for your image-turned GIF. But, if you want, you can adjust certain settings for a better outcome
For example, you can speed up the animation with the ‘Speed’ slider. Or, you can increase the number of times the GIF loops by adjusting the ‘Repeat’ slider. Test out a couple of settings to get the best result

**Step 5: Download as GIF
To wrap things up, it’s time to download your finished animation Loading.IO gives several options for this. But, of course, in our case, we choose to ‘Download As: GIF’

02How to Make an Animated GIF in Photoshop [Tutorial]
For the next tutorial, we’ll be showing you how to use Photoshop to create and edit an animated GIF This process is fairly lengthy and is not recommended for beginners. But, it is a very professional method of creating an animated GIF — one that will allow you to control every step of the process (which may be exactly what you want)
**Step 1: Import Images into an Image Stack
First, starting on a new product, upload the images that you want to turn into a GIF into a photoshop ‘Image Stack’. This can be done by clicking the ‘File’ tab and selecting the ‘Scripts > Load Files into Stack…’ option
Afterward, a pop-up window will appear where you will be prompted to browse your computer for the aforementioned images Click ‘OK’ when done

**Step 2: Organize Layers
Check the ‘Layers’ panel for the images that you uploaded and organize them based on how you want them to appear for your animated GIF

**Step 3: (Optional) Import Video
If you want to work on a video to turn into a GIF instead, you can do such by selecting the ‘File’ tab and clicking on the ‘Import > Video Frames to Layers…’ option. This will get you to the same place shown in Step 2
Note: Just be careful that you do not transfer an image that is too long Photoshop may not be able to properly break it down, if so.

**Step 4: Open Timeline Then Create Frame Animation
Next, in order to start working on your animation, open the Timeline Window This can be done by clicking the ‘Window’ tab and selecting ‘Timeline’
With the ‘Timeline’ Window now open, select the ‘Create Frame Animation’ option to begin working

**Step 5: Make Frame from Layers
In order to transfer your uploaded images from the ‘Layers’ panel to your timeline, select the ‘Menu’ option on the top-right hand corner of the ‘Timeline’ window and select the ‘Make Frames From Layers’ option

**Step 6: Preview Animation and Adjust as Needed
To preview your animation, click the ‘Play’ button This is the best time to check that your frames have been organized correctly If they are not, you can adjust them by dragging and dropping them on the timeline.
OR, you can use the ‘Reverse Frames’ option if your animation has been completely flipped around

**Step 7: Create an Animation Loop
In order to be a proper looped GIF, the animation should repeat endlessly You can make sure of this by changing the ‘Repeat’ option to ‘Forever’ (as is shown in the image below).

**Step 8: Export Finished Animation to Gif
In order to finish turning your image into GIF, you’ll need to export it in the proper format This is possible by selecting the ‘File’ tab and then clicking the ‘Export > Save for Web (Legacy)…’ option
A pop-up window should appear where you can control export settings Do so in order to ensure that you have the best outcome

03How To Make an Animated GIF in Wondershare Filmora Video Editor (Fast & Easy)
For Win 7 or later (64-bit)
For macOS 10.12 or later
For our last tutorial, we’ll be showing you how to make an animated GIF with the use of Wondershare Wondershare Filmora Video Editor . Filmora is a video editor, one that is used by professionals all over to produce high-quality content And, of course, as a video editor, it works just as well as a GIF maker. One that you can use to create images into a GIF easily
**Step 1: Launch Filmora
First, download and install Filmora If you want to follow along with this demonstration, you can Wondershare offers a FREE trial where you can test out all of the software’s functions before making a commitment

Step 2: Upload Video to Turn into GIF
For this next step, we do something akin to what we did earlier with Photoshop. And that is to upload images or a video to fit into a timeline
This process is started by first uploading images, which you can do by clicking the ‘File’ tab and selecting the ‘Import Media > Import Media Files’ option

**Step 3: Drag Media to Timeline
With Filmora, the ‘Timeline’ window is already open Also, you won’t have to do anything complicated to get your media onto the said timeline. Just drag and drop it from the Media library (as is shown in the image below).

**Step 4: Edit or Adjust GIF
Before moving forward, you should take this chance to make adjustments to the media that you uploaded into your timeline There are many things that you can do at this stage so feel free to experiment
For our example, we cut down the video that we uploaded by using the ‘Trim’ option (which you can find by right-clicking on video media).

**Step 5: Export into GIF
Finally, to finish us off, we export our finished GIF This can be done by selecting the ‘Export’ tab and then clicking the ‘Create Video’ option A pop-up window will appear where you can adjust export settings

● Key Takeaways from This Episode →
● GIFs are fun and easy-to-share content It’s accepted by most platforms and can even be used to create professional, animated icons to be added to video content
● The process of turning an image into a GIF can be a bit tricky. But, don’t worry, so long as you start with high-quality media and use a reliable Photo-GIF Creator, then you should be fine
● If you’re struggling with turning your images into GIFs, check out one of the tutorials that we’ve offered We specifically chose the three GIF creators that we demonstrated to offer multiple methods that you can choose from
There are in fact ways to turn an image into GIF easily We’ll be showing off a couple of some of the easier ways below, including in-depth tutorials of some of the best methods so that you will no longer have to be troubled.
These tutorials, of course, will focus on teaching you how to create GIF from photos If that’s something you’re interested in, continue reading
In this article
01 [Why GIF?](#Part 1)
02 [How to Add an Image to a GIF?](#Part 2)
Part 1 Why GIF?
Before we move on to the tutorials, let’s do a brief account on GIF files We’ve also answered some of the more common questions regarding using a GIF image maker below for your edification
But, first: Why GIF? Well, it all comes down to what you’re looking for A lot of people use GIF files to create animated icons that they can use for their accounts. Some just genuinely want to create a GIF file that they can share with their friends and families (either for a laugh or something else) GIF files are a convenient vessel for doing this because they have a lot of flexibility and are accepted by most platforms
01Why Gif from My Images Are Blurry?
One of the biggest issues people tend to have when turning an image into GIF is that they come out of the process with a blurry end-product. No one wants that But, how are you supposed to avoid it? Well, it all depends on the tool that you’re using and your initial picture For the former, it’s best to review the upload requirements of your chosen GIF maker to get a better end result. For the latter, it’s best to pick a good, high-quality GIF creator for a better outcome
02There Are Jaggy Strokes Around Gif?
Another issue that you might suffer from while trying to create GIFs from photos is jaggy or raggedy strokes around the GIF when converted. These occur often with GIF makers that support transparency If you find these happening to you, adjust the transparency settings to get rid of the white pixel outline around your converted GIF.
Part 2 How to Add an Image to a GIF?
Now it’s finally time for the tutorials that we promised at the beginning of this article These tutorials will range from online to software solutions — so that you can get a clear idea of what you can expect from all these different GIF makers. To be more specific, we’ll be demonstrating with an online images to GIF converter, how to create animated GIF photoshop, and how to easily turn any image into GIF with the photo GIF creator, Wondershare Filmora Video Editor.
01Image to GIF: How to Turn Photos into Animated GIFs
For our first tutorial, we’re going to be demonstrating how to create GIF from photos with an online photo GIF creator More specifically, we’ll be demonstrating with Loading.IO, which is an online tool that you can use to create animated icons for your profiles or on your video content It comes with several animation options and other settings that you can use to quickly create GIFs from photos
**Step 1: Go to Loading.IO
Of course, we start off this tutorial by opening the GIF maker. In this case, since the tool is hosted online, that’s as easy as opening the link that we’ve provided below It will take you directly to the online GIF creator.
URL: https://loading.io/animation/icon/
**Step 2: Upload Photo
Once on-site, it’s time to upload the photo that you want to turn into a GIF As this is an icon creator, you should pick a photo with the proper parameters
To upload your icon for animating, select the ‘Upload’ button and browse your computer or your Google Drive for the image in question.
**Step 3: Choose animation Style
Next, choose how you want the uploaded photo to be animated Loading.IO offers a couple of animations that you can choose from Including the ‘beat’ animation, which is what we choose for our example
**Step 4: Adjust Settings
This step is technically optional, as there are default settings already prepared if you have no other specifications for your image-turned GIF. But, if you want, you can adjust certain settings for a better outcome
For example, you can speed up the animation with the ‘Speed’ slider. Or, you can increase the number of times the GIF loops by adjusting the ‘Repeat’ slider. Test out a couple of settings to get the best result
**Step 5: Download as GIF
To wrap things up, it’s time to download your finished animation Loading.IO gives several options for this. But, of course, in our case, we choose to ‘Download As: GIF’
02How to Make an Animated GIF in Photoshop [Tutorial]
For the next tutorial, we’ll be showing you how to use Photoshop to create and edit an animated GIF This process is fairly lengthy and is not recommended for beginners. But, it is a very professional method of creating an animated GIF — one that will allow you to control every step of the process (which may be exactly what you want)
**Step 1: Import Images into an Image Stack
First, starting on a new product, upload the images that you want to turn into a GIF into a photoshop ‘Image Stack’. This can be done by clicking the ‘File’ tab and selecting the ‘Scripts > Load Files into Stack…’ option
Afterward, a pop-up window will appear where you will be prompted to browse your computer for the aforementioned images Click ‘OK’ when done
**Step 2: Organize Layers
Check the ‘Layers’ panel for the images that you uploaded and organize them based on how you want them to appear for your animated GIF
**Step 3: (Optional) Import Video
If you want to work on a video to turn into a GIF instead, you can do such by selecting the ‘File’ tab and clicking on the ‘Import > Video Frames to Layers…’ option. This will get you to the same place shown in Step 2
Note: Just be careful that you do not transfer an image that is too long Photoshop may not be able to properly break it down, if so.
**Step 4: Open Timeline Then Create Frame Animation
Next, in order to start working on your animation, open the Timeline Window This can be done by clicking the ‘Window’ tab and selecting ‘Timeline’
With the ‘Timeline’ Window now open, select the ‘Create Frame Animation’ option to begin working
**Step 5: Make Frame from Layers
In order to transfer your uploaded images from the ‘Layers’ panel to your timeline, select the ‘Menu’ option on the top-right hand corner of the ‘Timeline’ window and select the ‘Make Frames From Layers’ option
**Step 6: Preview Animation and Adjust as Needed
To preview your animation, click the ‘Play’ button This is the best time to check that your frames have been organized correctly If they are not, you can adjust them by dragging and dropping them on the timeline.
OR, you can use the ‘Reverse Frames’ option if your animation has been completely flipped around
**Step 7: Create an Animation Loop
In order to be a proper looped GIF, the animation should repeat endlessly You can make sure of this by changing the ‘Repeat’ option to ‘Forever’ (as is shown in the image below).
**Step 8: Export Finished Animation to Gif
In order to finish turning your image into GIF, you’ll need to export it in the proper format This is possible by selecting the ‘File’ tab and then clicking the ‘Export > Save for Web (Legacy)…’ option
A pop-up window should appear where you can control export settings Do so in order to ensure that you have the best outcome
03How To Make an Animated GIF in Wondershare Filmora Video Editor (Fast & Easy)
For Win 7 or later (64-bit)
For macOS 10.12 or later
For our last tutorial, we’ll be showing you how to make an animated GIF with the use of Wondershare Wondershare Filmora Video Editor . Filmora is a video editor, one that is used by professionals all over to produce high-quality content And, of course, as a video editor, it works just as well as a GIF maker. One that you can use to create images into a GIF easily
**Step 1: Launch Filmora
First, download and install Filmora If you want to follow along with this demonstration, you can Wondershare offers a FREE trial where you can test out all of the software’s functions before making a commitment
Step 2: Upload Video to Turn into GIF
For this next step, we do something akin to what we did earlier with Photoshop. And that is to upload images or a video to fit into a timeline
This process is started by first uploading images, which you can do by clicking the ‘File’ tab and selecting the ‘Import Media > Import Media Files’ option
**Step 3: Drag Media to Timeline
With Filmora, the ‘Timeline’ window is already open Also, you won’t have to do anything complicated to get your media onto the said timeline. Just drag and drop it from the Media library (as is shown in the image below).
**Step 4: Edit or Adjust GIF
Before moving forward, you should take this chance to make adjustments to the media that you uploaded into your timeline There are many things that you can do at this stage so feel free to experiment
For our example, we cut down the video that we uploaded by using the ‘Trim’ option (which you can find by right-clicking on video media).
**Step 5: Export into GIF
Finally, to finish us off, we export our finished GIF This can be done by selecting the ‘Export’ tab and then clicking the ‘Create Video’ option A pop-up window will appear where you can adjust export settings
● Key Takeaways from This Episode →
● GIFs are fun and easy-to-share content It’s accepted by most platforms and can even be used to create professional, animated icons to be added to video content
● The process of turning an image into a GIF can be a bit tricky. But, don’t worry, so long as you start with high-quality media and use a reliable Photo-GIF Creator, then you should be fine
● If you’re struggling with turning your images into GIFs, check out one of the tutorials that we’ve offered We specifically chose the three GIF creators that we demonstrated to offer multiple methods that you can choose from
Top 15 Male Anime Characters [By Voting]
Top 15 Male Anime Characters [By Voting]
Shanoon Cox
Mar 27, 2024• Proven solutions
You don’t generally see the kind of hype and excitement for a single category of content like one that revolves around anime. Anime offers a complete package filled with emotions, drama, entertainment, amazing plot twist, stunning visuals – and of course, admirable characters. No matter how good or bad the show is, an anime is always defined by its characters. A good-looking, charming, and badass hero is the backbone of an anime. Believe it or not but many popular cult-favorite anime characters have millions of fans. Today we will reveal the top 15 male anime characters.
Stay tuned to find out if your favorite anime boy made it to the list!
Best 15 Male Anime Characters/Anime Boys Voted by Anime Fans
Here is a list of the coolest of the cool top 15 most loved male anime characters in anime history according to the fan votes. Note that the characters here are listed in no particular order:
- 1. Levi Ackerman — Attack on Titan
- 2. Kakashi Hatake — Naruto
- 3. Itachi Uchiha — Naruto
- 4. L — Death Note
- 5. Ken Kaneki — Tokyo Ghoul
- 6. Karma Akabane – Assassination Classroom
- 7. Katsuki Bakugou – My Hero Academia
- 8. Killua Zaoldyeck – Hunter X Hunter
- 9. Hak – Yona of the Dawn
- 10. Ban – The Seven Deadly Sins
- 11. Satoru Gojo – Jujutsu Kaisen
- 12. Zero Kiryu – Vampire Knight
- 13. Edward Elric – Fullmetal Alchemist
- 14. Victor Nikiforov – Yuri!!! on Ice
- 15. Ayato Sakamaki – Diabolik Lovers
1. Levi Ackerman — Attack on Titan
Levi Ackerman is a cold, distant, antisocial anime boy. He looks like a young teenager but he’s decades old. Levi is the Captain of the Scouting Legion division and Special Operations Squad. He boasts the title of “Humanity’s Strongest Soldier” because he is the strongest human being in the world who can easily take down Titans. What makes this character so realistic is that he is not perfect; he’s facing his own emotional trauma and insecurities. Since his introduction, he has gained immense love and appreciation from the fans. Levi’s stern face, tactful nature and strength make him one of the best male anime characters.
2. Kakashi Hatake — Naruto
Naruto is perhaps one of the most famous anime shows out there with a number of cult-favorite characters. Kakashi Hatake is Naruto’s sensei and leader of team 7. Kakashi Hatake is a shinobi of Konohagakure’s Hatake clan. His teammate Obito Uchiha gives him a Sharingan. He gets the title “Copy Ninja Kakashi” because he can copy the moves of other ninjas due to his Sharingan. Kakashi is famous for his mysterious appearance, relaxed attitude, and dynamic personality.
3. Itachi Uchiha — Naruto

Itachi Uchiha is one of the most famous anime characters of all time. He is the most popular edge lord in the anime world. He is popular due to his older brother whose t-shirts and mixtapes he stole. Itachi Uchiha is not a protagonist but an anti-hero. He kills the entire Uchiha clan except for his brother Sasuke. Despite his negative characteristics, fans love him. His mysterious history, dreamy eyes, cool moves, and sexy personality make him an attractive male anime character. Itachi has millions of fans around the world with dedicated fandom websites.
4. L — Death Note
L Lawliet is the famous detective in Death Note. He is famous for his different aesthetic and strong personality. He is a man of high intelligence, awkward posture and intriguing mysteries. Ever since his introduction, L has left a long-lasting impression on viewers. This suspense series would have been incomplete without L. His social ineptitude and complex strategic reasoning are the perfect addition to the plot.
5. Ken Kaneki — Tokyo Ghoul
Ken Kaneki is the main character in Tokyo Ghoul married to Touka Kirishima. He has a gentle, introverted, and kind personality. At the beginning of the series, he is a normal man but then Rize Kamishiro’s kakuhou is transplanted in him. Ken then transforms into an artificial one-eyed ghoul, the first of his kind. Being half-ghoul, half-human he becomes a Quinx. Later on, he is known as the Eyepatch and becomes one of the strongest ghouls ever.
6. Karma Akabane – Assassination Classroom
Karma Akabane is a young, mischievous, and clever character in the anime series Assassination Classroom. Karma goes to the Kunugigaoka Junior High School and studies under Korosensei. Karma is a popular character because most teens can relate to his stubbornness. He is popular in school for violence and troublesome attitude. Even though he is shown to be cunning, sadistic, manipulating, and aggressive, there is still a tender side to him – and that’s what makes his character so exciting.
7. Katsuki Bakugou – My Hero Academia
Katsuki Bakugo is a famous male character in My Hero Academia manga and anime. His love and hate relationship with Katsuki is an important aspect of his overall personality. Being rude, arrogant, aggressive, and short-tempered, Katsuki is a man of average height. He has the typical; Japanese physique with a slim, muscular build. He is given the hero name “Great Explosion Murder God Dynamite” because he is very hot-headed and violent. Anime fans all over the world love his sexy lustrous ash-blond bangs, his fighting abilities, and his epic hero costume with Grenadier Bracers.
8. Killua Zaoldyeck – Hunter X Hunter
Killua Zaoldyeck is one of the strongest and most impactful characters of Hunter x Hunter. He is cool, sharp, and mischievous. Even though Killua is relegated as Gon Freecss’ sidekick, he has managed to grab the audience’s attention. His mysterious history, deadly talent, and never-ending contemplation of morality make him a great character.
9. Hak – Yona of the Dawn
Hak is the second most important character of this anime and manga series. Hak is the former General and Chief of the Wind Tribe who falls in love with Princess Yona. Hak is famous for his outstanding martial arts, swordsmanship, and archery skills. He earns the title of “Lightning Beast”, in the Kingdom of Kouka because he is the strongest fighter in the country. He is famous for his charming personality, sarcasm, wit, humor, and nonchalant behavior.
10. Ban – The Seven Deadly Sins
Ban is the king of Benwick and sin of Greed in Seven Deadly Sins. He is married to Elaine and has a daughter named Lancelot. and the king of Benwick. Ban is famous for his resilience and for giving up immortality to resurrect Elaine. Ban’s character is inspiring and passionate. He follows his heart and sometimes ends up suffering due to his selfishness and greedy nature. However, he is still caring and selfless for the people he loves and that’s what makes him so amazing.
11. Satoru Gojo – Jujutsu Kaisen
Satoru Gojo of Jujutsu Kaisen is a special grade jujutsu sorcerer. He teaches at the Tokyo Metropolitan Curse Technical College. Satoru is a tall handsome man with white hair and bright blue eyes. Gojo is a complex personality known to be nonchalant and fun around his friends, colleagues, and students. He is famous for his strength, speed, and reflexes. He is also the most powerful Jujutsu sorcerer
12. Zero Kiryu – Vampire Knight
Zero Kiryu is a vampire hunter and an ex-vampire. Zero is a tall attractive man with silver hair and snow-white skin and lavender eyes. He is one of the most popular manga and anime characters. He has a cool laid back rough and tough appearance; he has tattoos and multiple ear piercings. The tattoo is actually Hunter’s Seal which suppresses his vampire side and tames him. He has a strong loving personality. Even though he comes across as hostile and cold-hearted, he has a kind heart. He wishes to protect humans against his own people.
13. Edward Elric – Fullmetal Alchemist
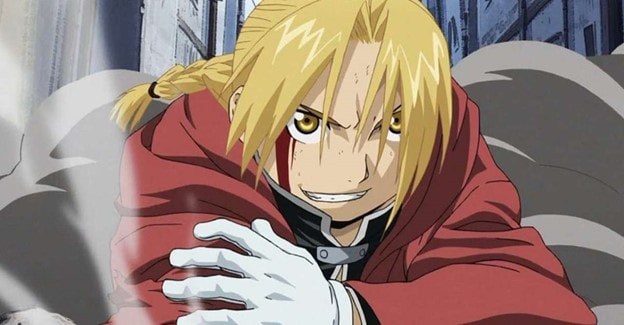
Fullmetal Alchemist is the biggest Shounen anime with millions of fans. Edward Elric is the main protagonist of this anime series and manga. Fans love him for his spunky personality and morally conflicted human emotions. He loses his arm due to an alchemy experiment gone wrong. He is popular for his struggles through life, constant existential drama, heartwarming friendships, and epic alchemy battles. He is loud-mouthed, arrogant, headstrong, and resilient.
14. Victor Nikiforov – Yuri!!! on Ice
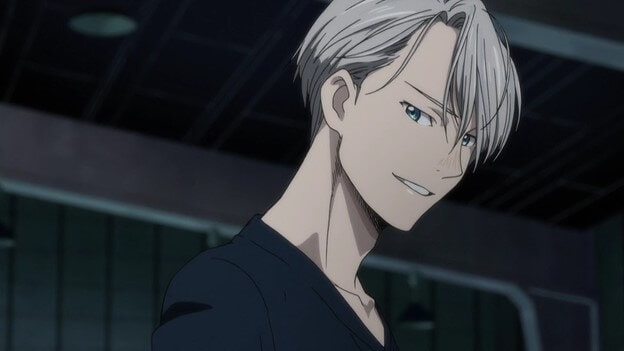
Victor Nikiforov is a famous figure skater in Yurri!!! On Ice. He is the coach and choreographer of Yuri Katsuki’s and his fiancé. Victor is presented as a very handsome man. He has a slim tall physique, light blue eyes, and short gray hair with bangs, the classic Japanese anime boy. Even though the star performer is Yuri, Victor has a strong celebrity persona and charisma. His flirtatious looks, sexy strength, and stunning performances, leaves the audience wanting for more. Victor is also very hardworking and always tries to perfect his skills and moves. His fun attitude, good looks, and easy-going personality make him one of the best male anime characters.
15. Ayato Sakamaki – Diabolik Lovers
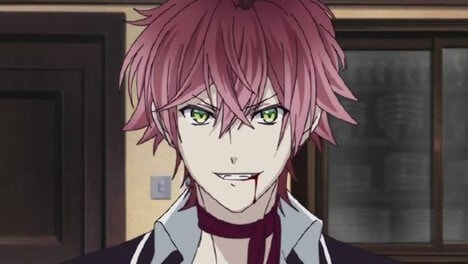
Ayato Sakamaki belongs to the Sakamaki household and is the third son of the Vampire king Karlheinz and his wife Cordelia. Ayato is an angry young man with a slender body and rough reddish-colored spiky hair. He has a fair complexion and narrow green eyes. Ayato is a troublesome character yearning for attention. He is presented as a mischievous and clever young boy who looks down on others. By nature, he is a bully and teases people for his personal pleasure. Ayato refers to himself as “Ore-sama” (Yours Truly) after he falls in love with Chichinashi. Fans love him because he is a narcissist who is mercilessly passionate about torture – exactly what a real vampire should be!
Why Anime Boys Are Attractive?
What makes anime boys so attractive is their gentle demeanor. Anime has given a different touch to masculinity as compared to western shows - where an attractive man is usually portrayed as a tall macho dude with 6 packs. However, the concept of an anime boy is generally someone with a soft, cute, lithe yet athletic and badass personality. These hardcore tough guys have feminine qualities which set them apart from the mainstream heartthrobs like Chris Evans as Captain America or Zac Efron as Matt Brody.
Also, the ideal Japanese male is also much different than a Western guy. Japanese don’t desire strong, muscular, handsome Greek God-looking men. For them, the idea of an attractive man is a cool, laidback, charming, gentle guy with adorable looks and a goofy personality. Thus, a male anime character is a perfect combination of manly and sensitive - and women love that!
Create an Animation Video with Anireel
In simple words, Anireel is software that lets the creators create wonderfully animated videos by integrating fun elements and scenes into them. This animated video software is user-friendly and makes life easy for animation video creators. We understand that many individuals want to create great animation videos which they can use for many purposes, however, they feel that it is a very daunting task. Luckily, that’s not the case with the Anireel explainer video software.


Create an Animation Video with Smart Video Editor
Many people may think making an animation video is difficult. Actually, as long as you get the right video editor, it is not that difficult. Today, we would like to recommend you to use Filmora .
As a desktop solution for video editing , Filmora makes animation video creation easier than ever. You can check the below video about how to create an animation video. Except for video making, Filmora offers advanced features like Green Screen, Speed Ramping, Color Correction, and more to help you create a video for your loved anime character. Download Filmora and try it today!
Download Mac Version ](https://tools.techidaily.com/wondershare/filmora/download/ )
Shanoon Cox
Shanoon Cox is a writer and a lover of all things video.
Follow @Shanoon Cox
Shanoon Cox
Mar 27, 2024• Proven solutions
You don’t generally see the kind of hype and excitement for a single category of content like one that revolves around anime. Anime offers a complete package filled with emotions, drama, entertainment, amazing plot twist, stunning visuals – and of course, admirable characters. No matter how good or bad the show is, an anime is always defined by its characters. A good-looking, charming, and badass hero is the backbone of an anime. Believe it or not but many popular cult-favorite anime characters have millions of fans. Today we will reveal the top 15 male anime characters.
Stay tuned to find out if your favorite anime boy made it to the list!
Best 15 Male Anime Characters/Anime Boys Voted by Anime Fans
Here is a list of the coolest of the cool top 15 most loved male anime characters in anime history according to the fan votes. Note that the characters here are listed in no particular order:
- 1. Levi Ackerman — Attack on Titan
- 2. Kakashi Hatake — Naruto
- 3. Itachi Uchiha — Naruto
- 4. L — Death Note
- 5. Ken Kaneki — Tokyo Ghoul
- 6. Karma Akabane – Assassination Classroom
- 7. Katsuki Bakugou – My Hero Academia
- 8. Killua Zaoldyeck – Hunter X Hunter
- 9. Hak – Yona of the Dawn
- 10. Ban – The Seven Deadly Sins
- 11. Satoru Gojo – Jujutsu Kaisen
- 12. Zero Kiryu – Vampire Knight
- 13. Edward Elric – Fullmetal Alchemist
- 14. Victor Nikiforov – Yuri!!! on Ice
- 15. Ayato Sakamaki – Diabolik Lovers
1. Levi Ackerman — Attack on Titan
Levi Ackerman is a cold, distant, antisocial anime boy. He looks like a young teenager but he’s decades old. Levi is the Captain of the Scouting Legion division and Special Operations Squad. He boasts the title of “Humanity’s Strongest Soldier” because he is the strongest human being in the world who can easily take down Titans. What makes this character so realistic is that he is not perfect; he’s facing his own emotional trauma and insecurities. Since his introduction, he has gained immense love and appreciation from the fans. Levi’s stern face, tactful nature and strength make him one of the best male anime characters.
2. Kakashi Hatake — Naruto
Naruto is perhaps one of the most famous anime shows out there with a number of cult-favorite characters. Kakashi Hatake is Naruto’s sensei and leader of team 7. Kakashi Hatake is a shinobi of Konohagakure’s Hatake clan. His teammate Obito Uchiha gives him a Sharingan. He gets the title “Copy Ninja Kakashi” because he can copy the moves of other ninjas due to his Sharingan. Kakashi is famous for his mysterious appearance, relaxed attitude, and dynamic personality.
3. Itachi Uchiha — Naruto
Itachi Uchiha is one of the most famous anime characters of all time. He is the most popular edge lord in the anime world. He is popular due to his older brother whose t-shirts and mixtapes he stole. Itachi Uchiha is not a protagonist but an anti-hero. He kills the entire Uchiha clan except for his brother Sasuke. Despite his negative characteristics, fans love him. His mysterious history, dreamy eyes, cool moves, and sexy personality make him an attractive male anime character. Itachi has millions of fans around the world with dedicated fandom websites.
4. L — Death Note
L Lawliet is the famous detective in Death Note. He is famous for his different aesthetic and strong personality. He is a man of high intelligence, awkward posture and intriguing mysteries. Ever since his introduction, L has left a long-lasting impression on viewers. This suspense series would have been incomplete without L. His social ineptitude and complex strategic reasoning are the perfect addition to the plot.
5. Ken Kaneki — Tokyo Ghoul
Ken Kaneki is the main character in Tokyo Ghoul married to Touka Kirishima. He has a gentle, introverted, and kind personality. At the beginning of the series, he is a normal man but then Rize Kamishiro’s kakuhou is transplanted in him. Ken then transforms into an artificial one-eyed ghoul, the first of his kind. Being half-ghoul, half-human he becomes a Quinx. Later on, he is known as the Eyepatch and becomes one of the strongest ghouls ever.
6. Karma Akabane – Assassination Classroom
Karma Akabane is a young, mischievous, and clever character in the anime series Assassination Classroom. Karma goes to the Kunugigaoka Junior High School and studies under Korosensei. Karma is a popular character because most teens can relate to his stubbornness. He is popular in school for violence and troublesome attitude. Even though he is shown to be cunning, sadistic, manipulating, and aggressive, there is still a tender side to him – and that’s what makes his character so exciting.
7. Katsuki Bakugou – My Hero Academia
Katsuki Bakugo is a famous male character in My Hero Academia manga and anime. His love and hate relationship with Katsuki is an important aspect of his overall personality. Being rude, arrogant, aggressive, and short-tempered, Katsuki is a man of average height. He has the typical; Japanese physique with a slim, muscular build. He is given the hero name “Great Explosion Murder God Dynamite” because he is very hot-headed and violent. Anime fans all over the world love his sexy lustrous ash-blond bangs, his fighting abilities, and his epic hero costume with Grenadier Bracers.
8. Killua Zaoldyeck – Hunter X Hunter
Killua Zaoldyeck is one of the strongest and most impactful characters of Hunter x Hunter. He is cool, sharp, and mischievous. Even though Killua is relegated as Gon Freecss’ sidekick, he has managed to grab the audience’s attention. His mysterious history, deadly talent, and never-ending contemplation of morality make him a great character.
9. Hak – Yona of the Dawn
Hak is the second most important character of this anime and manga series. Hak is the former General and Chief of the Wind Tribe who falls in love with Princess Yona. Hak is famous for his outstanding martial arts, swordsmanship, and archery skills. He earns the title of “Lightning Beast”, in the Kingdom of Kouka because he is the strongest fighter in the country. He is famous for his charming personality, sarcasm, wit, humor, and nonchalant behavior.
10. Ban – The Seven Deadly Sins
Ban is the king of Benwick and sin of Greed in Seven Deadly Sins. He is married to Elaine and has a daughter named Lancelot. and the king of Benwick. Ban is famous for his resilience and for giving up immortality to resurrect Elaine. Ban’s character is inspiring and passionate. He follows his heart and sometimes ends up suffering due to his selfishness and greedy nature. However, he is still caring and selfless for the people he loves and that’s what makes him so amazing.
11. Satoru Gojo – Jujutsu Kaisen
Satoru Gojo of Jujutsu Kaisen is a special grade jujutsu sorcerer. He teaches at the Tokyo Metropolitan Curse Technical College. Satoru is a tall handsome man with white hair and bright blue eyes. Gojo is a complex personality known to be nonchalant and fun around his friends, colleagues, and students. He is famous for his strength, speed, and reflexes. He is also the most powerful Jujutsu sorcerer
12. Zero Kiryu – Vampire Knight
Zero Kiryu is a vampire hunter and an ex-vampire. Zero is a tall attractive man with silver hair and snow-white skin and lavender eyes. He is one of the most popular manga and anime characters. He has a cool laid back rough and tough appearance; he has tattoos and multiple ear piercings. The tattoo is actually Hunter’s Seal which suppresses his vampire side and tames him. He has a strong loving personality. Even though he comes across as hostile and cold-hearted, he has a kind heart. He wishes to protect humans against his own people.
13. Edward Elric – Fullmetal Alchemist
Fullmetal Alchemist is the biggest Shounen anime with millions of fans. Edward Elric is the main protagonist of this anime series and manga. Fans love him for his spunky personality and morally conflicted human emotions. He loses his arm due to an alchemy experiment gone wrong. He is popular for his struggles through life, constant existential drama, heartwarming friendships, and epic alchemy battles. He is loud-mouthed, arrogant, headstrong, and resilient.
14. Victor Nikiforov – Yuri!!! on Ice
Victor Nikiforov is a famous figure skater in Yurri!!! On Ice. He is the coach and choreographer of Yuri Katsuki’s and his fiancé. Victor is presented as a very handsome man. He has a slim tall physique, light blue eyes, and short gray hair with bangs, the classic Japanese anime boy. Even though the star performer is Yuri, Victor has a strong celebrity persona and charisma. His flirtatious looks, sexy strength, and stunning performances, leaves the audience wanting for more. Victor is also very hardworking and always tries to perfect his skills and moves. His fun attitude, good looks, and easy-going personality make him one of the best male anime characters.
15. Ayato Sakamaki – Diabolik Lovers
Ayato Sakamaki belongs to the Sakamaki household and is the third son of the Vampire king Karlheinz and his wife Cordelia. Ayato is an angry young man with a slender body and rough reddish-colored spiky hair. He has a fair complexion and narrow green eyes. Ayato is a troublesome character yearning for attention. He is presented as a mischievous and clever young boy who looks down on others. By nature, he is a bully and teases people for his personal pleasure. Ayato refers to himself as “Ore-sama” (Yours Truly) after he falls in love with Chichinashi. Fans love him because he is a narcissist who is mercilessly passionate about torture – exactly what a real vampire should be!
Why Anime Boys Are Attractive?
What makes anime boys so attractive is their gentle demeanor. Anime has given a different touch to masculinity as compared to western shows - where an attractive man is usually portrayed as a tall macho dude with 6 packs. However, the concept of an anime boy is generally someone with a soft, cute, lithe yet athletic and badass personality. These hardcore tough guys have feminine qualities which set them apart from the mainstream heartthrobs like Chris Evans as Captain America or Zac Efron as Matt Brody.
Also, the ideal Japanese male is also much different than a Western guy. Japanese don’t desire strong, muscular, handsome Greek God-looking men. For them, the idea of an attractive man is a cool, laidback, charming, gentle guy with adorable looks and a goofy personality. Thus, a male anime character is a perfect combination of manly and sensitive - and women love that!
Create an Animation Video with Anireel
In simple words, Anireel is software that lets the creators create wonderfully animated videos by integrating fun elements and scenes into them. This animated video software is user-friendly and makes life easy for animation video creators. We understand that many individuals want to create great animation videos which they can use for many purposes, however, they feel that it is a very daunting task. Luckily, that’s not the case with the Anireel explainer video software.
Create an Animation Video with Smart Video Editor
Many people may think making an animation video is difficult. Actually, as long as you get the right video editor, it is not that difficult. Today, we would like to recommend you to use Filmora .
As a desktop solution for video editing , Filmora makes animation video creation easier than ever. You can check the below video about how to create an animation video. Except for video making, Filmora offers advanced features like Green Screen, Speed Ramping, Color Correction, and more to help you create a video for your loved anime character. Download Filmora and try it today!
Download Mac Version ](https://tools.techidaily.com/wondershare/filmora/download/ )
Shanoon Cox
Shanoon Cox is a writer and a lover of all things video.
Follow @Shanoon Cox
Learn Disney Cartoon Drawing to See More Disney Magic Moments
Learn Disney Cartoon Drawing to See More Disney Magic Moments
An easy yet powerful editor
Numerous effects to choose from
Detailed tutorials provided by the official channel
How to Draw a Disney Caricature

Disney-Inspired Ipad Drawing Class for Beginners
In this article
01 [How to Draw a Disney Caricature](#Part 1)
02 [Disney-Inspired Ipad Drawing Class for Beginners](#Part 2)
Part 1 How to Draw a Disney Caricature
Below is the step-by-step guide to making a Disney cartoon drawing with colors from the comfort of your home:
01How to Draw Mickey

Unarguably, Mickey Mouse is one of the most famous anime characters globally. This character was created in 1928 and is a famous Disney cartoon drawing by animators. Here are straightforward steps to help you draw a Mickey Mouse:
Step 1: Sketch the general but carefully observed features of Mickey Mouse, including the position of ears, body shape (reverse C shape), body proportions including eyes, limbs, and arms, length of arms, button on his pants, and angle on the hands.
Step 2: Take your pencil and paper, and using gentle and weak strokes, make a simple sketch of the head, neck, belly, and limbs.

Step 3: Draw contours of the mouth, ears, and nose.

Step 4: Specify the face features like a smiling opened mouth, tip of the nose, and eyes.

Step 5: Draw the hands carefully, observing the length of both arms and their proportion to the size of the character’s head.

Step 6: Sketch the outline contours of the shoes, the legs, and the pants.

Step 7: Sketch the final outline contour of the body, then erase excess lines where necessary. Add the two buttons on Mickey mouse pants.

Step 8: Draw his nose’s tail, tongue, and ellipse.

Step 9: First, use a 2B or 4B or any soft black color pencil to color the black parts.

Step 10: Depending on your preference, you can color with water, acrylic paints, or pastels.

02How to Draw Captain America
Follow these simple steps to make a Disney cartoon drawing of Captain America:
Step 1: Draw the head and chest
Draw the outlines of his masked face using smooth lines. Draw a curved line across his face to divide his face from his mask. Draw a large letter A and add tiny wings beside it on his forehead. Draw his mouth, eyes, and nose. Use curved lines to indicate his shoulder and chest, then draw a star on his chest.

Step 2: Draw his arm and waist
Draw a curved line on the shoulder to represent the bicep, then draw his gloved arm curled to form a fist. Draw curved lines beneath the chest to represent his muscular weight, then draw the pouches on his belt and use more curved lines to draw his waist.

Step 3: Draw his legs
Here, we shall portray Captain America in action. Use curved lines to show his extended right leg with boots. The left leg should appear more petite.

Step 4: Draw his shield
Against his right arm, carefully draw a flattened circular shape. You can achieve this by drawing concentric circles with a large star in the middle. Draw his arm poking out from behind his shield.

Step 5: Include the final details
Add some vertical lines across his waist and some details on his boots.

Step 6: Colour Captain America
Using colors of the American flag, color your drawing with red, white, and blue colors.

03How to Draw Stitch
Stitch is a bulletproof and fireproof alien from the Lilo and Stitch animations. Here’s how you can draw Stitch:
Step 1: Draw a circle that would form Stitch’s head

Step 2: Using a long curved line, draw an irregular peanut shape beneath the head to represent its body.

Step 3: To form its light underbelly, enclose a small shape parallel to the outline of Stitch’s body using a long curved line. On the chest region, draw a series of small “V” shapes to indicate the presence of fur.

Step 4: Draw Stitch’s arm using curved lines for the upper arm and another pair for the lower arm. Draw his bent hands and fingers using short lines. At the tip of its fingers, draw small pointed triangles to represent its claws.

Step 5: Erase the guidelines from Stitch’s arm

Step 6: Draw Stitch’s outstretched arm using a pair of curved lines and small “C” shaped lines to represent the fingers. Use short lines to connect the fingers. Draw small “V” shapes at the tip of the fingers for the triangular claws.

Step 7: Use a pair of curved lines to sketch each leg, then enclose the toes using C-shaped lines

Step 8: Sketch the ears using long curved lines to indicate the base and folds. Sketch the fur on top of Stitch’s head using a series of curved lines.

Step 9: Draw a big circle for the nose and use curved lines to indicate the nostrils. For the eyes, draw irregular rounded shapes, one within the other. Sketch too long curved lines to show the mouth and small blonde triangles for the teeth. Above the eyes and nose, draw curved lines.

Step 10: Use different shades of blue to colour Stitch.

Part 2 Disney-Inspired Ipad Drawing Class for Beginner
Here is a list of classes for beginners interested in drawing Disney characters.
01Dive into the world of Animation with a Disney-Inspired Ipad Drawing Course

This Disney-inspired lesson focuses on real-life scenarios that are beautiful and adorable. Create your everyday settings by sketching backgrounds and outfitting figures.
It will assist you in developing a straightforward approach to drawing cartoon characters through experimentation and time. Follow along and sketch characters, then make your new character.
02Drawing Faces: A Beginner‘s Guide

Ira Marcks, a graphic novelist, will teach you everything you need to know about drawing faces. Are you completely new when it comes to drawing? No worries; follow along with Ira’s bite-sized lectures, and you’ll be ready to delve into a class project by the end of the course.
Do you prefer to set your speed and work at it? If yes, then extend your learning beyond the classroom, download Ira’s Drawing Faces Book.
03Disney Inspired Drawings: Faces and Expressions

Learners will look at sketching a cartoon image of themselves or people they know while exploring the specific traits of Disney-style characters in this one-time live drawing lesson.
Learners will collaborate with the teacher while working on their art projects. This is a technique class, so the focus will be on the process and working towards a finished goal. Nevertheless, a piece may get completed outside of class.
This program is for students who have a basic understanding of drawing and proportion, are open to artistic growth, and are comfortable appearing on camera and sharing their work in a small group setting. All to help each other, and the classroom environment will support all students.
04Free Art Lessons By The Parks’ Imagineers
This lesson will teach how to create your theme park, design virtual landscapes, and even sketch unique costumes!
You’ll also learn how to draw characters from Frozen 2 like Anna and Elsa and classics like Mickey Mouse, Daisy Duck, Pluto, and others.
Your class experience can be enjoyable when using an easy-to-use tool like Wondershare Filmora.
Wondershare Filmora Video Editor is a robust and easy-to-use video editor for users of all skill levels, from beginner to advanced. Its advanced tools, adjustable keyframing, smoothing effects, and motion blur will considerably assist you in creating a high-quality animation video. Furthermore, the auto color correction and audio mixing will elevate your 2D animation film to new heights. Filmora is the best solution if you want more productivity, control, and customization options for your Disney cartoon drawings and animation.
For Win 7 or later (64-bit)
For macOS 10.12 or later
● Ending Thoughts →
● How to make a Disney cartoon drawing
● A step-by-step guide to drawing your favorite Disney cartoon drawing with colors
● How to use Filmora to create animations
● Different Disney-inspired beginner classes for iPad users.
How to Draw a Disney Caricature
Disney-Inspired Ipad Drawing Class for Beginners
In this article
01 [How to Draw a Disney Caricature](#Part 1)
02 [Disney-Inspired Ipad Drawing Class for Beginners](#Part 2)
Part 1 How to Draw a Disney Caricature
Below is the step-by-step guide to making a Disney cartoon drawing with colors from the comfort of your home:
01How to Draw Mickey
Unarguably, Mickey Mouse is one of the most famous anime characters globally. This character was created in 1928 and is a famous Disney cartoon drawing by animators. Here are straightforward steps to help you draw a Mickey Mouse:
Step 1: Sketch the general but carefully observed features of Mickey Mouse, including the position of ears, body shape (reverse C shape), body proportions including eyes, limbs, and arms, length of arms, button on his pants, and angle on the hands.
Step 2: Take your pencil and paper, and using gentle and weak strokes, make a simple sketch of the head, neck, belly, and limbs.
Step 3: Draw contours of the mouth, ears, and nose.
Step 4: Specify the face features like a smiling opened mouth, tip of the nose, and eyes.
Step 5: Draw the hands carefully, observing the length of both arms and their proportion to the size of the character’s head.
Step 6: Sketch the outline contours of the shoes, the legs, and the pants.
Step 7: Sketch the final outline contour of the body, then erase excess lines where necessary. Add the two buttons on Mickey mouse pants.
Step 8: Draw his nose’s tail, tongue, and ellipse.
Step 9: First, use a 2B or 4B or any soft black color pencil to color the black parts.
Step 10: Depending on your preference, you can color with water, acrylic paints, or pastels.
02How to Draw Captain America
Follow these simple steps to make a Disney cartoon drawing of Captain America:
Step 1: Draw the head and chest
Draw the outlines of his masked face using smooth lines. Draw a curved line across his face to divide his face from his mask. Draw a large letter A and add tiny wings beside it on his forehead. Draw his mouth, eyes, and nose. Use curved lines to indicate his shoulder and chest, then draw a star on his chest.
Step 2: Draw his arm and waist
Draw a curved line on the shoulder to represent the bicep, then draw his gloved arm curled to form a fist. Draw curved lines beneath the chest to represent his muscular weight, then draw the pouches on his belt and use more curved lines to draw his waist.
Step 3: Draw his legs
Here, we shall portray Captain America in action. Use curved lines to show his extended right leg with boots. The left leg should appear more petite.
Step 4: Draw his shield
Against his right arm, carefully draw a flattened circular shape. You can achieve this by drawing concentric circles with a large star in the middle. Draw his arm poking out from behind his shield.
Step 5: Include the final details
Add some vertical lines across his waist and some details on his boots.
Step 6: Colour Captain America
Using colors of the American flag, color your drawing with red, white, and blue colors.
03How to Draw Stitch
Stitch is a bulletproof and fireproof alien from the Lilo and Stitch animations. Here’s how you can draw Stitch:
Step 1: Draw a circle that would form Stitch’s head
Step 2: Using a long curved line, draw an irregular peanut shape beneath the head to represent its body.
Step 3: To form its light underbelly, enclose a small shape parallel to the outline of Stitch’s body using a long curved line. On the chest region, draw a series of small “V” shapes to indicate the presence of fur.
Step 4: Draw Stitch’s arm using curved lines for the upper arm and another pair for the lower arm. Draw his bent hands and fingers using short lines. At the tip of its fingers, draw small pointed triangles to represent its claws.
Step 5: Erase the guidelines from Stitch’s arm
Step 6: Draw Stitch’s outstretched arm using a pair of curved lines and small “C” shaped lines to represent the fingers. Use short lines to connect the fingers. Draw small “V” shapes at the tip of the fingers for the triangular claws.
Step 7: Use a pair of curved lines to sketch each leg, then enclose the toes using C-shaped lines
Step 8: Sketch the ears using long curved lines to indicate the base and folds. Sketch the fur on top of Stitch’s head using a series of curved lines.
Step 9: Draw a big circle for the nose and use curved lines to indicate the nostrils. For the eyes, draw irregular rounded shapes, one within the other. Sketch too long curved lines to show the mouth and small blonde triangles for the teeth. Above the eyes and nose, draw curved lines.
Step 10: Use different shades of blue to colour Stitch.
Part 2 Disney-Inspired Ipad Drawing Class for Beginner
Here is a list of classes for beginners interested in drawing Disney characters.
01Dive into the world of Animation with a Disney-Inspired Ipad Drawing Course
This Disney-inspired lesson focuses on real-life scenarios that are beautiful and adorable. Create your everyday settings by sketching backgrounds and outfitting figures.
It will assist you in developing a straightforward approach to drawing cartoon characters through experimentation and time. Follow along and sketch characters, then make your new character.
02Drawing Faces: A Beginner‘s Guide
Ira Marcks, a graphic novelist, will teach you everything you need to know about drawing faces. Are you completely new when it comes to drawing? No worries; follow along with Ira’s bite-sized lectures, and you’ll be ready to delve into a class project by the end of the course.
Do you prefer to set your speed and work at it? If yes, then extend your learning beyond the classroom, download Ira’s Drawing Faces Book.
03Disney Inspired Drawings: Faces and Expressions
Learners will look at sketching a cartoon image of themselves or people they know while exploring the specific traits of Disney-style characters in this one-time live drawing lesson.
Learners will collaborate with the teacher while working on their art projects. This is a technique class, so the focus will be on the process and working towards a finished goal. Nevertheless, a piece may get completed outside of class.
This program is for students who have a basic understanding of drawing and proportion, are open to artistic growth, and are comfortable appearing on camera and sharing their work in a small group setting. All to help each other, and the classroom environment will support all students.
04Free Art Lessons By The Parks’ Imagineers
This lesson will teach how to create your theme park, design virtual landscapes, and even sketch unique costumes!
You’ll also learn how to draw characters from Frozen 2 like Anna and Elsa and classics like Mickey Mouse, Daisy Duck, Pluto, and others.
Your class experience can be enjoyable when using an easy-to-use tool like Wondershare Filmora.
Wondershare Filmora Video Editor is a robust and easy-to-use video editor for users of all skill levels, from beginner to advanced. Its advanced tools, adjustable keyframing, smoothing effects, and motion blur will considerably assist you in creating a high-quality animation video. Furthermore, the auto color correction and audio mixing will elevate your 2D animation film to new heights. Filmora is the best solution if you want more productivity, control, and customization options for your Disney cartoon drawings and animation.
For Win 7 or later (64-bit)
For macOS 10.12 or later
● Ending Thoughts →
● How to make a Disney cartoon drawing
● A step-by-step guide to drawing your favorite Disney cartoon drawing with colors
● How to use Filmora to create animations
● Different Disney-inspired beginner classes for iPad users.
How to Turn Yourself Into WhatsApp Cartoon
How to Turn Yourself Into a WhatsApp Cartoon
An easy yet powerful editor
Numerous effects to choose from
Detailed tutorials provided by the official channel
Let me ask you a question - how much fun would it be if you could create your own animated stickers and send them to your friends and family members on Whatsapp? I mean, it would make the entire conversation more fun and also add a personal element to the entire chat. Right? Well, to tell you the truth, it is possible to create Whatsapp cartoons and stickers, and the best part is you don’t need any technical expertise to get the job done.
Of course, for a long time, Whatsapp didn’t allow its users to use third-party animated stickers within the messenger. But, recently the messaging platform introduced a custom “stickers pack” feature that now allows people to upload their own stickers and create a dedicated sticker app.
You can also rely on several third-party sticker designer applications to get the job done. So, if you have been looking for a way to use your own face as an animated sticker in Whatsapp, continue reading. In this guide, we’ll walk you through different ways to create and upload a custom cartoon sticker in Whatsapp and make your Whatsapp chats more fun.
In this article
01 [How to Create Your Own Custom Animated Whatsapp Stickers](#Part 1)
02 [How to Create Custom Animated Whatsapp Stickers on Android and iPhone](#Part 2)
Part 1 How to Create Your Own Custom Animated Whatsapp Stickers
Now, before we go any further, I would like to point out that Whatsapp doesn’t allow users to directly create a custom cartoon sticker. There’s no AR feature that’ll turn your face into a cartoon character. So, to use a cartoon Whatsapp profile picture, you’ll have to rely on a third-party tool to get the job done. Based on which platform you use to access Whatsapp, you can choose a wide variety of Whatsapp animated sticker creators and use them to design custom cartoon stickers to make traditional Whatsapp conversations more fun.
One of the easiest ways to create custom stickers for Whatsapp is to use Wondershare Wondershare Filmora Video Editor . Filmora is a full-scale video editing software that’s specifically designed to help editors unleash their creativity and create stunning movies for different platforms.
For Win 7 or later (64-bit)
For macOS 10.12 or later
Filmora is among the most popular video editing tools that many creators use to edit high-quality YouTube vlogs and other types of videos for other platforms. However, Wondershare Filmora is not just a video editing tool. You can also use it to create custom cartoon animations and export them in the desired format within a few seconds. Filmora has a timeline-based interface that makes it relatively easier for editors to streamline the entire editing process while ensuring that none of the shots go missing.

Filmora also has a built-in media store - known as FilmStocks - where you can find hundreds of video effects, animations, animated characters, etc. FilmStocks also offers access to copyright-free music, allowing creators to use high-quality music in their videos without worrying about unexpected copyright strikes.
So, if you are looking for an all-in-one tool to create Whatsapp cartoon stickers, install Wondershare Filmora on your computer and start turning your face into an animated sticker.
Part 1 How to Create Custom Animated Whatsapp Stickers on Android and iPhone
One of the tools that can help you do the job is “Toon Me”. As the name implies, Toon Me is an online platform that’s designed to help users turn their faces into respective cartoon stickers. It’s designed by the developers at Photo Labs - an online platform that makes photo editing a hassle-free task. Since the tool is designed by expert developers, you can expect to get the best results in the end. And, the best part is creating custom cartoon characters using Toon Me is a relatively easy process.

All you have to do is download Toon Me on your phone and use the camera to create a Whatsapp cartoon sticker for yourself. The app is available on both Google Play Store and Apple’s App Store. It means regardless of the smartphone you’re using, Toon Me will allow you to design a Whatsapp cartoon sticker without any hassle.
Like Toon Me, there are dozens of other applications you can install on your smartphone to create personalized animated stickers. One such example is Sticker Maker. Sticker Maker is an Android application that’ll allow you to capture your face and turn it into an animated sticker. It’s compatible across different Android versions and runs smoothly on all Android models. So, if you own an Android device, here’s the step-by-step process to use Sticker Maker to turn your face into an animated sticker.
Step 1 - Start by installing Sticker Maker on your smartphone and launch the application to get started.
Step 2 - On its home screen, click the “Create a New Sticker Pack” option.
Step 3 - Give the sticker pack a name and then, press enter to proceed further.
Step 4 - At this point, you can either select one of the existing pictures from your Gallery or open the camera to click a fresh selfie. Either way, upload the picture and let the app convert it into a corresponding sticker.
Step 5 - You can upload 8-10 pictures at once and create the entire sticker pack instantly. And, once you have successfully created the sticker pack, simply click the “Add to Whatsapp” button.

That’s it; the selected sticker pack will get added to your Whatsapp’s sticker collection and you’ll be able to use them right away. That’s how quick and easy it is to create custom Whatsapp cartoons using different tools on your smartphone.
● Ending Thoughts →
● Using personalized Whatsapp cartoon stickers is a great way to make Whatsapp conversations fun.
● Wondershare Filmora is a feature-packed video editing software that’s designed to help creators create stunning videos and Whatsapp stickers. Its timeline-based interface and built-in media store will allow you to create stunning Whatsapp stickers without any hassle
● You can also download dedicated sticker maker applications on your iPhone or Android devices and use them directly to create visually appealing animated stickers for Whatsapp.
Let me ask you a question - how much fun would it be if you could create your own animated stickers and send them to your friends and family members on Whatsapp? I mean, it would make the entire conversation more fun and also add a personal element to the entire chat. Right? Well, to tell you the truth, it is possible to create Whatsapp cartoons and stickers, and the best part is you don’t need any technical expertise to get the job done.
Of course, for a long time, Whatsapp didn’t allow its users to use third-party animated stickers within the messenger. But, recently the messaging platform introduced a custom “stickers pack” feature that now allows people to upload their own stickers and create a dedicated sticker app.
You can also rely on several third-party sticker designer applications to get the job done. So, if you have been looking for a way to use your own face as an animated sticker in Whatsapp, continue reading. In this guide, we’ll walk you through different ways to create and upload a custom cartoon sticker in Whatsapp and make your Whatsapp chats more fun.
In this article
01 [How to Create Your Own Custom Animated Whatsapp Stickers](#Part 1)
02 [How to Create Custom Animated Whatsapp Stickers on Android and iPhone](#Part 2)
Part 1 How to Create Your Own Custom Animated Whatsapp Stickers
Now, before we go any further, I would like to point out that Whatsapp doesn’t allow users to directly create a custom cartoon sticker. There’s no AR feature that’ll turn your face into a cartoon character. So, to use a cartoon Whatsapp profile picture, you’ll have to rely on a third-party tool to get the job done. Based on which platform you use to access Whatsapp, you can choose a wide variety of Whatsapp animated sticker creators and use them to design custom cartoon stickers to make traditional Whatsapp conversations more fun.
One of the easiest ways to create custom stickers for Whatsapp is to use Wondershare Wondershare Filmora Video Editor . Filmora is a full-scale video editing software that’s specifically designed to help editors unleash their creativity and create stunning movies for different platforms.
For Win 7 or later (64-bit)
For macOS 10.12 or later
Filmora is among the most popular video editing tools that many creators use to edit high-quality YouTube vlogs and other types of videos for other platforms. However, Wondershare Filmora is not just a video editing tool. You can also use it to create custom cartoon animations and export them in the desired format within a few seconds. Filmora has a timeline-based interface that makes it relatively easier for editors to streamline the entire editing process while ensuring that none of the shots go missing.
Filmora also has a built-in media store - known as FilmStocks - where you can find hundreds of video effects, animations, animated characters, etc. FilmStocks also offers access to copyright-free music, allowing creators to use high-quality music in their videos without worrying about unexpected copyright strikes.
So, if you are looking for an all-in-one tool to create Whatsapp cartoon stickers, install Wondershare Filmora on your computer and start turning your face into an animated sticker.
Part 1 How to Create Custom Animated Whatsapp Stickers on Android and iPhone
One of the tools that can help you do the job is “Toon Me”. As the name implies, Toon Me is an online platform that’s designed to help users turn their faces into respective cartoon stickers. It’s designed by the developers at Photo Labs - an online platform that makes photo editing a hassle-free task. Since the tool is designed by expert developers, you can expect to get the best results in the end. And, the best part is creating custom cartoon characters using Toon Me is a relatively easy process.
All you have to do is download Toon Me on your phone and use the camera to create a Whatsapp cartoon sticker for yourself. The app is available on both Google Play Store and Apple’s App Store. It means regardless of the smartphone you’re using, Toon Me will allow you to design a Whatsapp cartoon sticker without any hassle.
Like Toon Me, there are dozens of other applications you can install on your smartphone to create personalized animated stickers. One such example is Sticker Maker. Sticker Maker is an Android application that’ll allow you to capture your face and turn it into an animated sticker. It’s compatible across different Android versions and runs smoothly on all Android models. So, if you own an Android device, here’s the step-by-step process to use Sticker Maker to turn your face into an animated sticker.
Step 1 - Start by installing Sticker Maker on your smartphone and launch the application to get started.
Step 2 - On its home screen, click the “Create a New Sticker Pack” option.
Step 3 - Give the sticker pack a name and then, press enter to proceed further.
Step 4 - At this point, you can either select one of the existing pictures from your Gallery or open the camera to click a fresh selfie. Either way, upload the picture and let the app convert it into a corresponding sticker.
Step 5 - You can upload 8-10 pictures at once and create the entire sticker pack instantly. And, once you have successfully created the sticker pack, simply click the “Add to Whatsapp” button.
That’s it; the selected sticker pack will get added to your Whatsapp’s sticker collection and you’ll be able to use them right away. That’s how quick and easy it is to create custom Whatsapp cartoons using different tools on your smartphone.
● Ending Thoughts →
● Using personalized Whatsapp cartoon stickers is a great way to make Whatsapp conversations fun.
● Wondershare Filmora is a feature-packed video editing software that’s designed to help creators create stunning videos and Whatsapp stickers. Its timeline-based interface and built-in media store will allow you to create stunning Whatsapp stickers without any hassle
● You can also download dedicated sticker maker applications on your iPhone or Android devices and use them directly to create visually appealing animated stickers for Whatsapp.
Also read:
- Updated 2024 Approved 10 Best Free GIF Apps for iPhone and iPad
- 2024 Approved 12 Best Stop Motion Studios Worth Recommending
- New 2024 Approved Most Popular Tips on Learning Animate Rigging
- New FREE Top 10 Best Convert Video Between GIF and Software High Quality, 2024
- In 2024, How to Create A GIF with Sound?
- What Wikipedia Cant Tell You About the 10 Batman Cartoons for 2024
- In 2024, 12 Dubbed Anime Websites to Watch for Free
- 2024 Approved Best 12 Illusion Gifs Top Picks
- Updated 2024 Approved 15 Best Pics Collage Apps Top Picks
- New In 2024, A Beginners Guide for Learning 3D Animation
- New 5 Ways You Never Heard of for Converting MP4 to GIF in Photoshop for 2024
- New 12 Animation Video Maker That Can Triple Conversion Rates for 2024
- Updated In 2024, 15 Top Collage Makers to Create Aesthetic Collages
- How to Make Whiteboard Animation Videos
- New In 2024, Can I Still Do Animated Logo Design Without Design Skills?
- Updated 10 Photoshop Cartoon Effects For Creatives for 2024
- New In 2024, Thousands Already Found 15 Best Sites to Watch Cartoons Online Free And So Can You
- New Something About Types of Motion Graphics for 2024
- Updated 10 Stunning Stop Motion Movies You Should Not Miss for 2024
- How to Insert a GIF Into Powerpoint
- New In 2024, How To Turn Yourself Into Anime Character
- New 2024 Approved How to Make Whiteboard Animation Videos
- Updated 15 Animated Characters We All Had A Crush On for 2024
- New 10 Top Tools to Make Pic Collage for Windows
- Updated 15 Best Collage Makers to Create Aesthetic Collages
- 2024 Approved Ready to Animate Game Character From Scratch?
- New What Is the Best Collage Photo Grid Maker - Experts Choice for 2024
- New In 2024, Best GIF Resizers to Reduce GIF Size
- Updated Best GIF Maker Software for Windows and Mac for 2024
- New 2024 Approved Top 4 Websites to Get Anime Footage for Free
- Updated In 2024, Best Websites to Download Animated GIFs for Free-Free GIF Download
- Updated How to Send and Add Snapchat GIFs 100 The Easy Way for 2024
- New In 2024, Something About Types of Motion Graphics
- 2024 Approved Top 3 Ways to Create Gif Images with Great 3D Gif Maker
- Updated In 2024, 6 Proven Ways to Dub Anime for Anime Voice Actor
- 2024 Approved How To Learn Cartoon Sketch Drawing— Pencil Sketch for Beginners
- New Have You Seen the Facebook Cartoon App Everyones Using Lately
- New 2024 Approved Best 10 Old Cartoons From Cartoon Network That You Miss
- New 2024 Approved Before You Learn Facebook Slideshow 5 Things You Should Know
- In 2024, Hacks to do pokemon go trainer battles For Vivo Y100t | Dr.fone
- How To Repair iOS System of Apple iPhone 11? | Dr.fone
- In 2024, How Can Sony Xperia 10 VMirror Share to PC? | Dr.fone
- In 2024, How to Track Lava Blaze Pro 5G Location without Installing Software? | Dr.fone
- How to Unlock iPhone 14 Pro, Apples New iPhone
- How to Fix Locked Apple ID on iPhone 6s Plus
- 2024 Approved A Detailed Review of Murf.ai AI Text-to-Speech Tool
- How To Bypass iCloud By Checkra1n Even From Apple iPhone 7 If Youve Tried Everything
- In 2024, 2 Ways to Transfer Text Messages from Oppo Reno 8T 5G to iPhone 15/14/13/12/11/X/8/ | Dr.fone
- Why does the pokemon go battle league not available On Motorola Edge+ (2023) | Dr.fone
- In 2024, 3 Methods to Mirror Itel P55+ to Roku | Dr.fone
- 3uTools Virtual Location Not Working On Poco F5 Pro 5G? Fix Now | Dr.fone
- In 2024, Dose Life360 Notify Me When Someone Checks My Location On HTC U23 Pro? | Dr.fone
- In 2024, Edit and Send Fake Location on Telegram For your Apple iPhone 11 Pro Max in 3 Ways | Dr.fone
- Play Store Not Working On Motorola Moto G04? 8 Solutions Inside | Dr.fone
- How To Do Nokia C12 Plus Screen Sharing | Dr.fone
- Undelete lost music from Motorola Edge+ (2023)
- In 2024, Ultimate Guide to Catch the Regional-Located Pokemon For Oppo A79 5G | Dr.fone
- Hassle-Free Ways to Remove FRP Lock on Nokia C02with/without a PC
- How to Fix Error 495 While Download/Updating Android Apps On Xiaomi Redmi Note 13 5G | Dr.fone
- What You Need To Know To Improve Your ZTE Axon 40 Lite Hard Reset | Dr.fone
- Best Anti Tracker Software For Samsung Galaxy XCover 6 Pro Tactical Edition | Dr.fone
- In 2024, How I Transferred Messages from Realme V30T to iPhone 12/XS (Max) in Seconds | Dr.fone
- In 2024, How To Delete iCloud Account Remove Your Apple ID Permanently On iPhone SE
- Bypassing Google Account With vnROM Bypass For Realme 11X 5G
- Why does the pokemon go battle league not available On Realme C53 | Dr.fone
- iPogo will be the new iSpoofer On Samsung Galaxy S23+? | Dr.fone
- Full Tutorial to Bypass Your Infinix Face Lock?
- Turning Off Two Factor Authentication From Apple iPhone 14 Pro Max? 5 Tips You Must Know
- In 2024, 5 Ways To Teach You To Transfer Files from Motorola Edge 40 Pro to Other Android Devices Easily | Dr.fone
- How To Create an Apple Developer Account From iPhone 15 Pro
- In 2024, Does Airplane Mode Turn off GPS Location On Oppo Find X7? | Dr.fone
- In 2024, The Top 5 Android Apps That Use Fingerprint Sensor to Lock Your Apps On Oppo Find N3
- Best Ways on How to Unlock/Bypass/Swipe/Remove Nokia 130 Music Fingerprint Lock
- Prank Your Friends! Easy Ways to Fake and Share Google Maps Location On Tecno Camon 20 Pro 5G | Dr.fone
- Itel S23+ Stuck on Screen – Finding Solutions For Stuck on Boot | Dr.fone
- How To Fix Unresponsive Phone Touchscreen Of Honor 90 Pro | Dr.fone
- Title: What Wikipedia Wont Tell You Specifically About Character Rigging
- Author: Elon
- Created at : 2024-05-19 03:04:27
- Updated at : 2024-05-20 03:04:27
- Link: https://animation-videos.techidaily.com/what-wikipedia-wont-tell-you-specifically-about-character-rigging/
- License: This work is licensed under CC BY-NC-SA 4.0.
