
:max_bytes(150000):strip_icc():format(webp)/GettyImages-642250032-010d3026f565420eac9ac098bced6278.jpg)
2024 Approved How to Stop Animation From Looping in Unity
How to Stop Animation From Looping in Unity
How to Stop Animation from Looping in Unity
An easy yet powerful editor
Numerous effects to choose from
Detailed tutorials provided by the official channel
Unity is an IDE interface all designed exclusively for game developers. However, you can do much more with Unity than game development. But, our main concern here is something else than this subject. You’re looking for easy tutorials on Unity stop animation!

And luckily, we’ve got you covered as we’ve briefly explained how to perform Unity stop animation from looping and the steps to make a smooth animation.
In this article
01 [What is Unity Used for?](#Part 1)
02 [How to Stop Animation Playing in Loop in Unity?](#Part 2)
03 [How to Smooth an Animation in Unity?](#Part 3)
Part 1 What is Unity Used for?
Unity is a software tool friendly to all the game developers out there. This tool is used by the large community of game developers to power and create their game development projects. And, the software is more of a professional means and not a simple pared-down ‘game builder .’Unity also offers one of the most significant inbuilt features like rendering, physics, and collision detection. Thus, one of the powerful aspects of Unity is that game developers need not go out of the box and create everything from scratch. Instead, they are available with the physics engine required to develop games quickly. Another robust feature of Unity is that it includes an excellent ‘Asset Store’ where developers can upload their creations and showcase them to the whole community. So, that’s Unity and its uses in a broader scope!
Before we take you through the next section, it’s important to mention that Unity is also known as cross-platform IDE, where IDE stands for ‘integrated development environment.’ So, it can be called more of an interface with access to all the tools and resources required to develop games.
Apart from the game development, Unity is known for other excellent usage purposes as:
● Simulations
● Animation
● Architectural Visualization
● Previsualization for Film
● Interactive Experiences
Among these features only, we’ll describe Unity stop animation from looping in detail.
Part 2 How to Stop Animation Playing in Loop in Unity?
As we said, we’ll describe to you the most accessible definition of how to stop Animation in Unity. Thus, there are simple steps that we’d like to define firsthand before explaining the whole procedure with an image-centric step-by-step guide.
So, those simple steps to stop motion animation in After Effects in the loop also go like below:
Step 1 Go to the Project tab and select Animation.
Step 2 Open the Inspector tab.
Step 3 Uncheck the checkbox Loop Time, and you’re good to go!
We’ll describe the same, i.e., Unity stop animation from looping through the step guide below.
In this guide, we’ll explain right from applying the Animation so that you’d understand better. So, let’s begin without any further ado!
01Step 1 Delete animation folder
We have already created an animation folder in the folder named as own Animation, so click that folder, click the animation folder, and then another folder along with as shown below. Hold the Shift key and click another folder. Then, right-click the Delete tab as depicted below.
Similarly, you can also delete the Animation if you wish.

02Step 2 Create an animation for the subject
Now, you may have different subjects. We’re creating Animation on Mobile Joystick for reference, as shown below.

Now, hit the Create tab on the Unity panel below. Then, proceed to save your Animation in the folder you’ve already created for the same.

03Step 3 Give positions to the animation
Firstly, hit the red-icon button used for recording, as shown below.

Give the position on the left side after you click the button. And, then, clicking almost near to 3you can give the position to the right-hand side as shown below.

Now, the animation has been set. You can see the animation from left to right if you click the Play button. So, here, you can see the results of infinite loop animation, which won’t stop.

You can follow two ways to stop this Animation in Unity from looping, and we’ll describe both methods below.
04Step 4 Stop animation Unity Way 1
Go to the animation folder where you’ve created the animation and click the New Animation icon as shown below.

Now, you have to uncheck the Loop Time tab on the top-right corner of the Unity panel.

05Step 5 Stop animation Unity Way 2
Alternatively, you can click the Animator tab on the top of the Unity panel and double-tap the New Animation button. Then, it will also delete or uncheck the loop time, as shown below.

These were all the steps to stop animation Unity.
Part 3 How to Smooth an Animation in Unity?
After done with Unity stop animation, it’s time to smooth your Unity animation. Again, we will describe it simply if you’re used to the Unity platform and then with a step guide with respective screenshots.
So, stay tuned until the end to reveal the easy steps of smoothing an animation in Unity.
Select the Dopesheet at the bottom of the animation window. Then, you need to switch to the ‘Curves’ view once you create your Animation in the Dopesheet. These animation curves help you accelerate and decelerate animations so that the movement and other things can stop and start smoothly.
So, let’s begin with the step guide tutorial on the same as follows:
For reference, take an example of a metronome object imported from Blender to Unity. Here, we’ve grouped all the pendulum objects under one rotation so that when we move the pendulum, it pivots to the correct point, as shown below.

01Add the animator
So, the first step begins with adding the Animator component to the parent object. You can do this by clicking the Add Component tab on the Unity panel’s left side, searching for Animator, and clicking the Animator.
You will also need a controller to control the animations. Go to your animation folder, right-click, and select Create> Animator Controller tab.

Let’s call or give it a name metronome animator as shown below.
Then, you need to drag this into your animator component. Again, you need to go to your animations folder, right-click, select Create> Animations tab.
Now, give this a name pendulum full swing.
02Open the animator tab
Now, open the animator tab, drag this pendulum swing animation to that panel, and double-tap the yellow-colored New Animation button.

03Create an animation
With the game object selected, the animated metronome pendulum, in this case, we’d like to animate the X component of the rotation. So, you need to click Add Property> Transform> Rotation tab and click the + sign on its right, as shown below.
Now, click the plus sign automatically to set two keyframes, one at the beginning and one at the end. Now, click on end select all, and then delete for now.

04Add keyframes to rotate the pendulum
With the first set of keyframes and the pendulum all way to the right, go halfway and change the rotation to the left on the left panel of Unity. Then, add another keyframe.

05Slow down the animation
As you can observe, the Animation of this pendulum is in a straight line and feels unnatural to the eyes. Thus, we’re required to smooth this Animation now! For this purpose, go to the Curves; you can see the pink properties of rotation as going from one side to another.

Now, you need to adjust these pink curves. Start by adding a key to one of its sides, as shown below. After that, it is all on you how slow or fasts you want these values to be.
Here, you’re all done smoothing the animation in Unity after learning the stop-animation Unity tutorial.
You can even stop motion animation on Photoshop with the above tutorial.
06Bonus Tip:
We want to introduce an excellent video editor software called Filmora Video Editor . It is from the house of Wondershare, a well-known software company worldwide.

Wondershare Filmora - Best Video Editor for Mac/Windows
5,481,435 people have downloaded it.
Build unique custom animations without breaking a sweat.
Focus on creating epic stories and leave the details to Filmora’s auto features.
Start a creative adventure with drag & drop effects and endless possibilities.
Filmora simplifies advanced features to save you time and effort.
Filmora cuts out repetition so you can move on to your next creative breakthrough.
With Filmora, you can easily add Animation and edit your videos to make them look world-class. The latest version and new updates are eye-candy and quick fix for beginner video editors.
So, please pay a visit to the Filmora website and check out its Mac and Windows version for free today.
● Key Takeaways from This Episode →
● Learning the concept and usage of Unity
● A tutorial on how to stop animation in Unity from looping
● A tutorial on how to smooth animation in Unity
● Introduction to Filmora, the top-most video editor software for beginners.
Unity is an IDE interface all designed exclusively for game developers. However, you can do much more with Unity than game development. But, our main concern here is something else than this subject. You’re looking for easy tutorials on Unity stop animation!
And luckily, we’ve got you covered as we’ve briefly explained how to perform Unity stop animation from looping and the steps to make a smooth animation.
In this article
01 [What is Unity Used for?](#Part 1)
02 [How to Stop Animation Playing in Loop in Unity?](#Part 2)
03 [How to Smooth an Animation in Unity?](#Part 3)
Part 1 What is Unity Used for?
Unity is a software tool friendly to all the game developers out there. This tool is used by the large community of game developers to power and create their game development projects. And, the software is more of a professional means and not a simple pared-down ‘game builder .’Unity also offers one of the most significant inbuilt features like rendering, physics, and collision detection. Thus, one of the powerful aspects of Unity is that game developers need not go out of the box and create everything from scratch. Instead, they are available with the physics engine required to develop games quickly. Another robust feature of Unity is that it includes an excellent ‘Asset Store’ where developers can upload their creations and showcase them to the whole community. So, that’s Unity and its uses in a broader scope!
Before we take you through the next section, it’s important to mention that Unity is also known as cross-platform IDE, where IDE stands for ‘integrated development environment.’ So, it can be called more of an interface with access to all the tools and resources required to develop games.
Apart from the game development, Unity is known for other excellent usage purposes as:
● Simulations
● Animation
● Architectural Visualization
● Previsualization for Film
● Interactive Experiences
Among these features only, we’ll describe Unity stop animation from looping in detail.
Part 2 How to Stop Animation Playing in Loop in Unity?
As we said, we’ll describe to you the most accessible definition of how to stop Animation in Unity. Thus, there are simple steps that we’d like to define firsthand before explaining the whole procedure with an image-centric step-by-step guide.
So, those simple steps to stop motion animation in After Effects in the loop also go like below:
Step 1 Go to the Project tab and select Animation.
Step 2 Open the Inspector tab.
Step 3 Uncheck the checkbox Loop Time, and you’re good to go!
We’ll describe the same, i.e., Unity stop animation from looping through the step guide below.
In this guide, we’ll explain right from applying the Animation so that you’d understand better. So, let’s begin without any further ado!
01Step 1 Delete animation folder
We have already created an animation folder in the folder named as own Animation, so click that folder, click the animation folder, and then another folder along with as shown below. Hold the Shift key and click another folder. Then, right-click the Delete tab as depicted below.
Similarly, you can also delete the Animation if you wish.
02Step 2 Create an animation for the subject
Now, you may have different subjects. We’re creating Animation on Mobile Joystick for reference, as shown below.
Now, hit the Create tab on the Unity panel below. Then, proceed to save your Animation in the folder you’ve already created for the same.
03Step 3 Give positions to the animation
Firstly, hit the red-icon button used for recording, as shown below.
Give the position on the left side after you click the button. And, then, clicking almost near to 3you can give the position to the right-hand side as shown below.
Now, the animation has been set. You can see the animation from left to right if you click the Play button. So, here, you can see the results of infinite loop animation, which won’t stop.
You can follow two ways to stop this Animation in Unity from looping, and we’ll describe both methods below.
04Step 4 Stop animation Unity Way 1
Go to the animation folder where you’ve created the animation and click the New Animation icon as shown below.
Now, you have to uncheck the Loop Time tab on the top-right corner of the Unity panel.
05Step 5 Stop animation Unity Way 2
Alternatively, you can click the Animator tab on the top of the Unity panel and double-tap the New Animation button. Then, it will also delete or uncheck the loop time, as shown below.
These were all the steps to stop animation Unity.
Part 3 How to Smooth an Animation in Unity?
After done with Unity stop animation, it’s time to smooth your Unity animation. Again, we will describe it simply if you’re used to the Unity platform and then with a step guide with respective screenshots.
So, stay tuned until the end to reveal the easy steps of smoothing an animation in Unity.
Select the Dopesheet at the bottom of the animation window. Then, you need to switch to the ‘Curves’ view once you create your Animation in the Dopesheet. These animation curves help you accelerate and decelerate animations so that the movement and other things can stop and start smoothly.
So, let’s begin with the step guide tutorial on the same as follows:
For reference, take an example of a metronome object imported from Blender to Unity. Here, we’ve grouped all the pendulum objects under one rotation so that when we move the pendulum, it pivots to the correct point, as shown below.
01Add the animator
So, the first step begins with adding the Animator component to the parent object. You can do this by clicking the Add Component tab on the Unity panel’s left side, searching for Animator, and clicking the Animator.
You will also need a controller to control the animations. Go to your animation folder, right-click, and select Create> Animator Controller tab.
Let’s call or give it a name metronome animator as shown below.
Then, you need to drag this into your animator component. Again, you need to go to your animations folder, right-click, select Create> Animations tab.
Now, give this a name pendulum full swing.
02Open the animator tab
Now, open the animator tab, drag this pendulum swing animation to that panel, and double-tap the yellow-colored New Animation button.
03Create an animation
With the game object selected, the animated metronome pendulum, in this case, we’d like to animate the X component of the rotation. So, you need to click Add Property> Transform> Rotation tab and click the + sign on its right, as shown below.
Now, click the plus sign automatically to set two keyframes, one at the beginning and one at the end. Now, click on end select all, and then delete for now.
04Add keyframes to rotate the pendulum
With the first set of keyframes and the pendulum all way to the right, go halfway and change the rotation to the left on the left panel of Unity. Then, add another keyframe.
05Slow down the animation
As you can observe, the Animation of this pendulum is in a straight line and feels unnatural to the eyes. Thus, we’re required to smooth this Animation now! For this purpose, go to the Curves; you can see the pink properties of rotation as going from one side to another.
Now, you need to adjust these pink curves. Start by adding a key to one of its sides, as shown below. After that, it is all on you how slow or fasts you want these values to be.
Here, you’re all done smoothing the animation in Unity after learning the stop-animation Unity tutorial.
You can even stop motion animation on Photoshop with the above tutorial.
06Bonus Tip:
We want to introduce an excellent video editor software called Filmora Video Editor . It is from the house of Wondershare, a well-known software company worldwide.
Wondershare Filmora - Best Video Editor for Mac/Windows
5,481,435 people have downloaded it.
Build unique custom animations without breaking a sweat.
Focus on creating epic stories and leave the details to Filmora’s auto features.
Start a creative adventure with drag & drop effects and endless possibilities.
Filmora simplifies advanced features to save you time and effort.
Filmora cuts out repetition so you can move on to your next creative breakthrough.
With Filmora, you can easily add Animation and edit your videos to make them look world-class. The latest version and new updates are eye-candy and quick fix for beginner video editors.
So, please pay a visit to the Filmora website and check out its Mac and Windows version for free today.
● Key Takeaways from This Episode →
● Learning the concept and usage of Unity
● A tutorial on how to stop animation in Unity from looping
● A tutorial on how to smooth animation in Unity
● Introduction to Filmora, the top-most video editor software for beginners.
Pencil2D Animation Tutorial Overview
Animation is one of the trendiest technologies. The basics of animation were formulated in the 2000s from the moving page trick. The first few animators learned that animation is nothing but continuous switching of frames from one to another. One animated still is switched to another and then another in a quick sequence such that it makes a sequential moving frame. Today, animation has come a long way from where it started and today it is used for several commercials, tutorials, and even educational lecture videos. Pencil2D animation is an amazing animation tool that can be used by even neophytes. Want to learn more about 2d pencil animation and its super cool features? Well, you’re at the perfect place. Today we’ll be telling you more about pencil 2d animation and giving you a small overview of its usage.
In this article
01 [What is Pencil2D and How to Install?](#Part 1)
02 [Overview of the Application Interface](#Part 2)
03 [How to Create Animations with Pencil2D?](#Part 3)
Part 1 What is Pencil2D and How to Install?
2d pencil animation is popular open-source animation software. The software is pretty cool for those who are newly starting off with animation. The open-source software is available on all major operating systems including Windows, Mac OS, and Unix. Using this amazing software, we can make amazing cartoon characters using traditional cartoon-making techniques such as tracing drawing, skinning. Using this software, you can save animations in the native animation formats or extract the animation to PNG, JPG, or other formats. Wish to explore more about pencil 2d animation software? Follow the steps listed below in order to download the pencil2d animation software.
● Firstly, you need to ensure that your device has ample space on it.
● Next, you need to head to the official website of pencil2d.
● Further, you need to select your operating system. You can find different versions of the software, namely windows 7/8/10, windows XP/ Vista, Mac OS, and Linux
● Once downloaded, you need to start the installation setup. Note that this may take a while to download.
● Once downloaded, you can start familiarizing yourself with the software.
Part 2 Overview of the Application Interface
1. The brush tool
The brush tool must have reminded you of paint software in windows. The brush tool is a popular and highly utilitarian basic tool in Pencil2D animation software. You can either access it via the user interface or quickly access it by using the B key on your keyboard. As the name suggests, the brush tool is literally just a brush that allows you to draw and paint any sort of drawings of different shades, colors, and thickness. If you wish to change the color, you can find a color palette on the left side of the interface.

2. The eraser tool
You’ve a brush tool; it’s almost common sense that there’d be an eraser. The eraser tool has an eraser as its icon. If you wish to use the eraser, click on the eraser tool or simply click the E button on your keyboard. Once you’ve selected the tool, you need to simply hover over the parts you wish to erase.

3. Bucket tool
The bucket tool is another useful tool that you can find in the left tool pane of pencil 2d animation. The tool icon looks like a bucket and it is used to fill an entire area with a particular color. You can choose the color you’d like to fill from the color pallet available on the left side. Alternatively, you can also access the bucket tool by pressing the “K” key on your keyboard.

4. Custom colors
A cool feature that you can find on pencil 2d animation software is the custom color one. You can merge and mix colors according to your choice and create your own color. To do so, you need to click on the small color box that you’ll find at the top right of your screen. By doing so, a huge color wheel will appear on your screen. Now you can either enter values of the R, G, and B if you wish to merge different colors and make a new one or select a particular color from the huge color wheel that appears in front of you. These colors vary in gradient, shade, and a lot of different factors.

5. The Undo button
The Undo button is a highly useful functionality for the lazy ones who do not wish to erase the mistake they made. By undoing, the previous step gets reverted and you can start over again. The traditional undo shortcut, Ctrl+Z does work in the pencil 2d animation. Alternatively, you can also use the undo feature via the user interface. You can do so by heading over to the edit option in the topmost bar. The first option in the drop-down menu would be undo.

Part 3 How to Create Animations with Pencil2D?
Creating animations in pencil 2d is slightly sophisticated and certainly needs minimal practice. Follow the steps listed below in order to learn how to animate through pencil 2d to make your first animation.
1. Ensure that you’ve turned on your bitmap on the first frame
Animation works through quick switching of frame which makes it appear as though the object is in motion. By turning on the bitmap, pencil 2d animation ensures that you’ve no blank frames at the start of your animation.

2. Draw your animated character
Since you’re trying to animate, you need to have an animated character or object. Hence, the first step to making your first animation is by drawing the object or character that you wish to animate. Try to make the character as realistic as possible. To start with, maybe you can try animating just a stick figure; this is because animating a complex character is rather difficult for beginners.

3.The three circular buttons
Once you’re satisfied with the character you draw, you need to spot the 3 circular buttons which are arranged in the “+”,”-“,”+” order. By pressing the first “+” button, you can add an empty slide. If you click on the “-“ button, it will delete the most recent slide and if you click on the next “+” button, it will duplicate the current slide.

4.Repeat until you get an animation
Now that you know how to deal with multiple frames, you can continue creating frames and making the animated characters move by tweaking with the drawing in every frame. For instance, if you wish to show that the animated character is running, in one of the frames the left leg should be forward and in the next one, the right leg should be forward. Keep repeating this process of tweaking with frames until you’ve your desired animated video.

Now that we’ve seen the process of animation via Pencil2D, you must have realized that it’s pretty orthodox and complicated. Moreover, you cannot carry out rigging and other newer animation techniques. Hence, we introduce you to Wondershare Filmora Video Editor , your all in one animation making platform. Here you can animate without any hassle. Wondershare Filmora makes your job easier with multiple animation features, you needn’t even draw your animated character. You can simply import a custom-made character and rig the character. Further, you need not deal with multiple frames and personally pay attention to each frame. All in all, Filmora makes your job simple and your animations much more seamless.
For Win 7 or later (64-bit)
For macOS 10.12 or later
Key Takeaways from This Episode
● Animation is actively being used for multiple purposes.
● Today we took a look at one of the orthodox yet popular animation tools, Pencil2D.
● The Pencil2D animation tool offers you multiple functionalities and allows you to make animations.
● Next, we also took a look at Wondershare Filmora Pro, your one-stop shop for all animation needs. You can find multiple animation features here and it’s all so simple.
● What are you waiting for? Your next animation is just one click away.
02 [Overview of the Application Interface](#Part 2)
03 [How to Create Animations with Pencil2D?](#Part 3)
Part 1 What is Pencil2D and How to Install?
2d pencil animation is popular open-source animation software. The software is pretty cool for those who are newly starting off with animation. The open-source software is available on all major operating systems including Windows, Mac OS, and Unix. Using this amazing software, we can make amazing cartoon characters using traditional cartoon-making techniques such as tracing drawing, skinning. Using this software, you can save animations in the native animation formats or extract the animation to PNG, JPG, or other formats. Wish to explore more about pencil 2d animation software? Follow the steps listed below in order to download the pencil2d animation software.
● Firstly, you need to ensure that your device has ample space on it.
● Next, you need to head to the official website of pencil2d.
● Further, you need to select your operating system. You can find different versions of the software, namely windows 7/8/10, windows XP/ Vista, Mac OS, and Linux
● Once downloaded, you need to start the installation setup. Note that this may take a while to download.
● Once downloaded, you can start familiarizing yourself with the software.
Part 2 Overview of the Application Interface
1. The brush tool
The brush tool must have reminded you of paint software in windows. The brush tool is a popular and highly utilitarian basic tool in Pencil2D animation software. You can either access it via the user interface or quickly access it by using the B key on your keyboard. As the name suggests, the brush tool is literally just a brush that allows you to draw and paint any sort of drawings of different shades, colors, and thickness. If you wish to change the color, you can find a color palette on the left side of the interface.
2. The eraser tool
You’ve a brush tool; it’s almost common sense that there’d be an eraser. The eraser tool has an eraser as its icon. If you wish to use the eraser, click on the eraser tool or simply click the E button on your keyboard. Once you’ve selected the tool, you need to simply hover over the parts you wish to erase.
3. Bucket tool
The bucket tool is another useful tool that you can find in the left tool pane of pencil 2d animation. The tool icon looks like a bucket and it is used to fill an entire area with a particular color. You can choose the color you’d like to fill from the color pallet available on the left side. Alternatively, you can also access the bucket tool by pressing the “K” key on your keyboard.
4. Custom colors
A cool feature that you can find on pencil 2d animation software is the custom color one. You can merge and mix colors according to your choice and create your own color. To do so, you need to click on the small color box that you’ll find at the top right of your screen. By doing so, a huge color wheel will appear on your screen. Now you can either enter values of the R, G, and B if you wish to merge different colors and make a new one or select a particular color from the huge color wheel that appears in front of you. These colors vary in gradient, shade, and a lot of different factors.
5. The Undo button
The Undo button is a highly useful functionality for the lazy ones who do not wish to erase the mistake they made. By undoing, the previous step gets reverted and you can start over again. The traditional undo shortcut, Ctrl+Z does work in the pencil 2d animation. Alternatively, you can also use the undo feature via the user interface. You can do so by heading over to the edit option in the topmost bar. The first option in the drop-down menu would be undo.
Part 3 How to Create Animations with Pencil2D?
Creating animations in pencil 2d is slightly sophisticated and certainly needs minimal practice. Follow the steps listed below in order to learn how to animate through pencil 2d to make your first animation.
1. Ensure that you’ve turned on your bitmap on the first frame
Animation works through quick switching of frame which makes it appear as though the object is in motion. By turning on the bitmap, pencil 2d animation ensures that you’ve no blank frames at the start of your animation.
2. Draw your animated character
Since you’re trying to animate, you need to have an animated character or object. Hence, the first step to making your first animation is by drawing the object or character that you wish to animate. Try to make the character as realistic as possible. To start with, maybe you can try animating just a stick figure; this is because animating a complex character is rather difficult for beginners.
3.The three circular buttons
Once you’re satisfied with the character you draw, you need to spot the 3 circular buttons which are arranged in the “+”,”-“,”+” order. By pressing the first “+” button, you can add an empty slide. If you click on the “-“ button, it will delete the most recent slide and if you click on the next “+” button, it will duplicate the current slide.
4.Repeat until you get an animation
Now that you know how to deal with multiple frames, you can continue creating frames and making the animated characters move by tweaking with the drawing in every frame. For instance, if you wish to show that the animated character is running, in one of the frames the left leg should be forward and in the next one, the right leg should be forward. Keep repeating this process of tweaking with frames until you’ve your desired animated video.
Now that we’ve seen the process of animation via Pencil2D, you must have realized that it’s pretty orthodox and complicated. Moreover, you cannot carry out rigging and other newer animation techniques. Hence, we introduce you to Wondershare Filmora Video Editor , your all in one animation making platform. Here you can animate without any hassle. Wondershare Filmora makes your job easier with multiple animation features, you needn’t even draw your animated character. You can simply import a custom-made character and rig the character. Further, you need not deal with multiple frames and personally pay attention to each frame. All in all, Filmora makes your job simple and your animations much more seamless.
For Win 7 or later (64-bit)
For macOS 10.12 or later
Key Takeaways from This Episode
● Animation is actively being used for multiple purposes.
● Today we took a look at one of the orthodox yet popular animation tools, Pencil2D.
● The Pencil2D animation tool offers you multiple functionalities and allows you to make animations.
● Next, we also took a look at Wondershare Filmora Pro, your one-stop shop for all animation needs. You can find multiple animation features here and it’s all so simple.
● What are you waiting for? Your next animation is just one click away.
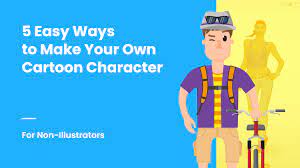
10 Cartoon Character Makers to Create Animated Characters
10 Cartoon Character Makers to Create Animated Characters
An easy yet powerful editor
Numerous effects to choose from
Detailed tutorials provided by the official channel
Learning cartoon making is easy through various application or makers online. Draw cartoon characters sketch in easy steps.

With the changing marketing and business trends, people and business owners are adopting different patterns in the pictures to make them visually good and attractive. Videos and pictures with animated characters look so amazing and gain maximum customers views. This ultimately helps the business owners to generate more leads for their business.
Not only business, but the presence of animated characters is also seen in the stories and status of the people over social media accounts. People impress others through making their own cartoon characters and animated pictures or characters. Earlier it has very tough to create cartoon character, but with so many online makers today, one can easily draw and create cartoon characters. There are various platforms that use software to turn a picture into a cartoon character or even animated picture. There are easy and interesting ways to create cartoon characters. If you love to see and are interested in drawing cartoon characters, then you can make it through various platforms. Let’s see some easy way to create own cartoon character.
In this article
01 [5 Easy Ways to Create Your Own Cartoon Character [For Non-illustrators] ](#Part 1)
02 [5 Create Cartoon Characters to Create Animated Characters for PRO](#Part 2)
03 [How to Create a Cartoon Character: A General Guide](#Part 3)
Part 1 5 Easy Ways to Create Your Own Cartoon Character [For Non-illustrators]
01Through Online Avatar Builders
Avatar building is an extraordinary way of presenting yourself. The best thing with avatar builders is that there is no need to download any application. You can easily do it in your device through online websites. They are the easiest and economical way of creating cartoon. You can add fun elements with these Avatar builders. Some of the websites that offer avatar building tools are:
Cartoonize: You can instantly make cartoon or avatar characters through Cartoonize. It can be used for face customization and adding colors. Face features like eyes, nose, hair style and expressions can be perfectly drawn with this tool. You can learn more by going to their official website.
The process is simple. You can upload your picture, go to cartoonize option at the top of the menu, do the necessary edits and features. Save it and your avatar cartoon is ready.
The other avatar building platforms are charatoon and Face your Manga. For Face your Manga, Adobe Flash Player is required. The gallery can be explored with some famous avatar of popular personalities.
02Character builders
The other way to create your own cartoon character is through character builders. The difference of this cartoon making is that one can create a complete cartoon with complete features. Like from head to toe. GraphicMama Character Maker Packs is one that offers kit to make customized cartoons.
03Tools for converting pictures into cartoons
A perfect cartoon can be made when it resemble truly as you are. The best method for doing that is using software to turn a picture into a cartoon. Filters, facial expressions and styles can be added through this way. Adobe Character Animator is a tool that can be used to convert a picture, catch the facial expression and voice.
You can learn to create cartoon character from photo by following the video
The other two ways are related to taking help of others in making the cartoon characters. Some of them are:
04Outsourcing designers or illustrators
When the perfection level is not achieved through own creation, the other option is to get it done through designers or illustrators. There are freelancers and studio who offer such services. They create cartoon as per the requirement of the customers.
05Modification in Stock cartoon characters
Those who are not having any experience of making cartoons, they can use the stocks cartoon characters and can change them with the use of software.
Part 2 5 Create Cartoon Characters to Create Animated Characters for PRO
A professional cartoon maker need some advance tools and features to give a unique and perfect look to his cartoon drawn. So, for them some applications or cartoon character maker is good. Let’s see some of the makers that are specifically designed for professionals:
01Animaker
This has various themes to make your cartoon look great. It brings life to a character. The steps involve in making a cartoon character is as under:
● As required, select the animated template.
● You can add customized features as such as backgrounds, pictures and animated text.
● Music can also be added and can be selected from the library.
● After the character is ready, you can share or download the video.
02Adobe
This is the most widely platform or maker for creating high quality contents, cartoon avatar and games. Sketch and drawing tool are there in the maker that gives real experience to the cartoon. The platform facilitates exploring the file to WebGL, SVG and Adobe AIR.
You can view how it works and the process in the video-
03Reallusion
Text and voice has given a new definition to the cartoon world. If you desire to add some interesting elements in cartoon through text and voices, then Reallusion is a good option for you. It has 3D head creation tool which can be used to make animated cartoons for mails and e-cards.
You can view how it works and the process in the video-
04Renderforest
This cartoon maker has some great collection of professionally designed templates, to make cartoon making process easy and perfect. Templates for kids, education, character adventure, healthcare and iconic animation are some of the collections one can find in this maker.
The process of cartoon creation is easy with following steps:
● Choose the most excellent cartoon templates or start from zero through sketch,
● You can edit the already available stories. Even animated characters can be used.
● Add some customized features like voice or music, style or colors.
● This is how you can create exclusive vibrant cartoons.
Video can be watched at-
05Biteable
Biteable has several templates like leadership skill tips, travel agent explainer and many more. The video clips, music, animated templates of this maker create engaging cartoon characters.
The process to develop a cartoon video through Biteable is as under:
● Open the maker Biteable
● As per your requirement, pick the one cartoon template
● Log in the account
● You can add many effects like backing music, clips and text.
● As made in the website, you can share on social media and emails.
Part 3 How to Create a Cartoon Character: A General Guide
A professional cartoon expert becomes an expert after a continuous practice. It’s not easy to learn making cartoons. Therefore to be an expert one need to learn the basics and other important principles for cartoon making. A general guide for the same is as under:
● Begin with basic steps
Learn the basic shapes like making ovals, circles and other shapes. This will help you to be perfection in making the basic outline of the cartoon. This will improve you skill and you can explore more possibilities with the basic outlines.
● Shape improvement
This is an advance stage of basic step. This step will help you to define the shape of the cartoon character you are going to draw. It gives structure and design to a character.
● Including details
This stage is more about designing a character. Pose, expression, attires, props are selected in this step. The personality of a character is made better. It makes the character more interesting and engaging.
● Shadow of cartoon character
Before giving a final touch to the character, it is necessary to check the shadow of the picture drawn. It will show whether you are on right path or not.
● Final touch
The last step is adding all details in the character. It may be straight teeth, big smile, messy hairs or anything. Lines can be made fine and clean. You can add colors of your choice.
The other platform or cartoon maker that can be checked out is Filmora.
Wondershare Filmora Video Editor is software used for making, editing and adding effects to pictures or videos. It is easy to use application loaded with many advanced tools and features to make picture and video editing simple. Those who are looking for a robust application for capturing some precious moments through picture and videos, then Filmora is a perfect application.
Filmora can be used to draw and insert cartoon characters in any video. Animation, text and music can be added effectively with Filmora. A beginner can easily learn to create cartoon character online.
Wondershare Filmora
Get started easily with Filmora’s powerful performance, intuitive interface, and countless effects!
Try It Free Try It Free Try It Free Learn More >

● Ending Thoughts →
● Cartoon characters making is not an easy task. But now there are cartoon character maker free which has made easy to learn cartoon making. The various tools used are Avatar maker, cartoon making, turning picture into cartoon and through experts support.
● The different professional cartoon character maker online are Animaker, Reallusion, Biteable and Adobe. Through these cartoon makers making cartoon characters are easy with advanced features.
● Filmora is one of the popular picture and video making and editing software which can also be used for making amazing cartoon characters.
Learning cartoon making is easy through various application or makers online. Draw cartoon characters sketch in easy steps.
With the changing marketing and business trends, people and business owners are adopting different patterns in the pictures to make them visually good and attractive. Videos and pictures with animated characters look so amazing and gain maximum customers views. This ultimately helps the business owners to generate more leads for their business.
Not only business, but the presence of animated characters is also seen in the stories and status of the people over social media accounts. People impress others through making their own cartoon characters and animated pictures or characters. Earlier it has very tough to create cartoon character, but with so many online makers today, one can easily draw and create cartoon characters. There are various platforms that use software to turn a picture into a cartoon character or even animated picture. There are easy and interesting ways to create cartoon characters. If you love to see and are interested in drawing cartoon characters, then you can make it through various platforms. Let’s see some easy way to create own cartoon character.
In this article
01 [5 Easy Ways to Create Your Own Cartoon Character [For Non-illustrators] ](#Part 1)
02 [5 Create Cartoon Characters to Create Animated Characters for PRO](#Part 2)
03 [How to Create a Cartoon Character: A General Guide](#Part 3)
Part 1 5 Easy Ways to Create Your Own Cartoon Character [For Non-illustrators]
01Through Online Avatar Builders
Avatar building is an extraordinary way of presenting yourself. The best thing with avatar builders is that there is no need to download any application. You can easily do it in your device through online websites. They are the easiest and economical way of creating cartoon. You can add fun elements with these Avatar builders. Some of the websites that offer avatar building tools are:
Cartoonize: You can instantly make cartoon or avatar characters through Cartoonize. It can be used for face customization and adding colors. Face features like eyes, nose, hair style and expressions can be perfectly drawn with this tool. You can learn more by going to their official website.
The process is simple. You can upload your picture, go to cartoonize option at the top of the menu, do the necessary edits and features. Save it and your avatar cartoon is ready.
The other avatar building platforms are charatoon and Face your Manga. For Face your Manga, Adobe Flash Player is required. The gallery can be explored with some famous avatar of popular personalities.
02Character builders
The other way to create your own cartoon character is through character builders. The difference of this cartoon making is that one can create a complete cartoon with complete features. Like from head to toe. GraphicMama Character Maker Packs is one that offers kit to make customized cartoons.
03Tools for converting pictures into cartoons
A perfect cartoon can be made when it resemble truly as you are. The best method for doing that is using software to turn a picture into a cartoon. Filters, facial expressions and styles can be added through this way. Adobe Character Animator is a tool that can be used to convert a picture, catch the facial expression and voice.
You can learn to create cartoon character from photo by following the video
The other two ways are related to taking help of others in making the cartoon characters. Some of them are:
04Outsourcing designers or illustrators
When the perfection level is not achieved through own creation, the other option is to get it done through designers or illustrators. There are freelancers and studio who offer such services. They create cartoon as per the requirement of the customers.
05Modification in Stock cartoon characters
Those who are not having any experience of making cartoons, they can use the stocks cartoon characters and can change them with the use of software.
Part 2 5 Create Cartoon Characters to Create Animated Characters for PRO
A professional cartoon maker need some advance tools and features to give a unique and perfect look to his cartoon drawn. So, for them some applications or cartoon character maker is good. Let’s see some of the makers that are specifically designed for professionals:
01Animaker
This has various themes to make your cartoon look great. It brings life to a character. The steps involve in making a cartoon character is as under:
● As required, select the animated template.
● You can add customized features as such as backgrounds, pictures and animated text.
● Music can also be added and can be selected from the library.
● After the character is ready, you can share or download the video.
02Adobe
This is the most widely platform or maker for creating high quality contents, cartoon avatar and games. Sketch and drawing tool are there in the maker that gives real experience to the cartoon. The platform facilitates exploring the file to WebGL, SVG and Adobe AIR.
You can view how it works and the process in the video-
03Reallusion
Text and voice has given a new definition to the cartoon world. If you desire to add some interesting elements in cartoon through text and voices, then Reallusion is a good option for you. It has 3D head creation tool which can be used to make animated cartoons for mails and e-cards.
You can view how it works and the process in the video-
04Renderforest
This cartoon maker has some great collection of professionally designed templates, to make cartoon making process easy and perfect. Templates for kids, education, character adventure, healthcare and iconic animation are some of the collections one can find in this maker.
The process of cartoon creation is easy with following steps:
● Choose the most excellent cartoon templates or start from zero through sketch,
● You can edit the already available stories. Even animated characters can be used.
● Add some customized features like voice or music, style or colors.
● This is how you can create exclusive vibrant cartoons.
Video can be watched at-
05Biteable
Biteable has several templates like leadership skill tips, travel agent explainer and many more. The video clips, music, animated templates of this maker create engaging cartoon characters.
The process to develop a cartoon video through Biteable is as under:
● Open the maker Biteable
● As per your requirement, pick the one cartoon template
● Log in the account
● You can add many effects like backing music, clips and text.
● As made in the website, you can share on social media and emails.
Part 3 How to Create a Cartoon Character: A General Guide
A professional cartoon expert becomes an expert after a continuous practice. It’s not easy to learn making cartoons. Therefore to be an expert one need to learn the basics and other important principles for cartoon making. A general guide for the same is as under:
● Begin with basic steps
Learn the basic shapes like making ovals, circles and other shapes. This will help you to be perfection in making the basic outline of the cartoon. This will improve you skill and you can explore more possibilities with the basic outlines.
● Shape improvement
This is an advance stage of basic step. This step will help you to define the shape of the cartoon character you are going to draw. It gives structure and design to a character.
● Including details
This stage is more about designing a character. Pose, expression, attires, props are selected in this step. The personality of a character is made better. It makes the character more interesting and engaging.
● Shadow of cartoon character
Before giving a final touch to the character, it is necessary to check the shadow of the picture drawn. It will show whether you are on right path or not.
● Final touch
The last step is adding all details in the character. It may be straight teeth, big smile, messy hairs or anything. Lines can be made fine and clean. You can add colors of your choice.
The other platform or cartoon maker that can be checked out is Filmora.
Wondershare Filmora Video Editor is software used for making, editing and adding effects to pictures or videos. It is easy to use application loaded with many advanced tools and features to make picture and video editing simple. Those who are looking for a robust application for capturing some precious moments through picture and videos, then Filmora is a perfect application.
Filmora can be used to draw and insert cartoon characters in any video. Animation, text and music can be added effectively with Filmora. A beginner can easily learn to create cartoon character online.
Wondershare Filmora
Get started easily with Filmora’s powerful performance, intuitive interface, and countless effects!
Try It Free Try It Free Try It Free Learn More >
● Ending Thoughts →
● Cartoon characters making is not an easy task. But now there are cartoon character maker free which has made easy to learn cartoon making. The various tools used are Avatar maker, cartoon making, turning picture into cartoon and through experts support.
● The different professional cartoon character maker online are Animaker, Reallusion, Biteable and Adobe. Through these cartoon makers making cartoon characters are easy with advanced features.
● Filmora is one of the popular picture and video making and editing software which can also be used for making amazing cartoon characters.
2D Character Animation: Everything You Should Know About It
2D Character Animation: Everything You Should Know About It
An easy yet powerful editor
Numerous effects to choose from
Detailed tutorials provided by the official channel
2D character animation is one of the significant kinds of animation popularly used for creating animated movies, marketing videos, cartoons, advertisements, educational content, corporate presentations, video games, etc.
With the popularity of video content, more and more businesses tend to use animation for promotion, as they magnify conversion rates by 20%. Some companies hire 2D character animation services; others try to make them online with software help.
In this article
01 [What is 2D Character Animation and What Does 2D Animation Do?](#Part 1)
02 [2D Character Animation Tips and Tricks](#Part 2)
03 [An Ultimate Guide to Create 2D Character Animation Online](#Part 3)
04 [5 Great 2D Character Animation Templates](#Part 4)
Part 1 What is 2D Character Animation and What Does 2D Animation Do?
2D animation is identified by having its characters and objects created in a 2D space. It means that they only have height and width to specify.
However, 2D animation is considered a traditional style, known from the 1800s. Initially, it was designed by merging the frames in which one drawing was followed by another and making them different; every second consists of 24 frames.
We all remember the classic Disney animations. Snow White and the Seven Dwarfs, The Little Mermaid, Bambi, etc. They are some of the highly famous 2D animation styles.
With the advancement of computer technologies, this process also got digitized through various 2D character animation software.
In this guide, we’ll talk about everything relatable to 2D character animation, and let’s proceed with the expert tips and tricks to create inspirational style within animation character 2D.
Part 2 2D Character Animation Tips and Tricks
01Look for a real-time reference
Using a real-world reference for 2D character animation can help you effectively animate faces. For example, when studios collaborate with voice-over artists, they often record their facial movements. It further helps 2D animators to ensure their expressions get captured convincingly.
If it seems impossible, you can consider using your face, so you have something to refer back to. You could also use a mirror and utter the words your character will speak. It will display the correct animated expressions.
02Observe real life
You need to use observation a lot more. One of the primary aspects of 2D character animation is bringing life to animate objections. Therefore, you must carefully consider how emotion can get portrayed and select each movement accordingly.
Take time watching how people in real-life environments talk and interact with each other, how they express emotions, how they move, etc. Please don’t spend much time doing this, as it is valuable to research.
03Simplicity is the key
2D character animation is never complex compared with 3D. Think carefully before creating a scene too complicated. You must not include too much information, which is hard to digest, and you may even find yourself compromising the scene’s realism. Try not to heavy the stage with too many pose changes or other elements, and keep it genuine.
04Draw animation again and again
Drawing animation consumes a lot of time. You can’t complete it within one day, so you better know deep down that one task only can be done after you have revamped it various times. For 2D character animation, you may need to draw objects on paper several times.
You can’t master the skill of animation character 2D quickly. Luckily, all pains will be relieved someday.
05Feedback is important
Feedback is an essential element of artistic development. It’s wise to actively seek out feedback from familiar figures who can help you enhance. Naturally, we may see work we have invested a great deal of time and effort indifferently to someone not so involved in the creative process. Feedback can equate to a valuable learning opportunity that will assist you produce the results hit the spot much more appropriately.
Part 3 An Ultimate Guide to Create 2D Character Animation Online
Let’s now look at making an illustrated 2D character animation move on a screen.
While there are nearly numerous options for 2D character animation tools and software, this tutorial will animate a character in Adobe After Effects.
Steps to create 2D character animation After Effects
01Step 1: Download and Install Duik
You need to install the Duik animation plugin for Adobe After Effects to simplify the whole process. You can animate and rig characters’ entire limbs with Duik using just the placement of their feet and hands.
While this isn’t an essential step, it can be valuable for beginners, as you’ll see in this tutorial. Luckily, Duik is available for free from Rainbox Laboratory.
02Step 2: Design Your Character
You need a moving character before you’re able to start animating. You can create this character in Adobe Illustrator and import it into After Effects.
Try creating a straightforward character with an aim on the character’s limbs.
In the example mentioned below, you can see that the body is a very rudimentary shape—a circle—with long legs that make it simple to consider the animation process.

Check the character’s joints. Making a round joint between the lower and upper parts of the legs, for instance, will help the character move more smoothly.

03Step 3: Make and Import Your Character Artwork
Now, you’ll need to make a few final adjustments before moving your character artwork. Break your character out into layers firstly. Every section of the character that will move independently needs a separate layer.
So, layers include his circular body, face, and the leg’s segments (i.e., lower leg, upper leg, and foot).

To import your character artwork, go to File, click the Import tab, and choose your character file. Ensure that you need to import it as a composition to ensure it includes the layers you just created.
04Step 4: Establish Initial Character Rigging
Now, the 2D character animation is almost over by the initial rigging.
Firstly, lower the opacity of all your layers to above 50% to see the critical joints within the character.
Next, you must ensure that the joints hinge in the ideal direction. It’s simple to do with the anchor point tool. For each character’s layer, place the anchor point at the center of gravity for each layer of the 2D character animation.
The anchor point would probably go between the eyes for the layer of the face (i.e., the nose, eyes, and mouth). For each legs’ section, hold the anchor point where the leg will hinge (e.g., the anchor point would be at the highest point for the leg’s upper portion, where it meets the body).

Then, use the parent tool to join the limbs’ sections. For instance, the parent of the foot would be the lower leg, and the upper portion is the parent of the lower leg.
It makes sure that the leg moves together as one unit with multiple hinge points.
Finally, use the Duik toolbar to create character controllers. Controllers control the rotation and position of critical elements within your character. For the ankles of the 2D character animation, you would select the controller that encompasses both the rotation and position.
05Step 5: Create Your Rig
Use the Duik toolbar to create a rig. Select each layer from the extremities inward from each limb, lasting with your controllers.
You would select the ankle for a leg, followed by the upper portion, the lower leg, and conclusively, the controller at the ankle. Then, select auto-rig within the Rigging area of the Duik toolbar.
The entire leg will move when you move that ankle controller. If your character contains them, repeat the process for the other leg, along with other limbs.
Before proceeding, test the limbs to make sure they hinge and move correctly. You need to adjust the opacity of the character back to 100% once you are satisfied with the movements.

06Step 6: Start Animating Your Character
You can begin animating after completing a rig. First, create keyframes—the ending and beginning points of the character’s movement. The character’s legs are at their most magnified are thus the endpoints for a walk cycle. Make sure that the beginning and ending of keyframes are identical to get an ideal loop.
Start adding in-between frames from there, like when one leg crosses over the other in the middle of a walking stride.
Moreover, you can add ‘easing” to the animation via 2D character animation After Effects’ Easy Ease tab, located under the Animation button, and Keyframe Assistant.
It will smoothen the transition between the keyframes. You will have a primary walking sequence at this instance.

Now, you can make further refinements to add detail and secondary movement, like a bobbing motion of the head. You can also modify elements like the keyframe velocity, further smoothing out the animation.
As you practice, you’ll get a better feel for your animation preferences and develop more advanced realistic 2D animation character design capabilities.
Part 4 5 Great 2D Character Animation Templates
1 – FrameStory Character Animation Toolkit
2 – Explainer Video Character Animation ToolKit
3 – 2D Character Animation After Effects Template
4 – Character Animation ToolKit
5 – Rigged Character Animation Mockup Template
Given above is a list of the best 2D character animation templates worth considering. Yet, if you are tired of using After Effects Templates, why not select Wondershare Filmora Template Mode?
It is a brand-new mode recently launched by Filmora to ramp up your story. It is a simplistic way to use compared with After Effects.
****Wondershare Filmora Video Editor Template Mode**
For Win 7 or later (64-bit)
For macOS 10.12 or later
Filmora Template Mode is a bold breakthrough that helps you create incredible videos in a minute. Forget about dragging n dropping the video clips into a timeline; Filmora template Mode provides you a new way of generating videos automatically by using various stylish video templates.
Steps to create a stunning animated video in 3 levels
01Step 1: Choose a template
Pick up a video template that best suits your needs.

02Step 2: Import Media
Import at least three video clips or images and let AI assist you in ramping the production process without hassle.

03Step 3: Export Project
Export media among multiple social media platforms.

● Key Takeaways from This Episode →
● Understanding 2D character animation tips and tricks
● A step by step guide to creating 2D character animation online
● Five best 2D character animation templates
● The best alternative of using the Template mode directly within the Wondershare Filmora
2D character animation is one of the significant kinds of animation popularly used for creating animated movies, marketing videos, cartoons, advertisements, educational content, corporate presentations, video games, etc.
With the popularity of video content, more and more businesses tend to use animation for promotion, as they magnify conversion rates by 20%. Some companies hire 2D character animation services; others try to make them online with software help.
In this article
01 [What is 2D Character Animation and What Does 2D Animation Do?](#Part 1)
02 [2D Character Animation Tips and Tricks](#Part 2)
03 [An Ultimate Guide to Create 2D Character Animation Online](#Part 3)
04 [5 Great 2D Character Animation Templates](#Part 4)
Part 1 What is 2D Character Animation and What Does 2D Animation Do?
2D animation is identified by having its characters and objects created in a 2D space. It means that they only have height and width to specify.
However, 2D animation is considered a traditional style, known from the 1800s. Initially, it was designed by merging the frames in which one drawing was followed by another and making them different; every second consists of 24 frames.
We all remember the classic Disney animations. Snow White and the Seven Dwarfs, The Little Mermaid, Bambi, etc. They are some of the highly famous 2D animation styles.
With the advancement of computer technologies, this process also got digitized through various 2D character animation software.
In this guide, we’ll talk about everything relatable to 2D character animation, and let’s proceed with the expert tips and tricks to create inspirational style within animation character 2D.
Part 2 2D Character Animation Tips and Tricks
01Look for a real-time reference
Using a real-world reference for 2D character animation can help you effectively animate faces. For example, when studios collaborate with voice-over artists, they often record their facial movements. It further helps 2D animators to ensure their expressions get captured convincingly.
If it seems impossible, you can consider using your face, so you have something to refer back to. You could also use a mirror and utter the words your character will speak. It will display the correct animated expressions.
02Observe real life
You need to use observation a lot more. One of the primary aspects of 2D character animation is bringing life to animate objections. Therefore, you must carefully consider how emotion can get portrayed and select each movement accordingly.
Take time watching how people in real-life environments talk and interact with each other, how they express emotions, how they move, etc. Please don’t spend much time doing this, as it is valuable to research.
03Simplicity is the key
2D character animation is never complex compared with 3D. Think carefully before creating a scene too complicated. You must not include too much information, which is hard to digest, and you may even find yourself compromising the scene’s realism. Try not to heavy the stage with too many pose changes or other elements, and keep it genuine.
04Draw animation again and again
Drawing animation consumes a lot of time. You can’t complete it within one day, so you better know deep down that one task only can be done after you have revamped it various times. For 2D character animation, you may need to draw objects on paper several times.
You can’t master the skill of animation character 2D quickly. Luckily, all pains will be relieved someday.
05Feedback is important
Feedback is an essential element of artistic development. It’s wise to actively seek out feedback from familiar figures who can help you enhance. Naturally, we may see work we have invested a great deal of time and effort indifferently to someone not so involved in the creative process. Feedback can equate to a valuable learning opportunity that will assist you produce the results hit the spot much more appropriately.
Part 3 An Ultimate Guide to Create 2D Character Animation Online
Let’s now look at making an illustrated 2D character animation move on a screen.
While there are nearly numerous options for 2D character animation tools and software, this tutorial will animate a character in Adobe After Effects.
Steps to create 2D character animation After Effects
01Step 1: Download and Install Duik
You need to install the Duik animation plugin for Adobe After Effects to simplify the whole process. You can animate and rig characters’ entire limbs with Duik using just the placement of their feet and hands.
While this isn’t an essential step, it can be valuable for beginners, as you’ll see in this tutorial. Luckily, Duik is available for free from Rainbox Laboratory.
02Step 2: Design Your Character
You need a moving character before you’re able to start animating. You can create this character in Adobe Illustrator and import it into After Effects.
Try creating a straightforward character with an aim on the character’s limbs.
In the example mentioned below, you can see that the body is a very rudimentary shape—a circle—with long legs that make it simple to consider the animation process.
Check the character’s joints. Making a round joint between the lower and upper parts of the legs, for instance, will help the character move more smoothly.
03Step 3: Make and Import Your Character Artwork
Now, you’ll need to make a few final adjustments before moving your character artwork. Break your character out into layers firstly. Every section of the character that will move independently needs a separate layer.
So, layers include his circular body, face, and the leg’s segments (i.e., lower leg, upper leg, and foot).
To import your character artwork, go to File, click the Import tab, and choose your character file. Ensure that you need to import it as a composition to ensure it includes the layers you just created.
04Step 4: Establish Initial Character Rigging
Now, the 2D character animation is almost over by the initial rigging.
Firstly, lower the opacity of all your layers to above 50% to see the critical joints within the character.
Next, you must ensure that the joints hinge in the ideal direction. It’s simple to do with the anchor point tool. For each character’s layer, place the anchor point at the center of gravity for each layer of the 2D character animation.
The anchor point would probably go between the eyes for the layer of the face (i.e., the nose, eyes, and mouth). For each legs’ section, hold the anchor point where the leg will hinge (e.g., the anchor point would be at the highest point for the leg’s upper portion, where it meets the body).
Then, use the parent tool to join the limbs’ sections. For instance, the parent of the foot would be the lower leg, and the upper portion is the parent of the lower leg.
It makes sure that the leg moves together as one unit with multiple hinge points.
Finally, use the Duik toolbar to create character controllers. Controllers control the rotation and position of critical elements within your character. For the ankles of the 2D character animation, you would select the controller that encompasses both the rotation and position.
05Step 5: Create Your Rig
Use the Duik toolbar to create a rig. Select each layer from the extremities inward from each limb, lasting with your controllers.
You would select the ankle for a leg, followed by the upper portion, the lower leg, and conclusively, the controller at the ankle. Then, select auto-rig within the Rigging area of the Duik toolbar.
The entire leg will move when you move that ankle controller. If your character contains them, repeat the process for the other leg, along with other limbs.
Before proceeding, test the limbs to make sure they hinge and move correctly. You need to adjust the opacity of the character back to 100% once you are satisfied with the movements.
06Step 6: Start Animating Your Character
You can begin animating after completing a rig. First, create keyframes—the ending and beginning points of the character’s movement. The character’s legs are at their most magnified are thus the endpoints for a walk cycle. Make sure that the beginning and ending of keyframes are identical to get an ideal loop.
Start adding in-between frames from there, like when one leg crosses over the other in the middle of a walking stride.
Moreover, you can add ‘easing” to the animation via 2D character animation After Effects’ Easy Ease tab, located under the Animation button, and Keyframe Assistant.
It will smoothen the transition between the keyframes. You will have a primary walking sequence at this instance.
Now, you can make further refinements to add detail and secondary movement, like a bobbing motion of the head. You can also modify elements like the keyframe velocity, further smoothing out the animation.
As you practice, you’ll get a better feel for your animation preferences and develop more advanced realistic 2D animation character design capabilities.
Part 4 5 Great 2D Character Animation Templates
1 – FrameStory Character Animation Toolkit
2 – Explainer Video Character Animation ToolKit
3 – 2D Character Animation After Effects Template
4 – Character Animation ToolKit
5 – Rigged Character Animation Mockup Template
Given above is a list of the best 2D character animation templates worth considering. Yet, if you are tired of using After Effects Templates, why not select Wondershare Filmora Template Mode?
It is a brand-new mode recently launched by Filmora to ramp up your story. It is a simplistic way to use compared with After Effects.
****Wondershare Filmora Video Editor Template Mode**
For Win 7 or later (64-bit)
For macOS 10.12 or later
Filmora Template Mode is a bold breakthrough that helps you create incredible videos in a minute. Forget about dragging n dropping the video clips into a timeline; Filmora template Mode provides you a new way of generating videos automatically by using various stylish video templates.
Steps to create a stunning animated video in 3 levels
01Step 1: Choose a template
Pick up a video template that best suits your needs.
02Step 2: Import Media
Import at least three video clips or images and let AI assist you in ramping the production process without hassle.
03Step 3: Export Project
Export media among multiple social media platforms.
● Key Takeaways from This Episode →
● Understanding 2D character animation tips and tricks
● A step by step guide to creating 2D character animation online
● Five best 2D character animation templates
● The best alternative of using the Template mode directly within the Wondershare Filmora
In-Depth Study of Cartoon Painting Starts From Learning to Draw It
In-depth Study of Cartoon Painting Starts from Learning to Draw It
An easy yet powerful editor
Numerous effects to choose from
Detailed tutorials provided by the official channel
Cartoon painting is slowly becoming popular due to its many benefits, especially easy cartoon canvas painting. For instance, it is pretty eye-grabbing, especially if your audience is children.

Thanks to the animation aspect, it has become relatively cheap to do advertisements with cartoons instead of real people.
In this article
01 [What Are Good Cartoons to Draw?](#Part 1)
02 [How Do You Draw a Cartoon Character for Beginners?](#Part 2)
03 [Is There Anything else You Can Do to Draw Cartoons More Quickly?](#Part 3)
Part 1 What Are Good Cartoons to Draw?
As far as good cartoons are concerned, expect about 5 popular types. These cartoons to draw include:
01 Illustrative Cartoons
They are the most suitable cartoons to draw when portraying particular ideas directly and simply.
The cartoons are primarily used in advertisements, teaching aids, and explaining stories. They also have text that explains them further.
It explains why they are common in school books, making them perfect for explaining content or subject.

02 Animated Cartoons
It is important to note that these cartoons are drawn using computers despite looking as if they are hand-drawn. One thing that makes them stand out is that they seem to be in action and movement.
As much as that’s how they seem from the viewer’s perspective, that’s far from the truth. They are just drawn in series, and since the first one will differ from the second one, there is that illusion of movement created.

03 Comic Strips or Panels
In most cases, these are regular features characterized by established or known characters and usually displayed in newspapers.
Just like the animated cartoons, they are showcased in series to tell or illustrate a story. The series of panels have words said by the various characters.
The words are usually in balloons, and a single comic strip may cover a single or double page of a newspaper.

04 Gag Cartoons
As the name gag suggests, these cartoons revolve around jokes. These single-paneled cartoons often make fun of human beings.
Through overstatements, humor resonates from what is drawn. They can either serve as entertainment or point out, if not make fun of, people, especially their mistakes and faults. Besides the cartoon, expect a caption that’s often a single sentence.

05 Editorial or Political Cartoons
These cartoons are also made for the newspapers. Expect them to be a single drawing on an editorial page. It sheds more light on a particular newspaper’s editorial comment.
As much as some have captions, that’s not always the case. Just like the gag cartoons, they ridicule people, but the editorial ones focus on celebrities.

Part 2 How Do You Draw a Cartoon Character for Beginners?
Even cartoon painting experts were once beginners. So, feel encouraged because you stand a chance also to become an expert in the long run. All you need to do is take the first step. Fortunately, we are here to hold your hand as you do so. So. Without further ado, let’s get started.
01 Cartoon Painting of a Young Character
These are the steps you need to follow when doing so:
Step 1Start with the face
The face is significant, especially when it comes to cartoon painting. It has complex as well as simple parts. For example, the face itself is pretty basic since you will need to begin with a circle.
After that, draw a horizontal and vertical line and ensure that they intersect in the middle.

Step 2Draw the eyes by drawing
Draw the eyes by drawing an oval and ensuring that the top side is slightly tilting to the side.
Do the same thing on the other side since the norm is a pair of eyes. The gap between the two should also be sensible.

Step 3Draw eyebrows
On the upper side of the eye, ensure that the lines are slightly thick. The eyebrows also need to be placed above the eyes, slightly above the thick line representing the eyelashes.

Step 4Draw jaw
After that, start shaping the jaw. Keep in mind that it plays a huge role in determining whether the character will look thin or fat. Additionally, how you draw the jaw determines whether the character will be old or young and how old or young the person will look.

Step 5Draw nose
Design the nose and ensure that you don’t put many details. The good thing about the nose is that a tip is enough to serve the purpose. Another common approach when drawing the nose is doing so as if you are viewing it from the side.

Step 6Draw mouth
Next, draw the mouth and consider the age of your character as you do so. If it is a child, despite the gender, stick to simplicity. You should also avoid drawing the lips. Preferably, go for the good, expressive trace since it never disappoints.

Step 7Draw ears
Proceed to the ears and in relation to whether the character is facing the camera or not. If your character is looking at the camera, you should see the front side view. Therefore, it won’t make sense to display the internal cavities in this case.

Step 8Draw haircut
Proceed to the ears and in relation to whether the character is facing the camera or not. If your character is looking at the camera, you should see the front side view. Therefore, it won’t make sense to display the internal cavities in this case.
As scary as it may look, you need not be an expert to make the haircut look perfect. Additionally, there is no constant way of drawing the haircut, and you are at liberty to practice as much creativity as possible.
Nevertheless, please don’t take it lightly since it can be quite descriptive. For instance, the hair is used to tell the personality of a character. Practice makes perfect, and you better keep doing it until you get it right. Ensure that what you draw shows the age and character of the cartoons to draw as perfectly as possible.
So far, our focus has been on a young character. However, that’s not always the case explaining why we will look at a cartoon painting of an old character.

02 Cartoon Paintings of an Old Character
If you want your character to look old, this is the way to go:
Step 1Old character draw a face
The face is no different from that of a young character. Start with the eyes and add their pupils, eyebrows and don’t forget to add wrinkles.
Since the character is old compared to the previous one, ensure that the eyebrows are thick. They should occupy more space of the forehead.

Step 2Old character make the chin
Make the chin longer too.

Step 3Old character draw the nose
Ensure that the nose design looks wider and larger since the character is old. To achieve that, make the nose look close to the eyes

Step 4Old character exaggerates mustache
Skip the mouth bit and instead go for a big, exaggerated mustache. That’s one common characteristic of an old character, especially male.

Step 5Draw hair
When it comes to hair, bald and side hair will play the trick perfectly. The nose is no different from that of a young character.

03 Cartoon Painting of a Female Character
So far, our focus has been on a male character. So, what do you do if you want to create a female one instead? These are some of the steps to follow as you do so.
The procedure is not that different. However, consider that women’s facial structures are more delicate than those of their male counterparts. Some of the things that stand out include long hair, a small nose, a thin chin, thin eyebrows, and large, expressive eyelashes. Large pupils will also do, especially if you are good at drawing.

Key Takeaways from This Episode
● There are five major types of cartoons to draw, animation, editorial, gag, illustrative and comic strips.
● Cartoon painting is not that hard, especially if you have a guide on how to go about it.
● If that turns out to be difficult, you can always go for the Filmora pro.
Cartoon painting is slowly becoming popular due to its many benefits, especially easy cartoon canvas painting. For instance, it is pretty eye-grabbing, especially if your audience is children.
Thanks to the animation aspect, it has become relatively cheap to do advertisements with cartoons instead of real people.
In this article
01 [What Are Good Cartoons to Draw?](#Part 1)
02 [How Do You Draw a Cartoon Character for Beginners?](#Part 2)
03 [Is There Anything else You Can Do to Draw Cartoons More Quickly?](#Part 3)
Part 1 What Are Good Cartoons to Draw?
As far as good cartoons are concerned, expect about 5 popular types. These cartoons to draw include:
01 Illustrative Cartoons
They are the most suitable cartoons to draw when portraying particular ideas directly and simply.
The cartoons are primarily used in advertisements, teaching aids, and explaining stories. They also have text that explains them further.
It explains why they are common in school books, making them perfect for explaining content or subject.
02 Animated Cartoons
It is important to note that these cartoons are drawn using computers despite looking as if they are hand-drawn. One thing that makes them stand out is that they seem to be in action and movement.
As much as that’s how they seem from the viewer’s perspective, that’s far from the truth. They are just drawn in series, and since the first one will differ from the second one, there is that illusion of movement created.
03 Comic Strips or Panels
In most cases, these are regular features characterized by established or known characters and usually displayed in newspapers.
Just like the animated cartoons, they are showcased in series to tell or illustrate a story. The series of panels have words said by the various characters.
The words are usually in balloons, and a single comic strip may cover a single or double page of a newspaper.
04 Gag Cartoons
As the name gag suggests, these cartoons revolve around jokes. These single-paneled cartoons often make fun of human beings.
Through overstatements, humor resonates from what is drawn. They can either serve as entertainment or point out, if not make fun of, people, especially their mistakes and faults. Besides the cartoon, expect a caption that’s often a single sentence.
05 Editorial or Political Cartoons
These cartoons are also made for the newspapers. Expect them to be a single drawing on an editorial page. It sheds more light on a particular newspaper’s editorial comment.
As much as some have captions, that’s not always the case. Just like the gag cartoons, they ridicule people, but the editorial ones focus on celebrities.
Part 2 How Do You Draw a Cartoon Character for Beginners?
Even cartoon painting experts were once beginners. So, feel encouraged because you stand a chance also to become an expert in the long run. All you need to do is take the first step. Fortunately, we are here to hold your hand as you do so. So. Without further ado, let’s get started.
01 Cartoon Painting of a Young Character
These are the steps you need to follow when doing so:
Step 1Start with the face
The face is significant, especially when it comes to cartoon painting. It has complex as well as simple parts. For example, the face itself is pretty basic since you will need to begin with a circle.
After that, draw a horizontal and vertical line and ensure that they intersect in the middle.
Step 2Draw the eyes by drawing
Draw the eyes by drawing an oval and ensuring that the top side is slightly tilting to the side.
Do the same thing on the other side since the norm is a pair of eyes. The gap between the two should also be sensible.
Step 3Draw eyebrows
On the upper side of the eye, ensure that the lines are slightly thick. The eyebrows also need to be placed above the eyes, slightly above the thick line representing the eyelashes.
Step 4Draw jaw
After that, start shaping the jaw. Keep in mind that it plays a huge role in determining whether the character will look thin or fat. Additionally, how you draw the jaw determines whether the character will be old or young and how old or young the person will look.
Step 5Draw nose
Design the nose and ensure that you don’t put many details. The good thing about the nose is that a tip is enough to serve the purpose. Another common approach when drawing the nose is doing so as if you are viewing it from the side.
Step 6Draw mouth
Next, draw the mouth and consider the age of your character as you do so. If it is a child, despite the gender, stick to simplicity. You should also avoid drawing the lips. Preferably, go for the good, expressive trace since it never disappoints.
Step 7Draw ears
Proceed to the ears and in relation to whether the character is facing the camera or not. If your character is looking at the camera, you should see the front side view. Therefore, it won’t make sense to display the internal cavities in this case.
Step 8Draw haircut
Proceed to the ears and in relation to whether the character is facing the camera or not. If your character is looking at the camera, you should see the front side view. Therefore, it won’t make sense to display the internal cavities in this case.
As scary as it may look, you need not be an expert to make the haircut look perfect. Additionally, there is no constant way of drawing the haircut, and you are at liberty to practice as much creativity as possible.
Nevertheless, please don’t take it lightly since it can be quite descriptive. For instance, the hair is used to tell the personality of a character. Practice makes perfect, and you better keep doing it until you get it right. Ensure that what you draw shows the age and character of the cartoons to draw as perfectly as possible.
So far, our focus has been on a young character. However, that’s not always the case explaining why we will look at a cartoon painting of an old character.
02 Cartoon Paintings of an Old Character
If you want your character to look old, this is the way to go:
Step 1Old character draw a face
The face is no different from that of a young character. Start with the eyes and add their pupils, eyebrows and don’t forget to add wrinkles.
Since the character is old compared to the previous one, ensure that the eyebrows are thick. They should occupy more space of the forehead.
Step 2Old character make the chin
Make the chin longer too.
Step 3Old character draw the nose
Ensure that the nose design looks wider and larger since the character is old. To achieve that, make the nose look close to the eyes
Step 4Old character exaggerates mustache
Skip the mouth bit and instead go for a big, exaggerated mustache. That’s one common characteristic of an old character, especially male.
Step 5Draw hair
When it comes to hair, bald and side hair will play the trick perfectly. The nose is no different from that of a young character.
03 Cartoon Painting of a Female Character
So far, our focus has been on a male character. So, what do you do if you want to create a female one instead? These are some of the steps to follow as you do so.
The procedure is not that different. However, consider that women’s facial structures are more delicate than those of their male counterparts. Some of the things that stand out include long hair, a small nose, a thin chin, thin eyebrows, and large, expressive eyelashes. Large pupils will also do, especially if you are good at drawing.
Key Takeaways from This Episode
● There are five major types of cartoons to draw, animation, editorial, gag, illustrative and comic strips.
● Cartoon painting is not that hard, especially if you have a guide on how to go about it.
● If that turns out to be difficult, you can always go for the Filmora pro.
15 Types of Cartoon Drawing Styles with Examples
15 Types of Cartoon Drawing Styles with Examples
An easy yet powerful editor
Numerous effects to choose from
Detailed tutorials provided by the official channel
The perfect, if not the best, place to begin cartoon drawing style as an artist is drawings or sketches since you don’t need a lot of drawing equipment to start this type of drawing. What you chiefly need is just your pen and paper to begin.
So, let’s move ahead as this content will show you different cartoon drawing styles, and in no time, you’ll master the art.
In this article
01 [15 Types of Cartoon You May Use for Your Next Marketing Project](#Part 1)
02 [How To Draw Myself In Five Different Cartoon Styles](#Part 2)
Part 1 Types of Cartoon You May Use for Your Next Marketing Project
As I’ve mentioned before, there are various types and styles of cartoon drawings. Below are a few cartoon drawing styles you may want to use for your next project.
01Modern Cartoon Style
This style is currently the most common art style displayed on TV channels like Cartoon Network.
Note that this cartoon-style drawing’s main features are the thick outlines, geometric shapes, and bright colors.
One of the significant reasons this drawing style is this way is that using simple shapes without much detail makes the overall animation process much faster and saves resources for the studios. Nonetheless, it is a beautiful and captivating cartoon drawing style!
This drawing style is used by many modern cartoons. Here are a few examples:
● The Powerpuff Girls
● Dexter’s Laboratory
● Codename: Kids Next Door
● Gravity Falls
02Realistic Cartoon Style
This cartoon drawing style is more quirky since, generally, cartoon drawing is more likely to simplify shapes. The realistic cartoon-style drawing adds more details and keeps figures much more in line with reality. This drawing style is typical among artists who vectorize people’s photographs.
You can also, to some extent, include Caricatures in this category. Caricatures are generally very realistic besides the whole enlargement and shrinking of specific body parts!
Few examples of realistic cartoon drawing styles:
● Ugly Americans
● General Caricataures
● Archer
03Modern Anime
This style tends to be more complex, primarily seen in drawings where the characters seem to be in motion, like in comic books. Modern-day drawings of this style have a lot of shadows and highlights in their character and environment, giving them a relatively new level of complexity.
Here are a few examples of modern animes that follow this Japanese cartoon drawing style.
● My Hero Academia
● Sword Art Online
● Attack on Titan
● Fullmetal Alchemist Brotherhood
04Classic Manga
The old Japanese manga characters tend to possess human-like attributes (proportions) in terms of the body. The difference is the big eyes they have the most time.
Generally, this cartoon drawing style focuses more on feminine bodies, possessing angular chins and thin bodies. Some drawing styles tend to make some parts of the body overtly long compared to the rest of the body; for instance, the legs are mostly longer than other parts.
A few examples of classic manga possessing this cartoon style drawing are:
● Oh My Goddess
● Urusei Yatsura
● Sailor Moon
● Hellsing
05Chibi Drawing Style
The Chibi Cartoon Drawing Style mainly focuses on making the characters into a tiny version of themselves as if being compressed or compacted into a small container.
Examples of where this drawing style is used:
● Lucky Star
● Bottle Fairy
● Himouto! Umaru-chan
06The Simpsons Cartoon Drawing Style
This cartoon-style drawing is widely famous. Though this style has undergone some evolution throughout the years, the main features remained constant! That is to say, the yellow bodies and big and white sphere-like eyes remained.
07Classic Disney
This drawing style was a staple for years, though this drawing style has had an evolutionary cartoon drawing style over the years.
08Mid 20th Century Disney
Disney upped their game during the mid 20th century and started working more with live actors, drawing from references, and filming shots before drawing the cartoons.
Some remarkable examples of this cartoon drawing style are
● Alice in Wonderland
● Cinderella
● Beauty and the Beast
09Modern Disney Drawing Style
This cartoon-style drawing is an immediate improvement of the mid-20th 20th drawing style. This cartoon style is brighter, more detailed, and more complex generally.
Although Disney has stopped creating 2D cartoon drawings, there are still some examples of this more refined art style:
● The Princess and the Frog
● Lilo and Stitch
10Old Cartoon Drawing Style
This drawing style is mostly in black and white format, with very high contrast body parts. The features of this style are having short bodies and long limbs. Sometimes, this type of drawing is referred to as Noodle drawing because the character’s body moves as if there are no bones in their body.
Some examples of this cartoon drawing style include:
● Mickey Mouse
● Betty Boop
11South Park
South Park cartoon drawing style is aptly geometric and has little depth. Shadows or highlights in this cartoon-style are rare. The colors are pretty solid and clean.
12Chrono Trigger/ Dragon Ball (Akira Toriyama)
Akira Toriyama’s cartoon drawing style characterizes having big and almost rectangular eyes and a lot of geometric shapes and definitions in the muscles.
13Crayon Shin-Chan
This cartoon-style drawing is effortless. An exciting aspect of this style is that it doesn’t mind pushing the limits of the character.
The lines generally are thin, and the eyes are prominent in black and white colors.
14Betty Boop
Betty Boop’s cartoon drawing style possesses contrasting black and white colors. Fragile lines with the characters contain a very high amount of black shapes.
15Adventure Time
Adventure Time’s art is incredibly geometric, and its characters are nearly boneless, making it a more current example of a cartoon drawing style.
More fluid animation is possible as a result of this. The art is also quite brilliant, with vibrant hues that leap off the screen.
Aside from that, the characters’ eyes are usually tiny (with a few exceptions), and the lines are skinny.
Part 2 How to draw myself in five different cartoon styles
There are loads of cartoon characters to choose from when trying to draw me. To sketch yourself as a cartoon, first, you have to determine what cartoon drawing style to appear in. This will give you hints on how to go about the drawing.
● The traditional drawing method is a pencil and paper.
● Online Avatar builders
● Adobe character animator
● Outsource to designers or illustrators
● Hire a studio or a freelancer
● Wondershare Filmora Video Editor
Wondershare Filmora - Best Video Editor for Mac/Windows
5,481,435 people have downloaded it.
Build unique custom animations without breaking a sweat.
Focus on creating epic stories and leave the details to Filmora’s auto features.
Start a creative adventure with drag & drop effects and endless possibilities.
Filmora simplifies advanced features to save you time and effort.
Filmora cuts out repetition so you can move on to your next creative breakthrough.
The Filmora software is an easy-to-use editing app with many beautiful features that can make your animation or cartoon-style drawing more vibrant.
● Split-screen makes it easier to tell a story or draw with multiple screens.
● Preset templates are superb for turning your drawings into creative videos.
● Motion graphics
● Keyframing
● Screen recorder and other unique features.
● Ending Thoughts →
● We’ve looked at the various cartoon drawing styles.
● How to draw self in cartoon style.
● The Filmora software to upbeat your sketches at the professional level.
● hus, go check out any cartoon-style drawings and see which one you like best. Make sure to study the reference drawing and practice more to perfect the artist in you.
A Roster of 15 Best Disney Channel Cartoons
A Roster of 15 Best Disney Channel Cartoons
An easy yet powerful editor
Numerous effects to choose from
Detailed tutorials provided by the official channel
Disney channel is among the most liked channel by children. Undoubtedly, in childhood, every one of us, at some point has seen the best cartoon on it. The Disney channel cartoons always hit the top of the list because of the content and graphics used. Well, we cannot forget that still some people are fond of it and wish to try out some of the best cartoons.
Well, if you are also a big fan of the best Disney cartoons, stay tuned with us in this read till the last. Here we are exploring the list of all the best cartoons on this channel and sharing something new too. Let’s get started!
In this article
01 [All Best 10 Disney Channel Cartoons](#Part 1)
02 [All 5 Upcoming Disney Movies in 2022](#Part 2)
03 [How to View Disney Channel Cartoons](#Part 3)
Part 1 All Best 10 Disney Channel Cartoons
In this section, firstly, we discuss the best cartoons on Disney plus that viewer must try out. These are as follows:
01Gravity Falls
Gravity Falls is a Disney Channel show. It has a large fan base, and the show has been consistently popular for its high-quality storytelling. It has also been praised by critics for its artistic style and visual appeal. The show is about the adventures of a boy named Dipper Pines who lives in an old house with his family and also his brother, Mabel.
Premiered: June 15 2012
Stars (IMDb): 8.9/10
02Kim Possible
“Kim Possible is an American animated television series created by Craig McCracken for Disney Channel. The series follows the adventures of teenage girl Kim Possible and her friends Ron Stoppable and Goofy as they try to stop evil villains.
Premiered: 7 June 2002
Stars (IMDb): 7.2/10
03Phineas and Ferb
Phineas and Ferb is a popular cartoon that Disney has produced. It is known for its humorous storyline and characters. Phineas and Ferb are two best friends who are always trying to get into trouble with their inventions. They invent many different things which they use for their own purposes but never really think about the consequences of what they do. They also have some sort of relationship with Perry the Platypus.
Premiered: August 17 2007
Stars (IMDb): 8.1/10
04The Owl House
The Owl house is one of the greatest animated cartoons that has ever been made. It has a simple storyline, it is well-made, and it has a strong message. The main character of the cartoon is an owl. He has a set of skills that he can use to help humans out. The story revolves around the concept of the warrior.
Premiered: January 10, 2020
Stars (IMDb): 8.2/10
05Darkwing Duck
Darkwing Duck is a Disney Channel animated series created by Don Hertzfeldt. The show follows the adventures of Darkwing Duck and his friends as they work to save the world from evil and disaster.
Premiered: September 6 1991
Stars (IMDb): 7.6/10
06Star vs The Forces of Evil
We are all familiar with the classic Disney Channel cartoon “The Forces of Evil”. It is a story about a group of mischievous children who want to defeat evil forces. They want to take over the world and rule it. But then they learn that there are two sides to every story and that sometimes good can win out over evil.
Premiered: January 18 2015
Stars (IMDb): 8.1/10
07The New Adventures of Winnie the Pooh
Winnie the Pooh is a very popular cartoon series with a huge fan base. The story of this cartoon is about a young bear who lives in the forest, who meets two other bears and a tree, who is his best friend. He has some adventures with them. This cartoon was first shown in 1959. It was later adapted into an animated movie in 1966, which became very popular among children and adults alike.
Premiered: January 17 1988
Stars (IMDb): 7.7/10
08The Ghost and Molly McGee
The Ghost and Molly McGee want to get back home. It’s up to them to find their way through the maze of mirrors and see if they can make it back home. The two ghosts have been separated for ages, but now they are reunited in this big adventure!
Premiered: October 1 2021
Stars (IMDb): 7.3/10
09Recess
Disney channel cartoon’s “Recess” is a pre-school cartoon series produced by Disney Channel. This is a story of a few friends who met on the ground during recess time and had fun together. They get into so many things that turn out to be the game changer for them.
Premiered: September 13 1997
Stars (IMDb): 6.6/10
10Curious George
Curious George is a cute African monkey who can’t seem to stay out of mischief. “The Man in the Yellow Hat,” George’s pal, tries his hardest to look after him and is always there to save the day. Learning, forgiveness, and playful curiosity are among the show’s themes.
Premiered: 4 September 2006
Stars (IMDb): 6.5/10
Part 2 All 5 Upcoming Disney Movies in 2022
After exploring the list of best cartoons on Disney Plus, how can we forget to check out the upcoming movies on Disney in 2022? Yes, there is plenty of option available for 2022 as well. Few of them are: -
01Polar Bear (film)
A polar bear is an upcoming movie on Disney. This movie highlights the polar bear’s era and helps people to know more about them. This will be going to release on April 22, 2022.
02Fire Island
Fire Island is an upcoming American romantic comedy film directed by Andrew Ahn and written by and starring Joel Kim Booster. Releasing on Hulu on June 3, 2022. The story revolves around two friends embracing a long weeks’ vacation. They also find out some new friends during the same adventure.
03Good Luck to You, Leo Grande
Good Luck to You, Leo Grande is a romantic movie that revolves around a window. She hires a sex worker to fulfil her fantasies. This movie will hit the cinemas on January 22 2022.
04Not Okay
Not okay is a movie about friends who are planning a trip but then get into some uninvited troubles and are not in the state to come out of them. This movie will be in cinemas on August 5, 2022.
05Black Panther: Wakanda Forever
Black Panther: Wakanda Forever is a superhero film. This movie will amaze all the viewers with its plot and graphics used. This movie will be in cinemas on November 11, 2022.
Part 3 How to View Disney Channel Cartoons
We are pretty sure if you are a big fan of Disney Channel Cartoons, you might be getting curious to try out the Disney cartoon face too. But sometimes it happens that the graphics available online doesn’t meet our needs, due to which we are not able to try that out.
If the same is happening to you, then try Filmora. Yes, you read it right. This is one of the best editing tools available helpful in extracting the cartoon face, and you can use them easily. This tool will help you to edit the videos too, and after it, the same can be used with the best graphics easily.
This wonderful tool will cater to your obsession with Disney cartoons and help you to get the best outcomes available. You will be able to express more and achieve more. Exploring more about the features of Wondershare Filmora Video Editor that can help you includes: -
● Video editing is at its best.
● Editing features for every kind of video.
● Innovative interface.
● Colour correction can be done easily.
● Multiple effects for video.
For Win 7 or later (64-bit)
For macOS 10.12 or later
All these features are helpful for users to View Disney Channel Cartoons easily, and in case they are in video creation and wish to use them can go ahead with it. For sure, their editing along with video needs will be catered to, and there will be no problem in resolving things.
● Ending Thoughts →
● Disney channel has the best cartoon content, and no other channel can beat it. that’s why we created this amazing list for you.
● Filmora is one of the best tools available helpful for users to create the best videos with Disney cartoon characters too.
● Upcoming Disney channel cartoons are best to watch in 2022, and viewers must not miss them.
Also read:
- New In 2024, 10 Best Animation Makers for Kids to Have Fun
- New Want to Make a Meme GIF?
- Updated 2024 Approved Guide on Creating GIF in WhatsApp iPhone
- A Roster of 15 Top Disney Channel Cartoons for 2024
- Updated 2024 Approved 15 Top Collage Makers to Create Aesthetic Collages
- 6 Proven Ways to Dub Anime for Anime Voice Actor
- Updated 2024 Approved Best Canva 10 Animated Templates
- Updated 2024 Approved Tips for GIF to Animated PNG You Should Know
- Top 10 Websites to Download Anime Subtitles for Free for 2024
- New 2024 Approved How to Draw A Skeleton Cartoon – A Step by Step Guide
- 12 Animated Slideshow PowerPoint Templates and Tools to Make Them for 2024
- New 2024 Approved Best GIF Maker Software for Windows and Mac
- Updated In 2024, Top 15 Greatest Claymation Movies of All Time
- New 2024 Approved Formula to Animate Photos From 10 Animate Pictures App
- New Easy Shortcut to Convert Videos to Gifs on iPhone for 2024
- Updated How to Analyze an Editorial Cartoon Easily
- New Learn Easy Blender Rigging in Only 2 Minutes for 2024
- New How to Create a Whiteboard Video Step by Step for 2024
- Updated 2024 Approved Are You Ready to Animate Game Character From Scratch?
- In 2024, 15 Forgotten Cartoon Characters of All Time
- Updated Why These 10+ Top Text Motion Templates Are Worth Your Attention for 2024
- New In 2024, Methods to Make Photo Motion Effect Online?
- Updated 2024 Approved Top 10 Video to GIF Converters Top Picks
- Updated How to Make a GIF in Photoshop
- New 15 Best Apps to Turn Photos Into Cartoons and Sketches for 2024
- In 2024, 15 Best Sites to Watch Cartoons Online Free And So Can You
- Updated 2024 Approved 12 Aesthetic GIF Instagram for Marketers and Creatives
- New 10 Realistic Cartoon Characters You Will Run Away From if You Met in R
- Updated 2024 Approved How to Animate Image on Scroll
- New How to Draw Cartoons Step by Step with This Guide
- 2024 Approved 2D Character Animation Everything You Should Know About It
- New 2024 Approved How to Find Some Different Ways to Animated Cartoon of Yourself
- New 2024 Approved What Wikipedia Wont Tell You Specifically About Character Rigging
- New What Is Anime? Anime VS Manga VS Cartoon
- Top 10 Banned Anime Around the World and Why for 2024
- In 2024, Ways to stop parent tracking your Samsung Galaxy A54 5G | Dr.fone
- In 2024, The Best iSpoofer Alternative to Try On Realme Narzo N55 | Dr.fone
- How to Unlock Apple ID Activation Lock From Apple iPhone 6?
- All About Factory Reset, What Is It and What It Does to Your Nokia C32? | Dr.fone
- In 2024, iSpoofer is not working On Tecno Pova 5 Pro? Fixed | Dr.fone
- In 2024, Dose Life360 Notify Me When Someone Checks My Location On Samsung Galaxy F04? | Dr.fone
- In 2024, Pokémon Go Cooldown Chart On Realme C55 | Dr.fone
- 3 Ways to Change Location on Facebook Marketplace for Realme GT 5 | Dr.fone
- 8 Quick Fixes Unfortunately, Snapchat has Stopped on Tecno Pova 5 | Dr.fone
- iSpoofer is not working On Huawei P60? Fixed | Dr.fone
- How to Turn Off Google Location to Stop Tracking You on Realme 12 Pro 5G | Dr.fone
- In 2024, 5 Easy Ways to Copy Contacts from Infinix Hot 40 to iPhone 14 and 15 | Dr.fone
- Reasons for Realme V30T Stuck on Boot Screen and Ways To Fix Them | Dr.fone
- New Top 5 Best Tools to Convert Text to Audio Online for Free for 2024
- How to Restore Deleted Tecno Pova 5 Pictures An Easy Method Explained.
- Title: 2024 Approved How to Stop Animation From Looping in Unity
- Author: Elon
- Created at : 2024-05-19 03:04:55
- Updated at : 2024-05-20 03:04:55
- Link: https://animation-videos.techidaily.com/2024-approved-how-to-stop-animation-from-looping-in-unity/
- License: This work is licensed under CC BY-NC-SA 4.0.
