
:max_bytes(150000):strip_icc():format(webp)/YoungAsianmanusinglaptopandreadingnewspaperonplane-59960904685fbe00103478bd.jpg)
2024 Approved Secrets to Make 2D Game Animation
Secrets to Make 2D Game Animation
Secrets to Make 2D Game Animation
An easy yet powerful editor
Numerous effects to choose from
Detailed tutorials provided by the official channel
In this dominated era by 2D game animation, when even the latest versions of Super Mario Bros and Street Fighter. are created of polygonized characters, quality sprite-based 2D games are rare.
In this article
01 [2D Game Animation Courses and Tutorials](#Part 1)
02 [5 Best Game Animation Services to Buy Online](#Part 2)
03 [Best 5 Game Animation Tools for Development As of 2022](#Part 3)
04 [3 Tips for Making Great Animations for 2D Games](#Part 4)
05 [How to Make 2D Animation for Games](#Part 5)
Part 1 2D Game Animation Courses and Tutorials
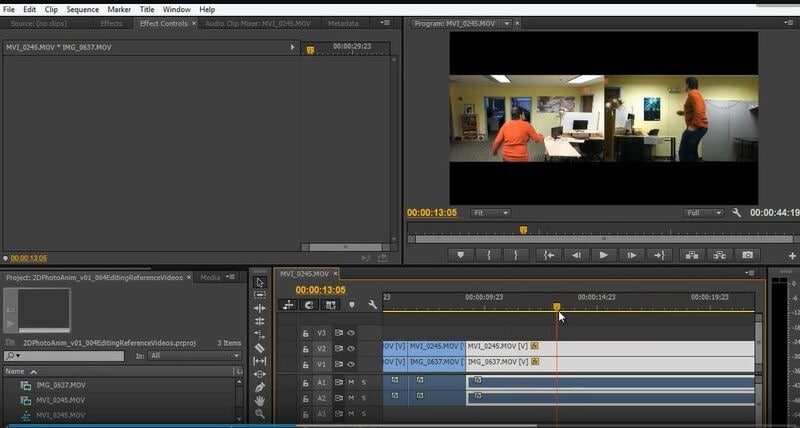
01Animating a 2D Character within Live-Action Video in Photoshop and Premiere
This tutorial greatly defines the process of creating traditional 2D animation in Photoshop implacable over live-action video. We’ll discuss the live-action planning shots with animation in mind, continuity of video editing, and making references for video animation. You will also know how to create the critical poses via rough animation to finish the entire movement and make final line images.
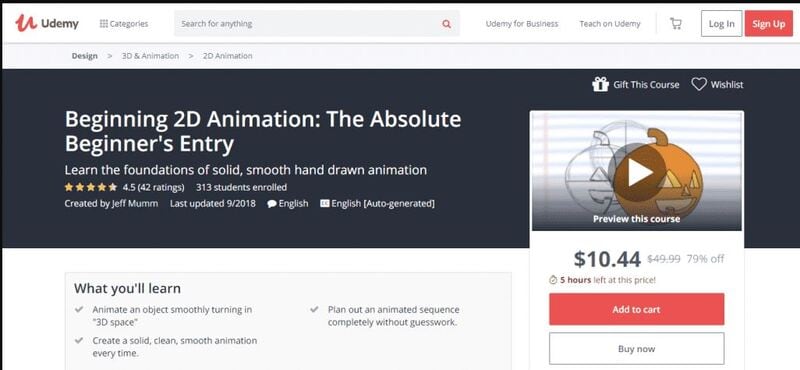
02Beginning 2D Animation: The Absolute Beginner’s Entry with Jeff Mumm
This course lays a solid foundation for absolute beginners entering the exciting world of 2D game animation. Here, we describe the detailed steps to create unique and great-looking animations.
You will also learn ‘easing,’ one of the twelve animation principles, and ultimately plan an animated sequence.
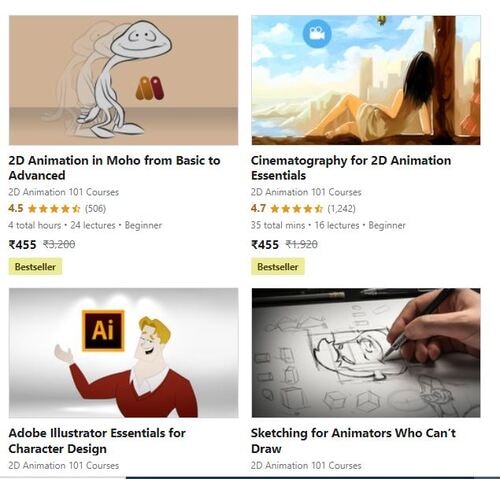
032D Animation in Moho from Basic to Advanced
This course focuses on applying the principles of animation to create an organic walk cycle for the character. This tutorial or course will also teach you how to rig and prepare your animated characters and do 2D game animation.
You will also learn how to trace characters in Moho and use different drawing tools.
Also, you will learn how to create an organic walk cycle by applying advanced animation principles.

042D Animation 101 Courses
This is one of the free online and the ultimate 2D game character design and animation courses that offer free online certificates. Autumn Leave Films has ten years of experience in the film industry and a great collection of short films – nearly 30 2D Animation 101 Courses.
2D Animation 101 provides eight courses, plus free and proprietary 2D game character animation software. In addition, their “Free Step-by-Step Plan” is specifically compelling to beginners in the 2D Animation arena.
It includes daily 10-minute lessons, online 2D game character animation tutorials, suggestions, and tips on using the required software.
05Skillshare -2D Animation for Beginners with Adobe Animate
This is one of the free online 2D animation courses that offer free online animation courses with certificates. You can learn 2D animation online by following Walt’s course. This course is designed for beginners and demonstrates how to create animated characters by providing students with an understanding of the fundamental principles and vivid examples. This tutorial covers various topics, including vector art basics in Animate, nested animations, adding audio to animations, and more.
This short course or tutorial is ideal for animation for personal rather than professional reasons.

Part 2 5 Best Game Animation Services to Buy Online
Rather than using and learning the best 2D animation software for game development, we’d like to describe a list of the top 5 freelancing platforms to rely upon for the best game animation services.
01Upwork
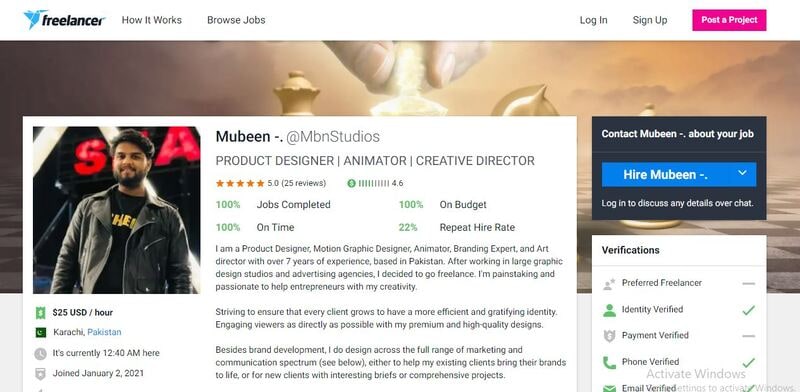
02Freelancer
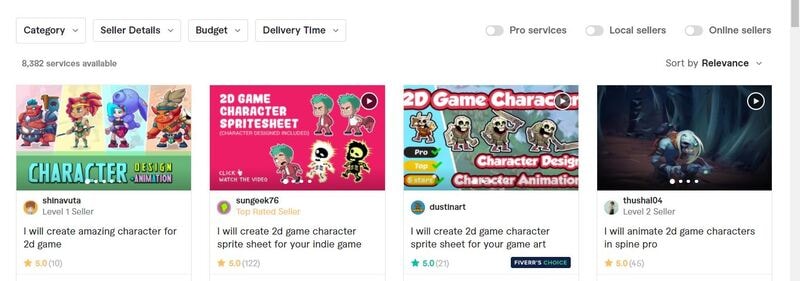
03Fiverr
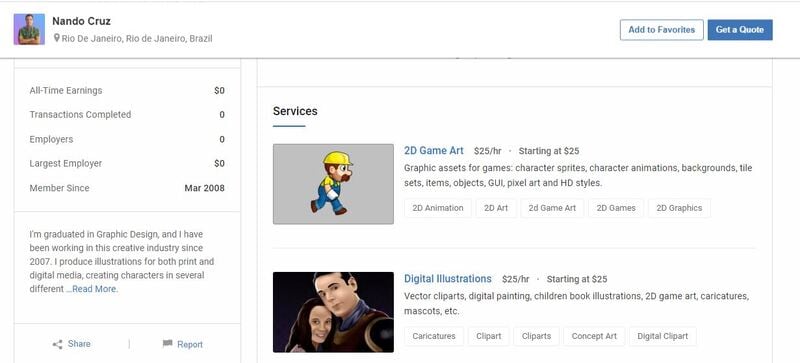
04Guru
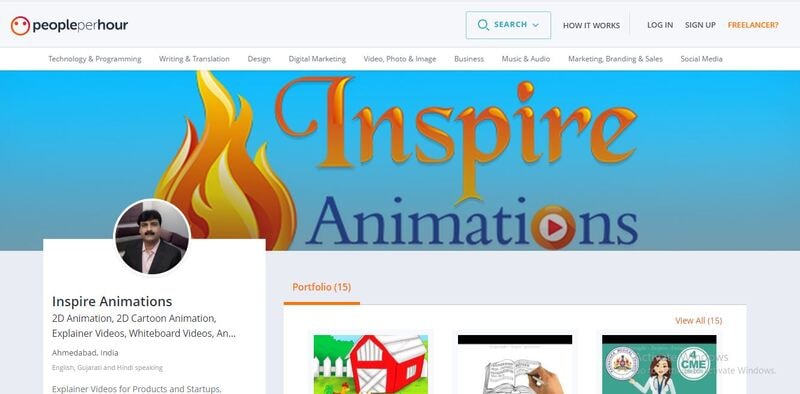
05PeoplePerHour
Part 3 Best 5 Game Animation Tools for Development As of 2022
01Adobe Animate
It is a program from Adobe’s Creative Cloud. It offers the ability to make many varieties of animated features, games, or other Flash multimedia. The program was called Adobe Flash Professional for more than ten years; that name was retired in 2015.
The main features of Animate are as follows:
● Integration with your Adobe cloud library of assets
● Easy cross-platform use with other Adobe products
● Creates animated movies, cartoons, or clips
● Creates Flash games or interactive Flash utilities
02Moho
It’s a comprehensive and best 2D game animation software where your animations are basically on the level of some of your favorite creations. It’s projected toward animators looking to hone their craft.
You could create some fantastic stuff if you’re up to the task (and the price). Moreover, they’re constantly adding updates.
03Plastic Animation Paper
Plastic Animation Paper is another best 2D game character animation software that deals heavily with the concept of pencil drawing.
The program is designed for the most straightforward use and involves clear resolution. You can do whatever you wish with your drawings and elevate yourself to the next level.
04Stop Motion Studio
‘Want to create movies like Wallace and those groovy Lego shorts on YouTube? Stop Motion Studio allows you to create terrific stop action movies with a bucket of specialized features.’
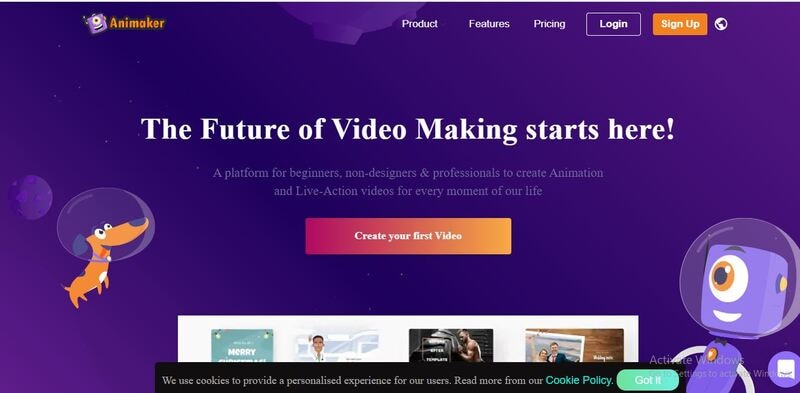
05Animaker
Learning how to make 2D animation for games with Animaker is also good to set up a storyboard and animate the characters or props in that scene. It’s used by companies like Verizon, Google, Pepsi, etc.
It’s appropriate for ad placement on websites and simplistic for beginners. They make it easy and super-fast to get lost for hours animating.
Part 4 3 Tips for Making Great Animations for 2D Games
Now that you have some initial idea of 2D game animation let’s jump to the top 3 tips that will help you create the best and unique 2D game character animation designs with ease.
It will be beneficial while knowing how to make 2D animation for games.
01Focus on the story and start with simple movements
You need to focus on the storyline so that outcome will come accordingly. Focus on every detail while sketching, and don’t miss out on simple movements. Take paper and pencil and start drawing simple exercises like the movement of a bouncing ball etc.
02Use keyframes properly
You need to carefully use keyframes’ start and endpoints to have robust storytelling and movements. To adequately describe the first and last, you need to consider effectively using the keyframes.
03Enliven your characters
You need to give life to your characters so that audience can best relate to the story. Also, pay good attention to facial expressions, sound, tickling movements, etc.
Although these may look like the most straightforward tips ever, these are the most practical 2D game animation strategies that can do wonders if used effectively.
Part 5 How to Make 2D Animation for Games
Making 2D game character animation isn’t a straightforward process and thus needs detailed knowledge that we will describe below.
Let’s use Unity as the best 2D animation software for games without further ado!
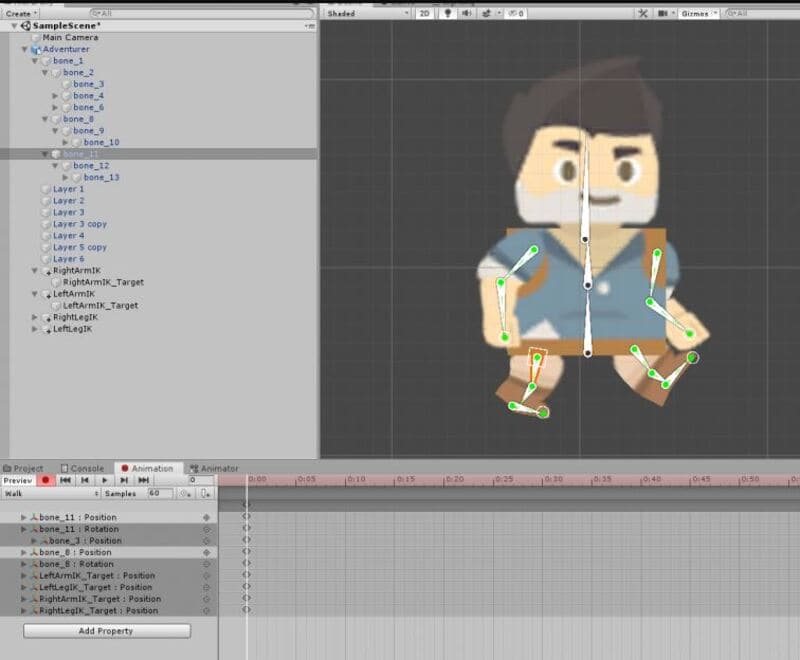
Essential awareness of the Unity Editor (how to navigate and open tabs) is required to work with the Unity Animation window.
01Step 1: Start the Animation tab
Choose the Adventurer character and launch the Animation tab.
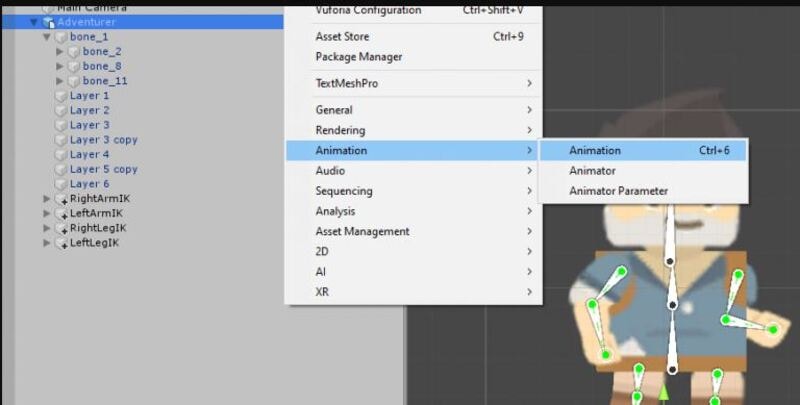
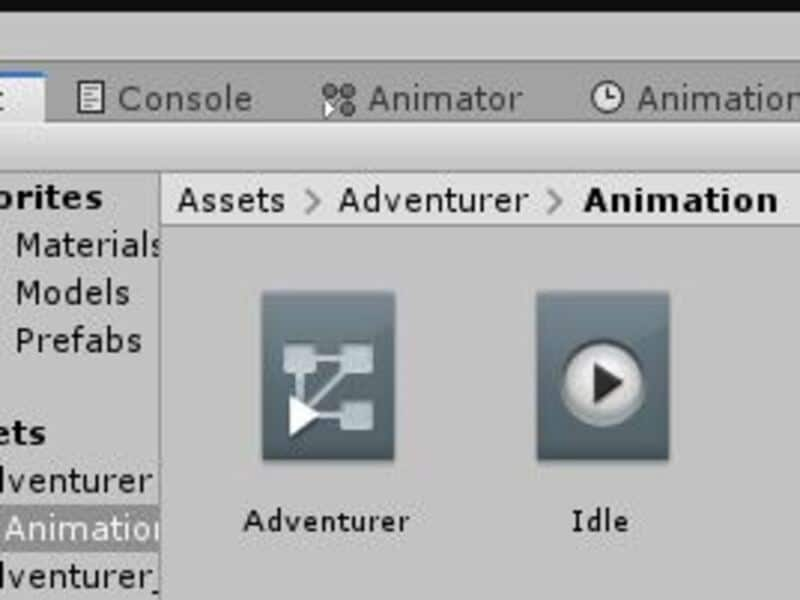
Dock this next to your project tab and console tab. Head towards the project tab and name with the Adventurer folder. Make a new folder known as “Animation.”
With the Animation tab, create a new animation known as “Idle” placed in our Animation folder.
It also creates an Animator Controller in that same folder.
Now, let’s start animating this character!
02Step 2: Proceed with the Idle Animation
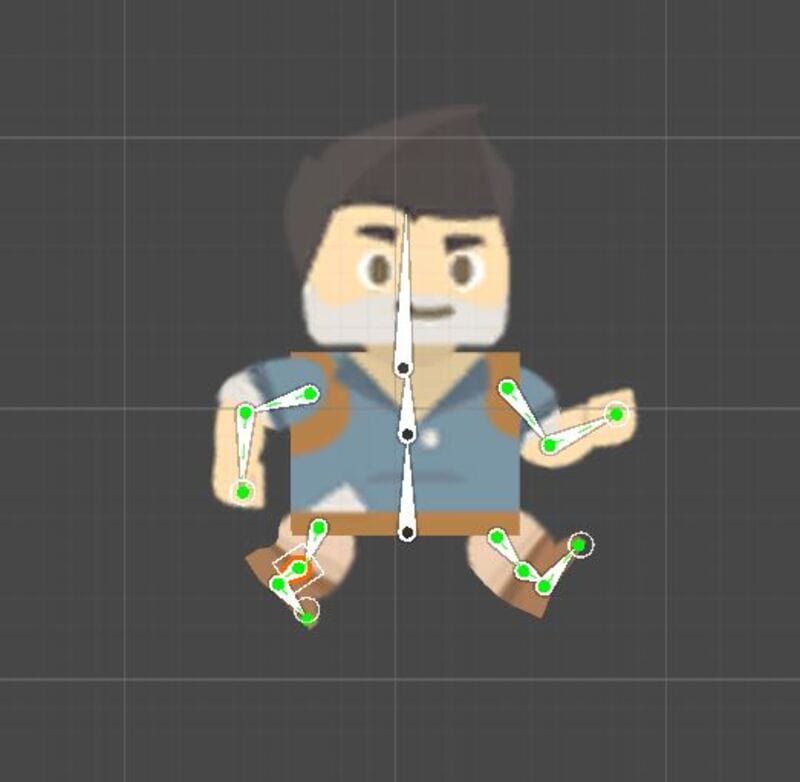
IKs contribute a lot to the efficiency and speed of animating when it comes to idle animation. We must animate a subtle movement very similar to a breathing motion. Tap the red record button and move the character to this position:
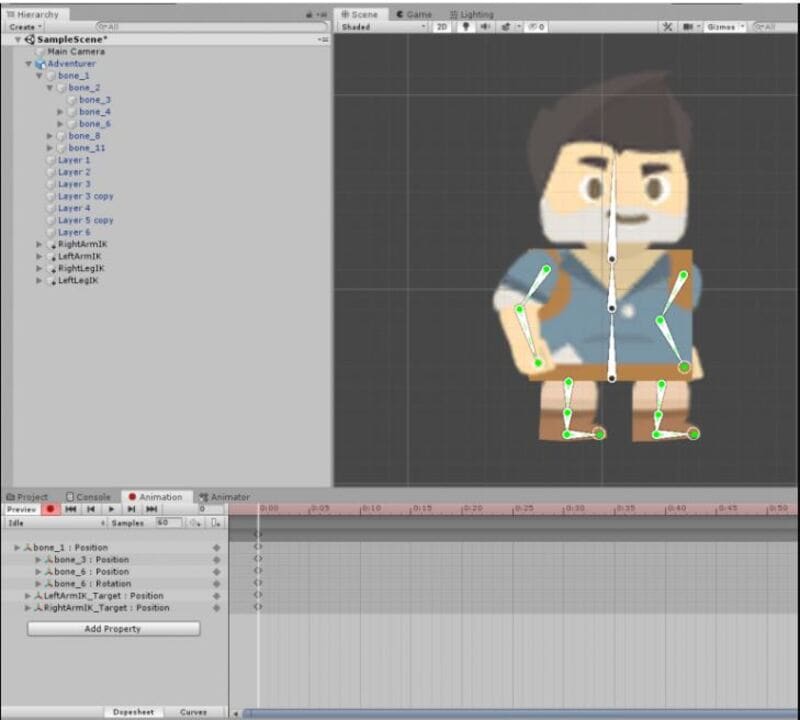
Now go about fifty frames ahead and barely move the top torso bone straight down.
Drag the arm IKs to the side to contain less bend in them and display a sort of “swinging” motion. Here is the pose that I chose:
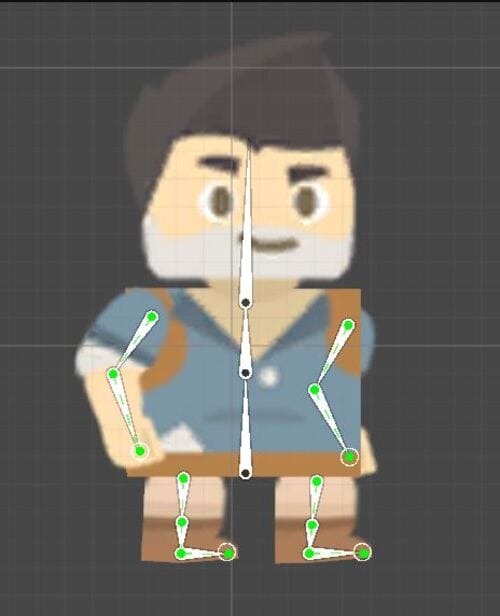
A subtle tweak is there. It makes the idle animation look strange if we create large movements. Then, choose the first group of keyframes and tap the Ctrl-C (Command-C on a Mac).
Then, paste these frame-centric keyframes on number 1:50.
So, the nice looping animation is over now! It looks genuine, but we need to add some head motion to improve the illusion.
Just rotate the head back ever so slightly. But, as you can see, it makes a huge difference. Alright! Congratulations! We now have an idle animation!
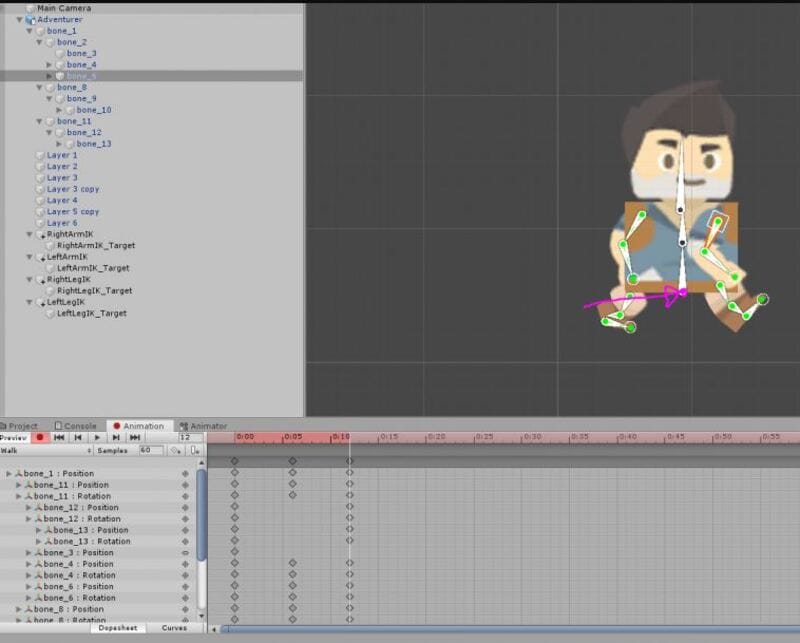
03Step 3: Start walk animation
Create a new animation clip called ‘Walk.”
This animation is a bit more technical. Here, we need to know a few essential things about walk locomotion. The walk animation’s primary function is that the character is always touching the ground. Therefore, we should never have a pose where our character is airborne. Also, I use the word “pose” intentionally. When we animate in 2D, an action comprises certain key poses. In the scenario of the walk animation, we have one posture like this:
Here we have the right foot (relative to the character) touching the ground as you wander.
Then, about six frames ahead, we have a “passing pose.”
It contains a slight movement downwards. It further adds a realistic bobbing motion.
We must animate the character moving forward by moving the entire character game object. Don’t move the surface by any other means except by dragging the character as the whole object.
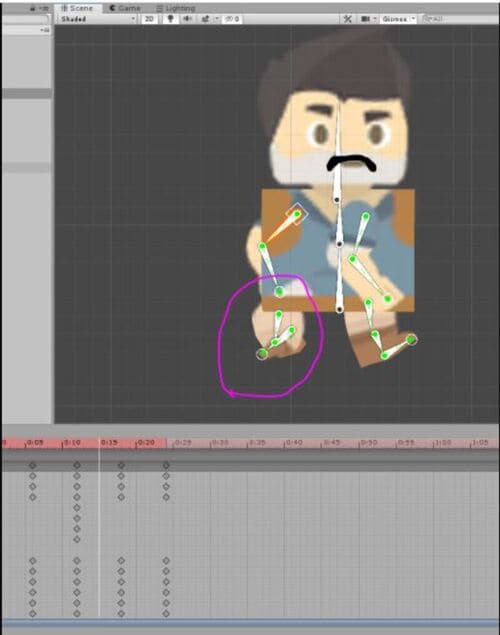
Then, the “dynamic pose” with the left foot touching the ground this time.
This happens at frame twelve, and we are still forwarding the character.
Now, we just require a final passing pose.
And then we recreate the same pose!
Now, copy the first keyframe and paste it. Reposition the character on the X-axis to match the forward motion. Now, go back to your animation and tweak any limbs bending in the wrong direction.
We are done!
04Step 4: Run animation
For the Run animation, create one pose with the airborne character. The distance covered is also more significant than the walk animation. Besides, the run animation has a similar general structure, but we add one extra pose to improve the illusion ultimately.
Create a new animation folder or clip called “Run.”
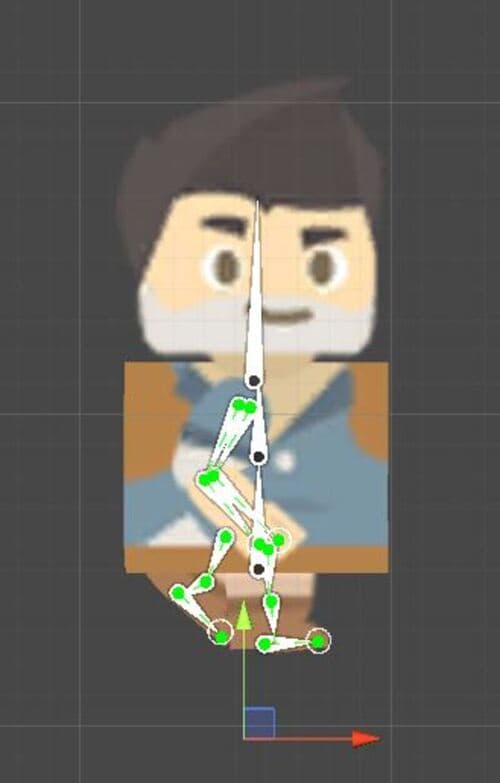
Tap the record tab and move the limbs to this pose:
The armature, we found, was very fiddly, so be patient while trying to create this pose. This first dynamic pose means that we need to have the whole character move slightly up on the y-axis. Then, after forwarding the six frames, we drag the character in different positions and down while limbs reposition to make the first passing pose.
Go through these two keyframes to check if you have an experimental animation. Reposition the feet to avoid foot sliding.
Then, the second dynamic pose happens six frames forward:
Now, we have another passing posture at frame number 18:
And conclusively, we have our final dynamic pose and make it look like the first pose. An excellent place to begin is to copy the first frame and paste it at the end. Drag the character forward on the X-axis into the ideal place. Now move the limbs into roughly the exact position as the beginning pose.
05Step 5: Go back to animation and check
Now, you can go back through the animation and consider checking two things. Firstly, correct any unnaturally bent limbs.
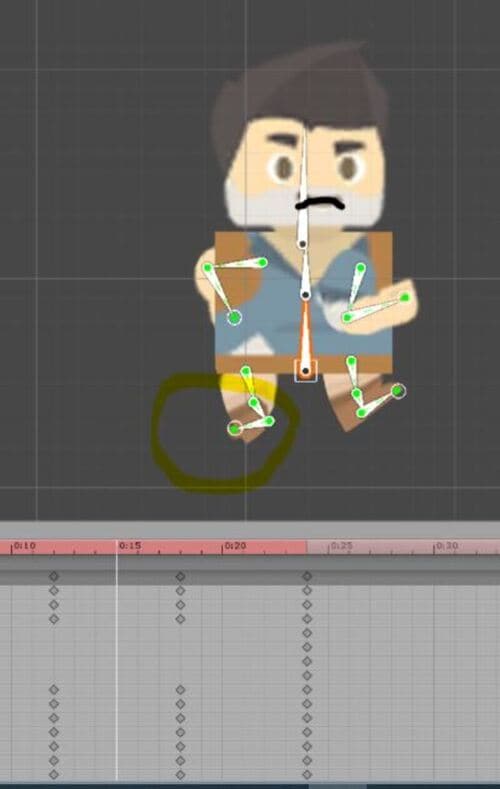
06Step 6: Create a contact pose
Secondly, we are required to add a unique pose to this run cycle called a “Contact Pose,” where we can visibly see the character make contact with the ground. This pose occurs a few frames after the dynamic pose and a few before the passing pose. It is simply the forward leg making early contact with the ground.

We need one of these before every passing pose. Also, while we’re here, let’s add a little more toe movement after passing each passing pose to make it look like the character got pushed off the ground.
So, this is the procedure to use the best 2D animation software for game development via Unity, and you can similarly continue to make jump animations, root motion, and more.
This tutorial mainly focused on animating a 2D character and dove deeper into the actual structure of an animation. Knowing these things will allow you to animate 2D characters and 3D characters as the principles are the same for each medium.
Easiest Solution for 2D Game Character Animation
Animating 2D games with Filmora Pro is a perfect choice. You get to try out its excellent 2D and 3D animation functions that are highly affordable and simple to use for both Android and iOS devices. You can consider using keyframe animations and letting them look realistic.
You can also get your fingers on a vast range of video editing tools with Wondershare Filmora Video Editor , such as color correction and grading, motion tracking, keying, simulations, and more. It allows you to make incredible animated videos and cinematic reels.
How to animate games with Wondershare Filmora
More advancement means more and kinds of games are fading out to obscurity. You can now animate 2D games underrated and add a bit of your touch to them via software like Filmora Pro and others like it.
For example, Filmora Pro features a dozen different transition effects like Centre Wipe, Evaporate, or Linear Wipe.
For Win 7 or later (64-bit)
For macOS 10.12 or later
You can also apply 3D rendering techniques to your games’ light and shadow effects.
● Key Takeaways from This Episode →
● A guide to the ultimate 2d game character design & animation course
● A guide to 5 best game animation services
● Learning five best 2D game character animation tools
● Tips for making excellent 2D game animations
● A step by ultimate step guide to making 2D game animation character in Unity
● Exploring the easiest solution for 2D game animation
In this dominated era by 2D game animation, when even the latest versions of Super Mario Bros and Street Fighter. are created of polygonized characters, quality sprite-based 2D games are rare.
In this article
01 [2D Game Animation Courses and Tutorials](#Part 1)
02 [5 Best Game Animation Services to Buy Online](#Part 2)
03 [Best 5 Game Animation Tools for Development As of 2022](#Part 3)
04 [3 Tips for Making Great Animations for 2D Games](#Part 4)
05 [How to Make 2D Animation for Games](#Part 5)
Part 1 2D Game Animation Courses and Tutorials
01Animating a 2D Character within Live-Action Video in Photoshop and Premiere
This tutorial greatly defines the process of creating traditional 2D animation in Photoshop implacable over live-action video. We’ll discuss the live-action planning shots with animation in mind, continuity of video editing, and making references for video animation. You will also know how to create the critical poses via rough animation to finish the entire movement and make final line images.
02Beginning 2D Animation: The Absolute Beginner’s Entry with Jeff Mumm
This course lays a solid foundation for absolute beginners entering the exciting world of 2D game animation. Here, we describe the detailed steps to create unique and great-looking animations.
You will also learn ‘easing,’ one of the twelve animation principles, and ultimately plan an animated sequence.
032D Animation in Moho from Basic to Advanced
This course focuses on applying the principles of animation to create an organic walk cycle for the character. This tutorial or course will also teach you how to rig and prepare your animated characters and do 2D game animation.
You will also learn how to trace characters in Moho and use different drawing tools.
Also, you will learn how to create an organic walk cycle by applying advanced animation principles.
042D Animation 101 Courses
This is one of the free online and the ultimate 2D game character design and animation courses that offer free online certificates. Autumn Leave Films has ten years of experience in the film industry and a great collection of short films – nearly 30 2D Animation 101 Courses.
2D Animation 101 provides eight courses, plus free and proprietary 2D game character animation software. In addition, their “Free Step-by-Step Plan” is specifically compelling to beginners in the 2D Animation arena.
It includes daily 10-minute lessons, online 2D game character animation tutorials, suggestions, and tips on using the required software.
05Skillshare -2D Animation for Beginners with Adobe Animate
This is one of the free online 2D animation courses that offer free online animation courses with certificates. You can learn 2D animation online by following Walt’s course. This course is designed for beginners and demonstrates how to create animated characters by providing students with an understanding of the fundamental principles and vivid examples. This tutorial covers various topics, including vector art basics in Animate, nested animations, adding audio to animations, and more.
This short course or tutorial is ideal for animation for personal rather than professional reasons.
Part 2 5 Best Game Animation Services to Buy Online
Rather than using and learning the best 2D animation software for game development, we’d like to describe a list of the top 5 freelancing platforms to rely upon for the best game animation services.
01Upwork
02Freelancer
03Fiverr
04Guru
05PeoplePerHour
Part 3 Best 5 Game Animation Tools for Development As of 2022
01Adobe Animate
It is a program from Adobe’s Creative Cloud. It offers the ability to make many varieties of animated features, games, or other Flash multimedia. The program was called Adobe Flash Professional for more than ten years; that name was retired in 2015.
The main features of Animate are as follows:
● Integration with your Adobe cloud library of assets
● Easy cross-platform use with other Adobe products
● Creates animated movies, cartoons, or clips
● Creates Flash games or interactive Flash utilities
02Moho
It’s a comprehensive and best 2D game animation software where your animations are basically on the level of some of your favorite creations. It’s projected toward animators looking to hone their craft.
You could create some fantastic stuff if you’re up to the task (and the price). Moreover, they’re constantly adding updates.
03Plastic Animation Paper
Plastic Animation Paper is another best 2D game character animation software that deals heavily with the concept of pencil drawing.
The program is designed for the most straightforward use and involves clear resolution. You can do whatever you wish with your drawings and elevate yourself to the next level.
04Stop Motion Studio
‘Want to create movies like Wallace and those groovy Lego shorts on YouTube? Stop Motion Studio allows you to create terrific stop action movies with a bucket of specialized features.’
05Animaker
Learning how to make 2D animation for games with Animaker is also good to set up a storyboard and animate the characters or props in that scene. It’s used by companies like Verizon, Google, Pepsi, etc.
It’s appropriate for ad placement on websites and simplistic for beginners. They make it easy and super-fast to get lost for hours animating.
Part 4 3 Tips for Making Great Animations for 2D Games
Now that you have some initial idea of 2D game animation let’s jump to the top 3 tips that will help you create the best and unique 2D game character animation designs with ease.
It will be beneficial while knowing how to make 2D animation for games.
01Focus on the story and start with simple movements
You need to focus on the storyline so that outcome will come accordingly. Focus on every detail while sketching, and don’t miss out on simple movements. Take paper and pencil and start drawing simple exercises like the movement of a bouncing ball etc.
02Use keyframes properly
You need to carefully use keyframes’ start and endpoints to have robust storytelling and movements. To adequately describe the first and last, you need to consider effectively using the keyframes.
03Enliven your characters
You need to give life to your characters so that audience can best relate to the story. Also, pay good attention to facial expressions, sound, tickling movements, etc.
Although these may look like the most straightforward tips ever, these are the most practical 2D game animation strategies that can do wonders if used effectively.
Part 5 How to Make 2D Animation for Games
Making 2D game character animation isn’t a straightforward process and thus needs detailed knowledge that we will describe below.
Let’s use Unity as the best 2D animation software for games without further ado!
Essential awareness of the Unity Editor (how to navigate and open tabs) is required to work with the Unity Animation window.
01Step 1: Start the Animation tab
Choose the Adventurer character and launch the Animation tab.
Dock this next to your project tab and console tab. Head towards the project tab and name with the Adventurer folder. Make a new folder known as “Animation.”
With the Animation tab, create a new animation known as “Idle” placed in our Animation folder.
It also creates an Animator Controller in that same folder.
Now, let’s start animating this character!
02Step 2: Proceed with the Idle Animation
IKs contribute a lot to the efficiency and speed of animating when it comes to idle animation. We must animate a subtle movement very similar to a breathing motion. Tap the red record button and move the character to this position:
Now go about fifty frames ahead and barely move the top torso bone straight down.
Drag the arm IKs to the side to contain less bend in them and display a sort of “swinging” motion. Here is the pose that I chose:
A subtle tweak is there. It makes the idle animation look strange if we create large movements. Then, choose the first group of keyframes and tap the Ctrl-C (Command-C on a Mac).
Then, paste these frame-centric keyframes on number 1:50.
So, the nice looping animation is over now! It looks genuine, but we need to add some head motion to improve the illusion.
Just rotate the head back ever so slightly. But, as you can see, it makes a huge difference. Alright! Congratulations! We now have an idle animation!
03Step 3: Start walk animation
Create a new animation clip called ‘Walk.”
This animation is a bit more technical. Here, we need to know a few essential things about walk locomotion. The walk animation’s primary function is that the character is always touching the ground. Therefore, we should never have a pose where our character is airborne. Also, I use the word “pose” intentionally. When we animate in 2D, an action comprises certain key poses. In the scenario of the walk animation, we have one posture like this:
Here we have the right foot (relative to the character) touching the ground as you wander.
Then, about six frames ahead, we have a “passing pose.”
It contains a slight movement downwards. It further adds a realistic bobbing motion.
We must animate the character moving forward by moving the entire character game object. Don’t move the surface by any other means except by dragging the character as the whole object.
Then, the “dynamic pose” with the left foot touching the ground this time.
This happens at frame twelve, and we are still forwarding the character.
Now, we just require a final passing pose.
And then we recreate the same pose!
Now, copy the first keyframe and paste it. Reposition the character on the X-axis to match the forward motion. Now, go back to your animation and tweak any limbs bending in the wrong direction.
We are done!
04Step 4: Run animation
For the Run animation, create one pose with the airborne character. The distance covered is also more significant than the walk animation. Besides, the run animation has a similar general structure, but we add one extra pose to improve the illusion ultimately.
Create a new animation folder or clip called “Run.”
Tap the record tab and move the limbs to this pose:
The armature, we found, was very fiddly, so be patient while trying to create this pose. This first dynamic pose means that we need to have the whole character move slightly up on the y-axis. Then, after forwarding the six frames, we drag the character in different positions and down while limbs reposition to make the first passing pose.
Go through these two keyframes to check if you have an experimental animation. Reposition the feet to avoid foot sliding.
Then, the second dynamic pose happens six frames forward:
Now, we have another passing posture at frame number 18:
And conclusively, we have our final dynamic pose and make it look like the first pose. An excellent place to begin is to copy the first frame and paste it at the end. Drag the character forward on the X-axis into the ideal place. Now move the limbs into roughly the exact position as the beginning pose.
05Step 5: Go back to animation and check
Now, you can go back through the animation and consider checking two things. Firstly, correct any unnaturally bent limbs.
06Step 6: Create a contact pose
Secondly, we are required to add a unique pose to this run cycle called a “Contact Pose,” where we can visibly see the character make contact with the ground. This pose occurs a few frames after the dynamic pose and a few before the passing pose. It is simply the forward leg making early contact with the ground.
We need one of these before every passing pose. Also, while we’re here, let’s add a little more toe movement after passing each passing pose to make it look like the character got pushed off the ground.
So, this is the procedure to use the best 2D animation software for game development via Unity, and you can similarly continue to make jump animations, root motion, and more.
This tutorial mainly focused on animating a 2D character and dove deeper into the actual structure of an animation. Knowing these things will allow you to animate 2D characters and 3D characters as the principles are the same for each medium.
Easiest Solution for 2D Game Character Animation
Animating 2D games with Filmora Pro is a perfect choice. You get to try out its excellent 2D and 3D animation functions that are highly affordable and simple to use for both Android and iOS devices. You can consider using keyframe animations and letting them look realistic.
You can also get your fingers on a vast range of video editing tools with Wondershare Filmora Video Editor , such as color correction and grading, motion tracking, keying, simulations, and more. It allows you to make incredible animated videos and cinematic reels.
How to animate games with Wondershare Filmora
More advancement means more and kinds of games are fading out to obscurity. You can now animate 2D games underrated and add a bit of your touch to them via software like Filmora Pro and others like it.
For example, Filmora Pro features a dozen different transition effects like Centre Wipe, Evaporate, or Linear Wipe.
For Win 7 or later (64-bit)
For macOS 10.12 or later
You can also apply 3D rendering techniques to your games’ light and shadow effects.
● Key Takeaways from This Episode →
● A guide to the ultimate 2d game character design & animation course
● A guide to 5 best game animation services
● Learning five best 2D game character animation tools
● Tips for making excellent 2D game animations
● A step by ultimate step guide to making 2D game animation character in Unity
● Exploring the easiest solution for 2D game animation
10 Great Moving Animation PowerPoint Techniques
10 Awesome Moving Animation PowerPoint Techniques
An easy yet powerful editor
Numerous effects to choose from
Detailed tutorials provided by the official channel
PowerPoints can be quite dull without anything to spice it up. So, this question is more than 100% warranted. Fortunately, we were able to pull together a tutorial on creating moving animation PowerPoint presentations.
Complete with some templates that you can start off with (if you’d prefer to make it as simple as possible for yourself.)
In this article
01 [6 Animated Powerpoint Templates with Interactive Features](#Part 1)
02 [How to Create a Moving Animation in Powerpoint](#Part 2)
03 [10 Moving Animation Powerpoint Techniques](#Part 3)
Part 1 6 Animated PowerPoint Templates with Interactive Features
The default people tend to-go-to when it comes to presentations are videos. As they tend to be more engaging on their own. For that, you’ll see people gravitating towards software like Filmora, which can create beautiful, eye-catching presentations that you can easily and quickly share. Not just to an immediate audience, but also on social media and the like.
However, of course, sometimes a personal touch is important in a presentation — important to have a ‘voice’ attached to the image on the screen. But just because this is the case, doesn’t mean that you shouldn’t go all out on your presentation. Hence, why moving animation PowerPoint templates are such a big deal:
01Company Presentation PowerPoint Template
For the first of the Moving Animation PowerPoint templates that we have to introduce, we chose the ‘Company Presentation PowerPoint Template.’ As you can perhaps guess from the name, it’s a very professional template. It comes with a total of 500 sample slides that you can choose from (50 of which are unique), and it’s set up with professional animations that can spice up your presentation without making it look gaudy or over-the-top.

02Move Animated PowerPoint Template
Next is the modern, minimalistic template called “Move Animated.” This one is a lot more versatile, with every single one of the 144 unique slides available suitably animated. The best part of it is definitely the easy way in which it can be used. With the modern, minimalistic style, it’s easy enough to remove the presets and replace them with suitable company or product images to promote your content, idea, or project.

0340 Animated Conceptual Slides for PowerPoint
Again, we have another modern and minimalistic kind of PowerPoint template with ‘40 Animated Conceptual Slides for PowerPoint.’ It comes with 40 modern slides, all of which come fully animated are easy enough to customize with your own branding or content.

04UNIGRAPH - Animated & Creative Template (PPTX)
For a bit more fun, our next template is “UNIGRAPH.” This still definitely fits the description ‘minimalistic’ but the pop of color and effects that it brings to the table gives it a different kind of vibe from all the others. No less professional, but certainly more fun. Of course, most importantly, perhaps, is the fact that each slide is smoothly animated.

05Graph & Charts PowerPoint Presentation
For this next one, we introduce a template set called “Graphs & Charts” for those who may want to present their products, projects, ideas, etc. in the shape of graphs and charts. It’s perfect for professionals, certainly. Especially with its clean look, brightened only by occasional pops of color that can be seen from the graphs and charts that it comes with.

06Laststyle - PowerPoint Template
This next PowerPoint template is most suited for businesses looking to promote their products. The creator of the template has provided five different colored versions of the template, each with 30 unique slides that were carefully sectioned with suitable animations.

Part 2 How to Create a Moving Animation in PowerPoint
Now we come to the point of the article where we speak directly to those who may want to experiment more by personally creating a moving animation PowerPoint. For this example, we’ll be teaching you how to create a path animation PowerPoint with the available tools that the software offers under ‘Animation.’ Stick around if you want to learn more.
01Step 1. Open Project.
First things first, of course. Start a new project. When you’ve started, move on to the Animation tab (which we’ve pointed out in the image below.)

02Step 2. Add Animation.
Then, make sure to select the object or model that you want to animate (in this case, we’ve inserted a 2D model of a businessman), and then click the ‘Add Animation’ button (shown in the image below.)

03Step 3. Choose Animation.
Under ‘Add Animation’ you’ll find several different options for animations that you can choose from. Of course, since our goal is to create a PowerPoint Motion Path Animation, we have selected one of the ‘Motion Path’ options.

04Step 4. Choose Motion Path Animation
In order to make motion animation in PowerPoint, you must select one of the offered ‘Motion Paths’ (i.e., Bounce, Line, Arcs, etc.) and then use the motion path tool that appears to control the direction you wish to make your character move.
In this example, we chose the ‘Lines’ motion path (1) and then used the line tool to create a path for our businessman model. To walk from the right side of the screen towards the left.

05Step 5. Adjust Animation.
With path animation PowerPoint complete, you can adjust as needed with the tools provided. For example, you can have the character start moving as soon as the slide opens, or wait until a minute has passed, you can extend the animation by changing duration, etc.

Part 3 10 Moving Animation PowerPoint Techniques
For this last step, we break down some important PowerPoint 3D Animation need-to-knows. Including the specifics provided by each of the options made available to you and why it’s important to explore every single one to create better and more professional-looking presentations.
01Transitions
When it comes to PowerPoint presentations, most people are no doubt the most familiar with ‘Transitions’ when talking in terms of adding animation into a presentation. This one decides whether you want to shift from one slide to another smoothly, or if you want the previous slide to break into splinters, or rotate into the next slide, and so on and so forth. It’s an ‘in-between’ animation that signals where one ends and the other begins.

02Animations
Now, for the ‘Animations’ tab, we focus on animations that occur in the slide (not in-between like transitions). This can include a wide array of things. Whether it be characters moving (like shown in the tutorial we provided), text boxes appearing and disappearing in short order, images bouncing into view in dramatic fashion, and so on and so forth. There’s lots of potential here.

03Animation - Start
We mentioned this previously in the tutorial, but PowerPoint (which does not offer the more advanced 3D customization options), does still give you the freedom to choose how you want certain animations to work.
In the case of the ‘Animations-Start’ option, the goal is to decide when an animation starts playing. Do you want it to start after a click? Or maybe you want it to start up immediately? Whatever the case may be, this function will let you choose the specifics.

044. Animation - Duration
Next, we decide how long you want the animation to last. For example, if you chose to add a PowerPoint 3D rotation animation into a character, how long do you want it to spin before it settles into place? Perhaps only a second? Perhaps more? Whatever you chose, this is the option that will let you finalize that.

05Animation - Delay
This one is self-explanatory as well. But suffice to say, the ‘Delay’ option is for deciding how much an animation is delayed before starting. For example, if you chose to start it ‘On Click’ you can increase the delay to keep it from playing immediately on click.

06Break Up Presentation into Sections
A lot of PowerPoint templates, you’ll find, are naturally broken into sections. This is because it is easier to consume it in that way. It’s also a good signal to your audience as to what point of the presentation you are on. Are you in the beginning? The middle? Near the end? Etc. In this case, the best option for showing it is transitions that separate the sections from one another.

07Add Animation - Entrance
As promised earlier, we’ll be going through each type of animation is available under the ‘Add Animation’ option. The first is “Entrance” animations. This one is pretty easy to guess. It makes up a variety of animations that serve as its entrance animation. Here are some examples:
● Appear: To have objects appear without any other effect.
● Fade: To have objects fade into view.
● Bounce: To have objects bounce into view.
● Swivel: To have objects swivel into view.

08Add Animation - Emphasis
This next animation style is to give emphasis to an already-present object. For example, at a click, you can have a text box ‘Pulse’ and become the center of attention. You can change ‘Object Color’ to make it stand out. And so on.

099. Add Animation - Exit
Opposite of the ‘Entrance’ animations are the ‘Exit’ animations. You’ll notice that the style of animations is the same here. The only difference is that the animations occur to exit the project out of the presentation. For example, an image exiting to reveal text. Or text flying out to be replaced with more text, etc.

10Add Animation - Motion Path
We’ve already mentioned the PowerPoint Motion Path animation style previously, but just to reiterate some things, this is the most customizable animation feature on PowerPoint. One that allows you to move objects across the slide in whatever way you wish. In our example, we created a motion path animation that took the character from the center of the screen to the left of the screen.

● Key Takeaways from This Episode →
● While videos are the most popular way to share information, there are some presentations that require a heavier guiding hand.
● In these situations, a PowerPoint presentation, carefully animated, can serve in place of an edited video.
● There are templates available that you can take advantage of if you’d prefer to start with something to work from. We introduced some in this article that we think were particularly notable.
● But, of course, more careful personalization is sometimes necessary. In that case, we hope that you find our tutorial and our list of PowerPoint techniques helpful.
PowerPoints can be quite dull without anything to spice it up. So, this question is more than 100% warranted. Fortunately, we were able to pull together a tutorial on creating moving animation PowerPoint presentations.
Complete with some templates that you can start off with (if you’d prefer to make it as simple as possible for yourself.)
In this article
01 [6 Animated Powerpoint Templates with Interactive Features](#Part 1)
02 [How to Create a Moving Animation in Powerpoint](#Part 2)
03 [10 Moving Animation Powerpoint Techniques](#Part 3)
Part 1 6 Animated PowerPoint Templates with Interactive Features
The default people tend to-go-to when it comes to presentations are videos. As they tend to be more engaging on their own. For that, you’ll see people gravitating towards software like Filmora, which can create beautiful, eye-catching presentations that you can easily and quickly share. Not just to an immediate audience, but also on social media and the like.
However, of course, sometimes a personal touch is important in a presentation — important to have a ‘voice’ attached to the image on the screen. But just because this is the case, doesn’t mean that you shouldn’t go all out on your presentation. Hence, why moving animation PowerPoint templates are such a big deal:
01Company Presentation PowerPoint Template
For the first of the Moving Animation PowerPoint templates that we have to introduce, we chose the ‘Company Presentation PowerPoint Template.’ As you can perhaps guess from the name, it’s a very professional template. It comes with a total of 500 sample slides that you can choose from (50 of which are unique), and it’s set up with professional animations that can spice up your presentation without making it look gaudy or over-the-top.
02Move Animated PowerPoint Template
Next is the modern, minimalistic template called “Move Animated.” This one is a lot more versatile, with every single one of the 144 unique slides available suitably animated. The best part of it is definitely the easy way in which it can be used. With the modern, minimalistic style, it’s easy enough to remove the presets and replace them with suitable company or product images to promote your content, idea, or project.
0340 Animated Conceptual Slides for PowerPoint
Again, we have another modern and minimalistic kind of PowerPoint template with ‘40 Animated Conceptual Slides for PowerPoint.’ It comes with 40 modern slides, all of which come fully animated are easy enough to customize with your own branding or content.
04UNIGRAPH - Animated & Creative Template (PPTX)
For a bit more fun, our next template is “UNIGRAPH.” This still definitely fits the description ‘minimalistic’ but the pop of color and effects that it brings to the table gives it a different kind of vibe from all the others. No less professional, but certainly more fun. Of course, most importantly, perhaps, is the fact that each slide is smoothly animated.
05Graph & Charts PowerPoint Presentation
For this next one, we introduce a template set called “Graphs & Charts” for those who may want to present their products, projects, ideas, etc. in the shape of graphs and charts. It’s perfect for professionals, certainly. Especially with its clean look, brightened only by occasional pops of color that can be seen from the graphs and charts that it comes with.
06Laststyle - PowerPoint Template
This next PowerPoint template is most suited for businesses looking to promote their products. The creator of the template has provided five different colored versions of the template, each with 30 unique slides that were carefully sectioned with suitable animations.
Part 2 How to Create a Moving Animation in PowerPoint
Now we come to the point of the article where we speak directly to those who may want to experiment more by personally creating a moving animation PowerPoint. For this example, we’ll be teaching you how to create a path animation PowerPoint with the available tools that the software offers under ‘Animation.’ Stick around if you want to learn more.
01Step 1. Open Project.
First things first, of course. Start a new project. When you’ve started, move on to the Animation tab (which we’ve pointed out in the image below.)
02Step 2. Add Animation.
Then, make sure to select the object or model that you want to animate (in this case, we’ve inserted a 2D model of a businessman), and then click the ‘Add Animation’ button (shown in the image below.)
03Step 3. Choose Animation.
Under ‘Add Animation’ you’ll find several different options for animations that you can choose from. Of course, since our goal is to create a PowerPoint Motion Path Animation, we have selected one of the ‘Motion Path’ options.
04Step 4. Choose Motion Path Animation
In order to make motion animation in PowerPoint, you must select one of the offered ‘Motion Paths’ (i.e., Bounce, Line, Arcs, etc.) and then use the motion path tool that appears to control the direction you wish to make your character move.
In this example, we chose the ‘Lines’ motion path (1) and then used the line tool to create a path for our businessman model. To walk from the right side of the screen towards the left.
05Step 5. Adjust Animation.
With path animation PowerPoint complete, you can adjust as needed with the tools provided. For example, you can have the character start moving as soon as the slide opens, or wait until a minute has passed, you can extend the animation by changing duration, etc.
Part 3 10 Moving Animation PowerPoint Techniques
For this last step, we break down some important PowerPoint 3D Animation need-to-knows. Including the specifics provided by each of the options made available to you and why it’s important to explore every single one to create better and more professional-looking presentations.
01Transitions
When it comes to PowerPoint presentations, most people are no doubt the most familiar with ‘Transitions’ when talking in terms of adding animation into a presentation. This one decides whether you want to shift from one slide to another smoothly, or if you want the previous slide to break into splinters, or rotate into the next slide, and so on and so forth. It’s an ‘in-between’ animation that signals where one ends and the other begins.
02Animations
Now, for the ‘Animations’ tab, we focus on animations that occur in the slide (not in-between like transitions). This can include a wide array of things. Whether it be characters moving (like shown in the tutorial we provided), text boxes appearing and disappearing in short order, images bouncing into view in dramatic fashion, and so on and so forth. There’s lots of potential here.
03Animation - Start
We mentioned this previously in the tutorial, but PowerPoint (which does not offer the more advanced 3D customization options), does still give you the freedom to choose how you want certain animations to work.
In the case of the ‘Animations-Start’ option, the goal is to decide when an animation starts playing. Do you want it to start after a click? Or maybe you want it to start up immediately? Whatever the case may be, this function will let you choose the specifics.
044. Animation - Duration
Next, we decide how long you want the animation to last. For example, if you chose to add a PowerPoint 3D rotation animation into a character, how long do you want it to spin before it settles into place? Perhaps only a second? Perhaps more? Whatever you chose, this is the option that will let you finalize that.
05Animation - Delay
This one is self-explanatory as well. But suffice to say, the ‘Delay’ option is for deciding how much an animation is delayed before starting. For example, if you chose to start it ‘On Click’ you can increase the delay to keep it from playing immediately on click.
06Break Up Presentation into Sections
A lot of PowerPoint templates, you’ll find, are naturally broken into sections. This is because it is easier to consume it in that way. It’s also a good signal to your audience as to what point of the presentation you are on. Are you in the beginning? The middle? Near the end? Etc. In this case, the best option for showing it is transitions that separate the sections from one another.
07Add Animation - Entrance
As promised earlier, we’ll be going through each type of animation is available under the ‘Add Animation’ option. The first is “Entrance” animations. This one is pretty easy to guess. It makes up a variety of animations that serve as its entrance animation. Here are some examples:
● Appear: To have objects appear without any other effect.
● Fade: To have objects fade into view.
● Bounce: To have objects bounce into view.
● Swivel: To have objects swivel into view.
08Add Animation - Emphasis
This next animation style is to give emphasis to an already-present object. For example, at a click, you can have a text box ‘Pulse’ and become the center of attention. You can change ‘Object Color’ to make it stand out. And so on.
099. Add Animation - Exit
Opposite of the ‘Entrance’ animations are the ‘Exit’ animations. You’ll notice that the style of animations is the same here. The only difference is that the animations occur to exit the project out of the presentation. For example, an image exiting to reveal text. Or text flying out to be replaced with more text, etc.
10Add Animation - Motion Path
We’ve already mentioned the PowerPoint Motion Path animation style previously, but just to reiterate some things, this is the most customizable animation feature on PowerPoint. One that allows you to move objects across the slide in whatever way you wish. In our example, we created a motion path animation that took the character from the center of the screen to the left of the screen.
● Key Takeaways from This Episode →
● While videos are the most popular way to share information, there are some presentations that require a heavier guiding hand.
● In these situations, a PowerPoint presentation, carefully animated, can serve in place of an edited video.
● There are templates available that you can take advantage of if you’d prefer to start with something to work from. We introduced some in this article that we think were particularly notable.
● But, of course, more careful personalization is sometimes necessary. In that case, we hope that you find our tutorial and our list of PowerPoint techniques helpful.
Most Effective Tactics to Set WhatsApp Status
Most Effective Tactics to Set WhatsApp Status
An easy yet powerful editor
Numerous effects to choose from
Detailed tutorials provided by the official channel
People generally use images to be uploaded as their WhatsApp status and unknown to many, videos as well as GIFs can also be added as status.
This status remains on your profile for 24 hours and can be viewed only by people who are on your contact list. So, if you too looking for ways to add WhatsApp status GIF, keep reading.
In this article
01 [How to set an animated GIF as WhatsApp status from the phone gallery?](#Part 1)
02 [How to set an animated GIF as WhatsApp status using an app?](#Part 2)
03 [Setting WhatsApp GIF status using device internal camera](#Part 3)
04 [How to create an interesting GIF in a hassle-free manner using Wondershare Filmora](#Part 4)
Part 1 How to set an animated GIF as WhatsApp status from the phone gallery?
If the GIF that you wish to use as the WhatsApp status is present on your phone, you can add it directly from the phone gallery. The steps to get this task done are enlisted below.
Step 1. Launch WhatsApp on your phone and then click on the Status tab.
Step 2. Tap on the My status tab to add a new status. The camera app on the phone will open and you need to launch the phone gallery now.
Step 3. Choose the desired GIF from the gallery, click on it and then tap on the Send button to set it as your status.
The selected GIF will be set as your WhatsApp status.
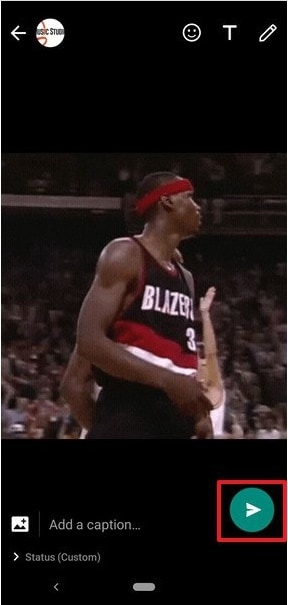
Part 2 How to set an animated GIF as WhatsApp status using an app?
Another way to add an animated GIF WhatsApp status is by using an app and for this, we recommend Giphy as the best tool. The steps to use the app for setting an animated status are as follows.
Step 1. Download, install and open the Giphy app on your phone.
Step 2. The main interface of the app will show multiple GIF options. You can also search your choice of animation based on categories or by using the search box.
Step 3. Next, click on the desired GIF to open it and see it in a larger frame.
Step 4. Under the selected GIF, click on the icon resembling a paper plane, and sharing options will appear.
Step 5. Choose the WhatsApp icon from the options available and then at the next menu, click on the My status option.
Step 6. Next, tap on the green arrow at the bottom-right corner to set GIF as WhatsApp status.
Part 3 Setting WhatsApp GIF status using device internal camera
Another way to add an animated GIF as WhatsApp status is using the internal camera of the device. The steps for the same are as follows.
Step 1. On your phone, launch WhatsApp and at the Status tab, click on the My Status option.
Step 2. The camera of the phone will get activated and now to start the video recording, you need to tap and hold the button that is used for taking the images.
Step 3. Record the video for which you wish to make an animation (video cannot be longer than 5 seconds).
Step 4. After the recording is done, you can adjust the duration using the slider and then choose to play the recorded video as GIF. Click on the Send button to share the video as WhatsApp Status.

Part 4 How to create an interesting GIF in a hassle-free manner using Wondershare Filmora Video Editor
If you wish to set your WhatsApp status as interesting GIF videos, you would need to download such animations online. Another way is to get customized GIF files and this professional tool will be required. If you too want to create your own customized animation in a hassle-free manner, we suggest using Wondershare Filmora. Not only WhatsApp status, but you can also use software for creating GIF animations for web pages, social media sites, ad banners, and other uses.
Wondershare Filmora
Get started easily with Filmora’s powerful performance, intuitive interface, and countless effects!
Try It Free Try It Free Try It Free Learn More >

Using Wondershare Filmora, artistic animations can be quickly created using an image as well as videos. The process is simple and does not require any advanced technical know-how. To create the desired GIF video, there are multiple options for customizations available like adding text, overlays, elements, and more.
Key features of the software
● Create GIF animations using videos and still images.
● Support all key video and image formats like FLV, MKV, MP4, and more.
● Allows customizing the animations by adding text, overlays, elements, and others.
● Quick and hassle-free tool for creating an interesting GIF.
● Windows and Mac support.
Steps to create GIF for WhatsApp status using Wondershare Filmora
Step 1. Launch Wondershare Filmora and add video or images from which you wish to create an animated GIF.
Step 2. Drag and drop the added media file to the timeline of the software.
Step 3. Next, edit and customize the added files using features like combine, crop, split, speed-up, slow, and more.
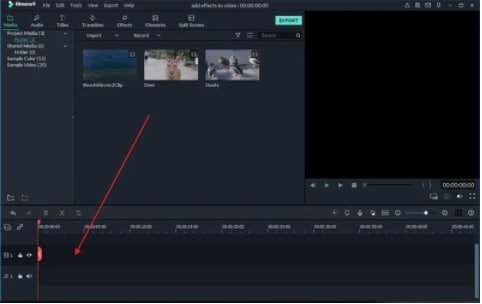
Step 4. You can also add text or elements like sound and others to the added files.
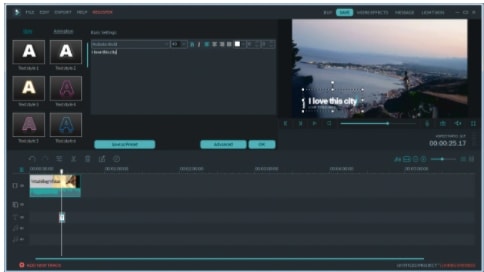
Step 5. Next, when all settings are done, choose GIF at the Local tab to save the media file as GIF. Choose the desired file name and the system location to save the file. Finally, click on the Export button.
The created GIF animation will save to your selected folder and can be used as WhatsApp status, on social media sites, or for any other use as needed.
● Key Takeaways from This Episode →
●GIF animations can now be used as WhatsApp status.
●There are multiple ways to set GIF animations as WhatsApp status.
People generally use images to be uploaded as their WhatsApp status and unknown to many, videos as well as GIFs can also be added as status.
This status remains on your profile for 24 hours and can be viewed only by people who are on your contact list. So, if you too looking for ways to add WhatsApp status GIF, keep reading.
In this article
01 [How to set an animated GIF as WhatsApp status from the phone gallery?](#Part 1)
02 [How to set an animated GIF as WhatsApp status using an app?](#Part 2)
03 [Setting WhatsApp GIF status using device internal camera](#Part 3)
04 [How to create an interesting GIF in a hassle-free manner using Wondershare Filmora](#Part 4)
Part 1 How to set an animated GIF as WhatsApp status from the phone gallery?
If the GIF that you wish to use as the WhatsApp status is present on your phone, you can add it directly from the phone gallery. The steps to get this task done are enlisted below.
Step 1. Launch WhatsApp on your phone and then click on the Status tab.
Step 2. Tap on the My status tab to add a new status. The camera app on the phone will open and you need to launch the phone gallery now.
Step 3. Choose the desired GIF from the gallery, click on it and then tap on the Send button to set it as your status.
The selected GIF will be set as your WhatsApp status.
Part 2 How to set an animated GIF as WhatsApp status using an app?
Another way to add an animated GIF WhatsApp status is by using an app and for this, we recommend Giphy as the best tool. The steps to use the app for setting an animated status are as follows.
Step 1. Download, install and open the Giphy app on your phone.
Step 2. The main interface of the app will show multiple GIF options. You can also search your choice of animation based on categories or by using the search box.
Step 3. Next, click on the desired GIF to open it and see it in a larger frame.
Step 4. Under the selected GIF, click on the icon resembling a paper plane, and sharing options will appear.
Step 5. Choose the WhatsApp icon from the options available and then at the next menu, click on the My status option.
Step 6. Next, tap on the green arrow at the bottom-right corner to set GIF as WhatsApp status.
Part 3 Setting WhatsApp GIF status using device internal camera
Another way to add an animated GIF as WhatsApp status is using the internal camera of the device. The steps for the same are as follows.
Step 1. On your phone, launch WhatsApp and at the Status tab, click on the My Status option.
Step 2. The camera of the phone will get activated and now to start the video recording, you need to tap and hold the button that is used for taking the images.
Step 3. Record the video for which you wish to make an animation (video cannot be longer than 5 seconds).
Step 4. After the recording is done, you can adjust the duration using the slider and then choose to play the recorded video as GIF. Click on the Send button to share the video as WhatsApp Status.
Part 4 How to create an interesting GIF in a hassle-free manner using Wondershare Filmora Video Editor
If you wish to set your WhatsApp status as interesting GIF videos, you would need to download such animations online. Another way is to get customized GIF files and this professional tool will be required. If you too want to create your own customized animation in a hassle-free manner, we suggest using Wondershare Filmora. Not only WhatsApp status, but you can also use software for creating GIF animations for web pages, social media sites, ad banners, and other uses.
Wondershare Filmora
Get started easily with Filmora’s powerful performance, intuitive interface, and countless effects!
Try It Free Try It Free Try It Free Learn More >
Using Wondershare Filmora, artistic animations can be quickly created using an image as well as videos. The process is simple and does not require any advanced technical know-how. To create the desired GIF video, there are multiple options for customizations available like adding text, overlays, elements, and more.
Key features of the software
● Create GIF animations using videos and still images.
● Support all key video and image formats like FLV, MKV, MP4, and more.
● Allows customizing the animations by adding text, overlays, elements, and others.
● Quick and hassle-free tool for creating an interesting GIF.
● Windows and Mac support.
Steps to create GIF for WhatsApp status using Wondershare Filmora
Step 1. Launch Wondershare Filmora and add video or images from which you wish to create an animated GIF.
Step 2. Drag and drop the added media file to the timeline of the software.
Step 3. Next, edit and customize the added files using features like combine, crop, split, speed-up, slow, and more.
Step 4. You can also add text or elements like sound and others to the added files.
Step 5. Next, when all settings are done, choose GIF at the Local tab to save the media file as GIF. Choose the desired file name and the system location to save the file. Finally, click on the Export button.
The created GIF animation will save to your selected folder and can be used as WhatsApp status, on social media sites, or for any other use as needed.
● Key Takeaways from This Episode →
●GIF animations can now be used as WhatsApp status.
●There are multiple ways to set GIF animations as WhatsApp status.
Top 8 Tools Tell You How to Make Slideshows for Instagram
Top 8 Tools Tell You How to Make Slideshows for Instagram
An easy yet powerful editor
Numerous effects to choose from
Detailed tutorials provided by the official channel
Instagram slideshows land among the latest social media trends of fun and entertainment. Learn how to attract jaw dropping peer attention with creating the same!
In this article
01 [When Should You Use an Instagram Slideshow?](#Part 1)
02 [How to Make an Instagram Slideshow with Music?](#Part 2)
03 [8 Best Instagram Slideshow Apps for Creating Outstanding Slideshow](#Part 3)
Part 1 When Should You Use an Instagram Slideshow?
Revolutions in technology has opened doors to a plenty of new and exciting means of information sharing, entertainment and communication. Playing its part in the game, Instagram slideshow has emerged as an exciting means of quick and impactful content sharing. Diving deeper into the discussion, let us talk about the different areas of working with an Instagram slide show in the following section:
01Explanatory Product Demonstrations and Stepwise Tutorials
Considering the diverse media collaboration entertained by this social media platform, you get the liberty to include 10 media files of videos and images while creating a slideshow on Instagram. This is an affordably sufficient media space to demonstrate your newly launched product in front of the target audience.
The aforesaid characteristic of a slideshow for Instagram can be put to another use of creating detailed, step by step guides and product usage tutorials to create an increased and confident customer reach and brand applicability. A few examples include the presentations of recipes by food blogs and chefs, or a detailed look of the day’s outfit by fashion bloggers.
02Interactive Storytelling or Recreate an Event
Gone are the times when stories and events were restricted to a single image or video with a limited scope of understanding and explanation. You can now work with a combination of multiple images and videos to create more vivid and graphical descriptions of stories, narratives and events.
You can work on creating an engaging slideshow for Instagram to tell an amazing story, voice a narration from the beginning to the end, or share your best moments with your cherished audience, which will surely give them the feel of enjoying the adventure along with you.
03Create a Collection
You can now use a slide show for Instagram to design and present a collection of manifold ideas and products within a single post. You can improvise the collection with displaying a series of related products, showcasing a summary of your different blog posts through the week, or simply present a list of your most reliable inspirations, resources and influencers.
04Exciting Video Teasers
If you have a scheduled video release to entertain your audience, try working with interactive slideshows for Instagram to create some sensational teaser content of the upcoming release to imbibe a natural sense of curiosity within your audience.
You can experiment with releasing a mini photoshoot tour of your filming set, share close up progression details, or include a cliffhanger in the end of your Instagram slideshow to ensure the retrieval of your audience towards watching the release of the actual big content. You can use these short teasers as effective means of creating a campaign buzz, while building a closer connect with your audience.
Part 2 How to Make an Instagram Slideshow with Music?
By now, you must have gathered enough knowledge regarding the credibility of Instagram slideshows in catering to a diversity of commercial, professional and personal content sharing needs. Considering the same, you may conveniently feel motivated to try hands at creating stunning slideshow presentations for Instagram on your own.
Adhering to the concern, let us move ahead with our discussion, while talking about how to make a slideshow for Instagram and supplement the same with adaptable background music to develop amazing content masterpieces and share them with social media peers, while grabbing their obvious attention.
While there are a number of choices in the software market to choose your Instagram slideshow creator tool, the FlexClip tool can be a reliable option. Read though the following section to learn the slideshow creation process in the program with a comprehensive and stepwise tutorial guide:
Step 1: Download the Slideshow Creator Tool
Visit the official website of FlexClip to download and install the slideshow maker software in your preferred device.

Step 2: Start from Scratch
After a successful installation, proceed to launch the tool in your system and wait till the software greets you with its welcome interface. Here, you will have to reach to and tap the ‘Start to Create’ button to begin with the slideshow creation process. You can also select a preset template to work on your slideshow if nothing new clicks in your mind.
Step 3: Select an Aspect Ratio
In the tool’s creator window, navigate to the ‘Options Panel’ at the left and click on ‘More’ to select a suitable aspect ratio. Picking the 9:16 ratio would be a good choice.

Step 4: Upload Your Media
In the same ‘Options Panel’, click on ‘Media’ for dragging and dropping the desired video and image files from your device to the program’s media timeline, followed by applying them to the tool’s storyboard. You can alternatively, choose to directly work with media pages of any preset slideshow template.

Step 5: Customize Your Media
You can now proceed to improvise your media files with amazing texts, filters, stickers, emojis, widgets, etc., by clicking on specific object categories from the ‘Options Panel’.

Step 6: Include Seamless Transitions
Proceed to uplift your creation to the next level with the application of stunning image and video transitions. Navigate to the ‘Options Panel’ and tap ‘Elements’. A variety of transition effects will be displayed to choose from. Select the one you like to add it to your slideshow.

Step 7: Add a Background Music
An in line background audio is the best way to set the mood of your slideshow. Choose to add the same to your creation for making a more engaging impact on the audience. Visit the ‘Options Panel’ again and click on ‘Music’ to open the program’s audio library and select a perfect background music from the huge variety of choices, to include in your slideshow.

Step 8: Preview Your Creation
When you have finished customizing your slideshow, navigate to the top right corner of the editor’s storyboard and hit the ‘Preview’ button to visualize and ensure that your slideshow has everything at the right place. You can continue editing if there is a need to make some changes.
Step 9: Time to Save and Share!
When you are happy with your work, consider saving it either to your device or Google Dropbox, from where you can easily upload the same to your Instagram handle.
Part 3 Best Instagram Slideshow Apps for Creating Outstanding Slideshow
Social media is the talk of the trend in today’s times, which has extended its boundaries to visibly everything around us. Speaking in the light of the fact, slideshow presentations are no exception. Social media platforms today have come up with amazing tools and applications to create and share a stunning slideshow Instagram story with utmost ease and within an affordable time span.
Now that you have developed a comprehensive understanding of the credibility of working with Instagram slideshows and their creation process with the inclusion of complementary background music, let us dive into learning about some of the best and most popular Instagram apps for creating awesome slideshow presentations in the following section:
01Filme Lite
This tool lands among the leading user preferences to work on creating slideshow presentations. The application software is packed with a heap of latest features that form the Instagram trends in current times.
Apart from complementing your slideshow creations with tons of features, this slideshow maker for Instagram grants you the liberty to include your most loved videos and images within your presentation and customize them with a diverse range of effects, along with adjusting their play duration within the slideshow. Additional to image and video customization, you are also allowed to choose the image transition style that perfectly suits your content arrangement within the slides.
Working with the tool, you can be sure of getting an unparalleled slideshow creation experience with a very interactive and user oriented design interface, that is simple enough to be easily understood and worked upon by a newbie to the creative world.
02VivaVideo
If you are working on a detailed presentation and wish to spark up your creation with stunning varieties of jaw dropping special effects, consider creating your PowerPoint slideshows in this application. The tool’s effect library is a storehouse of the most amazing special effects that promise of transforming your slideshow into a visual masterpiece.
You can separately apply these effects to each of the slideshow images or choose to work on a combination of selected effects to include within a single video. Apart from this, you are free to choose an apt background music for your presentation slides from the extensive audio library of the software. The bottom line is; you are assured to a complete fun experience while creating slideshows with this tool.
03Movavi
If you are familiar enough with the fundamental concepts and the trivial anecdotes of working with slideshow presentations and want to take your graphic creativity to the next level, you can try hands at using the Movavi slideshow creator software to design high end PowerPoint presentations of professional quality. The best thing about the tool is, it works online and does not require a software download for usage concerns.
Along with creating online slideshow presentations with ease, the tool permits you to create online videos within minutes and instantly download the same for specific usage. You can further, pop up your presentation slides with wonderful transition and animation effects and also make adjustments in the play duration of each slide. The tool lets you choose and add a perfect background music to your presentation from its conveniently vast audio library.
04Slideshow Lab
If you have just landed into the world of creating slideshow presentations and are looking for easy solutions on how to make a slideshow on Instagram, consider working with this software to polish your design creativity. The simple and user cohesive interface of the tool is best for beginners to understand and get customary with the creation process, that takes the minimum possible time to render an appreciable PowerPoint presentation.
Talking about the slideshow design process, you will need to start with selecting a set of desired images, followed by uploading the same into the tool’s slideshow creator timeline. The next step is to arrange the images in the sequential order of appearance, select an appealing background music and apply smooth image transitions. When you are done with everything, proceed to save the presentation to your device.
05MoShow
While you can choose to create stunning slideshow presentations with almost any class of images, the aforesaid app works best to render Instagram images into a top rated Instagram photo slideshow without compromising with the high resolution image quality of Instagram photos. The application integrates motion pictures and lighting effects to transform the otherwise regular images into lively still captures.
Considering the credibility of the tool in overall user experience, its indeed a thumbs up from graphic creators across the globe, thanks to its smart and interactive interface, in time performance and outstanding creation outputs.
06InVideo Editor
Put an end to your search of effective solutions on how to do a slideshow on Instagram with the InVideo Editor, a smart video and graphic editor that can also be employed to adhere to the requirement of creating amazing slideshow presentations from Instagram media. While the creation process hardly takes a few minutes, you can work with the application to explore your editing creativity to the finest levels. The tool works well with any of your MacOs and Windows compatible devices.
The editor’s effects library is loaded with tons of graphic transitions and filters that are dedicated to enhance the contents of your presentation with utmost ease. You can add creative modifications to the slideshow media, such as, cut, crop and trim videos and images and add the most convincing music, overlays, fonts, etc., and enjoy an additional free access to hundreds of stock videos and slideshow templates.
07LightMV
This one is an online slideshow creator utility that works well with almost any operating system including Windows, iOS, Android and Mac. Essentially a cloud centered editor program, this tool caters to your high quality slideshow creation needs in the most effective way. The design process is quite simple, where you only need to add the images and videos, design your presentation and wait till everything comes to place.
What’s more appealing factor about the tool is that you will never need to download the program in your device or purchase a subscription plan to use the application. All you need to do is land into the tool’s website in your favorite browser and tap on the ‘Slideshow’ option to begin with the creation process. You can select from a heap of preset stunning slideshow templates to create the most enhanced PowerPoint presentation.
08Fliptastic
The Fliptastic slideshow creator app is exclusively developed to adhere to the graphic design concerns of iOS users. This one is a no cost graphic utility with a plethora of versatile features and considerable user backup. The app’s effect library is packed with a unique set of slideshow design templates, transitions, background music choices and filters that work to compliment your presentation with the subtlest look ever.
Paying a bit extra attention to the audio inclusion within the slides, the app offers you a range of free music files to work with, while additionally allowing you to upload and use one from your device or the internet.
09Creating Instagram Slideshows With Filmora
Talking exclusively within the domain of video creation and editing, the credibility of the Wondershare Filmora Video Editor software needs no introduction. Moving ahead with our discussion, let us learn about the process of creating awesome Instagram slideshows with Filmora in the following section:
Step 1: Download and Install the Program
To begin with addressing the concern of how to make a slideshow on Instagram story, navigate to the official Wondershare website and download the Wondershare Filmora Video Editor to your preferred system and proceed to install the same.

Wondershare Filmora - Best Video Editor for Mac/Windows
5,481,435 people have downloaded it.
Build unique custom animations without breaking a sweat.
Focus on creating epic stories and leave the details to Filmora’s auto features.
Start a creative adventure with drag & drop effects and endless possibilities.
Filmora simplifies advanced features to save you time and effort.
Filmora cuts out repetition so you can move on to your next creative breakthrough.
Step 2: Import Your Media
Launch the editor program and wait for the latter’s welcome screen to appear. Here, you need to import the images, videos and other media files to the editor timeline for including them in your slideshow. It is recommended to collect all the image and video files into one single folder before opening a new slideshow design project.
In the editor’s welcome screen, navigate to the ‘Media’ tab at the top left corner and click on the same to open the ‘Import’ menu. From here, you need to choose the ‘Import a Media Folder’ option, followed by navigating to the folder that contains the to be imported media files. When you have reached to the required folder, select it and tap ‘OK’ to import the same into the project timeline. When all the files have been imported, you can see them in the ‘Project Media’ panel.

Step 3: Timeline Positioning of Media Files
Reach to the ‘File’ menu and choose ‘Preferences’ from the latter’s dropdown menu. In the ‘Preferences’ window, hit the ‘Editing’ tab and tap on ‘Photo Preferences’. From the drop down menu that follows, choose the ‘Crop to Fit’ option to adjust the aspect ratio of your imported images in line with the slideshow project. In case your images have the 9:16 vertical aspect ratio, select the ‘Fit’ option to make a proper screen fit.

You can proceed to include the image zoom and camera pan features within your project by clicking on the ‘Pan & Zoom’ option. You can further, modify the preset durations of transitions, effects and photos in the ‘Editing’ tab itself before adding them to the editor timeline. Another way of doing the same is to drag the ends of the media files inward or outward, post the timeline adding process.

When you have finished making the required adjustments, navigate back the ‘Media Panel’ to include the imported media files within the project timeline. You can either click on the files to add them, or choose to ‘Drag and Drop’ the same at a preferred place within the timeline.
When all the images and videos have been added, proceed to arrange them in the desired order of appearance in the slideshow, followed by adjusting their screen time and play durations through any of the methods explained above.
Step 4: Add Transitions to Eliminate Hard Cuts
The smooth play of a slideshow is often distorted by hard cuts, which can be escaped by applying smooth transition effects to the slides. Consider exploring the ‘Transitions’ tab of Filmora to choose from a diversity of easily customizable transition effects and place them at the intersection point of the respective slides in the project timeline.
Instead of applying the same transition to every slide, prefer choosing the one that exclusively suits the content arrangement and flow within particular slides. This would save your slideshow from getting a repetitive look.

Post the timeline adding of a transition, you can double click on the same to reach the ‘Transition Setting Window’, where you are allowed to customize the play duration and select its ‘Transition Mode’. Play durations can alternatively be customised in the project timeline by dragging the slider in a left or right direction.
Step 5: Add Overlays and Filters for an Improvised Colour Scheme
To enhance the thematic appeal of your slideshow, consider desaturating the colours of the included images with the extensive range of visual effects and overlays available in the ‘Effects’ tab of the software’s editing timeline. Opening the tab, you are exposed to a series of ‘Filter and Overlay’ categories, that have further subdivisions of Light Leaks, Sepia Tone and Lomography.
To add a particular effect, place it in the timeline track above the desired clip or image. Observe the changes in the ‘Preview Panel’ and proceed to adjust the effect settings if required, by double clicking on the particular effect.

Step 6: Include Motion Graphic Elements
To supplement your slideshow with elegant motion graphics, navigate to the ‘Elements’ tab in the editor timeline. From here, you can access and choose any suitable motion graphic template from a diversity of available choices, to include within the project timeline. The step is completely optional and you should pay attention to the style of content presentation and the cause of creation of your slideshow when choosing to add these elements to the same.

Step 7: Record Voiceovers and Create Soundtracks
To record a voiceover for your slideshow, navigate to the ‘Media’ tab and tap the ‘Record’ dropdown menu. Click on ‘Record Voiceover’ in the list of options that appears. The ‘Record Audio’ icon pops up and you now need to select a microphone to be used in the recording process. When you are ready, tap the ‘Record’ button to let the recording begin.

You can now see your voice recording appear in the ‘Media’ tab with the previously imported media files, ready to be placed within the audio track of the project timeline. Filmora’s audio library is a storehouse of free access music and audio effects. To add one to your slideshow, navigate and click on the ‘Audio’ tab to select from the extensive Rock, Young & Bright, Electronic, etc., music subcategories till you get the perfect match for your presentation.

Once you have selected all the music tracks, place them one by one on the project timeline and move ahead with adjusting their play durations.
Step 8: Export Your Creation
When you are satisfied with your work, you can export the slideshow directly from Filmora to a number of media sharing platforms. All you need to do is, navigate to and tap the ‘Export’ button in the top right corner of the editor screen and proceed to set the resolution and frame rate, and select the output file format of your created slideshow in the ‘Export Window’ that appears.

When you are ready with everything, click on the ‘Export’ button at the bottom right corner of the screen to share your slideshow across different platforms, including YouTube, Instagram, Vimeo, etc.
The time required by Filmora to render your slideshow on the chosen platform will depend on the output file size. Considering the fact that larger files require a much longer time to be rendered, it would be a smart decision to limit the file size of your slideshow within 500 MB.
● Ending Thoughts →
● Instagram slideshows are exciting means of diving into fun-filled entertainment with your social media peers.
● When looking for solutions on how to create a slideshow on Instagram, there are loads of choices in the software market.
● Talking of best creator alternatives, you can pick the Wondershare Filmora slideshow developer program to make an amazing Insta story slideshow.
Instagram slideshows land among the latest social media trends of fun and entertainment. Learn how to attract jaw dropping peer attention with creating the same!
In this article
01 [When Should You Use an Instagram Slideshow?](#Part 1)
02 [How to Make an Instagram Slideshow with Music?](#Part 2)
03 [8 Best Instagram Slideshow Apps for Creating Outstanding Slideshow](#Part 3)
Part 1 When Should You Use an Instagram Slideshow?
Revolutions in technology has opened doors to a plenty of new and exciting means of information sharing, entertainment and communication. Playing its part in the game, Instagram slideshow has emerged as an exciting means of quick and impactful content sharing. Diving deeper into the discussion, let us talk about the different areas of working with an Instagram slide show in the following section:
01Explanatory Product Demonstrations and Stepwise Tutorials
Considering the diverse media collaboration entertained by this social media platform, you get the liberty to include 10 media files of videos and images while creating a slideshow on Instagram. This is an affordably sufficient media space to demonstrate your newly launched product in front of the target audience.
The aforesaid characteristic of a slideshow for Instagram can be put to another use of creating detailed, step by step guides and product usage tutorials to create an increased and confident customer reach and brand applicability. A few examples include the presentations of recipes by food blogs and chefs, or a detailed look of the day’s outfit by fashion bloggers.
02Interactive Storytelling or Recreate an Event
Gone are the times when stories and events were restricted to a single image or video with a limited scope of understanding and explanation. You can now work with a combination of multiple images and videos to create more vivid and graphical descriptions of stories, narratives and events.
You can work on creating an engaging slideshow for Instagram to tell an amazing story, voice a narration from the beginning to the end, or share your best moments with your cherished audience, which will surely give them the feel of enjoying the adventure along with you.
03Create a Collection
You can now use a slide show for Instagram to design and present a collection of manifold ideas and products within a single post. You can improvise the collection with displaying a series of related products, showcasing a summary of your different blog posts through the week, or simply present a list of your most reliable inspirations, resources and influencers.
04Exciting Video Teasers
If you have a scheduled video release to entertain your audience, try working with interactive slideshows for Instagram to create some sensational teaser content of the upcoming release to imbibe a natural sense of curiosity within your audience.
You can experiment with releasing a mini photoshoot tour of your filming set, share close up progression details, or include a cliffhanger in the end of your Instagram slideshow to ensure the retrieval of your audience towards watching the release of the actual big content. You can use these short teasers as effective means of creating a campaign buzz, while building a closer connect with your audience.
Part 2 How to Make an Instagram Slideshow with Music?
By now, you must have gathered enough knowledge regarding the credibility of Instagram slideshows in catering to a diversity of commercial, professional and personal content sharing needs. Considering the same, you may conveniently feel motivated to try hands at creating stunning slideshow presentations for Instagram on your own.
Adhering to the concern, let us move ahead with our discussion, while talking about how to make a slideshow for Instagram and supplement the same with adaptable background music to develop amazing content masterpieces and share them with social media peers, while grabbing their obvious attention.
While there are a number of choices in the software market to choose your Instagram slideshow creator tool, the FlexClip tool can be a reliable option. Read though the following section to learn the slideshow creation process in the program with a comprehensive and stepwise tutorial guide:
Step 1: Download the Slideshow Creator Tool
Visit the official website of FlexClip to download and install the slideshow maker software in your preferred device.
Step 2: Start from Scratch
After a successful installation, proceed to launch the tool in your system and wait till the software greets you with its welcome interface. Here, you will have to reach to and tap the ‘Start to Create’ button to begin with the slideshow creation process. You can also select a preset template to work on your slideshow if nothing new clicks in your mind.
Step 3: Select an Aspect Ratio
In the tool’s creator window, navigate to the ‘Options Panel’ at the left and click on ‘More’ to select a suitable aspect ratio. Picking the 9:16 ratio would be a good choice.
Step 4: Upload Your Media
In the same ‘Options Panel’, click on ‘Media’ for dragging and dropping the desired video and image files from your device to the program’s media timeline, followed by applying them to the tool’s storyboard. You can alternatively, choose to directly work with media pages of any preset slideshow template.
Step 5: Customize Your Media
You can now proceed to improvise your media files with amazing texts, filters, stickers, emojis, widgets, etc., by clicking on specific object categories from the ‘Options Panel’.
Step 6: Include Seamless Transitions
Proceed to uplift your creation to the next level with the application of stunning image and video transitions. Navigate to the ‘Options Panel’ and tap ‘Elements’. A variety of transition effects will be displayed to choose from. Select the one you like to add it to your slideshow.
Step 7: Add a Background Music
An in line background audio is the best way to set the mood of your slideshow. Choose to add the same to your creation for making a more engaging impact on the audience. Visit the ‘Options Panel’ again and click on ‘Music’ to open the program’s audio library and select a perfect background music from the huge variety of choices, to include in your slideshow.
Step 8: Preview Your Creation
When you have finished customizing your slideshow, navigate to the top right corner of the editor’s storyboard and hit the ‘Preview’ button to visualize and ensure that your slideshow has everything at the right place. You can continue editing if there is a need to make some changes.
Step 9: Time to Save and Share!
When you are happy with your work, consider saving it either to your device or Google Dropbox, from where you can easily upload the same to your Instagram handle.
Part 3 Best Instagram Slideshow Apps for Creating Outstanding Slideshow
Social media is the talk of the trend in today’s times, which has extended its boundaries to visibly everything around us. Speaking in the light of the fact, slideshow presentations are no exception. Social media platforms today have come up with amazing tools and applications to create and share a stunning slideshow Instagram story with utmost ease and within an affordable time span.
Now that you have developed a comprehensive understanding of the credibility of working with Instagram slideshows and their creation process with the inclusion of complementary background music, let us dive into learning about some of the best and most popular Instagram apps for creating awesome slideshow presentations in the following section:
01Filme Lite
This tool lands among the leading user preferences to work on creating slideshow presentations. The application software is packed with a heap of latest features that form the Instagram trends in current times.
Apart from complementing your slideshow creations with tons of features, this slideshow maker for Instagram grants you the liberty to include your most loved videos and images within your presentation and customize them with a diverse range of effects, along with adjusting their play duration within the slideshow. Additional to image and video customization, you are also allowed to choose the image transition style that perfectly suits your content arrangement within the slides.
Working with the tool, you can be sure of getting an unparalleled slideshow creation experience with a very interactive and user oriented design interface, that is simple enough to be easily understood and worked upon by a newbie to the creative world.
02VivaVideo
If you are working on a detailed presentation and wish to spark up your creation with stunning varieties of jaw dropping special effects, consider creating your PowerPoint slideshows in this application. The tool’s effect library is a storehouse of the most amazing special effects that promise of transforming your slideshow into a visual masterpiece.
You can separately apply these effects to each of the slideshow images or choose to work on a combination of selected effects to include within a single video. Apart from this, you are free to choose an apt background music for your presentation slides from the extensive audio library of the software. The bottom line is; you are assured to a complete fun experience while creating slideshows with this tool.
03Movavi
If you are familiar enough with the fundamental concepts and the trivial anecdotes of working with slideshow presentations and want to take your graphic creativity to the next level, you can try hands at using the Movavi slideshow creator software to design high end PowerPoint presentations of professional quality. The best thing about the tool is, it works online and does not require a software download for usage concerns.
Along with creating online slideshow presentations with ease, the tool permits you to create online videos within minutes and instantly download the same for specific usage. You can further, pop up your presentation slides with wonderful transition and animation effects and also make adjustments in the play duration of each slide. The tool lets you choose and add a perfect background music to your presentation from its conveniently vast audio library.
04Slideshow Lab
If you have just landed into the world of creating slideshow presentations and are looking for easy solutions on how to make a slideshow on Instagram, consider working with this software to polish your design creativity. The simple and user cohesive interface of the tool is best for beginners to understand and get customary with the creation process, that takes the minimum possible time to render an appreciable PowerPoint presentation.
Talking about the slideshow design process, you will need to start with selecting a set of desired images, followed by uploading the same into the tool’s slideshow creator timeline. The next step is to arrange the images in the sequential order of appearance, select an appealing background music and apply smooth image transitions. When you are done with everything, proceed to save the presentation to your device.
05MoShow
While you can choose to create stunning slideshow presentations with almost any class of images, the aforesaid app works best to render Instagram images into a top rated Instagram photo slideshow without compromising with the high resolution image quality of Instagram photos. The application integrates motion pictures and lighting effects to transform the otherwise regular images into lively still captures.
Considering the credibility of the tool in overall user experience, its indeed a thumbs up from graphic creators across the globe, thanks to its smart and interactive interface, in time performance and outstanding creation outputs.
06InVideo Editor
Put an end to your search of effective solutions on how to do a slideshow on Instagram with the InVideo Editor, a smart video and graphic editor that can also be employed to adhere to the requirement of creating amazing slideshow presentations from Instagram media. While the creation process hardly takes a few minutes, you can work with the application to explore your editing creativity to the finest levels. The tool works well with any of your MacOs and Windows compatible devices.
The editor’s effects library is loaded with tons of graphic transitions and filters that are dedicated to enhance the contents of your presentation with utmost ease. You can add creative modifications to the slideshow media, such as, cut, crop and trim videos and images and add the most convincing music, overlays, fonts, etc., and enjoy an additional free access to hundreds of stock videos and slideshow templates.
07LightMV
This one is an online slideshow creator utility that works well with almost any operating system including Windows, iOS, Android and Mac. Essentially a cloud centered editor program, this tool caters to your high quality slideshow creation needs in the most effective way. The design process is quite simple, where you only need to add the images and videos, design your presentation and wait till everything comes to place.
What’s more appealing factor about the tool is that you will never need to download the program in your device or purchase a subscription plan to use the application. All you need to do is land into the tool’s website in your favorite browser and tap on the ‘Slideshow’ option to begin with the creation process. You can select from a heap of preset stunning slideshow templates to create the most enhanced PowerPoint presentation.
08Fliptastic
The Fliptastic slideshow creator app is exclusively developed to adhere to the graphic design concerns of iOS users. This one is a no cost graphic utility with a plethora of versatile features and considerable user backup. The app’s effect library is packed with a unique set of slideshow design templates, transitions, background music choices and filters that work to compliment your presentation with the subtlest look ever.
Paying a bit extra attention to the audio inclusion within the slides, the app offers you a range of free music files to work with, while additionally allowing you to upload and use one from your device or the internet.
09Creating Instagram Slideshows With Filmora
Talking exclusively within the domain of video creation and editing, the credibility of the Wondershare Filmora Video Editor software needs no introduction. Moving ahead with our discussion, let us learn about the process of creating awesome Instagram slideshows with Filmora in the following section:
Step 1: Download and Install the Program
To begin with addressing the concern of how to make a slideshow on Instagram story, navigate to the official Wondershare website and download the Wondershare Filmora Video Editor to your preferred system and proceed to install the same.
Wondershare Filmora - Best Video Editor for Mac/Windows
5,481,435 people have downloaded it.
Build unique custom animations without breaking a sweat.
Focus on creating epic stories and leave the details to Filmora’s auto features.
Start a creative adventure with drag & drop effects and endless possibilities.
Filmora simplifies advanced features to save you time and effort.
Filmora cuts out repetition so you can move on to your next creative breakthrough.
Step 2: Import Your Media
Launch the editor program and wait for the latter’s welcome screen to appear. Here, you need to import the images, videos and other media files to the editor timeline for including them in your slideshow. It is recommended to collect all the image and video files into one single folder before opening a new slideshow design project.
In the editor’s welcome screen, navigate to the ‘Media’ tab at the top left corner and click on the same to open the ‘Import’ menu. From here, you need to choose the ‘Import a Media Folder’ option, followed by navigating to the folder that contains the to be imported media files. When you have reached to the required folder, select it and tap ‘OK’ to import the same into the project timeline. When all the files have been imported, you can see them in the ‘Project Media’ panel.
Step 3: Timeline Positioning of Media Files
Reach to the ‘File’ menu and choose ‘Preferences’ from the latter’s dropdown menu. In the ‘Preferences’ window, hit the ‘Editing’ tab and tap on ‘Photo Preferences’. From the drop down menu that follows, choose the ‘Crop to Fit’ option to adjust the aspect ratio of your imported images in line with the slideshow project. In case your images have the 9:16 vertical aspect ratio, select the ‘Fit’ option to make a proper screen fit.
You can proceed to include the image zoom and camera pan features within your project by clicking on the ‘Pan & Zoom’ option. You can further, modify the preset durations of transitions, effects and photos in the ‘Editing’ tab itself before adding them to the editor timeline. Another way of doing the same is to drag the ends of the media files inward or outward, post the timeline adding process.
When you have finished making the required adjustments, navigate back the ‘Media Panel’ to include the imported media files within the project timeline. You can either click on the files to add them, or choose to ‘Drag and Drop’ the same at a preferred place within the timeline.
When all the images and videos have been added, proceed to arrange them in the desired order of appearance in the slideshow, followed by adjusting their screen time and play durations through any of the methods explained above.
Step 4: Add Transitions to Eliminate Hard Cuts
The smooth play of a slideshow is often distorted by hard cuts, which can be escaped by applying smooth transition effects to the slides. Consider exploring the ‘Transitions’ tab of Filmora to choose from a diversity of easily customizable transition effects and place them at the intersection point of the respective slides in the project timeline.
Instead of applying the same transition to every slide, prefer choosing the one that exclusively suits the content arrangement and flow within particular slides. This would save your slideshow from getting a repetitive look.
Post the timeline adding of a transition, you can double click on the same to reach the ‘Transition Setting Window’, where you are allowed to customize the play duration and select its ‘Transition Mode’. Play durations can alternatively be customised in the project timeline by dragging the slider in a left or right direction.
Step 5: Add Overlays and Filters for an Improvised Colour Scheme
To enhance the thematic appeal of your slideshow, consider desaturating the colours of the included images with the extensive range of visual effects and overlays available in the ‘Effects’ tab of the software’s editing timeline. Opening the tab, you are exposed to a series of ‘Filter and Overlay’ categories, that have further subdivisions of Light Leaks, Sepia Tone and Lomography.
To add a particular effect, place it in the timeline track above the desired clip or image. Observe the changes in the ‘Preview Panel’ and proceed to adjust the effect settings if required, by double clicking on the particular effect.
Step 6: Include Motion Graphic Elements
To supplement your slideshow with elegant motion graphics, navigate to the ‘Elements’ tab in the editor timeline. From here, you can access and choose any suitable motion graphic template from a diversity of available choices, to include within the project timeline. The step is completely optional and you should pay attention to the style of content presentation and the cause of creation of your slideshow when choosing to add these elements to the same.
Step 7: Record Voiceovers and Create Soundtracks
To record a voiceover for your slideshow, navigate to the ‘Media’ tab and tap the ‘Record’ dropdown menu. Click on ‘Record Voiceover’ in the list of options that appears. The ‘Record Audio’ icon pops up and you now need to select a microphone to be used in the recording process. When you are ready, tap the ‘Record’ button to let the recording begin.
You can now see your voice recording appear in the ‘Media’ tab with the previously imported media files, ready to be placed within the audio track of the project timeline. Filmora’s audio library is a storehouse of free access music and audio effects. To add one to your slideshow, navigate and click on the ‘Audio’ tab to select from the extensive Rock, Young & Bright, Electronic, etc., music subcategories till you get the perfect match for your presentation.
Once you have selected all the music tracks, place them one by one on the project timeline and move ahead with adjusting their play durations.
Step 8: Export Your Creation
When you are satisfied with your work, you can export the slideshow directly from Filmora to a number of media sharing platforms. All you need to do is, navigate to and tap the ‘Export’ button in the top right corner of the editor screen and proceed to set the resolution and frame rate, and select the output file format of your created slideshow in the ‘Export Window’ that appears.
When you are ready with everything, click on the ‘Export’ button at the bottom right corner of the screen to share your slideshow across different platforms, including YouTube, Instagram, Vimeo, etc.
The time required by Filmora to render your slideshow on the chosen platform will depend on the output file size. Considering the fact that larger files require a much longer time to be rendered, it would be a smart decision to limit the file size of your slideshow within 500 MB.
● Ending Thoughts →
● Instagram slideshows are exciting means of diving into fun-filled entertainment with your social media peers.
● When looking for solutions on how to create a slideshow on Instagram, there are loads of choices in the software market.
● Talking of best creator alternatives, you can pick the Wondershare Filmora slideshow developer program to make an amazing Insta story slideshow.
Beginners Guide for Learning 3D Animation
A Beginners Guide for Learning 3D Animation
An easy yet powerful editor
Numerous effects to choose from
Detailed tutorials provided by the official channel
“I am still finding it difficult to go into animation even after covering some basic concepts of animation, hardware, software, books, and courses. Is there a way I can learn 3D animation and graphic design courses quickly and easily?”
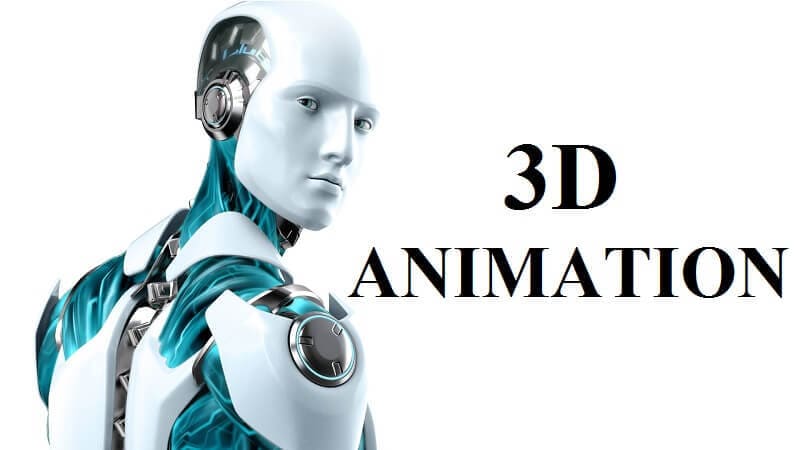
This guide will show you what professional 3D animators go through and share how you can start your animation career. Sit back and enjoy this all-encompassing and educating guide to learn 3D Animation for beginners!
In this article
01 [Should You Study 3D Animation?](#Part 1)
02 [Top 5 Programs for 3D Animation](#Part 2)
03 [The Best 10 Online Courses to Learn 3D Animation for Beginners](#Part 3)
04 [Recommended 3D Animation Learning Books and Resources](#Part 4)
Part 1 Should You Study 3D Animation?
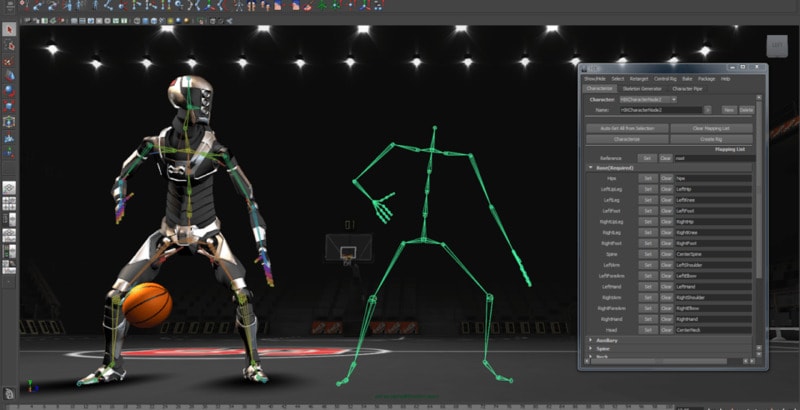
3D animation is a graphic design technique that uses motions to bring props, characters, objects, etc., to life. For a long time, 3D animation has created TV shows, films, and games, but now it is widely used to create materials for businesses that help them advertise their services and products. The most common usage of 3D animation is creating three-dimensional moving objects and placing them in a digital environment. There is software used to generate these objects specifically for 3D animation with 3D animation courses online for free to learn how to use such software. This software helps 3D animators to create the illusion of movement needed to bring these objects to life.
As the popularity of 3D animation begins to grow, its usage also increases. 3D animation can be useful for the following:
● Many businesses use 3D animation for presentation and more examples and graphics.
● 3D animation is used in real estate as many apartment complexes use it to create interior and exterior renders for their properties. 3D animation allows renters or buyers to view the property without visiting it.
● 3D animation can also be valuable in the medical industry to create exciting graphics for presentation.
You can divide the process of 3D animation into three primary phases:
● Modeling: The modeling stage is how characters or objects get created. This stage can include scanning natural objects into a computer or using a modeling tool. Both methods are helpful and outstanding. When you scan real-world objects into your computer, it saves a lot of time; creating a model entirely by yourself using a tool will give you control over the entire look. Irrespective of the methods used, textures must be added to the character or objects before moving to the next stage.
● Animation and layout: At this stage, the created models are animated and positioned into a particular scene, first determining a layout by creating a set and adding objects into it. The characters and things must be animated by assigning animation variables, and then models within the scene can be given life through motion capture and keyframing.
● Rendering: This stage is where the scene generates into the finished image by using a specific software as the process of rendering cannot be handled by a typical computer
For learning 3D animation, practice, to make yourself perfect for getting your 3D animation as smooth and precise as you would like it to take some time. If your set goal is to create 3D characters, you first need to know how to recreate people in a digital form. According to the 3D animation forum, it takes at least eight months to learn how to animate if only you spend about three to four hours every day. It takes firm dedication to learn 3D animation and graphic design courses.
Part 2 Top 5 Programs for 3D Animation
Aside from the three basic phases involved in 3D animation, there are other individual steps that and needed in 3D animation and 3D animation graphic design courses which include:
● Step 1: creating the story and conceptualizing
● Step 2: making the 3D models
● Step 3: rigging, texturing, and animation
● Step 4: setting up the cameras and lightning
● Step 5: rendering
● Step 6: applying special effects and compositing
● Step 7: editing, music, and Foley
● Step 8: the final output
The best part of 3D animation is finding free animation programs without watermarks that are very useful for creating content on Windows and Mac. These best 3D animation courses include:
01Filmora
For Win 7 or later (64-bit)
For macOS 10.12 or later
Wondershare Filmora Video Editor is a straightforward and powerful animation software to create 3D animated text, shapes, elements, or transitions you want for your videos with its 800+ stunning effects. This software comes with a keyframing, green screen, video stabilization, color tuning, split and zoom, amongst others, that help you create precise and smooth animation effects. Filmora program works perfectly on your Windows and Mac computer.
02Blender
Blender is an open-source, powerful 3D animation software for professional users. This animation software does not easily make an image and mission since it focuses on 3D. It takes your animation projects to a whole new level as this program works perfectly on your Mac computer.
03DAZ Studio
DAZ Studio is a potent and completely free tool for 3D animation creation that lets you create short videos whether you are using this for pleasure or business. This 3D animation creator is complicated to use, and 3D effects are at the core focus of this software. This software is highly compatible with Windows 64 bit, and you can build a model, render, and pose animation within the skin texture level.
04Terragen

Terragen is a completely free 3D animation program for Windows tablets and computers. It allows you to create a photo-realistic CG environment and 3D animation that you want. The featured image gallery on this software homepage will give you a profound idea of the outcome when you use the program.
05Anim8or
Anim8or Easy free 3D animation program supports 3D modeler and Truetype fonts to meet your advanced needs. This program is difficult for beginners but allows you to create a unique work according to your needs.
Part 3 The Best 10 Online Courses to Learn 3D Animation for Beginners
There are online 3D animation courses for beginners to learn from and these courses include:
01Introduction to Voxel Art for Character Design by Zach Soares
Price: $12.99
Certificate: Available upon completion of the course
02Psychedelic Animation with Photoshop and After Effects by Klarens Malluta
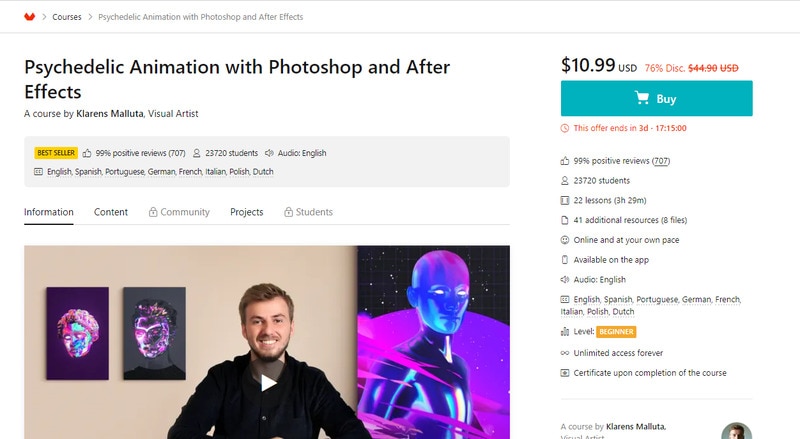
Price: $10.99
Certificate: Available upon completion of the course
032D and 3D Animation with After Effects and Cinema 4D by Andrea Gendusa
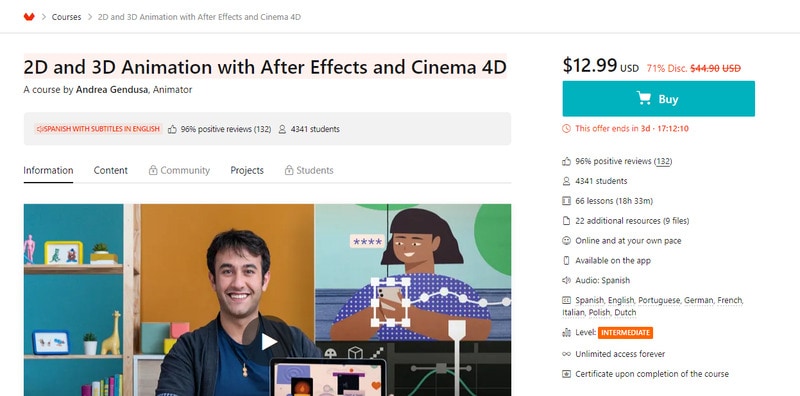
Price: $12.99
Certificate: Available upon completion of the course
04Blender for Beginners by Carlos Sifuentes Haro
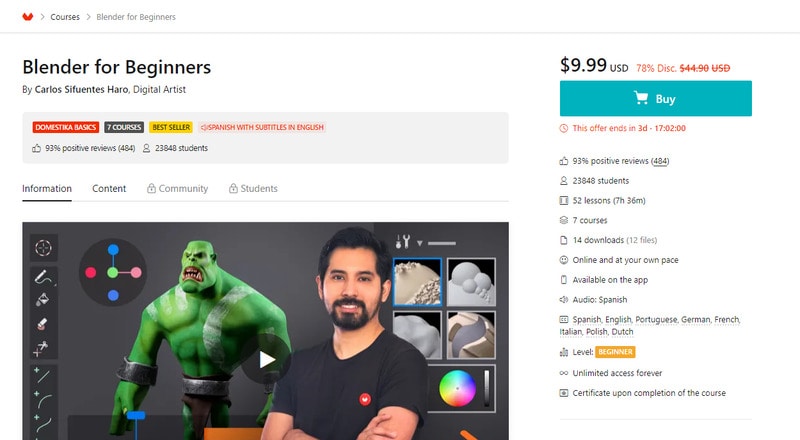
Price: $9.99
Certificate: Available upon completion of the course
05Adobe After Effects for Beginners by Manuel Neto
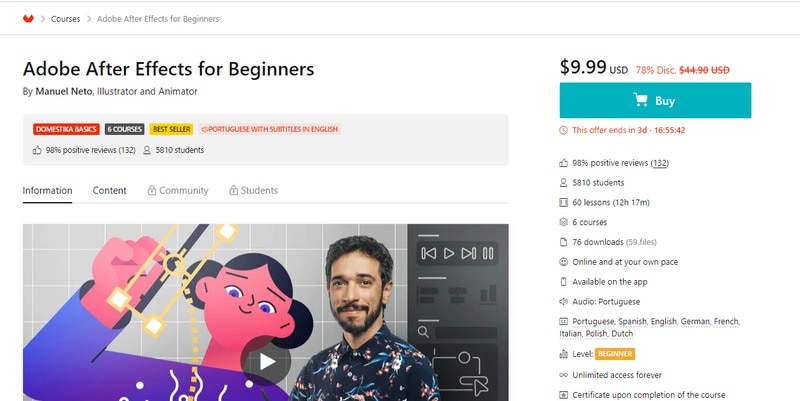
Price: $9.99
Certificate: Available upon completion of the course
06Animation for Typographic Compositions by Holke 79
Price: $12.99
Certificate: Available upon completion of the course
07Adobe After Effects for Character Animation By Facundo López
Price: $9.99
Certificate: Available upon completion of the course
08Animation Techniques with 3D Effects in After Effects by Moncho Massé
Price: $10.99
Certificate: Available upon completion of the course
093D Typography: Playing with Color and Volume by Thomas Burden
Price: $12.99
Certificate: Available upon completion of the course
103D Animation for Non Animators with Cinema 4D by Zigor Samaniego

Price: $11.99
Certificate: Certificate upon completion of the course
Part 4 Part 4 Recommended 3D Animation Learning Books and Resources
Learn 3D animation with the best 3D animation courses, learning books, and resources. Books and Resources for learning 3D animation include but are not limited to:
● 3D Animation Essentials by Andy Beane
3D Animation Essentials by Andy Beane is a comprehensive book on the fundamentals and principles of 3D animation for films and video games.
● 3D Art Essential by Ami Chopine
3D Art Essential by Ami Chopine is all about the hows and whys of 3D animation and teachers why certain techniques and styles work for a particular project.
● Key Takeaways from This Episode →
● Understanding 3D Animation
● Top 5 Programs used for learning 3D Animation
● The Best 10 Online 3D Animation Courses for Beginners
● 3D Animation Graphic Design Courses, Learning Books and Resources
“I am still finding it difficult to go into animation even after covering some basic concepts of animation, hardware, software, books, and courses. Is there a way I can learn 3D animation and graphic design courses quickly and easily?”
This guide will show you what professional 3D animators go through and share how you can start your animation career. Sit back and enjoy this all-encompassing and educating guide to learn 3D Animation for beginners!
In this article
01 [Should You Study 3D Animation?](#Part 1)
02 [Top 5 Programs for 3D Animation](#Part 2)
03 [The Best 10 Online Courses to Learn 3D Animation for Beginners](#Part 3)
04 [Recommended 3D Animation Learning Books and Resources](#Part 4)
Part 1 Should You Study 3D Animation?
3D animation is a graphic design technique that uses motions to bring props, characters, objects, etc., to life. For a long time, 3D animation has created TV shows, films, and games, but now it is widely used to create materials for businesses that help them advertise their services and products. The most common usage of 3D animation is creating three-dimensional moving objects and placing them in a digital environment. There is software used to generate these objects specifically for 3D animation with 3D animation courses online for free to learn how to use such software. This software helps 3D animators to create the illusion of movement needed to bring these objects to life.
As the popularity of 3D animation begins to grow, its usage also increases. 3D animation can be useful for the following:
● Many businesses use 3D animation for presentation and more examples and graphics.
● 3D animation is used in real estate as many apartment complexes use it to create interior and exterior renders for their properties. 3D animation allows renters or buyers to view the property without visiting it.
● 3D animation can also be valuable in the medical industry to create exciting graphics for presentation.
You can divide the process of 3D animation into three primary phases:
● Modeling: The modeling stage is how characters or objects get created. This stage can include scanning natural objects into a computer or using a modeling tool. Both methods are helpful and outstanding. When you scan real-world objects into your computer, it saves a lot of time; creating a model entirely by yourself using a tool will give you control over the entire look. Irrespective of the methods used, textures must be added to the character or objects before moving to the next stage.
● Animation and layout: At this stage, the created models are animated and positioned into a particular scene, first determining a layout by creating a set and adding objects into it. The characters and things must be animated by assigning animation variables, and then models within the scene can be given life through motion capture and keyframing.
● Rendering: This stage is where the scene generates into the finished image by using a specific software as the process of rendering cannot be handled by a typical computer
For learning 3D animation, practice, to make yourself perfect for getting your 3D animation as smooth and precise as you would like it to take some time. If your set goal is to create 3D characters, you first need to know how to recreate people in a digital form. According to the 3D animation forum, it takes at least eight months to learn how to animate if only you spend about three to four hours every day. It takes firm dedication to learn 3D animation and graphic design courses.
Part 2 Top 5 Programs for 3D Animation
Aside from the three basic phases involved in 3D animation, there are other individual steps that and needed in 3D animation and 3D animation graphic design courses which include:
● Step 1: creating the story and conceptualizing
● Step 2: making the 3D models
● Step 3: rigging, texturing, and animation
● Step 4: setting up the cameras and lightning
● Step 5: rendering
● Step 6: applying special effects and compositing
● Step 7: editing, music, and Foley
● Step 8: the final output
The best part of 3D animation is finding free animation programs without watermarks that are very useful for creating content on Windows and Mac. These best 3D animation courses include:
01Filmora
For Win 7 or later (64-bit)
For macOS 10.12 or later
Wondershare Filmora Video Editor is a straightforward and powerful animation software to create 3D animated text, shapes, elements, or transitions you want for your videos with its 800+ stunning effects. This software comes with a keyframing, green screen, video stabilization, color tuning, split and zoom, amongst others, that help you create precise and smooth animation effects. Filmora program works perfectly on your Windows and Mac computer.
02Blender
Blender is an open-source, powerful 3D animation software for professional users. This animation software does not easily make an image and mission since it focuses on 3D. It takes your animation projects to a whole new level as this program works perfectly on your Mac computer.
03DAZ Studio
DAZ Studio is a potent and completely free tool for 3D animation creation that lets you create short videos whether you are using this for pleasure or business. This 3D animation creator is complicated to use, and 3D effects are at the core focus of this software. This software is highly compatible with Windows 64 bit, and you can build a model, render, and pose animation within the skin texture level.
04Terragen
Terragen is a completely free 3D animation program for Windows tablets and computers. It allows you to create a photo-realistic CG environment and 3D animation that you want. The featured image gallery on this software homepage will give you a profound idea of the outcome when you use the program.
05Anim8or
Anim8or Easy free 3D animation program supports 3D modeler and Truetype fonts to meet your advanced needs. This program is difficult for beginners but allows you to create a unique work according to your needs.
Part 3 The Best 10 Online Courses to Learn 3D Animation for Beginners
There are online 3D animation courses for beginners to learn from and these courses include:
01Introduction to Voxel Art for Character Design by Zach Soares
Price: $12.99
Certificate: Available upon completion of the course
02Psychedelic Animation with Photoshop and After Effects by Klarens Malluta
Price: $10.99
Certificate: Available upon completion of the course
032D and 3D Animation with After Effects and Cinema 4D by Andrea Gendusa
Price: $12.99
Certificate: Available upon completion of the course
04Blender for Beginners by Carlos Sifuentes Haro
Price: $9.99
Certificate: Available upon completion of the course
05Adobe After Effects for Beginners by Manuel Neto
Price: $9.99
Certificate: Available upon completion of the course
06Animation for Typographic Compositions by Holke 79
Price: $12.99
Certificate: Available upon completion of the course
07Adobe After Effects for Character Animation By Facundo López
Price: $9.99
Certificate: Available upon completion of the course
08Animation Techniques with 3D Effects in After Effects by Moncho Massé
Price: $10.99
Certificate: Available upon completion of the course
093D Typography: Playing with Color and Volume by Thomas Burden
Price: $12.99
Certificate: Available upon completion of the course
103D Animation for Non Animators with Cinema 4D by Zigor Samaniego
Price: $11.99
Certificate: Certificate upon completion of the course
Part 4 Part 4 Recommended 3D Animation Learning Books and Resources
Learn 3D animation with the best 3D animation courses, learning books, and resources. Books and Resources for learning 3D animation include but are not limited to:
● 3D Animation Essentials by Andy Beane
3D Animation Essentials by Andy Beane is a comprehensive book on the fundamentals and principles of 3D animation for films and video games.
● 3D Art Essential by Ami Chopine
3D Art Essential by Ami Chopine is all about the hows and whys of 3D animation and teachers why certain techniques and styles work for a particular project.
● Key Takeaways from This Episode →
● Understanding 3D Animation
● Top 5 Programs used for learning 3D Animation
● The Best 10 Online 3D Animation Courses for Beginners
● 3D Animation Graphic Design Courses, Learning Books and Resources
In-Depth Study of Cartoon Painting Starts From Learning to Draw It
In-depth Study of Cartoon Painting Starts from Learning to Draw It
An easy yet powerful editor
Numerous effects to choose from
Detailed tutorials provided by the official channel
Cartoon painting is slowly becoming popular due to its many benefits, especially easy cartoon canvas painting. For instance, it is pretty eye-grabbing, especially if your audience is children.

Thanks to the animation aspect, it has become relatively cheap to do advertisements with cartoons instead of real people.
In this article
01 [What Are Good Cartoons to Draw?](#Part 1)
02 [How Do You Draw a Cartoon Character for Beginners?](#Part 2)
03 [Is There Anything else You Can Do to Draw Cartoons More Quickly?](#Part 3)
Part 1 What Are Good Cartoons to Draw?
As far as good cartoons are concerned, expect about 5 popular types. These cartoons to draw include:
01 Illustrative Cartoons
They are the most suitable cartoons to draw when portraying particular ideas directly and simply.
The cartoons are primarily used in advertisements, teaching aids, and explaining stories. They also have text that explains them further.
It explains why they are common in school books, making them perfect for explaining content or subject.

02 Animated Cartoons
It is important to note that these cartoons are drawn using computers despite looking as if they are hand-drawn. One thing that makes them stand out is that they seem to be in action and movement.
As much as that’s how they seem from the viewer’s perspective, that’s far from the truth. They are just drawn in series, and since the first one will differ from the second one, there is that illusion of movement created.

03 Comic Strips or Panels
In most cases, these are regular features characterized by established or known characters and usually displayed in newspapers.
Just like the animated cartoons, they are showcased in series to tell or illustrate a story. The series of panels have words said by the various characters.
The words are usually in balloons, and a single comic strip may cover a single or double page of a newspaper.

04 Gag Cartoons
As the name gag suggests, these cartoons revolve around jokes. These single-paneled cartoons often make fun of human beings.
Through overstatements, humor resonates from what is drawn. They can either serve as entertainment or point out, if not make fun of, people, especially their mistakes and faults. Besides the cartoon, expect a caption that’s often a single sentence.

05 Editorial or Political Cartoons
These cartoons are also made for the newspapers. Expect them to be a single drawing on an editorial page. It sheds more light on a particular newspaper’s editorial comment.
As much as some have captions, that’s not always the case. Just like the gag cartoons, they ridicule people, but the editorial ones focus on celebrities.

Part 2 How Do You Draw a Cartoon Character for Beginners?
Even cartoon painting experts were once beginners. So, feel encouraged because you stand a chance also to become an expert in the long run. All you need to do is take the first step. Fortunately, we are here to hold your hand as you do so. So. Without further ado, let’s get started.
01 Cartoon Painting of a Young Character
These are the steps you need to follow when doing so:
Step 1Start with the face
The face is significant, especially when it comes to cartoon painting. It has complex as well as simple parts. For example, the face itself is pretty basic since you will need to begin with a circle.
After that, draw a horizontal and vertical line and ensure that they intersect in the middle.

Step 2Draw the eyes by drawing
Draw the eyes by drawing an oval and ensuring that the top side is slightly tilting to the side.
Do the same thing on the other side since the norm is a pair of eyes. The gap between the two should also be sensible.

Step 3Draw eyebrows
On the upper side of the eye, ensure that the lines are slightly thick. The eyebrows also need to be placed above the eyes, slightly above the thick line representing the eyelashes.

Step 4Draw jaw
After that, start shaping the jaw. Keep in mind that it plays a huge role in determining whether the character will look thin or fat. Additionally, how you draw the jaw determines whether the character will be old or young and how old or young the person will look.

Step 5Draw nose
Design the nose and ensure that you don’t put many details. The good thing about the nose is that a tip is enough to serve the purpose. Another common approach when drawing the nose is doing so as if you are viewing it from the side.

Step 6Draw mouth
Next, draw the mouth and consider the age of your character as you do so. If it is a child, despite the gender, stick to simplicity. You should also avoid drawing the lips. Preferably, go for the good, expressive trace since it never disappoints.

Step 7Draw ears
Proceed to the ears and in relation to whether the character is facing the camera or not. If your character is looking at the camera, you should see the front side view. Therefore, it won’t make sense to display the internal cavities in this case.

Step 8Draw haircut
Proceed to the ears and in relation to whether the character is facing the camera or not. If your character is looking at the camera, you should see the front side view. Therefore, it won’t make sense to display the internal cavities in this case.
As scary as it may look, you need not be an expert to make the haircut look perfect. Additionally, there is no constant way of drawing the haircut, and you are at liberty to practice as much creativity as possible.
Nevertheless, please don’t take it lightly since it can be quite descriptive. For instance, the hair is used to tell the personality of a character. Practice makes perfect, and you better keep doing it until you get it right. Ensure that what you draw shows the age and character of the cartoons to draw as perfectly as possible.
So far, our focus has been on a young character. However, that’s not always the case explaining why we will look at a cartoon painting of an old character.

02 Cartoon Paintings of an Old Character
If you want your character to look old, this is the way to go:
Step 1Old character draw a face
The face is no different from that of a young character. Start with the eyes and add their pupils, eyebrows and don’t forget to add wrinkles.
Since the character is old compared to the previous one, ensure that the eyebrows are thick. They should occupy more space of the forehead.

Step 2Old character make the chin
Make the chin longer too.

Step 3Old character draw the nose
Ensure that the nose design looks wider and larger since the character is old. To achieve that, make the nose look close to the eyes

Step 4Old character exaggerates mustache
Skip the mouth bit and instead go for a big, exaggerated mustache. That’s one common characteristic of an old character, especially male.

Step 5Draw hair
When it comes to hair, bald and side hair will play the trick perfectly. The nose is no different from that of a young character.

03 Cartoon Painting of a Female Character
So far, our focus has been on a male character. So, what do you do if you want to create a female one instead? These are some of the steps to follow as you do so.
The procedure is not that different. However, consider that women’s facial structures are more delicate than those of their male counterparts. Some of the things that stand out include long hair, a small nose, a thin chin, thin eyebrows, and large, expressive eyelashes. Large pupils will also do, especially if you are good at drawing.

Key Takeaways from This Episode
● There are five major types of cartoons to draw, animation, editorial, gag, illustrative and comic strips.
● Cartoon painting is not that hard, especially if you have a guide on how to go about it.
● If that turns out to be difficult, you can always go for the Filmora pro.
Cartoon painting is slowly becoming popular due to its many benefits, especially easy cartoon canvas painting. For instance, it is pretty eye-grabbing, especially if your audience is children.
Thanks to the animation aspect, it has become relatively cheap to do advertisements with cartoons instead of real people.
In this article
01 [What Are Good Cartoons to Draw?](#Part 1)
02 [How Do You Draw a Cartoon Character for Beginners?](#Part 2)
03 [Is There Anything else You Can Do to Draw Cartoons More Quickly?](#Part 3)
Part 1 What Are Good Cartoons to Draw?
As far as good cartoons are concerned, expect about 5 popular types. These cartoons to draw include:
01 Illustrative Cartoons
They are the most suitable cartoons to draw when portraying particular ideas directly and simply.
The cartoons are primarily used in advertisements, teaching aids, and explaining stories. They also have text that explains them further.
It explains why they are common in school books, making them perfect for explaining content or subject.
02 Animated Cartoons
It is important to note that these cartoons are drawn using computers despite looking as if they are hand-drawn. One thing that makes them stand out is that they seem to be in action and movement.
As much as that’s how they seem from the viewer’s perspective, that’s far from the truth. They are just drawn in series, and since the first one will differ from the second one, there is that illusion of movement created.
03 Comic Strips or Panels
In most cases, these are regular features characterized by established or known characters and usually displayed in newspapers.
Just like the animated cartoons, they are showcased in series to tell or illustrate a story. The series of panels have words said by the various characters.
The words are usually in balloons, and a single comic strip may cover a single or double page of a newspaper.
04 Gag Cartoons
As the name gag suggests, these cartoons revolve around jokes. These single-paneled cartoons often make fun of human beings.
Through overstatements, humor resonates from what is drawn. They can either serve as entertainment or point out, if not make fun of, people, especially their mistakes and faults. Besides the cartoon, expect a caption that’s often a single sentence.
05 Editorial or Political Cartoons
These cartoons are also made for the newspapers. Expect them to be a single drawing on an editorial page. It sheds more light on a particular newspaper’s editorial comment.
As much as some have captions, that’s not always the case. Just like the gag cartoons, they ridicule people, but the editorial ones focus on celebrities.
Part 2 How Do You Draw a Cartoon Character for Beginners?
Even cartoon painting experts were once beginners. So, feel encouraged because you stand a chance also to become an expert in the long run. All you need to do is take the first step. Fortunately, we are here to hold your hand as you do so. So. Without further ado, let’s get started.
01 Cartoon Painting of a Young Character
These are the steps you need to follow when doing so:
Step 1Start with the face
The face is significant, especially when it comes to cartoon painting. It has complex as well as simple parts. For example, the face itself is pretty basic since you will need to begin with a circle.
After that, draw a horizontal and vertical line and ensure that they intersect in the middle.
Step 2Draw the eyes by drawing
Draw the eyes by drawing an oval and ensuring that the top side is slightly tilting to the side.
Do the same thing on the other side since the norm is a pair of eyes. The gap between the two should also be sensible.
Step 3Draw eyebrows
On the upper side of the eye, ensure that the lines are slightly thick. The eyebrows also need to be placed above the eyes, slightly above the thick line representing the eyelashes.
Step 4Draw jaw
After that, start shaping the jaw. Keep in mind that it plays a huge role in determining whether the character will look thin or fat. Additionally, how you draw the jaw determines whether the character will be old or young and how old or young the person will look.
Step 5Draw nose
Design the nose and ensure that you don’t put many details. The good thing about the nose is that a tip is enough to serve the purpose. Another common approach when drawing the nose is doing so as if you are viewing it from the side.
Step 6Draw mouth
Next, draw the mouth and consider the age of your character as you do so. If it is a child, despite the gender, stick to simplicity. You should also avoid drawing the lips. Preferably, go for the good, expressive trace since it never disappoints.
Step 7Draw ears
Proceed to the ears and in relation to whether the character is facing the camera or not. If your character is looking at the camera, you should see the front side view. Therefore, it won’t make sense to display the internal cavities in this case.
Step 8Draw haircut
Proceed to the ears and in relation to whether the character is facing the camera or not. If your character is looking at the camera, you should see the front side view. Therefore, it won’t make sense to display the internal cavities in this case.
As scary as it may look, you need not be an expert to make the haircut look perfect. Additionally, there is no constant way of drawing the haircut, and you are at liberty to practice as much creativity as possible.
Nevertheless, please don’t take it lightly since it can be quite descriptive. For instance, the hair is used to tell the personality of a character. Practice makes perfect, and you better keep doing it until you get it right. Ensure that what you draw shows the age and character of the cartoons to draw as perfectly as possible.
So far, our focus has been on a young character. However, that’s not always the case explaining why we will look at a cartoon painting of an old character.
02 Cartoon Paintings of an Old Character
If you want your character to look old, this is the way to go:
Step 1Old character draw a face
The face is no different from that of a young character. Start with the eyes and add their pupils, eyebrows and don’t forget to add wrinkles.
Since the character is old compared to the previous one, ensure that the eyebrows are thick. They should occupy more space of the forehead.
Step 2Old character make the chin
Make the chin longer too.
Step 3Old character draw the nose
Ensure that the nose design looks wider and larger since the character is old. To achieve that, make the nose look close to the eyes
Step 4Old character exaggerates mustache
Skip the mouth bit and instead go for a big, exaggerated mustache. That’s one common characteristic of an old character, especially male.
Step 5Draw hair
When it comes to hair, bald and side hair will play the trick perfectly. The nose is no different from that of a young character.
03 Cartoon Painting of a Female Character
So far, our focus has been on a male character. So, what do you do if you want to create a female one instead? These are some of the steps to follow as you do so.
The procedure is not that different. However, consider that women’s facial structures are more delicate than those of their male counterparts. Some of the things that stand out include long hair, a small nose, a thin chin, thin eyebrows, and large, expressive eyelashes. Large pupils will also do, especially if you are good at drawing.
Key Takeaways from This Episode
● There are five major types of cartoons to draw, animation, editorial, gag, illustrative and comic strips.
● Cartoon painting is not that hard, especially if you have a guide on how to go about it.
● If that turns out to be difficult, you can always go for the Filmora pro.
20 Free After Effects Logo Reveal Templates You Will Want to Know
20 Free After Effects Logo Reveal Templates You Will Want to Know
An easy yet powerful editor
Numerous effects to choose from
Detailed tutorials provided by the official channel
The free After Effects logo reveals templates is a creative and clean animation that is very easy to use and customizable in just a few clicks. This template allows you to change the color, edit the text, add your logo, and click on render and contains two different logo animations for you to choose from. It does not require any plugin, and you can use it for your following modern and professional logo animation.
![]()
By incorporating a logo animation into your video, you can make your brand memorable and choose a suitable template for your brand personality. So, get ready for all the free logo reveal templates in this article.
In this article
01 [20 Best Logo Reveal Templates for After Effects 2022](#Part 1)
02 [Learn How to Use After Effects Logo Reveal Templates](#Part 2)
Part 1 Best Logo Reveal Templates for After Effects 2022
You can use an animated logo reveal if you need to add spice to your marketing campaigns and branded videos. An animated logo reveal is explained as a Great way to capture your audience’s attention as they screw through their newsfeed and stand you out from the competition. This section of the article will give you After Effects logo reveal templates for free that you can choose from this 2022:
![]()
01[Fast Flip Logo Reveal Template](https://dsqqu7oxq6o1v.cloudfront.net/preview-215084-pWlBMUhYg4-high.mp4 target=)
Fast Flip logo reveal template free to download is perfect for those on a budget and uses stock photography which can be replaced with photos of a company or team to review and an elegant logo at the end. All that is required is to customize the color, replace the images, and add your logo.
02Logo Web Search
Logo Web Search is an easy-to-use, stylish and simple animation for a company website. It allows you to change colors quickly and free sound effects, and all you need to do is change the logo text and click on render.
03Search Logo Reveal
Search Logo Reveal After Effect template for free allows you to customize the text and easily drag and drop in your logo. It provides a unique way to review your logo by using an animated search bar with a sample question and bringing up your logo as the answer. It can be a great add on to websites with search options.
04Colors Logo Reveal
Colors Logo Reveal is a super clean and straightforward After Effects logo reveal template that is very easy to use for designers and creators. It contains two different logos animations that you can choose from and requires no plugin. Add your logo, change the color, edit the text, and click on render.
05Logo Reveal
Logo Reveal is perfect for small business companies and startups with an easy-to-use template that comes with detailed instruction on how to customize and render your logo reveal Project.
06Unlock Phone Logo Reveal
Unlock Phone Logo Reveal is one of the dynamic logo reveal After Effects templates for free with a modern design, smooth transition effects, and simple text animation that is super easy to use. All that is required is to edit the text, drag and drop in your media, and click on render. It comprises a cool intro or opener to presentations, slideshows, promotions, and event videos to impress your audience.
07Orbital Free HUD Logo Reveal
Orbital Free HUD Logo Reveal is perfect for any tech company, and it’s done up in futuristic style and includes the complete. AEP project file with background texture and elements.
08Corporate logo reveal
Corporate Logo Reveal template is a stylish and contemporary template that features a simple shape that is elegantly animated and combined with reviewing your logo. It has one logo placeholder, editable text layers, and an easy-to-use color controller. An excellent logo reveals the Premiere Pro template free to download for companies like stockbrokers.
09White Scroll Logo Reveals
White Scroll Logo Reveals perfect for a more classic logo opener and comes with three background versions and three different logo placement options.
10Shape Logo Reveal
Shape Logo Reveal is a stylish logo reveal template with colorful shape layers and lines that beautifully form a clean-looking logo reveal. It is a short intro for a business slideshow, promotions, events, TV shows, videos, commercials, corporate presentations, etc.
11Free Animated Logo Reveals
Free Animated Logo Reveals is packed with three different logos reveal, which a suitable for corporates and an excellent option for one who wants a modern and professional logo show.
12Clean Titles And Logo Reveal
Clean Titles and Logo Reveal offers stylish templates which an eye-catching design and contains two text placeholders and one logo placeholder. It is effortless to use and a short introduction to TV shows, commercials, slideshows, promotions, Facebook and YouTube videos, etc.
13Hi-Tech Logo Reveal 02
Hi-Tech Logo Reveal is a premium animated logo reveal that features a dark blue background joint with light blue HUD elements and a perfect logo reveal template for a company that wants to stand out online.
14Testimonials Logo Reveal
Testimonials logo Reveal is a stylish and clean project that is perfect for displaying the company’s testimonials and reviews. This After Effects logo reveal template for free features six title placeholders, one logo holder, and six photo placeholders, requiring no plugin.
15Elegant Logo Reveal
Elegant logo Reveals perfect for a feminine background. It features chrome logo pens with a silky dark background, enabling you to easily add your text, insert your logo, and change the colors.
16Logo Web Search II
Logo Web Search II is a stylish and straightforward animation mainly for company websites. It is elementary to use.
17Battle Logo Reveal
Blue Action Logo Reveal is for those looking for a minimalist logo opener and features a dynamic animation style, including an editable text layer and a logo placeholder. It also allows you to adjust the colors easily.
18Blue Action Logo Reveal
Blue Action Logo Reveal is majorly for those looking for a minimalist logo opener and features a dynamic animation style including an editable text layer and a logo placeholder. It also allows you to easily adjust the colors.
19Logo Introduction Template
Logo Introduction Template is a free logo reveal from Premiere Pro. It is perfect for the ones looking for a Tudor style logo reveal and allows you to easily customize the colors and insert your logo with a detailed help file.
20Minimal Logo Klick
Minimal Logo Klick comes in a sleek and modern design with playful animation. It encompasses a logo placeholder, an editable text layer, and an intelligent color controller. If you are searching for an unfussy and free logo reveal online, this one is for you.
Part 2 Learn How to Use After Effects Logo Reveal Templates
This section provides you with a basic tutorial on using the logo reveal After Effects template for free. However, this is a professional video editing software, but if video editing is new to you, you can try out Filmora, which is powerful, easy to use for new users. In Filmora, you will use the logo reveal template as a professional even if you are a beginner.
Below is how to use the After Effects logo reveals template:
01Open After Effects and Begin
Open your After Effect software and set up your Project ready. To begin face, create a composition using composition>New. You can also search the web resolution to 3x 2for this Project.
![]()
02Start Creating Logo
Next is to create a solid layer for your logo by using layers>new>solid, and select an appropriate color to match your composition.
![]()
Next is the creator logo by adding the pre-prepared logo artwork. Go to layer>new>text to create a text layer and adjust the text size and color to see.
![]()
03Add Animation to Logo
Manipulate your logo to create an animation and ensure that everything is right where you want it.
![]()
04Add Effects and Keyframe
Add Effect by going to Effect>Simulation>CC Particle World or click on Effects and Presets panel on the right to drag the CC Particle World effect onto your solid layer.
![]()
Set off your animation by adding a keyframe and controlling the animation of the particles effect through the birth rate setting, which is found by expanding the settings in the timeline panel for the solid layer.
![]()
05Import Vector Graphics and Finish
Finally, import your vector graphics into the After Effects by dragging and dropping the file into the Project panel, which brings up an import dialogue.
For Win 7 or later (64-bit)
For macOS 10.12 or later
That’s it! You successfully made use of the logo reveal maker.
● Key Takeaways from This Episode →
● The top 20 logo reveal Premiere Pro templates free to download.
● THow to make logo with After Effects – the logo reveal maker.
● TLastly, the logo reveal, free online tool, Filmora.
● TI hope I’ve gave you a few ideas on the After Effects logo reveal template for your Project and provided a breakdown of other software you can use for free logo reveal, such as Filmora. The article also lists the best logo reveal templates for after-effects that you can choose from this 202You can also use other software for your free logo reveal, but we all need to start somewhere.
Also read:
- Updated 2024 Approved How to Make Slideshow in LinkedIn
- New 2024 Approved Best 10 Photo Animator Templates
- 2024 Approved Whats Rigging Animation
- How to Cartoonize Photo Photoshop in Simple Steps for 2024
- Updated 2024 Approved Top 7 Animated GIF Text Makers
- Updated 2024 Approved How to Make Whiteboard Animation Videos
- Updated In 2024, 12 Aesthetic GIF Instagram for Marketers and Creatives
- Updated 2024 Approved How to Create Picsart Cartoon in Simple Ways
- New 2024 Approved Can I Still Do Animated Logo Design Without Design Skills?
- Ways to Stop Animation From Looping in Unity for 2024
- In 2024, 15 Forgotten Cartoon Characters of All Time
- Updated 2024 Approved How to Animate Picture Online Without Learning From Scratch
- Updated In 2024, 5 Free Animated Gif Sources You Must Check
- Updated 2024 Approved Beginner Tutorial on Making Unity 2D Animation
- 2024 Approved Useful Tips for Canva Animated Elements
- 2024 Approved Before You Learn Facebook Slideshow 5 Things You Should Know How-TOS
- Updated In 2024, How to Make Well Done Animated GIF By Yourself?
- 2024 Approved How to Animate - Adobe Animate Tutorial for All
- New How to Create Free Photo Collage Frame in Minutes?
- Updated How to Create Slideshow in LinkedIn
- Updated Nurturing the Spirit Through the Top 10 Intellectual Anime Websites for 2024
- Updated The Secret Sauce for Making GIF Instagram Story More Stunning
- Updated You Can Turn a TikTok Into a GIF Now
- Updated 2024 Approved Techniques on Making After Effects 2D Animation
- In 2024, Most Effective Ways to Set WhatsApp Status
- New In 2024, The 10 Most Adorable Aesthetic Cartoon Characters
- Updated Types of Cartoon Styles You May Use for Your Next Marketing Project
- Updated In 2024, 5 Different Animation Styles A Simple but Complete Guide
- How To Restore a Bricked Oppo Reno 11 5G Back to Operation | Dr.fone
- Ultimate Guide on Oppo A1x 5G FRP Bypass
- How to Quickly Fix Bluetooth Not Working on Tecno Spark 20 Pro+ | Dr.fone
- Video File Repair - How to Fix Corrupted video files of Huawei Nova 12 Ultra?
- In 2024, How to Watch Hulu Outside US On Honor Play 7T | Dr.fone
- Full guide to iPhone SE (2020) iCloud Bypass
- In 2024, Apple ID Unlock From iPhone X? How to Fix it?
- Motorola Moto G73 5G Bootloop Problem, How to Fix it Without Data Loss | Dr.fone
- 5 Best Route Generator Apps You Should Try On OnePlus Nord N30 5G | Dr.fone
- The Complete Guide to Vivo V30 FRP Bypass Everything You Need to Know
- Does find my friends work on Poco M6 Pro 4G | Dr.fone
- How to Unlock a Network Locked Oppo Find X7 Ultra Phone?
- How to Change/Add Location Filters on Snapchat For your Itel A60s | Dr.fone
- In 2024, How To Activate and Use Life360 Ghost Mode On Nokia C210 | Dr.fone
- 3 Facts You Need to Know about Screen Mirroring Nokia G310 | Dr.fone
- Realme Data Retrieval tool – restore lost data from Realme 10T 5G
- Fake Android Location without Rooting For Your Realme 11X 5G | Dr.fone
- How To Change Realme 11X 5G Lock Screen Clock in Seconds
- 7 Ways to Unlock a Locked Gionee F3 Pro Phone
- Full Guide to Unlock Apple iPhone 15 Pro Max with iTunes | Dr.fone
- Ultimate Guide on Infinix Hot 40 FRP Bypass
- In 2024, A Working Guide For Pachirisu Pokemon Go Map On Honor Magic 6 | Dr.fone
- Title: 2024 Approved Secrets to Make 2D Game Animation
- Author: Elon
- Created at : 2024-05-19 03:04:31
- Updated at : 2024-05-20 03:04:31
- Link: https://animation-videos.techidaily.com/2024-approved-secrets-to-make-2d-game-animation/
- License: This work is licensed under CC BY-NC-SA 4.0.
