
:max_bytes(150000):strip_icc():format(webp)/samsung-soundbar-dolby-atmos-569f1fdd925e46ab8b3e1f51d95e1e6c.jpg)
New <Https //images.wondershare.com/filmora/article-images/filmora9-website>
https://images.wondershare.com/filmora/article-images/filmora9-website
2D Character Animation: Everything You Should Know About It
An easy yet powerful editor
Numerous effects to choose from
Detailed tutorials provided by the official channel
2D character animation is one of the significant kinds of animation popularly used for creating animated movies, marketing videos, cartoons, advertisements, educational content, corporate presentations, video games, etc.
With the popularity of video content, more and more businesses tend to use animation for promotion, as they magnify conversion rates by 20%. Some companies hire 2D character animation services; others try to make them online with software help.
In this article
01 [What is 2D Character Animation and What Does 2D Animation Do?](#Part 1)
02 [2D Character Animation Tips and Tricks](#Part 2)
03 [An Ultimate Guide to Create 2D Character Animation Online](#Part 3)
04 [5 Great 2D Character Animation Templates](#Part 4)
Part 1 What is 2D Character Animation and What Does 2D Animation Do?
2D animation is identified by having its characters and objects created in a 2D space. It means that they only have height and width to specify.
However, 2D animation is considered a traditional style, known from the 1800s. Initially, it was designed by merging the frames in which one drawing was followed by another and making them different; every second consists of 24 frames.
We all remember the classic Disney animations. Snow White and the Seven Dwarfs, The Little Mermaid, Bambi, etc. They are some of the highly famous 2D animation styles.
With the advancement of computer technologies, this process also got digitized through various 2D character animation software.
In this guide, we’ll talk about everything relatable to 2D character animation, and let’s proceed with the expert tips and tricks to create inspirational style within animation character 2D.
Part 2 2D Character Animation Tips and Tricks
01Look for a real-time reference
Using a real-world reference for 2D character animation can help you effectively animate faces. For example, when studios collaborate with voice-over artists, they often record their facial movements. It further helps 2D animators to ensure their expressions get captured convincingly.
If it seems impossible, you can consider using your face, so you have something to refer back to. You could also use a mirror and utter the words your character will speak. It will display the correct animated expressions.
02Observe real life
You need to use observation a lot more. One of the primary aspects of 2D character animation is bringing life to animate objections. Therefore, you must carefully consider how emotion can get portrayed and select each movement accordingly.
Take time watching how people in real-life environments talk and interact with each other, how they express emotions, how they move, etc. Please don’t spend much time doing this, as it is valuable to research.
03Simplicity is the key
2D character animation is never complex compared with 3D. Think carefully before creating a scene too complicated. You must not include too much information, which is hard to digest, and you may even find yourself compromising the scene’s realism. Try not to heavy the stage with too many pose changes or other elements, and keep it genuine.
04Draw animation again and again
Drawing animation consumes a lot of time. You can’t complete it within one day, so you better know deep down that one task only can be done after you have revamped it various times. For 2D character animation, you may need to draw objects on paper several times.
You can’t master the skill of animation character 2D quickly. Luckily, all pains will be relieved someday.
05Feedback is important
Feedback is an essential element of artistic development. It’s wise to actively seek out feedback from familiar figures who can help you enhance. Naturally, we may see work we have invested a great deal of time and effort indifferently to someone not so involved in the creative process. Feedback can equate to a valuable learning opportunity that will assist you produce the results hit the spot much more appropriately.
Part 3 An Ultimate Guide to Create 2D Character Animation Online
Let’s now look at making an illustrated 2D character animation move on a screen.
While there are nearly numerous options for 2D character animation tools and software, this tutorial will animate a character in Adobe After Effects.
Steps to create 2D character animation After Effects
01Step 1: Download and Install Duik
You need to install the Duik animation plugin for Adobe After Effects to simplify the whole process. You can animate and rig characters’ entire limbs with Duik using just the placement of their feet and hands.
While this isn’t an essential step, it can be valuable for beginners, as you’ll see in this tutorial. Luckily, Duik is available for free from Rainbox Laboratory.
02Step 2: Design Your Character
You need a moving character before you’re able to start animating. You can create this character in Adobe Illustrator and import it into After Effects.
Try creating a straightforward character with an aim on the character’s limbs.
In the example mentioned below, you can see that the body is a very rudimentary shape—a circle—with long legs that make it simple to consider the animation process.

Check the character’s joints. Making a round joint between the lower and upper parts of the legs, for instance, will help the character move more smoothly.

03Step 3: Make and Import Your Character Artwork
Now, you’ll need to make a few final adjustments before moving your character artwork. Break your character out into layers firstly. Every section of the character that will move independently needs a separate layer.
So, layers include his circular body, face, and the leg’s segments (i.e., lower leg, upper leg, and foot).

To import your character artwork, go to File, click the Import tab, and choose your character file. Ensure that you need to import it as a composition to ensure it includes the layers you just created.
04Step 4: Establish Initial Character Rigging
Now, the 2D character animation is almost over by the initial rigging.
Firstly, lower the opacity of all your layers to above 50% to see the critical joints within the character.
Next, you must ensure that the joints hinge in the ideal direction. It’s simple to do with the anchor point tool. For each character’s layer, place the anchor point at the center of gravity for each layer of the 2D character animation.
The anchor point would probably go between the eyes for the layer of the face (i.e., the nose, eyes, and mouth). For each legs’ section, hold the anchor point where the leg will hinge (e.g., the anchor point would be at the highest point for the leg’s upper portion, where it meets the body).

Then, use the parent tool to join the limbs’ sections. For instance, the parent of the foot would be the lower leg, and the upper portion is the parent of the lower leg.
It makes sure that the leg moves together as one unit with multiple hinge points.
Finally, use the Duik toolbar to create character controllers. Controllers control the rotation and position of critical elements within your character. For the ankles of the 2D character animation, you would select the controller that encompasses both the rotation and position.
05Step 5: Create Your Rig
Use the Duik toolbar to create a rig. Select each layer from the extremities inward from each limb, lasting with your controllers.
You would select the ankle for a leg, followed by the upper portion, the lower leg, and conclusively, the controller at the ankle. Then, select auto-rig within the Rigging area of the Duik toolbar.
The entire leg will move when you move that ankle controller. If your character contains them, repeat the process for the other leg, along with other limbs.
Before proceeding, test the limbs to make sure they hinge and move correctly. You need to adjust the opacity of the character back to 100% once you are satisfied with the movements.

06Step 6: Start Animating Your Character
You can begin animating after completing a rig. First, create keyframes—the ending and beginning points of the character’s movement. The character’s legs are at their most magnified are thus the endpoints for a walk cycle. Make sure that the beginning and ending of keyframes are identical to get an ideal loop.
Start adding in-between frames from there, like when one leg crosses over the other in the middle of a walking stride.
Moreover, you can add ‘easing” to the animation via 2D character animation After Effects’ Easy Ease tab, located under the Animation button, and Keyframe Assistant.
It will smoothen the transition between the keyframes. You will have a primary walking sequence at this instance.

Now, you can make further refinements to add detail and secondary movement, like a bobbing motion of the head. You can also modify elements like the keyframe velocity, further smoothing out the animation.
As you practice, you’ll get a better feel for your animation preferences and develop more advanced realistic 2D animation character design capabilities.
Part 4 5 Great 2D Character Animation Templates
1 – FrameStory Character Animation Toolkit
2 – Explainer Video Character Animation ToolKit
3 – 2D Character Animation After Effects Template
4 – Character Animation ToolKit
5 – Rigged Character Animation Mockup Template
Given above is a list of the best 2D character animation templates worth considering. Yet, if you are tired of using After Effects Templates, why not select Wondershare Filmora Template Mode?
It is a brand-new mode recently launched by Filmora to ramp up your story. It is a simplistic way to use compared with After Effects.
****Wondershare Filmora Video Editor Template Mode**
For Win 7 or later (64-bit)
For macOS 10.12 or later
Filmora Template Mode is a bold breakthrough that helps you create incredible videos in a minute. Forget about dragging n dropping the video clips into a timeline; Filmora template Mode provides you a new way of generating videos automatically by using various stylish video templates.
Steps to create a stunning animated video in 3 levels
01Step 1: Choose a template
Pick up a video template that best suits your needs.

02Step 2: Import Media
Import at least three video clips or images and let AI assist you in ramping the production process without hassle.

03Step 3: Export Project
Export media among multiple social media platforms.

● Key Takeaways from This Episode →
● Understanding 2D character animation tips and tricks
● A step by step guide to creating 2D character animation online
● Five best 2D character animation templates
● The best alternative of using the Template mode directly within the Wondershare Filmora
2D character animation is one of the significant kinds of animation popularly used for creating animated movies, marketing videos, cartoons, advertisements, educational content, corporate presentations, video games, etc.
With the popularity of video content, more and more businesses tend to use animation for promotion, as they magnify conversion rates by 20%. Some companies hire 2D character animation services; others try to make them online with software help.
In this article
01 [What is 2D Character Animation and What Does 2D Animation Do?](#Part 1)
02 [2D Character Animation Tips and Tricks](#Part 2)
03 [An Ultimate Guide to Create 2D Character Animation Online](#Part 3)
04 [5 Great 2D Character Animation Templates](#Part 4)
Part 1 What is 2D Character Animation and What Does 2D Animation Do?
2D animation is identified by having its characters and objects created in a 2D space. It means that they only have height and width to specify.
However, 2D animation is considered a traditional style, known from the 1800s. Initially, it was designed by merging the frames in which one drawing was followed by another and making them different; every second consists of 24 frames.
We all remember the classic Disney animations. Snow White and the Seven Dwarfs, The Little Mermaid, Bambi, etc. They are some of the highly famous 2D animation styles.
With the advancement of computer technologies, this process also got digitized through various 2D character animation software.
In this guide, we’ll talk about everything relatable to 2D character animation, and let’s proceed with the expert tips and tricks to create inspirational style within animation character 2D.
Part 2 2D Character Animation Tips and Tricks
01Look for a real-time reference
Using a real-world reference for 2D character animation can help you effectively animate faces. For example, when studios collaborate with voice-over artists, they often record their facial movements. It further helps 2D animators to ensure their expressions get captured convincingly.
If it seems impossible, you can consider using your face, so you have something to refer back to. You could also use a mirror and utter the words your character will speak. It will display the correct animated expressions.
02Observe real life
You need to use observation a lot more. One of the primary aspects of 2D character animation is bringing life to animate objections. Therefore, you must carefully consider how emotion can get portrayed and select each movement accordingly.
Take time watching how people in real-life environments talk and interact with each other, how they express emotions, how they move, etc. Please don’t spend much time doing this, as it is valuable to research.
03Simplicity is the key
2D character animation is never complex compared with 3D. Think carefully before creating a scene too complicated. You must not include too much information, which is hard to digest, and you may even find yourself compromising the scene’s realism. Try not to heavy the stage with too many pose changes or other elements, and keep it genuine.
04Draw animation again and again
Drawing animation consumes a lot of time. You can’t complete it within one day, so you better know deep down that one task only can be done after you have revamped it various times. For 2D character animation, you may need to draw objects on paper several times.
You can’t master the skill of animation character 2D quickly. Luckily, all pains will be relieved someday.
05Feedback is important
Feedback is an essential element of artistic development. It’s wise to actively seek out feedback from familiar figures who can help you enhance. Naturally, we may see work we have invested a great deal of time and effort indifferently to someone not so involved in the creative process. Feedback can equate to a valuable learning opportunity that will assist you produce the results hit the spot much more appropriately.
Part 3 An Ultimate Guide to Create 2D Character Animation Online
Let’s now look at making an illustrated 2D character animation move on a screen.
While there are nearly numerous options for 2D character animation tools and software, this tutorial will animate a character in Adobe After Effects.
Steps to create 2D character animation After Effects
01Step 1: Download and Install Duik
You need to install the Duik animation plugin for Adobe After Effects to simplify the whole process. You can animate and rig characters’ entire limbs with Duik using just the placement of their feet and hands.
While this isn’t an essential step, it can be valuable for beginners, as you’ll see in this tutorial. Luckily, Duik is available for free from Rainbox Laboratory.
02Step 2: Design Your Character
You need a moving character before you’re able to start animating. You can create this character in Adobe Illustrator and import it into After Effects.
Try creating a straightforward character with an aim on the character’s limbs.
In the example mentioned below, you can see that the body is a very rudimentary shape—a circle—with long legs that make it simple to consider the animation process.
Check the character’s joints. Making a round joint between the lower and upper parts of the legs, for instance, will help the character move more smoothly.
03Step 3: Make and Import Your Character Artwork
Now, you’ll need to make a few final adjustments before moving your character artwork. Break your character out into layers firstly. Every section of the character that will move independently needs a separate layer.
So, layers include his circular body, face, and the leg’s segments (i.e., lower leg, upper leg, and foot).
To import your character artwork, go to File, click the Import tab, and choose your character file. Ensure that you need to import it as a composition to ensure it includes the layers you just created.
04Step 4: Establish Initial Character Rigging
Now, the 2D character animation is almost over by the initial rigging.
Firstly, lower the opacity of all your layers to above 50% to see the critical joints within the character.
Next, you must ensure that the joints hinge in the ideal direction. It’s simple to do with the anchor point tool. For each character’s layer, place the anchor point at the center of gravity for each layer of the 2D character animation.
The anchor point would probably go between the eyes for the layer of the face (i.e., the nose, eyes, and mouth). For each legs’ section, hold the anchor point where the leg will hinge (e.g., the anchor point would be at the highest point for the leg’s upper portion, where it meets the body).
Then, use the parent tool to join the limbs’ sections. For instance, the parent of the foot would be the lower leg, and the upper portion is the parent of the lower leg.
It makes sure that the leg moves together as one unit with multiple hinge points.
Finally, use the Duik toolbar to create character controllers. Controllers control the rotation and position of critical elements within your character. For the ankles of the 2D character animation, you would select the controller that encompasses both the rotation and position.
05Step 5: Create Your Rig
Use the Duik toolbar to create a rig. Select each layer from the extremities inward from each limb, lasting with your controllers.
You would select the ankle for a leg, followed by the upper portion, the lower leg, and conclusively, the controller at the ankle. Then, select auto-rig within the Rigging area of the Duik toolbar.
The entire leg will move when you move that ankle controller. If your character contains them, repeat the process for the other leg, along with other limbs.
Before proceeding, test the limbs to make sure they hinge and move correctly. You need to adjust the opacity of the character back to 100% once you are satisfied with the movements.
06Step 6: Start Animating Your Character
You can begin animating after completing a rig. First, create keyframes—the ending and beginning points of the character’s movement. The character’s legs are at their most magnified are thus the endpoints for a walk cycle. Make sure that the beginning and ending of keyframes are identical to get an ideal loop.
Start adding in-between frames from there, like when one leg crosses over the other in the middle of a walking stride.
Moreover, you can add ‘easing” to the animation via 2D character animation After Effects’ Easy Ease tab, located under the Animation button, and Keyframe Assistant.
It will smoothen the transition between the keyframes. You will have a primary walking sequence at this instance.
Now, you can make further refinements to add detail and secondary movement, like a bobbing motion of the head. You can also modify elements like the keyframe velocity, further smoothing out the animation.
As you practice, you’ll get a better feel for your animation preferences and develop more advanced realistic 2D animation character design capabilities.
Part 4 5 Great 2D Character Animation Templates
1 – FrameStory Character Animation Toolkit
2 – Explainer Video Character Animation ToolKit
3 – 2D Character Animation After Effects Template
4 – Character Animation ToolKit
5 – Rigged Character Animation Mockup Template
Given above is a list of the best 2D character animation templates worth considering. Yet, if you are tired of using After Effects Templates, why not select Wondershare Filmora Template Mode?
It is a brand-new mode recently launched by Filmora to ramp up your story. It is a simplistic way to use compared with After Effects.
****Wondershare Filmora Video Editor Template Mode**
For Win 7 or later (64-bit)
For macOS 10.12 or later
Filmora Template Mode is a bold breakthrough that helps you create incredible videos in a minute. Forget about dragging n dropping the video clips into a timeline; Filmora template Mode provides you a new way of generating videos automatically by using various stylish video templates.
Steps to create a stunning animated video in 3 levels
01Step 1: Choose a template
Pick up a video template that best suits your needs.
02Step 2: Import Media
Import at least three video clips or images and let AI assist you in ramping the production process without hassle.
03Step 3: Export Project
Export media among multiple social media platforms.
● Key Takeaways from This Episode →
● Understanding 2D character animation tips and tricks
● A step by step guide to creating 2D character animation online
● Five best 2D character animation templates
● The best alternative of using the Template mode directly within the Wondershare Filmora
10 Classical Animated Cartoon Types With Examples
10 Classical Animated Cartoon Types With Examples
An easy yet powerful editor
Numerous effects to choose from
Detailed tutorials provided by the official channel
In today’s time, animation has advanced way more and we can name more than one series, starting from “BoJack Horseman” to “The Flintstones” which can be simply termed as a funny cartoon.
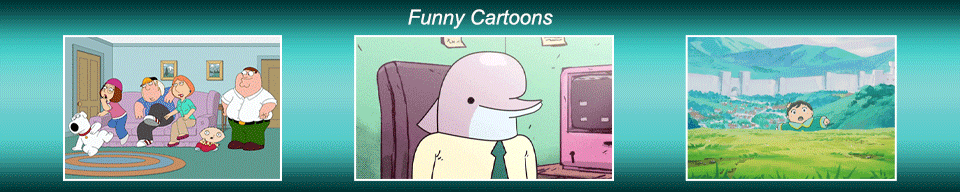
In this article, we will look at the 10 best classical animated cartoon types along with relevant examples to help you understand.
In this article
01 [The Best Animated Series of All Time](#Part 1)
02 [Anyway We Can Create Animation Ourselves?](#Part 2)
Part 1 The Best Animated Series of All Time
Here are 10 classical animated cartoon types with an example for each of them. A lot of us have our earliest TV memories tied to an animated series or the nostalgia of one of the very popular 90s cartoons. In this list, you might as well find one of those funny cartoons or even one of your very favorite Disney cartoons.
01 Doug (1991-1994)
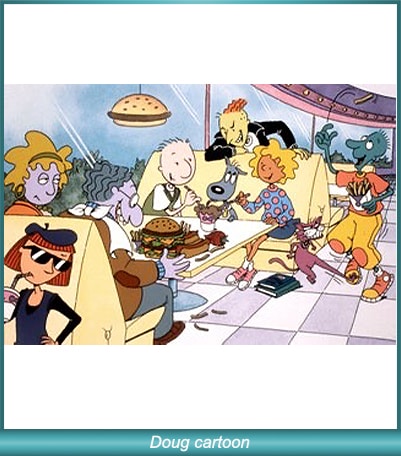
For people who were more into Nickelodeon than Disney/ABC, Doug was one of the most popular 90s cartoons. The funny cartoon show was rated to be one of the most relatable goobers on children’s TV. Along with that, the funny cartoon was known for the ingenuity and creative character names like Doug Funnie, Patti Mayonnaise, Skeeter, Porkchop, Tippi Dink, Roger Klotz, and Mosquito Valentine.
02 Popeye The Sailor (1960-1963)
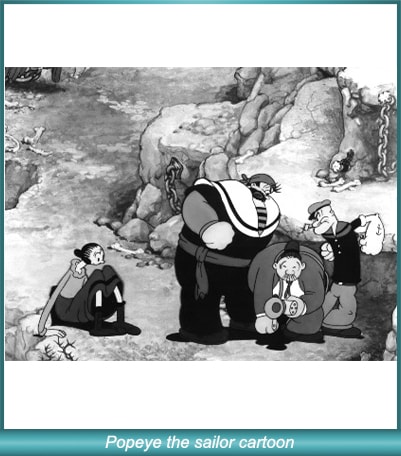
“Popeye” initially started out as a comic strip in newspapers, but after the theatrical short features started airing on TV during the 1950s, soon 220 cartoons were created in just two years, making it one of the most popular television shows of all time. It had rudimentary animation and focused on the popularity of the character “Popeye the Sailor” which is still a very well-known character.
03 Pokemon (1997-Present)
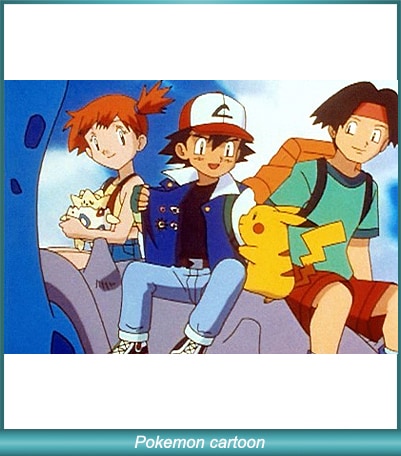
It’s that good and it keeps going on. Pokemon was initially a series of games for the Nintendo Gameboy and from there it grew to be immensely popular where children across the globe simply loved the cute cartoon characters in the show. The Japanese pocket monsters became an integral part of life when the animated television series started airing.
04 Dexter’s Laboratory (1996-2003)
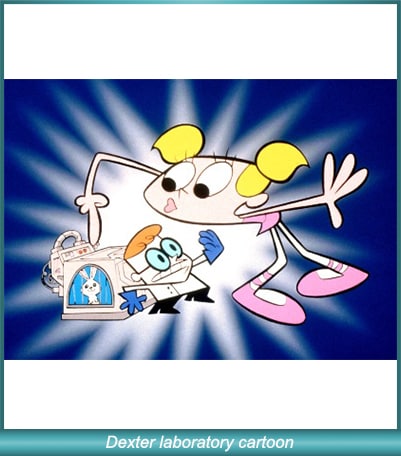
In 1996 Cartoon Network audiences were introduced to a show named Dexter’s Laboratory with Dexter as the primary character of the cartoon show. The boy genius had a massive hidden laboratory under his house. Every episode would feature Dexter planning an exciting experiment which was a favorite of kids. The series is one of the highest-rated series on the Cartoon Network and it also received a Primetime Emmy Award in 1996.
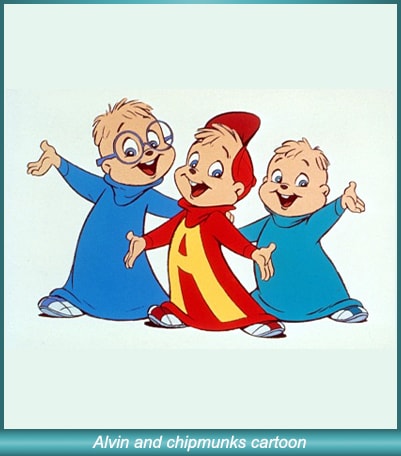
05 Alvin and the Chipmunks (1983-1990)
Alvin and the Chipmunks have been known since the 1960s. Although the show “Alvin and the Chipmunks’’ became popular on NBC in 1983. It featured three main characters: Alvin, Simon, and the loveable Theodore who got into all kinds of hijinks. The series had a large following, especially after the Chip-ettes, female versions of the Chipmunks, were introduced.
06 Scooby Doo, Where Are You! (1969-1970)

Barely any other two-season title has ever become as popular as “Scooby Doo, Where Are You!” The animation franchise is existent even today. The main attraction of this very funny cartoon was the cowardly Great Dane with a speech impediment. The dog solved crimes with teen friends and perfectly captured the imaginations of children as well as teenagers with subtle horror elements and some really hilarious catchphrases.
07 The Flintstones (1960-1966)

The Flintstones is inspired by “The Honeymooners’’ and was also the first animated series released in primetime. It was also the most successful one of its kind until “The Simpsons” was released 30 years later. The popularity of the series was because of its satirical take on modern suburban culture through the use of absurd, anachronistic elements in a Stone Age setting.
08 The Simpsons (1987-1990)

The Simpsons are simply one of the most popular and revolutionary 90s cartoons. It became a cultural juggernaut during its time and has been rated highly by viewers of all ages. The series emphasizes animation which has increased its appeal to modern viewers.
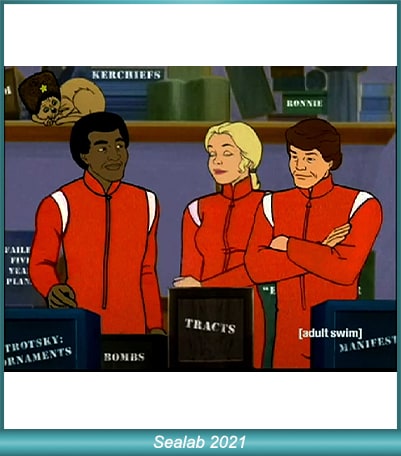
09 Sealab 2021 (2000-2005)
Sealab 2021 is one of Adult Swim’s initial launches of cartoons. It follows a forgotten ’70s adventure cartoon that turns the environmentally-friendly adventure into a blend of workplace resentments and absurd humor.
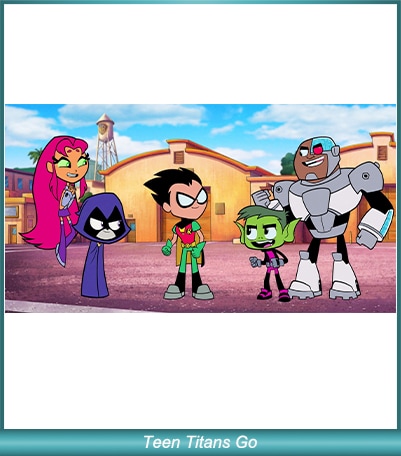
10 Teen Titans Go (2013- Present)
This is one of the modern and fast-paced animated series with jokes infused in every quarter of a minute. The funny cartoon animation is popular for its pop-culture references, sly hits at the DC universe, and a well-presented set of self-deprecating jokes.
Part 2 Anyway We Can Create Animation Ourselves?
There can be a number of reasons why you may need to create an animation. With modern technology, it is very easy and possible to quickly and effectively create animations suited for your purposes. Before you go on to creating animations, you need to know about the 5 key kinds of animation popular in modern times. They are:
3D computer animation
Traditional animation
Stop motion
2D Vector-based animation
Motion graphics
No matter which one you are going to create, what you need is an efficient and versatile tool like the Wondershare Filmora . This tool is an advanced and highly functional tool that is used and recommended by professionals all across the globe. The tool enables you to create all kinds of animations with increased ease. The video editing tool comes with a vast range of professional tools that can help you create the perfect video for storytelling.
With Filmora you can create animations just as you imagine. With a range of customization options, you can actually, “breathe life into your clips.” Amongst the key features of the tools, the mentionable ones are:
Motion tracking
A vast range of animation options
Ease in and ease out features
Pan and zoom
A range of text styles and editing options to adjust lights and flares warps and distorts, etc.
Filmora is the perfect tool to bring your imagination to life and express your cinematic flair. The vast range of tools and easy usability help you make the most of your venture and create the perfect animations for your purposes, seamlessly and really quickly.
Key Takeaways from This Episode
● Animation is a vast and versatile field. With the advancement of computer technology and the transformation of the animation industry, we have moved far ahead with our approaches than where we were with the 90s cartoons.
● This article has brought forward the various animation styles that have been a part of the animation industry.
● From the old funny cartoons to the latest dramatic animated web series, you have read about it all to help you better understand the distinctions and the evolution of animation over time.
● Along with BoJack Horseman or just one of the popular Disney cartoons, you have also read about how to create your own animations all by yourself. Filmora Pro is the perfect tool for making animations for a variety of purposes, including marketing videos.
● We hope all of that information will help you make the most of your animation venture!
In today’s time, animation has advanced way more and we can name more than one series, starting from “BoJack Horseman” to “The Flintstones” which can be simply termed as a funny cartoon.
In this article, we will look at the 10 best classical animated cartoon types along with relevant examples to help you understand.
In this article
01 [The Best Animated Series of All Time](#Part 1)
02 [Anyway We Can Create Animation Ourselves?](#Part 2)
Part 1 The Best Animated Series of All Time
Here are 10 classical animated cartoon types with an example for each of them. A lot of us have our earliest TV memories tied to an animated series or the nostalgia of one of the very popular 90s cartoons. In this list, you might as well find one of those funny cartoons or even one of your very favorite Disney cartoons.
01 Doug (1991-1994)
For people who were more into Nickelodeon than Disney/ABC, Doug was one of the most popular 90s cartoons. The funny cartoon show was rated to be one of the most relatable goobers on children’s TV. Along with that, the funny cartoon was known for the ingenuity and creative character names like Doug Funnie, Patti Mayonnaise, Skeeter, Porkchop, Tippi Dink, Roger Klotz, and Mosquito Valentine.
02 Popeye The Sailor (1960-1963)
“Popeye” initially started out as a comic strip in newspapers, but after the theatrical short features started airing on TV during the 1950s, soon 220 cartoons were created in just two years, making it one of the most popular television shows of all time. It had rudimentary animation and focused on the popularity of the character “Popeye the Sailor” which is still a very well-known character.
03 Pokemon (1997-Present)
It’s that good and it keeps going on. Pokemon was initially a series of games for the Nintendo Gameboy and from there it grew to be immensely popular where children across the globe simply loved the cute cartoon characters in the show. The Japanese pocket monsters became an integral part of life when the animated television series started airing.
04 Dexter’s Laboratory (1996-2003)
In 1996 Cartoon Network audiences were introduced to a show named Dexter’s Laboratory with Dexter as the primary character of the cartoon show. The boy genius had a massive hidden laboratory under his house. Every episode would feature Dexter planning an exciting experiment which was a favorite of kids. The series is one of the highest-rated series on the Cartoon Network and it also received a Primetime Emmy Award in 1996.
05 Alvin and the Chipmunks (1983-1990)
Alvin and the Chipmunks have been known since the 1960s. Although the show “Alvin and the Chipmunks’’ became popular on NBC in 1983. It featured three main characters: Alvin, Simon, and the loveable Theodore who got into all kinds of hijinks. The series had a large following, especially after the Chip-ettes, female versions of the Chipmunks, were introduced.
06 Scooby Doo, Where Are You! (1969-1970)
Barely any other two-season title has ever become as popular as “Scooby Doo, Where Are You!” The animation franchise is existent even today. The main attraction of this very funny cartoon was the cowardly Great Dane with a speech impediment. The dog solved crimes with teen friends and perfectly captured the imaginations of children as well as teenagers with subtle horror elements and some really hilarious catchphrases.
07 The Flintstones (1960-1966)
The Flintstones is inspired by “The Honeymooners’’ and was also the first animated series released in primetime. It was also the most successful one of its kind until “The Simpsons” was released 30 years later. The popularity of the series was because of its satirical take on modern suburban culture through the use of absurd, anachronistic elements in a Stone Age setting.
08 The Simpsons (1987-1990)
The Simpsons are simply one of the most popular and revolutionary 90s cartoons. It became a cultural juggernaut during its time and has been rated highly by viewers of all ages. The series emphasizes animation which has increased its appeal to modern viewers.
09 Sealab 2021 (2000-2005)
Sealab 2021 is one of Adult Swim’s initial launches of cartoons. It follows a forgotten ’70s adventure cartoon that turns the environmentally-friendly adventure into a blend of workplace resentments and absurd humor.
10 Teen Titans Go (2013- Present)
This is one of the modern and fast-paced animated series with jokes infused in every quarter of a minute. The funny cartoon animation is popular for its pop-culture references, sly hits at the DC universe, and a well-presented set of self-deprecating jokes.
Part 2 Anyway We Can Create Animation Ourselves?
There can be a number of reasons why you may need to create an animation. With modern technology, it is very easy and possible to quickly and effectively create animations suited for your purposes. Before you go on to creating animations, you need to know about the 5 key kinds of animation popular in modern times. They are:
3D computer animation
Traditional animation
Stop motion
2D Vector-based animation
Motion graphics
No matter which one you are going to create, what you need is an efficient and versatile tool like the Wondershare Filmora . This tool is an advanced and highly functional tool that is used and recommended by professionals all across the globe. The tool enables you to create all kinds of animations with increased ease. The video editing tool comes with a vast range of professional tools that can help you create the perfect video for storytelling.
With Filmora you can create animations just as you imagine. With a range of customization options, you can actually, “breathe life into your clips.” Amongst the key features of the tools, the mentionable ones are:
Motion tracking
A vast range of animation options
Ease in and ease out features
Pan and zoom
A range of text styles and editing options to adjust lights and flares warps and distorts, etc.
Filmora is the perfect tool to bring your imagination to life and express your cinematic flair. The vast range of tools and easy usability help you make the most of your venture and create the perfect animations for your purposes, seamlessly and really quickly.
Key Takeaways from This Episode
● Animation is a vast and versatile field. With the advancement of computer technology and the transformation of the animation industry, we have moved far ahead with our approaches than where we were with the 90s cartoons.
● This article has brought forward the various animation styles that have been a part of the animation industry.
● From the old funny cartoons to the latest dramatic animated web series, you have read about it all to help you better understand the distinctions and the evolution of animation over time.
● Along with BoJack Horseman or just one of the popular Disney cartoons, you have also read about how to create your own animations all by yourself. Filmora Pro is the perfect tool for making animations for a variety of purposes, including marketing videos.
● We hope all of that information will help you make the most of your animation venture!
Top 10 Animated Photo Collage Apps You Should Know
Versatile Video Editor - Wondershare Filmora
An easy yet powerful editor
Numerous effects to choose from
Detailed tutorials provided by the official channel
What if you wish to animate images, adding movement to stationary objects in time? Well, there are apps for these purposes!
Videos and GIFs are a mainstay of social media. These days it’s rare to see a still photo online. The simplicity with which you can add filter and movement effects to your images has identified a proliferation of these online animated photos.
So what if you wish to apply animation to a still image? There are many apps for such purposes. Given below is a selection of the best apps you can use to animate images on both Android and iPhone devices with the help of animated photo collage apps.
In this article
01 [Top 10 Animated Photo Collage Apps ](#Part 1)
02 [Wondershare Filmora: The Advanced Editing App of 2022!](#Part 2)
Part 1 Top 10 Animated Photo Collage Apps
We’ve compiled an index of the top 10 animated collage apps compatible with photo enthusiasts and photographers at every level of expertise. Most of these amazing apps are available for both iOS and Android, so there are numerous options no matter what device you’re using.
Before showcasing your collage-making skills, gather the perfect images from your last photography project.
1. GIPHY
The GIPHY is the mega search engine for all things related to GIFs.
Here, you can easily upload and find reaction memes for anything under the sun; GIPHY is also available with a mobile app. It also helps you to frame your GIFs and animate photos. Then, you can upload them by using the inbuilt animation tools on the platform.
It consists of a sticker maker (available for iPhone X and later), and you can also add captions to your animated images or shoot your short videos.
2. Motionleap
Motionleap is also an ideal animated photo collage app, and for a good reason. This app is highly reviewed, with 250,000 plus ratings of five stars in the Play Store.
Motionleap is a free animated photo collage app, although there’s a subscription and Pro version, too. Also, it doesn’t put a watermark over your image when you download it to your phone.
The app’s primary goal is animating still images and converting them into short, concise, and looping videos. Programming directional cues can easily do it into your image by dragging your thumb across the screen.
You can also freeze certain image sections and apply filters on top of your picture to frame an atmosphere within your image.
Unluckily, Motionleap saves your animated still photos in video format unless you’ve paid for a Pro account.
3. Movepic

Movepic is almost similar to Motionleap in that it animates images, but you can make a massive chunk of this animation with its inbuilt filters and overlays.
The only limitation is that you wouldn’t be able to remove the watermark without updating it to a VIP account. Movepic also saves your pictures automatically as a movie file than within a GIFformat.
4. ImgPlay
ImgPlay is another ideal animated collage maker app you can use to animate images. It creates ready-to-use animated images for the web and consists of easy-to-understand yet advanced controls. Unfortunately, it also adds a watermark on your image—one that you can’t remove unless you update to a complete account.
The process of making animated images online and GIFs can be in a couple of different ways within ImgPlay itself. You can use still photographs side-by-side, use burst images, or even videos.
5. Zoetropic
If you wish to animate your photo within a few minutes only, Zoetropic is for you. Though its functions aren’t as extensive as other apps we’ve mentioned, it does the job pretty well.
To get started, you choose your images and then select motion points. Next, you mask or stabilize the areas you want to keep still. Finally, you choose your overlays and animations. You can also change colors and add tags.
On the downside, it has limited the number of effects you can access on a free account. However, you might find what you’re considering if you are looking for a prompt manner to animate a photo online.
6. StoryZ
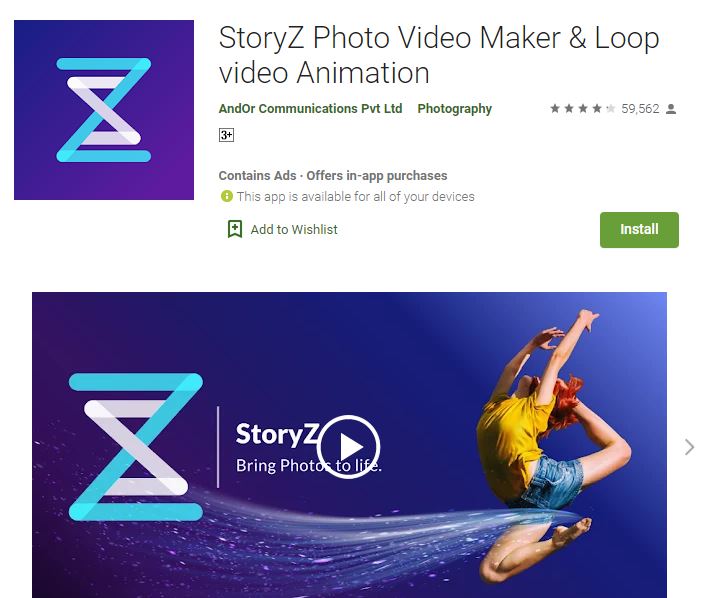
Despite its unattractive user interface, StoryZ is one of the useful apps on this list. It works excellent with still photographs to animate them effectively via various programmed paths of movements, overlays, and color filters—a lot of which are free and unique. It also automatically saves your files as GIFs.
One of the most incredible things about StoryZ is cutting the watermark from your image if you preview a quick ad before saving the file.
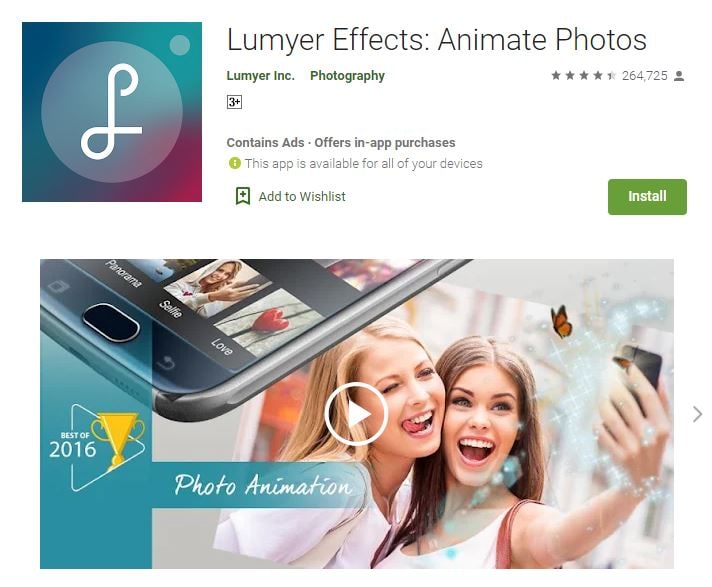
7. Lumyer
Lumyer is one of the useful animated photo collage apps on our list, which lets you add hundreds and thousands of effects to your pictures to animate them. So whether you wish to include sparkle or subtle weather effects, seasonal animations for Christmas and Halloween, or all-out scene transformations like appearing on a rollercoaster, Lumyer can do it.
If you’re okay with the watermark, Lumyer is a good choice, but otherwise, you may prefer one of our other recommended photo animation college apps.
8. VIMAGE 3D
VIMAGE got recognized with Google Play award in 2018. It can make some pretty good-looking animated photos in just a few clicks. There’s a wide variety of animations, filters, and sounds to select among a bundle of options.
You don’t even need to select the object because VIMAGE detects and replaces it for you quite automatically.
Similar to these apps, you do need to pay to remove the watermark, get access to the full effects library, and you can export your photos online in up to 2560p resolution.
9. Photo Bender
Photo Bender is an Android-specific animated photo collage app that helps you warp to animate photos digitally by coloring your image by stretching it, bending it, and using brushes. You can then export your transformed images as GIFs, JPEGs, MP4s, and PNGs.
While this app doesn’t contain ratings like others on this list, it is highly rated, so it’s still worth a look.
10. Werble
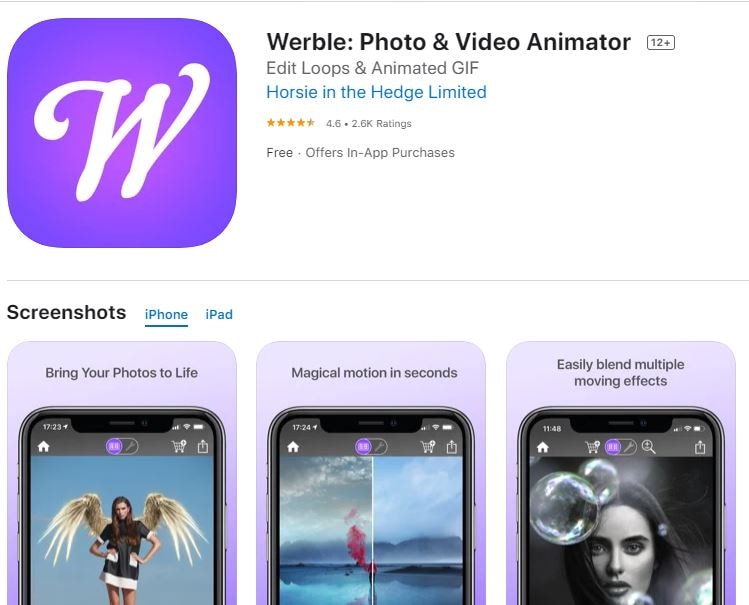
The primary purpose of Werble is to animate your images, and while the basic account is free, in-app purchases are also available. Most of Werble’s animations come through different filter effects that you can add on top of your images.
A downside to Werble is that it saves these images entirely automatically as GIFs, so they’re ready to use online. The limitation? However, you need to pay to cut the watermark that they place on your image. That watermark is huge enough to be disturbing.
Part 2 Wondershare Filmora: The Advanced Editing App of 2022
If you are tired of considering various animated photo collage apps, here is a section to introduce you to the best alternative with a reliable yet powerful video editor.
Filmora : This platform comes entirely loaded with advanced social integration options and editing functions. You can enjoy premium preloaded video editing services on your mobile devices with this tool. For video customization requirements, you can imply multiple caption options, title editing facilities, and advanced animation effects.
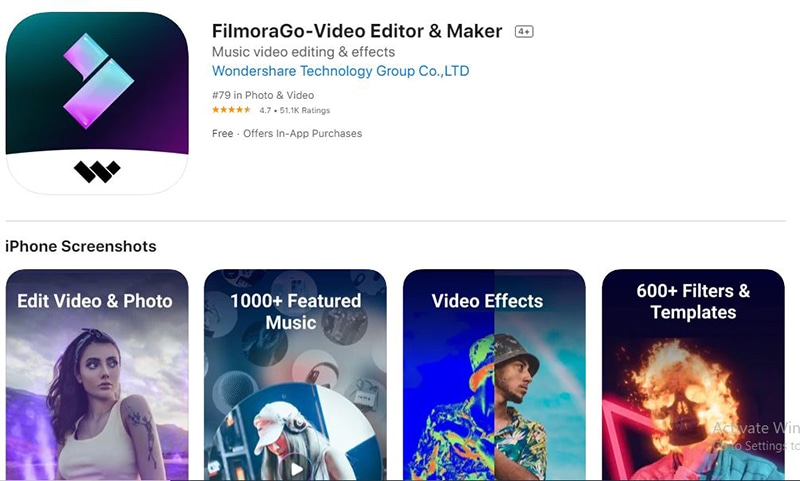
Filmora Features
- Filmora is available for both Android as well as iOS devices without any login.
- Filmora assists users in importing camera roll, Instagram, Google Plus, and Facebook collections with simplicity.
- This software tool contains different advanced features and highlights the missing components of the above-listed animated collage maker apps.
- You can add watermarks to all created videos.
- Above all, now share videos directly shared via Instagram, Facebook, WhatsApp, Email, Vimeo, YouTube, etc.
This advanced editing tool, Wondershare Filmora, can efficiently serve all your requirements. The good part is that it syncs well with iOS and Android devices so that you can access it anywhere with simplicity.
Also, Filmora provides is compatible with 4K videos, which is the most outstanding merit for developing informative video sessions and tutorials. Its ability to work offline with principal functions will simplify your editing tasks even when the internet connection is still an issue.
Wondershare Filmora
Get started easily with Filmora’s powerful performance, intuitive interface, and countless effects!
Try It Free Try It Free Try It Free Learn More >

AI Portrait – The best feature of Wondershare Filmora for gameplay editing
The AI Portrait is a new add-on in Wondershare Filmora. It can easily remove video backgrounds without using a green screen or chroma key, allowing you to add borders, glitch effects, pixelated, noise, or segmentation video effects.

Conclusion
Now that we’ve run through some great animated photo collage apps that can enliven your images, you can choose the ones you’re wandering to try out. They all follow roughly a similar concept, so you should select the ones you think will work best for such needs.
Gone are the days when you had to necessarily use a robust desktop computer to edit your videos and images. You can go forward to efficiently perform the same operation all from your smartphone with significant effects by using the Wondershare Filmora.
What if you wish to animate images, adding movement to stationary objects in time? Well, there are apps for these purposes!
Videos and GIFs are a mainstay of social media. These days it’s rare to see a still photo online. The simplicity with which you can add filter and movement effects to your images has identified a proliferation of these online animated photos.
So what if you wish to apply animation to a still image? There are many apps for such purposes. Given below is a selection of the best apps you can use to animate images on both Android and iPhone devices with the help of animated photo collage apps.
In this article
01 [Top 10 Animated Photo Collage Apps ](#Part 1)
02 [Wondershare Filmora: The Advanced Editing App of 2022!](#Part 2)
Part 1 Top 10 Animated Photo Collage Apps
We’ve compiled an index of the top 10 animated collage apps compatible with photo enthusiasts and photographers at every level of expertise. Most of these amazing apps are available for both iOS and Android, so there are numerous options no matter what device you’re using.
Before showcasing your collage-making skills, gather the perfect images from your last photography project.
1. GIPHY
The GIPHY is the mega search engine for all things related to GIFs.
Here, you can easily upload and find reaction memes for anything under the sun; GIPHY is also available with a mobile app. It also helps you to frame your GIFs and animate photos. Then, you can upload them by using the inbuilt animation tools on the platform.
It consists of a sticker maker (available for iPhone X and later), and you can also add captions to your animated images or shoot your short videos.
2. Motionleap
Motionleap is also an ideal animated photo collage app, and for a good reason. This app is highly reviewed, with 250,000 plus ratings of five stars in the Play Store.
Motionleap is a free animated photo collage app, although there’s a subscription and Pro version, too. Also, it doesn’t put a watermark over your image when you download it to your phone.
The app’s primary goal is animating still images and converting them into short, concise, and looping videos. Programming directional cues can easily do it into your image by dragging your thumb across the screen.
You can also freeze certain image sections and apply filters on top of your picture to frame an atmosphere within your image.
Unluckily, Motionleap saves your animated still photos in video format unless you’ve paid for a Pro account.
3. Movepic
Movepic is almost similar to Motionleap in that it animates images, but you can make a massive chunk of this animation with its inbuilt filters and overlays.
The only limitation is that you wouldn’t be able to remove the watermark without updating it to a VIP account. Movepic also saves your pictures automatically as a movie file than within a GIFformat.
4. ImgPlay
ImgPlay is another ideal animated collage maker app you can use to animate images. It creates ready-to-use animated images for the web and consists of easy-to-understand yet advanced controls. Unfortunately, it also adds a watermark on your image—one that you can’t remove unless you update to a complete account.
The process of making animated images online and GIFs can be in a couple of different ways within ImgPlay itself. You can use still photographs side-by-side, use burst images, or even videos.
5. Zoetropic
If you wish to animate your photo within a few minutes only, Zoetropic is for you. Though its functions aren’t as extensive as other apps we’ve mentioned, it does the job pretty well.
To get started, you choose your images and then select motion points. Next, you mask or stabilize the areas you want to keep still. Finally, you choose your overlays and animations. You can also change colors and add tags.
On the downside, it has limited the number of effects you can access on a free account. However, you might find what you’re considering if you are looking for a prompt manner to animate a photo online.
6. StoryZ
Despite its unattractive user interface, StoryZ is one of the useful apps on this list. It works excellent with still photographs to animate them effectively via various programmed paths of movements, overlays, and color filters—a lot of which are free and unique. It also automatically saves your files as GIFs.
One of the most incredible things about StoryZ is cutting the watermark from your image if you preview a quick ad before saving the file.
7. Lumyer
Lumyer is one of the useful animated photo collage apps on our list, which lets you add hundreds and thousands of effects to your pictures to animate them. So whether you wish to include sparkle or subtle weather effects, seasonal animations for Christmas and Halloween, or all-out scene transformations like appearing on a rollercoaster, Lumyer can do it.
If you’re okay with the watermark, Lumyer is a good choice, but otherwise, you may prefer one of our other recommended photo animation college apps.
8. VIMAGE 3D
VIMAGE got recognized with Google Play award in 2018. It can make some pretty good-looking animated photos in just a few clicks. There’s a wide variety of animations, filters, and sounds to select among a bundle of options.
You don’t even need to select the object because VIMAGE detects and replaces it for you quite automatically.
Similar to these apps, you do need to pay to remove the watermark, get access to the full effects library, and you can export your photos online in up to 2560p resolution.
9. Photo Bender
Photo Bender is an Android-specific animated photo collage app that helps you warp to animate photos digitally by coloring your image by stretching it, bending it, and using brushes. You can then export your transformed images as GIFs, JPEGs, MP4s, and PNGs.
While this app doesn’t contain ratings like others on this list, it is highly rated, so it’s still worth a look.
10. Werble
The primary purpose of Werble is to animate your images, and while the basic account is free, in-app purchases are also available. Most of Werble’s animations come through different filter effects that you can add on top of your images.
A downside to Werble is that it saves these images entirely automatically as GIFs, so they’re ready to use online. The limitation? However, you need to pay to cut the watermark that they place on your image. That watermark is huge enough to be disturbing.
Part 2 Wondershare Filmora: The Advanced Editing App of 2022
If you are tired of considering various animated photo collage apps, here is a section to introduce you to the best alternative with a reliable yet powerful video editor.
Filmora : This platform comes entirely loaded with advanced social integration options and editing functions. You can enjoy premium preloaded video editing services on your mobile devices with this tool. For video customization requirements, you can imply multiple caption options, title editing facilities, and advanced animation effects.
Filmora Features
- Filmora is available for both Android as well as iOS devices without any login.
- Filmora assists users in importing camera roll, Instagram, Google Plus, and Facebook collections with simplicity.
- This software tool contains different advanced features and highlights the missing components of the above-listed animated collage maker apps.
- You can add watermarks to all created videos.
- Above all, now share videos directly shared via Instagram, Facebook, WhatsApp, Email, Vimeo, YouTube, etc.
This advanced editing tool, Wondershare Filmora, can efficiently serve all your requirements. The good part is that it syncs well with iOS and Android devices so that you can access it anywhere with simplicity.
Also, Filmora provides is compatible with 4K videos, which is the most outstanding merit for developing informative video sessions and tutorials. Its ability to work offline with principal functions will simplify your editing tasks even when the internet connection is still an issue.
Wondershare Filmora
Get started easily with Filmora’s powerful performance, intuitive interface, and countless effects!
Try It Free Try It Free Try It Free Learn More >
AI Portrait – The best feature of Wondershare Filmora for gameplay editing
The AI Portrait is a new add-on in Wondershare Filmora. It can easily remove video backgrounds without using a green screen or chroma key, allowing you to add borders, glitch effects, pixelated, noise, or segmentation video effects.
Conclusion
Now that we’ve run through some great animated photo collage apps that can enliven your images, you can choose the ones you’re wandering to try out. They all follow roughly a similar concept, so you should select the ones you think will work best for such needs.
Gone are the days when you had to necessarily use a robust desktop computer to edit your videos and images. You can go forward to efficiently perform the same operation all from your smartphone with significant effects by using the Wondershare Filmora.
How to Create Picsart Cartoon in Simple Ways
How to Create Picsart Cartoon
An easy yet powerful editor
Numerous effects to choose from
Detailed tutorials provided by the official channel
Cartoonized images are a convenient source of fun and media entertainment in present times. Try hands at creating your own caricature masterpieces with Picsart!
In this article
01 [How To Edit Cartoon Picture in Picsart](#Part 1)
02 [How To Make A Cartoon On Your Phone](#Part 2)
03 [How to Cartoon Yourself on Picsart](#Part 3)
Part 1 How to Edit Cartoon Picture in Picsart
Cartoonized pictures as you must be aware of, are comic transformations of real-time images and are widely used on social media to add a funny angle to the diversity of conversation going on, or even just as a source of plentiful amusement.
If you often feel motivated to experiment with the art and are looking for a perfect solution, see through the following section for a detailed and stepwise guide to create and edit a Picsart cartoon with utmost ease and within a quick time span:
User’s Guide to Edit Cartoon Pictures in Picsart
Step 1: Download the Picsart Application
Visit the official Picsart website to download the desktop version of the app in your Windows or MacOs supported PC.
Step 2: Make a Selection
Launch the app in your system to reach the Picsart welcome screen. Navigate to the bottom and tap the ‘+’ symbol. You are now required to choose a desired image to create the cartoon edit. You can either browse through your system gallery or search a specific one from the Picsart photo library in the ‘Search Bar’ at the top of the app screen.

Step 3: Let’s Get Editing!
When you have made your choice, navigate to the toolbar at the bottom of the app screen and click on the ‘Effects’ tab. Make a side scroll to choose a specific effect category, like that of ‘Artistic’ or ‘Magic’ to open a library of effects in the selected category.
As an example, selecting the ‘Cartoonizer’ option in the ‘Artistic’ effects category can add an immediate caricature feel to your selected real-time image. You can further include manual adjustments to get the perfect cartoon look by pressing and holding the ‘Cartoonizer’ option. There are a whole variety of magical effects, such as, Neo Pop, Soul, Badlands, Animation and Paw in the ‘Magic’ effects category, that are just perfect in giving your edit a fantasizing look with a Picsart cartoon background.
If you are looking for a quicker editing process, prefer adding cartoonized elements, like ‘Picsart Stickers’ to your image instead of going for a complete caricature edit. To do this, open the ‘Picsart Photo Editor’, navigates to the ‘Sticker’ symbol and click on it, followed by searching ‘Cartoon Sticker’. You can alternatively search a specific keyword with the ‘Cartoon’ descriptor, if you are clear on what you want to add.
You can further, resize your selected sticker with a ‘Two Finger Pinch’ or use the ‘Eraser’ tool to ward off any unwanted portions from the same. You are free to take as many repetitions of the process as you wish, till you get the perfect result for saving to your device and sharing on your social media handles.

Step 4: Time to Save and Share!
When you are satisfied with your work, navigate to the right hand corner and tap ‘Apply’ to finalize your changes, followed by clicking on the ‘Next’ button at the top right corner of the app screen to save and export your creation.
Part 2 How to Make a Cartoon on Your Phone
After a detailed analysis of the cartoon editing procedure in your desktops, let us see thro ugh the method of creating cartoonized images on your MacOs and Android smartphones on the following section:
Stepwise Procedure for Creating Cartoonized Images on Phone
Step 1: Download the Application
When going to use the Picsart editor application on your smartphone, you will first require a download of the same in your concerned device. You can do this by visiting the ‘Google PlayStore’ for an Android device or the ‘Apple App Store’ for MacOs smartphones.
Step 2: Choose a Real-time Image
After a successful launch of the ‘Picsart Editor’ application in your smartphone, reach to and click on the ‘+’ icon at the bottom of the app’s working interface. This needs to be followed by selecting any specific real-time image, either from your smartphone gallery or the Picsart photo library using the top ‘Search Bar’ of the interface, for creating a cartoonized edit.

Step 3: Editing Begins!
Once you are done with selecting the image, proceed to add effects to your selection by clicking the ‘Effects’ tab in the bottom toolbar, succeeded by picking a desired effect type through a right scroll. Tap on any category, such as, Magic, Artistic, etc, to open the effect library of the same.
For instance, you can click on the ‘Cartoonizer’ option within Artistic’ effects to supplement your uploaded real-time image with an instant cartoonized effect. You are also granted the liberty to make manual changes to set the caricature image effects as per your preferences, which you can do with a ‘Press and Hold’ of the ‘Cartoonizer’ tab. If you have a diversion towards complementing your cartoonized images with magical effects, choose from Animation, Neo Pop, Paw, Badlands, Paw, and other amazing options in the ‘Magic’ category.

Step 4: Save and Export
When you have completed the editing process and the changes satisfy you, go to the ‘Apply’ tab at the right side of the editor screen to see the changes appear in your edit. You can now navigate to the upper right corner of the app screen and click on ‘Next’ to save your work locally to your device, along with exporting the same across different media platforms.
Part 3 How to Cartoon Yourself on Picsart
Having learnt about the interesting ways to edit cartoon pictures and create cartoons on your smartphone, you might like to try hands on creating a cartoon portrait of yourself in the Picsart editor for a variety of reasons, like that of creating cartoon profile pics of yourself. Let us have a look of the procedure for the same using the Picsart Online Image Editor tool in the following section:
User’s Guide to Create a Cartoon Portrait With Picsart Online Photo Editor
Step 1: Launch the Application
In any of your favorite internet browsers, search for and open ‘Picsart Desktop Editor’. In the app’s working interface, tap ‘Upload’ or ‘New Project’ to choose an image from your device or the free to use Picsart image library respectively, for proceeding with the cartoonized transformations.

Step 2: Edit Your Selection
Tap on the ‘Effects’ tab from the editing toolbar at the top of your image and select a desired effect category to access the diversity of cartoonifying filters. It is recommended to select the ‘Magic’ category for the most splendid cartoon effects, such as, Paw, Badland, Animation, Soul and Neo Pop among many others.

You can even make manual adjustments in the brightness, color, saturation, burn and fade, etc., of the image by clicking on the ‘Adjust’ and ‘Blend’ options at the top of the image workspace.

Step 3: Download and Share Your Work
When you are done editing, navigate to and click on the ‘Share’ option at the upper right corner of the editor screen to download your cartoonized image.

****Wondershare Filmora Video Editor Cartoon Image Creator**
For Win 7 or later (64-bit)
For macOS 10.12 or later
Picsart is certainly a dependable solution to create caricature images, but if you are keen on looking for an alternative application to cater to the need, Introduced to the software market by Wondershare, the Filmora Cartoon Image Creator can be a convenient rescue. The app promises you of a high quality cartoonized edit with a plethora of editing effects to suit your most specific editing preferences.
● Ending Thoughts →
● Creating cartoonized edits from real time images is a fun and entertaining activity along with being the latest media trend.
● The Picsart editor application allows making caricature images from actual stills through desktop, smartphone and online compatible image editing program.
● Talking of suitable Picsart alternatives, you can rely on the Filmora Cartoon Image Creator application for high quality cartoonized image creation.
Cartoonized images are a convenient source of fun and media entertainment in present times. Try hands at creating your own caricature masterpieces with Picsart!
In this article
01 [How To Edit Cartoon Picture in Picsart](#Part 1)
02 [How To Make A Cartoon On Your Phone](#Part 2)
03 [How to Cartoon Yourself on Picsart](#Part 3)
Part 1 How to Edit Cartoon Picture in Picsart
Cartoonized pictures as you must be aware of, are comic transformations of real-time images and are widely used on social media to add a funny angle to the diversity of conversation going on, or even just as a source of plentiful amusement.
If you often feel motivated to experiment with the art and are looking for a perfect solution, see through the following section for a detailed and stepwise guide to create and edit a Picsart cartoon with utmost ease and within a quick time span:
User’s Guide to Edit Cartoon Pictures in Picsart
Step 1: Download the Picsart Application
Visit the official Picsart website to download the desktop version of the app in your Windows or MacOs supported PC.
Step 2: Make a Selection
Launch the app in your system to reach the Picsart welcome screen. Navigate to the bottom and tap the ‘+’ symbol. You are now required to choose a desired image to create the cartoon edit. You can either browse through your system gallery or search a specific one from the Picsart photo library in the ‘Search Bar’ at the top of the app screen.
Step 3: Let’s Get Editing!
When you have made your choice, navigate to the toolbar at the bottom of the app screen and click on the ‘Effects’ tab. Make a side scroll to choose a specific effect category, like that of ‘Artistic’ or ‘Magic’ to open a library of effects in the selected category.
As an example, selecting the ‘Cartoonizer’ option in the ‘Artistic’ effects category can add an immediate caricature feel to your selected real-time image. You can further include manual adjustments to get the perfect cartoon look by pressing and holding the ‘Cartoonizer’ option. There are a whole variety of magical effects, such as, Neo Pop, Soul, Badlands, Animation and Paw in the ‘Magic’ effects category, that are just perfect in giving your edit a fantasizing look with a Picsart cartoon background.
If you are looking for a quicker editing process, prefer adding cartoonized elements, like ‘Picsart Stickers’ to your image instead of going for a complete caricature edit. To do this, open the ‘Picsart Photo Editor’, navigates to the ‘Sticker’ symbol and click on it, followed by searching ‘Cartoon Sticker’. You can alternatively search a specific keyword with the ‘Cartoon’ descriptor, if you are clear on what you want to add.
You can further, resize your selected sticker with a ‘Two Finger Pinch’ or use the ‘Eraser’ tool to ward off any unwanted portions from the same. You are free to take as many repetitions of the process as you wish, till you get the perfect result for saving to your device and sharing on your social media handles.
Step 4: Time to Save and Share!
When you are satisfied with your work, navigate to the right hand corner and tap ‘Apply’ to finalize your changes, followed by clicking on the ‘Next’ button at the top right corner of the app screen to save and export your creation.
Part 2 How to Make a Cartoon on Your Phone
After a detailed analysis of the cartoon editing procedure in your desktops, let us see thro ugh the method of creating cartoonized images on your MacOs and Android smartphones on the following section:
Stepwise Procedure for Creating Cartoonized Images on Phone
Step 1: Download the Application
When going to use the Picsart editor application on your smartphone, you will first require a download of the same in your concerned device. You can do this by visiting the ‘Google PlayStore’ for an Android device or the ‘Apple App Store’ for MacOs smartphones.
Step 2: Choose a Real-time Image
After a successful launch of the ‘Picsart Editor’ application in your smartphone, reach to and click on the ‘+’ icon at the bottom of the app’s working interface. This needs to be followed by selecting any specific real-time image, either from your smartphone gallery or the Picsart photo library using the top ‘Search Bar’ of the interface, for creating a cartoonized edit.
Step 3: Editing Begins!
Once you are done with selecting the image, proceed to add effects to your selection by clicking the ‘Effects’ tab in the bottom toolbar, succeeded by picking a desired effect type through a right scroll. Tap on any category, such as, Magic, Artistic, etc, to open the effect library of the same.
For instance, you can click on the ‘Cartoonizer’ option within Artistic’ effects to supplement your uploaded real-time image with an instant cartoonized effect. You are also granted the liberty to make manual changes to set the caricature image effects as per your preferences, which you can do with a ‘Press and Hold’ of the ‘Cartoonizer’ tab. If you have a diversion towards complementing your cartoonized images with magical effects, choose from Animation, Neo Pop, Paw, Badlands, Paw, and other amazing options in the ‘Magic’ category.
Step 4: Save and Export
When you have completed the editing process and the changes satisfy you, go to the ‘Apply’ tab at the right side of the editor screen to see the changes appear in your edit. You can now navigate to the upper right corner of the app screen and click on ‘Next’ to save your work locally to your device, along with exporting the same across different media platforms.
Part 3 How to Cartoon Yourself on Picsart
Having learnt about the interesting ways to edit cartoon pictures and create cartoons on your smartphone, you might like to try hands on creating a cartoon portrait of yourself in the Picsart editor for a variety of reasons, like that of creating cartoon profile pics of yourself. Let us have a look of the procedure for the same using the Picsart Online Image Editor tool in the following section:
User’s Guide to Create a Cartoon Portrait With Picsart Online Photo Editor
Step 1: Launch the Application
In any of your favorite internet browsers, search for and open ‘Picsart Desktop Editor’. In the app’s working interface, tap ‘Upload’ or ‘New Project’ to choose an image from your device or the free to use Picsart image library respectively, for proceeding with the cartoonized transformations.
Step 2: Edit Your Selection
Tap on the ‘Effects’ tab from the editing toolbar at the top of your image and select a desired effect category to access the diversity of cartoonifying filters. It is recommended to select the ‘Magic’ category for the most splendid cartoon effects, such as, Paw, Badland, Animation, Soul and Neo Pop among many others.
You can even make manual adjustments in the brightness, color, saturation, burn and fade, etc., of the image by clicking on the ‘Adjust’ and ‘Blend’ options at the top of the image workspace.
Step 3: Download and Share Your Work
When you are done editing, navigate to and click on the ‘Share’ option at the upper right corner of the editor screen to download your cartoonized image.
****Wondershare Filmora Video Editor Cartoon Image Creator**
For Win 7 or later (64-bit)
For macOS 10.12 or later
Picsart is certainly a dependable solution to create caricature images, but if you are keen on looking for an alternative application to cater to the need, Introduced to the software market by Wondershare, the Filmora Cartoon Image Creator can be a convenient rescue. The app promises you of a high quality cartoonized edit with a plethora of editing effects to suit your most specific editing preferences.
● Ending Thoughts →
● Creating cartoonized edits from real time images is a fun and entertaining activity along with being the latest media trend.
● The Picsart editor application allows making caricature images from actual stills through desktop, smartphone and online compatible image editing program.
● Talking of suitable Picsart alternatives, you can rely on the Filmora Cartoon Image Creator application for high quality cartoonized image creation.
How to Make Your Own GIF on WhatsApp in Simple Ways
How to Make Your Own GIF on WhatsApp in Simple Ways
An easy yet powerful editor
Numerous effects to choose from
Detailed tutorials provided by the official channel
The feature of adding a GIF to your conversations on WhatsApp has been rolled out for a long and these animations add liveliness to your chats. On your iPhone as well as Android devices, there is an integrated library of these GIFs in several categories that can be used.
Additionally, you can even make your own GIF using the videos on your WhatsApp in a few simple steps. Learn all about these GIFs and how to make your own GIF on WhatsApp.
In this article
01 [How to send GIF from the integrated library on WhatsApp](#Part 1)
02 [How to create WhatsApp GIF using Videos on Android and iPhone](#Part 2)
03 [How to create an excellent GIF using Wondershare Filmora](#Part 3)
Part 1 How to send GIF from the integrated library on WhatsApp
Your iPhone, as well as Android devices, has a library of GIFs that can be used to search for the desired animations. The steps for sharing these GIFs are as follows.
Step 1. Launch WhatsApp on your smartphone and open the chat to which you wish to send the GIF. On your Android phone, click on the smiley emoji and then select GIF options from the bottom of the screen and the library of the animations will open.
On your iPhone, to open the library of GIF, click on the sticker icon.
Step 2. You can choose from available GIF and even search for the desired one using the keyword at the search icon.
Step 3. Tap on the selected GIF and then click on the Send button that will share the animation to the chat.
Part 2 How to create WhatsApp GIF using Videos on Android and iPhone
In addition to the library, WhatsApp also allows creating GIF animations using the videos on the device. (For iPhone users, even Live Photos can be used). For a video to be used as GIF, it cannot be more than 6 seconds. So, the longer videos need to be trimmed to under 6 seconds.
Steps to create custom GIF WhatsApp using videos
Step 1. Open the WhatsApp chat on your phone where you want to send the GIF. Click on the camera icon and then select the video from your device’s gallery. Alternatively, you can also record a live video to create a GIF.
Step 2. After the video is added, trim it down under 6 seconds using the slider at the top. You can add text to the video using the Caption option.
Step 3. Next, click on the GIF button that will convert the added video into GIF. Finally, click on the Send button at the bottom-right corner.
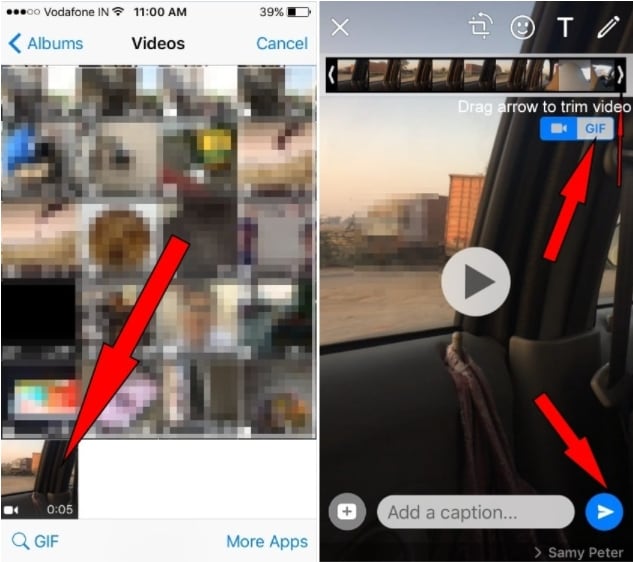
Part 3 How to create an excellent GIF using Wondershare Filmora
Though iPhone and Android, both allow creating a GIF from videos on your device, the option for customizations is limited. So, if you want to create your own GIF using images and videos, Wondershare Filmora will work as the best software. This versatile tool supports all key media formats like JPG, PNG, MP4, MKV, MOV, and others for creating GIF animations.
The overall process is fast as well as simple where you just need to add the media files, edit them and choose to save them as GIFs. Using Wondershare Filmora Video Editor , multiple customizations can be done, like rotating, trimming, adding texts, adding sounds, speed-up, adding elements, and more.
Wondershare Filmora
Get started easily with Filmora’s powerful performance, intuitive interface, and countless effects!
Try It Free Try It Free Try It Free Learn More >
Steps to create GIF using Wondershare Filmora
StepLaunch the Wondershare software on your system and add the local media files from which you wish to create a GIF.
Step 1. Next, drag and drop the files to the timeline of the software.
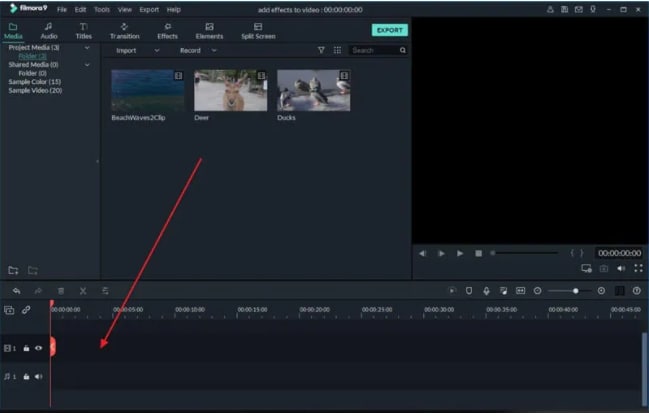
Step 2. Using the editing tools, you can customize the added files.
Step 3. Add texts, and effects as needed using the functions at the software.
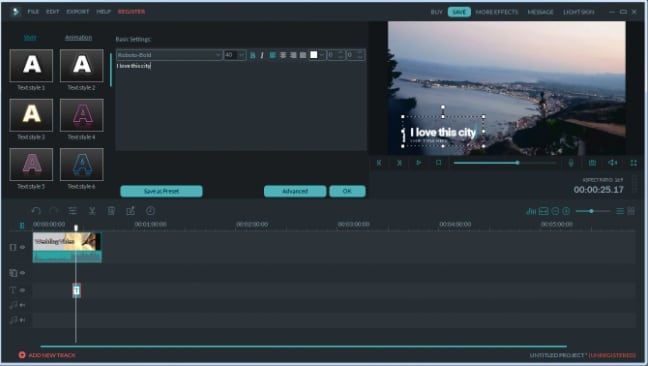
Step 4. Next, at the Local tab choose the GIF option, select the desired file name and the system location to save the file. Finally, click on the EXPORT button to start the file processing.
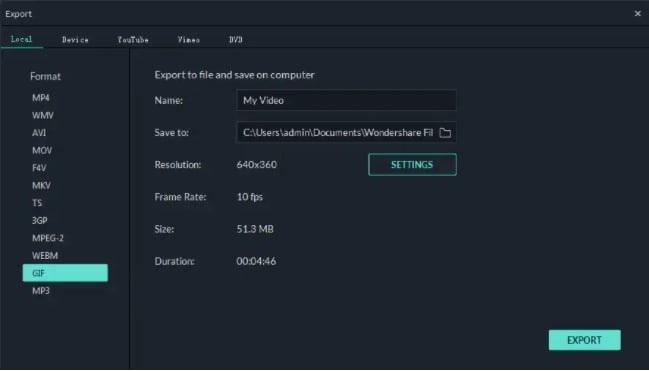
● Key Takeaways from This Episode →
●GIF animations can be added from the integrated library at Android and iPhone devices.
●Using the local videos on the phone, GIF can also be created.
●For creating an excellent and professional-looking GIF, Wondershare Filmora works as one of the best tools that is simple and quick to use.
The feature of adding a GIF to your conversations on WhatsApp has been rolled out for a long and these animations add liveliness to your chats. On your iPhone as well as Android devices, there is an integrated library of these GIFs in several categories that can be used.
Additionally, you can even make your own GIF using the videos on your WhatsApp in a few simple steps. Learn all about these GIFs and how to make your own GIF on WhatsApp.
In this article
01 [How to send GIF from the integrated library on WhatsApp](#Part 1)
02 [How to create WhatsApp GIF using Videos on Android and iPhone](#Part 2)
03 [How to create an excellent GIF using Wondershare Filmora](#Part 3)
Part 1 How to send GIF from the integrated library on WhatsApp
Your iPhone, as well as Android devices, has a library of GIFs that can be used to search for the desired animations. The steps for sharing these GIFs are as follows.
Step 1. Launch WhatsApp on your smartphone and open the chat to which you wish to send the GIF. On your Android phone, click on the smiley emoji and then select GIF options from the bottom of the screen and the library of the animations will open.
On your iPhone, to open the library of GIF, click on the sticker icon.
Step 2. You can choose from available GIF and even search for the desired one using the keyword at the search icon.
Step 3. Tap on the selected GIF and then click on the Send button that will share the animation to the chat.
Part 2 How to create WhatsApp GIF using Videos on Android and iPhone
In addition to the library, WhatsApp also allows creating GIF animations using the videos on the device. (For iPhone users, even Live Photos can be used). For a video to be used as GIF, it cannot be more than 6 seconds. So, the longer videos need to be trimmed to under 6 seconds.
Steps to create custom GIF WhatsApp using videos
Step 1. Open the WhatsApp chat on your phone where you want to send the GIF. Click on the camera icon and then select the video from your device’s gallery. Alternatively, you can also record a live video to create a GIF.
Step 2. After the video is added, trim it down under 6 seconds using the slider at the top. You can add text to the video using the Caption option.
Step 3. Next, click on the GIF button that will convert the added video into GIF. Finally, click on the Send button at the bottom-right corner.
Part 3 How to create an excellent GIF using Wondershare Filmora
Though iPhone and Android, both allow creating a GIF from videos on your device, the option for customizations is limited. So, if you want to create your own GIF using images and videos, Wondershare Filmora will work as the best software. This versatile tool supports all key media formats like JPG, PNG, MP4, MKV, MOV, and others for creating GIF animations.
The overall process is fast as well as simple where you just need to add the media files, edit them and choose to save them as GIFs. Using Wondershare Filmora Video Editor , multiple customizations can be done, like rotating, trimming, adding texts, adding sounds, speed-up, adding elements, and more.
Wondershare Filmora
Get started easily with Filmora’s powerful performance, intuitive interface, and countless effects!
Try It Free Try It Free Try It Free Learn More >
Steps to create GIF using Wondershare Filmora
StepLaunch the Wondershare software on your system and add the local media files from which you wish to create a GIF.
Step 1. Next, drag and drop the files to the timeline of the software.
Step 2. Using the editing tools, you can customize the added files.
Step 3. Add texts, and effects as needed using the functions at the software.
Step 4. Next, at the Local tab choose the GIF option, select the desired file name and the system location to save the file. Finally, click on the EXPORT button to start the file processing.
● Key Takeaways from This Episode →
●GIF animations can be added from the integrated library at Android and iPhone devices.
●Using the local videos on the phone, GIF can also be created.
●For creating an excellent and professional-looking GIF, Wondershare Filmora works as one of the best tools that is simple and quick to use.
10 Cartoon Canvas Painting Ideas for Total Beginners
10 Cartoon Canvas Painting Ideas for Total Beginners
An easy yet powerful editor
Numerous effects to choose from
Detailed tutorials provided by the official channel
Beginning your streak into cartoon canvas painting? Stay tuned to learn about the 10 most amazing ideas to design your best cartoon canvas art in no time!
In this article
01 [10 Cartoon Canvas Painting Ideas](#Part 1)
02 [How To Paint A Cartoon On Canvas](#Part 2)
Part 1 Cartoon Canvas Painting Ideas
Cartoon are an evergreen favourite for almost everyone around. After all, who would mind sparing a laugh on the adorable musings of the cutest cat and mouse duo in Tom and Jerry, or long for a dive into the fantasy of icy adventures with the Frozen fairy tale! While the huge caricature repository has the best of fun to offer, watching them peep at you from the canvas painting on your art wall is no less of a delight.
When starting to create your own cartoon canvas art, end your search of the most striking painting idea with the amazingly stunning choices in the following section:
01Tom and Jerry
These two are undoubtedly the pioneers of the entire cartoon story that has affordably existed till date. The naughty duo promises to lighten up your day with a mere gaze through the art wall in your room, in the same way as their show sets the mood in. Painting them on your room’s wall canvas will certainly add life to the place.
02Super Mario
Who can forget this adorable red plumber, who conveniently takes the credit for giving us the fondest childhood memories? Whether or not a regular console gamer, this adventure hero is an undisputed favorite of everyone around. So why not make him a member of your art collection through a cartoon canvas painting!
03Characters from the Frozen Land
The adorable cartoon characters from the icy landscapes of this winter fairy saga are possibly the best way to begin your exciting journey of cartoon canvas painting. While the magical storyline of the pixie quest has a diversity of the coolest and the most adorable characters to choose from, you are always free to pick your favorite one and start your design spree.
04Kung fu Panda
If you are a parallel admirer of martial arts and caricature heroes, this cartoon character would be an apt choice to satisfy your love for canvas painting. The adorably cute bear eyeing at you from the painting in his best warlike posture would certainly motivate you to work on keeping a check of your fitness levels!
05Sponge Bob
Living up to his name, this spongy creature has created a separate and strong fan base among viewers of all age groups beyond time. Choosing this character for your cartoon canvas art is surely going to spark up your day with the vibrancy of a real rainbow, even in between the sulkiest of moments, as they say, it’s time to brighten up your life with Bob!
06Homer Simpson
If you are convincingly fascinated by the lures of life overseas, this American toon character is all set to give you the perfect feel of the day to day American lifestyle. Try hands at painting a scene from the eventful life of the Simpson family that is ready to add a fun angle to the most boring chores, while giving you a parodical glimpse of the American society and culture.
07Characters from the Avenger Series
Avengers must be your absolute favorite if you have a love for battle and combat games. Bring your adventure feel back to life with creating a canvas painting art of your most admired avenger, or consider including all of them on a king size canvas if you are having a tough time picking the best from the best!
08Angry Birds
These furious creatures have been a global sensation since their entry into the world of gaming. While these star birds take you on a stunning adventure realism with an amazing graphic excellence, a caricature canvas art of these in your painting collection will certainly add the missing spunk to your graphic creativity.
09Members and Trainers of the Pokémon Species
From TV series to gaming adventures, the love for Pokémon has stood the tests of time in every dimension. When it comes to adding these characters to your canvas painting, you have a storehouse of choices from the cute Pikachu and the meticulous Ash to the nasty team Rocket and other amazing members of the Pokémon species.
10Donald Duck
If you are keen on adding a touch of nostalgia to your creative drawing, consider designing a masterpiece of cartoon canvas artwork portraying this bubbly ad quaky creature that has given you the best of childhood entertainment in the form of possibly the most reliable financial advisor and the cutest good luck charm of toon land.
Now that the graphic design technology has reached its par, you can explore your creativity to design these characters for various uses, such as, illustrative, animated, gag, editorial and political cartoons, or caricatures on comic panels and strips.
Part 2 How To Paint A Cartoon On Canvas
Now that you have come cross the exciting ideas of creating cartoon canvas art, this must be a sufficient motivation to experiment with creating a top class caricature canvas painting for yourself. Read through the following section to get an insight into the knowhow of painting a cartoon on canvas in the easiest possible way!
User’s Guide to Create a Cartoon Canvas Painting on Wondershare Filmora Video Editor
Before entering into the actual design task, you will require a download, installation and launch of the Wondershare Filmora application to any of your Windows or Mac supported devices. Visit the following link for a free download of the software program:

Wondershare Filmora - Best Video Editor for Mac/Windows
5,481,435 people have downloaded it.
Build unique custom animations without breaking a sweat.
Focus on creating epic stories and leave the details to Filmora’s auto features.
Start a creative adventure with drag & drop effects and endless possibilities.
Filmora simplifies advanced features to save you time and effort.
Filmora cuts out repetition so you can move on to your next creative breakthrough.
Painting a Young Character
Take the following steps to draw the caricature form of a young or middle aged character in Wondershare Filmora:
Step 1:
Launch Wondershare Filmora on your system and then start new project. Now import the video from your computer in the software interface.

Step 2:
Once you have added the video then simply drag and drop it in the timeline.

Step 3
Once you have added video to the timeline double click on the added video in timeline to open the video editing menu of Wondershare Filmora.

Step 4:
Now, click the “Animation” tab in the editing options at the left side of interface then you can select anyone from the available preset options.

Step 5:
Select any preset from the available list and then drag and drop it in the timeline to apply the preset on the video. After applying you can use the play button to preview the file. This is the way to create beautiful animation with the Wondershare Filmora. Just like this you can quickly create the best Cartoon canvas as well.

Step 5
After doing all necessary editing you just need to click the “Export” button and save it on your computer.

● Ending Thoughts →
● Cartoon canvas art has gained immense popularity in recent times having a reliable economic and creation advantage with the growth of animation design.
● There are a variety of cartoon painting ideas that you can choose to explore your graphic design creativity.
● When looking for the best solutions to work on creating caricature canvas art, Wondershare Filmora is your worthiest choice.
Beginning your streak into cartoon canvas painting? Stay tuned to learn about the 10 most amazing ideas to design your best cartoon canvas art in no time!
In this article
01 [10 Cartoon Canvas Painting Ideas](#Part 1)
02 [How To Paint A Cartoon On Canvas](#Part 2)
Part 1 Cartoon Canvas Painting Ideas
Cartoon are an evergreen favourite for almost everyone around. After all, who would mind sparing a laugh on the adorable musings of the cutest cat and mouse duo in Tom and Jerry, or long for a dive into the fantasy of icy adventures with the Frozen fairy tale! While the huge caricature repository has the best of fun to offer, watching them peep at you from the canvas painting on your art wall is no less of a delight.
When starting to create your own cartoon canvas art, end your search of the most striking painting idea with the amazingly stunning choices in the following section:
01Tom and Jerry
These two are undoubtedly the pioneers of the entire cartoon story that has affordably existed till date. The naughty duo promises to lighten up your day with a mere gaze through the art wall in your room, in the same way as their show sets the mood in. Painting them on your room’s wall canvas will certainly add life to the place.
02Super Mario
Who can forget this adorable red plumber, who conveniently takes the credit for giving us the fondest childhood memories? Whether or not a regular console gamer, this adventure hero is an undisputed favorite of everyone around. So why not make him a member of your art collection through a cartoon canvas painting!
03Characters from the Frozen Land
The adorable cartoon characters from the icy landscapes of this winter fairy saga are possibly the best way to begin your exciting journey of cartoon canvas painting. While the magical storyline of the pixie quest has a diversity of the coolest and the most adorable characters to choose from, you are always free to pick your favorite one and start your design spree.
04Kung fu Panda
If you are a parallel admirer of martial arts and caricature heroes, this cartoon character would be an apt choice to satisfy your love for canvas painting. The adorably cute bear eyeing at you from the painting in his best warlike posture would certainly motivate you to work on keeping a check of your fitness levels!
05Sponge Bob
Living up to his name, this spongy creature has created a separate and strong fan base among viewers of all age groups beyond time. Choosing this character for your cartoon canvas art is surely going to spark up your day with the vibrancy of a real rainbow, even in between the sulkiest of moments, as they say, it’s time to brighten up your life with Bob!
06Homer Simpson
If you are convincingly fascinated by the lures of life overseas, this American toon character is all set to give you the perfect feel of the day to day American lifestyle. Try hands at painting a scene from the eventful life of the Simpson family that is ready to add a fun angle to the most boring chores, while giving you a parodical glimpse of the American society and culture.
07Characters from the Avenger Series
Avengers must be your absolute favorite if you have a love for battle and combat games. Bring your adventure feel back to life with creating a canvas painting art of your most admired avenger, or consider including all of them on a king size canvas if you are having a tough time picking the best from the best!
08Angry Birds
These furious creatures have been a global sensation since their entry into the world of gaming. While these star birds take you on a stunning adventure realism with an amazing graphic excellence, a caricature canvas art of these in your painting collection will certainly add the missing spunk to your graphic creativity.
09Members and Trainers of the Pokémon Species
From TV series to gaming adventures, the love for Pokémon has stood the tests of time in every dimension. When it comes to adding these characters to your canvas painting, you have a storehouse of choices from the cute Pikachu and the meticulous Ash to the nasty team Rocket and other amazing members of the Pokémon species.
10Donald Duck
If you are keen on adding a touch of nostalgia to your creative drawing, consider designing a masterpiece of cartoon canvas artwork portraying this bubbly ad quaky creature that has given you the best of childhood entertainment in the form of possibly the most reliable financial advisor and the cutest good luck charm of toon land.
Now that the graphic design technology has reached its par, you can explore your creativity to design these characters for various uses, such as, illustrative, animated, gag, editorial and political cartoons, or caricatures on comic panels and strips.
Part 2 How To Paint A Cartoon On Canvas
Now that you have come cross the exciting ideas of creating cartoon canvas art, this must be a sufficient motivation to experiment with creating a top class caricature canvas painting for yourself. Read through the following section to get an insight into the knowhow of painting a cartoon on canvas in the easiest possible way!
User’s Guide to Create a Cartoon Canvas Painting on Wondershare Filmora Video Editor
Before entering into the actual design task, you will require a download, installation and launch of the Wondershare Filmora application to any of your Windows or Mac supported devices. Visit the following link for a free download of the software program:
Wondershare Filmora - Best Video Editor for Mac/Windows
5,481,435 people have downloaded it.
Build unique custom animations without breaking a sweat.
Focus on creating epic stories and leave the details to Filmora’s auto features.
Start a creative adventure with drag & drop effects and endless possibilities.
Filmora simplifies advanced features to save you time and effort.
Filmora cuts out repetition so you can move on to your next creative breakthrough.
Painting a Young Character
Take the following steps to draw the caricature form of a young or middle aged character in Wondershare Filmora:
Step 1:
Launch Wondershare Filmora on your system and then start new project. Now import the video from your computer in the software interface.
Step 2:
Once you have added the video then simply drag and drop it in the timeline.
Step 3
Once you have added video to the timeline double click on the added video in timeline to open the video editing menu of Wondershare Filmora.
Step 4:
Now, click the “Animation” tab in the editing options at the left side of interface then you can select anyone from the available preset options.
Step 5:
Select any preset from the available list and then drag and drop it in the timeline to apply the preset on the video. After applying you can use the play button to preview the file. This is the way to create beautiful animation with the Wondershare Filmora. Just like this you can quickly create the best Cartoon canvas as well.
Step 5
After doing all necessary editing you just need to click the “Export” button and save it on your computer.
● Ending Thoughts →
● Cartoon canvas art has gained immense popularity in recent times having a reliable economic and creation advantage with the growth of animation design.
● There are a variety of cartoon painting ideas that you can choose to explore your graphic design creativity.
● When looking for the best solutions to work on creating caricature canvas art, Wondershare Filmora is your worthiest choice.
Also read:
- In 2024, 10 Amazing Wallpaper Collage Ideas and Photos
- Updated 12 Aesthetic GIF Instagram for Marketers and Creatives
- Adobe Animate CC Everything You Need to Know
- Updated 2024 Approved How to Find Some Different Ways to Animated Cartoon of Yourself
- Animate Photo Online with These Awesome Tools for 2024
- New A Beginners Guide to Tell You What 3D Animation Is
- 2024 Approved Top 10 Apps to Enhance Your Instagram Story Slideshow
- Updated In 2024, 5 Free Animated Gif Sources You Must Check
- Updated Ultimate Guide to Animated Characters Drawings
- 10 Best Convert Video Between GIF Software High Quality
- New How to Make GIF Stickers for WhatsApp 100 The Simple Way
- New 10 Options for Your Need on Animation Makers for 2024
- 2024 Approved 10 Cartoon Canvas Painting Ideas for Total Beginners
- New Is Blender 2D Animation As Awesome As 3D for 2024
- Updated Learn How to Do Funny Cartoon Drawings
- New In 2024, 8 Free GIF Animators to Make Your Own GIF
- New 2024 Approved How to Find Some Different Ways to Animated Cartoon of Yourself
- How to Create a Whiteboard Animation Video
- New In 2024, Create Animated Video on Canva
- New Step-by-Step Guide to Send Gif WhatsApp on Android for 2024
- In 2024, 10 Top Memorable Japanese Cat Cartoons
- In 2024, How to Create a Whiteboard Video Step by Step
- New How to Make Your Characters Interactive in Unity Animation Rigging
- Updated 2024 Approved How I Animate Discord Profile Pictures (& You Can Too)
- Whiteboard Animation Services Top 15 Animation Companies to Pick
- New 2024 Approved Learn About Lip-Syncing in Animation
- Updated Nurturing the Spirit Through the Top 10 Intellectual Anime Websites
- Updated 2024 Approved What Make Aesthetic Cartoon Drawing More Understandable
- New Want to Make a Meme GIF? Heres How to Do for 2024
- New In 2024, Amazing Ways to Find Suitable Animated Graphic Maker
- In 2024, Whats Music Video GIF & How to Add Music to Your GIF Files
- New Learn How to Draw Cartoons Step by Step with This Guide for 2024
- New 2024 Approved How to Make Photo 3D Cartoon Online
- 2024 Approved Easy Shortcut to Convert Videos to Gifs on iPhone
- Updated What Wikipedia Cant Tell You About the 10 Batman Cartoons
- New The Coolest Anime Characters Ever| List of Top Favorites for 2024
- New You Can Turn a TikTok Into a GIF Now. Heres How for 2024
- Updated No. 1 Maker to Animate Your Logo Online Free for 2024
- In 2024, Best 10 3D Text Animation Templates
- New 2024 Approved How to Cartoonize Photo Photoshop in Simple Steps
- 2024 Approved 10 Classical Animated Cartoon Types With Examples
- In 2024, How to Unlock iPhone 15, Apples New iPhone
- Top 4 Ways to Trace OnePlus Ace 3 Location | Dr.fone
- How to Change Your Sony Xperia 5 V Location on life360 Without Anyone Knowing? | Dr.fone
- Overview of the Best Xiaomi Redmi 13C Screen Mirroring App | Dr.fone
- New In 2024, Best Toolbox to Translate YouTube Videos to English Subtitles
- All Things You Need to Know about Wipe Data/Factory Reset For HTC U23 Pro | Dr.fone
- Can't play MP4 files on Motorola Defy 2
- Removing Device From Apple ID For your iPhone SE (2022)
- How to Fix Error 495 While Download/Updating Android Apps On Vivo Y56 5G | Dr.fone
- Quick Fixes for Why Is My Itel S23+ Black and White | Dr.fone
- The Ultimate Guide to Bypassing iCloud Activation Lock from iPhone XS Max
- How to Perform Hard Reset on Oppo F23 5G? | Dr.fone
- Hard Reset Vivo V29 in 3 Efficient Ways | Dr.fone
- How To Repair System Issues of iPhone XR? | Dr.fone
- Lock Your Samsung Galaxy F34 5G Phone in Style The Top 5 Gesture Lock Screen Apps
- In 2024, 3 Effective Methods to Fake GPS location on Android For your Oppo A2 | Dr.fone
- Easy Guide How To Bypass Oppo Reno 11 Pro 5G FRP Android 10/11/12/13
- In 2024, How to Transfer Data After Switching From Xiaomi 13T to Latest Samsung | Dr.fone
- In 2024, How to Unlock Oppo Find X7 Ultra Bootloader Easily
- In 2024, How to Transfer from Apple iPhone SE to Samsung Galaxy S20? | Dr.fone
- Title: New <Https //images.wondershare.com/filmora/article-images/filmora9-website>
- Author: Elon
- Created at : 2024-05-19 03:04:31
- Updated at : 2024-05-20 03:04:31
- Link: https://animation-videos.techidaily.com/new-(https-imageswondersharecomfilmoraarticle-imagesfilmora9-website)/
- License: This work is licensed under CC BY-NC-SA 4.0.
