
:max_bytes(150000):strip_icc():format(webp)/social-media-text-588a94263df78caebc620f05.jpg)
New Adobe Auto Rigger Is AWESOME
Adobe Auto Rigger Is AWESOME
Adobe Auto Rigger is AWESOME
An easy yet powerful editor
Numerous effects to choose from
Detailed tutorials provided by the official channel
The Adobe Auto rigger is definitely something to look into if you want to quickly and easily prep 3D Animated Characters (without having to learn all the difficult ins and outs of Adobe 3D Rigging.) It’s a perfect tool for beginners.
Especially those that aren’t really looking to create big animated projects, just small animated characters or objects that they can use for their websites, video content, video game development, etc.
In this article
01 [What’s Adobe Auto Rigger?](#Part 1)
02 [How Do You Auto Rig a Character in Adobe?](#Part 2)
03 [Other AWESOME Auto Rigger Tools](#Part 3)
Part 1 What’s Adobe Auto Rigger?
Alright, so what is the Adobe Auto Rigger and how does it differ from Adobe Animate Advanced Rigging or Adobe After Effects Rigging? Is there any difference at all??? The simple answer? Yes, there is a definite difference.
It’s all thanks to the third-party tool, Mixamo, which will allow you to upload characters for auto rigging (basically bypassing the kind of work that is usually required for manually rigging and animating in Adobe Animate and After Effects.) We’ll talk more about this in the tutorial below. For now, all you need to know is that it takes care of setting up a character for you with only a few simple steps.
Thus, enabling you to quickly move forward in your projects if you wish. Whether you’re intending to create a quick little animation for your website, or jumping into a video editing software like Wondershare Filmora Video Editor (which is great professional software with everything you need to start creating high-quality content that you can share with your audience.)

Part 2 How Do You Auto Rig a Character in Adobe?
Now onto our promised tutorial. Here, we make use of the Adobe Auto Rigger, Mixamo, in order to demonstrate how you can bypass Adobe Rigging by making use of Mixamo’s auto-rigging functions or their pre-existing character models for creating your projects.
01Upload Your Own Character
To start, you’ll need to visit ‘Maximo.com’ and sign in with your Adobe ID (email and password required.)
You can also sign-up for free if you’d like. That option is available for those who may want to explore the available options first.
Once you’re logged in, go to the ‘Editor’ panel and prepare to upload a custom character for automatic rigging. This is assuming that you have a character design already prepared, of course. If not, then don’t worry. The next should help.

02(Optional) Browse for Downloadable Characters
The best part of Mixamo is that it has a rich library full of pre-rigged characters that you can use should you wish to. These can be found under the ‘Characters’ tab (shown in the image below.)
So, if you don’t have a character model prepared just yet or have no intention of diving too deeply into character design just in general, you don’t have to worry. You can just download one of the pre-rigged characters here and use them for your project.

03Rig a Custom Character
If you’ve decided to go forward with a custom character, after all, upload it to the Adobe Auto Rigger (shown in the image below.)
This is a very straightforward tool that you can use to place the most important markers on your figure (chin, wrists, elbows, knees, and groin). Once you’ve confirmed the placement of all these points, you can continue and come out of it with your Model auto-rigged and work-ready.

04Download Rigged Character and Begin Animation
It may take several minutes for the Adobe Auto Rigger to completely finish auto-rigging your project, so have a bit of patience. You’ll be taken back to the main interface when complete, and you’ll be able to download your now rigged model for use.
Part 3 Other AWESOME Auto Rigger Tools
Now, just in case you’re interested in other methods of automatically rigging outside of what we demonstrated above for rigging in Adobe Animate and After Effects… We’ve included some other add-ons and tools that you can use with other popular Animation software. They’re all a little bit different, so make sure to pay attention to the details provided (and watch the video attached too. As it should show you just what exactly each of these auto-rigging tools is capable of doing for you.)
01InstantRig - Auto Rigger
The first Auto Rigger on this list is ‘Instant Rig.’ This is a rigging tool for the Animation software called 3ds Max. More specifically, it’s a ‘modular rigging’ tool. That makes it very versatile, allowing you to determine the features of the character that you are working with based on their attributes (no matter how many fingers, toes, tails, ears, etc. they need.) The tool is particularly popular with game developers, as it is a quick and easy way of rigging game characters — whether they be humanoid or beastly in form. (A free version of the tool is available, but a full license will require a one-time fee of around $35.)
02Auto-Rig Pro
Next, we have the auto-rigging addon for the free, open-source Animation Software, Blender. This add-on can be used very similarly to the Adobe Animate Puppet Rig tools — and is free to use besides. The add-on has a ‘smart feature’ that is capable of automatically rigging up joints and bones of humanoid forms in an instant and can also be used for rigging up non-humanoid characters — albeit, it would have to be manual.
03Perseus Auto Rig - Maya
Next up, we have Perseus Auto Rig. This one works with Maya (which is a very popular professional software used by a lot of animation studios in the industry) and actually comes in three versions. There’s the Perseus ‘Biped Rigging’ license for humanoid characters, the Perseus ‘Facial Rigging’ license for rigging facial features, and the Perseus ‘Quadruped Rigging’ license for non-humanoid creatures.
04Auto Character Setup
Next is the auto-character set-up tool for MODO. This is a tool designed for rigging up bi-pedal characters — so mostly humanoid forms. But it does offer some flexibility as to the form that bipedal character takes. So, you can adjust it as needed if there’s something incongruous with your design and the auto-rigger itself.
05IKMAX
For our last tool for auto-rigging, we have IKMAX. This works for 3ds Max and Maya (both of which we’ve mentioned before. It’s very easy to use and adjust as needed — with sliders that you can fiddle around with the work through any problem areas if need be.
● Key Takeaways from This Episode →
● If you’re interested in introducing animations into your content but you don’t have the time or the patience to get too involved with Adobe Rigging (which is a complex subject to talk about even for some professional animators), the auto-rigging solutions are definitely something to consider.
● The Adobe Auto Rigger, Mixamo, is an especially exciting tool to try out. Not only is it incredibly easy to use, but it comes with pre-made character designs that you can play around with to start your experimentations into animation early.
● If Adobe is not your software of choice, don’t worry. There are other auto-rigging tools that you can try out if need be. We introduced at least five that you can use with some of the more popular alternative animation software in a list for you to look through.
The Adobe Auto rigger is definitely something to look into if you want to quickly and easily prep 3D Animated Characters (without having to learn all the difficult ins and outs of Adobe 3D Rigging.) It’s a perfect tool for beginners.
Especially those that aren’t really looking to create big animated projects, just small animated characters or objects that they can use for their websites, video content, video game development, etc.
In this article
01 [What’s Adobe Auto Rigger?](#Part 1)
02 [How Do You Auto Rig a Character in Adobe?](#Part 2)
03 [Other AWESOME Auto Rigger Tools](#Part 3)
Part 1 What’s Adobe Auto Rigger?
Alright, so what is the Adobe Auto Rigger and how does it differ from Adobe Animate Advanced Rigging or Adobe After Effects Rigging? Is there any difference at all??? The simple answer? Yes, there is a definite difference.
It’s all thanks to the third-party tool, Mixamo, which will allow you to upload characters for auto rigging (basically bypassing the kind of work that is usually required for manually rigging and animating in Adobe Animate and After Effects.) We’ll talk more about this in the tutorial below. For now, all you need to know is that it takes care of setting up a character for you with only a few simple steps.
Thus, enabling you to quickly move forward in your projects if you wish. Whether you’re intending to create a quick little animation for your website, or jumping into a video editing software like Wondershare Filmora Video Editor (which is great professional software with everything you need to start creating high-quality content that you can share with your audience.)
Part 2 How Do You Auto Rig a Character in Adobe?
Now onto our promised tutorial. Here, we make use of the Adobe Auto Rigger, Mixamo, in order to demonstrate how you can bypass Adobe Rigging by making use of Mixamo’s auto-rigging functions or their pre-existing character models for creating your projects.
01Upload Your Own Character
To start, you’ll need to visit ‘Maximo.com’ and sign in with your Adobe ID (email and password required.)
You can also sign-up for free if you’d like. That option is available for those who may want to explore the available options first.
Once you’re logged in, go to the ‘Editor’ panel and prepare to upload a custom character for automatic rigging. This is assuming that you have a character design already prepared, of course. If not, then don’t worry. The next should help.
02(Optional) Browse for Downloadable Characters
The best part of Mixamo is that it has a rich library full of pre-rigged characters that you can use should you wish to. These can be found under the ‘Characters’ tab (shown in the image below.)
So, if you don’t have a character model prepared just yet or have no intention of diving too deeply into character design just in general, you don’t have to worry. You can just download one of the pre-rigged characters here and use them for your project.
03Rig a Custom Character
If you’ve decided to go forward with a custom character, after all, upload it to the Adobe Auto Rigger (shown in the image below.)
This is a very straightforward tool that you can use to place the most important markers on your figure (chin, wrists, elbows, knees, and groin). Once you’ve confirmed the placement of all these points, you can continue and come out of it with your Model auto-rigged and work-ready.
04Download Rigged Character and Begin Animation
It may take several minutes for the Adobe Auto Rigger to completely finish auto-rigging your project, so have a bit of patience. You’ll be taken back to the main interface when complete, and you’ll be able to download your now rigged model for use.
Part 3 Other AWESOME Auto Rigger Tools
Now, just in case you’re interested in other methods of automatically rigging outside of what we demonstrated above for rigging in Adobe Animate and After Effects… We’ve included some other add-ons and tools that you can use with other popular Animation software. They’re all a little bit different, so make sure to pay attention to the details provided (and watch the video attached too. As it should show you just what exactly each of these auto-rigging tools is capable of doing for you.)
01InstantRig - Auto Rigger
The first Auto Rigger on this list is ‘Instant Rig.’ This is a rigging tool for the Animation software called 3ds Max. More specifically, it’s a ‘modular rigging’ tool. That makes it very versatile, allowing you to determine the features of the character that you are working with based on their attributes (no matter how many fingers, toes, tails, ears, etc. they need.) The tool is particularly popular with game developers, as it is a quick and easy way of rigging game characters — whether they be humanoid or beastly in form. (A free version of the tool is available, but a full license will require a one-time fee of around $35.)
02Auto-Rig Pro
Next, we have the auto-rigging addon for the free, open-source Animation Software, Blender. This add-on can be used very similarly to the Adobe Animate Puppet Rig tools — and is free to use besides. The add-on has a ‘smart feature’ that is capable of automatically rigging up joints and bones of humanoid forms in an instant and can also be used for rigging up non-humanoid characters — albeit, it would have to be manual.
03Perseus Auto Rig - Maya
Next up, we have Perseus Auto Rig. This one works with Maya (which is a very popular professional software used by a lot of animation studios in the industry) and actually comes in three versions. There’s the Perseus ‘Biped Rigging’ license for humanoid characters, the Perseus ‘Facial Rigging’ license for rigging facial features, and the Perseus ‘Quadruped Rigging’ license for non-humanoid creatures.
04Auto Character Setup
Next is the auto-character set-up tool for MODO. This is a tool designed for rigging up bi-pedal characters — so mostly humanoid forms. But it does offer some flexibility as to the form that bipedal character takes. So, you can adjust it as needed if there’s something incongruous with your design and the auto-rigger itself.
05IKMAX
For our last tool for auto-rigging, we have IKMAX. This works for 3ds Max and Maya (both of which we’ve mentioned before. It’s very easy to use and adjust as needed — with sliders that you can fiddle around with the work through any problem areas if need be.
● Key Takeaways from This Episode →
● If you’re interested in introducing animations into your content but you don’t have the time or the patience to get too involved with Adobe Rigging (which is a complex subject to talk about even for some professional animators), the auto-rigging solutions are definitely something to consider.
● The Adobe Auto Rigger, Mixamo, is an especially exciting tool to try out. Not only is it incredibly easy to use, but it comes with pre-made character designs that you can play around with to start your experimentations into animation early.
● If Adobe is not your software of choice, don’t worry. There are other auto-rigging tools that you can try out if need be. We introduced at least five that you can use with some of the more popular alternative animation software in a list for you to look through.
5 Best Adobe Animate Courses & Classes | Beginners Complete Tutorial
5 Best Adobe Animate Courses & Classes | Beginners Complete Tutorial
An easy yet powerful editor
Numerous effects to choose from
Detailed tutorials provided by official channel
Professional animation is hence one of the fields that has a bright future. Willing to learn more about animation?

Don’t worry! We’ve got you covered, follow this article and find out more about the best 5 Adobe animate courses.
In this article
01 [What is Adobe Animate CC?](#Part 1)
02 [Top 8 FULL ADOBE ANIMATE COURSES | Beginners Complete Tutorial](#Part 2)
03 [How to Quickly Learn the Skills of Adobe Animate Course](#Part 3)
Part 1 What is Adobe Animate CC?
1. Who should take Adobe Animate course?
Learning is never bound. Anyone willing to learn can put in effort and time. As long as you wish to learn, and have an interest in it you can take it up. Those of you who wish to make a career in animation are highly recommended to take up this course. The Adobe animate course can help you kickstart your career as a professional animator.
2. Are there prerequisites to Adobe Animate course?
Animation is one such field that does not require a lot of prerequisites. In fact, even a beginner who has absolutely no idea about animation can take up the adobe animate course.
Part 2 Top 5 FULL ADOBE ANIMATE COURSES | Beginners Complete Tutorial
1. Adobe animate CC 2018- HTML5 Banner Ads
Adobe animate CC 2018- HTML5 Banner Ads is one of the most comprehensive courses on adobe animate. It teaches you several relevant skills associated with animation and marketing (one of the primary applications of animation).

Skills you will learn:
● Basics of HTML5 banner ads using adobe animate
● Understanding the importance of Adobe animate CC in web advertisements
● Through this course, you’d become an expert at publishing ad networks
● The course will help you explore tools and techniques related to banner advertising
Udemy: Udemy Duration: About 5 hours
Pros
The course is beginner-friendly; it helps you advance your career in animation from scratch.
The course covers even complex concepts.
You receive a course completion certificate
Cons
The course is paid and you need to pay a nominal fee in order to access the lecture videos.
The course is monotonous i.e. there is no live teaching.
2. 2D animation for beginners with adobe animate, Walt Wonderwolk
If you’re looking for a well-designed course that covers almost all the necessary concepts, then this course is just the right one for you. Through this course, you can learn all about Adobe animate. All the primary concepts are explained in detail in this course.

Skills you will learn:
● All the primary concepts of computer-generated animations using Adobe animate.
● You will learn important concepts such as eases, symbols, vector drawings, tweens, and key frames.
● You will also learn how to add sound to your animation
● You will gain hands-on knowledge about drawing, composition, and animation of characters.
Udemy: skillshare
Pros
The course is great for beginners to start learning about Adobe animate
The course covers fundamental concepts of animation
Cons
You need a skillshare membership in order to access the lecture videos.
You need to pay in order to get a skillshare membership
You do not get a course completion certificate
3. Rigging and animating in Adobe animate
Looking for a quick crash course about Adobe animate? Well, this course is perfect for you. As the name suggests, in this course you shall learn all about rigging and animating 2d characters.

Skills you will learn:
● rigging and animating adobe animate
● Through this course, you will know how to efficiently animate any character
● Discover the utilization of vectors and images for rigging
● You will get a clear understanding of important concepts such as layer parenting, motion tweening, and symbols.
Udemy: Udemy Duration: around 4 hours
Pros
You will learn the major concepts of animation.
You will learn about rigging in detail, one of the core concepts of animation.
The course is available on Udemy, one of the most accessible platforms.
Cons
The course is not free, you need to pay a nominal amount to access the course.
It is not a renowned course.
The course is not Beginner friendly, it needs you to have some understanding of animation.
4. Learning Adobe Animate CC: Animation, LinkedIn learning
LinkedIn’s new platform, LinkedIn learning has several professional courses. Learning Adobe animate CC is one of the courses available on LinkedIn learning. It teaches you all about digital transformations. By the end of this course, you will be able to create a handy bit of animation.

Skills you will learn:
● Fundamentals of digital animation on Adobe animate CC
● Understanding and implementation of concepts such as keyframes, symbols, tweening, and drawing tools.
● Understand about the creation of natural effects and shape tweens.
● Adding music and sound effects to your animation.
Udemy: LinkedIn learning Duration: Around 3 hours
Pros
The course duration is considerably shorter.
All the primary concepts of animation are given importance in this course.
You get additional quizzes and study material along with the lecture videos
Cons
You need to have an active LinkedIn learning membership.
You need to pay for the LinkedIn learning membership.
The course is fast-paced, you need to grasp the concepts quickly.
5. Animate a walk cycle frame by frame in Adobe animate
This hands-on course is perfect for those who prefer experimenting as they watch the lecture videos. The course teaches you how to animate 2D and 3D characters smoothly. As you near the end of this course, you will have a clear understanding of how animation works and how to animate a hand-drawn character from scratch.

Skills you will learn:
● You will learn how to animate a hand-drawn character from scratch.
● You shall learn how to set up a working canvas and design a character.
● You will learn about the essential features of designing such as color fills, overlapping actions, shadows, and cleanup strokes.
Udemy: skillshare
Pros
The course focuses on the design aspect of animated characters.
The course gives you a hands-on experience with animation tools.
The course helps you learn how to create creative hand drawn characters.
Cons
You need an active skillshare membership to access the lecture videos
Skillshare membership is a paid one.
There are courses from more popular counterparts such as Udemy.
Part 3 How to Quickly Learn the Skills of Adobe Animate Course
Now that you’ve decided to get your hands dirty by dwelling into animation, you must give Wondershare Filmora Pro a try. What’s Wondershare Filmora ?
It’s essentially a one-stop shop for all your video editing needs. From video editing to rigging Wwondershare Filmora Pro has got it all. Using this platform, even a beginner can create exquisite animated videos.
The platform offers you several tools that are easy to use.
Even a neophyte could easily create beautiful animations by using Wondershare Filmora Pro. Using Wondershare Filmora Pro, you can not only animate characters but also define their motion, add sound effects, and edit videos. Filmora Pro offers you animation tools that are easier to operate and resultantly help you make amazing animated videos.
Wondershare Filmora
Get started easily with Filmora’s powerful performance, intuitive interface, and countless effects!
Try It Free Try It Free Try It Free Learn More >

Key Takeaways from This Episode
● As we see, today we’ve taken a look at a few of the best Adobe animate courses.
● Each of the courses can help you learn the basics of animation.
● Animation is indeed one of the budding fields, and with these fruitful courses, you can learn all about animation and possibly begin your journey as a freelancer or a professional in animation.
● Through these courses, you can create animated advertisement videos with ease. Wondershare Filmora Pro however can make your job easier by offering you amazing tools for generating animated videos!<
● Well, on this note we shall take leave! Wishing you good luck on your journey as an animator!
Professional animation is hence one of the fields that has a bright future. Willing to learn more about animation?
Don’t worry! We’ve got you covered, follow this article and find out more about the best 5 Adobe animate courses.
In this article
01 [What is Adobe Animate CC?](#Part 1)
02 [Top 8 FULL ADOBE ANIMATE COURSES | Beginners Complete Tutorial](#Part 2)
03 [How to Quickly Learn the Skills of Adobe Animate Course](#Part 3)
Part 1 What is Adobe Animate CC?
1. Who should take Adobe Animate course?
Learning is never bound. Anyone willing to learn can put in effort and time. As long as you wish to learn, and have an interest in it you can take it up. Those of you who wish to make a career in animation are highly recommended to take up this course. The Adobe animate course can help you kickstart your career as a professional animator.
2. Are there prerequisites to Adobe Animate course?
Animation is one such field that does not require a lot of prerequisites. In fact, even a beginner who has absolutely no idea about animation can take up the adobe animate course.
Part 2 Top 5 FULL ADOBE ANIMATE COURSES | Beginners Complete Tutorial
1. Adobe animate CC 2018- HTML5 Banner Ads
Adobe animate CC 2018- HTML5 Banner Ads is one of the most comprehensive courses on adobe animate. It teaches you several relevant skills associated with animation and marketing (one of the primary applications of animation).
Skills you will learn:
● Basics of HTML5 banner ads using adobe animate
● Understanding the importance of Adobe animate CC in web advertisements
● Through this course, you’d become an expert at publishing ad networks
● The course will help you explore tools and techniques related to banner advertising
Udemy: Udemy Duration: About 5 hours
Pros
The course is beginner-friendly; it helps you advance your career in animation from scratch.
The course covers even complex concepts.
You receive a course completion certificate
Cons
The course is paid and you need to pay a nominal fee in order to access the lecture videos.
The course is monotonous i.e. there is no live teaching.
2. 2D animation for beginners with adobe animate, Walt Wonderwolk
If you’re looking for a well-designed course that covers almost all the necessary concepts, then this course is just the right one for you. Through this course, you can learn all about Adobe animate. All the primary concepts are explained in detail in this course.
Skills you will learn:
● All the primary concepts of computer-generated animations using Adobe animate.
● You will learn important concepts such as eases, symbols, vector drawings, tweens, and key frames.
● You will also learn how to add sound to your animation
● You will gain hands-on knowledge about drawing, composition, and animation of characters.
Udemy: skillshare
Pros
The course is great for beginners to start learning about Adobe animate
The course covers fundamental concepts of animation
Cons
You need a skillshare membership in order to access the lecture videos.
You need to pay in order to get a skillshare membership
You do not get a course completion certificate
3. Rigging and animating in Adobe animate
Looking for a quick crash course about Adobe animate? Well, this course is perfect for you. As the name suggests, in this course you shall learn all about rigging and animating 2d characters.
Skills you will learn:
● rigging and animating adobe animate
● Through this course, you will know how to efficiently animate any character
● Discover the utilization of vectors and images for rigging
● You will get a clear understanding of important concepts such as layer parenting, motion tweening, and symbols.
Udemy: Udemy Duration: around 4 hours
Pros
You will learn the major concepts of animation.
You will learn about rigging in detail, one of the core concepts of animation.
The course is available on Udemy, one of the most accessible platforms.
Cons
The course is not free, you need to pay a nominal amount to access the course.
It is not a renowned course.
The course is not Beginner friendly, it needs you to have some understanding of animation.
4. Learning Adobe Animate CC: Animation, LinkedIn learning
LinkedIn’s new platform, LinkedIn learning has several professional courses. Learning Adobe animate CC is one of the courses available on LinkedIn learning. It teaches you all about digital transformations. By the end of this course, you will be able to create a handy bit of animation.
Skills you will learn:
● Fundamentals of digital animation on Adobe animate CC
● Understanding and implementation of concepts such as keyframes, symbols, tweening, and drawing tools.
● Understand about the creation of natural effects and shape tweens.
● Adding music and sound effects to your animation.
Udemy: LinkedIn learning Duration: Around 3 hours
Pros
The course duration is considerably shorter.
All the primary concepts of animation are given importance in this course.
You get additional quizzes and study material along with the lecture videos
Cons
You need to have an active LinkedIn learning membership.
You need to pay for the LinkedIn learning membership.
The course is fast-paced, you need to grasp the concepts quickly.
5. Animate a walk cycle frame by frame in Adobe animate
This hands-on course is perfect for those who prefer experimenting as they watch the lecture videos. The course teaches you how to animate 2D and 3D characters smoothly. As you near the end of this course, you will have a clear understanding of how animation works and how to animate a hand-drawn character from scratch.
Skills you will learn:
● You will learn how to animate a hand-drawn character from scratch.
● You shall learn how to set up a working canvas and design a character.
● You will learn about the essential features of designing such as color fills, overlapping actions, shadows, and cleanup strokes.
Udemy: skillshare
Pros
The course focuses on the design aspect of animated characters.
The course gives you a hands-on experience with animation tools.
The course helps you learn how to create creative hand drawn characters.
Cons
You need an active skillshare membership to access the lecture videos
Skillshare membership is a paid one.
There are courses from more popular counterparts such as Udemy.
Part 3 How to Quickly Learn the Skills of Adobe Animate Course
Now that you’ve decided to get your hands dirty by dwelling into animation, you must give Wondershare Filmora Pro a try. What’s Wondershare Filmora ?
It’s essentially a one-stop shop for all your video editing needs. From video editing to rigging Wwondershare Filmora Pro has got it all. Using this platform, even a beginner can create exquisite animated videos.
The platform offers you several tools that are easy to use.
Even a neophyte could easily create beautiful animations by using Wondershare Filmora Pro. Using Wondershare Filmora Pro, you can not only animate characters but also define their motion, add sound effects, and edit videos. Filmora Pro offers you animation tools that are easier to operate and resultantly help you make amazing animated videos.
Wondershare Filmora
Get started easily with Filmora’s powerful performance, intuitive interface, and countless effects!
Try It Free Try It Free Try It Free Learn More >
Key Takeaways from This Episode
● As we see, today we’ve taken a look at a few of the best Adobe animate courses.
● Each of the courses can help you learn the basics of animation.
● Animation is indeed one of the budding fields, and with these fruitful courses, you can learn all about animation and possibly begin your journey as a freelancer or a professional in animation.
● Through these courses, you can create animated advertisement videos with ease. Wondershare Filmora Pro however can make your job easier by offering you amazing tools for generating animated videos!<
● Well, on this note we shall take leave! Wishing you good luck on your journey as an animator!
How to Obtain and Create Animated GIF Icons Like a Pro?
Versatile Video Editor - Wondershare Filmora
An easy yet powerful editor
Numerous effects to choose from
Detailed tutorials provided by the official channel
Are you looking for some interesting and animated GIF icons? Then simply read this guide to discover funny GIF icons and learn how to create them on your own.
GIF, which stands for Graphics Interchange Format, has now become extremely popular among social media. From sending our reactions to something to wishing others on special occasions, GIFs can be used in so many ways. Though, there are times when we would like to use animated GIF icons in your designs to make them more appealing. Therefore, in this post, I will let you know how to create some funny GIF icons and would also share a few resources to find readily available GIF icons.
![]()
In this article
01 [Smart Ways to Create Your Own Animated GIF Icons](#Part 1)
02 [Top 3 Resources to Get Free Animated GIF Icons](#Part 2)
Part 1 Smart Ways to Create Your Own Animated GIF Icons
While there are so many ways to come up with animated GIF icons, I would recommend exploring the following options:
Method 1: Use Adobe Photoshop to Create GIF Icons
If you are looking for a professional solution to create a live GIF icon, then I would recommend using Adobe Photoshop. While the application is not that easy to use, it will be an ideal long-term solution. In nutshell, you can create animated GIF icons by loading assets, duplicating layers, and then merging them in the following way:
Step 1 Load Assets on Photoshop
At first, you can simply launch Adobe Photoshop on your system and go to its File > Scripts to load media assets into your stack.
![]()
This will let you browse and load the media assets to your projects. In case you don’t have a layer created, then you can just go to its File > Layer and create a new layer.
![]()
You can now rename your layers and can go to its File > Window > Timeline to get a timeline view of the added assets.
![]()
Step 2 Work on the Video Timeline to Create a GIF
Great! Once you have got the timeline view on the application, you can click on its dropdown menu and choose to create a frame animation.
![]()
Afterward, you can select the added media and go to its Properties menu on the sidebar. From here, you can choose to create a new layer for each frame and then make frames from each layer.
![]()
This will create multiple frames on the timeline at the bottom. You can edit each frame on the timeline and can also set up its preferred duration.
![]()
You can also right-click the frames and select how many times your loading icon GIF would be repeated.
![]()
Step 3 Preview and Export your GIF from Photoshop
Lastly, you can get a preview of your animated GIF icons and can go to its File > Export and choose to save it for the web in a compatible (GIF) format.
![]()
Method 2: Make Stunning Animated GIF Icons with Wondershare Filmora
Since Adobe Photoshop can be quite complicated to use, you can consider using Wondershare Filmora to create all kinds of animated GIF icons. It is a user-friendly media editing application that has a wide range of readily available assets and would also let you import files from your system.
Besides that, there are tons of stickers, visual elements, captions, animations, transitions, and so on that would let you create and customize funny GIF icons. Therefore, if you want to create animated GIF icons using Filmora, then you can simply follow these steps:
Step 1 Load Media Files (Images and Videos) on Filmora
To get things started, you can just launch Wondershare Filmora on your system and go to its File > Import menu to load media files to it. You can also drag and drop your media files directly to the interface of Filmora.

Step 2 Create or Edit GIFs on Wondershare Filmora
After loading your images or video clips, you can drag and drop them to the timeline at the bottom. In case you can want to get rid of any video clip, you can just hover the mouse around and use its trimming tool to meet your requirements.

Once you have edited your videos or images, you can just go to their properties from the sidebar. From here, you can scale, reposition, rotate, flip, and perform other edits on your media files.

If you want to add texts to your GIFs, then just visit the “Titles” section of Filmora from the top. This will let you explore and include any caption effect that you can later edit on Filmora.

You can also go to the “Effects” section from the sidebar to explore a wide range of transitions, filters, stickers, and more that you can add to your GIFs.

Step 3 Export your Animated GIFs from Filmora
That’s it! Once you have worked on your funny GIF icons, you can get their preview, and click on the “Export” icon from the top. Here, you can select “GIF” as a target format and simply save them to a preferred location on your system.

Method 3: Take the Assistance of Canva to Create Animated GIFs
You might already know that Canva is already a popular online application that can be used to create social media posts, marketing video ads, brochures, GIFs, and more. Since Canva offers a wide range of assets (images, GIFs, and more), you can use it to create animated GIF icons on the go.
Step 1 Select a Template of your Choice on Canvas
Whenever you want to create a loading icon GIF, you can just go to your Canva account and look for any existing template. Apart from its existing template, you can also load a blank canvas.
![]()
Step 2 Use the Existing Designing Features of Canva
Great! Once you have opened your canvas, you can explore tons of assets on the side. For instance, you can add texts, borders, objects, and so on from the sidebar to your canvas. You can also select a relevant animation style and add it to your project.
![]()
Step 3 Export the Media as a GIF from Canva
After working on the live GIF icon on Canva, you can just go to the Export option from the top and save it as a GIF on your system.
![]()
Part 2 Top 3 Resources to Get Free Animated GIF Icons
If you are running short on time and would like to get some premade animated GIF icons, then you can explore the following options.
1. Icons8
Icons8 is one of the most popular resources for free animated GIF icons. You can explore a wide range of more than 3000 animated icons (free and paid) on the website and can download them on your system in a preferred format. For your convenience, these animated icons are listed in different categories on Icons8.
![]()
2. Giphy
Giphy is one of the most popular websites that is entirely dedicated to GIFs. Therefore, if you are looking for an animated Discord server icon, a professional icon, or a personal animation – you can find it all on Giphy. While it has an extensive range of icons, they aren’t listed in different categories, and finding the right GIF can be time-consuming.
![]()
3. Cliply
Lastly, you can also go to the official website of Cliply to explore tons of animated GIF icons. There are all kinds of GIF Discord server icons, 3D icons, professional sets, and more that you can download from Cliply.
![]()
Wondershare Filmora
Get started easily with Filmora’s powerful performance, intuitive interface, and countless effects!
Try It Free Try It Free Try It Free Learn More >
AI Portrait – The best feature of Wondershare Filmora for gameplay editing
The AI Portrait is a new add-on in Wondershare Filmora. It can easily remove video backgrounds without using a green screen or chroma key, allowing you to add borders, glitch effects, pixelated, noise, or segmentation video effects.

Conclusion
There you go! I’m sure that after going through this post, you can easily find all kinds of animated GIF icons. Though, if you have specific requirements and would like to come up with some customized loading or funny GIF icons, then you can consider using tools like Canva, Photoshop, or Filmora. Out of them, Wondershare Filmora has to be the best solution to create live GIF icons as it features tons of resources and will let you come up with any video or GIF on the go.
Are you looking for some interesting and animated GIF icons? Then simply read this guide to discover funny GIF icons and learn how to create them on your own.
GIF, which stands for Graphics Interchange Format, has now become extremely popular among social media. From sending our reactions to something to wishing others on special occasions, GIFs can be used in so many ways. Though, there are times when we would like to use animated GIF icons in your designs to make them more appealing. Therefore, in this post, I will let you know how to create some funny GIF icons and would also share a few resources to find readily available GIF icons.
![]()
In this article
01 [Smart Ways to Create Your Own Animated GIF Icons](#Part 1)
02 [Top 3 Resources to Get Free Animated GIF Icons](#Part 2)
Part 1 Smart Ways to Create Your Own Animated GIF Icons
While there are so many ways to come up with animated GIF icons, I would recommend exploring the following options:
Method 1: Use Adobe Photoshop to Create GIF Icons
If you are looking for a professional solution to create a live GIF icon, then I would recommend using Adobe Photoshop. While the application is not that easy to use, it will be an ideal long-term solution. In nutshell, you can create animated GIF icons by loading assets, duplicating layers, and then merging them in the following way:
Step 1 Load Assets on Photoshop
At first, you can simply launch Adobe Photoshop on your system and go to its File > Scripts to load media assets into your stack.
![]()
This will let you browse and load the media assets to your projects. In case you don’t have a layer created, then you can just go to its File > Layer and create a new layer.
![]()
You can now rename your layers and can go to its File > Window > Timeline to get a timeline view of the added assets.
![]()
Step 2 Work on the Video Timeline to Create a GIF
Great! Once you have got the timeline view on the application, you can click on its dropdown menu and choose to create a frame animation.
![]()
Afterward, you can select the added media and go to its Properties menu on the sidebar. From here, you can choose to create a new layer for each frame and then make frames from each layer.
![]()
This will create multiple frames on the timeline at the bottom. You can edit each frame on the timeline and can also set up its preferred duration.
![]()
You can also right-click the frames and select how many times your loading icon GIF would be repeated.
![]()
Step 3 Preview and Export your GIF from Photoshop
Lastly, you can get a preview of your animated GIF icons and can go to its File > Export and choose to save it for the web in a compatible (GIF) format.
![]()
Method 2: Make Stunning Animated GIF Icons with Wondershare Filmora
Since Adobe Photoshop can be quite complicated to use, you can consider using Wondershare Filmora to create all kinds of animated GIF icons. It is a user-friendly media editing application that has a wide range of readily available assets and would also let you import files from your system.
Besides that, there are tons of stickers, visual elements, captions, animations, transitions, and so on that would let you create and customize funny GIF icons. Therefore, if you want to create animated GIF icons using Filmora, then you can simply follow these steps:
Step 1 Load Media Files (Images and Videos) on Filmora
To get things started, you can just launch Wondershare Filmora on your system and go to its File > Import menu to load media files to it. You can also drag and drop your media files directly to the interface of Filmora.
Step 2 Create or Edit GIFs on Wondershare Filmora
After loading your images or video clips, you can drag and drop them to the timeline at the bottom. In case you can want to get rid of any video clip, you can just hover the mouse around and use its trimming tool to meet your requirements.
Once you have edited your videos or images, you can just go to their properties from the sidebar. From here, you can scale, reposition, rotate, flip, and perform other edits on your media files.
If you want to add texts to your GIFs, then just visit the “Titles” section of Filmora from the top. This will let you explore and include any caption effect that you can later edit on Filmora.
You can also go to the “Effects” section from the sidebar to explore a wide range of transitions, filters, stickers, and more that you can add to your GIFs.
Step 3 Export your Animated GIFs from Filmora
That’s it! Once you have worked on your funny GIF icons, you can get their preview, and click on the “Export” icon from the top. Here, you can select “GIF” as a target format and simply save them to a preferred location on your system.
Method 3: Take the Assistance of Canva to Create Animated GIFs
You might already know that Canva is already a popular online application that can be used to create social media posts, marketing video ads, brochures, GIFs, and more. Since Canva offers a wide range of assets (images, GIFs, and more), you can use it to create animated GIF icons on the go.
Step 1 Select a Template of your Choice on Canvas
Whenever you want to create a loading icon GIF, you can just go to your Canva account and look for any existing template. Apart from its existing template, you can also load a blank canvas.
![]()
Step 2 Use the Existing Designing Features of Canva
Great! Once you have opened your canvas, you can explore tons of assets on the side. For instance, you can add texts, borders, objects, and so on from the sidebar to your canvas. You can also select a relevant animation style and add it to your project.
![]()
Step 3 Export the Media as a GIF from Canva
After working on the live GIF icon on Canva, you can just go to the Export option from the top and save it as a GIF on your system.
![]()
Part 2 Top 3 Resources to Get Free Animated GIF Icons
If you are running short on time and would like to get some premade animated GIF icons, then you can explore the following options.
1. Icons8
Icons8 is one of the most popular resources for free animated GIF icons. You can explore a wide range of more than 3000 animated icons (free and paid) on the website and can download them on your system in a preferred format. For your convenience, these animated icons are listed in different categories on Icons8.
![]()
2. Giphy
Giphy is one of the most popular websites that is entirely dedicated to GIFs. Therefore, if you are looking for an animated Discord server icon, a professional icon, or a personal animation – you can find it all on Giphy. While it has an extensive range of icons, they aren’t listed in different categories, and finding the right GIF can be time-consuming.
![]()
3. Cliply
Lastly, you can also go to the official website of Cliply to explore tons of animated GIF icons. There are all kinds of GIF Discord server icons, 3D icons, professional sets, and more that you can download from Cliply.
![]()
Wondershare Filmora
Get started easily with Filmora’s powerful performance, intuitive interface, and countless effects!
Try It Free Try It Free Try It Free Learn More >
AI Portrait – The best feature of Wondershare Filmora for gameplay editing
The AI Portrait is a new add-on in Wondershare Filmora. It can easily remove video backgrounds without using a green screen or chroma key, allowing you to add borders, glitch effects, pixelated, noise, or segmentation video effects.
Conclusion
There you go! I’m sure that after going through this post, you can easily find all kinds of animated GIF icons. Though, if you have specific requirements and would like to come up with some customized loading or funny GIF icons, then you can consider using tools like Canva, Photoshop, or Filmora. Out of them, Wondershare Filmora has to be the best solution to create live GIF icons as it features tons of resources and will let you come up with any video or GIF on the go.
How to Make Slideshow in LinkedIn
How to Create Slideshow in LinkedIn
An easy yet powerful editor
Numerous effects to choose from
Detailed tutorials provided by the official channel
LinkedIn slideshows are interesting means of professional content presentations in an elusive and catchy style. Stay tuned to learn everything about LinkedIn slideshows!
In this article
01 [Why Should You Care LinkedIn Slideshow?](#Part 1)
02 [What Are the Specs & Dimensions of LinkedIn Slideshow?](#Part 2)
03 [Examples of LinkedIn Slideshow](#Part 3)
04 [How to Create Slideshow in LinkedIn?](#Part 4)
Part 1 Why Should You Care LinkedIn Slideshow?
Today’s IT revolutionized era has a technology infused solution to everything and employment is no exception. Defining the platform, LinkedIn is a professional social networking site that allows you to put forward your qualifications, education, skills, expertise and experience to address your job oriented concerns. The platform is a market leader in hiring professionals to a diversity of work profiles, while increasing the number of potential audiences.
The social media platform essentially works to keep the job realm informed about you with the most detailed aspects. This is why, creating a LinkedIn profile turns out to be a significant step in the professional world. Let us get into understanding some more beneficial aspects of a LinkedIn recognition in the following section:
01Establishing Professional Connections
Making yourself available on the professional front through a LinkedIn profile lets you know about the diversities of recruitment prerequisites, connect with professionals belonging to different domains, backgrounds and industries, while getting numerous opportunities to meet people who share a similar work perspective as yours.
02Being Informed About Job Postings
A LinkedIn profile caters most effectively to your concern of getting regular updates about employment opportunities in a diverse range of industrial and business corporations, companies and recruiting agencies. You can use the platform to create a professional account and follow the respective company pages that match with your qualifications and expertise, to get the latest updates of their job postings and vacancy announcements.
03Recruiter’s Search Visibility
Having a LinkedIn profile affordably means that you are entitled to a recognition in the recruiter’s search results on Google, thus giving a considerable boost to your chances of being viewed and hired. This is additionally beneficial for the recruiting agencies as well, who get the maximum fruit with the least effort.
04Globalization
Creating a comprehensive LinkedIn profile with the correct choice of keywords and exact content opens up employment opportunities beyond the cross country borders, thanks to the platform’s global reach and credibility. This in turn, causes your professional integrity to be presented in front of a large scale audience diversity.
05Personal Branding
Being active on LinkedIn lets you become a brand for yourself through its endorsement and recommendation features. Seeing your LinkedIn profile, your akin, coworkers and professionally senior acquaintances of the past can write a positive testimonial on your expertise, thus increasing your chances of being hired to a new job post.
06A Valuable Asset
You can conveniently regard a LinkedIn profile as your professional diary, where you can update your latest corporate or industrial achievements, awards, project undertakings and voluntary activities. This will facilitate your recruiter with the latest and exact information about your corporate capabilities, which would further aid the latter to consider on hiring you.
07Real and Trustworthy Platform
Creating a LinkedIn profile essentially requires furnishing real and authentic details of education, skills and professional backgrounds for getting relevant opportunities in their respective fields. Uploading false information and fake details will anyway result in beating around the bush, without any significant gain and hence, this practice is essentially avoided by LinkedIn users.
08Active Job Search
Instead of following the conventional passive job seeker pattern of sending resume and waiting for the HR response, LinkedIn allows you to be in regular touch with the recruiter of your chosen company for latest updates on the hiring process. If you are worried of getting the ‘desperate’ tag, rest assured as the platform will rather present you as a proactive professional.
Part 2 What Are the Specs & Dimensions of LinkedIn Slideshow?
Now that you are familiar with the credibility of a LinkedIn carousel post in the professional world, let us get into some more details of the utility with proceeding towards a discussion of the different specifications and dimensions of a LinkedIn slideshow and the professional aspects of the same in the following section:
● Take Care of the File Size
The credibility of LinkedIn carousel posts lies in the engaging presentation of your static and monotonous text to make them stand out of the crowded newsfeed. True that your creative skills are sufficient enough to design a graphic masterpiece, yet you should take care to remain within an affordable limit, lest you would end up with a large file that gets difficult to upload and process. Most reliably, a 100 MB file size would easily fit into the bill.
● Restrict Your Slide Count
When creating a slideshow LinkedIn presentation, it is normal to get a bit over the line while including the most exemplary and comprehensive details about your professional qualifications, skills and background. Relax, that’s nothing wrong! However, all you need to care about is limiting the slide count of your slideshow to a maximum of 300 pages. As a genuine approach, no one would bother going beyond that to read about you anyway!
● Use a Commendable File Format
You would ideally want the documents and media files in your slideshow to have the finest quality. LinkedIn allows you to create and share your graphic presentations in the PDF, DOCX, DOC, PPTX and PPT file formats. If you want the assurance of your slideshows having the highest resolution and appreciable output quality, it is recommended to save them in the PDF file format.
● Make a Careful Upload
When you are ready to upload your presentation, consider taking a close preview of its contents to make sure that you have not missed out on anything. This becomes all the more necessary, owing to the fact that, you are not allowed to edit your post in anyway after it gets uploaded on your LinkedIn profile.
● Bonus Tip
To include the latest and up-to-date information within your presentation, consider visiting the LinkedIn official webpage directly from your platform account.
Part 3 Examples of LinkedIn Slideshow
Creating a LinkedIn slide show can be both, exciting as well as advantageous on the professional front. After having an insight of the significance, dimensions and specifications, let us now move towards browsing through some of the most excellent examples of LinkedIn slideshow presentations in the following section:
● Share Numbers, Infographics and Statistics
The utility of the LinkedIn platform to share documents has been worked upon by Brian Wallace, an infographic agency owner, to present his professional excellence in front of the target audiences through useful statistics and examples. Opening his work profile, you would firstly get to see an infographic PDF export, which are later uploaded as document files on a LinkedIn post that speaks in favor of the statistics.
● Share Action Oriented Business Modules
Travis Lachner, the CEO of a renowned business enterprise, has worked upon the clever idea of designing appealing, call to action presentations to encourage the participation of his potential audiences in the business module through a graphical arrow desisgn, asking them to share their opinions via relatable comments.
● Stepwise Instructions and Design Frameworks
This LinkedIn feature is utilized by Demodesk to present a stepwise demonstration of its newly launched ‘One Feature Framework’ through a slideshow presentation. You can work with the facility to share documents comprising of market oriented case studies, business reports, frameworks, etc., from your company’s official webpage.
● Conference Presentations and Event Contents
LinkedIn slideshows are indeed the most expressive means of sharing conference essentials and event marketing. Such presentations have been perfectly put to use by Jens Hilgers, the eSports creator and entrepreneur, to help viewers and players in navigating through his game landscapes. You can also choose a simple task of creating a buzz of your upcoming event among your audience, like Garter did to inform about the CFO & Executive Conference.
● Content Promotion
You can use a LinkedIn slideshow post to effectively promote your content among a global audience like Matheos Simou, a graphic designer cum recruitment strategist, who utilized LinkedIn presentations to educate his target audience about the significance of graphic desisgn and product branding outsources through his slideshow post titled ‘Flipping Pointless Brand Identity’.
Part 4 How to Create Slideshow in LinkedIn?
Having talked enough about LinkedIn slideshows and their market credibility, let us now make an attempt to try hands at creating professionally useful LinkedIn presentations. The following section describes a detailed, stepwise tutorial to adhere to the aforesaid purpose within a quick time span and utmost ease:
● User’s Guide to Create a LinkedIn Slideshow
Step 1: Open Your LinkedIn Profile
Start with logging in to your LinkedIn profile in any preferred device.
Step 2: Create a Google Slide Deck
Launch Google Slides in your device and proceed to design a slide deck on the same.

Step 3: Add Content to the Inaugural Slide
Populate the first slide of your presentation with the opening content, like the titles and subtitles of slideshow creation objective, company name, profile and expertise, etc.

As far as designing the subsequent slides is concerned, it would be a smart idea to clone the first slide to maintain an overall homogeneity.

Step 4: Save Your Work
When you are done with creating the presentation, choose to save it on your profile in the PDF file format for ensuring a high output quality.

Step 5: Sharing Your Creation
Create a document post on your profile to share the slideshow presentation with fellow LinkedIn users.

Step 6: Describe Your Post
The last step is to supplement your post with a suitable description and a few catchy hashtags. When you are happy with your work, navigate to the bottom right of the profile screen and tap ‘Post’.

● Creating LinkedIn Slideshows with Wondershare Filmora
When looking for a convenient and easy to use slideshow creator to design your LinkedIn presentations, you can rely on the Wondershare Filmora Video Editor Slideshow Creator software program to make high end, professional quality slide shows in a commendable resolution, and supplement them with a diversity of cohesive graphic effects.
For Win 7 or later (64-bit)
For macOS 10.12 or later
● Ending Thoughts →
● LinkedIn slideshows are highly useful in creating a notable impact of your professional skills and capabilities in front of job recruiters.
● There are some essential aspects of LinkedIn slideshows, which you should consider while designing your presentation.
● Wondershare Filmora is certainly one among the best software solutions to create LinkedIn slideshows with high end professional excellence.
LinkedIn slideshows are interesting means of professional content presentations in an elusive and catchy style. Stay tuned to learn everything about LinkedIn slideshows!
In this article
01 [Why Should You Care LinkedIn Slideshow?](#Part 1)
02 [What Are the Specs & Dimensions of LinkedIn Slideshow?](#Part 2)
03 [Examples of LinkedIn Slideshow](#Part 3)
04 [How to Create Slideshow in LinkedIn?](#Part 4)
Part 1 Why Should You Care LinkedIn Slideshow?
Today’s IT revolutionized era has a technology infused solution to everything and employment is no exception. Defining the platform, LinkedIn is a professional social networking site that allows you to put forward your qualifications, education, skills, expertise and experience to address your job oriented concerns. The platform is a market leader in hiring professionals to a diversity of work profiles, while increasing the number of potential audiences.
The social media platform essentially works to keep the job realm informed about you with the most detailed aspects. This is why, creating a LinkedIn profile turns out to be a significant step in the professional world. Let us get into understanding some more beneficial aspects of a LinkedIn recognition in the following section:
01Establishing Professional Connections
Making yourself available on the professional front through a LinkedIn profile lets you know about the diversities of recruitment prerequisites, connect with professionals belonging to different domains, backgrounds and industries, while getting numerous opportunities to meet people who share a similar work perspective as yours.
02Being Informed About Job Postings
A LinkedIn profile caters most effectively to your concern of getting regular updates about employment opportunities in a diverse range of industrial and business corporations, companies and recruiting agencies. You can use the platform to create a professional account and follow the respective company pages that match with your qualifications and expertise, to get the latest updates of their job postings and vacancy announcements.
03Recruiter’s Search Visibility
Having a LinkedIn profile affordably means that you are entitled to a recognition in the recruiter’s search results on Google, thus giving a considerable boost to your chances of being viewed and hired. This is additionally beneficial for the recruiting agencies as well, who get the maximum fruit with the least effort.
04Globalization
Creating a comprehensive LinkedIn profile with the correct choice of keywords and exact content opens up employment opportunities beyond the cross country borders, thanks to the platform’s global reach and credibility. This in turn, causes your professional integrity to be presented in front of a large scale audience diversity.
05Personal Branding
Being active on LinkedIn lets you become a brand for yourself through its endorsement and recommendation features. Seeing your LinkedIn profile, your akin, coworkers and professionally senior acquaintances of the past can write a positive testimonial on your expertise, thus increasing your chances of being hired to a new job post.
06A Valuable Asset
You can conveniently regard a LinkedIn profile as your professional diary, where you can update your latest corporate or industrial achievements, awards, project undertakings and voluntary activities. This will facilitate your recruiter with the latest and exact information about your corporate capabilities, which would further aid the latter to consider on hiring you.
07Real and Trustworthy Platform
Creating a LinkedIn profile essentially requires furnishing real and authentic details of education, skills and professional backgrounds for getting relevant opportunities in their respective fields. Uploading false information and fake details will anyway result in beating around the bush, without any significant gain and hence, this practice is essentially avoided by LinkedIn users.
08Active Job Search
Instead of following the conventional passive job seeker pattern of sending resume and waiting for the HR response, LinkedIn allows you to be in regular touch with the recruiter of your chosen company for latest updates on the hiring process. If you are worried of getting the ‘desperate’ tag, rest assured as the platform will rather present you as a proactive professional.
Part 2 What Are the Specs & Dimensions of LinkedIn Slideshow?
Now that you are familiar with the credibility of a LinkedIn carousel post in the professional world, let us get into some more details of the utility with proceeding towards a discussion of the different specifications and dimensions of a LinkedIn slideshow and the professional aspects of the same in the following section:
● Take Care of the File Size
The credibility of LinkedIn carousel posts lies in the engaging presentation of your static and monotonous text to make them stand out of the crowded newsfeed. True that your creative skills are sufficient enough to design a graphic masterpiece, yet you should take care to remain within an affordable limit, lest you would end up with a large file that gets difficult to upload and process. Most reliably, a 100 MB file size would easily fit into the bill.
● Restrict Your Slide Count
When creating a slideshow LinkedIn presentation, it is normal to get a bit over the line while including the most exemplary and comprehensive details about your professional qualifications, skills and background. Relax, that’s nothing wrong! However, all you need to care about is limiting the slide count of your slideshow to a maximum of 300 pages. As a genuine approach, no one would bother going beyond that to read about you anyway!
● Use a Commendable File Format
You would ideally want the documents and media files in your slideshow to have the finest quality. LinkedIn allows you to create and share your graphic presentations in the PDF, DOCX, DOC, PPTX and PPT file formats. If you want the assurance of your slideshows having the highest resolution and appreciable output quality, it is recommended to save them in the PDF file format.
● Make a Careful Upload
When you are ready to upload your presentation, consider taking a close preview of its contents to make sure that you have not missed out on anything. This becomes all the more necessary, owing to the fact that, you are not allowed to edit your post in anyway after it gets uploaded on your LinkedIn profile.
● Bonus Tip
To include the latest and up-to-date information within your presentation, consider visiting the LinkedIn official webpage directly from your platform account.
Part 3 Examples of LinkedIn Slideshow
Creating a LinkedIn slide show can be both, exciting as well as advantageous on the professional front. After having an insight of the significance, dimensions and specifications, let us now move towards browsing through some of the most excellent examples of LinkedIn slideshow presentations in the following section:
● Share Numbers, Infographics and Statistics
The utility of the LinkedIn platform to share documents has been worked upon by Brian Wallace, an infographic agency owner, to present his professional excellence in front of the target audiences through useful statistics and examples. Opening his work profile, you would firstly get to see an infographic PDF export, which are later uploaded as document files on a LinkedIn post that speaks in favor of the statistics.
● Share Action Oriented Business Modules
Travis Lachner, the CEO of a renowned business enterprise, has worked upon the clever idea of designing appealing, call to action presentations to encourage the participation of his potential audiences in the business module through a graphical arrow desisgn, asking them to share their opinions via relatable comments.
● Stepwise Instructions and Design Frameworks
This LinkedIn feature is utilized by Demodesk to present a stepwise demonstration of its newly launched ‘One Feature Framework’ through a slideshow presentation. You can work with the facility to share documents comprising of market oriented case studies, business reports, frameworks, etc., from your company’s official webpage.
● Conference Presentations and Event Contents
LinkedIn slideshows are indeed the most expressive means of sharing conference essentials and event marketing. Such presentations have been perfectly put to use by Jens Hilgers, the eSports creator and entrepreneur, to help viewers and players in navigating through his game landscapes. You can also choose a simple task of creating a buzz of your upcoming event among your audience, like Garter did to inform about the CFO & Executive Conference.
● Content Promotion
You can use a LinkedIn slideshow post to effectively promote your content among a global audience like Matheos Simou, a graphic designer cum recruitment strategist, who utilized LinkedIn presentations to educate his target audience about the significance of graphic desisgn and product branding outsources through his slideshow post titled ‘Flipping Pointless Brand Identity’.
Part 4 How to Create Slideshow in LinkedIn?
Having talked enough about LinkedIn slideshows and their market credibility, let us now make an attempt to try hands at creating professionally useful LinkedIn presentations. The following section describes a detailed, stepwise tutorial to adhere to the aforesaid purpose within a quick time span and utmost ease:
● User’s Guide to Create a LinkedIn Slideshow
Step 1: Open Your LinkedIn Profile
Start with logging in to your LinkedIn profile in any preferred device.
Step 2: Create a Google Slide Deck
Launch Google Slides in your device and proceed to design a slide deck on the same.
Step 3: Add Content to the Inaugural Slide
Populate the first slide of your presentation with the opening content, like the titles and subtitles of slideshow creation objective, company name, profile and expertise, etc.
As far as designing the subsequent slides is concerned, it would be a smart idea to clone the first slide to maintain an overall homogeneity.
Step 4: Save Your Work
When you are done with creating the presentation, choose to save it on your profile in the PDF file format for ensuring a high output quality.
Step 5: Sharing Your Creation
Create a document post on your profile to share the slideshow presentation with fellow LinkedIn users.
Step 6: Describe Your Post
The last step is to supplement your post with a suitable description and a few catchy hashtags. When you are happy with your work, navigate to the bottom right of the profile screen and tap ‘Post’.
● Creating LinkedIn Slideshows with Wondershare Filmora
When looking for a convenient and easy to use slideshow creator to design your LinkedIn presentations, you can rely on the Wondershare Filmora Video Editor Slideshow Creator software program to make high end, professional quality slide shows in a commendable resolution, and supplement them with a diversity of cohesive graphic effects.
For Win 7 or later (64-bit)
For macOS 10.12 or later
● Ending Thoughts →
● LinkedIn slideshows are highly useful in creating a notable impact of your professional skills and capabilities in front of job recruiters.
● There are some essential aspects of LinkedIn slideshows, which you should consider while designing your presentation.
● Wondershare Filmora is certainly one among the best software solutions to create LinkedIn slideshows with high end professional excellence.
Some Must-Know Useful Lego Animation Ideas for You
Some Must-know Useful Lego Animation ideas for you
An easy yet powerful editor
Numerous effects to choose from
Detailed tutorials provided by the official channel
There are so many things to learn in creating a LEGO movie, including the software and stop motion animation. There are tons of Lego animation software data for beginners and professionals. Many beginners make classic mistakes in brickfilming, and as a result, they don’t get the most out of their effort.
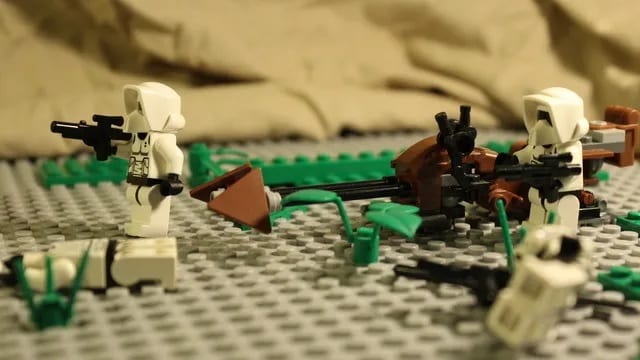
Do you want to create a stop motion LEGO movie and determine the kind of tool you will have to apply to Lego city animation? Worry not, as this Lego animation tutorial will guide you through some more useful LEGO animation ideas for beginners and professionals. And, you will get to know how Lego animation videos and Lego ww2 animation goes hand in hand with the help of different Lego Animation Makers here under Lego animation class. In addition to that, some excellent Lego animation movie examples will give you a better idea of how Lego Animation works in reality.
In this article
01 [Best LEGO Animation Makers in 2022](#Part 1)
02 [Three Sharing of LEGO Animation Examples worth Learning from](#Part 2)
03 [Advanced LEGO Animation Tips for You](#Part 3)
Part 1 LEGO Animation Makers for Windows/Mac
01**Wondershare Filmora Video Editor **

Wondershare Filmora - Best Video Editor for Mac/Windows
5,481,435 people have downloaded it.
Build unique custom animations without breaking a sweat.
Focus on creating epic stories and leave the details to Filmora’s auto features.
Start a creative adventure with drag & drop effects and endless possibilities.
Filmora simplifies advanced features to save you time and effort.
Filmora cuts out repetition so you can move on to your next creative breakthrough.
Filmora Video Editor is the best LEGO stop motion movie maker available for windows and Mac and highly recommended video editing software. This software is suitable for making LEGO among us animation because of its exclusive features:
● LEGO stop-motion movies are done quickly on this software
● It uses the editing tools like cropping, trimming, combing, rotating, and splitting videos.
● It has various effects that you can use to style your video and make a masterpiece.
● It supports Windows (bits), and MacOs 10.(High Sierra), Mac OS 10.(Sierra), OS X 10.(El Capitan), OS X 10.(Yosemite)
● Your LEGO stop-motion movie can be directly online using this software.
02FrameByFrame
FrameByFrame is a free LEGO mouth animation maker available for Mac users. It is an introductory video creation program that uses a webcam to create stop motion. It is elementary to use, and you need to have cameras such as i-sight connected with your Mac device to take shots by pressing the camera button. This software displays what you took by the camera and the frame superimposed to create the stop motion movie. It is light, easy to use, and you can trim the unwanted parts if needed.
03Boinx iStopMotion
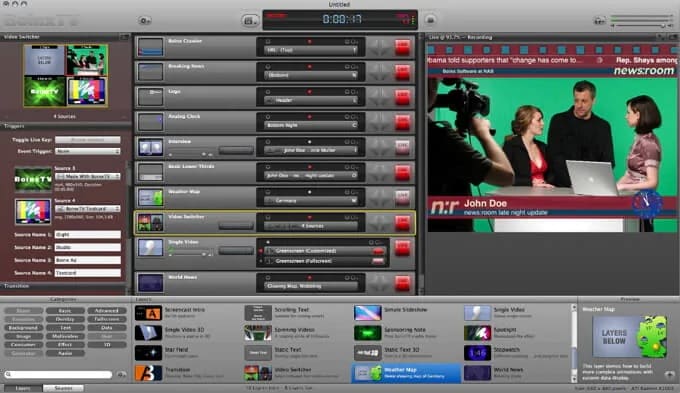
Boinx iStopMotion is a paid LEGO stop-motion movie-maker ideal for higher-level Mac devices. It can create a shot-by-shot sequence using stop motion and time-lapse. With the help of the menu, it is perfect for kids and features onion skinning. It allows you to create a LEGO movie from your imagination and creativity, which features overlay, zooming, blinking to make movement more visible, etc. After creating or using this software, you can export your video and enjoy it on your movie player.
04Stop Motion Pro Eclipse
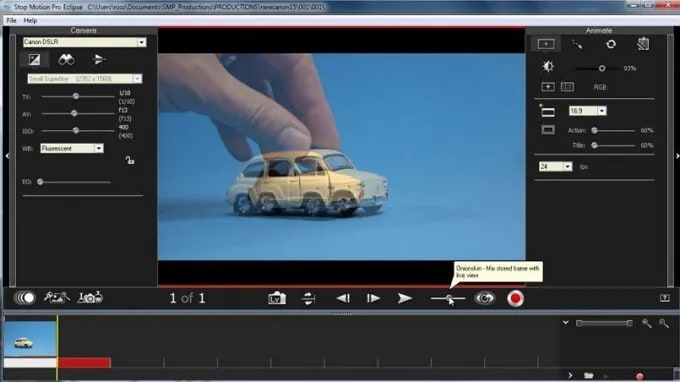
Stop Motion Pro Eclipse is a paid video creation software available for Windows to help you create LEGO stop motion animation movies. It is highly compatible with many popular video webcams and cameras that can capture and paste pictures and turn them into lovely stories with animated characters. It allows you to play up to frames per second, and while you can lay back to stop moving animation, you can also record audio. It also allows you to plan and track the movement of the movie characters and Lego friends animation.
05IKITMovie
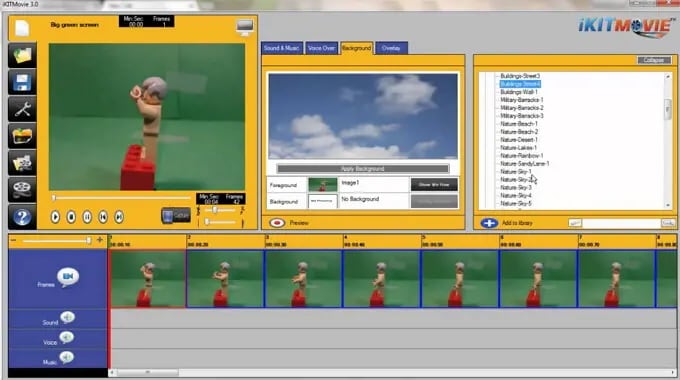
IKITMovie is a paid Lego animations 63movie maker for Windows devices that helps solve the problem of making good LEGO stop motion animation videos. It is easy to use in any age range and has thousands of background audio tracks. It is perfect for creating LEGO animation or clay motion by using the green screen feature to replace the original background of the video with still or moving images.
Part 2 LEGO Animation Makers for Android and iPhone
01Stop Motion Studio
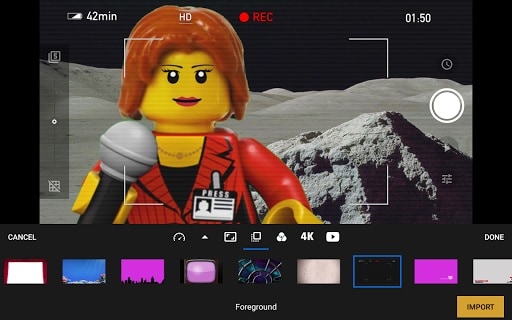
Stop Motion Studio is best for iOS and Android devices equipped with a versatile set of animated stop-motion tools and Grant complete control over all camera settings. It allows you to create LEGO stop-motion animated movies instantly and anywhere using your mobile phone free of charge but requires in-app purchases if you would want to export your project in resolution or import pics into the app.
02Clayframes
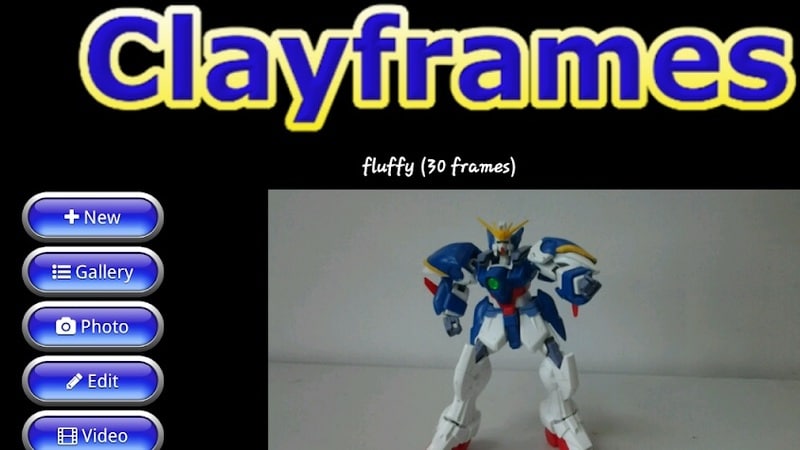
Clayframes is the best LEGO stop motion app 4 Android devices to capture new footage or import images you want to use and arrange them the way you want. The eraser tool in the app allows you to remove objects you don’t want to keep in the shot and Rigs.
03iMotion
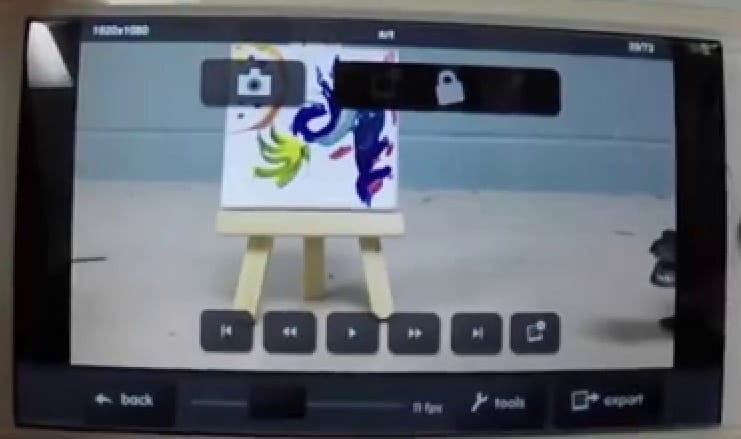
iMotion is available for iPad and iPhone users to create LEGO stop motion videos from an app. It’s has a Wi-Fi remote, photo library import mods, and time-lapse that you can choose the best to meet the demand of your project.
04Life Lapse Stop Motion Maker

Life Lapse Stop Motion Maker offers an all-in-one tool you need to edit and shoot a LEGO stop motion animation available on Android and iPhone devices. While shooting in LEGO stop motion video, you can focus on white balance and exposure lock ghosted image overlay, or time intervals.
05I Can Animate
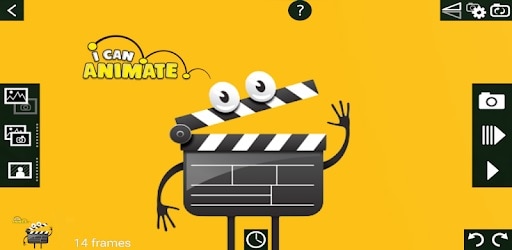
I Can Animate is a straightforward app to create a LEGO stop motion video within a few steps and is available for Android and iOS devices. Post launching the app, you can click on Design, and a device camera will open to start creating your video.
Part 3 Three Sharing of LEGO Animation Examples worth Learning from
This section of the article will share three LEGO animation examples that are worth learning from:
01Minecraft LEGO Animation
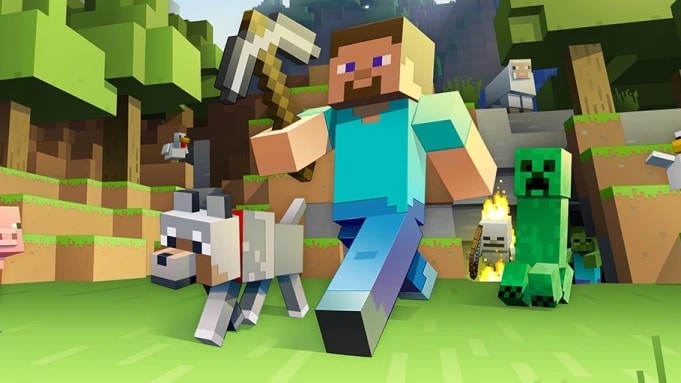
Minecraft LEGO brings one of the most popular lego Minecraft animation video games into the real world with authentic characters and features. Minecraft Lego animation videos are a limitless possibility to build play and display, and the perfect way to expand play is creative fun.
02Ninjago LEGO Animation
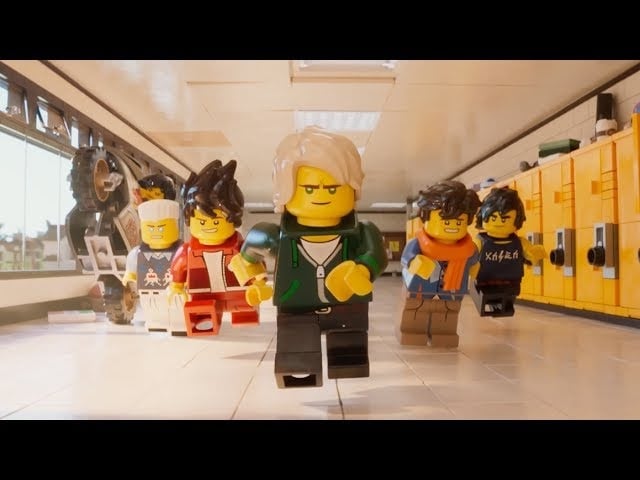
Ninjago LEGO is a cartoon Network series inspired by Japanese and Chinese culture and myths in a fictional world. The Lego Ninjago animation theme enjoyed popularity and success in the first and two years before planned discontinuation in 2013.
03Blender LEGO Animation

Blender LEGO is an add-on known as a bricker to convert a mesh into a real photo brick model. Bricker is a fun and stylish plugin for Lego blender animation with specific tools for designing alternative LEGO sets.
Part 4 Advanced LEGO Animation Tips for You
This section provides the top LEGO animation movies ranked in 20and also offer a guide on how to make a Lego star wars animation:
LEGO Animation Movies Ranked in 2022
01Battle of the Brick

This LEGO animation video follows the epic battle between blue and red and a recreation of the Zanzibar map of the halo franchise
02Lego Thriller

This video is from Berlin in Germany and uses LEGO as pixel instead of stop motion characters in the creation of fantastic effects
03Adventure Time Title in LEGO
This is a LEGO recreation of cartoon series that comprises stunning detail and complexity.
04Lego Cl!ck
This LEGO stop motion video shows what happens when ideas click and integrate human and non-human elements.
05Lego Arcade

This is a LEGO stop motion video that recreation classic arcade games.
Part 5 How to Make a LEGO Animation
Once the production stage is complete, it is time to move to the post-production stage in Filmora, where your LEGO animated stop motion video will get to its final form:
For Win 7 or later (64-bit)
For macOS 10.12 or later
01Step Arrange images
The first thing is to place all the images you want to use in the final production of the video into a folder. Then arrange them accordingly in the same ways they should appear in the video.
02Step Launch Software
Launch Filmora and click on create a new project and add the project you made to the Filmora media tab. Also, import all audio files you want to use in your project before doing any actual editing.
03Step Edit Media
Move to the File menu, click on the preferred option, and go to the edit tab to set the maximum duration of a photo in the video you are creating. The value you are inserting into the photo duration box is determined by the number of frames in your video.
Please note that Filmora does not allow you to reduce a video frame rate below 23.97FPS. Therefore if you want your LEGO animation to have frame-per-second, you should send the photo duration value to 00:00:04.
04Step Preview
After that, you can add your media access to the timeline and click on the Play button to preview the results. When satisfied with the results, you can export your LEGO animated video from Filmora.
● Key Takeaways from This Episode →
● Some of the best LEGO Animation makers
● LEGO animation maker for different devices
● Some of the critical tips for creating LEGO animation videos
● If you are a beginner in LEGO animation, this article completely breaks down everything. You learned about LEGO animation and the best LEGO animation software that you can use effectively. Some parts of the report also give ideas on some LEGO animation that you can copy while working on yours.
There are so many things to learn in creating a LEGO movie, including the software and stop motion animation. There are tons of Lego animation software data for beginners and professionals. Many beginners make classic mistakes in brickfilming, and as a result, they don’t get the most out of their effort.
Do you want to create a stop motion LEGO movie and determine the kind of tool you will have to apply to Lego city animation? Worry not, as this Lego animation tutorial will guide you through some more useful LEGO animation ideas for beginners and professionals. And, you will get to know how Lego animation videos and Lego ww2 animation goes hand in hand with the help of different Lego Animation Makers here under Lego animation class. In addition to that, some excellent Lego animation movie examples will give you a better idea of how Lego Animation works in reality.
In this article
01 [Best LEGO Animation Makers in 2022](#Part 1)
02 [Three Sharing of LEGO Animation Examples worth Learning from](#Part 2)
03 [Advanced LEGO Animation Tips for You](#Part 3)
Part 1 LEGO Animation Makers for Windows/Mac
01**Wondershare Filmora Video Editor **
Wondershare Filmora - Best Video Editor for Mac/Windows
5,481,435 people have downloaded it.
Build unique custom animations without breaking a sweat.
Focus on creating epic stories and leave the details to Filmora’s auto features.
Start a creative adventure with drag & drop effects and endless possibilities.
Filmora simplifies advanced features to save you time and effort.
Filmora cuts out repetition so you can move on to your next creative breakthrough.
Filmora Video Editor is the best LEGO stop motion movie maker available for windows and Mac and highly recommended video editing software. This software is suitable for making LEGO among us animation because of its exclusive features:
● LEGO stop-motion movies are done quickly on this software
● It uses the editing tools like cropping, trimming, combing, rotating, and splitting videos.
● It has various effects that you can use to style your video and make a masterpiece.
● It supports Windows (bits), and MacOs 10.(High Sierra), Mac OS 10.(Sierra), OS X 10.(El Capitan), OS X 10.(Yosemite)
● Your LEGO stop-motion movie can be directly online using this software.
02FrameByFrame
FrameByFrame is a free LEGO mouth animation maker available for Mac users. It is an introductory video creation program that uses a webcam to create stop motion. It is elementary to use, and you need to have cameras such as i-sight connected with your Mac device to take shots by pressing the camera button. This software displays what you took by the camera and the frame superimposed to create the stop motion movie. It is light, easy to use, and you can trim the unwanted parts if needed.
03Boinx iStopMotion
Boinx iStopMotion is a paid LEGO stop-motion movie-maker ideal for higher-level Mac devices. It can create a shot-by-shot sequence using stop motion and time-lapse. With the help of the menu, it is perfect for kids and features onion skinning. It allows you to create a LEGO movie from your imagination and creativity, which features overlay, zooming, blinking to make movement more visible, etc. After creating or using this software, you can export your video and enjoy it on your movie player.
04Stop Motion Pro Eclipse
Stop Motion Pro Eclipse is a paid video creation software available for Windows to help you create LEGO stop motion animation movies. It is highly compatible with many popular video webcams and cameras that can capture and paste pictures and turn them into lovely stories with animated characters. It allows you to play up to frames per second, and while you can lay back to stop moving animation, you can also record audio. It also allows you to plan and track the movement of the movie characters and Lego friends animation.
05IKITMovie
IKITMovie is a paid Lego animations 63movie maker for Windows devices that helps solve the problem of making good LEGO stop motion animation videos. It is easy to use in any age range and has thousands of background audio tracks. It is perfect for creating LEGO animation or clay motion by using the green screen feature to replace the original background of the video with still or moving images.
Part 2 LEGO Animation Makers for Android and iPhone
01Stop Motion Studio
Stop Motion Studio is best for iOS and Android devices equipped with a versatile set of animated stop-motion tools and Grant complete control over all camera settings. It allows you to create LEGO stop-motion animated movies instantly and anywhere using your mobile phone free of charge but requires in-app purchases if you would want to export your project in resolution or import pics into the app.
02Clayframes
Clayframes is the best LEGO stop motion app 4 Android devices to capture new footage or import images you want to use and arrange them the way you want. The eraser tool in the app allows you to remove objects you don’t want to keep in the shot and Rigs.
03iMotion
iMotion is available for iPad and iPhone users to create LEGO stop motion videos from an app. It’s has a Wi-Fi remote, photo library import mods, and time-lapse that you can choose the best to meet the demand of your project.
04Life Lapse Stop Motion Maker
Life Lapse Stop Motion Maker offers an all-in-one tool you need to edit and shoot a LEGO stop motion animation available on Android and iPhone devices. While shooting in LEGO stop motion video, you can focus on white balance and exposure lock ghosted image overlay, or time intervals.
05I Can Animate
I Can Animate is a straightforward app to create a LEGO stop motion video within a few steps and is available for Android and iOS devices. Post launching the app, you can click on Design, and a device camera will open to start creating your video.
Part 3 Three Sharing of LEGO Animation Examples worth Learning from
This section of the article will share three LEGO animation examples that are worth learning from:
01Minecraft LEGO Animation
Minecraft LEGO brings one of the most popular lego Minecraft animation video games into the real world with authentic characters and features. Minecraft Lego animation videos are a limitless possibility to build play and display, and the perfect way to expand play is creative fun.
02Ninjago LEGO Animation
Ninjago LEGO is a cartoon Network series inspired by Japanese and Chinese culture and myths in a fictional world. The Lego Ninjago animation theme enjoyed popularity and success in the first and two years before planned discontinuation in 2013.
03Blender LEGO Animation
Blender LEGO is an add-on known as a bricker to convert a mesh into a real photo brick model. Bricker is a fun and stylish plugin for Lego blender animation with specific tools for designing alternative LEGO sets.
Part 4 Advanced LEGO Animation Tips for You
This section provides the top LEGO animation movies ranked in 20and also offer a guide on how to make a Lego star wars animation:
LEGO Animation Movies Ranked in 2022
01Battle of the Brick
This LEGO animation video follows the epic battle between blue and red and a recreation of the Zanzibar map of the halo franchise
02Lego Thriller
This video is from Berlin in Germany and uses LEGO as pixel instead of stop motion characters in the creation of fantastic effects
03Adventure Time Title in LEGO
This is a LEGO recreation of cartoon series that comprises stunning detail and complexity.
04Lego Cl!ck
This LEGO stop motion video shows what happens when ideas click and integrate human and non-human elements.
05Lego Arcade
This is a LEGO stop motion video that recreation classic arcade games.
Part 5 How to Make a LEGO Animation
Once the production stage is complete, it is time to move to the post-production stage in Filmora, where your LEGO animated stop motion video will get to its final form:
For Win 7 or later (64-bit)
For macOS 10.12 or later
01Step Arrange images
The first thing is to place all the images you want to use in the final production of the video into a folder. Then arrange them accordingly in the same ways they should appear in the video.
02Step Launch Software
Launch Filmora and click on create a new project and add the project you made to the Filmora media tab. Also, import all audio files you want to use in your project before doing any actual editing.
03Step Edit Media
Move to the File menu, click on the preferred option, and go to the edit tab to set the maximum duration of a photo in the video you are creating. The value you are inserting into the photo duration box is determined by the number of frames in your video.
Please note that Filmora does not allow you to reduce a video frame rate below 23.97FPS. Therefore if you want your LEGO animation to have frame-per-second, you should send the photo duration value to 00:00:04.
04Step Preview
After that, you can add your media access to the timeline and click on the Play button to preview the results. When satisfied with the results, you can export your LEGO animated video from Filmora.
● Key Takeaways from This Episode →
● Some of the best LEGO Animation makers
● LEGO animation maker for different devices
● Some of the critical tips for creating LEGO animation videos
● If you are a beginner in LEGO animation, this article completely breaks down everything. You learned about LEGO animation and the best LEGO animation software that you can use effectively. Some parts of the report also give ideas on some LEGO animation that you can copy while working on yours.
Best GIF to Video Converters
Best GIF to Video Converters

Shanoon Cox
Mar 27, 2024• Proven solutions
GIF files are gaining more popularity these days but still, the strange fact is that some social media sites do not offer support to GIF file format. One of the biggest examples of such platforms is Instagram. But, if you are a real fun lover then this simple issue cannot stop you from uploading interesting animations or videos over the internet. As Instagram does not support GIF images so why not to get them converted to simple video files and then update an entertaining sequence for your audience. That’s really a great idea.
You may also like: How to Upload GIF to Instagram >>
It is much easier to convert GIF images into many popular video file formats like AVI or MOV etc and then can be further shared on YouTube , Instagram and many other sites. So if you are ready to get started with this adventure then keep reading this article. Here you will find details about the best GIF to video converter tools that are popular among professionals as well as beginners.
Best GIF to Video Converters
Desktop Solutions to Converting GIF to Video
1. Wondershare Filmora
One of the best recommendations for your GIF to Video conversion needs is Wondershare Filmora due to its user-friendly interface. This tool works fine on Mac as well as the Windows platform and extends support to all popular video file formats like WMV, MP4 and MKV etc.
Key Features:
- Filmora offers a wide range of editing features like aspect ratio, speed, trim, merge, rotate and crop adjustments.
- Users can also add music to videos to make them more appealing.
- Possesses so many special effects along with text and title editing options.
- Files can be easily exported to iPhone, Android-like devices.
- It allows easy sharing of media on social media sites like Dailymotion, Vimeo, and YouTube, etc.
However, if you want to make a GIF online, Filmora meme maker is your ultimate solution. It helps you make images, GIFs and video memes directly without watermark. It is totally FREE to use and no signup. You can change text size, color, and position to create a caption when you are editing. Filmora meme maker supports converting GIF to video. Just with a few clicks, your GIF is done . Try it now!
 Download Mac Version ](https://tools.techidaily.com/wondershare/filmora/download/ )
2. Converter Lite
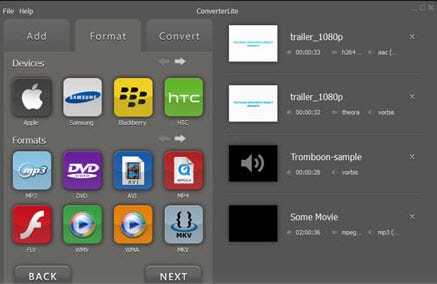
Key Features: Converter Lite extends support to numerous image and video file formats.
- Videos can be easily converted to animated GIFs and vice versa.
- The conversion process can be carried with impressive animation and effects additions.
- The frame rate can be defined by users.
How to Use?
- Import your desired GIF image.
- Select format for the destination file.
- Hit the Convert option.
Pros:
- Users can define the frame rate as per need.
- Provides huge options for the selection of input/ output file formats.
Cons:
- It leaves a watermark on output files.
3. Amazing GIF to Video Converter
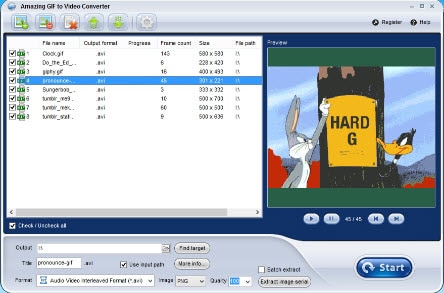
Key Features:
- It assists in the fast conversion of videos to GIF formats and the best part is that users can also clip video files to get their desired end results.
- It generates a preview of the edited file before initiating the actual conversion process.
- The converted animated GIF files can be easily shared on other platforms.
How to Use?
- First of all, users need to upload their GIF images to the software platform.
- Generate a preview of all frames.
- Now adjust your output file parameters to avail customized results.
- Choose your output file format and define the destination.
- Initiate the conversion process.
Pros:
- It extends support to all popular video file formats.
- The interactive interface makes it easier to operate even for beginners.
Cons:
- Reviewers do not rate its performance up to the mark.
4. Movavi Video Converter

Key Features: This tool supports a wide range of editing functions like trim, rotate, crop, etc.
- It can handle multiple media file formats like SWF, MOV, MKV, 3GP, MP4, WAV and FLV, etc.
- Movavi can be used to create captions and watermarks on videos. Marketers find it very useful.
- The most amazing thing to know is that this tool works perfectly on a wide range of devices like Xbox, iPhone, iPad, Sony PlayStation as well as on Android devices.
How to Use?
- Get your files imported on the Movavi timeline.
- Choose your desired output file format and adjust settings accordingly.
- Get your files converted immediately.
Pros:
- User-friendly interface.
- Instant conversion.
Cons:
- It cannot process copy-protected versions of media files or DVDs.
Smartphone App Solutions to Convert GIF to Video
1. GIFShare – iPhone
It can be used to convert GIFs into videos and then share them immediately on social media platforms. With GIFShare, you can easily keep your Instagram page updated with all new GIF converted videos.
How to Use?
- Upload your GIF files to the software platform; you can get them from camera roll or from GIFShare.
- Make desired editing on background and speed etc parameters.
- Get it converted with customized size level.
- Upload outputs directly to Instagram.
2. Gifaroo - Android
Here is one more interactive tool that allows users to directly upload GIF converted to Instagram. There are so many customization filters, effects, and background editing options; users can also alter captions with different colors and font styles.
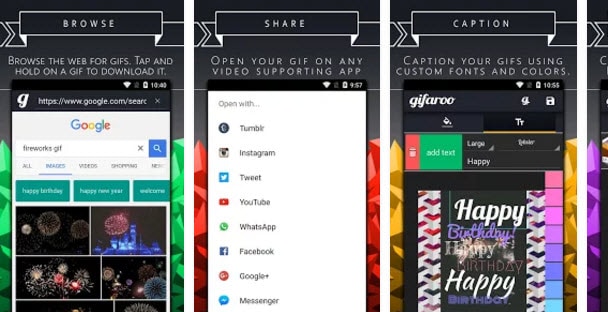
How to Use?
- Start browsing some interesting GIF animations on your Gifaroo app directly.
- Bring the desired one to the editing platform with a single tap.
3. GifVid
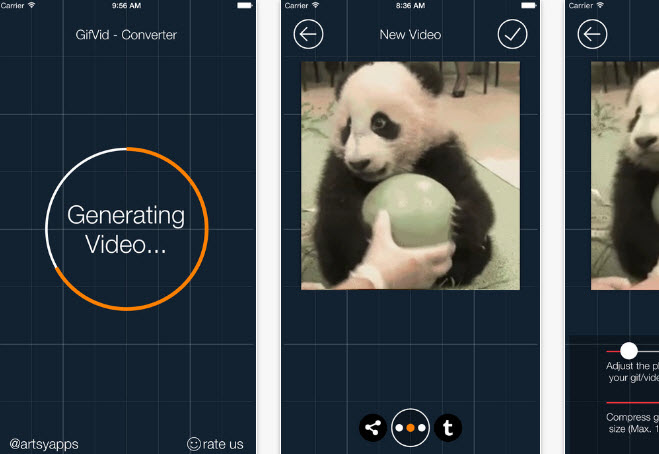
With GifVid you can convert simple videos into GIF animations and collection of GIFs can be turned back to videos with different file formats. Once your file gets converted then you can easily share them on Tumblr, Imgur, iMessage, etc.
Key Features: GifVid is designed with a straight forward and user-friendly design.
- Various editing options.
- This tool can be used in multiple languages.
- Supported Platform: Works on iOS devices like iPad and iPhones.
- Developer: It was developed by Artsy Apps.
Online GIF to Video Converters
1. GIFtovideo.com
Due to the impressive user interface, advanced editing options, and fast conversion rate, this tool is kept at first positing with higher user ratings. It can easily process uploaded video files as well as URL based links hence you can enjoy full flexibility on your portable as well as desktop devices.
Key Features: Beginners can easily handle its intuitive interface.
- The simple layout makes editing tasks much easier and conversion can be completed within very little time.
- Supported Platform: It works on Window platform with an active internet connection.
- Developer: This tool is owned and developed by Studio September that is a popular software developer company at Deutsch.
2. Cloud Convert
On Cloud Convert, users can easily process all popular video file formats to generate high-quality outcomes. It is not just limited to MP4 rather can support all professional-level media extensions. If you wish to make editing with few specific settings like codec adjustments then Cloud Convert can assist you better. If you want to access full feature version then you can get registered to this converter tool as paid users are able to avail more facilities.
Key Features: Cloud Convert can process any video file format with ease so you can bring any desired file to its timeline.
- Here you will get more freedom for customization settings of all converted videos.
- Supported Platforms: This tool is compatible with Windows only and users need to get their device connected to a high-speed internet connection to avail the best services.
- Developer: This tool is designed and maintained y a Germany based company, Lunaweb Ltd.
3. GIF2MP4
Here is one more easy to use yet feature-rich converter tool that can easily process your collection of GIF images to generate an MP4 video as an output. As the name indicates, this tool is intentionally designed for assisting users to get their GIF files converted with MP4 video file extension. There are numerous features hidden inside this online converter tool but once you start working over it your will be able to do awesome creativity with each editing project.
Key Features: It offers fast one-way conversion from GIF to MP4 video files.
- Simple and intuitive design.
- Supported Platforms: Mac and Window but the device must be connected to the internet for its operation.
- Developer: This tool is designed by trubo@zelnet.ru .
Read More to Get: the ultimate guide on How to Convert GIF to Video on your laptop or phone.
If you want to make GIF quickly, Filmora will offer you an online solution for making a GIF. Filmora meme maker can help you make images, GIFs and video memes directly without watermark. It is totally FREE and no signup. You can change text size, color, and position to create a caption.
Frequently Asked Questions About GIF to Video Converters
1. Can You Convert A GIF to Video?
The file format of all GIF files can be changed, but only if you have access to a GIF to Video converter. These apps allow you to choose the video file format to which a GIF file is going to be converted, so you can choose to turn a GIF into an MP4, AVI, or any other popular video file format.
Converting a GIF to a video can be useful if you want to post a GIF to Instagram or some other social media platform that doesn’t offer support for GIF files.
2. How to Save A GIF As A Video from An iPhone?
You must install one of the GIF creator apps for iOS before you can start converting GIFs to videos from your iPhone. Once you go through the installation process, you should launch the app you installed and import a GIF you want to turn into a video into the app. You can then edit the GIF if you want, and then proceed to export it. During the process of exporting a GIF, you should choose one of the available video file formats such as MP4 or MOV and your GIF will be converted into a video.
Shanoon Cox
Shanoon Cox is a writer and a lover of all things video.
Follow @Shanoon Cox
Shanoon Cox
Mar 27, 2024• Proven solutions
GIF files are gaining more popularity these days but still, the strange fact is that some social media sites do not offer support to GIF file format. One of the biggest examples of such platforms is Instagram. But, if you are a real fun lover then this simple issue cannot stop you from uploading interesting animations or videos over the internet. As Instagram does not support GIF images so why not to get them converted to simple video files and then update an entertaining sequence for your audience. That’s really a great idea.
You may also like: How to Upload GIF to Instagram >>
It is much easier to convert GIF images into many popular video file formats like AVI or MOV etc and then can be further shared on YouTube , Instagram and many other sites. So if you are ready to get started with this adventure then keep reading this article. Here you will find details about the best GIF to video converter tools that are popular among professionals as well as beginners.
Best GIF to Video Converters
Desktop Solutions to Converting GIF to Video
1. Wondershare Filmora
One of the best recommendations for your GIF to Video conversion needs is Wondershare Filmora due to its user-friendly interface. This tool works fine on Mac as well as the Windows platform and extends support to all popular video file formats like WMV, MP4 and MKV etc.
Key Features:
- Filmora offers a wide range of editing features like aspect ratio, speed, trim, merge, rotate and crop adjustments.
- Users can also add music to videos to make them more appealing.
- Possesses so many special effects along with text and title editing options.
- Files can be easily exported to iPhone, Android-like devices.
- It allows easy sharing of media on social media sites like Dailymotion, Vimeo, and YouTube, etc.
However, if you want to make a GIF online, Filmora meme maker is your ultimate solution. It helps you make images, GIFs and video memes directly without watermark. It is totally FREE to use and no signup. You can change text size, color, and position to create a caption when you are editing. Filmora meme maker supports converting GIF to video. Just with a few clicks, your GIF is done . Try it now!
Download Mac Version ](https://tools.techidaily.com/wondershare/filmora/download/ )
2. Converter Lite
Key Features: Converter Lite extends support to numerous image and video file formats.
- Videos can be easily converted to animated GIFs and vice versa.
- The conversion process can be carried with impressive animation and effects additions.
- The frame rate can be defined by users.
How to Use?
- Import your desired GIF image.
- Select format for the destination file.
- Hit the Convert option.
Pros:
- Users can define the frame rate as per need.
- Provides huge options for the selection of input/ output file formats.
Cons:
- It leaves a watermark on output files.
3. Amazing GIF to Video Converter
Key Features:
- It assists in the fast conversion of videos to GIF formats and the best part is that users can also clip video files to get their desired end results.
- It generates a preview of the edited file before initiating the actual conversion process.
- The converted animated GIF files can be easily shared on other platforms.
How to Use?
- First of all, users need to upload their GIF images to the software platform.
- Generate a preview of all frames.
- Now adjust your output file parameters to avail customized results.
- Choose your output file format and define the destination.
- Initiate the conversion process.
Pros:
- It extends support to all popular video file formats.
- The interactive interface makes it easier to operate even for beginners.
Cons:
- Reviewers do not rate its performance up to the mark.
4. Movavi Video Converter
Key Features: This tool supports a wide range of editing functions like trim, rotate, crop, etc.
- It can handle multiple media file formats like SWF, MOV, MKV, 3GP, MP4, WAV and FLV, etc.
- Movavi can be used to create captions and watermarks on videos. Marketers find it very useful.
- The most amazing thing to know is that this tool works perfectly on a wide range of devices like Xbox, iPhone, iPad, Sony PlayStation as well as on Android devices.
How to Use?
- Get your files imported on the Movavi timeline.
- Choose your desired output file format and adjust settings accordingly.
- Get your files converted immediately.
Pros:
- User-friendly interface.
- Instant conversion.
Cons:
- It cannot process copy-protected versions of media files or DVDs.
Smartphone App Solutions to Convert GIF to Video
1. GIFShare – iPhone
It can be used to convert GIFs into videos and then share them immediately on social media platforms. With GIFShare, you can easily keep your Instagram page updated with all new GIF converted videos.
How to Use?
- Upload your GIF files to the software platform; you can get them from camera roll or from GIFShare.
- Make desired editing on background and speed etc parameters.
- Get it converted with customized size level.
- Upload outputs directly to Instagram.
2. Gifaroo - Android
Here is one more interactive tool that allows users to directly upload GIF converted to Instagram. There are so many customization filters, effects, and background editing options; users can also alter captions with different colors and font styles.
How to Use?
- Start browsing some interesting GIF animations on your Gifaroo app directly.
- Bring the desired one to the editing platform with a single tap.
3. GifVid
With GifVid you can convert simple videos into GIF animations and collection of GIFs can be turned back to videos with different file formats. Once your file gets converted then you can easily share them on Tumblr, Imgur, iMessage, etc.
Key Features: GifVid is designed with a straight forward and user-friendly design.
- Various editing options.
- This tool can be used in multiple languages.
- Supported Platform: Works on iOS devices like iPad and iPhones.
- Developer: It was developed by Artsy Apps.
Online GIF to Video Converters
1. GIFtovideo.com
Due to the impressive user interface, advanced editing options, and fast conversion rate, this tool is kept at first positing with higher user ratings. It can easily process uploaded video files as well as URL based links hence you can enjoy full flexibility on your portable as well as desktop devices.
Key Features: Beginners can easily handle its intuitive interface.
- The simple layout makes editing tasks much easier and conversion can be completed within very little time.
- Supported Platform: It works on Window platform with an active internet connection.
- Developer: This tool is owned and developed by Studio September that is a popular software developer company at Deutsch.
2. Cloud Convert
On Cloud Convert, users can easily process all popular video file formats to generate high-quality outcomes. It is not just limited to MP4 rather can support all professional-level media extensions. If you wish to make editing with few specific settings like codec adjustments then Cloud Convert can assist you better. If you want to access full feature version then you can get registered to this converter tool as paid users are able to avail more facilities.
Key Features: Cloud Convert can process any video file format with ease so you can bring any desired file to its timeline.
- Here you will get more freedom for customization settings of all converted videos.
- Supported Platforms: This tool is compatible with Windows only and users need to get their device connected to a high-speed internet connection to avail the best services.
- Developer: This tool is designed and maintained y a Germany based company, Lunaweb Ltd.
3. GIF2MP4
Here is one more easy to use yet feature-rich converter tool that can easily process your collection of GIF images to generate an MP4 video as an output. As the name indicates, this tool is intentionally designed for assisting users to get their GIF files converted with MP4 video file extension. There are numerous features hidden inside this online converter tool but once you start working over it your will be able to do awesome creativity with each editing project.
Key Features: It offers fast one-way conversion from GIF to MP4 video files.
- Simple and intuitive design.
- Supported Platforms: Mac and Window but the device must be connected to the internet for its operation.
- Developer: This tool is designed by trubo@zelnet.ru .
Read More to Get: the ultimate guide on How to Convert GIF to Video on your laptop or phone.
If you want to make GIF quickly, Filmora will offer you an online solution for making a GIF. Filmora meme maker can help you make images, GIFs and video memes directly without watermark. It is totally FREE and no signup. You can change text size, color, and position to create a caption.
Frequently Asked Questions About GIF to Video Converters
1. Can You Convert A GIF to Video?
The file format of all GIF files can be changed, but only if you have access to a GIF to Video converter. These apps allow you to choose the video file format to which a GIF file is going to be converted, so you can choose to turn a GIF into an MP4, AVI, or any other popular video file format.
Converting a GIF to a video can be useful if you want to post a GIF to Instagram or some other social media platform that doesn’t offer support for GIF files.
2. How to Save A GIF As A Video from An iPhone?
You must install one of the GIF creator apps for iOS before you can start converting GIFs to videos from your iPhone. Once you go through the installation process, you should launch the app you installed and import a GIF you want to turn into a video into the app. You can then edit the GIF if you want, and then proceed to export it. During the process of exporting a GIF, you should choose one of the available video file formats such as MP4 or MOV and your GIF will be converted into a video.
Shanoon Cox
Shanoon Cox is a writer and a lover of all things video.
Follow @Shanoon Cox
Also read:
- New 2024 Approved 6 Unexpected Ways Gif Animation Maker That Affect Your Marketing
- Updated Learn About Lip-Syncing in Animation for 2024
- In 2024, Best 10 Old Cartoons From Cartoon Network That You Miss
- 2024 Approved Best 10 Animated Templates in Canva
- Guide on Creating GIF in WhatsApp iPhone for 2024
- Updated Christmas Is Coming! How to Find & Make Animated Christmas GIFs for 2024
- Updated How to Create a Whiteboard Animation Video
- Updated 2024 Approved Top 8 Anime Name Generators Online-Get Cool Anime Names
- New 2024 Approved How To Create Animated Clipart in PowerPoint
- Updated In 2024, How to Make a Video a Live Photo
- New Top 10 Websites to Download Anime Subtitles for Free
- In 2024, 10 Caricature Makers to Turn Your Photo to Caricature Effects
- 2024 Approved 10 Awesome Moving Animation PowerPoint Techniques
- New 2024 Approved Top 10 Free Online Animated Logo Makers Everyone Should Know
- New How to Make a Video a Live Photo
- In 2024, Secrets to Make 2D Game Animation
- New In 2024, The Only Guide Youll Ever Need to Learn About GIF Video Downloader
- Updated How to Draw Skeleton Cartoon – A Step by Step Guide
- New Animated Business Logos and Tools to Create for 2024
- Updated Best 15 Horror Animes That Will Trigger a Heart Attack
- Updated Some Must-Know Useful Lego Animation Ideas
- Updated In 2024, Amazing Techniques of Motion Graphics in Premiere Pro
- A Beginners Guide to Explain What 3D Animation Is for 2024
- New Ways You Can Master to Find 10 Best Free Animated Text Generator
- All About 3D Medical Animation And Its Uses
- New The Best 8 Places for High-Quality Royalty Free Gifs (Paid and Free) for 2024
- New The Definitive Guide to Whiteboard Animation for 2024
- Updated 5 Ways You Never Heard of for Converting MP4 to GIF in Photoshop for 2024
- Updated Adobe Animate Text Effects Skills That You Need to Know for 2024
- Updated In 2024, Have You Seen the Facebook Cartoon App Everyones Using Recently
- How I Animate Discord Profile Pictures
- New 2024 Approved Top 10 Video to GIF Converters Top Picks
- New Best 12 Illusion Gifs Top Picks for 2024
- Updated Popular Tips on Learning Animate Rigging
- Updated How to Create Animated Video on Canva?
- Updated Learn Disney Cartoon Drawing to See Disney Magic Moments
- Updated 2024 Approved Tutorial Guide to Animate Pictures in Canva
- In 2024, Top 10 Online Animated Logo Makers Everyone Should Know
- Updated 12 Aesthetic GIF Instagram for Marketers
- Updated Is It That Easy to Make My Own Animated Character, In 2024
- New Ideas of Learning How to Send WhatsApp Animated Gifs
- Updated Whiteboard Animation Services Top 15 Animation Companies to Pick
- Updated How to Create Benime Whiteboard Animation in Android
- New In 2024, The 10 Most Adorable Aesthetic Cartoon Characters
- Updated 2024 Approved A Beginners Guide for Learning 3D Animation
- Updated In 2024, Learn Simple Blender Rigging in Only 2 Minutes
- How to Stop Animation From Looping in Unity for 2024
- New 2024 Approved The Only Guide to Make 2D Rigging Clear to You
- Which is the Best Fake GPS Joystick App On Vivo Y27 4G? | Dr.fone
- Solved Mac Doesnt Recognize my iPhone 14 Plus | Stellar
- How Can I Use a Fake GPS Without Mock Location On Honor 90 GT? | Dr.fone
- Undeleted lost videos from Vivo V29e
- In 2024, How To Unlock A Found Apple iPhone 14?
- Top 10 Best Spy Watches For your Nokia C12 | Dr.fone
- 7 Ways to Lock Apps on Apple iPhone SE (2020) and iPad Securely
- Guide to Mirror Your Huawei Nova Y71 to Other Android devices | Dr.fone
- Forgotten The Voicemail Password Of Honor Play 7T? Try These Fixes
- How to Stream Apple iPhone 14 Pro to Computer? | Dr.fone
- In 2024, How to Reset Apple ID and Apple Password On Apple iPhone XS Max
- Removing Device From Apple ID For your Apple iPhone 13 mini
- New Guide How To Check iCloud Activation Lock Status From Your iPhone 6 Plus
- In 2024, Full Guide to Unlock Your Vivo Y78 5G
- In 2024, Easily Unlock Your Vivo Y56 5G Device SIM
- How To Fix OEM Unlock Missing on Vivo T2 5G?
- Solutions to restore deleted files from Moto G Stylus (2023)
- In 2024, How to Bypass FRP from Samsung Galaxy S24?
- In 2024, 3 Things You Must Know about Fake Snapchat Location On Poco C50 | Dr.fone
- In 2024, Ultimate Guide on Xiaomi Civi 3 Disney 100th Anniversary Edition FRP Bypass
- How To Simulate GPS Movement With Location Spoofer On Samsung Galaxy S23 Ultra? | Dr.fone
- 3 Effective Methods to Fake GPS location on Android For your Oppo Reno 11F 5G | Dr.fone
- In 2024, How To Bypass Honor X50i FRP In 3 Different Ways
- How to Transfer Data from Motorola Moto G34 5G to Any iOS Devices | Dr.fone
- 3 Effective Ways to Bypass Activation Lock on iPhone SE (2020)
- In 2024, How to use Snapchat Location Spoofer to Protect Your Privacy On Realme V30T? | Dr.fone
- How to Sign Out of Apple ID On iPhone 11 without Password?
- Fake the Location to Get Around the MLB Blackouts on Vivo Y100i | Dr.fone
- A Step-by-Step Guide on Using ADB and Fastboot to Remove FRP Lock on your Honor Magic 5 Lite
- How To Restore a Bricked Realme C55 Back to Operation | Dr.fone
- Top 7 Skype Hacker to Hack Any Skype Account On your Oppo Find X7 | Dr.fone
- In 2024, How to Change GPS Location on Realme V30T Easily & Safely | Dr.fone
- In 2024, 4 Feasible Ways to Fake Location on Facebook For your Samsung Galaxy A25 5G | Dr.fone
- Possible solutions to restore deleted photos from Oppo Reno 9A.
- In 2024, How To Remove Phone Number From Your Apple ID on Your iPhone 12 mini?
- In 2024, Easy Guide How To Bypass Lava FRP Android 10/11/12/13
- In 2024, How to get the dragon scale and evolution-enabled pokemon On OnePlus Nord CE 3 5G? | Dr.fone
- 5 Easy Ways to Change Location on YouTube TV On Lava Agni 2 5G | Dr.fone
- Title: New Adobe Auto Rigger Is AWESOME
- Author: Elon
- Created at : 2024-05-19 03:04:35
- Updated at : 2024-05-20 03:04:35
- Link: https://animation-videos.techidaily.com/new-adobe-auto-rigger-is-awesome/
- License: This work is licensed under CC BY-NC-SA 4.0.
