

New In 2024, Best Practices on Online 3D Avatar Creator
Best Practices on Online 3D Avatar Creator
Best Practices on Online 3D Avatar Creator
An easy yet powerful editor
Numerous effects to choose from
Detailed tutorials provided by the official channel
Avatar will match your personality to your social media profiles, YouTube videos, Snapchat, and many others. With 3D Avatar makers online, designing an Avatar is about customizing the color, layout, typography, and other designs and instantly sharing your Avatar to the social media digital platform as easy as choosing a template, customizing, and sharing.
The new software involved in AR and VR technologies uses these realistically customized Avatars. The accurate representation of virtual reality will give a feeling of being in an absolute sense. Users will love to create an avatar representing themselves in the virtual spaces. Making an avatar does not mean you lock your personality; you can change it anytime. This Avatar is created by capturing a webcam, ensuring it is perfect. We will discuss many free 3D Avatar creators online.
In this article
01 [What is a 3D Avatar?](#Part 1)
02 [Best 10 Practices on How to Create an Avatar for Spatial](#Part 2)
03 [How to Create a Gallery in Spatial for Your Art (NFT and Non-NFT)](#Part 3)
04 [How to Build Your Own 3D Avatar Accurately?](#Part 4)
Part 1 What is a 3D Avatar?
In Computer graphics, Avatar is the virtual representation of the user. This can be in the 2D illustration used as a profile picture and 3D representation used in games, VR, and AR technologies. Lately, termed as “Picons,” which means personal icons, but not used now. The use of these avatars was first coined by Neal Stephenson in 1992, which is a stepping stone for the vast Metaverse Universe. A graphic representation by which users wish to represent themselves. It is a caricature of a person, not precisely a photography of that person, is a simple fancy cartoon and bizarre structure; however, the images of natural objects identify the shape and design.
They are widely in online games and websites. They are an integral part of online chat, messaging systems, blogs, and artificial intelligence, especially VR. There are many Online 3D Avatar Creators available, and we shall you get the right match.
01What is Avatar Social Media?
These days’ social media play an integral part in our lives personally and professionally. We can connect with friends and customers easily sitting at the desk. An Avatar can be a profile picture on social media such as Bitmoji. Most users use their photos, sometimes supplemented by digital frames. There are various definitions to represent Avatar-like on social media it is a tiny cartoon picture representing us or our business in social media. Even if it is small, it can significantly impact the people who visit our profile to contact us, so we need to make sure it accurately represents who we are by utilizing an avatar. Keeping a profile picture is very important in social media, which creates a great impression to the followers than visiting a default profile picture set by the applications. There are many free 3D Avatar creators online from which you can create a free 3D avatar and directly share it on your social media.
02Why Do You Need a 3d Avatar?
These 3D avatars show a sense of seriousness and trust. Customers and people who communicate with them directly using avatars feel as if they are physically present in front of them, which makes them joyful, confident, and satisfied. Intelligent technologies like IoT and Machine learning have converted their way of working with 3D avatars having the central part. This is the beginning of the Metaverse universe, where we will have 3D Avatars in malls as salespersons and waiters in restaurants, and many more.
Part 2 Best 10 Practices On How To Create An Avatar For Spatial
Avatars being the most exciting topic for us today, let us get into creating the best Avatar and 3D avatar creator online for free. Besides, we shall see the software and unique features available in it.
01What Are the Best Avatar Creator?
Creating an Avatar can be seen to be complicated, but it is not. You need not even use complex software to create avatars. Let us discuss some Best Avatar Creators in the market to date.
❶ Face Your Manga
Face Your Manga is a 3D Avatar creator Online. We have truly outstanding and most generally utilized Avatar creators getting going our list. Face Your Manga allows you to make a graphical cartoon version of yourself, and it offers a ton of customization features like skin tone, structure, and shape.
There are some default formats, yet you can change them if you feel more innovative. The site is simple to use and free, so you have nothing to lose to create a free 3D Avatar.
![]()
❷ Bitmoji
Bitmoji is the most popular and well-known option on this list, and it’s also the best option for having Animoji on Android! It’s the most popular application in the Play Store, with around 100 million downloads.
With Bitmoji, you can undoubtedly make a ton of stickers and emojis with your face, which means you’ll have the option to effectively and completely put yourself out there. It incorporates a face-like, laughing, crying face, and that’s just the beginning. This is a free 3D avatar creator online that you can get from the Play Store.
![]()
❸ BeFuncky
BeFuncky is a 3D Avatar creator online to edit your photo creatively. This is extraordinary for the people who need to make an Avatar taking motivation from an image without the expectation of making it too cartoony.
You can blow up colors, including a few genuinely fascinating impacts, or essentially change the contrast. Regardless, the site creates a free 3D Avatar loaded with choices!
![]()
❹ PickaFace
A genuinely excellent site we can suggest you use is PickaFace, as it is a 3D avatar creator online. It has a creative drawing style, extraordinary for the people after something more careful than most applications and sites offer.
Considering all the things it offers, including a ton of customization choices, we can say, PickaFace creates a free 3D avatar like no other subscription software.
![]()
❺ Doppelme
We have Doppelme among the best 3D Avatar maker online to finalize the list. The site is similar to other choices we’ve discussed, with numerous customization choices.
The figures and cartoons you create can be changed in any way you choose, whether for your symbol or your friends.
![]()
02Top 8 Practices On How To Create An Avatar For Spatial
To begin creating avatars in spatial, you only need to submit a single photo of yourself. Spatial believes that avatars will have a significant impact on the internet.
●Start by creating a Spatial Account for you using Google, Microsoft, or Slack accounts. The best practice in Spatial is to add good light and color to the Avatar.
●After this, you have to create an avatar with the first step with your webcam, make sure the photo is clear and has perfect light on it.
●Later in your profile, you will have an edit menu to edit your Avatar anytime.
Light is an essential feature in avatar creation. That will create a better light than artificial lightning.
●Spatial will begin to generate a 3D avatar of you once it has a good photo of you.
●You may modify the shirt, skin tone, and color. After you’ve used all of your ingenuity, click “Looks Good,” and you’re done.
●Next, you can customize your Avatar. There is the customization of body, shape for men, woman. Users love to make the Avatar look like themselves. You can make a hand body effect while using VR headsets if you are a hand talker. If joined from the web, you will have different movements with keyboards like dancing.
●Make changes to spatial VR avatar anytime and update. You can change the skin tone, color of the shirt, and your name. The realistic effects create a real presence in VR meetings.
❶ Spatial – Collaborate From Anywhere In Ar.
This is the launch film of Spatial, “A short real-time in Spatial,” a better way to build and work together, a way that brought us to sit next to each other face to face.
●Spatial is a collaborative computing environment that combines all the creativity and visualizes it in the room.
●All of your digital devices are seamlessly tied together into an infinite workspace.
●With a click, you can expand the world’s information with all the power.
●Using AR, infinite canvas pixels become tactile, letting you manipulate them like clay.
●You can sketch a drawing on paper and have them in front of you as a visual.
❷ Spatial Passthrough Prototype
●With this passthrough, you will feel a completely immersive experience.
●To avoid this, Facebook has partnered with spatial and Logitech for the K830 keyboard, which will help users prevent mixed sensations and provide a complete VR experience.
●Facebook says this will provide an infinite office experience.
●There are multiple customizable screens and multiple monitor setups.
●Companies have already collaborated with spatial to bring up infinite offices.
❸ Microsoft Build Keynote collaboration with Spatial
Microsoft and Teams have worked with Spatial.
●A Spatial option on the team’s channel allows you to enter a 2D meeting with avatars.
●To turn something into 3D, scan the QR code and put on the VR or AR Hololens glasses.
●Through Hololens, they can access data with Microsoft productivity apps.
●They can also adjust the position of the robot.
●The eye-tracking is good, which enables the avatars to convey user emoticon.
❹ Qualcomm Snapdragon Summit Keynote
The stage where the digital world is changing, where virtually everyone and everything is connected. We are moving into the world of VR, which is the next noble platform.
●We are all going to wear glasses for effective and interactive communication.
●Spatial tools are already used in companies like Purina to bring the teams together.
●Spatial allows all people on Oculus, Hololens, and even AR-capable smartphones to engage in one virtual environment.
●These are used in games like Pokémon.
●There will be a vast development in technology with these features.
❺ Hololens 2 Launch Keynote
●Hololens is very comfortable and fits like a hat.
●And it signs in as we put on the device.
●After recognizing your Hololens, recognize your hands and then the world.
●You can touch the holo, move it and even resize it.
●Hololens collaborated with Spatial with many more features involved in connecting people, playing games, etc.
❻ Spatial In the Wall Street Journal
●With Virtual reality headsets like Hololens and Oculus Quest with virtual reality platforms like Spatial, you can meet up and collaborate with colleagues and friends.
●You can switch to any world you choose using VR Headsets within a second.
●Before this pandemic, VR used in the market was forecasted at about 829 million in 2018.
●If you wear a holographic headset, you can feel like someone is there with you in the room, and it feels natural.
●Connecting through Spatial is very simple. You need to need to sign in through a Spatial account.
❼ Spatial on TED
This is a video of the Co-founder talking about the improvement of technologies and the transformative nature of Holographic Telepresence.
●The technology improvement from wired telephones to phones and now zoom meetings to VR and AR meetings.
●The troubles in ordinary meetings end through these VR technologies.
●TED has collaborated with Spatial to increase its market.
●TED is an online broadcast that focuses on the target audience with scripted logic.
●The seized extend how to use most of the Spatial features.
❼ AR Insider – A Publication about Spatial Computing
●AR insider profiles as the most significant innovation in VR technologies.
●This is the most crucial feature in Spatial Computing producing the best VR experiences.
●This is like a launchpad to update daily insights of Spatial computing.
●They collect data from top sources.
●It is also seen as a business angle because it has fun games in AR and VR and technical.
Part 3 How To Create A Gallery In Spatial For Your Art (Nft And Non-Nft)
Many artists and creators have been working in Spatial to show their talents on social platforms.
Provide the 3D models the stage they deserve.
You can directly drag/drop your files into Spatial directly.
NFT artists and collectors can import directly from the collections via the Metamask integration.
You can use the gorgeous environment in the library or use your 3D model of yours to set a unique customer environment.
The technologies will be helpful to create an Avatar and Digital Twins to humanize the remote work as companies move to the hybrid work methods.
The future of the world will look like a science fiction movie.
The AR and VR promise to revolutionize the workplace.
The digital twins will be the following way to show ourselves to the digital environment in a decade.
VR headsets are getting cost-efficient, and people are starting to use them. It has to be still improved to be more efficient and lighter.
Part 4 How to Build Your Own 3D Avatar Accurately?
Turning into an Avatar or Disney character is now accessible using AI software like Wondershare Wondershare Filmora Video Editor . Among the various trends in social media, creating an Avatar is getting trendy nowadays. Let us discuss the steps to create a 3D Avatar creator online.
For Win 7 or later (64-bit)
For macOS 10.12 or later
Step 1: To start learning to create a 3D avatar, you need to know how to make layers and stack them on each other.
Step 2: Later, you can “Liquify” the layers to form a mold for your Avatar.
Step 3: Before turning it into a cartoon, apply the skin smoothening effects to create a more realistic image.
Step 4: Now, you can apply details like eyes, nose, hairs, dress, and facial lines to your Avatars.
Step 5: You can change the color of any particular feature.
Compared to all other 3D Avatar creators online free, Wondershare Filmora Video Editor is the most user-friendly and efficient software.
● Key Takeaways from This Episode →
● Learned about multiple applications available for creating 3D Avatars
● Looked into the future world through Spatial
● Discussed the steps involved in making a 3D Avatar maker online using Wondershare Filmora Video Editor
[Top 10] Best and Fast Ways to Turn Image Into Gif
[Top 10] Best and Fast Ways to Turn Image into Gif
An easy yet powerful editor
Numerous effects to choose from
Detailed tutorials provided by the official channel
There are in fact ways to turn an image into GIF easily We’ll be showing off a couple of some of the easier ways below, including in-depth tutorials of some of the best methods so that you will no longer have to be troubled.
These tutorials, of course, will focus on teaching you how to create GIF from photos If that’s something you’re interested in, continue reading
In this article
01 [Why GIF?](#Part 1)
02 [How to Add an Image to a GIF?](#Part 2)
Part 1 Why GIF?
Before we move on to the tutorials, let’s do a brief account on GIF files We’ve also answered some of the more common questions regarding using a GIF image maker below for your edification
But, first: Why GIF? Well, it all comes down to what you’re looking for A lot of people use GIF files to create animated icons that they can use for their accounts. Some just genuinely want to create a GIF file that they can share with their friends and families (either for a laugh or something else) GIF files are a convenient vessel for doing this because they have a lot of flexibility and are accepted by most platforms
01Why Gif from My Images Are Blurry?
One of the biggest issues people tend to have when turning an image into GIF is that they come out of the process with a blurry end-product. No one wants that But, how are you supposed to avoid it? Well, it all depends on the tool that you’re using and your initial picture For the former, it’s best to review the upload requirements of your chosen GIF maker to get a better end result. For the latter, it’s best to pick a good, high-quality GIF creator for a better outcome
02There Are Jaggy Strokes Around Gif?
Another issue that you might suffer from while trying to create GIFs from photos is jaggy or raggedy strokes around the GIF when converted. These occur often with GIF makers that support transparency If you find these happening to you, adjust the transparency settings to get rid of the white pixel outline around your converted GIF.
Part 2 How to Add an Image to a GIF?
Now it’s finally time for the tutorials that we promised at the beginning of this article These tutorials will range from online to software solutions — so that you can get a clear idea of what you can expect from all these different GIF makers. To be more specific, we’ll be demonstrating with an online images to GIF converter, how to create animated GIF photoshop, and how to easily turn any image into GIF with the photo GIF creator, Wondershare Filmora Video Editor.
01Image to GIF: How to Turn Photos into Animated GIFs
For our first tutorial, we’re going to be demonstrating how to create GIF from photos with an online photo GIF creator More specifically, we’ll be demonstrating with Loading.IO, which is an online tool that you can use to create animated icons for your profiles or on your video content It comes with several animation options and other settings that you can use to quickly create GIFs from photos
**Step 1: Go to Loading.IO
Of course, we start off this tutorial by opening the GIF maker. In this case, since the tool is hosted online, that’s as easy as opening the link that we’ve provided below It will take you directly to the online GIF creator.
URL: https://loading.io/animation/icon/

**Step 2: Upload Photo
Once on-site, it’s time to upload the photo that you want to turn into a GIF As this is an icon creator, you should pick a photo with the proper parameters
To upload your icon for animating, select the ‘Upload’ button and browse your computer or your Google Drive for the image in question.

**Step 3: Choose animation Style
Next, choose how you want the uploaded photo to be animated Loading.IO offers a couple of animations that you can choose from Including the ‘beat’ animation, which is what we choose for our example

**Step 4: Adjust Settings
This step is technically optional, as there are default settings already prepared if you have no other specifications for your image-turned GIF. But, if you want, you can adjust certain settings for a better outcome
For example, you can speed up the animation with the ‘Speed’ slider. Or, you can increase the number of times the GIF loops by adjusting the ‘Repeat’ slider. Test out a couple of settings to get the best result

**Step 5: Download as GIF
To wrap things up, it’s time to download your finished animation Loading.IO gives several options for this. But, of course, in our case, we choose to ‘Download As: GIF’

02How to Make an Animated GIF in Photoshop [Tutorial]
For the next tutorial, we’ll be showing you how to use Photoshop to create and edit an animated GIF This process is fairly lengthy and is not recommended for beginners. But, it is a very professional method of creating an animated GIF — one that will allow you to control every step of the process (which may be exactly what you want)
**Step 1: Import Images into an Image Stack
First, starting on a new product, upload the images that you want to turn into a GIF into a photoshop ‘Image Stack’. This can be done by clicking the ‘File’ tab and selecting the ‘Scripts > Load Files into Stack…’ option
Afterward, a pop-up window will appear where you will be prompted to browse your computer for the aforementioned images Click ‘OK’ when done

**Step 2: Organize Layers
Check the ‘Layers’ panel for the images that you uploaded and organize them based on how you want them to appear for your animated GIF

**Step 3: (Optional) Import Video
If you want to work on a video to turn into a GIF instead, you can do such by selecting the ‘File’ tab and clicking on the ‘Import > Video Frames to Layers…’ option. This will get you to the same place shown in Step 2
Note: Just be careful that you do not transfer an image that is too long Photoshop may not be able to properly break it down, if so.

**Step 4: Open Timeline Then Create Frame Animation
Next, in order to start working on your animation, open the Timeline Window This can be done by clicking the ‘Window’ tab and selecting ‘Timeline’
With the ‘Timeline’ Window now open, select the ‘Create Frame Animation’ option to begin working

**Step 5: Make Frame from Layers
In order to transfer your uploaded images from the ‘Layers’ panel to your timeline, select the ‘Menu’ option on the top-right hand corner of the ‘Timeline’ window and select the ‘Make Frames From Layers’ option

**Step 6: Preview Animation and Adjust as Needed
To preview your animation, click the ‘Play’ button This is the best time to check that your frames have been organized correctly If they are not, you can adjust them by dragging and dropping them on the timeline.
OR, you can use the ‘Reverse Frames’ option if your animation has been completely flipped around

**Step 7: Create an Animation Loop
In order to be a proper looped GIF, the animation should repeat endlessly You can make sure of this by changing the ‘Repeat’ option to ‘Forever’ (as is shown in the image below).

**Step 8: Export Finished Animation to Gif
In order to finish turning your image into GIF, you’ll need to export it in the proper format This is possible by selecting the ‘File’ tab and then clicking the ‘Export > Save for Web (Legacy)…’ option
A pop-up window should appear where you can control export settings Do so in order to ensure that you have the best outcome

03**How To Make an Animated GIF in Wondershare Filmora Video Editor
For Win 7 or later (64-bit)
For macOS 10.12 or later
For our last tutorial, we’ll be showing you how to make an animated GIF with the use of Wondershare Wondershare Filmora Video Editor . Filmora is a video editor, one that is used by professionals all over to produce high-quality content And, of course, as a video editor, it works just as well as a GIF maker. One that you can use to create images into a GIF easily
**Step 1: Launch Filmora
First, download and install Filmora If you want to follow along with this demonstration, you can Wondershare offers a FREE trial where you can test out all of the software’s functions before making a commitment

Step 2: Upload Video to Turn into GIF
For this next step, we do something akin to what we did earlier with Photoshop. And that is to upload images or a video to fit into a timeline
This process is started by first uploading images, which you can do by clicking the ‘File’ tab and selecting the ‘Import Media > Import Media Files’ option

**Step 3: Drag Media to Timeline
With Filmora, the ‘Timeline’ window is already open Also, you won’t have to do anything complicated to get your media onto the said timeline. Just drag and drop it from the Media library (as is shown in the image below).

**Step 4: Edit or Adjust GIF
Before moving forward, you should take this chance to make adjustments to the media that you uploaded into your timeline There are many things that you can do at this stage so feel free to experiment
For our example, we cut down the video that we uploaded by using the ‘Trim’ option (which you can find by right-clicking on video media).

**Step 5: Export into GIF
Finally, to finish us off, we export our finished GIF This can be done by selecting the ‘Export’ tab and then clicking the ‘Create Video’ option A pop-up window will appear where you can adjust export settings

● Key Takeaways from This Episode →
● GIFs are fun and easy-to-share content It’s accepted by most platforms and can even be used to create professional, animated icons to be added to video content
● The process of turning an image into a GIF can be a bit tricky. But, don’t worry, so long as you start with high-quality media and use a reliable Photo-GIF Creator, then you should be fine
● If you’re struggling with turning your images into GIFs, check out one of the tutorials that we’ve offered We specifically chose the three GIF creators that we demonstrated to offer multiple methods that you can choose from
There are in fact ways to turn an image into GIF easily We’ll be showing off a couple of some of the easier ways below, including in-depth tutorials of some of the best methods so that you will no longer have to be troubled.
These tutorials, of course, will focus on teaching you how to create GIF from photos If that’s something you’re interested in, continue reading
In this article
01 [Why GIF?](#Part 1)
02 [How to Add an Image to a GIF?](#Part 2)
Part 1 Why GIF?
Before we move on to the tutorials, let’s do a brief account on GIF files We’ve also answered some of the more common questions regarding using a GIF image maker below for your edification
But, first: Why GIF? Well, it all comes down to what you’re looking for A lot of people use GIF files to create animated icons that they can use for their accounts. Some just genuinely want to create a GIF file that they can share with their friends and families (either for a laugh or something else) GIF files are a convenient vessel for doing this because they have a lot of flexibility and are accepted by most platforms
01Why Gif from My Images Are Blurry?
One of the biggest issues people tend to have when turning an image into GIF is that they come out of the process with a blurry end-product. No one wants that But, how are you supposed to avoid it? Well, it all depends on the tool that you’re using and your initial picture For the former, it’s best to review the upload requirements of your chosen GIF maker to get a better end result. For the latter, it’s best to pick a good, high-quality GIF creator for a better outcome
02There Are Jaggy Strokes Around Gif?
Another issue that you might suffer from while trying to create GIFs from photos is jaggy or raggedy strokes around the GIF when converted. These occur often with GIF makers that support transparency If you find these happening to you, adjust the transparency settings to get rid of the white pixel outline around your converted GIF.
Part 2 How to Add an Image to a GIF?
Now it’s finally time for the tutorials that we promised at the beginning of this article These tutorials will range from online to software solutions — so that you can get a clear idea of what you can expect from all these different GIF makers. To be more specific, we’ll be demonstrating with an online images to GIF converter, how to create animated GIF photoshop, and how to easily turn any image into GIF with the photo GIF creator, Wondershare Filmora Video Editor.
01Image to GIF: How to Turn Photos into Animated GIFs
For our first tutorial, we’re going to be demonstrating how to create GIF from photos with an online photo GIF creator More specifically, we’ll be demonstrating with Loading.IO, which is an online tool that you can use to create animated icons for your profiles or on your video content It comes with several animation options and other settings that you can use to quickly create GIFs from photos
**Step 1: Go to Loading.IO
Of course, we start off this tutorial by opening the GIF maker. In this case, since the tool is hosted online, that’s as easy as opening the link that we’ve provided below It will take you directly to the online GIF creator.
URL: https://loading.io/animation/icon/
**Step 2: Upload Photo
Once on-site, it’s time to upload the photo that you want to turn into a GIF As this is an icon creator, you should pick a photo with the proper parameters
To upload your icon for animating, select the ‘Upload’ button and browse your computer or your Google Drive for the image in question.
**Step 3: Choose animation Style
Next, choose how you want the uploaded photo to be animated Loading.IO offers a couple of animations that you can choose from Including the ‘beat’ animation, which is what we choose for our example
**Step 4: Adjust Settings
This step is technically optional, as there are default settings already prepared if you have no other specifications for your image-turned GIF. But, if you want, you can adjust certain settings for a better outcome
For example, you can speed up the animation with the ‘Speed’ slider. Or, you can increase the number of times the GIF loops by adjusting the ‘Repeat’ slider. Test out a couple of settings to get the best result
**Step 5: Download as GIF
To wrap things up, it’s time to download your finished animation Loading.IO gives several options for this. But, of course, in our case, we choose to ‘Download As: GIF’
02How to Make an Animated GIF in Photoshop [Tutorial]
For the next tutorial, we’ll be showing you how to use Photoshop to create and edit an animated GIF This process is fairly lengthy and is not recommended for beginners. But, it is a very professional method of creating an animated GIF — one that will allow you to control every step of the process (which may be exactly what you want)
**Step 1: Import Images into an Image Stack
First, starting on a new product, upload the images that you want to turn into a GIF into a photoshop ‘Image Stack’. This can be done by clicking the ‘File’ tab and selecting the ‘Scripts > Load Files into Stack…’ option
Afterward, a pop-up window will appear where you will be prompted to browse your computer for the aforementioned images Click ‘OK’ when done
**Step 2: Organize Layers
Check the ‘Layers’ panel for the images that you uploaded and organize them based on how you want them to appear for your animated GIF
**Step 3: (Optional) Import Video
If you want to work on a video to turn into a GIF instead, you can do such by selecting the ‘File’ tab and clicking on the ‘Import > Video Frames to Layers…’ option. This will get you to the same place shown in Step 2
Note: Just be careful that you do not transfer an image that is too long Photoshop may not be able to properly break it down, if so.
**Step 4: Open Timeline Then Create Frame Animation
Next, in order to start working on your animation, open the Timeline Window This can be done by clicking the ‘Window’ tab and selecting ‘Timeline’
With the ‘Timeline’ Window now open, select the ‘Create Frame Animation’ option to begin working
**Step 5: Make Frame from Layers
In order to transfer your uploaded images from the ‘Layers’ panel to your timeline, select the ‘Menu’ option on the top-right hand corner of the ‘Timeline’ window and select the ‘Make Frames From Layers’ option
**Step 6: Preview Animation and Adjust as Needed
To preview your animation, click the ‘Play’ button This is the best time to check that your frames have been organized correctly If they are not, you can adjust them by dragging and dropping them on the timeline.
OR, you can use the ‘Reverse Frames’ option if your animation has been completely flipped around
**Step 7: Create an Animation Loop
In order to be a proper looped GIF, the animation should repeat endlessly You can make sure of this by changing the ‘Repeat’ option to ‘Forever’ (as is shown in the image below).
**Step 8: Export Finished Animation to Gif
In order to finish turning your image into GIF, you’ll need to export it in the proper format This is possible by selecting the ‘File’ tab and then clicking the ‘Export > Save for Web (Legacy)…’ option
A pop-up window should appear where you can control export settings Do so in order to ensure that you have the best outcome
03**How To Make an Animated GIF in Wondershare Filmora Video Editor
For Win 7 or later (64-bit)
For macOS 10.12 or later
For our last tutorial, we’ll be showing you how to make an animated GIF with the use of Wondershare Wondershare Filmora Video Editor . Filmora is a video editor, one that is used by professionals all over to produce high-quality content And, of course, as a video editor, it works just as well as a GIF maker. One that you can use to create images into a GIF easily
**Step 1: Launch Filmora
First, download and install Filmora If you want to follow along with this demonstration, you can Wondershare offers a FREE trial where you can test out all of the software’s functions before making a commitment
Step 2: Upload Video to Turn into GIF
For this next step, we do something akin to what we did earlier with Photoshop. And that is to upload images or a video to fit into a timeline
This process is started by first uploading images, which you can do by clicking the ‘File’ tab and selecting the ‘Import Media > Import Media Files’ option
**Step 3: Drag Media to Timeline
With Filmora, the ‘Timeline’ window is already open Also, you won’t have to do anything complicated to get your media onto the said timeline. Just drag and drop it from the Media library (as is shown in the image below).
**Step 4: Edit or Adjust GIF
Before moving forward, you should take this chance to make adjustments to the media that you uploaded into your timeline There are many things that you can do at this stage so feel free to experiment
For our example, we cut down the video that we uploaded by using the ‘Trim’ option (which you can find by right-clicking on video media).
**Step 5: Export into GIF
Finally, to finish us off, we export our finished GIF This can be done by selecting the ‘Export’ tab and then clicking the ‘Create Video’ option A pop-up window will appear where you can adjust export settings
● Key Takeaways from This Episode →
● GIFs are fun and easy-to-share content It’s accepted by most platforms and can even be used to create professional, animated icons to be added to video content
● The process of turning an image into a GIF can be a bit tricky. But, don’t worry, so long as you start with high-quality media and use a reliable Photo-GIF Creator, then you should be fine
● If you’re struggling with turning your images into GIFs, check out one of the tutorials that we’ve offered We specifically chose the three GIF creators that we demonstrated to offer multiple methods that you can choose from
15 Forgotten Cartoon Characters of All Time
15 Forgotten Cartoon Characters of All Time You Used to Love
An easy yet powerful editor
Numerous effects to choose from
Detailed tutorials provided by the official channel
Whether you are from your 70’s, 80’s or 90’s, thanks to video streaming services like Amazon, Netflix, YouTube and various others, you are now getting a golden chance to watch your favourite cartoons at your comfort.
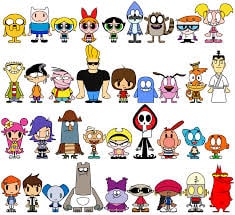
Watching Cartoons were always one of the favourite activities that everything loves to experience without any age restriction. For different centuries cartoon industry has been treated as the perfect medium for the entertainment. With lots of cartoons flooding your TV sets from the last few decades everybody have seen different varieties of characters that have won the hearts of millions.
In this article
01 [Five 70s cartoon characters](#Part 1)
02 [Five 80s cartoon characters](#Part 2)
03 [Five 90s cartoon characters](#Part 3)
Part 1 Six 70s cartoon characters
All the cartoon characters mentioned below were very popular during the 70s &are still having good marks in our hearts today. 70s were known for interesting cartoon series.
01Bagpuss
Premiered: 1974
Actors: Oliver Postgate
YouTube video
Summary
Saggy cloth-cat from this show was featured in around 13 episodes. At that time ‘stop-motion’ technique for animation was utilized by the creators for this television series.
02Fat Albert
Name of the character: Fat Albert
Name of Show: Fat Albert and Cosby Kids
Premiered: 1974
Actors: Weird Harold, Rudy, Mush-mouth, Dumb Donald, Bucky, Bill & of course-Fat Albert.
YouTube video
Summary: Still childhood experiences of Bill-Cosby have had amazing influence on making of this amazing TV series.
03Fred Flintstones
Name of the character: Fred Flintstones
Name of Show: Flintstones
Premiered: 1960-1966
Actors: John Goodman.
YouTube video
YouTube video
Summary
Flintstones returned to TV-screens with characters as well as cultural-references thrown into stone- age narrative that ultimately captivated the audience right before time of ‘The Simpsons’. This show set the premise at the time of stone-age but carefully and delicately crafted plot characteristic of modern day. The Flintstones fascinated audience with casual manner of how the characters faced-life, thus making lasting connection with audience who were craving for celluloid freshness. Fred Flintstone was one of the most amazing 70s cartoon characters.
04The Herbs
Name of the character: The Herbs
**Name of Show:**The Herbs!
Premiered: 1968
Actors:Gordon Rollings .
YouTube video
Summary
Multiple different characters were featured in this 3D animated series with a leading role by same character name. Other important characters were ‘Parsley the Lion’, Sir-Basil, Tarragon-the-Dragon, Lady Rosemary, Sage the Owl, Dill the Dog, Bay Leaf & Signor Solidago.
05Godzooky
Name of the character: Godzooky
**Name of Show:**Godzilla.
Premiered: 1978
Actors: Jeff David as Captain Carl Majors
YouTube video
Summary
Created by Hanna-Barbera-Productions this television series Godzooky.Don-Messick gave his voice for this amazing character. After some popularity of 60s cartoon characters, this was the only one that was extremely famous for his villain attitude.
06Casper
Name of the character: Casper
Name of Show: ‘Casper and the Angels’
Premiered: 1979-1980
Actors: Casper: Julie McWhirter, Nerdley: Hall Smith
YouTube video
Summary
Magic of 70s cartoon cartoons still prevails and Casper is the most amazing example. The ‘Casper’ character was a ghost that was presented in television series as a friendly person. It was like a ghost-child who always tries to befriend the people rather than scaring them off.
Part 2 Five 80s cartoon characters
01Jem
Name of the character: Jem
Name of Show: ‘Jem’
Premiered: 1985
Actors: Britta Phillips as Jerrica Benton
YouTube video
Summary
“Showtime synergy!” beginning with this attractive storylines, this was slightly more adult as compared to the average 80s cartoon characters. This was pretty cool cartoon and sometimes inspires El to easily come-up with her own style of fun alter-ego that Jem could use in order to escape stresses of being world’s savior.
02Penny
Name of the character: Penny
Name of Show: ‘’Inspector Gadget’
Premiered: 1983
Actors: Mona Marshall, Holly Berger
YouTube video
Summary
Penny in this series was the brain behind her uncle’s all crazy escapades. El makes use of her brain in order to provide help for Hopper fling enemies whenever his brawn was not enough to get things done. Both characters tasked with the outsmarting similar power of enemies Dr. Claw in the Inspector Gadget and runs M.A.D. a criminal organization and other ones were Evil Russians beneath mall in the Stranger Things. It was always good to watch this fancy, amazing character from 90s, 80s female cartoon characters.
03Garfield
Name of the character: Garfield
Name of Show: ‘Garfield and Friends’
Premiered: 1988-1995
Actors: Bill Murray as Garfield
YouTube video:
Summary
Followed by Lazy cat Garfield, this show contains excitable dog-Odie, imaginative pig-Orson, & their animal-friends with lots of small-scale adventures around their hometown like playing pranks, throwing birthday-parties, and watching movies together. Garfield was a lazy-cat that only desire to lie around the habits of watching-TV & eating Lasagna, however his friends as well as his owner-Jon always drags him into fun loving adventures of their own.
04Michaelangelo
Name of the character: MichaelLangelo
Name of Show: ‘Teenage Mutant Ninja Turtles’
Premiered: 1987-1996
Actors: Noel Fisher, Greg Cipes, Robbie Rist
YouTube video:
Summary
Michelangelo or nicknamed Mike/Mikey, is the fictional superhero & a leading character from the four main characters of favorite 80’s show Teenage Mutant Ninja Turtles. Michaelangelo, Raphael, Donatello and Leonardo are popular mutant-turtles all have grown-up as youngsters with their mentor Splinter at underground. They fight villains like Foot Clan, Shredder, &intelligent brain inside the jar named Krang. Because of so many fun-villains inside this series were presented, that show was so much popular and beloved by everyone. This TV-series aired for around 10 seasons.
05Firestar
Name of the character: FireStar
Name of Show: Spider-Man & his Amazing Friends
Premiered: 1981
Actors: Kathy Garver, Laura Bailey
YouTube video
Summary
Firestar got the ability to battle wide range of super-villains together with the Spider-Man & Iceman in this animated show Spider-Man & His Amazing Friends. She had never ever appeared in the comic book form earlier Spider-Man & his Amazing-Friends hit but you might see her in modern, live-action Marvel Cinematic-Universe very soon.
Use Wondershare Filmora Video Editor for Cartoon animations, Styles and Editing
cartoon主题视频
For Win 7 or later (64-bit)
For macOS 10.12 or later
Still thinking about your favorite cartoon characters from 80’s or 90’s? Then Filmora can help you to create nostalgic moments again with your hand crafts. You can make video animations, sketch and draw an art of your loved ones from the list of extremely popular cartoon characters. FIlmora is the best choice drawing some amazing cartoons in just few steps.
Even you can Cartoonize any of your video with your favorite animations of cartoons through cartoon effects.
It is the best Smartphone and PC platform based software to make cartoons.
Later on you can share your creations with other platforms over the web.
Even if you want to customize or edit any cartoon, you can do this with its powerful editing features.
Part 3 Five 90s cartoon characters
Most of us are from ‘90s but at the same time, during our children, we didn’t had a lot of options rather than just watch whatever put on the television. At that time cartoons were super-cool with popular music & contains originality. One of the most interesting things was the presence of sense-of-commonality among the people especially children. Cartoons materialized during ‘90s still continue to charm us and cartoon characters were the most among all. Let dig deep-down into our memory lane today & check out the amazing cartoon characters from Golden Period of animation.
01Dexter
Name of the character: Dexter
Name of Show: Dexter’s Laboratory
Premiered: 1995-2003
Actors: Dexter: Christine Cavanaugh, Dee-Dee: Kat Cressida
YouTube video:
Summary
Dexter was the original & the ultimate genius during 90s. Dexter’s intelligence as well as knack for the new inventions made him not only popular but also the smartest one’s among the cartoon characters from 90s cartoon network characters. He was credited with creation of plethora of extraordinary devices & known for someone who keeps on experimenting with various ideas on his mindful head. Dexter shares cute love-hate relationship with an annoying sister of his own Dee-Dee.
02Buster Bunny
Name of the character: Buster Bunny
Name of Show: Tiny Toon Adventures
Premiered: 1995-2003
Actors: Charlie Adler and John Kassir
YouTube video:
Summary
In the list of cartoon network characters 90swe name we have is Buster bunny. Somewhat similar to ‘Looney Tunes’ cartoon-series, the Tiny Toon Adventures’s USP was Buster Bunny and does the same so adventurously. With its young & enthusiastic personality of male rabbit was the commander of all sorts for Tiny Toons. He was capable of dealing with his own-set of issues together with other complicated School curriculum.
03Mojo Jojo
Name of the character: Mojo Jojo!
Name of Show: The Powerpuff Girls
Premiered: 1998-2005
Actors: Cathy Cavadini, Tom Kenny, Tara Strong, EG Daily.
YouTube video:
Summary
The Powerpuff-Girls was one of the most amazing and the most recognizable cartoons characters of all times. Mojo Jojo character also featured in this popular animated-television series with its evil mysteries and actions. This character was at prime time during 90’s and Mojo jojo always threatens Powerpuff Girls with his skills and expertise in gadgets, strategies etc. but somehow powerpuff-girls always managed to beat Mojo-Jojo.
04Courage
Name of the character: Courage
Name of Show: Courage The Cowardly Dog
Premiered: 1996
Actors: Marty Grabstein
YouTube video
Courage character may be easily scared &often found nervous, but he was someone who cares for his owner Muriel & Eustace and would go to any level to protect them. It was the most encouraging and commendable projections of canine on-screen. He was loyal & loving with his emotions to be selfless by risking his life for his owners. Before the arrival of2000 cartoon characters, this was favorite entertainment package for all age group.
05Johnny Bravo
Name of the character: Johnny Bravo
Name of Show: Johnny Bravo
Premiered: 1997–2004
Actors: Jeff Bennett, Brenda Vaccaro& Mae Whitman
YouTube video:
Summary
Who don’t know about ‘Johnny Bravo’? This was one of the most famous and extremely popular character of cartoon network 90s cartoon characters. During 90s this gain so much popularity and showcased with a bang. The animated character Johnny bravo was all famous and was the leading figure. The iconic and comic character Johnny was the central attraction of this television series. He was confident and good-looking as humanly as possible. You often see him wearing sunglasses with black shirt & blue jeans. He was somewhere a positive-individual with no bad-qualities whatsoever that makes him goofy &truly a blue narcissist. No matter how tough were the circumstances, if Johnny cares for or likes a girl, he can go beyond the ordinary level to assure that that particular girl like him at the end.
● Ending Thoughts →
● Different characters from all eras 70’s, 80’s and 90’s were true examples of perfect personality for the children.
● You can cherish all the moments by living again you period as a kid with all those characters
● No matter what the situation or circumstances demands cartoon characters always the best to ensure great level of entertainment without any age restrictions.
Whether you are from your 70’s, 80’s or 90’s, thanks to video streaming services like Amazon, Netflix, YouTube and various others, you are now getting a golden chance to watch your favourite cartoons at your comfort.
Watching Cartoons were always one of the favourite activities that everything loves to experience without any age restriction. For different centuries cartoon industry has been treated as the perfect medium for the entertainment. With lots of cartoons flooding your TV sets from the last few decades everybody have seen different varieties of characters that have won the hearts of millions.
In this article
01 [Five 70s cartoon characters](#Part 1)
02 [Five 80s cartoon characters](#Part 2)
03 [Five 90s cartoon characters](#Part 3)
Part 1 Six 70s cartoon characters
All the cartoon characters mentioned below were very popular during the 70s &are still having good marks in our hearts today. 70s were known for interesting cartoon series.
01Bagpuss
Premiered: 1974
Actors: Oliver Postgate
YouTube video
Summary
Saggy cloth-cat from this show was featured in around 13 episodes. At that time ‘stop-motion’ technique for animation was utilized by the creators for this television series.
02Fat Albert
Name of the character: Fat Albert
Name of Show: Fat Albert and Cosby Kids
Premiered: 1974
Actors: Weird Harold, Rudy, Mush-mouth, Dumb Donald, Bucky, Bill & of course-Fat Albert.
YouTube video
Summary: Still childhood experiences of Bill-Cosby have had amazing influence on making of this amazing TV series.
03Fred Flintstones
Name of the character: Fred Flintstones
Name of Show: Flintstones
Premiered: 1960-1966
Actors: John Goodman.
YouTube video
YouTube video
Summary
Flintstones returned to TV-screens with characters as well as cultural-references thrown into stone- age narrative that ultimately captivated the audience right before time of ‘The Simpsons’. This show set the premise at the time of stone-age but carefully and delicately crafted plot characteristic of modern day. The Flintstones fascinated audience with casual manner of how the characters faced-life, thus making lasting connection with audience who were craving for celluloid freshness. Fred Flintstone was one of the most amazing 70s cartoon characters.
04The Herbs
Name of the character: The Herbs
**Name of Show:**The Herbs!
Premiered: 1968
Actors:Gordon Rollings .
YouTube video
Summary
Multiple different characters were featured in this 3D animated series with a leading role by same character name. Other important characters were ‘Parsley the Lion’, Sir-Basil, Tarragon-the-Dragon, Lady Rosemary, Sage the Owl, Dill the Dog, Bay Leaf & Signor Solidago.
05Godzooky
Name of the character: Godzooky
**Name of Show:**Godzilla.
Premiered: 1978
Actors: Jeff David as Captain Carl Majors
YouTube video
Summary
Created by Hanna-Barbera-Productions this television series Godzooky.Don-Messick gave his voice for this amazing character. After some popularity of 60s cartoon characters, this was the only one that was extremely famous for his villain attitude.
06Casper
Name of the character: Casper
Name of Show: ‘Casper and the Angels’
Premiered: 1979-1980
Actors: Casper: Julie McWhirter, Nerdley: Hall Smith
YouTube video
Summary
Magic of 70s cartoon cartoons still prevails and Casper is the most amazing example. The ‘Casper’ character was a ghost that was presented in television series as a friendly person. It was like a ghost-child who always tries to befriend the people rather than scaring them off.
Part 2 Five 80s cartoon characters
01Jem
Name of the character: Jem
Name of Show: ‘Jem’
Premiered: 1985
Actors: Britta Phillips as Jerrica Benton
YouTube video
Summary
“Showtime synergy!” beginning with this attractive storylines, this was slightly more adult as compared to the average 80s cartoon characters. This was pretty cool cartoon and sometimes inspires El to easily come-up with her own style of fun alter-ego that Jem could use in order to escape stresses of being world’s savior.
02Penny
Name of the character: Penny
Name of Show: ‘’Inspector Gadget’
Premiered: 1983
Actors: Mona Marshall, Holly Berger
YouTube video
Summary
Penny in this series was the brain behind her uncle’s all crazy escapades. El makes use of her brain in order to provide help for Hopper fling enemies whenever his brawn was not enough to get things done. Both characters tasked with the outsmarting similar power of enemies Dr. Claw in the Inspector Gadget and runs M.A.D. a criminal organization and other ones were Evil Russians beneath mall in the Stranger Things. It was always good to watch this fancy, amazing character from 90s, 80s female cartoon characters.
03Garfield
Name of the character: Garfield
Name of Show: ‘Garfield and Friends’
Premiered: 1988-1995
Actors: Bill Murray as Garfield
YouTube video:
Summary
Followed by Lazy cat Garfield, this show contains excitable dog-Odie, imaginative pig-Orson, & their animal-friends with lots of small-scale adventures around their hometown like playing pranks, throwing birthday-parties, and watching movies together. Garfield was a lazy-cat that only desire to lie around the habits of watching-TV & eating Lasagna, however his friends as well as his owner-Jon always drags him into fun loving adventures of their own.
04Michaelangelo
Name of the character: MichaelLangelo
Name of Show: ‘Teenage Mutant Ninja Turtles’
Premiered: 1987-1996
Actors: Noel Fisher, Greg Cipes, Robbie Rist
YouTube video:
Summary
Michelangelo or nicknamed Mike/Mikey, is the fictional superhero & a leading character from the four main characters of favorite 80’s show Teenage Mutant Ninja Turtles. Michaelangelo, Raphael, Donatello and Leonardo are popular mutant-turtles all have grown-up as youngsters with their mentor Splinter at underground. They fight villains like Foot Clan, Shredder, &intelligent brain inside the jar named Krang. Because of so many fun-villains inside this series were presented, that show was so much popular and beloved by everyone. This TV-series aired for around 10 seasons.
05Firestar
Name of the character: FireStar
Name of Show: Spider-Man & his Amazing Friends
Premiered: 1981
Actors: Kathy Garver, Laura Bailey
YouTube video
Summary
Firestar got the ability to battle wide range of super-villains together with the Spider-Man & Iceman in this animated show Spider-Man & His Amazing Friends. She had never ever appeared in the comic book form earlier Spider-Man & his Amazing-Friends hit but you might see her in modern, live-action Marvel Cinematic-Universe very soon.
Use Wondershare Filmora Video Editor for Cartoon animations, Styles and Editing
cartoon主题视频
For Win 7 or later (64-bit)
For macOS 10.12 or later
Still thinking about your favorite cartoon characters from 80’s or 90’s? Then Filmora can help you to create nostalgic moments again with your hand crafts. You can make video animations, sketch and draw an art of your loved ones from the list of extremely popular cartoon characters. FIlmora is the best choice drawing some amazing cartoons in just few steps.
Even you can Cartoonize any of your video with your favorite animations of cartoons through cartoon effects.
It is the best Smartphone and PC platform based software to make cartoons.
Later on you can share your creations with other platforms over the web.
Even if you want to customize or edit any cartoon, you can do this with its powerful editing features.
Part 3 Five 90s cartoon characters
Most of us are from ‘90s but at the same time, during our children, we didn’t had a lot of options rather than just watch whatever put on the television. At that time cartoons were super-cool with popular music & contains originality. One of the most interesting things was the presence of sense-of-commonality among the people especially children. Cartoons materialized during ‘90s still continue to charm us and cartoon characters were the most among all. Let dig deep-down into our memory lane today & check out the amazing cartoon characters from Golden Period of animation.
01Dexter
Name of the character: Dexter
Name of Show: Dexter’s Laboratory
Premiered: 1995-2003
Actors: Dexter: Christine Cavanaugh, Dee-Dee: Kat Cressida
YouTube video:
Summary
Dexter was the original & the ultimate genius during 90s. Dexter’s intelligence as well as knack for the new inventions made him not only popular but also the smartest one’s among the cartoon characters from 90s cartoon network characters. He was credited with creation of plethora of extraordinary devices & known for someone who keeps on experimenting with various ideas on his mindful head. Dexter shares cute love-hate relationship with an annoying sister of his own Dee-Dee.
02Buster Bunny
Name of the character: Buster Bunny
Name of Show: Tiny Toon Adventures
Premiered: 1995-2003
Actors: Charlie Adler and John Kassir
YouTube video:
Summary
In the list of cartoon network characters 90swe name we have is Buster bunny. Somewhat similar to ‘Looney Tunes’ cartoon-series, the Tiny Toon Adventures’s USP was Buster Bunny and does the same so adventurously. With its young & enthusiastic personality of male rabbit was the commander of all sorts for Tiny Toons. He was capable of dealing with his own-set of issues together with other complicated School curriculum.
03Mojo Jojo
Name of the character: Mojo Jojo!
Name of Show: The Powerpuff Girls
Premiered: 1998-2005
Actors: Cathy Cavadini, Tom Kenny, Tara Strong, EG Daily.
YouTube video:
Summary
The Powerpuff-Girls was one of the most amazing and the most recognizable cartoons characters of all times. Mojo Jojo character also featured in this popular animated-television series with its evil mysteries and actions. This character was at prime time during 90’s and Mojo jojo always threatens Powerpuff Girls with his skills and expertise in gadgets, strategies etc. but somehow powerpuff-girls always managed to beat Mojo-Jojo.
04Courage
Name of the character: Courage
Name of Show: Courage The Cowardly Dog
Premiered: 1996
Actors: Marty Grabstein
YouTube video
Courage character may be easily scared &often found nervous, but he was someone who cares for his owner Muriel & Eustace and would go to any level to protect them. It was the most encouraging and commendable projections of canine on-screen. He was loyal & loving with his emotions to be selfless by risking his life for his owners. Before the arrival of2000 cartoon characters, this was favorite entertainment package for all age group.
05Johnny Bravo
Name of the character: Johnny Bravo
Name of Show: Johnny Bravo
Premiered: 1997–2004
Actors: Jeff Bennett, Brenda Vaccaro& Mae Whitman
YouTube video:
Summary
Who don’t know about ‘Johnny Bravo’? This was one of the most famous and extremely popular character of cartoon network 90s cartoon characters. During 90s this gain so much popularity and showcased with a bang. The animated character Johnny bravo was all famous and was the leading figure. The iconic and comic character Johnny was the central attraction of this television series. He was confident and good-looking as humanly as possible. You often see him wearing sunglasses with black shirt & blue jeans. He was somewhere a positive-individual with no bad-qualities whatsoever that makes him goofy &truly a blue narcissist. No matter how tough were the circumstances, if Johnny cares for or likes a girl, he can go beyond the ordinary level to assure that that particular girl like him at the end.
● Ending Thoughts →
● Different characters from all eras 70’s, 80’s and 90’s were true examples of perfect personality for the children.
● You can cherish all the moments by living again you period as a kid with all those characters
● No matter what the situation or circumstances demands cartoon characters always the best to ensure great level of entertainment without any age restrictions.
How to Create Benime Whiteboard Animation on Android
How to Create Benime Whiteboard Animation in Android
An easy yet powerful editor
Numerous effects to choose from
Detailed tutorials provided by the official channel
Millions of people on social media would want to post the working system, information, and business policies on a topic. For this reason, such people need an easy way to make a good quality influential video in a short time. Although many applications can help you create animated videos.
In this article, we will be talking about whiteboard animation and, more specifically, about Benime whiteboard animation mod APK.
In this article
01 [What’s Benime Used for?](#Part 1)
02 [How to Create Benime Whiteboard Animation in Android](#Part 2)
Part 1 What’s Benime Used for?
Benime is the first doodle video creation application on Android devices that allows users to create professional and realistic doodle videos within minutes. It can add music and voice-over to audio, create presentations and marketing videos, and create a whiteboard animation using built-in assets.
One of the practical uses of Benime whiteboard animation is that it makes it very easy for anybody to create a professional whiteboard animation without any experience or knowledge in animation. With this application, you can use the built-in templates or decide to start from scratch using your drawings or images, then record yourself talking over the top of your work. It is one of the most active Android applications to explain ideas through a captivating animated video that can eventually increase your followers quickly.
It is used not just to explain information in an impersonal codon way but also to connect with your audience. By allowing your audience to show concern about what you are trying to showcase and evoking empathy.
It helps you get the audience to pay attention to the content you are creating by providing you with personalized graphics, colors, and images.
Benime is a great application that can help create an animated video using built-in assets. The application is flexible, user-friendly, and accessible via Benime whiteboard animation APK download. To download the Android application and make your desired video, you can also visit the Google play store to proceed with downloading the application as it contains advertisements and offers in-app purchases.
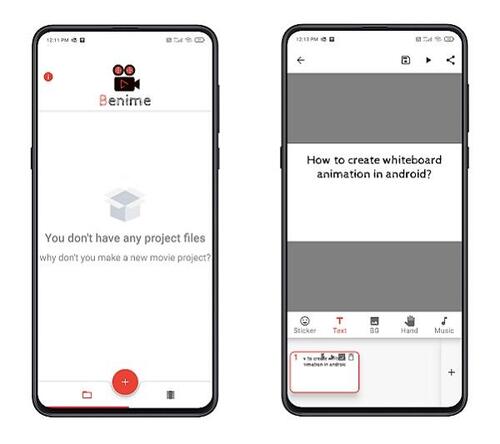
So, in short, we can say that Benime is valuable for,
● Whiteboard animation creation
● Inbuilt assets for video making
● Editing video with either voice, music, text, color
● Motion Slide animation
● Board background
● Supports online rendering of videos
● Instant preview functioning
● Sharing video in MP4 format
Part 2 How to Create Benime Whiteboard Animation in Android
We will also be giving you tips on all you need to know about creating a whiteboard animation:
● Write a script, whether it is a short script or a regular video. The whiteboard animation video might not succeed with exciting information and images and no coherent story. Since it is not a set of bullet points, storyboards, or blog stories, having a proper script is everything you need.
● Next is to start your storyboard to help you organize your thoughts much better. By creating a storyboard, you have a good idea of how the final product will look like and the transition of the story.
● Create memorable photos that will excite your audience. Perhaps if you are a creative person, this part will be much easier as all you need is to create a unique and fun image that will help pass the information that she wants to get across.
● Animates the created images and finds clearance between your script and the photos.
● Record the audio, which is the final step to ensure a perfectly synchronized audio and content.
Benime Whiteboard Animation application offers tons of features that can be used to enhance whiteboard animation creation. More so, here is a step-by-guide on how to use the Benime application more effectively and efficiently in creating a whiteboard animation:
01Software Download
First, download and install the Benime application on your phone and then open it.
02Create New Video
Click on the + sign to make a new video. Enter the video title, choose the desired video quality, and click Create a Movie.
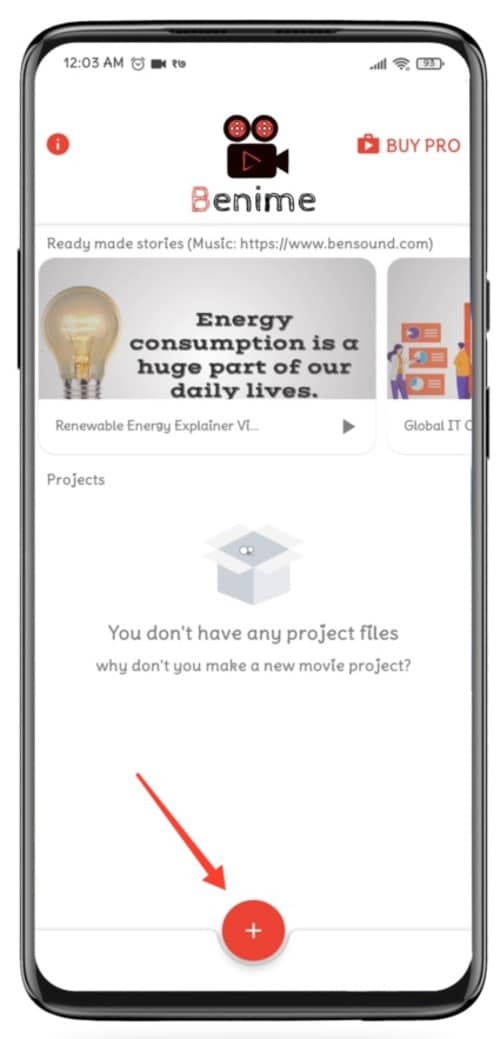
03Enter Text
A blank slide will be visible, where you will make changes, tap the Text option to enter the text.
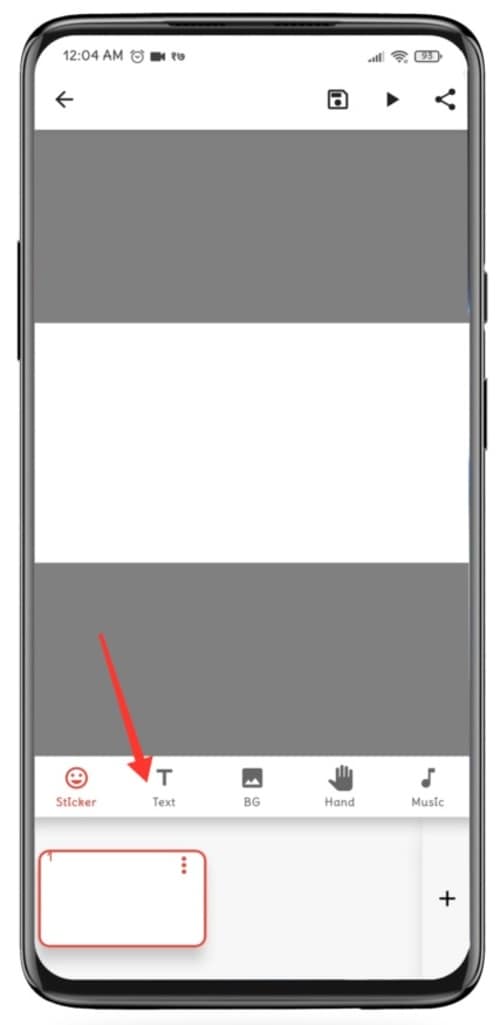
04Edit Text
After entering your desired text, click on the Insert option. The text size can be changeable by swiping to the left or right on the size line. More so, you can edit the color of the text by clicking on the color option. You can also change and use the application by clicking on the hand option. Background color change can go with the BG option.
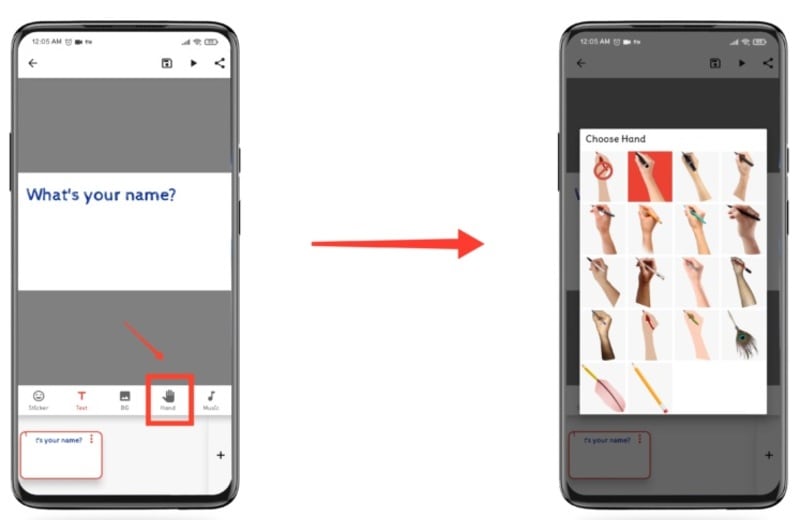
If you want to insert some characters, drawings, pictures, etc. Click on the sticker option at the bottom left and then slide to the right at the top to choose the icon or image that you want to insert.
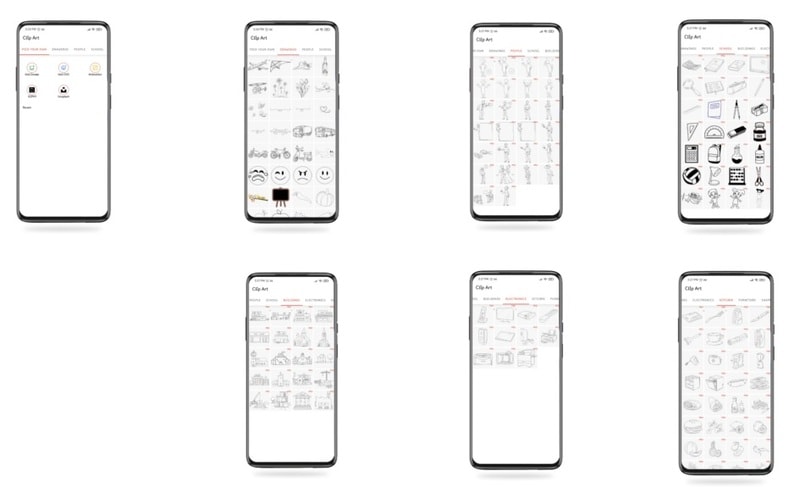
05Add Audio
After you are ok with the text and image, you can now add your voice over or music by clicking on any of the two options: voice over and music track.
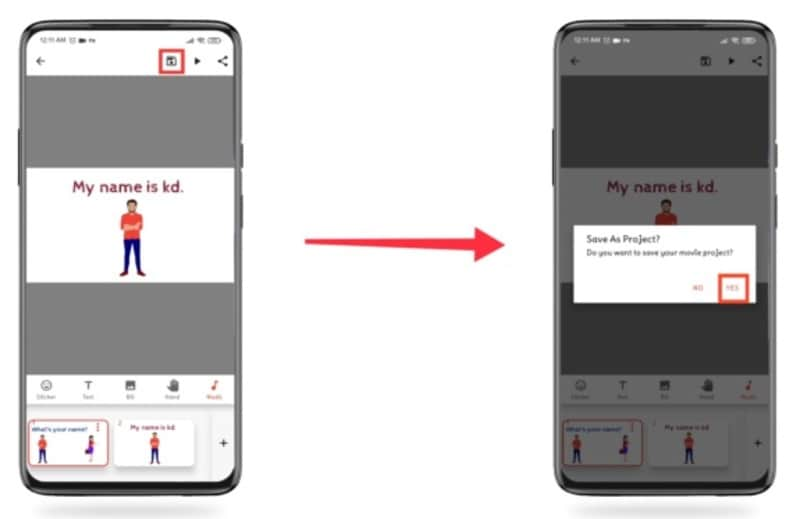
05Create and Share your Video
Lastly, click on the Save icon and then click on Yes. Then insert the name of the video and click on Make movie. Instantly the video will enter the rendering mode, and after this process, you will get the option of playing and sharing the film. Select the one you wish.
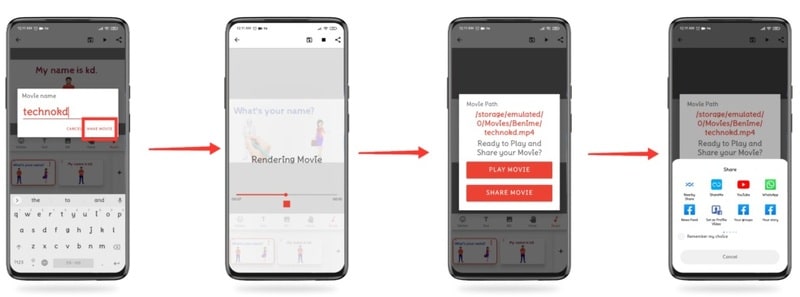
Benime Whiteboard animation can also be on PC via varieties of software. However, the Filmora software has proven to be one of the best because of its features. While working or creating a storyboard, the most aptly used software is Filmora. That will make it easy to create whiteboard animation with lots and lots of editing options in terms of transparency, 2D/animation, smooth keyframing, and a lot more.
Part 3 PC Tools Useful For Whiteboard Animation
01Renderforest Whiteboard Animation
Renderforest whiteboard animation: This is a free whiteboard animation tool that creates exciting and unique animation stories, a cloud-based program that does not need a powerful machine. It weeds hundreds of ready-made scenes to enhance your whiteboard animation stories
02Powtoon Whiteboard Animation
This can make a whiteboard animation very quickly for free, with an object to touch up video and free royalty music to make your whiteboard animation perfect.
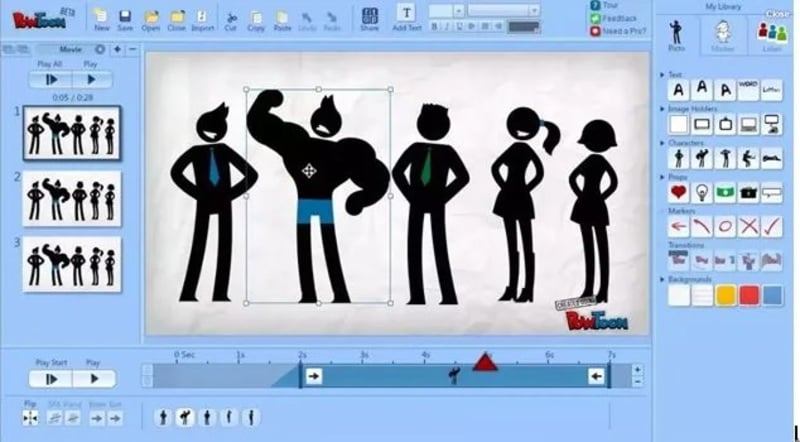
03Fiverr Whiteboard Animation
If looking for different whiteboard and animation explainers, Fiverr whiteboard animation will be the right choice. That will assist you in how to keep or engage your audience with proper explanation.
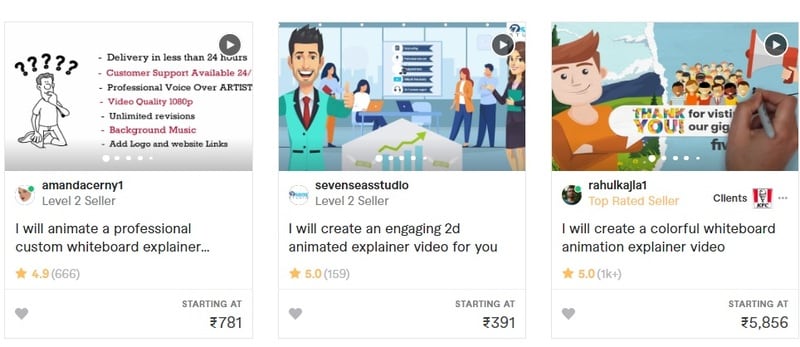
04Whiteboard Animation Videoscribe
Being in the education domain is a noble cause, and you can enhance the delivery of quality education through Whiteboard Animation Videoscribe. That will give you the freedom to modify your content with animation drawing. However, it is a subscription-based service.
05Vyond Whiteboard Animation
Vyond whiteboard animation provides you with in-house whiteboard animated video production solutions for educational, professional, or training purposes.
06Animaker Whiteboard Animation
This is another free whiteboard animation software used to make videos quickly with various functions. It includes a free-to-use option and a full video length that is enough. It supports a few props, characters, infographic icons, animated maps, charts, etc.
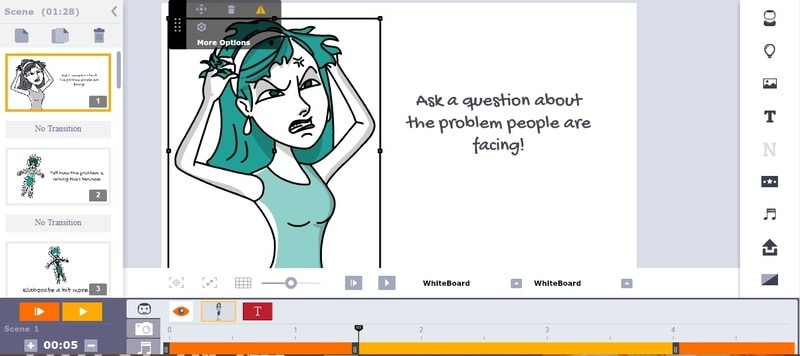
07Rawshorts Whiteboard Animation
This simple, easy-to-use whiteboard animation comes with an explainer video with a drag-and-drop interface. You can either start from nothing or choose between the animated whiteboard templates. Rendering and sharing the animated video in this software is super easy and comes with a Facebook, YouTube, and other social media platform integration. Anyone can use whether you are a beginner or professional, creating videos to show your client, training videos, and marketing videos that help demonstrate a strategy.
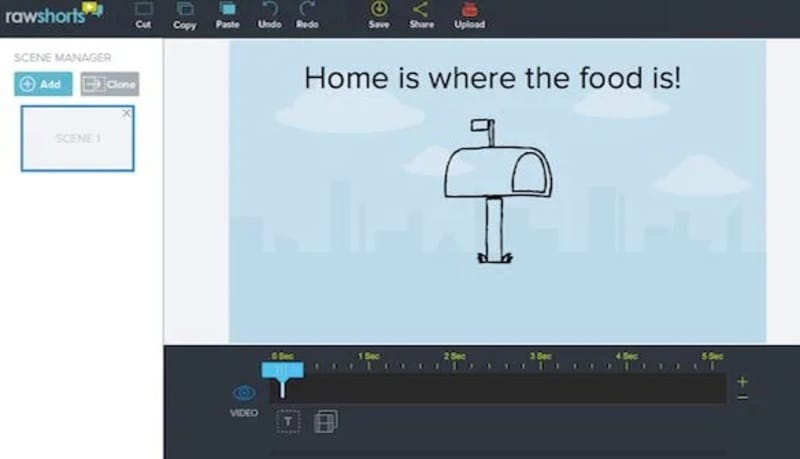
08Videojeeves Whiteboard Animation
This software has many whiteboard animation options, whether you are open to sharing something with your friends or creating a whiteboard animation for work. It helps to make your job easier and faster.
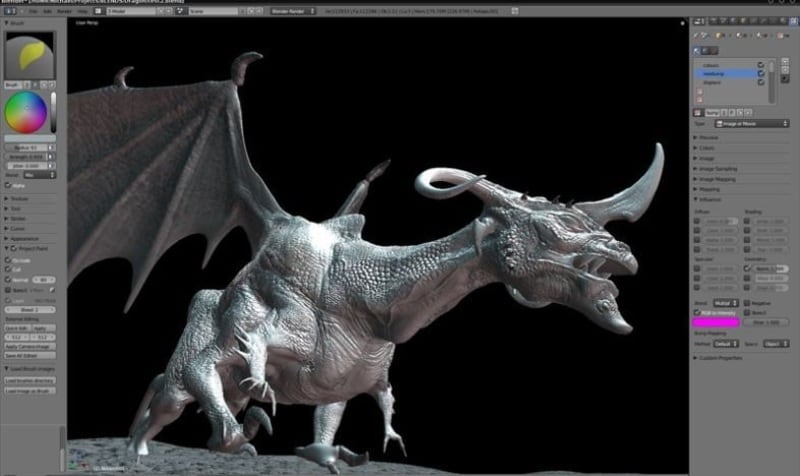
09Truscribe Whiteboard Animation
This premier software offers customers a dedicated plan when they are whiteboard animation videos can be created. With this software, the process can start when customers request a quote on their website, giving them more reliable information about the pricing and strategy.
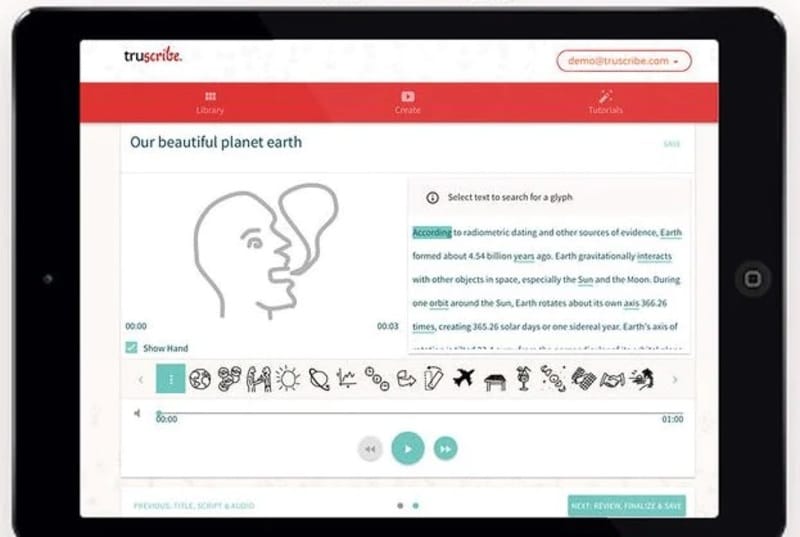
● Key Takeaways from This Episode →
● Basic functionality of Benime Whiteboard Animation software.
● How to create whiteboard animation with Benime.
● Whiteboard animation on PC with Filmora and some other relevant software.
Millions of people on social media would want to post the working system, information, and business policies on a topic. For this reason, such people need an easy way to make a good quality influential video in a short time. Although many applications can help you create animated videos.
In this article, we will be talking about whiteboard animation and, more specifically, about Benime whiteboard animation mod APK.
In this article
01 [What’s Benime Used for?](#Part 1)
02 [How to Create Benime Whiteboard Animation in Android](#Part 2)
Part 1 What’s Benime Used for?
Benime is the first doodle video creation application on Android devices that allows users to create professional and realistic doodle videos within minutes. It can add music and voice-over to audio, create presentations and marketing videos, and create a whiteboard animation using built-in assets.
One of the practical uses of Benime whiteboard animation is that it makes it very easy for anybody to create a professional whiteboard animation without any experience or knowledge in animation. With this application, you can use the built-in templates or decide to start from scratch using your drawings or images, then record yourself talking over the top of your work. It is one of the most active Android applications to explain ideas through a captivating animated video that can eventually increase your followers quickly.
It is used not just to explain information in an impersonal codon way but also to connect with your audience. By allowing your audience to show concern about what you are trying to showcase and evoking empathy.
It helps you get the audience to pay attention to the content you are creating by providing you with personalized graphics, colors, and images.
Benime is a great application that can help create an animated video using built-in assets. The application is flexible, user-friendly, and accessible via Benime whiteboard animation APK download. To download the Android application and make your desired video, you can also visit the Google play store to proceed with downloading the application as it contains advertisements and offers in-app purchases.
So, in short, we can say that Benime is valuable for,
● Whiteboard animation creation
● Inbuilt assets for video making
● Editing video with either voice, music, text, color
● Motion Slide animation
● Board background
● Supports online rendering of videos
● Instant preview functioning
● Sharing video in MP4 format
Part 2 How to Create Benime Whiteboard Animation in Android
We will also be giving you tips on all you need to know about creating a whiteboard animation:
● Write a script, whether it is a short script or a regular video. The whiteboard animation video might not succeed with exciting information and images and no coherent story. Since it is not a set of bullet points, storyboards, or blog stories, having a proper script is everything you need.
● Next is to start your storyboard to help you organize your thoughts much better. By creating a storyboard, you have a good idea of how the final product will look like and the transition of the story.
● Create memorable photos that will excite your audience. Perhaps if you are a creative person, this part will be much easier as all you need is to create a unique and fun image that will help pass the information that she wants to get across.
● Animates the created images and finds clearance between your script and the photos.
● Record the audio, which is the final step to ensure a perfectly synchronized audio and content.
Benime Whiteboard Animation application offers tons of features that can be used to enhance whiteboard animation creation. More so, here is a step-by-guide on how to use the Benime application more effectively and efficiently in creating a whiteboard animation:
01Software Download
First, download and install the Benime application on your phone and then open it.
02Create New Video
Click on the + sign to make a new video. Enter the video title, choose the desired video quality, and click Create a Movie.
03Enter Text
A blank slide will be visible, where you will make changes, tap the Text option to enter the text.
04Edit Text
After entering your desired text, click on the Insert option. The text size can be changeable by swiping to the left or right on the size line. More so, you can edit the color of the text by clicking on the color option. You can also change and use the application by clicking on the hand option. Background color change can go with the BG option.
If you want to insert some characters, drawings, pictures, etc. Click on the sticker option at the bottom left and then slide to the right at the top to choose the icon or image that you want to insert.
05Add Audio
After you are ok with the text and image, you can now add your voice over or music by clicking on any of the two options: voice over and music track.
05Create and Share your Video
Lastly, click on the Save icon and then click on Yes. Then insert the name of the video and click on Make movie. Instantly the video will enter the rendering mode, and after this process, you will get the option of playing and sharing the film. Select the one you wish.
Benime Whiteboard animation can also be on PC via varieties of software. However, the Filmora software has proven to be one of the best because of its features. While working or creating a storyboard, the most aptly used software is Filmora. That will make it easy to create whiteboard animation with lots and lots of editing options in terms of transparency, 2D/animation, smooth keyframing, and a lot more.
Part 3 PC Tools Useful For Whiteboard Animation
01Renderforest Whiteboard Animation
Renderforest whiteboard animation: This is a free whiteboard animation tool that creates exciting and unique animation stories, a cloud-based program that does not need a powerful machine. It weeds hundreds of ready-made scenes to enhance your whiteboard animation stories
02Powtoon Whiteboard Animation
This can make a whiteboard animation very quickly for free, with an object to touch up video and free royalty music to make your whiteboard animation perfect.
03Fiverr Whiteboard Animation
If looking for different whiteboard and animation explainers, Fiverr whiteboard animation will be the right choice. That will assist you in how to keep or engage your audience with proper explanation.
04Whiteboard Animation Videoscribe
Being in the education domain is a noble cause, and you can enhance the delivery of quality education through Whiteboard Animation Videoscribe. That will give you the freedom to modify your content with animation drawing. However, it is a subscription-based service.
05Vyond Whiteboard Animation
Vyond whiteboard animation provides you with in-house whiteboard animated video production solutions for educational, professional, or training purposes.
06Animaker Whiteboard Animation
This is another free whiteboard animation software used to make videos quickly with various functions. It includes a free-to-use option and a full video length that is enough. It supports a few props, characters, infographic icons, animated maps, charts, etc.
07Rawshorts Whiteboard Animation
This simple, easy-to-use whiteboard animation comes with an explainer video with a drag-and-drop interface. You can either start from nothing or choose between the animated whiteboard templates. Rendering and sharing the animated video in this software is super easy and comes with a Facebook, YouTube, and other social media platform integration. Anyone can use whether you are a beginner or professional, creating videos to show your client, training videos, and marketing videos that help demonstrate a strategy.
08Videojeeves Whiteboard Animation
This software has many whiteboard animation options, whether you are open to sharing something with your friends or creating a whiteboard animation for work. It helps to make your job easier and faster.
09Truscribe Whiteboard Animation
This premier software offers customers a dedicated plan when they are whiteboard animation videos can be created. With this software, the process can start when customers request a quote on their website, giving them more reliable information about the pricing and strategy.
● Key Takeaways from This Episode →
● Basic functionality of Benime Whiteboard Animation software.
● How to create whiteboard animation with Benime.
● Whiteboard animation on PC with Filmora and some other relevant software.
All About 3D Medical Animation
All About 3D Medical Animation And Its Uses
An easy yet powerful editor
Numerous effects to choose from
Detailed tutorials provided by the official channel
You can see the use of 3D animation in all spheres of life including the medical field. More and more professionals in the field of the healthcare industry are now using 3D animations for several different tasks like education, communication, marketing, and more.

So, if you too are keen to learn about 3D medical animation videos, their uses, popular companies, and other details, you are reading on the right page.
In this article
01 [What is 3D Medical Animation?](#Part 1)
02 [Uses of 3D Medical Animations](#Part 2)
03 [Benefits of Using 3D Medical Animations](#Part 3)
04 [Top 3D Animation Companies](#Part 4)
05 [The Best Tool to Edit Your 3D Medical Animated Video – Wondershare Filmora](#Part 4)
Part 1 What is 3D Medical Animation?
A 3D medical animation can be termed as an animation that is used for different tasks in the healthcare and medical industry. These animations are used for several different tasks like explaining and detailing the concepts to the patients, compelling the investors, training professionals, marketing devices and drugs, and more. Depending on the target audience, the animations can be created by taking the help of specialized industries or using animated software.
Part 2 Uses Of 3D Medical Animations
3D animations have proved to be useful in the healthcare and medical industry in several ways. Below we have gathered some of the key benefits of the same.
01Using As A Mode Of Communication With Patients
Communication with the patients is one of the major uses of 3D animation in the healthcare field. Using animations, the communication with the patients can be enhanced in several ways. Explaining complex medical conditions and procedures to patients is difficult and here the animations help to a great extent. Going through animation will make a patient well prepared to see the doctor and learn about his/her medical condition or procedure to be performed. Patients do not have medical knowledge and these animations help them to know their condition, scenario, and procedure in a simple way that they can understand.
02Training Of Medical Professionals
Medical professionals need to keep themselves updated with the latest trends and practices and for this, they need to undergo training from time to time. 3D animations for the topics to be studied help them in better understanding the concepts and the procedures. Moreover, animations also help in e-learning.
03Educating New Professionals
For the new students using 3D animations is a great way to teach complex medical topics which otherwise explaining them orally or visually are not that effective. Animations can be used to educate about different topics like the anatomy of a human body, medical procedures, drug mechanisms, use of devices, and more.
04Used As A Marketing Tool
Since the presentation of medical information is difficult, marketing in the healthcare industry is quite a challenge. Moreover, the investors do not possess any medical know-how and the task of marketing becomes even more difficult. Thus, using 3D medical animations can be helpful here to explain the products, devices, and other things. Marketing of medicines to patients can also be done using animated mascots and characters.
05Marketing To Medical Professional
While marketing products and devices to medical professionals is not difficult in terms of knowledge or know-how as they are from the medical background. But with multiple marketing teams approaching them, time is a limitation and thus presentation needs to be short yet informative which can be achieved through the use of animations. Moreover, these animations can be sent to professionals through emails or by sharing a website link.

Part 3 Benefits Of Using 3D Medical Animations
Above we have discussed several fields and uses of 3D medical animations. Several factors make these animations useful.
●Helps in offering an in-depth and detailed explanation of complex subjects.
●Offers broad scope of explanation and especially subjects that cannot be explained easily through images or orally.
●Visual presentations offer better recall of the topic and details.
●Engagement through animations is enhanced and better.
●3D medical animations look professional and thus appear to be more reliable.
●Animations can be created to cater to a wider audience and people for different subjects.
Part 4 Top 3D Animation Companies
Creating 3D medical animation is not like creating any other 3D animation as it not only requires technical know-how but also in-depth knowledge of the medical field. Thus, for creating 3D medical animations, take help from the companies that specialize in this field to create 3D medical animation videos. Below we have shortlisted some of the popular 3D medical animation company.
●DG Medical Animations
●The SGNY Group
●Fusion Medical Animation
●TMBA Inc
●Pixeldust Studios
●Indigo Productions
●Nanobot Medical Animation Studio
●MultiVision Digital
●ICom Creative
●INVIVO
●JLab Animation
These companies offer different 3D medical animation services and depending on your requirements, you can choose the best suitable one.

Part 5 The Best Tool To Edit Your 3d Medical Animated Video – Wondershare ** Wondershare Filmora Video Editor
Even if you have got a 3D medical animation video created by a professional company, several times, the need may arise to edit and customize it. In such situations, you would need a professional tool that can help in editing the video without affecting the quality and other details. Wondershare Wondershare Filmora Video Editor is one such excellent software that can be used for the task. This Windows and Mac-based tool comes with a feature-packed built-in editor that can let you edit the files quickly and in a hassle-free manner. Additionally, you can also create decent animations using multiple features of the software.
The interface is simple and user-friendly that making the task of video creation and editing simple.
Key features of the software
● Allows creating dynamic and lively videos using over 100 layers of media.
● Allows complete editing and customization of the video using the editor.
● Animations using keyframing and other features can be created.
● Enhance audio using features like background noise reduction, keyframe audio editing, audio equalizer, and more.
● Support to features likes stabilization, fisheye correction, speed controlling, advanced color correction, 3D LUTs, and more.
● Support to Windows and Mac.
For Win 7 or later (64-bit)
For macOS 10.12 or later
● Key Takeaways from This Episode →
● The use of 3D medical animation in the healthcare and medical industry has increased manifold.
● The 3D medical animations are used for communication with patients, training, marketing, educations, and other uses.
● Several professional and specialized industries can help you create 3D medical animations.
● To edit the created videos and create other decent ones, Wondershare Wondershare Filmora Video Editor works as a great option.
You can see the use of 3D animation in all spheres of life including the medical field. More and more professionals in the field of the healthcare industry are now using 3D animations for several different tasks like education, communication, marketing, and more.
So, if you too are keen to learn about 3D medical animation videos, their uses, popular companies, and other details, you are reading on the right page.
In this article
01 [What is 3D Medical Animation?](#Part 1)
02 [Uses of 3D Medical Animations](#Part 2)
03 [Benefits of Using 3D Medical Animations](#Part 3)
04 [Top 3D Animation Companies](#Part 4)
05 [The Best Tool to Edit Your 3D Medical Animated Video – Wondershare Filmora](#Part 4)
Part 1 What is 3D Medical Animation?
A 3D medical animation can be termed as an animation that is used for different tasks in the healthcare and medical industry. These animations are used for several different tasks like explaining and detailing the concepts to the patients, compelling the investors, training professionals, marketing devices and drugs, and more. Depending on the target audience, the animations can be created by taking the help of specialized industries or using animated software.
Part 2 Uses Of 3D Medical Animations
3D animations have proved to be useful in the healthcare and medical industry in several ways. Below we have gathered some of the key benefits of the same.
01Using As A Mode Of Communication With Patients
Communication with the patients is one of the major uses of 3D animation in the healthcare field. Using animations, the communication with the patients can be enhanced in several ways. Explaining complex medical conditions and procedures to patients is difficult and here the animations help to a great extent. Going through animation will make a patient well prepared to see the doctor and learn about his/her medical condition or procedure to be performed. Patients do not have medical knowledge and these animations help them to know their condition, scenario, and procedure in a simple way that they can understand.
02Training Of Medical Professionals
Medical professionals need to keep themselves updated with the latest trends and practices and for this, they need to undergo training from time to time. 3D animations for the topics to be studied help them in better understanding the concepts and the procedures. Moreover, animations also help in e-learning.
03Educating New Professionals
For the new students using 3D animations is a great way to teach complex medical topics which otherwise explaining them orally or visually are not that effective. Animations can be used to educate about different topics like the anatomy of a human body, medical procedures, drug mechanisms, use of devices, and more.
04Used As A Marketing Tool
Since the presentation of medical information is difficult, marketing in the healthcare industry is quite a challenge. Moreover, the investors do not possess any medical know-how and the task of marketing becomes even more difficult. Thus, using 3D medical animations can be helpful here to explain the products, devices, and other things. Marketing of medicines to patients can also be done using animated mascots and characters.
05Marketing To Medical Professional
While marketing products and devices to medical professionals is not difficult in terms of knowledge or know-how as they are from the medical background. But with multiple marketing teams approaching them, time is a limitation and thus presentation needs to be short yet informative which can be achieved through the use of animations. Moreover, these animations can be sent to professionals through emails or by sharing a website link.
Part 3 Benefits Of Using 3D Medical Animations
Above we have discussed several fields and uses of 3D medical animations. Several factors make these animations useful.
●Helps in offering an in-depth and detailed explanation of complex subjects.
●Offers broad scope of explanation and especially subjects that cannot be explained easily through images or orally.
●Visual presentations offer better recall of the topic and details.
●Engagement through animations is enhanced and better.
●3D medical animations look professional and thus appear to be more reliable.
●Animations can be created to cater to a wider audience and people for different subjects.
Part 4 Top 3D Animation Companies
Creating 3D medical animation is not like creating any other 3D animation as it not only requires technical know-how but also in-depth knowledge of the medical field. Thus, for creating 3D medical animations, take help from the companies that specialize in this field to create 3D medical animation videos. Below we have shortlisted some of the popular 3D medical animation company.
●DG Medical Animations
●The SGNY Group
●Fusion Medical Animation
●TMBA Inc
●Pixeldust Studios
●Indigo Productions
●Nanobot Medical Animation Studio
●MultiVision Digital
●ICom Creative
●INVIVO
●JLab Animation
These companies offer different 3D medical animation services and depending on your requirements, you can choose the best suitable one.
Part 5 The Best Tool To Edit Your 3d Medical Animated Video – Wondershare ** Wondershare Filmora Video Editor
Even if you have got a 3D medical animation video created by a professional company, several times, the need may arise to edit and customize it. In such situations, you would need a professional tool that can help in editing the video without affecting the quality and other details. Wondershare Wondershare Filmora Video Editor is one such excellent software that can be used for the task. This Windows and Mac-based tool comes with a feature-packed built-in editor that can let you edit the files quickly and in a hassle-free manner. Additionally, you can also create decent animations using multiple features of the software.
The interface is simple and user-friendly that making the task of video creation and editing simple.
Key features of the software
● Allows creating dynamic and lively videos using over 100 layers of media.
● Allows complete editing and customization of the video using the editor.
● Animations using keyframing and other features can be created.
● Enhance audio using features like background noise reduction, keyframe audio editing, audio equalizer, and more.
● Support to features likes stabilization, fisheye correction, speed controlling, advanced color correction, 3D LUTs, and more.
● Support to Windows and Mac.
For Win 7 or later (64-bit)
For macOS 10.12 or later
● Key Takeaways from This Episode →
● The use of 3D medical animation in the healthcare and medical industry has increased manifold.
● The 3D medical animations are used for communication with patients, training, marketing, educations, and other uses.
● Several professional and specialized industries can help you create 3D medical animations.
● To edit the created videos and create other decent ones, Wondershare Wondershare Filmora Video Editor works as a great option.
How to Cartoonize Photo Photoshop in Simple Steps
How to Cartoonize Photo Photoshop in Easy Steps
An easy yet powerful editor
Numerous effects to choose from
Detailed tutorials provided by the official channel
Cartoons, an already catchy entertainment source, can upgrade other media utilities on integration. Look through the easiest ways of creating cartoonize photo Photoshop stills!
In this article
01 [Types of Cartoon Effects in Photoshop](#Part 1)
02 [Easiest Ways to Cartoonize Photo in Photoshop](#Part 2)
03 [How to Use a Variety of Photoshop Special Effects to Create the Final Caricature Look](#Part 3)
Part 1 Types of Cartoon Effects in Photoshop
It is an absolute fun activity to explore your editing creativity in the realm of cartoonizing the otherwise ordinary still captures. Talking of the most convenient cartoon creator and editor applications, you can safely rely on the Photoshop Image Editor application to choose from a pool of cartoon editing effects for adding that spunky and funny element to your image files.
Presented in the following section, is a discussion of some of the most stunning and visibly amazing cartoon effects in the application’s Editor Library to cartoonize Photoshop images:
01Pop Art Photoshop Action
The effect is a predominantly preferred as a cartoon action Photoshop utility to caricaturize a normal image, along with customizing the same to change the colors and background of the original still capture for creating a brand new appearance with utmost ease. Apart from this, the aforesaid effect allows you to exclusively customize the globally acclaimed graphic masterpieces of Roy Lichtenstein. Working with the effect, you can edit a self-portrait or the favorite image of your pet to give the latter, a funny retro feel.

02Vintage Comic Creator
If the idea of sticking to just the creation of cartoon images is not enough to satisfy you, the Vintage Comic Creator effect allows you to expand your creativity level to work on cartoon based shape and text edits. You can use the effect to enhance an image logo or plain text with a comic book oriented text. A download of this cartoon effect template facilitates you with diversities of customizable layer styles, overlays and patterns.

03GTA Photoshop Action
This is a complete pleasure for the creative fan of Grand Theft Auto, the wicked chasing game series. Additional to creating a stark variety of edited cartoon stills, you are free to reinvent the aforesaid game’s most popular caricature edits, while using the GTA Photoshop Action editing filter. Launched by Indworks, the effect package consisting of 15 vibrant themes and 5 collage templates; promises a quick mimicry of your most cherished video and console games.

04Vector Paint Photoshop Action
The one is an amazing Photoshop effect for creating cartoon edits, which works through a merger of two different ingenious art themes or styles for transforming basic images into cartoonized stills.
The effect grants you the liberty to use varieties of art styles, such as, comic, photo retouching and energetic oil to obtain editing results comparable to that of any original photograph. The template is conveniently simple to use and assures you of quick results. All this, just at a nominal price of $6! Interesting, right?

05Ultra Realistic 3D Space Effect
Considering the fact of you being a space admirer, this one is the perfect image editor for you to add the vibrancy of stunning space elements and backgrounds within your cartoonized edits. The effect lets you play with the diverse range of customizable text and exciting caricature backgrounds. When downloading the template, you get a main setup file, a few editing examples and a web link to the free fonts present in the effect.

06Animated Zombie Grime Art Photoshop Action
Are you in love with the latest zombie grimes? If yes, then this action set is exclusive editor package for you. Working with the aforesaid image template, you can effortlessly add the perfect zombie theme to your cartoon edits, along with simultaneously creating a stunning animation, which you can use to enhance your video or GIF uploads on social media. Not forgetting the best part, you get a free access to this amazing utility.

Part 2 Easiest Ways to Cartoonize Photo in Photoshop
Having known about the amazing varieties of cartoonized editor templates in Photoshop, it is a natural instinct to feel motivated to create your own caricature images from normal capture stills. Addressing the concern of image transformation methods to turn a photo into a cartoon Photoshop, let us dive into some of the most affordable methods of creating cartoonized photos in the aforesaid editing application.
Talking of the most basic Photoshop tools for creating caricature images, you can start your editing spree with using the Graphic Tablet, Brush Tool, Layer Masks and a graphic pen to create amateur cartoonized edits from your still photographs, getting a full control on image tracing.
01Brush Tool
A few usage examples include working with a combination of the graphic tablet pen and the editor brushes to trace your image, using the brush in a masked or a fresh layer to avoid altering the actual image, and much more.
02Graphic Tablet
It is best to use the Photoshop Graphic Tablet for adhering to the concern of tracing cartoonized images. You can alternatively cater to the job with a trackpad, mouse, or even your hand. It is however, difficult to assure steady hand postures for image tracing, lest you are using a stylus pen.
03Pen Tool
Using the Pen Tool for cartoonizing your portrait, allows you to draw outlines along the desired figure within the image, along with its important elements, so that you can easily use these outlined paths to introduce different color blocks.
Similar to the Brush Tool, the Photoshop Pen utility grants you the freedom to vary the degree of detailing in your cartoon edit, from being highly expressive to only remaining around the shore. Working with the Pen Tool can, however be a bit tiring and time taking, with respect to the extent of detailing you wish to add to the caricature edits.
Additional to the aforementioned tools, you can also consider using the default image filters of the Photoshop application to get comparable results. This is an exclusively better option to choose, compared to the Pen Tool, when you are working without a Graphic Tablet. To get over the top realistic caricature renderings, you will need to supplement the use of Photoshop filters with the application’s editing channels and other adjustments.
Part 3 How to Use a Variety of Photoshop Special Effects to Create the Final Caricature Look
Considering the extensive discussion on the credibility of the Photoshop Image Editor application in the realm of creating stunning caricature images in high end resolution, let us proceed to learn about using the diversity of Photoshop’s special effects to get the last stage cartoonized appearance of ordinary still images.
User’s Guide to Create High End Cartoonized Look
The following tutorial is a stepwise explanation of the process to convert photo into cartoon Photoshop in the easiest possible way. Stick to the method for getting affordable results in a quick span.
Step 1: Download and Launch the Program
Visit the official website of Photoshop Image Editor for a free download of the software program in your system, followed by installing and launching the same in your device.
Step 2: Upload Your Image
On a successful launch of the editor program, you will be directed to the ‘Photoshop Editor’ window, where you are required to upload any desired still image from your device for creating a cartoonized edit. To do this, either simply add your image to the editor workspace using the ‘Drag and Drop’ method, or navigate to the ‘File’ tab in the top toolbar and click on ‘Open’ in the dropdown menu.
Step 3: Edge Enhancement
Once your image appears in the editor timeline, proceed to sharpen the edges of the face and body of the portrait. Start with navigating to and clicking on the ‘Filter’ option, followed by tapping on ‘Filter Gallery’ and selecting the ‘Artistic’ folder, where you need to choose the ‘Poster Edges’ option. Observe the effect of these setting on the portrait and make necessary changes.

Step 4: Background Setting
Ensure that the background and foreground of your image are set to white and black colors respectively. If not, proceed to adjust the same as required.

Step 5: Distorting the Edges
You now need to introduce some distortion in the edges of your portrait. Navigate to the ‘Filter’ option again, open the ‘Filter Gallery’ and choose ‘Torn Edges’ from the menu that drops down. Select the desired parameter values in accordance with your creative suitability.


Step 6: Using the Channels Panel
The next step is to select and copy your portrait using the ‘Ctrl + A’ and Ctrl + C commands respectively. Navigate to the ‘Channels’ panel at the right of the Photoshop workspace. At the panel’s bottom right, proceed with creating a new channel. It will be assigned the name ‘Alpha 1’ by Photoshop, which you are most welcome to change.


Step 7: Color Inversion
When you finish creating the channel, use the ‘Ctrl + V’ command to paste your portrait in the same. Proceed with inverting the image colors by navigating to the ‘Image’ option, followed by choosing the ‘Adjustment’ and ‘Invert’ options from the consecutive drop downs. Now, make a selection of the ‘White’ regions of your portrait by pressing the ‘Ctrl’ key and clicking on the ‘Alpha 1 Channel thumbnail.

Step 8: Layer Creation
Navigate to the ‘Layers’ panel at the right of the Photoshop workspace, and click on the ‘New Layer’ icon for creating a fresh layer. Fill the just created layer with black color, either by pressing ‘g’ from your system’s keyboard, or using the ‘Paint Bucket’ tool. Don’t forget to assign a suitable name to the layer.

Repeat the above process to create a separate layer and e fill the same with white color. The layer creation process is essential to separate the white and black colors of the actual image.

Step 10: Layer Dragging
In the ‘Layers’ panel, drag the ‘Black’ layer above the ‘White’ one.

Step 11: Creating Additional Layers
You are now required to create three more layers, with the same process as for the above two, for adding effects to the Skin, Clothes and Teeth/Eyes of the portrait. When you finish creation, assign suitable names to the layers, followed by dragging them below the ‘Black’ one within the ‘Layers’ panel.

Step 12: Color Selection and Application
Choose the respective colors for the clothes, skin and teeth/eyes of the cartoonized edit. To proceed with color application, navigate to the toolbar at the left of the Photoshop workspace and choose the ‘Brush Tool’. Finally, choose a particular layer and apply careful brush strokes to add color to the specific area of the portrait that you wish to edit. Follow the same process to add colors to the remaining layers to get the desired result in all areas of your cartoonized edit.

Step 13: Using the Gradient Tool
Navigate to the ‘Layers’ panel again and create a new ‘Gradient’ layer to further enhance your creation. You now need to select the ‘Gradient Tool’ from the toolbar at the left of the Photoshop workspace. The ‘Gradient Editor’ pops up with the continuously running ‘Gradient Bar’, as soon as you make the selection. Double click on the gradient boxes at both ends to select them, followed by making your color choices. Tap on ‘OK’ when you are satisfied with your work.

Step 14: Filling the Gradients
To proceed with gradient filling, press and hold the mouse button on the image at the bottom left and continue to drag the cursor to its top right corner. Leave the mouse and navigate to the ‘Layers’ panel for dragging and dropping the ‘Gradient’ layer above the ‘White’ layer.

You are now done with the process of creating a caricature edit from a normal still portrait. Your final image output will appear something like the following:

Cartoons, an already catchy entertainment source, can upgrade other media utilities on integration. Look through the easiest ways of creating cartoonize photo Photoshop stills!
In this article
01 [Types of Cartoon Effects in Photoshop](#Part 1)
02 [Easiest Ways to Cartoonize Photo in Photoshop](#Part 2)
03 [How to Use a Variety of Photoshop Special Effects to Create the Final Caricature Look](#Part 3)
Part 1 Types of Cartoon Effects in Photoshop
It is an absolute fun activity to explore your editing creativity in the realm of cartoonizing the otherwise ordinary still captures. Talking of the most convenient cartoon creator and editor applications, you can safely rely on the Photoshop Image Editor application to choose from a pool of cartoon editing effects for adding that spunky and funny element to your image files.
Presented in the following section, is a discussion of some of the most stunning and visibly amazing cartoon effects in the application’s Editor Library to cartoonize Photoshop images:
01Pop Art Photoshop Action
The effect is a predominantly preferred as a cartoon action Photoshop utility to caricaturize a normal image, along with customizing the same to change the colors and background of the original still capture for creating a brand new appearance with utmost ease. Apart from this, the aforesaid effect allows you to exclusively customize the globally acclaimed graphic masterpieces of Roy Lichtenstein. Working with the effect, you can edit a self-portrait or the favorite image of your pet to give the latter, a funny retro feel.
02Vintage Comic Creator
If the idea of sticking to just the creation of cartoon images is not enough to satisfy you, the Vintage Comic Creator effect allows you to expand your creativity level to work on cartoon based shape and text edits. You can use the effect to enhance an image logo or plain text with a comic book oriented text. A download of this cartoon effect template facilitates you with diversities of customizable layer styles, overlays and patterns.
03GTA Photoshop Action
This is a complete pleasure for the creative fan of Grand Theft Auto, the wicked chasing game series. Additional to creating a stark variety of edited cartoon stills, you are free to reinvent the aforesaid game’s most popular caricature edits, while using the GTA Photoshop Action editing filter. Launched by Indworks, the effect package consisting of 15 vibrant themes and 5 collage templates; promises a quick mimicry of your most cherished video and console games.
04Vector Paint Photoshop Action
The one is an amazing Photoshop effect for creating cartoon edits, which works through a merger of two different ingenious art themes or styles for transforming basic images into cartoonized stills.
The effect grants you the liberty to use varieties of art styles, such as, comic, photo retouching and energetic oil to obtain editing results comparable to that of any original photograph. The template is conveniently simple to use and assures you of quick results. All this, just at a nominal price of $6! Interesting, right?
05Ultra Realistic 3D Space Effect
Considering the fact of you being a space admirer, this one is the perfect image editor for you to add the vibrancy of stunning space elements and backgrounds within your cartoonized edits. The effect lets you play with the diverse range of customizable text and exciting caricature backgrounds. When downloading the template, you get a main setup file, a few editing examples and a web link to the free fonts present in the effect.
06Animated Zombie Grime Art Photoshop Action
Are you in love with the latest zombie grimes? If yes, then this action set is exclusive editor package for you. Working with the aforesaid image template, you can effortlessly add the perfect zombie theme to your cartoon edits, along with simultaneously creating a stunning animation, which you can use to enhance your video or GIF uploads on social media. Not forgetting the best part, you get a free access to this amazing utility.
Part 2 Easiest Ways to Cartoonize Photo in Photoshop
Having known about the amazing varieties of cartoonized editor templates in Photoshop, it is a natural instinct to feel motivated to create your own caricature images from normal capture stills. Addressing the concern of image transformation methods to turn a photo into a cartoon Photoshop, let us dive into some of the most affordable methods of creating cartoonized photos in the aforesaid editing application.
Talking of the most basic Photoshop tools for creating caricature images, you can start your editing spree with using the Graphic Tablet, Brush Tool, Layer Masks and a graphic pen to create amateur cartoonized edits from your still photographs, getting a full control on image tracing.
01Brush Tool
A few usage examples include working with a combination of the graphic tablet pen and the editor brushes to trace your image, using the brush in a masked or a fresh layer to avoid altering the actual image, and much more.
02Graphic Tablet
It is best to use the Photoshop Graphic Tablet for adhering to the concern of tracing cartoonized images. You can alternatively cater to the job with a trackpad, mouse, or even your hand. It is however, difficult to assure steady hand postures for image tracing, lest you are using a stylus pen.
03Pen Tool
Using the Pen Tool for cartoonizing your portrait, allows you to draw outlines along the desired figure within the image, along with its important elements, so that you can easily use these outlined paths to introduce different color blocks.
Similar to the Brush Tool, the Photoshop Pen utility grants you the freedom to vary the degree of detailing in your cartoon edit, from being highly expressive to only remaining around the shore. Working with the Pen Tool can, however be a bit tiring and time taking, with respect to the extent of detailing you wish to add to the caricature edits.
Additional to the aforementioned tools, you can also consider using the default image filters of the Photoshop application to get comparable results. This is an exclusively better option to choose, compared to the Pen Tool, when you are working without a Graphic Tablet. To get over the top realistic caricature renderings, you will need to supplement the use of Photoshop filters with the application’s editing channels and other adjustments.
Part 3 How to Use a Variety of Photoshop Special Effects to Create the Final Caricature Look
Considering the extensive discussion on the credibility of the Photoshop Image Editor application in the realm of creating stunning caricature images in high end resolution, let us proceed to learn about using the diversity of Photoshop’s special effects to get the last stage cartoonized appearance of ordinary still images.
User’s Guide to Create High End Cartoonized Look
The following tutorial is a stepwise explanation of the process to convert photo into cartoon Photoshop in the easiest possible way. Stick to the method for getting affordable results in a quick span.
Step 1: Download and Launch the Program
Visit the official website of Photoshop Image Editor for a free download of the software program in your system, followed by installing and launching the same in your device.
Step 2: Upload Your Image
On a successful launch of the editor program, you will be directed to the ‘Photoshop Editor’ window, where you are required to upload any desired still image from your device for creating a cartoonized edit. To do this, either simply add your image to the editor workspace using the ‘Drag and Drop’ method, or navigate to the ‘File’ tab in the top toolbar and click on ‘Open’ in the dropdown menu.
Step 3: Edge Enhancement
Once your image appears in the editor timeline, proceed to sharpen the edges of the face and body of the portrait. Start with navigating to and clicking on the ‘Filter’ option, followed by tapping on ‘Filter Gallery’ and selecting the ‘Artistic’ folder, where you need to choose the ‘Poster Edges’ option. Observe the effect of these setting on the portrait and make necessary changes.
Step 4: Background Setting
Ensure that the background and foreground of your image are set to white and black colors respectively. If not, proceed to adjust the same as required.
Step 5: Distorting the Edges
You now need to introduce some distortion in the edges of your portrait. Navigate to the ‘Filter’ option again, open the ‘Filter Gallery’ and choose ‘Torn Edges’ from the menu that drops down. Select the desired parameter values in accordance with your creative suitability.
Step 6: Using the Channels Panel
The next step is to select and copy your portrait using the ‘Ctrl + A’ and Ctrl + C commands respectively. Navigate to the ‘Channels’ panel at the right of the Photoshop workspace. At the panel’s bottom right, proceed with creating a new channel. It will be assigned the name ‘Alpha 1’ by Photoshop, which you are most welcome to change.
Step 7: Color Inversion
When you finish creating the channel, use the ‘Ctrl + V’ command to paste your portrait in the same. Proceed with inverting the image colors by navigating to the ‘Image’ option, followed by choosing the ‘Adjustment’ and ‘Invert’ options from the consecutive drop downs. Now, make a selection of the ‘White’ regions of your portrait by pressing the ‘Ctrl’ key and clicking on the ‘Alpha 1 Channel thumbnail.
Step 8: Layer Creation
Navigate to the ‘Layers’ panel at the right of the Photoshop workspace, and click on the ‘New Layer’ icon for creating a fresh layer. Fill the just created layer with black color, either by pressing ‘g’ from your system’s keyboard, or using the ‘Paint Bucket’ tool. Don’t forget to assign a suitable name to the layer.
Repeat the above process to create a separate layer and e fill the same with white color. The layer creation process is essential to separate the white and black colors of the actual image.
Step 10: Layer Dragging
In the ‘Layers’ panel, drag the ‘Black’ layer above the ‘White’ one.
Step 11: Creating Additional Layers
You are now required to create three more layers, with the same process as for the above two, for adding effects to the Skin, Clothes and Teeth/Eyes of the portrait. When you finish creation, assign suitable names to the layers, followed by dragging them below the ‘Black’ one within the ‘Layers’ panel.
Step 12: Color Selection and Application
Choose the respective colors for the clothes, skin and teeth/eyes of the cartoonized edit. To proceed with color application, navigate to the toolbar at the left of the Photoshop workspace and choose the ‘Brush Tool’. Finally, choose a particular layer and apply careful brush strokes to add color to the specific area of the portrait that you wish to edit. Follow the same process to add colors to the remaining layers to get the desired result in all areas of your cartoonized edit.
Step 13: Using the Gradient Tool
Navigate to the ‘Layers’ panel again and create a new ‘Gradient’ layer to further enhance your creation. You now need to select the ‘Gradient Tool’ from the toolbar at the left of the Photoshop workspace. The ‘Gradient Editor’ pops up with the continuously running ‘Gradient Bar’, as soon as you make the selection. Double click on the gradient boxes at both ends to select them, followed by making your color choices. Tap on ‘OK’ when you are satisfied with your work.
Step 14: Filling the Gradients
To proceed with gradient filling, press and hold the mouse button on the image at the bottom left and continue to drag the cursor to its top right corner. Leave the mouse and navigate to the ‘Layers’ panel for dragging and dropping the ‘Gradient’ layer above the ‘White’ layer.
You are now done with the process of creating a caricature edit from a normal still portrait. Your final image output will appear something like the following:
Top 10 Websites to Download Anime Subtitles for Free
Top 10 Websites to Download Anime Subtitles for Free

Shanoon Cox
Mar 27, 2024• Proven solutions
Subtitles are sometimes a distraction, but one cannot deny the fact that English anime subtitles are best for understanding a video properly in a different language. To watch your favorite Anime series, you would need to download anime subtitles. The idea behind anime subtitles is to not bind an anime series in a different language. In this article, you will learn about a few websites to download English as well as Japanese anime subtitles for free. When a dubbed version of your favorite anime series is not available you would simply need to put subtitles at work. Let’s dive into the article and find some exciting websites to download anime subtitles. You are going to learn:
- Part 1: Top10 Websites to Download Anime Subtitles
- Part 2: The Best Video Editor to Add Subtitles to an Anime
You may also like:
- Best Free Anime Streaming Sites to Download Anime
- Best Anime Series of All Time
- Top 4 Websites to Get Anime Footage for Free
Part 1: Top 10 Websites to Download Anime Subtitles
Here is a list of some amazing websites that have all the anime subtitles you can download at the moment. The best part about this guide is that it provides you with not only the anime English subtitles but also the entire anime series that you can download and watch.
- 1. OpenSubtitles
- 2. Kitsunekho
- 3. Subscene
- 4. SubDb
- 5. Addic7ed
- 6. Subtitles.hr
- 7. iSubtitles
- 8. Animetosho
- 9. CD Japan
- 10. AniSubs
1. OpenSubtitles
OpenSubtitles is one of the topmost subtitle websites where you can find all the latest as well old subtitles in multi-languages. The site is very normal in terms of the interface and looks like an old school website however the archives are huge. You can easily download anime subtitles from this website by clicking on the anime or series name and then click on the download option. It might ask you simple questions or to fill the captcha as a standard security check but that will be smooth.
The site is good, but sometimes the ads might annoy you a bit if you don’t like to surf a webpage with ads. And you need to become their VIP member to get rid of the annoying ads.
2. Kitsunekho
This is one of the best websites to download anime subtitles in different languages for free. The simple and easy interface lets you select from multiple options and series online. You can click on the series name and download the subtitle file in just a click. One can download subtitles in English, Japanese, Chinese and Korean language without going much deeper into finding the language options. All the subtitles are aggregated according to genre and language.
The interface of this website is super smooth, and there are no ads to annoy you.
3. Subscene
If you are looking for movies and anime at the same time so Subscene is a great website to download subtitles. One can easily download anime subtitles by searching their favorite series on the search bar and clicking on it to get the download options. Language is no bar on this website as almost all the languages are covered. The best part is that when you click on a series name your screen will get flooded with a lot of random subtitles in different languages.

Apart from some ads, the website is awesome.
4. SubDb
Subb is an open-source and free website with a huge database of subtitles. Being an open-source website, it’s a peer-to-peer network on which both the uploads and downloads are made by the user. This website has subtitles in different languages like English, Espanol, Italiano, Polski, and many more. You can only download the subtitles if you know how to run an API on your system.
The website is good but there is no search bar and a newbie with no tech knowledge cannot look for any file on this website.
5. Addic7ed
As the name suggests, you might get addicted to this site because of the multiple collections it has to download subtitles. You can download the subtitles on this website by clicking on the series name and there would be different subtitle files in many languages to download. There are many languages supported such as Japanese, English, Arabic, and many more to download subtitles.
The website has some good collections but the lack of search bar and too many irrelevant ads might irritate you.
6. Subtitles. hr
If you are looking for videos, software, and subtitles simultaneously, then Subtitles. hr is a great website where you can download subtitles in different languages. The concept of this website is also useful to the user where people upload the content and consume it. One can easily download the subtitles by clicking on the download button given on the website.
The website is good however the language icons are very small to recognize and it becomes difficult for a person to detect what exactly they are downloading.
7. iSubtitles
iSubtitles is a free website to download subtitles of your favorite anime series and movies. The website looks simple and has a search bar to put queries and get the result. Subtitles here are available in different languages from Arabic to Parsi and English to Japanese. Subtitle files are very easy to download as you only need to click on the anime series name and all the formats and languages available will be provided to you.
The website is good however there are a lot of ads to disturb you.
8. Animetosho
Animetosho is an old-school kind of website but the information here to vast to share. The website has a huge library of anime series, and you can download the entire anime series with all the subtitles on torrent/magnet. You can download the file and all the subtitle files are included in the same file.
There is a lot of information but it might look spammy to new users who are new to the internet industry.
9. CD Japan
This is a multi-niche website that covers content niches such as Music, Lifestyle, Anime, Apparel, and much more. The content on this website is more than huge and if you want to download anime subtitles then you might have to use the search bar or look for the anime tab on the menu. There is a lot of anime series in multiple languages available on this website.
Most of the anime series available here are paid and you need to purchase them to watch.
10. AniSubs
This website is only dedicated to download anime subtitles and you can find a lot of subtitle files here absolutely free. You can simply click on the anime series name and click on the download button to directly open the file into Google Drive or download it as a file on your computer. This site has subtitles in multiple languages depending upon the type and genre of anime series.

The website is good however a lot of ads might confuse you to differentiate between ads and content.
Part 2: The Best Video Editor to Add Subtitles to an Anime Video
Filmora is a great tool with endless effects and different ways to express creativity. Loaded with a lot of filters, overlays, transitions, video stabilization, and a lot of other features to create an amazing video. In terms of Anime, there is a lot of wonderful animation tool that you can use to add transitions and subtitles to your anime video. And Filmora has timeline-based video editing that allows you to drag and drop everything on the timeline and export the file to your computer or directly upload it to your YouTube Channel.
Step by step guide to add subtitles with Wondershare Filmora:
Step 1: Download and install Wondershare Filmora on your computer. Filmora is compatible with both Windows and macOS. To learn more about Filmora, you can visit Wondershare Video Community . If you don’t have time to read the text, just watch the below videos.


Step 2: To start with the editing and adding subtitles, import your anime video file by clicking on Import to upload media files. Then drop and drag it to the timeline.
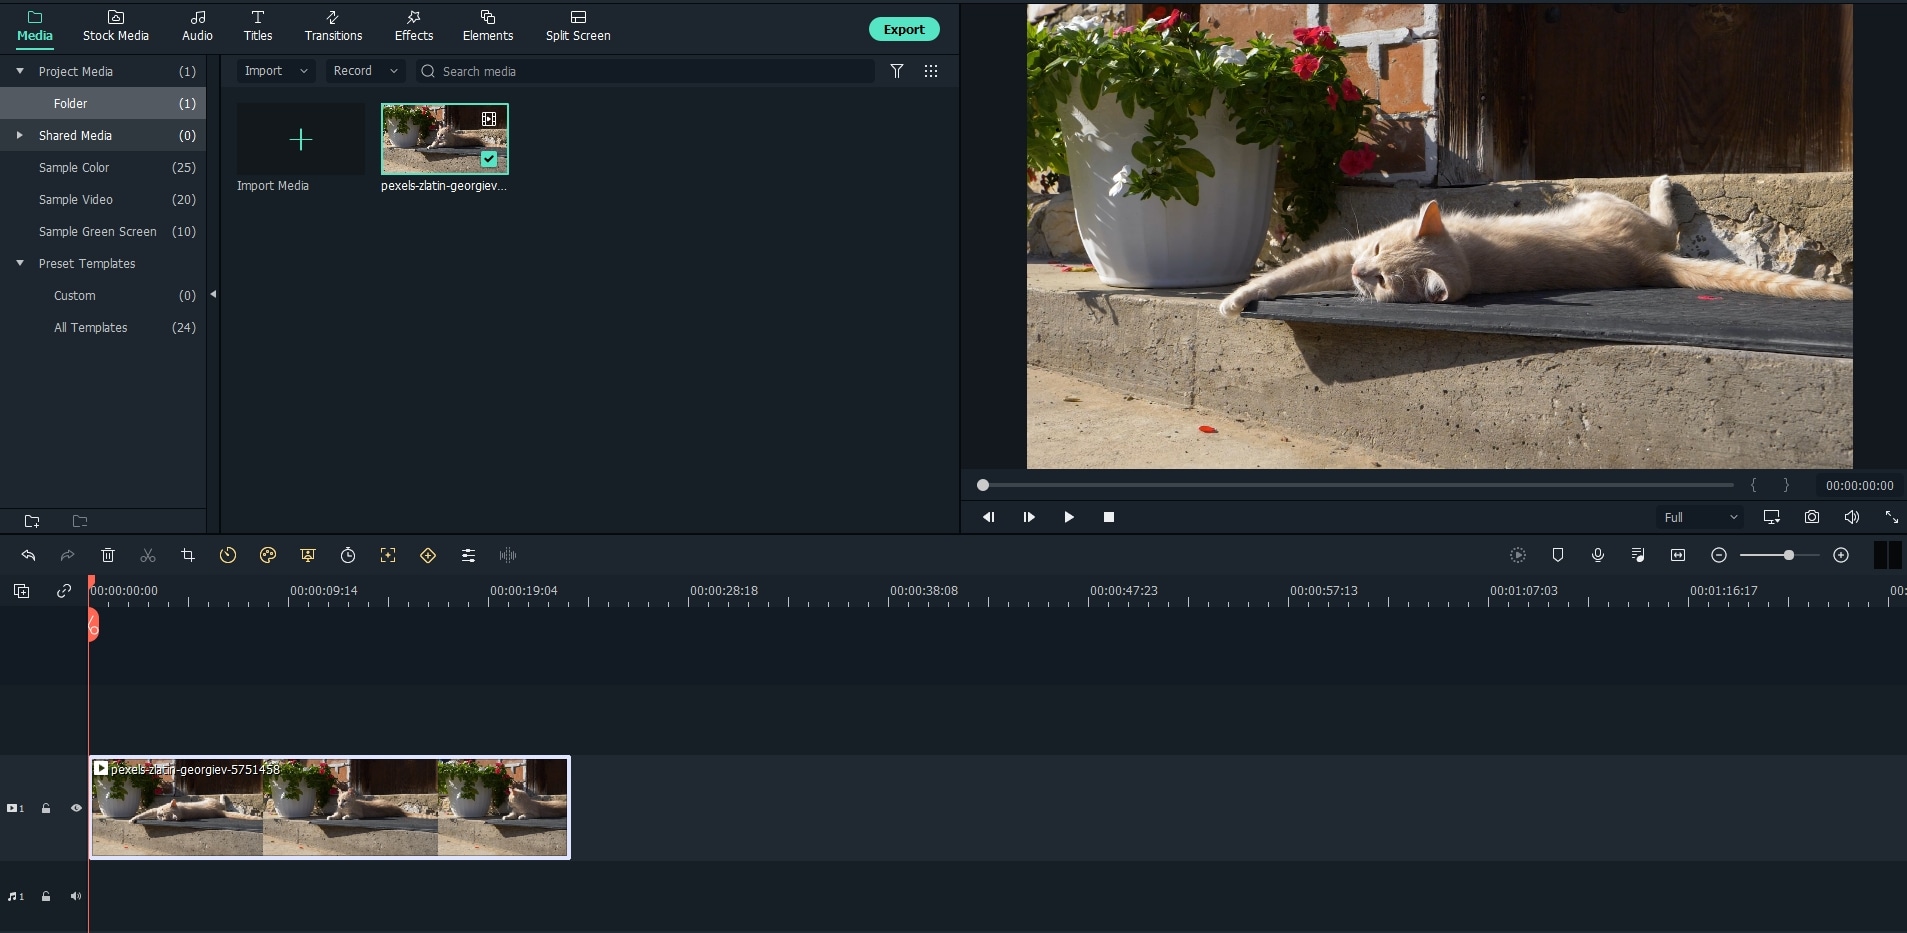
Step 3: Now, go to the Titles tab and select the template that you want to use on your video for subtitles. You can easily drag and drop your favorite template and start editing the text that you want to publish on your video. There are several text editing templates that you can use here.
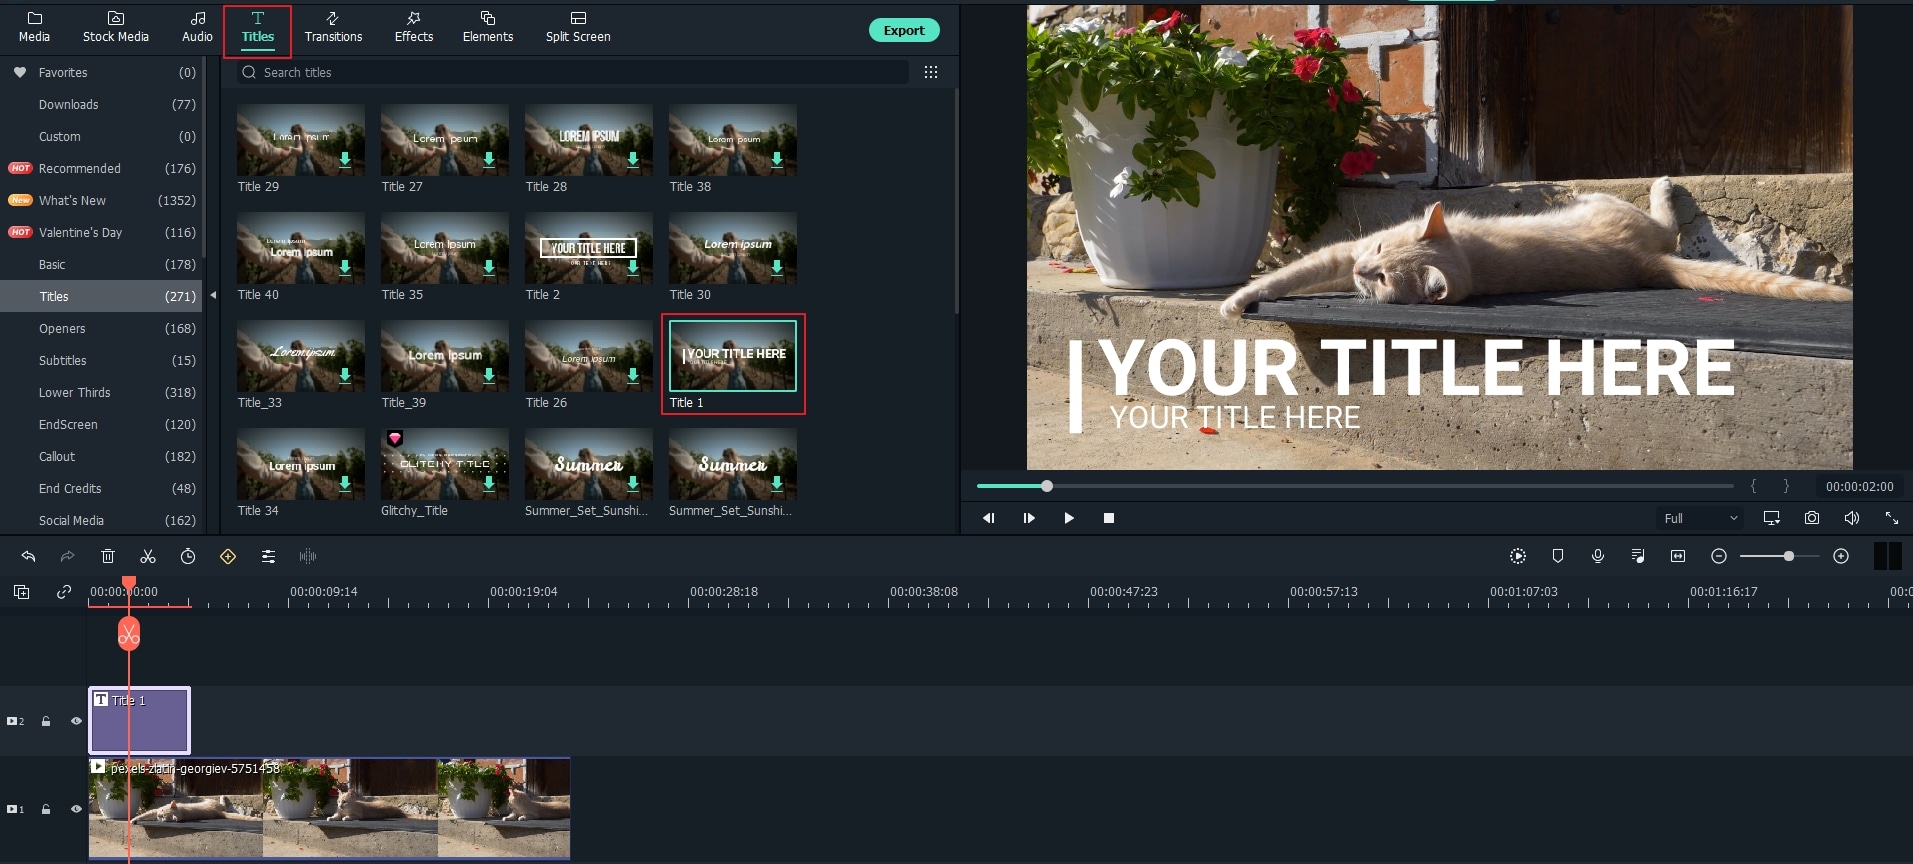
Step 4: If you want to add your own texts then double click on the Text on the timeline and input your text with colors, fonts, style, and animations.
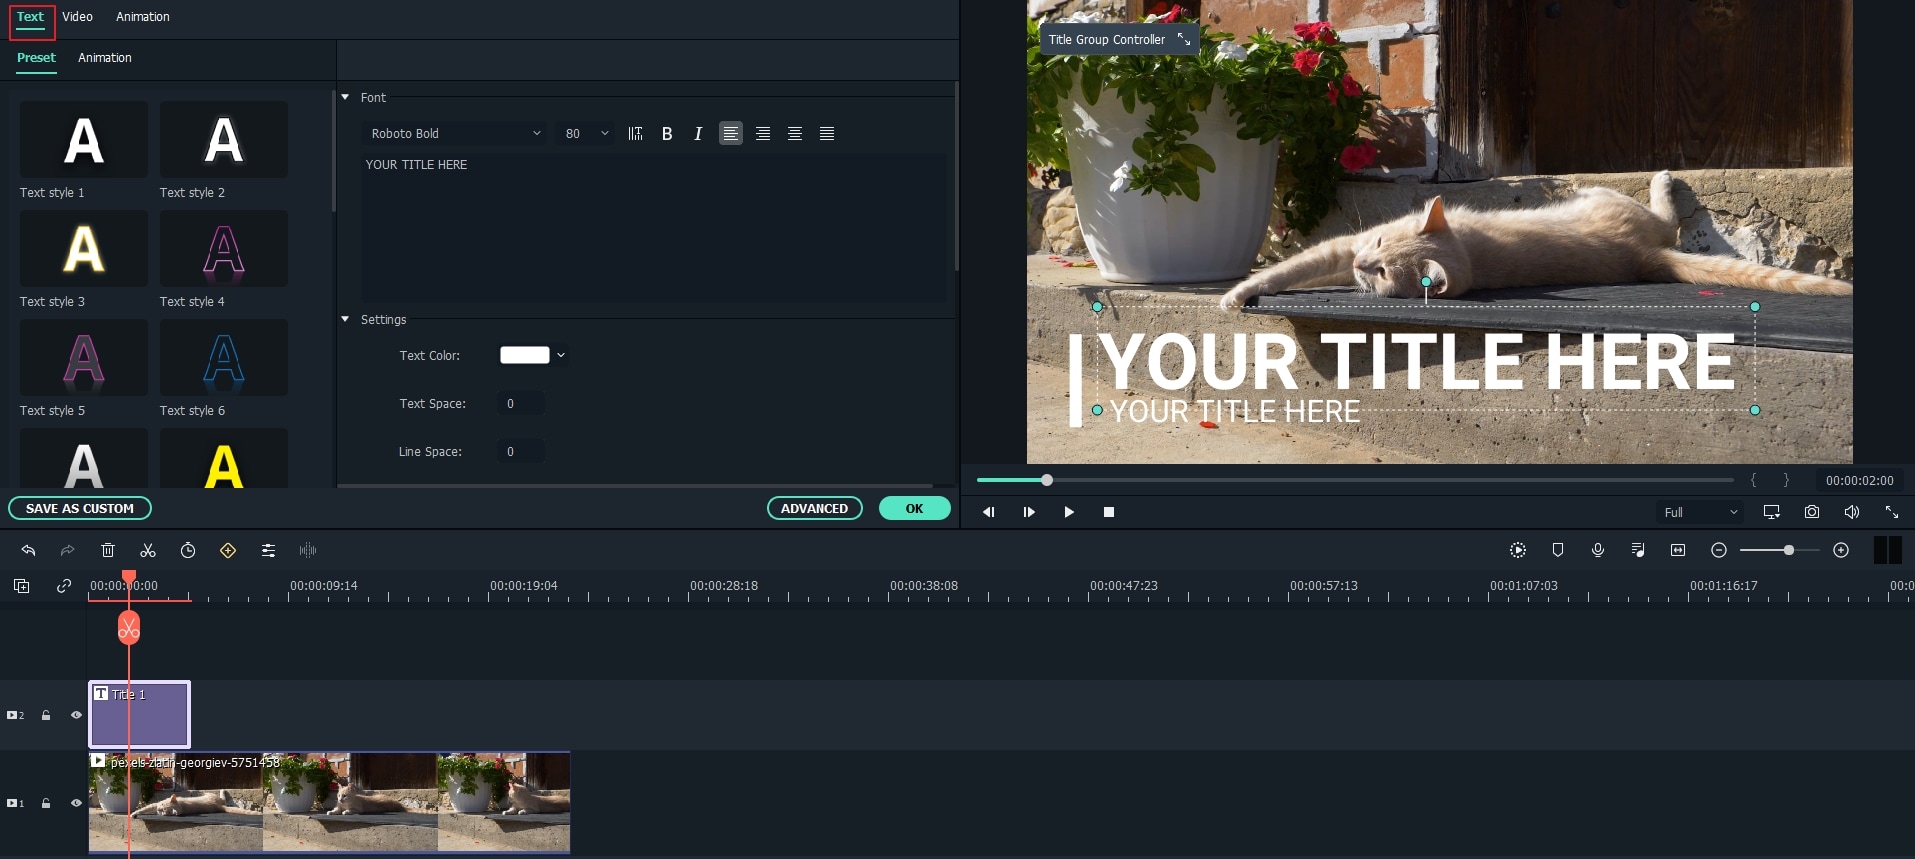
Step 5: To get more advanced results, you can use the Advanced button the timeline to enter the advanced editing tab, and here you can add animation, shadow, shapes, and borders to your text.
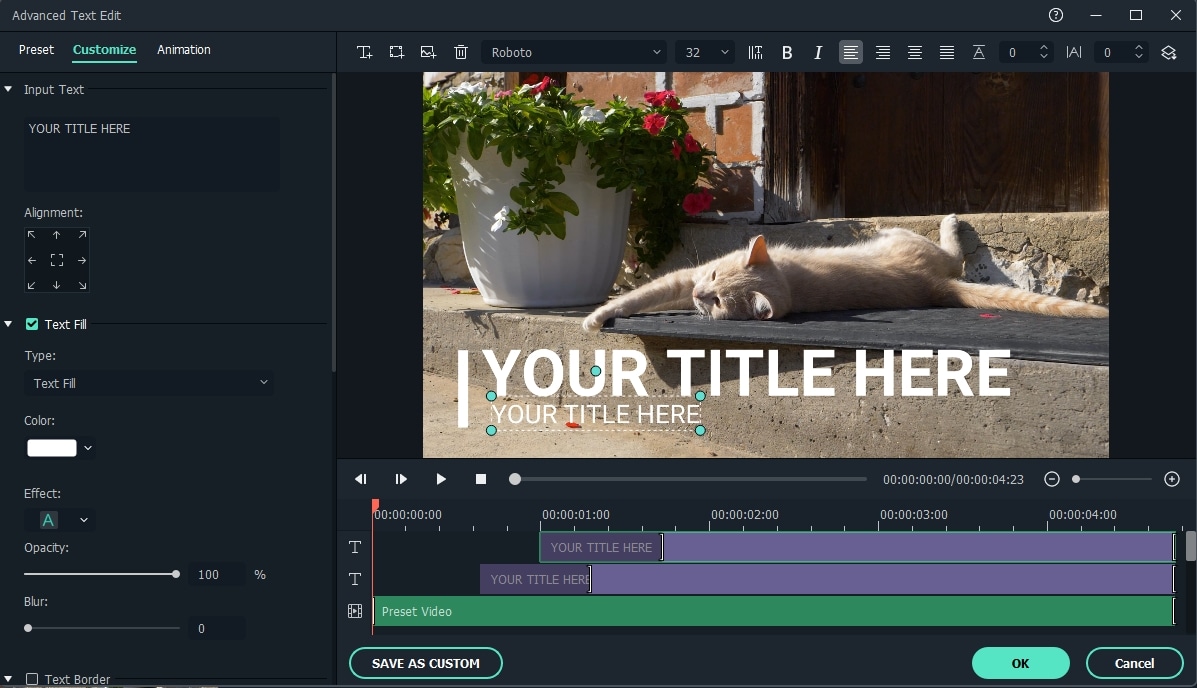
Step 6: Finally, when you are done, you can simply export the final version of your video clip in different available formats or you can directly upload your video to the YouTube channel.
So, using these simple steps you can create your texts and subtitles on the anime video clip.
Conclusion
Downloading anime subtitles is not an easy task but after reading this article you are in a position to use different websites to download anime subtitles. Anime subtitles are a must-have to understand the story if the anime is not in your native language. Also, if you are an anime enthusiast and want to edit an anime video in your style Wondershare Filmora is the best choice where you can use your skills and creativity to give a new shape to the anime video. All the creatives and features are available on Filmora that are powerful and capable of making any changes to an anime. Just drop a comment about the site you liked for subtitles and share this article with your friends who are anime lovers like you.
Shanoon Cox
Shanoon Cox is a writer and a lover of all things video.
Follow @Shanoon Cox
Shanoon Cox
Mar 27, 2024• Proven solutions
Subtitles are sometimes a distraction, but one cannot deny the fact that English anime subtitles are best for understanding a video properly in a different language. To watch your favorite Anime series, you would need to download anime subtitles. The idea behind anime subtitles is to not bind an anime series in a different language. In this article, you will learn about a few websites to download English as well as Japanese anime subtitles for free. When a dubbed version of your favorite anime series is not available you would simply need to put subtitles at work. Let’s dive into the article and find some exciting websites to download anime subtitles. You are going to learn:
- Part 1: Top10 Websites to Download Anime Subtitles
- Part 2: The Best Video Editor to Add Subtitles to an Anime
You may also like:
- Best Free Anime Streaming Sites to Download Anime
- Best Anime Series of All Time
- Top 4 Websites to Get Anime Footage for Free
Part 1: Top 10 Websites to Download Anime Subtitles
Here is a list of some amazing websites that have all the anime subtitles you can download at the moment. The best part about this guide is that it provides you with not only the anime English subtitles but also the entire anime series that you can download and watch.
- 1. OpenSubtitles
- 2. Kitsunekho
- 3. Subscene
- 4. SubDb
- 5. Addic7ed
- 6. Subtitles.hr
- 7. iSubtitles
- 8. Animetosho
- 9. CD Japan
- 10. AniSubs
1. OpenSubtitles
OpenSubtitles is one of the topmost subtitle websites where you can find all the latest as well old subtitles in multi-languages. The site is very normal in terms of the interface and looks like an old school website however the archives are huge. You can easily download anime subtitles from this website by clicking on the anime or series name and then click on the download option. It might ask you simple questions or to fill the captcha as a standard security check but that will be smooth.
The site is good, but sometimes the ads might annoy you a bit if you don’t like to surf a webpage with ads. And you need to become their VIP member to get rid of the annoying ads.
2. Kitsunekho
This is one of the best websites to download anime subtitles in different languages for free. The simple and easy interface lets you select from multiple options and series online. You can click on the series name and download the subtitle file in just a click. One can download subtitles in English, Japanese, Chinese and Korean language without going much deeper into finding the language options. All the subtitles are aggregated according to genre and language.
The interface of this website is super smooth, and there are no ads to annoy you.
3. Subscene
If you are looking for movies and anime at the same time so Subscene is a great website to download subtitles. One can easily download anime subtitles by searching their favorite series on the search bar and clicking on it to get the download options. Language is no bar on this website as almost all the languages are covered. The best part is that when you click on a series name your screen will get flooded with a lot of random subtitles in different languages.
Apart from some ads, the website is awesome.
4. SubDb
Subb is an open-source and free website with a huge database of subtitles. Being an open-source website, it’s a peer-to-peer network on which both the uploads and downloads are made by the user. This website has subtitles in different languages like English, Espanol, Italiano, Polski, and many more. You can only download the subtitles if you know how to run an API on your system.
The website is good but there is no search bar and a newbie with no tech knowledge cannot look for any file on this website.
5. Addic7ed
As the name suggests, you might get addicted to this site because of the multiple collections it has to download subtitles. You can download the subtitles on this website by clicking on the series name and there would be different subtitle files in many languages to download. There are many languages supported such as Japanese, English, Arabic, and many more to download subtitles.
The website has some good collections but the lack of search bar and too many irrelevant ads might irritate you.
6. Subtitles. hr
If you are looking for videos, software, and subtitles simultaneously, then Subtitles. hr is a great website where you can download subtitles in different languages. The concept of this website is also useful to the user where people upload the content and consume it. One can easily download the subtitles by clicking on the download button given on the website.
The website is good however the language icons are very small to recognize and it becomes difficult for a person to detect what exactly they are downloading.
7. iSubtitles
iSubtitles is a free website to download subtitles of your favorite anime series and movies. The website looks simple and has a search bar to put queries and get the result. Subtitles here are available in different languages from Arabic to Parsi and English to Japanese. Subtitle files are very easy to download as you only need to click on the anime series name and all the formats and languages available will be provided to you.
The website is good however there are a lot of ads to disturb you.
8. Animetosho
Animetosho is an old-school kind of website but the information here to vast to share. The website has a huge library of anime series, and you can download the entire anime series with all the subtitles on torrent/magnet. You can download the file and all the subtitle files are included in the same file.
There is a lot of information but it might look spammy to new users who are new to the internet industry.
9. CD Japan
This is a multi-niche website that covers content niches such as Music, Lifestyle, Anime, Apparel, and much more. The content on this website is more than huge and if you want to download anime subtitles then you might have to use the search bar or look for the anime tab on the menu. There is a lot of anime series in multiple languages available on this website.
Most of the anime series available here are paid and you need to purchase them to watch.
10. AniSubs
This website is only dedicated to download anime subtitles and you can find a lot of subtitle files here absolutely free. You can simply click on the anime series name and click on the download button to directly open the file into Google Drive or download it as a file on your computer. This site has subtitles in multiple languages depending upon the type and genre of anime series.
The website is good however a lot of ads might confuse you to differentiate between ads and content.
Part 2: The Best Video Editor to Add Subtitles to an Anime Video
Filmora is a great tool with endless effects and different ways to express creativity. Loaded with a lot of filters, overlays, transitions, video stabilization, and a lot of other features to create an amazing video. In terms of Anime, there is a lot of wonderful animation tool that you can use to add transitions and subtitles to your anime video. And Filmora has timeline-based video editing that allows you to drag and drop everything on the timeline and export the file to your computer or directly upload it to your YouTube Channel.
Step by step guide to add subtitles with Wondershare Filmora:
Step 1: Download and install Wondershare Filmora on your computer. Filmora is compatible with both Windows and macOS. To learn more about Filmora, you can visit Wondershare Video Community . If you don’t have time to read the text, just watch the below videos.
Step 2: To start with the editing and adding subtitles, import your anime video file by clicking on Import to upload media files. Then drop and drag it to the timeline.
Step 3: Now, go to the Titles tab and select the template that you want to use on your video for subtitles. You can easily drag and drop your favorite template and start editing the text that you want to publish on your video. There are several text editing templates that you can use here.
Step 4: If you want to add your own texts then double click on the Text on the timeline and input your text with colors, fonts, style, and animations.
Step 5: To get more advanced results, you can use the Advanced button the timeline to enter the advanced editing tab, and here you can add animation, shadow, shapes, and borders to your text.
Step 6: Finally, when you are done, you can simply export the final version of your video clip in different available formats or you can directly upload your video to the YouTube channel.
So, using these simple steps you can create your texts and subtitles on the anime video clip.
Conclusion
Downloading anime subtitles is not an easy task but after reading this article you are in a position to use different websites to download anime subtitles. Anime subtitles are a must-have to understand the story if the anime is not in your native language. Also, if you are an anime enthusiast and want to edit an anime video in your style Wondershare Filmora is the best choice where you can use your skills and creativity to give a new shape to the anime video. All the creatives and features are available on Filmora that are powerful and capable of making any changes to an anime. Just drop a comment about the site you liked for subtitles and share this article with your friends who are anime lovers like you.
Shanoon Cox
Shanoon Cox is a writer and a lover of all things video.
Follow @Shanoon Cox
Also read:
- New In 2024, The Only Guide Youll Ever Need to Learn About GIF Video Downloader
- Updated In 2024, How to Find Some Different Ways to Animated Cartoon of Yourself
- New In 2024, How to Animate Image on Scroll and Text on Scroll?
- New How to Create Your Avatar Free for 2024
- Updated In 2024, Best 15 Anime Shows That Are Great to Binge Watch
- New What This Post Can Teach You About Clay Animation for 2024
- How to Make GIF Instagram for 2024
- In 2024, Tips for Animated Collage Maker
- New What Are Differences Between 2D And 3D Animation for 2024
- 2024 Approved 5 Best Adobe Animate Courses & Classes | Beginners Complete Tutorial
- New How to Create a Whiteboard Video Step by Step 2023 Updated for 2024
- New In 2024, Learn Pencil2D Animation Tutorial Overview
- 2024 Approved 12 Animated Slideshow PowerPoint Templates
- Updated In 2024, How to Make Animated Videos for Business – an Ultimate Guide
- In 2024, How to Make a Video a Live Photo 2023
- In 2024, Best 10 Animoji Apps You Can Use to Edit Animoji
- In 2024, 10 Options for Your Need on Animation Makers
- Updated Top 10 Video to GIF Converters Top Picks
- Secrets to Make 2D Game Animation
- New How to Make Animated Videos for Business – an Ultimate Guide for 2024
- Updated How To Animate Graphics in Canva
- Updated In 2024, How to Learn Cartoon Characters Sketch Quickly
- New Best 15 Anime Fonts-Find Your Favorite One
- In 2024, Obtain and Create Animated GIF Icons
- New 2024 Approved Fuel Creativity with 10 Awesome Collection of 2D Animation Examples
- How to Animate Picture Online Without Learning From Scratch
- Best GIF Croppers How to Crop an Animated GIF
- Updated 2024 Approved Tips for GIF to Animated PNG
- Updated How to Create Photo Collage Frame for Free in Minutes, In 2024
- In 2024, Simple Shortcut to Convert Videos to Gifs on iPhone
- New In 2024, How to Make Architecture Animation
- How to Make 3D Cartoon of Yourself
- New Best GIF Resizers to Reduce GIF Size for 2024
- How to Make a GIF in Photoshop for 2024
- Updated In 2024, Tutorials to Make Animated Images – Even if Youre Just Starting Out
- Updated 10 Best Tools to Make Pic Collage for Windows
- Updated 2024 Approved Nurturing Mind, Heart, and Soul on the Top 5 Anime Streaming Sanctuaries
- Updated In 2024, Best 15 Horror Animes That Will Trigger a Heart Attack
- 10 Must-Use MP4 to GIF Converters to Get Perfect-Made GIF for 2024
- How to Change Credit Card on Your Apple iPhone 11 Apple ID and Apple Pay
- In 2024, How To Stream Anything From Nokia 150 (2023) to Apple TV | Dr.fone
- Ways to trade pokemon go from far away On Tecno Spark 20 Pro? | Dr.fone
- Fix Cant Take Screenshot Due to Security Policy on Oppo Reno 9A | Dr.fone
- In 2024, How To Unlock Any Vivo S18 Phone Password Using Emergency Call
- Recover your photos after Oppo F23 5G has been deleted.
- How To Leave a Life360 Group On Oppo A2 Without Anyone Knowing? | Dr.fone
- Proven Ways to Fix There Was A Problem Parsing the Package on Asus ROG Phone 7 Ultimate | Dr.fone
- In 2024, List of Pokémon Go Joysticks On Lava Blaze 2 5G | Dr.fone
- Forgot Pattern Lock? Heres How You Can Unlock Nubia Z50 Ultra Pattern Lock Screen
- 3 Solutions to Find Your ZTE Nubia Flip 5G Current Location of a Mobile Number | Dr.fone
- Planning to Use a Pokemon Go Joystick on OnePlus Open? | Dr.fone
- 3 Ways to Track Lava Yuva 3 Pro without Them Knowing | Dr.fone
- In 2024, How I Transferred Messages from Tecno Spark 10 4G to iPhone 12/XS (Max) in Seconds | Dr.fone
- Home Button Not Working on Sony Xperia 10 V? Here Are Real Fixes | Dr.fone
- How to play HEVC H.265 video on Sony ?
- In 2024, How To Use Special Features - Virtual Location On Poco X5 Pro? | Dr.fone
- 3 Ways to Change Location on Facebook Marketplace for Motorola Moto G 5G (2023) | Dr.fone
- In 2024, Ways To Find Unlocking Codes For Oppo K11x Phones
- Use Device Manager to identify malfunctioning your drivers with Windows Device Manager on Windows 11
- Will iSpoofer update On Nokia XR21 | Dr.fone
- In 2024, 3 Ways for Android Pokemon Go Spoofing On Oppo A56s 5G | Dr.fone
- In 2024, Easy Guide to Honor X9a FRP Bypass With Best Methods
- In 2024, Full Guide on Mirroring Your Honor Magic 5 to Your PC/Mac | Dr.fone
- How to Unlock Apple ID Activation Lock On iPhone SE (2020)?
- In 2024, Process of Screen Sharing Vivo T2x 5G to PC- Detailed Steps | Dr.fone
- In 2024, Top 4 Ways to Trace Oppo Reno 10 Pro+ 5G Location | Dr.fone
- Title: New In 2024, Best Practices on Online 3D Avatar Creator
- Author: Elon
- Created at : 2024-06-30 12:27:55
- Updated at : 2024-07-01 12:27:55
- Link: https://animation-videos.techidaily.com/new-in-2024-best-practices-on-online-3d-avatar-creator/
- License: This work is licensed under CC BY-NC-SA 4.0.
