
:max_bytes(150000):strip_icc():format(webp)/GettyImages-1443716794-411cf2c5404b4f35b2a1153826e5a280.jpg)
New The Definitive Guide to Whiteboard Animation for 2024
The Definitive Guide to Whiteboard Animation
The Definitive Guide to Whiteboard Animation
An easy yet powerful editor
Numerous effects to choose from
Detailed tutorials provided by the official channel
We think about moving videos with actors and actresses when we talk about motion. But, when we speak about doodle videos or drawn videos, we feel about whiteboard animation.
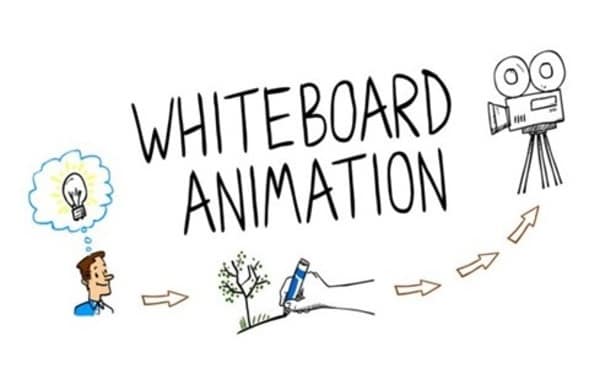
This article covers all the necessary information about whiteboard animation, Filmora whiteboard animation, whiteboard animation cost, etc. Under whiteboard animation, sketches adjust in a manner that results in continual animation reflection.
In this article
01 [What is Whiteboard Animation?](#Part 1)
02 [How Can Whiteboard Animation Be Used?](#Part 2)
03 [What is Whiteboard Animation Cost?](#Part 3)
04 [Some Whiteboard Animation Tools That Worth Using](#Part 4)
Part 1 What is Whiteboard Animation?

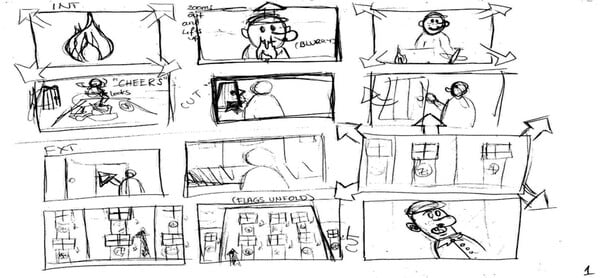
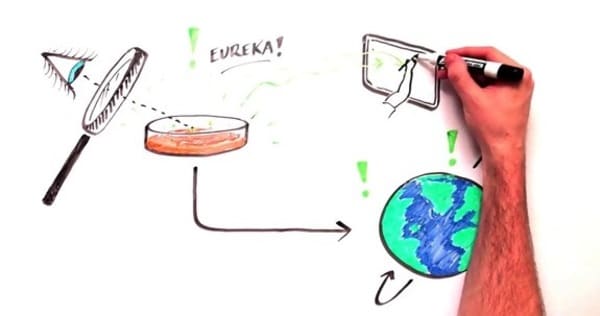
Whiteboard animation is a style that shows static watcher images getting drawn on the white screen. The graphics are at the core of a narration that walks the audience through the story by the draws. These animations are modest to understand, but they make us involved all of an impulsive.
Whiteboard animation could be a video in the middle of narration that walks the viewer through a story by viewing the illustrator’s hand drawing it onto a white background. Established in 2007, whiteboard animation may be a new and exciting way of communicating to the viewer in a very personal way.
It applies effects like time-lapse and stop-motion to bring stories to life. Its uses include internal and external television and internet advertisements, software and product demonstrations, whiteboard animation lectures and educational videos for all ages, and various artistic possibilities like untrue storytelling.
Whiteboard animation videos are traditionally made by simply recording the artist live as they draw the content for the video while at the same time reciting the story. An efficient technique in these visually-oriented times, but a tricky balancing act for even the most effective illustrators and speakers.
Part 2 How Can Whiteboard Animation Be Used?
While working with whiteboard animation for pc or going with whiteboard animation hand drawing in digital mode, it is important to understand how can whiteboard animation be used for? Let’s try to figure out that in the following points:
01Represent complex ideas in a simple way
A whiteboard video can offer assistance if the item or framework you need to portray is complex or exceedingly specialized. Individuals frequently get bored amid clarifications, and the more point by point those clarifications are, the harder it is to focus.
Whether you’re pushing an item on a press page or sharing a new trade prepare with your team, employing a high-quality whiteboard movement video to induce your point-over will keep up tall intrigued for as long as the video is playing. This can be because whiteboard liveliness is fast-moving, outwardly point by point, and frequently colorful, making them simple and fun to watch—for as long as it takes to clarify the thought.
02You can cover a part of your thoughts all at once
For reasons comparative to those displayed over, a whiteboard video is perfect on the off chance that you would like to cover an expansive sum of data within the introduction. With ideas unfolding visually as the storyteller portrays what’s going on, you’ll be able to get absent with counting a part of diverse thoughts within the same video without losing the watcher intrigued.
03You need to get other business attention
Did you know that whiteboard activity recordings are fair as compelling for Bshowcasing? The industrial-yet-casual look-and-feel of whiteboard activity loans itself astoundingly generously to a corporate environment.
Whiteboard movement administrations can donate you a noteworthy edge over competing companies once you approach other businesses along with your offer.
04You should maintain a strategic distance from awful performing artists at all costs
With whiteboard liveliness, you don’t ought to enlist on-screen characters to play in your video. This cruel noteworthy took a toll on reserve funds. Still, it can moreover spare you genuine embarrassment—good, persuading performing artists can be troublesome to find, and awful ones will have your group of onlookers wincing through the complete introduction. Movement ousts this issue inside and out.
05You plan to use social media marketing
If you need to utilize YouTube or social media advertisements for your promotion, whiteboard liveliness recordings alone will do the job. Individuals like them, so you’ve got a great chance of getting sees and clicks—and sales.
(Fun truth: Did you know there are 3billion looks conducted on YouTube alone each month? If you need your share of that activity, utilizing whiteboard activity recordings may be your best wager.)
06You want to create a story
On the off-chance that you need your video to tell a portion of your brand’s story, no one will do that way better than whiteboard movement administrations. Disney demonstrated that liveliness was an incredibly viable way to tell stories nearly a hundred years ago. Why not take after that convention?
07You want to use humor
When you need to consolidate humor into your video introduction, whiteboard activity is one of the most excellent ways to induce giggles. Novice performing artists can be unbalanced and irritating when they attempt to be clever on camera, but in whiteboard animation’s laid-back visual fashion, it can communicate humor immaculately.
08You need to reuse ancient sound substance
If you want to repurpose other sorts of the substance you’ve got lying around—say, a podcast scene or a discourse you gave—you can combine preexisting audio with whiteboard liveliness. This will assist you to capitalize on the substance you’ve as of now made, and it’ll undoubtedly breathe new life into it.
Part 3 What is Whiteboard Animation Cost?
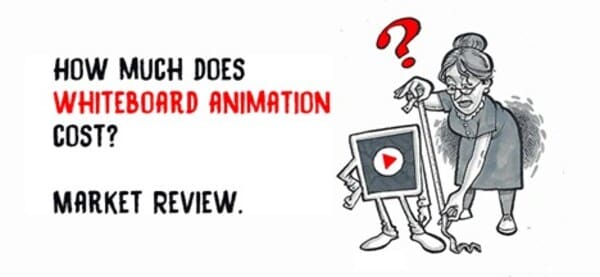
Should you contract an artisan or fair do-it-yourself for whiteboard activity? Let’s have a conversation around sweat equity.
You can set up a video camera yourself and utilize video altering computer program to make a Whiteboard Liveliness. However, it’ll likely require a couple of weeks of your time, and your comes about will be far from a professional studio’s quality. Expect ineffectively drawn pictures and composed words that are unreadable.
Whiteboard activity program can be fetched as small as $50plus saves a couple of weeks of your time. These cheap programs utilize an inactive picture of a hand and clip craftsmanship. But the ultimate item isn’t unique, and its esteem is an excellent Control Point introduction.
Another choice is Adobe Eventual outcomes, an industry-standard activity program. It’s what they utilize to create National Commercials. It costs $16in any case, and learning the computer program requires a bachelor’s degree.
Part 4 Some Whiteboard Animation Tools That Worth Using
Whiteboard animation software or whiteboard animation app permits you to form whiteboard animation videos. Animation software offers a visual, drag-and-drop interface to simplify the designing process for creators.
Wondering what whiteboard animations are? They’re explainer videos where a hand sketches on a whiteboard. Before, this was manual, where a lecturer writes on a whiteboard. But because of whiteboard animation software, you don’t have to have a whiteboard or compose aboard again.
Whiteboard animation tool has built-in hand styles and virtual whiteboards that automatically process animation formation.
Wondershare Filmora Video Editor and Camtasia are some of the best videos altering computer programs with cool features compared to other competing video varying Software.
Wondershare Filmora
Get started easily with Filmora’s powerful performance, intuitive interface, and countless effects!
Try It Free Try It Free Try It Free Learn More >

Here are a few steps to follow for making whiteboard animation videos in Filmora and Camtasia:
01Write a Script
Much like a standard video or a brief skit, there must be a script if a whiteboard animation video succeeds. It is excellent to have compelling images and information, but without a logical story, they’re nothing.
It is not a blog, storyboard, or a collection of bullet points. You hope for a proper script, which says everything about the video. Why? Because then you’ll know precisely what images should be added further in specific segments, what the narrator must show, and what transitions are necessary.
02Start with the Storyboard
Now you have got a script, and you’ve got a clear idea of how you want your video to return across. It’s time to start out building the storyboard. With a storyboard, you may be able to sort out your thoughts far better. You’ll see how each frame comes onto the screen, and a unit of ammunition ties into the opposite.
When you create your storyboard, you may have a simple idea about how your final product will look. If there is some alteration you’re not proud of, this can be the instant where you’ll make changes.
03Create Images
You may find this part very easy if you’re a precise person. It’s all about crafting fun and unique images that will help deliver the data you want to bring across. Attempt to create striking photos which will excite your audience. The simpler, more distinctive, and attractive you’ll be able to make those images, the higher your end product.
04Animate Those Images
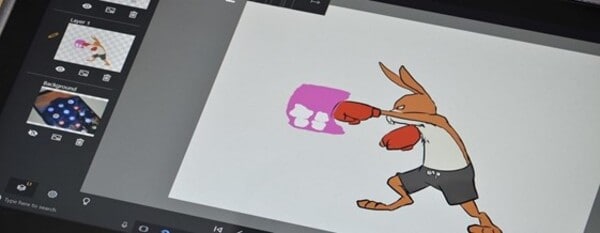
With your images drawn and in situ on the storyboard, it’s time to animate them. When animating your whiteboard animation video, confine in mind that every frame will likely show for no. quite seconds. This forces you to form every single movement count – with only some seconds per frame available, and quick movements are often preferable to extended scenes of stillness.
05Record and Sync the Audio
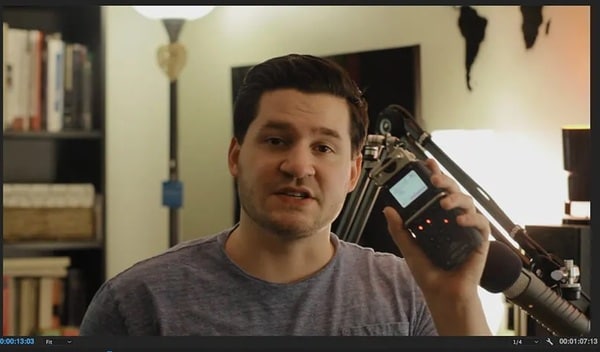
The audio is arguably one of the main essential parts of a whiteboard animation video. So, before recording the audio for any part of your project, practice reading through your script several times until you recognize it by memory and cannot struggle when speaking into the microphone during the particular recording process.
The final step involves getting your audio. Every animated video must have narration because it helps to elucidate what’s happening within the images that folks are seeing. Record your audio, and ensure it’s perfectly in sync with your content.
So, whether you are going with hand whiteboard animation and then modifying and animated with Filmora or the Camtasia whiteboard animation, both result in good whiteboard animation. Whereas, if looking for comprehensive video editing tools, the obvious choice will be Filmora.
● Key Takeaways from This Episode →
● In short, the article gives you the basic understanding of:
● What is meant by Whiteboard Animation?
● Different examples of whiteboard animation videos to explain the techniques
● Steps to apply whiteboard animation with Filmora
● Further, the article has explained Whiteboard Animation with different examples to clarify how it looks, and some websites may help you lead more about Whiteboard Animation videos. The most important question answered above is how to make videos ideally at Filmora. I hope your queries are explicit after reading this post.
We think about moving videos with actors and actresses when we talk about motion. But, when we speak about doodle videos or drawn videos, we feel about whiteboard animation.
This article covers all the necessary information about whiteboard animation, Filmora whiteboard animation, whiteboard animation cost, etc. Under whiteboard animation, sketches adjust in a manner that results in continual animation reflection.
In this article
01 [What is Whiteboard Animation?](#Part 1)
02 [How Can Whiteboard Animation Be Used?](#Part 2)
03 [What is Whiteboard Animation Cost?](#Part 3)
04 [Some Whiteboard Animation Tools That Worth Using](#Part 4)
Part 1 What is Whiteboard Animation?
Whiteboard animation is a style that shows static watcher images getting drawn on the white screen. The graphics are at the core of a narration that walks the audience through the story by the draws. These animations are modest to understand, but they make us involved all of an impulsive.
Whiteboard animation could be a video in the middle of narration that walks the viewer through a story by viewing the illustrator’s hand drawing it onto a white background. Established in 2007, whiteboard animation may be a new and exciting way of communicating to the viewer in a very personal way.
It applies effects like time-lapse and stop-motion to bring stories to life. Its uses include internal and external television and internet advertisements, software and product demonstrations, whiteboard animation lectures and educational videos for all ages, and various artistic possibilities like untrue storytelling.
Whiteboard animation videos are traditionally made by simply recording the artist live as they draw the content for the video while at the same time reciting the story. An efficient technique in these visually-oriented times, but a tricky balancing act for even the most effective illustrators and speakers.
Part 2 How Can Whiteboard Animation Be Used?
While working with whiteboard animation for pc or going with whiteboard animation hand drawing in digital mode, it is important to understand how can whiteboard animation be used for? Let’s try to figure out that in the following points:
01Represent complex ideas in a simple way
A whiteboard video can offer assistance if the item or framework you need to portray is complex or exceedingly specialized. Individuals frequently get bored amid clarifications, and the more point by point those clarifications are, the harder it is to focus.
Whether you’re pushing an item on a press page or sharing a new trade prepare with your team, employing a high-quality whiteboard movement video to induce your point-over will keep up tall intrigued for as long as the video is playing. This can be because whiteboard liveliness is fast-moving, outwardly point by point, and frequently colorful, making them simple and fun to watch—for as long as it takes to clarify the thought.
02You can cover a part of your thoughts all at once
For reasons comparative to those displayed over, a whiteboard video is perfect on the off chance that you would like to cover an expansive sum of data within the introduction. With ideas unfolding visually as the storyteller portrays what’s going on, you’ll be able to get absent with counting a part of diverse thoughts within the same video without losing the watcher intrigued.
03You need to get other business attention
Did you know that whiteboard activity recordings are fair as compelling for Bshowcasing? The industrial-yet-casual look-and-feel of whiteboard activity loans itself astoundingly generously to a corporate environment.
Whiteboard movement administrations can donate you a noteworthy edge over competing companies once you approach other businesses along with your offer.
04You should maintain a strategic distance from awful performing artists at all costs
With whiteboard liveliness, you don’t ought to enlist on-screen characters to play in your video. This cruel noteworthy took a toll on reserve funds. Still, it can moreover spare you genuine embarrassment—good, persuading performing artists can be troublesome to find, and awful ones will have your group of onlookers wincing through the complete introduction. Movement ousts this issue inside and out.
05You plan to use social media marketing
If you need to utilize YouTube or social media advertisements for your promotion, whiteboard liveliness recordings alone will do the job. Individuals like them, so you’ve got a great chance of getting sees and clicks—and sales.
(Fun truth: Did you know there are 3billion looks conducted on YouTube alone each month? If you need your share of that activity, utilizing whiteboard activity recordings may be your best wager.)
06You want to create a story
On the off-chance that you need your video to tell a portion of your brand’s story, no one will do that way better than whiteboard movement administrations. Disney demonstrated that liveliness was an incredibly viable way to tell stories nearly a hundred years ago. Why not take after that convention?
07You want to use humor
When you need to consolidate humor into your video introduction, whiteboard activity is one of the most excellent ways to induce giggles. Novice performing artists can be unbalanced and irritating when they attempt to be clever on camera, but in whiteboard animation’s laid-back visual fashion, it can communicate humor immaculately.
08You need to reuse ancient sound substance
If you want to repurpose other sorts of the substance you’ve got lying around—say, a podcast scene or a discourse you gave—you can combine preexisting audio with whiteboard liveliness. This will assist you to capitalize on the substance you’ve as of now made, and it’ll undoubtedly breathe new life into it.
Part 3 What is Whiteboard Animation Cost?
Should you contract an artisan or fair do-it-yourself for whiteboard activity? Let’s have a conversation around sweat equity.
You can set up a video camera yourself and utilize video altering computer program to make a Whiteboard Liveliness. However, it’ll likely require a couple of weeks of your time, and your comes about will be far from a professional studio’s quality. Expect ineffectively drawn pictures and composed words that are unreadable.
Whiteboard activity program can be fetched as small as $50plus saves a couple of weeks of your time. These cheap programs utilize an inactive picture of a hand and clip craftsmanship. But the ultimate item isn’t unique, and its esteem is an excellent Control Point introduction.
Another choice is Adobe Eventual outcomes, an industry-standard activity program. It’s what they utilize to create National Commercials. It costs $16in any case, and learning the computer program requires a bachelor’s degree.
Part 4 Some Whiteboard Animation Tools That Worth Using
Whiteboard animation software or whiteboard animation app permits you to form whiteboard animation videos. Animation software offers a visual, drag-and-drop interface to simplify the designing process for creators.
Wondering what whiteboard animations are? They’re explainer videos where a hand sketches on a whiteboard. Before, this was manual, where a lecturer writes on a whiteboard. But because of whiteboard animation software, you don’t have to have a whiteboard or compose aboard again.
Whiteboard animation tool has built-in hand styles and virtual whiteboards that automatically process animation formation.
Wondershare Filmora Video Editor and Camtasia are some of the best videos altering computer programs with cool features compared to other competing video varying Software.
Wondershare Filmora
Get started easily with Filmora’s powerful performance, intuitive interface, and countless effects!
Try It Free Try It Free Try It Free Learn More >
Here are a few steps to follow for making whiteboard animation videos in Filmora and Camtasia:
01Write a Script
Much like a standard video or a brief skit, there must be a script if a whiteboard animation video succeeds. It is excellent to have compelling images and information, but without a logical story, they’re nothing.
It is not a blog, storyboard, or a collection of bullet points. You hope for a proper script, which says everything about the video. Why? Because then you’ll know precisely what images should be added further in specific segments, what the narrator must show, and what transitions are necessary.
02Start with the Storyboard
Now you have got a script, and you’ve got a clear idea of how you want your video to return across. It’s time to start out building the storyboard. With a storyboard, you may be able to sort out your thoughts far better. You’ll see how each frame comes onto the screen, and a unit of ammunition ties into the opposite.
When you create your storyboard, you may have a simple idea about how your final product will look. If there is some alteration you’re not proud of, this can be the instant where you’ll make changes.
03Create Images
You may find this part very easy if you’re a precise person. It’s all about crafting fun and unique images that will help deliver the data you want to bring across. Attempt to create striking photos which will excite your audience. The simpler, more distinctive, and attractive you’ll be able to make those images, the higher your end product.
04Animate Those Images
With your images drawn and in situ on the storyboard, it’s time to animate them. When animating your whiteboard animation video, confine in mind that every frame will likely show for no. quite seconds. This forces you to form every single movement count – with only some seconds per frame available, and quick movements are often preferable to extended scenes of stillness.
05Record and Sync the Audio
The audio is arguably one of the main essential parts of a whiteboard animation video. So, before recording the audio for any part of your project, practice reading through your script several times until you recognize it by memory and cannot struggle when speaking into the microphone during the particular recording process.
The final step involves getting your audio. Every animated video must have narration because it helps to elucidate what’s happening within the images that folks are seeing. Record your audio, and ensure it’s perfectly in sync with your content.
So, whether you are going with hand whiteboard animation and then modifying and animated with Filmora or the Camtasia whiteboard animation, both result in good whiteboard animation. Whereas, if looking for comprehensive video editing tools, the obvious choice will be Filmora.
● Key Takeaways from This Episode →
● In short, the article gives you the basic understanding of:
● What is meant by Whiteboard Animation?
● Different examples of whiteboard animation videos to explain the techniques
● Steps to apply whiteboard animation with Filmora
● Further, the article has explained Whiteboard Animation with different examples to clarify how it looks, and some websites may help you lead more about Whiteboard Animation videos. The most important question answered above is how to make videos ideally at Filmora. I hope your queries are explicit after reading this post.
Top 10 Animated Photo Collage Apps You Should Know
Versatile Video Editor - Wondershare Filmora
An easy yet powerful editor
Numerous effects to choose from
Detailed tutorials provided by the official channel
What if you wish to animate images, adding movement to stationary objects in time? Well, there are apps for these purposes!
Videos and GIFs are a mainstay of social media. These days it’s rare to see a still photo online. The simplicity with which you can add filter and movement effects to your images has identified a proliferation of these online animated photos.
So what if you wish to apply animation to a still image? There are many apps for such purposes. Given below is a selection of the best apps you can use to animate images on both Android and iPhone devices with the help of animated photo collage apps.
In this article
01 [Top 10 Animated Photo Collage Apps ](#Part 1)
02 [Wondershare Filmora: The Advanced Editing App of 2022!](#Part 2)
Part 1 Top 10 Animated Photo Collage Apps
We’ve compiled an index of the top 10 animated collage apps compatible with photo enthusiasts and photographers at every level of expertise. Most of these amazing apps are available for both iOS and Android, so there are numerous options no matter what device you’re using.
Before showcasing your collage-making skills, gather the perfect images from your last photography project.
1. GIPHY
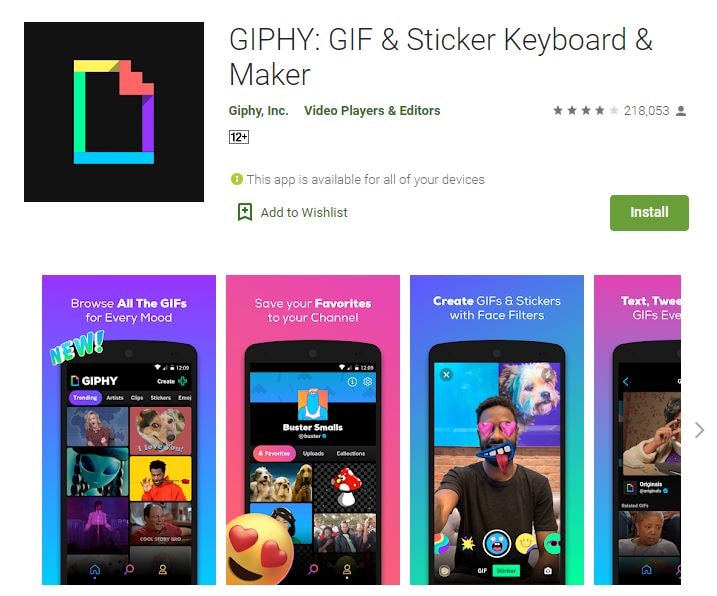
The GIPHY is the mega search engine for all things related to GIFs.
Here, you can easily upload and find reaction memes for anything under the sun; GIPHY is also available with a mobile app. It also helps you to frame your GIFs and animate photos. Then, you can upload them by using the inbuilt animation tools on the platform.
It consists of a sticker maker (available for iPhone X and later), and you can also add captions to your animated images or shoot your short videos.
2. Motionleap
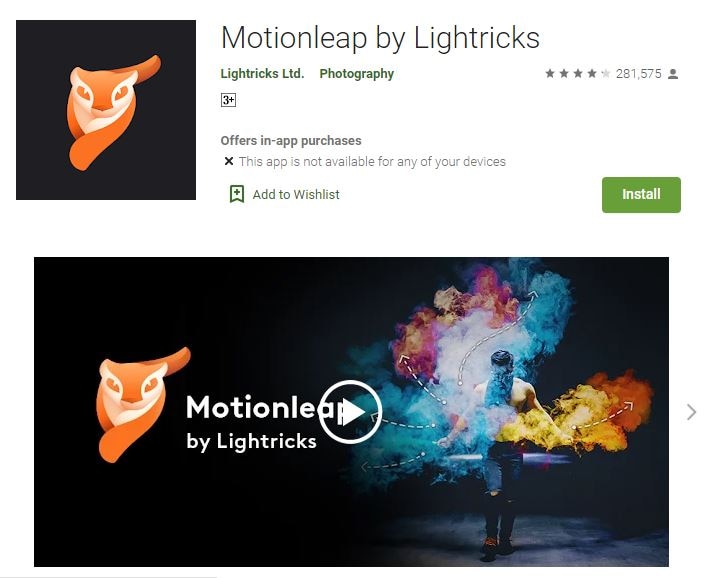
Motionleap is also an ideal animated photo collage app, and for a good reason. This app is highly reviewed, with 250,000 plus ratings of five stars in the Play Store.
Motionleap is a free animated photo collage app, although there’s a subscription and Pro version, too. Also, it doesn’t put a watermark over your image when you download it to your phone.
The app’s primary goal is animating still images and converting them into short, concise, and looping videos. Programming directional cues can easily do it into your image by dragging your thumb across the screen.
You can also freeze certain image sections and apply filters on top of your picture to frame an atmosphere within your image.
Unluckily, Motionleap saves your animated still photos in video format unless you’ve paid for a Pro account.
3. Movepic

Movepic is almost similar to Motionleap in that it animates images, but you can make a massive chunk of this animation with its inbuilt filters and overlays.
The only limitation is that you wouldn’t be able to remove the watermark without updating it to a VIP account. Movepic also saves your pictures automatically as a movie file than within a GIFformat.
4. ImgPlay
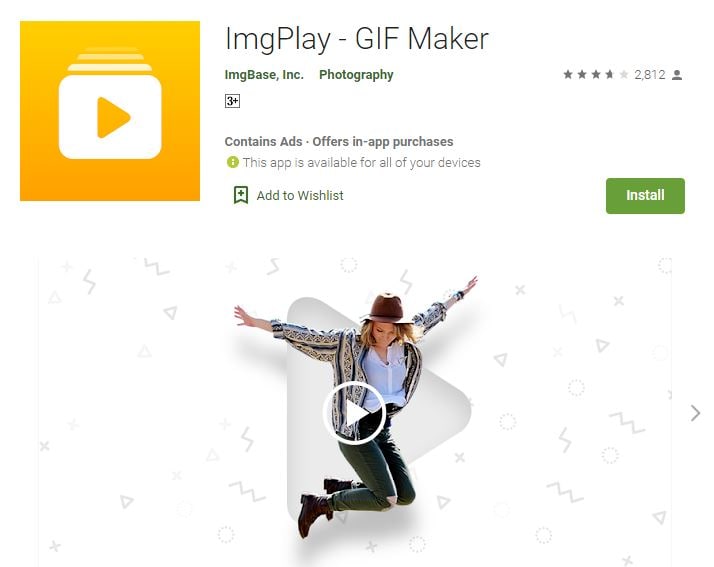
ImgPlay is another ideal animated collage maker app you can use to animate images. It creates ready-to-use animated images for the web and consists of easy-to-understand yet advanced controls. Unfortunately, it also adds a watermark on your image—one that you can’t remove unless you update to a complete account.
The process of making animated images online and GIFs can be in a couple of different ways within ImgPlay itself. You can use still photographs side-by-side, use burst images, or even videos.
5. Zoetropic
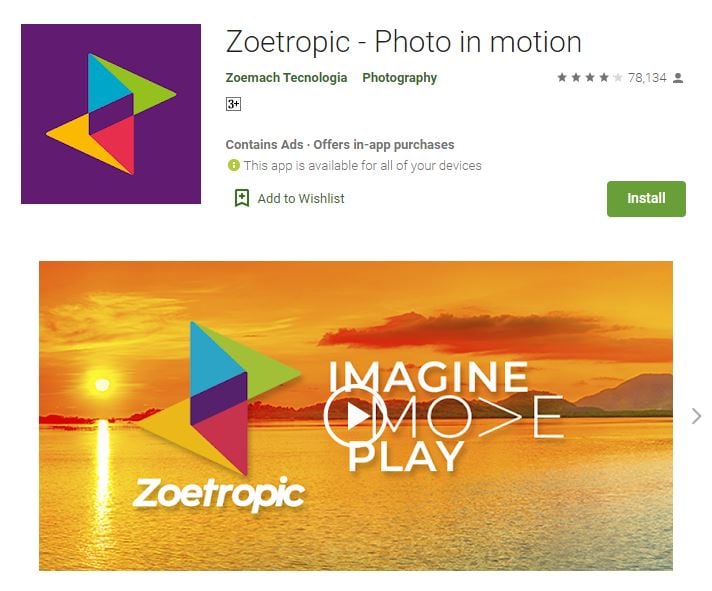
If you wish to animate your photo within a few minutes only, Zoetropic is for you. Though its functions aren’t as extensive as other apps we’ve mentioned, it does the job pretty well.
To get started, you choose your images and then select motion points. Next, you mask or stabilize the areas you want to keep still. Finally, you choose your overlays and animations. You can also change colors and add tags.
On the downside, it has limited the number of effects you can access on a free account. However, you might find what you’re considering if you are looking for a prompt manner to animate a photo online.
6. StoryZ
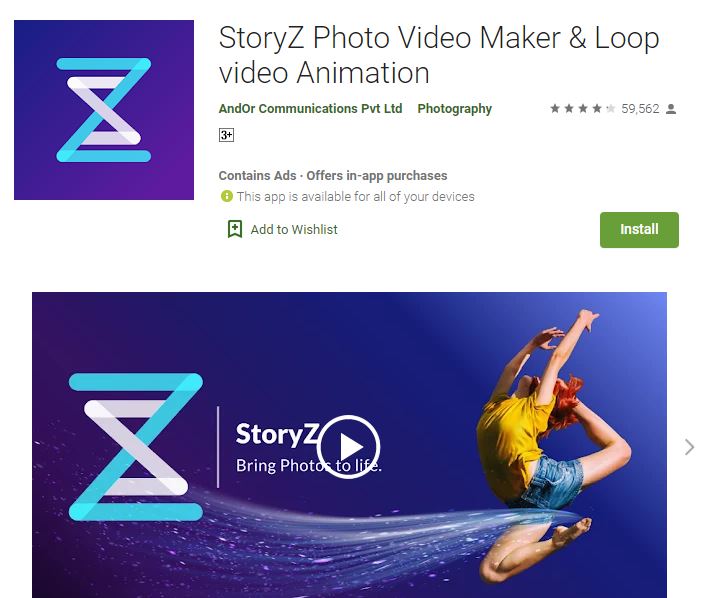
Despite its unattractive user interface, StoryZ is one of the useful apps on this list. It works excellent with still photographs to animate them effectively via various programmed paths of movements, overlays, and color filters—a lot of which are free and unique. It also automatically saves your files as GIFs.
One of the most incredible things about StoryZ is cutting the watermark from your image if you preview a quick ad before saving the file.
7. Lumyer
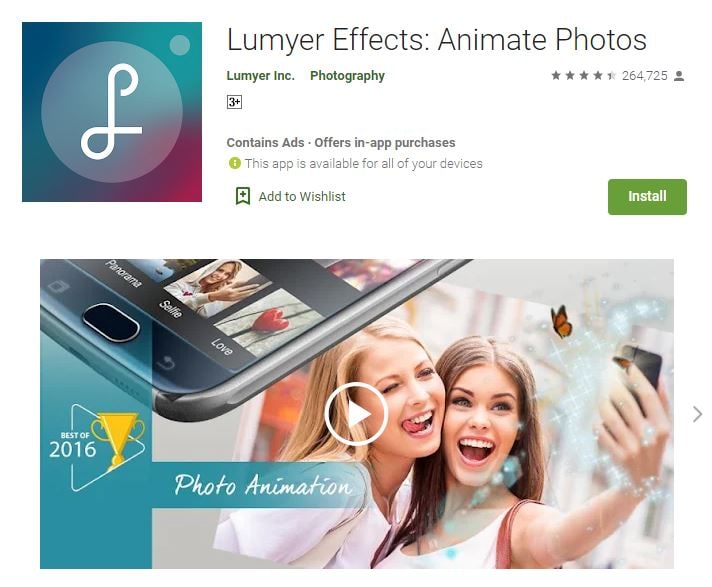
Lumyer is one of the useful animated photo collage apps on our list, which lets you add hundreds and thousands of effects to your pictures to animate them. So whether you wish to include sparkle or subtle weather effects, seasonal animations for Christmas and Halloween, or all-out scene transformations like appearing on a rollercoaster, Lumyer can do it.
If you’re okay with the watermark, Lumyer is a good choice, but otherwise, you may prefer one of our other recommended photo animation college apps.
8. VIMAGE 3D
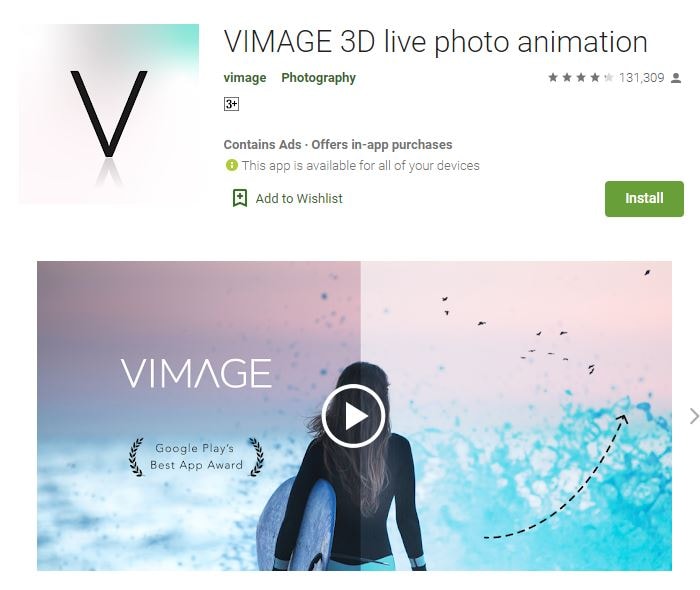
VIMAGE got recognized with Google Play award in 2018. It can make some pretty good-looking animated photos in just a few clicks. There’s a wide variety of animations, filters, and sounds to select among a bundle of options.
You don’t even need to select the object because VIMAGE detects and replaces it for you quite automatically.
Similar to these apps, you do need to pay to remove the watermark, get access to the full effects library, and you can export your photos online in up to 2560p resolution.
9. Photo Bender
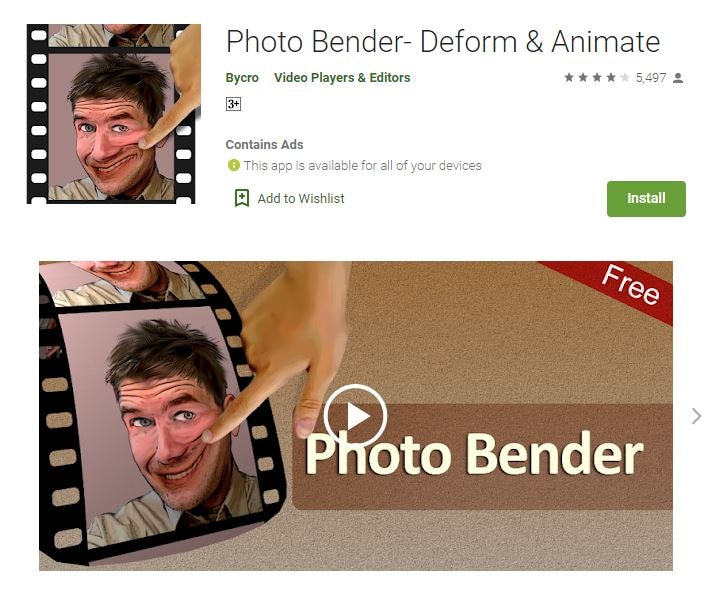
Photo Bender is an Android-specific animated photo collage app that helps you warp to animate photos digitally by coloring your image by stretching it, bending it, and using brushes. You can then export your transformed images as GIFs, JPEGs, MP4s, and PNGs.
While this app doesn’t contain ratings like others on this list, it is highly rated, so it’s still worth a look.
10. Werble
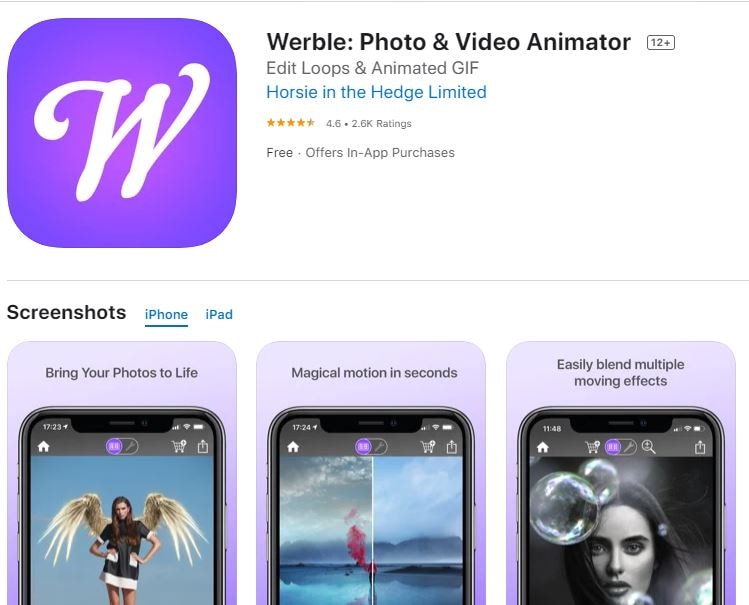
The primary purpose of Werble is to animate your images, and while the basic account is free, in-app purchases are also available. Most of Werble’s animations come through different filter effects that you can add on top of your images.
A downside to Werble is that it saves these images entirely automatically as GIFs, so they’re ready to use online. The limitation? However, you need to pay to cut the watermark that they place on your image. That watermark is huge enough to be disturbing.
Part 2 Wondershare Filmora: The Advanced Editing App of 2022
If you are tired of considering various animated photo collage apps, here is a section to introduce you to the best alternative with a reliable yet powerful video editor.
Filmora : This platform comes entirely loaded with advanced social integration options and editing functions. You can enjoy premium preloaded video editing services on your mobile devices with this tool. For video customization requirements, you can imply multiple caption options, title editing facilities, and advanced animation effects.
Filmora Features
- Filmora is available for both Android as well as iOS devices without any login.
- Filmora assists users in importing camera roll, Instagram, Google Plus, and Facebook collections with simplicity.
- This software tool contains different advanced features and highlights the missing components of the above-listed animated collage maker apps.
- You can add watermarks to all created videos.
- Above all, now share videos directly shared via Instagram, Facebook, WhatsApp, Email, Vimeo, YouTube, etc.
This advanced editing tool, Wondershare Filmora, can efficiently serve all your requirements. The good part is that it syncs well with iOS and Android devices so that you can access it anywhere with simplicity.
Also, Filmora provides is compatible with 4K videos, which is the most outstanding merit for developing informative video sessions and tutorials. Its ability to work offline with principal functions will simplify your editing tasks even when the internet connection is still an issue.
Wondershare Filmora
Get started easily with Filmora’s powerful performance, intuitive interface, and countless effects!
Try It Free Try It Free Try It Free Learn More >
AI Portrait – The best feature of Wondershare Filmora for gameplay editing
The AI Portrait is a new add-on in Wondershare Filmora. It can easily remove video backgrounds without using a green screen or chroma key, allowing you to add borders, glitch effects, pixelated, noise, or segmentation video effects.

Conclusion
Now that we’ve run through some great animated photo collage apps that can enliven your images, you can choose the ones you’re wandering to try out. They all follow roughly a similar concept, so you should select the ones you think will work best for such needs.
Gone are the days when you had to necessarily use a robust desktop computer to edit your videos and images. You can go forward to efficiently perform the same operation all from your smartphone with significant effects by using the Wondershare Filmora.
What if you wish to animate images, adding movement to stationary objects in time? Well, there are apps for these purposes!
Videos and GIFs are a mainstay of social media. These days it’s rare to see a still photo online. The simplicity with which you can add filter and movement effects to your images has identified a proliferation of these online animated photos.
So what if you wish to apply animation to a still image? There are many apps for such purposes. Given below is a selection of the best apps you can use to animate images on both Android and iPhone devices with the help of animated photo collage apps.
In this article
01 [Top 10 Animated Photo Collage Apps ](#Part 1)
02 [Wondershare Filmora: The Advanced Editing App of 2022!](#Part 2)
Part 1 Top 10 Animated Photo Collage Apps
We’ve compiled an index of the top 10 animated collage apps compatible with photo enthusiasts and photographers at every level of expertise. Most of these amazing apps are available for both iOS and Android, so there are numerous options no matter what device you’re using.
Before showcasing your collage-making skills, gather the perfect images from your last photography project.
1. GIPHY
The GIPHY is the mega search engine for all things related to GIFs.
Here, you can easily upload and find reaction memes for anything under the sun; GIPHY is also available with a mobile app. It also helps you to frame your GIFs and animate photos. Then, you can upload them by using the inbuilt animation tools on the platform.
It consists of a sticker maker (available for iPhone X and later), and you can also add captions to your animated images or shoot your short videos.
2. Motionleap
Motionleap is also an ideal animated photo collage app, and for a good reason. This app is highly reviewed, with 250,000 plus ratings of five stars in the Play Store.
Motionleap is a free animated photo collage app, although there’s a subscription and Pro version, too. Also, it doesn’t put a watermark over your image when you download it to your phone.
The app’s primary goal is animating still images and converting them into short, concise, and looping videos. Programming directional cues can easily do it into your image by dragging your thumb across the screen.
You can also freeze certain image sections and apply filters on top of your picture to frame an atmosphere within your image.
Unluckily, Motionleap saves your animated still photos in video format unless you’ve paid for a Pro account.
3. Movepic
Movepic is almost similar to Motionleap in that it animates images, but you can make a massive chunk of this animation with its inbuilt filters and overlays.
The only limitation is that you wouldn’t be able to remove the watermark without updating it to a VIP account. Movepic also saves your pictures automatically as a movie file than within a GIFformat.
4. ImgPlay
ImgPlay is another ideal animated collage maker app you can use to animate images. It creates ready-to-use animated images for the web and consists of easy-to-understand yet advanced controls. Unfortunately, it also adds a watermark on your image—one that you can’t remove unless you update to a complete account.
The process of making animated images online and GIFs can be in a couple of different ways within ImgPlay itself. You can use still photographs side-by-side, use burst images, or even videos.
5. Zoetropic
If you wish to animate your photo within a few minutes only, Zoetropic is for you. Though its functions aren’t as extensive as other apps we’ve mentioned, it does the job pretty well.
To get started, you choose your images and then select motion points. Next, you mask or stabilize the areas you want to keep still. Finally, you choose your overlays and animations. You can also change colors and add tags.
On the downside, it has limited the number of effects you can access on a free account. However, you might find what you’re considering if you are looking for a prompt manner to animate a photo online.
6. StoryZ
Despite its unattractive user interface, StoryZ is one of the useful apps on this list. It works excellent with still photographs to animate them effectively via various programmed paths of movements, overlays, and color filters—a lot of which are free and unique. It also automatically saves your files as GIFs.
One of the most incredible things about StoryZ is cutting the watermark from your image if you preview a quick ad before saving the file.
7. Lumyer
Lumyer is one of the useful animated photo collage apps on our list, which lets you add hundreds and thousands of effects to your pictures to animate them. So whether you wish to include sparkle or subtle weather effects, seasonal animations for Christmas and Halloween, or all-out scene transformations like appearing on a rollercoaster, Lumyer can do it.
If you’re okay with the watermark, Lumyer is a good choice, but otherwise, you may prefer one of our other recommended photo animation college apps.
8. VIMAGE 3D
VIMAGE got recognized with Google Play award in 2018. It can make some pretty good-looking animated photos in just a few clicks. There’s a wide variety of animations, filters, and sounds to select among a bundle of options.
You don’t even need to select the object because VIMAGE detects and replaces it for you quite automatically.
Similar to these apps, you do need to pay to remove the watermark, get access to the full effects library, and you can export your photos online in up to 2560p resolution.
9. Photo Bender
Photo Bender is an Android-specific animated photo collage app that helps you warp to animate photos digitally by coloring your image by stretching it, bending it, and using brushes. You can then export your transformed images as GIFs, JPEGs, MP4s, and PNGs.
While this app doesn’t contain ratings like others on this list, it is highly rated, so it’s still worth a look.
10. Werble
The primary purpose of Werble is to animate your images, and while the basic account is free, in-app purchases are also available. Most of Werble’s animations come through different filter effects that you can add on top of your images.
A downside to Werble is that it saves these images entirely automatically as GIFs, so they’re ready to use online. The limitation? However, you need to pay to cut the watermark that they place on your image. That watermark is huge enough to be disturbing.
Part 2 Wondershare Filmora: The Advanced Editing App of 2022
If you are tired of considering various animated photo collage apps, here is a section to introduce you to the best alternative with a reliable yet powerful video editor.
Filmora : This platform comes entirely loaded with advanced social integration options and editing functions. You can enjoy premium preloaded video editing services on your mobile devices with this tool. For video customization requirements, you can imply multiple caption options, title editing facilities, and advanced animation effects.
Filmora Features
- Filmora is available for both Android as well as iOS devices without any login.
- Filmora assists users in importing camera roll, Instagram, Google Plus, and Facebook collections with simplicity.
- This software tool contains different advanced features and highlights the missing components of the above-listed animated collage maker apps.
- You can add watermarks to all created videos.
- Above all, now share videos directly shared via Instagram, Facebook, WhatsApp, Email, Vimeo, YouTube, etc.
This advanced editing tool, Wondershare Filmora, can efficiently serve all your requirements. The good part is that it syncs well with iOS and Android devices so that you can access it anywhere with simplicity.
Also, Filmora provides is compatible with 4K videos, which is the most outstanding merit for developing informative video sessions and tutorials. Its ability to work offline with principal functions will simplify your editing tasks even when the internet connection is still an issue.
Wondershare Filmora
Get started easily with Filmora’s powerful performance, intuitive interface, and countless effects!
Try It Free Try It Free Try It Free Learn More >
AI Portrait – The best feature of Wondershare Filmora for gameplay editing
The AI Portrait is a new add-on in Wondershare Filmora. It can easily remove video backgrounds without using a green screen or chroma key, allowing you to add borders, glitch effects, pixelated, noise, or segmentation video effects.
Conclusion
Now that we’ve run through some great animated photo collage apps that can enliven your images, you can choose the ones you’re wandering to try out. They all follow roughly a similar concept, so you should select the ones you think will work best for such needs.
Gone are the days when you had to necessarily use a robust desktop computer to edit your videos and images. You can go forward to efficiently perform the same operation all from your smartphone with significant effects by using the Wondershare Filmora.
Beginner Tutorial on Making Unity 2D Animation
Beginner Tutorial on Making Unity 2D Animation
An easy yet powerful editor
Numerous effects to choose from
Detailed tutorials provided by the official channel
Now, ideally, Unity is considered to be a suitable tool for 3D games that have too many animated elements. But, this doesn’t mean that you cannot design 2D animations with Unity.
In this guide, we are going to show you how to get started with 2D animations in Unity and incorporate them into your games to enhance the overall gameplay.
In this article
01 [Can Unity Be Used for 2D Animation?](#Part 1)
02 [How Do You Make a 2D Animation in Unity?](#Part 2)
Part 1 Can Unity Be Used for 2D Animation?
First, things first; can Unity be used for 2D animations. The answer is Yes! Being a full-scale gaming engine, developers/designers can use Unity to create stunning Unity 2D animations for their games. The tool has dedicated 2D animation packages that contain all the elements you’ll need to create high-quality 2D animations for your games.
Keep in mind that for each object, you’ll have to create a separate 2D sprite sheet and use it to configure the 2D animation. However, there are other 2D animation packages that you can install, using sprite sheets is the most common method to get the job done. The latest versions of Unity also offer a dedicated Stripe library where you can add multiple Stripe Sheets and it becomes relatively easier to manage them.
With the Sprite library, 2D animations with Unity becomes a hassle-free job. Designers can even manage dozens of 2D animations without any hassle. The Sprite editor will also let you control the overall movement of different moving objects in your animation and make it look more sleek. In general, if you are planning to create 2D animations for your videos or even a dedicated mobile game, Unity can be a suitable software for the job.
Part 2 How Do You Make a 2D Animation in Unity?
To create a 2D animation with Unity, the first step would be to create a dedicated Sprite sheet. Now, you can use a wide variety of third-party programs to create the desired Sprite sheet. In general, it depends on the project requirements and the personal preferences of the designer himself. However, whichever tool you use to create the Stripe sheets, make sure that the final image is a transparent PNG file as it’ll make your job much easier while animating objects in Unity.
After you have successfully designed the stripe (a transparent image file) in an external application, the next step would be to import it to Unity. When you import the Stripe file, make sure to create a separate Sprite folder so that you can easily manage all these files in one place. Also, a dedicated Stripe folder will allow you to keep a check on each Stripe file in a hassle-free manner.

While importing 2D animations into Unity, you can also configure its settings to ensure that it matches the overall game design. Ideally, we recommend keeping the Pixels Per Unit to the same size as all your visual components. This will allow you to maintain the desired consistency throughout the project and make it visually enticing.
Now, before proceeding any further, make sure to switch to the “Stripe Editor” window. With the “Stripe Editor”, you’ll be able to control the overall settings of each animation individually and control the movement to make it look crisper. In the Stripe window, you can also adjust the slice settings and save your work to avoid any potential data loss.
At this point, you can move towards creating the 2D animation with Unity. To do this, you’ll have to bring both the Animation and the Animator tabs to UnityParts editing panel. You can make them visible by tapping the “Windows” option on your screen.

That’s it; a timeline-based editing panel will appear on your screen. From here onwards, you can get started with animating the object. Each animation will depend on your specific game requirements. So, feel free to unleash your creativity and use different elements of Unity to bring your 2D animations to life.
Part 3 Part 3 Creating 2D Animations for Your Videos - An Effective Solution for Video Editors
Now, when it comes to creating 2D animations for videos, you may not want to use a tool like Unity to get the job done. Why? Because Unity is more suitable for animating objects for games. Not to mention, Unity has a steep learning curve and if you are not an experienced Unity developer, you may fail to create a 2D animation properly.
So, if you only need a 2D animation for videos, we have a better alternative for the job. Instead of Unity, you can use Wondershare Filmora Video Editor for the job. It’s a full-scale video editing software that’s specifically designed to edit high-quality videos. Whether you are a YouTube or simply edit videos for your clients, using Wondershare Filmora will help you showcase your creativity more effectively.

Filmora has a built-in media library that offers a plethora of ready-to-use animation templates as well as video effects. You can import these animations into your video with a single click and enhance the overall quality of the video to drive better engagement. These animations are also customizable, which means you can tweak their appearance to match the overall theme of your video itself. The media player also offers audio effects that’ll make your videos more dramatic.
And, finally, you’ll also find a wide variety of advanced editing options such as keyframing, motion detection, and green screen editing. All these features will allow you to uplift the production quality of your videos and engage potential viewers more effectively.
For Win 7 or later (64-bit)
For macOS 10.12 or later
A few key features of Filmora that make it the most reliable video editing software include:
● Thousands of ready-to-use animation templates and video effects
● Easy-to-use timeline-based editing panel
● Dedicated audio editor to control the sound quality
● Cross-platform compatibility
So, if you are also planning to launch a high-scale video for YouTube or any other platform by adding
Key Takeaways from This Episode
● Creating 2D animations with Unity is possible, however, you must be an expert game developer with extensive experience in Unity game development
● To create Unity 2D animations, you’ll have to use Sprite Sheets and then import them into Unity to turn them into animation.
● Now, if you are a regular video editor and only want to create 2D animations for videos, you can also use full-scale software such as Wondershare Filmora Pro.
Now, ideally, Unity is considered to be a suitable tool for 3D games that have too many animated elements. But, this doesn’t mean that you cannot design 2D animations with Unity.
In this guide, we are going to show you how to get started with 2D animations in Unity and incorporate them into your games to enhance the overall gameplay.
In this article
01 [Can Unity Be Used for 2D Animation?](#Part 1)
02 [How Do You Make a 2D Animation in Unity?](#Part 2)
Part 1 Can Unity Be Used for 2D Animation?
First, things first; can Unity be used for 2D animations. The answer is Yes! Being a full-scale gaming engine, developers/designers can use Unity to create stunning Unity 2D animations for their games. The tool has dedicated 2D animation packages that contain all the elements you’ll need to create high-quality 2D animations for your games.
Keep in mind that for each object, you’ll have to create a separate 2D sprite sheet and use it to configure the 2D animation. However, there are other 2D animation packages that you can install, using sprite sheets is the most common method to get the job done. The latest versions of Unity also offer a dedicated Stripe library where you can add multiple Stripe Sheets and it becomes relatively easier to manage them.
With the Sprite library, 2D animations with Unity becomes a hassle-free job. Designers can even manage dozens of 2D animations without any hassle. The Sprite editor will also let you control the overall movement of different moving objects in your animation and make it look more sleek. In general, if you are planning to create 2D animations for your videos or even a dedicated mobile game, Unity can be a suitable software for the job.
Part 2 How Do You Make a 2D Animation in Unity?
To create a 2D animation with Unity, the first step would be to create a dedicated Sprite sheet. Now, you can use a wide variety of third-party programs to create the desired Sprite sheet. In general, it depends on the project requirements and the personal preferences of the designer himself. However, whichever tool you use to create the Stripe sheets, make sure that the final image is a transparent PNG file as it’ll make your job much easier while animating objects in Unity.
After you have successfully designed the stripe (a transparent image file) in an external application, the next step would be to import it to Unity. When you import the Stripe file, make sure to create a separate Sprite folder so that you can easily manage all these files in one place. Also, a dedicated Stripe folder will allow you to keep a check on each Stripe file in a hassle-free manner.
While importing 2D animations into Unity, you can also configure its settings to ensure that it matches the overall game design. Ideally, we recommend keeping the Pixels Per Unit to the same size as all your visual components. This will allow you to maintain the desired consistency throughout the project and make it visually enticing.
Now, before proceeding any further, make sure to switch to the “Stripe Editor” window. With the “Stripe Editor”, you’ll be able to control the overall settings of each animation individually and control the movement to make it look crisper. In the Stripe window, you can also adjust the slice settings and save your work to avoid any potential data loss.
At this point, you can move towards creating the 2D animation with Unity. To do this, you’ll have to bring both the Animation and the Animator tabs to UnityParts editing panel. You can make them visible by tapping the “Windows” option on your screen.
That’s it; a timeline-based editing panel will appear on your screen. From here onwards, you can get started with animating the object. Each animation will depend on your specific game requirements. So, feel free to unleash your creativity and use different elements of Unity to bring your 2D animations to life.
Part 3 Part 3 Creating 2D Animations for Your Videos - An Effective Solution for Video Editors
Now, when it comes to creating 2D animations for videos, you may not want to use a tool like Unity to get the job done. Why? Because Unity is more suitable for animating objects for games. Not to mention, Unity has a steep learning curve and if you are not an experienced Unity developer, you may fail to create a 2D animation properly.
So, if you only need a 2D animation for videos, we have a better alternative for the job. Instead of Unity, you can use Wondershare Filmora Video Editor for the job. It’s a full-scale video editing software that’s specifically designed to edit high-quality videos. Whether you are a YouTube or simply edit videos for your clients, using Wondershare Filmora will help you showcase your creativity more effectively.
Filmora has a built-in media library that offers a plethora of ready-to-use animation templates as well as video effects. You can import these animations into your video with a single click and enhance the overall quality of the video to drive better engagement. These animations are also customizable, which means you can tweak their appearance to match the overall theme of your video itself. The media player also offers audio effects that’ll make your videos more dramatic.
And, finally, you’ll also find a wide variety of advanced editing options such as keyframing, motion detection, and green screen editing. All these features will allow you to uplift the production quality of your videos and engage potential viewers more effectively.
For Win 7 or later (64-bit)
For macOS 10.12 or later
A few key features of Filmora that make it the most reliable video editing software include:
● Thousands of ready-to-use animation templates and video effects
● Easy-to-use timeline-based editing panel
● Dedicated audio editor to control the sound quality
● Cross-platform compatibility
So, if you are also planning to launch a high-scale video for YouTube or any other platform by adding
Key Takeaways from This Episode
● Creating 2D animations with Unity is possible, however, you must be an expert game developer with extensive experience in Unity game development
● To create Unity 2D animations, you’ll have to use Sprite Sheets and then import them into Unity to turn them into animation.
● Now, if you are a regular video editor and only want to create 2D animations for videos, you can also use full-scale software such as Wondershare Filmora Pro.
How to Make Animation Characters with the Best Character Creators
How-to Guide: Make Animation Characters with the Best Animated Character Creators
An easy yet powerful editor
Numerous effects to choose from
Detailed tutorials provided by the official channel
Are you a marketer and don’t know where to start? You can start with character animation?
This article will engage you with many software to create your own animated character. Plus, some easy ways too for those novices in this field with simple apps to create your own animated character.
In this article
01 [How to Choose the Right Character Animation Maker?](#Part 1)
02 [Top 8 Software to make Character Animation. ](#Part 2)
03 [3 Easy Ways to Make Your Own Cartoon Character (For Beginners/Non-Illustrators)](#Part 3)
Part 1 How to Choose the Right Character Animation Maker?
If you are concerned about which character animation maker to choose, be aware of the analysis and alternatives you need to know. After knowing the needs of the animation as going to be mentioned below, your chances of selecting the software correctly will increase.
At first, you need to know what are you creating, what kind of animation software you want to produce? What are the objectives of videos marketing or movies? By answering these questions, you can choose the correct software.
You need to decide the features you require in the software. You may not require all the advanced features. If you are doing a simple animated video, you require only simple features but enough to complete your project.
There is a separate type of software for 2D and 3D, and you need to choose your requirement to complete the project
Now that you have known all the features you need to consider before choosing software choose it wisely and enjoy creating character animation. We’ll go over a considerable number of animation software in this journal, and you can choose one of them.
Part 2 Top 8 software to Create Character Animation
Due to the difficulty in selecting character animation software, we have sorted out some of the most beneficial and user-friendly options.
01 Animaker
The best part of this software is its versatility and flexibility. Animaker is valuable software for every kind of business animation, and it involves multiple features. It is a feature-rich free animated character creator.
●You may create six different styles using Animaker: 2D, 2.5D, typography, infographic, whiteboard, and handcrafts.
●100 charts, 1000 icons, and 3000 maps are in the animated infographic.
●You can use advanced animation features like a record, multi-move, curve, transition effects, camera in and out, and enter/exit effects.
●Animaker supports audio features like text to speech, sound effects, voice recording, and creating custom sounds.
●Also, it comes along with pre-designed transition effects and supports HD videos.
This is free software for simple basic features, but in the case of professional uses, the price ranges from $12 - $99 based on the features required.
02Stop Motion Studio
If you are a beginner, this software would be helpful. After creating high-quality 2K stop motion animations videos, you can mix them with 2D drawings. The disadvantage does not have any free features.
●It runs on different operating systems like iOS, macOS, Android, and Windows.
●It has DSLR camera support.
●There is a green screen option to change the background of the video or animation.
●Other handy tools like paint tools, magic erasers, and sound effects.
●This is an effortless editing app.
The price of the Stop Motion Studio varies based on the operating system. For Windows, it is $1.99; for iOS and Android, the price is $4.99; and for Mac, the cost is $9.99.
03Vyond
With Vyond, you can create an array of handy and professional animated character creator videos. Users from pro to beginners can easily access this software for creating an explainer video and whiteboard animations using this feature-rich software.
●It offers a wide range of entering/exit effects for static images.
●Convenient drag and drop features for beginners to access quickly.
●One of the unique features here is automatic lip-syncing.
●There is a built-in library that you can customize.
●Vyond supports team collaboration and camera tools like camera angles and pan zooms.
Vyond offers a free trial of 14 days to check the features and friendliness. You can get the active features for a month or a year by paying $49 and $999 based on the specs you require.
04Wideo
This is an excellent online tool designed for beginners to develop animated videos. Here, you can create an animated character and use that in animated videos, presentations, and promotions with the animated character creator, the best tool for beginners.
●‘Wideo’ provides HD support for the users.
●You may use an extensive library of templates to make videos for various reasons.
●Add music and soundtracks to your videos.
●Publish the final animated videos directly to YouTube.
●The length of your videos and the amount of storage space depend on your plan.
The licensing plan of Wideo varies based on the expertise and features required. It ranges from $19 to $79 per month. Also, it has a free trial of 7 days.
05Blender
Blender is open-source software used to create animated characters online to create video games, models, renderings, etc. Blender has a rich animation feature, helping everyone to make all levels of animation.
●Blender is compatible with Mac OS X, Windows, and Linux.
●Advanced modeling, sculpting, and UV tools are included.
●Provided with rigging as well as animation in advanced mode.
●Enjoy other features like sculpt brush strokes, onion skinning, layers, and colors for the stroke and fill.
●It creates a very smooth animation video.
This is free animated character creator software. Thus, you need not pay to access any tools or features in Blender. It will be more beneficial for personal use without any investment.
06’Mango Animate’ Character Maker
‘Mango Animate’ Character Maker is the most excellent beginner character animating software available.
●It includes several action skeletons templates that make it simple to turn several PNG/PSD photos into realistic 2D animated creatures.
●Mango Animate CM comes with an extensive library of predefined motions, allowing users to animate their chosen character quickly and effortlessly.
●It may also personalize animated characters by changing their clothing or skin tone.
●Add facial expressions to tell fantastic stories.
●It can be operated by beginners also easily.
The ‘Mango Animate’ Character Maker price ranges from $ 4.08 to $16.58 per month based on the level of animation you are going to make (starter, pro, and enterprise).
01iClone
How about a character animation software whose name links to well-known companies like Ford and Microsoft?
●iClone is precisely that software with completely customizable 3D characters.
●And a wide range of lip-sync options.
●It’s a favorite among animators looking for a program that includes facial animation, motion key editing, and soft fabric physics simulation.
●Furthermore, thanks to its enhanced shadowing and lighting effects.
●Creating a realistic environment for characters has never been easier.
The price of iClone software is $398 for the character animation essential bundle and $199 for the standard package.
08Auto Desk Maya
Professional animation designers will find Autodesk Maya to be the ideal toolkit.
●It is a medium for channeling your technical and artistic abilities into fascinating 3D animations.
●Since it is a comprehensive program, it covers rendering, simulation, and modeling simultaneously.
●Clump modifier, MASH nodes, UV editor, and After Effects Live Link is significant characteristics worth highlighting in their innovative features.
●You can easily shape 3D objects and scenes with institutive modeling tools.
●It creates realistic effects from explosions to cloth simulation.
Auto Desk Maya is a costly software with a price of $215 per month and $4845 for three years.
Part 3 3 Easy Ways to Create Your Own Cartoon Character (For Beginners/Non-Illustrators)
Using the right yet easy tool is the right approach for those pretty new in creating their cartoon character. So, here we shall reveal about such easy ways to make your cartoon character.
01Online Avatar Builders
To create animated characters online, an avatar with avatar builders is a fun approach to a unique look for yourself. Because these tools are frequently online, you won’t need to install any software. In most circumstances, you won’t need to register to utilize the service. Online avatar generators have several advantages, including that they are either free or inexpensive to use. One significant disadvantage is that they can only acquire a hazy resemblance to you.
01Character Creator
With this online tool, create your own animated character, a custom female or male vector character. Aside from facial customization, you get access to a vast wardrobe of clothing, shoes, and body accessories. The character creator is ideal for generating a muscular, alternative “video game type” identity.
03Wondershare Wondershare Filmora Video Editor
Wondershare Wondershare Filmora Video Editor is an excellent option if you want simple but strong video editing tools. The keyframing tools will assist you in creating smooth and precise cartoon effects. With one click, you can quickly turn a photo into a comic. Additionally, you can choose from a variety of header templates and transitions. This is a free animated character creator.
For Win 7 or later (64-bit)
For macOS 10.12 or later
This YouTube tutorial will help you learn about keyframes and different templates. In comparison to the other ten ways listed above, we recommend Wondershare Filmora Video Editor .
● Key Takeaways from This Episode →
● Understanding how to choose the right character animator
● Eight software to create your own character animation
● Some of the simple ways to create cartoon characters.
Ways to Get the Most up to Date Cartoon Character Design Tips
Ways to Make Sure You Get the Most up to Date Cartoon Character Design Tips
An easy yet powerful editor
Numerous effects to choose from
Detailed tutorials provided by the official channel
Making an overall excellent and unique character design cartoon art style is sometimes hard. The truth is that everyone has a favorite cartoon character, but the question is, how does this character come to life? While you are about to start copying other well-known cartoon or comic characters, you will eventually branch out and come with your own. In addition, there are several ways to come up with ideas for cartoon characters’ concept art to draw. Any of these ways can get you started on populating your world of cartoons.
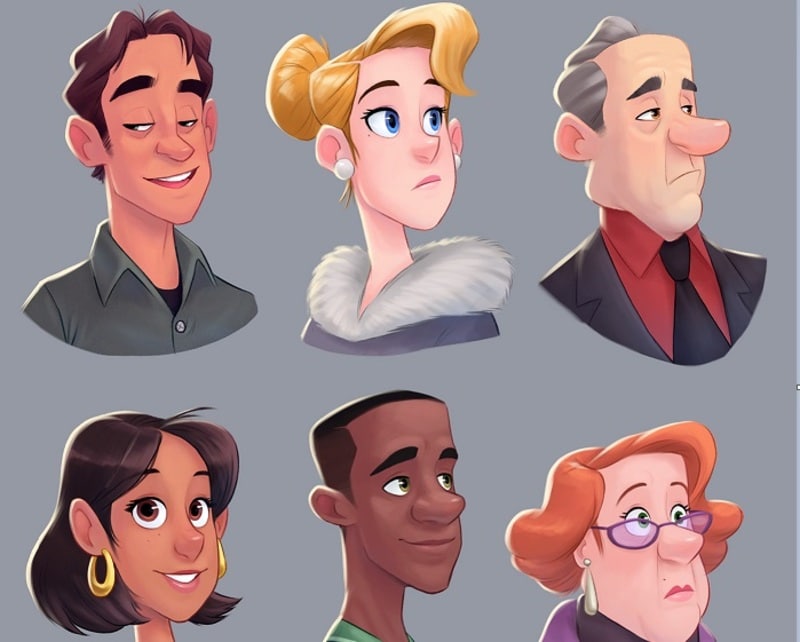
More so, the process of tackling your character design is often full of hurdles. This process requires a lot of creative thinking to create one’s character from the beginning, although many well-known characters from films, advertising, and cartoons look straightforward. But need to exert a vast amount of skill and effort to make them effective.
In this article
01 [10 Tips for Brilliant Cartoon Character Design](#Part 1)
02 [How to Apply Cartoon Character Design to Filmora Video Editing?](#Part 2)
Part 1 Tips for Brilliant Cartoon Character Design
As a cartoon character designer, here are 10 tips you need to put in place to make a brilliant cartoon character design. They are;
● Do not lose the magic
Make sure you try not to polish all the charm from your characters. Many character designers usually begin their project with a sketch and agree that this is often where the essence of the character gets captured. Therefore, when you start working up a design, make sure you do not lose that magic.
The first thing is to decide what you are trying to communicate and then create loose sketches with flow, acting, and movement. As soon as you tighten up the drawing, some of the dynamics will automatically loosen, so it is crucial to have as much life in the early stages as possible. In addition, movement is all but impossible to add later. Thus, you need to ensure that it is in the initial sketch.
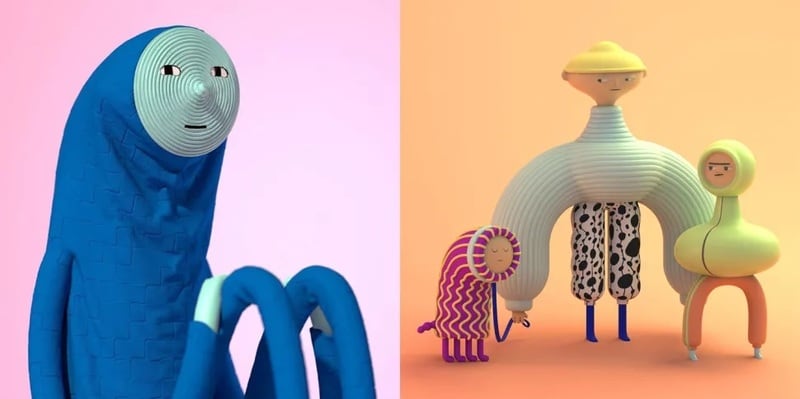
● Avoid reference material
Although inspiration needs to come from somewhere, the aim is to create something original, and you shouldn’t have the reference material right in front of you as you work.
Also, if you take a look at something and when you try and hazily remember it in your mind, that is when you can end up making something new, rather than making a pastiche of something.
● Make research on other characters
For guidance purposes, it can be much help when you try to deconstruct why certain character designs work and why some do not work. Also, there is no shortage of research material to be found, as illustrated characters are appearing everywhere like stickers on fruit, TV commercials, shop signs, cereal boxes, animations on mobile phones, etc. Make sure you study these character designs and think about what makes some successful and the particular thing you like about them.
● Also, take a look elsewhere
It is also a great idea to look beyond some character designs when hunting for inspiration because most times, when you begin a project, you might start with the feeling to evoke. The process usually starts with the designer taking a video of himself as a reference and capturing something of the character’s posture or idea’s movement.
● Try not to lose sight of the original idea
It is elementary to allow your favorite designs to influence you subconsciously. Sometimes when you look back at your initial artworks, it will bring back the feeling you had when you were creating them, and the project you are trying to develop will shift back on track.
● Exaggerate
When you exaggerate the defining features of your character design, it will help it appear larger than real life. Also, exaggerated features help viewers identify the characters’ essential qualities. Exaggeration is key in cartoon caricatures and also helps emphasize certain personality traits. In addition, if your character is strong, try not to give it normal-sized bulging arms, but soup them up so that they are five times as big as they should be. Note that the technique of exaggeration can also apply to characteristics.
● Decide the aim of your character design
When creating a character design, consider your audience as character designs mainly aim at young children, typically designed around bright colors and basic shapes. Also, commissioned character designs are no less creative but are usually more restrictive. Most clients usually have specific needs but want you to do your ‘thing.’ Usually, you need to break down the core features and personality. For example, if the eyes are essential, you will focus the whole design around the face, making this the key element that stands out.
● Make your character distinctive
Whether you are creating a monkey, monster, or robot, you can guarantee that there will be a hundred other similar creations out there. Therefore, your character design is required to be exciting and robust in a visual sense to captivate people’s attention.
● Create clear silhouettes
A silhouette is required to help you understand the character’s gesture which is another good way to differentiate your character and improve its pose. This lets you see how the character ‘reads’ and requires you to make the gesture clearer. It answers the question of; can things be simplified? Do you have a basic understanding of character, emotions, and how the line of action works? In addition, try not to overlap everything and keep the limbs separately.
● Consider line quality
Finally, curved and straight curved lines read by your eyes are at different speeds. The lines drawn are from which your character design is composed can go some way to describing it. Soft, thick, round, and even lines may suggest acute and approachable character, whereas sharp, uneven, scratchy lines may indicate an erratic and uneasy character.
Part 3 How to Apply Cartoon Character Design to Filmora Video Editing?
You can cartoon your character background design in your Video Editing turn a video into a cartoon depending on your device. If you are working on your mobile phone, then you can convert any number of your social media accounts that include film or photos to some degree. The detail or performance level will not be great most of the time.
But if you wish to do it professionally using your PC, then the best video to the cartoon software program for both Windows and Mac is Filmora. Filmora is the best software to convert video to a Cartoon background easily. It will enable you the requisite tools that will act as the right approach to create cartoon characters with appropriate locations and video.
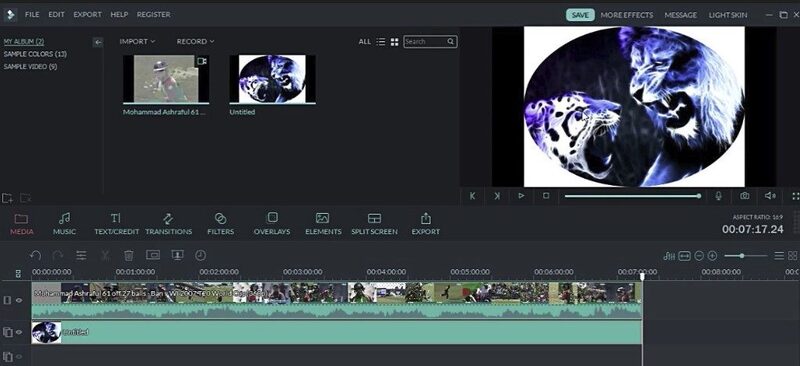
The Wondershare Filmora Video Editor professional video editing software allows you to turn your videos into cartoons easily. The process by which videos get converted into cartoon style on Filmora is straightforward.
Step 1: Import the videos into Filmora
From the official website of Filmora, you will get the link to download, install and launch. Then from the main interface, import your video to it.
Step 2: Add the Cartoon effect under Stylize
You can add different effects or use the Stylize animation effects to your cartoon character.
Step 3: Adjust the cartoon settings and do some basic color corrections to perfect the cartoon result.
Go through different settings to provide the exemplary cartoon character, its background, and full-fledged video edited with Filmora.
For Win 7 or later (64-bit)
For macOS 10.12 or later
● Ending Thoughts →
● This article explained all you require to get the most up-to-date cartoon character design tips. A section of the report gave a list of the information you need to put in place to achieve this. Another area recommended the best video to cartoon editing tools used by cartoon character designers to get the most out of their character design.
● Also, Filmora acts as the right tool to cover up all the necessary editing you might need to create your cartoon character with related background and artistic pieces of equipment.
Making an overall excellent and unique character design cartoon art style is sometimes hard. The truth is that everyone has a favorite cartoon character, but the question is, how does this character come to life? While you are about to start copying other well-known cartoon or comic characters, you will eventually branch out and come with your own. In addition, there are several ways to come up with ideas for cartoon characters’ concept art to draw. Any of these ways can get you started on populating your world of cartoons.
More so, the process of tackling your character design is often full of hurdles. This process requires a lot of creative thinking to create one’s character from the beginning, although many well-known characters from films, advertising, and cartoons look straightforward. But need to exert a vast amount of skill and effort to make them effective.
In this article
01 [10 Tips for Brilliant Cartoon Character Design](#Part 1)
02 [How to Apply Cartoon Character Design to Filmora Video Editing?](#Part 2)
Part 1 Tips for Brilliant Cartoon Character Design
As a cartoon character designer, here are 10 tips you need to put in place to make a brilliant cartoon character design. They are;
● Do not lose the magic
Make sure you try not to polish all the charm from your characters. Many character designers usually begin their project with a sketch and agree that this is often where the essence of the character gets captured. Therefore, when you start working up a design, make sure you do not lose that magic.
The first thing is to decide what you are trying to communicate and then create loose sketches with flow, acting, and movement. As soon as you tighten up the drawing, some of the dynamics will automatically loosen, so it is crucial to have as much life in the early stages as possible. In addition, movement is all but impossible to add later. Thus, you need to ensure that it is in the initial sketch.
● Avoid reference material
Although inspiration needs to come from somewhere, the aim is to create something original, and you shouldn’t have the reference material right in front of you as you work.
Also, if you take a look at something and when you try and hazily remember it in your mind, that is when you can end up making something new, rather than making a pastiche of something.
● Make research on other characters
For guidance purposes, it can be much help when you try to deconstruct why certain character designs work and why some do not work. Also, there is no shortage of research material to be found, as illustrated characters are appearing everywhere like stickers on fruit, TV commercials, shop signs, cereal boxes, animations on mobile phones, etc. Make sure you study these character designs and think about what makes some successful and the particular thing you like about them.
● Also, take a look elsewhere
It is also a great idea to look beyond some character designs when hunting for inspiration because most times, when you begin a project, you might start with the feeling to evoke. The process usually starts with the designer taking a video of himself as a reference and capturing something of the character’s posture or idea’s movement.
● Try not to lose sight of the original idea
It is elementary to allow your favorite designs to influence you subconsciously. Sometimes when you look back at your initial artworks, it will bring back the feeling you had when you were creating them, and the project you are trying to develop will shift back on track.
● Exaggerate
When you exaggerate the defining features of your character design, it will help it appear larger than real life. Also, exaggerated features help viewers identify the characters’ essential qualities. Exaggeration is key in cartoon caricatures and also helps emphasize certain personality traits. In addition, if your character is strong, try not to give it normal-sized bulging arms, but soup them up so that they are five times as big as they should be. Note that the technique of exaggeration can also apply to characteristics.
● Decide the aim of your character design
When creating a character design, consider your audience as character designs mainly aim at young children, typically designed around bright colors and basic shapes. Also, commissioned character designs are no less creative but are usually more restrictive. Most clients usually have specific needs but want you to do your ‘thing.’ Usually, you need to break down the core features and personality. For example, if the eyes are essential, you will focus the whole design around the face, making this the key element that stands out.
● Make your character distinctive
Whether you are creating a monkey, monster, or robot, you can guarantee that there will be a hundred other similar creations out there. Therefore, your character design is required to be exciting and robust in a visual sense to captivate people’s attention.
● Create clear silhouettes
A silhouette is required to help you understand the character’s gesture which is another good way to differentiate your character and improve its pose. This lets you see how the character ‘reads’ and requires you to make the gesture clearer. It answers the question of; can things be simplified? Do you have a basic understanding of character, emotions, and how the line of action works? In addition, try not to overlap everything and keep the limbs separately.
● Consider line quality
Finally, curved and straight curved lines read by your eyes are at different speeds. The lines drawn are from which your character design is composed can go some way to describing it. Soft, thick, round, and even lines may suggest acute and approachable character, whereas sharp, uneven, scratchy lines may indicate an erratic and uneasy character.
Part 3 How to Apply Cartoon Character Design to Filmora Video Editing?
You can cartoon your character background design in your Video Editing turn a video into a cartoon depending on your device. If you are working on your mobile phone, then you can convert any number of your social media accounts that include film or photos to some degree. The detail or performance level will not be great most of the time.
But if you wish to do it professionally using your PC, then the best video to the cartoon software program for both Windows and Mac is Filmora. Filmora is the best software to convert video to a Cartoon background easily. It will enable you the requisite tools that will act as the right approach to create cartoon characters with appropriate locations and video.
The Wondershare Filmora Video Editor professional video editing software allows you to turn your videos into cartoons easily. The process by which videos get converted into cartoon style on Filmora is straightforward.
Step 1: Import the videos into Filmora
From the official website of Filmora, you will get the link to download, install and launch. Then from the main interface, import your video to it.
Step 2: Add the Cartoon effect under Stylize
You can add different effects or use the Stylize animation effects to your cartoon character.
Step 3: Adjust the cartoon settings and do some basic color corrections to perfect the cartoon result.
Go through different settings to provide the exemplary cartoon character, its background, and full-fledged video edited with Filmora.
For Win 7 or later (64-bit)
For macOS 10.12 or later
● Ending Thoughts →
● This article explained all you require to get the most up-to-date cartoon character design tips. A section of the report gave a list of the information you need to put in place to achieve this. Another area recommended the best video to cartoon editing tools used by cartoon character designers to get the most out of their character design.
● Also, Filmora acts as the right tool to cover up all the necessary editing you might need to create your cartoon character with related background and artistic pieces of equipment.
How to Make an Animated Travel Map Video?
How to Make an Animated Travel Map Video?

Benjamin Arango
Mar 27, 2024• Proven solutions
Animated travel map videos make it easy for the viewers to follow the routes from the source to destination locations right on the single screen. While the static maps would only allow the audience to see the markers from where the journey would start and is expected to end, the animated ones show the real-time movements and therefore look more interactive when viewed.
That said, here you will learn how to create an attractive and engaging animated travel map video using one of the easiest post-production applications, Wondershare Filmora, which is widely appreciated by amateurs and professionals throughout the globe. In another section, you will also learn about an alternative program that might be of some help in case you are more into online designing.
- Method 1: Make Animated Travel Map Videos with Location Video Maker - [Video Tutorial]
- Method 2: Make Interactive Animated Travel Map with Pictramap
- Method 3: Create Animated Travel Map Using Multidev
Method 1 Make Animated Travel Map Videos with Location Video Maker
The entire process of creating an animated travel map video in Wondershare’s Filmora is categorized into two parts, wherein the first part you will collect all the ingredients that are needed to get started, and in the second part you will actually make an animated map using the tools and features present in Filmora.
Watch a video tutorial to see how to make an animated map for a video:
For Win 7 or later (64-bit)
 Secure Download
For macOS 10.14 or later
Secure Download


Part 1: Prepare the Travel Map Materials
Following are the ingredients and the methods to collect them for animated travel map preparation:
Step 1: Get the Map
The first thing that you would need to prepare an animated map is an image of a realistic map. Thanks to Google and Microsoft, these things are now pretty easy to arrange. The process is given below:
- Launch your preferred web browser
- Type google.com in the address bar or the search box and hit Enter
- Scroll to zoom out so you can see the entire world map on one screen

- Type Snipping Tool in the Cortana search box present on the left side of the Taskbar
- Launch Snipping Tool, and use it to capture the screenshot of the map
Note: Snipping Tool is a built-in app in Windows 10 and is available for free. If you are using any other operating system, or have a different program to capture the screenshots, feel free to use it according to your convenience.
- Save the screenshot you captured as a JPG file on your PC
Step 2: Mark Out the Map Path
The next step in the process of preparing an animated travel map is to mark your route on it. To do so, you can use any of your preferred photo editing tools. However, to keep this illustration simple, Microsoft Paint is used here, and the method is given below:
- Right-click the screenshot you just captured
- Go to Open with on the context menu, and then click Paint from the submenu that appears
- Pick your preferred color from the pallet of the Paint interface. It is advisable to use an eye-catchy shade such as Red
- Use the Sphere shape tool to draw a circle over the source and destination locations on the map
- Use the Line tool to draw a line from the source point to the destination. Try giving the line a few turns to make it look realistic
- Go to File > Save As, and save the marked image with a different name
Note: Once this is done, you should have two image files of the map, i.e., one without the marks and one with it
Step 3: Download Some Travel Icons
Another important ingredient in an effective travel map animation is touring icons such as location marker image, a traveling medium symbol like a helicopter, airplane, car/bike (for short distances), etc. A couple of websites that offer royalty-free stock photos at absolutely no cost are listed below:
Note: Although the websites given above allow you to download and use their stock images and icons for free, you may need to give credits to the designers/creators of the symbols while using their objects. Therefore, you are suggested to check the Terms & Conditions and norms of usage of the elements before downloading and adding them to your projects.
Part 2: Make Animated Travel Map Videos with Filmora
After you have gathered all the necessary ingredients that are required to create a travel map animation, it is now time to get to work. The following instructions would guide you through the step-by-step process of preparing a decent and realistic animated travel map in Wondershare Filmora :
For Win 7 or later (64-bit)
Secure Download
For macOS 10.14 or later
Secure Download
Step 1: Import Ingredients to Filmora and Add Them to the Timeline
Launch the video editor on your computer, click anywhere inside the Media window at the upper-left area, and import all the images and icons that you collected earlier to program. Next, drag both the images of the map, i.e., with and without the marks to the Timeline, and ensure that they are of the same duration and are placed on the same track.

Note: Be sure to put the map without the marks first, and then the one with the marks. Also note that the images have the playback duration of 5 seconds in the Timeline by default, and this tenure can be reduced or increased by dragging the side handle of the media to the left or right respectively.
Step 2: Add Transition for Illusion of Route Appearance
Go to Transition from the standard toolbar at the top, locate the Erase Slide transition effect from the available presets, and place it in between the two image files that you earlier added to the Timeline. Next, click and drag either of the side handles of the transition to the end of the media clip. Notice how the other side of the effect is expanded in equal proportion.

Step 3: Preview and Export
Press the Spacebar on the keyboard to preview the video and see if the route appears as if it is being drawn on the map. Once the animation looks acceptable, click EXPORT from the top-center, go to the Local tab on the Export window, select MP4 from the formats list in the left, and click EXPORT from the bottom-right corner to export the current animation to MP4.
Step 4: Customize the Travel Map Media
Either start a new project and import the video of the map you exported in the previous step to the app and then to the Timeline, or remove the existing media from the Timeline in the same project, and add the exported video to it for convenience.

For Win 7 or later (64-bit)
Secure Download
For macOS 10.14 or later
Secure Download
Next, position the Skimmer (Playhead) a couple of frames before the one the route line appears and starts stretching from, and click the Split icon from the editing toolbar above the Timeline itself. Repeat this process for the other side of the media, i.e., position the Skimmer a couple of frames after the route line reaches the destination location, and click the Split icon again. Then remove the separated segments from both the sides by selecting them and pressing Delete on the keyboard, leaving only the portion where the animation is visible.

Optionally, right-click the media that is left behind in the Timeline, and go to Speed and Duration from the context menu. On the Custom Speed box, drag the Speed slider to the left to decrease the playback speed resulting in the increased duration of the media. Alternatively, you can manually enter a value in the Speed box to get precise tenure. Click OK when you are done.

Step 5: Add Animations to Travel Map
Right-click the media in the Timeline, and go to Add Animation from the context menu. Make sure that the Skimmer is on the first frame, and add several keyframes as explained below:
- Click Add to add the first keyframe

- Move a couple of frames further, and click Add one more time. Now, while you are on this second keyframe, use the Scale slider to zoom in to the map so the source location remains within focus.

- Next, move the Playhead further and add another keyframe a couple of frames before the route line hits the edge of the window.
- After this, move the Playhead again and position it where the route line reaches its destination location. Add another keyframe here as well, and move the map in the Preview window so the focus is now on the destination.
- Move the Playhead a few frames further, add another keyframe, and use the Scale slider to zoom a bit more into the map to make the entire animation look realistic. Click OK to save the changes.
Step 6: Add Icons and Titles, and Export the Project
Drag the image of the traveling medium to the Timeline, and place it on the frame the route line starts from. Make sure to place the image on the track above the map, and stretch it to the end so it remains visible throughout the animation. Next, use the method explained above to add keyframes to move the medium along with the route line from the source to the destination. Optionally, add the image of the location marker at the destination point, go to Transition, and add your preferred transition effect, preferably Dissolve, to the marker track in the Timeline so it looks as if it has appeared as the medium arrived the destination.
For Win 7 or later (64-bit)
Secure Download
For macOS 10.14 or later
Secure Download
Get back to the first frame in the Timeline, go to Titles on the standard toolbar, and add a title preset somewhere near the source location. Resize the text, change the format as needed, and add your preferred caption to it such as the start time, name, etc. Reduce the duration of the track so the title appears for a few frames, preferably before the map animation starts. Click OK when done. Repeat this process for the destination point as well.
Once everything is complete, click the Play button in the Preview window to review your work. If the video looks acceptable, click EXPORT from the top-center of the interface, and use the method explained earlier to export the animated travel map in your preferred format.
![]()
Method 2 How to Make Interactive Animated Travel Map with Pictramap
If you don’t want to install a dedicated animation software on your computer due to limited hardware resources or some other reason, there is an online solution called Pictramap to create a travel map animation using a web browser. The web app offers a lucrative interface that could be easily understood and worked with to produce an animated map for free.
The process to create an animated travel map with Pictramap is given below:
Step 1: Create a Project
Launch your favorite web browser, go to https://www.pictramap.com/ , click Create yours now, it’s free, and sign up to Pictramap using your preferred method. When you are on the Dashboard, enter a name in the field available under the My Projects section, and click Create to create a new project (the animated map).

Step 2: Define the Locations and Method of Commute
On the map, right-click the location you want to start your journey from, enter the name of the location or any other significant title, and click Add. Click the location marker, click the Travel Mode icon, and select your preferred mode of traveling. Repeat this process to mark the destination location as well.

Step 3: Preview the Animation
Click the View Animation button from the upper-right corner of the page to see the animated travel map.

Downsides of Using Pictramap to Create Animated Travel Map Video
Although Pictramap allows you to create a travel map animation with ease and extremely quickly, at the time of this writing, it offers no way of downloading the animation to your PC, and therefore it couldn’t be used in your projects.
If you are using Wondershare Filmora, you can use its built-in screen recording feature to record the animation that Pictramap plays, and then save the captured footage as MP4 or any other format on your computer. This video can then be imported to your projects for further uses.
![]()
A cross-platform for making videos anywhere for all creators

Why your video editing isn’t good enough? How about some creative inspo?
- 100 Million+ Users
- 150+ Countries and Regions
- 4 Million+ Social Media Followers
- 5 Million+ Stock Media for Use
* Secure Download

Method 3 How To Make Animated Travel Map Using Multidev
Multi.dev is still a new web-based application to build awesome animated maps, but it’s good! The application helps you create presentations about all your recent and previous trips. And the interface is also hassle-free.
So, follow this step-by-step guide to making animated maps with Multi.dev.
Step 1: Open Multi.dev
Visit Multi.dev from your internet browser.

Once the tool gets open, you will see a demo video. This example clip will have animated maps of different locations. So it is up to you whether to use the same example and edit the places you have been to or are planning to visit. Or, simply create a new animated map from scratch.
Step 2: Choose Your First Location
Take your mouse cursor on the left side of the application and type the first location in the search bar. As soon as you do it, you will see that the “travel arrow” will automatically begin from there. Likewise, type and select the next location through the search bar.
Once you type the location, you will see 8 travel modes, including airplane, bus, and train. You can select the same mode for all sites or a different mode for another place. Totally up to you!

Step 3: Select Map Themes
All your chosen places will be highlighted in the software’s minimalistic map.

Step 4: Download Map on Your Computer
If you’re happy with the animated map, click the “Create Video” button to save the animated map on your computer in a few minutes.


Contrarily, you can also share the animation by choosing the “Share Animation” option.
Conclusion
An animated travel map plays an important role to add a realistic touring effect to your motion picture projects. While you can use a web app like Pictramap to create such an animation online easily and for free, the limitations it comes along with might keep you from choosing this method.
Instead, you may want to get more inclined toward a dedicated post-production software like Wondershare Filmora that gives you full control over the process, and the freedom to choose your preferred format to export the animation to for independent usage.
For Win 7 or later (64-bit)
Secure Download
For macOS 10.14 or later
Secure Download
Benjamin Arango
Benjamin Arango is a writer and a lover of all things video.
Follow @Benjamin Arango
Benjamin Arango
Mar 27, 2024• Proven solutions
Animated travel map videos make it easy for the viewers to follow the routes from the source to destination locations right on the single screen. While the static maps would only allow the audience to see the markers from where the journey would start and is expected to end, the animated ones show the real-time movements and therefore look more interactive when viewed.
That said, here you will learn how to create an attractive and engaging animated travel map video using one of the easiest post-production applications, Wondershare Filmora, which is widely appreciated by amateurs and professionals throughout the globe. In another section, you will also learn about an alternative program that might be of some help in case you are more into online designing.
- Method 1: Make Animated Travel Map Videos with Location Video Maker - [Video Tutorial]
- Method 2: Make Interactive Animated Travel Map with Pictramap
- Method 3: Create Animated Travel Map Using Multidev
Method 1 Make Animated Travel Map Videos with Location Video Maker
The entire process of creating an animated travel map video in Wondershare’s Filmora is categorized into two parts, wherein the first part you will collect all the ingredients that are needed to get started, and in the second part you will actually make an animated map using the tools and features present in Filmora.
Watch a video tutorial to see how to make an animated map for a video:
For Win 7 or later (64-bit)
Secure Download
For macOS 10.14 or later
Secure Download
Part 1: Prepare the Travel Map Materials
Following are the ingredients and the methods to collect them for animated travel map preparation:
Step 1: Get the Map
The first thing that you would need to prepare an animated map is an image of a realistic map. Thanks to Google and Microsoft, these things are now pretty easy to arrange. The process is given below:
- Launch your preferred web browser
- Type google.com in the address bar or the search box and hit Enter
- Scroll to zoom out so you can see the entire world map on one screen
- Type Snipping Tool in the Cortana search box present on the left side of the Taskbar
- Launch Snipping Tool, and use it to capture the screenshot of the map
Note: Snipping Tool is a built-in app in Windows 10 and is available for free. If you are using any other operating system, or have a different program to capture the screenshots, feel free to use it according to your convenience.
- Save the screenshot you captured as a JPG file on your PC
Step 2: Mark Out the Map Path
The next step in the process of preparing an animated travel map is to mark your route on it. To do so, you can use any of your preferred photo editing tools. However, to keep this illustration simple, Microsoft Paint is used here, and the method is given below:
- Right-click the screenshot you just captured
- Go to Open with on the context menu, and then click Paint from the submenu that appears
- Pick your preferred color from the pallet of the Paint interface. It is advisable to use an eye-catchy shade such as Red
- Use the Sphere shape tool to draw a circle over the source and destination locations on the map
- Use the Line tool to draw a line from the source point to the destination. Try giving the line a few turns to make it look realistic
- Go to File > Save As, and save the marked image with a different name
Note: Once this is done, you should have two image files of the map, i.e., one without the marks and one with it
Step 3: Download Some Travel Icons
Another important ingredient in an effective travel map animation is touring icons such as location marker image, a traveling medium symbol like a helicopter, airplane, car/bike (for short distances), etc. A couple of websites that offer royalty-free stock photos at absolutely no cost are listed below:
Note: Although the websites given above allow you to download and use their stock images and icons for free, you may need to give credits to the designers/creators of the symbols while using their objects. Therefore, you are suggested to check the Terms & Conditions and norms of usage of the elements before downloading and adding them to your projects.
Part 2: Make Animated Travel Map Videos with Filmora
After you have gathered all the necessary ingredients that are required to create a travel map animation, it is now time to get to work. The following instructions would guide you through the step-by-step process of preparing a decent and realistic animated travel map in Wondershare Filmora :
For Win 7 or later (64-bit)
Secure Download
For macOS 10.14 or later
Secure Download
Step 1: Import Ingredients to Filmora and Add Them to the Timeline
Launch the video editor on your computer, click anywhere inside the Media window at the upper-left area, and import all the images and icons that you collected earlier to program. Next, drag both the images of the map, i.e., with and without the marks to the Timeline, and ensure that they are of the same duration and are placed on the same track.
Note: Be sure to put the map without the marks first, and then the one with the marks. Also note that the images have the playback duration of 5 seconds in the Timeline by default, and this tenure can be reduced or increased by dragging the side handle of the media to the left or right respectively.
Step 2: Add Transition for Illusion of Route Appearance
Go to Transition from the standard toolbar at the top, locate the Erase Slide transition effect from the available presets, and place it in between the two image files that you earlier added to the Timeline. Next, click and drag either of the side handles of the transition to the end of the media clip. Notice how the other side of the effect is expanded in equal proportion.
Step 3: Preview and Export
Press the Spacebar on the keyboard to preview the video and see if the route appears as if it is being drawn on the map. Once the animation looks acceptable, click EXPORT from the top-center, go to the Local tab on the Export window, select MP4 from the formats list in the left, and click EXPORT from the bottom-right corner to export the current animation to MP4.
Step 4: Customize the Travel Map Media
Either start a new project and import the video of the map you exported in the previous step to the app and then to the Timeline, or remove the existing media from the Timeline in the same project, and add the exported video to it for convenience.
For Win 7 or later (64-bit)
Secure Download
For macOS 10.14 or later
Secure Download
Next, position the Skimmer (Playhead) a couple of frames before the one the route line appears and starts stretching from, and click the Split icon from the editing toolbar above the Timeline itself. Repeat this process for the other side of the media, i.e., position the Skimmer a couple of frames after the route line reaches the destination location, and click the Split icon again. Then remove the separated segments from both the sides by selecting them and pressing Delete on the keyboard, leaving only the portion where the animation is visible.
Optionally, right-click the media that is left behind in the Timeline, and go to Speed and Duration from the context menu. On the Custom Speed box, drag the Speed slider to the left to decrease the playback speed resulting in the increased duration of the media. Alternatively, you can manually enter a value in the Speed box to get precise tenure. Click OK when you are done.
Step 5: Add Animations to Travel Map
Right-click the media in the Timeline, and go to Add Animation from the context menu. Make sure that the Skimmer is on the first frame, and add several keyframes as explained below:
- Click Add to add the first keyframe
- Move a couple of frames further, and click Add one more time. Now, while you are on this second keyframe, use the Scale slider to zoom in to the map so the source location remains within focus.
- Next, move the Playhead further and add another keyframe a couple of frames before the route line hits the edge of the window.
- After this, move the Playhead again and position it where the route line reaches its destination location. Add another keyframe here as well, and move the map in the Preview window so the focus is now on the destination.
- Move the Playhead a few frames further, add another keyframe, and use the Scale slider to zoom a bit more into the map to make the entire animation look realistic. Click OK to save the changes.
Step 6: Add Icons and Titles, and Export the Project
Drag the image of the traveling medium to the Timeline, and place it on the frame the route line starts from. Make sure to place the image on the track above the map, and stretch it to the end so it remains visible throughout the animation. Next, use the method explained above to add keyframes to move the medium along with the route line from the source to the destination. Optionally, add the image of the location marker at the destination point, go to Transition, and add your preferred transition effect, preferably Dissolve, to the marker track in the Timeline so it looks as if it has appeared as the medium arrived the destination.
For Win 7 or later (64-bit)
Secure Download
For macOS 10.14 or later
Secure Download
Get back to the first frame in the Timeline, go to Titles on the standard toolbar, and add a title preset somewhere near the source location. Resize the text, change the format as needed, and add your preferred caption to it such as the start time, name, etc. Reduce the duration of the track so the title appears for a few frames, preferably before the map animation starts. Click OK when done. Repeat this process for the destination point as well.
Once everything is complete, click the Play button in the Preview window to review your work. If the video looks acceptable, click EXPORT from the top-center of the interface, and use the method explained earlier to export the animated travel map in your preferred format.
![]()
Method 2 How to Make Interactive Animated Travel Map with Pictramap
If you don’t want to install a dedicated animation software on your computer due to limited hardware resources or some other reason, there is an online solution called Pictramap to create a travel map animation using a web browser. The web app offers a lucrative interface that could be easily understood and worked with to produce an animated map for free.
The process to create an animated travel map with Pictramap is given below:
Step 1: Create a Project
Launch your favorite web browser, go to https://www.pictramap.com/ , click Create yours now, it’s free, and sign up to Pictramap using your preferred method. When you are on the Dashboard, enter a name in the field available under the My Projects section, and click Create to create a new project (the animated map).
Step 2: Define the Locations and Method of Commute
On the map, right-click the location you want to start your journey from, enter the name of the location or any other significant title, and click Add. Click the location marker, click the Travel Mode icon, and select your preferred mode of traveling. Repeat this process to mark the destination location as well.
Step 3: Preview the Animation
Click the View Animation button from the upper-right corner of the page to see the animated travel map.
Downsides of Using Pictramap to Create Animated Travel Map Video
Although Pictramap allows you to create a travel map animation with ease and extremely quickly, at the time of this writing, it offers no way of downloading the animation to your PC, and therefore it couldn’t be used in your projects.
If you are using Wondershare Filmora, you can use its built-in screen recording feature to record the animation that Pictramap plays, and then save the captured footage as MP4 or any other format on your computer. This video can then be imported to your projects for further uses.
![]()
A cross-platform for making videos anywhere for all creators
Why your video editing isn’t good enough? How about some creative inspo?
- 100 Million+ Users
- 150+ Countries and Regions
- 4 Million+ Social Media Followers
- 5 Million+ Stock Media for Use
* Secure Download
Method 3 How To Make Animated Travel Map Using Multidev
Multi.dev is still a new web-based application to build awesome animated maps, but it’s good! The application helps you create presentations about all your recent and previous trips. And the interface is also hassle-free.
So, follow this step-by-step guide to making animated maps with Multi.dev.
Step 1: Open Multi.dev
Visit Multi.dev from your internet browser.
Once the tool gets open, you will see a demo video. This example clip will have animated maps of different locations. So it is up to you whether to use the same example and edit the places you have been to or are planning to visit. Or, simply create a new animated map from scratch.
Step 2: Choose Your First Location
Take your mouse cursor on the left side of the application and type the first location in the search bar. As soon as you do it, you will see that the “travel arrow” will automatically begin from there. Likewise, type and select the next location through the search bar.
Once you type the location, you will see 8 travel modes, including airplane, bus, and train. You can select the same mode for all sites or a different mode for another place. Totally up to you!
Step 3: Select Map Themes
All your chosen places will be highlighted in the software’s minimalistic map.
Step 4: Download Map on Your Computer
If you’re happy with the animated map, click the “Create Video” button to save the animated map on your computer in a few minutes.
Contrarily, you can also share the animation by choosing the “Share Animation” option.
Conclusion
An animated travel map plays an important role to add a realistic touring effect to your motion picture projects. While you can use a web app like Pictramap to create such an animation online easily and for free, the limitations it comes along with might keep you from choosing this method.
Instead, you may want to get more inclined toward a dedicated post-production software like Wondershare Filmora that gives you full control over the process, and the freedom to choose your preferred format to export the animation to for independent usage.
For Win 7 or later (64-bit)
Secure Download
For macOS 10.14 or later
Secure Download
Benjamin Arango
Benjamin Arango is a writer and a lover of all things video.
Follow @Benjamin Arango
Amazing Ways to Find Suitable Animated Graphic Maker
Incredible Ways to Find Suitable Animated Graphic Maker
An easy yet powerful editor
Numerous effects to choose from
Detailed tutorials provided by the official channel
Are you an enthusiast of animations, too? Do you, too, want to create something fun and exciting and show your skills through animation?
It is a hundred percent possible, with the animated graphic maker software available in the present times. Let us know more about this fantastic world of animation and the suitable animated graphic maker that will make your animation dreams and skills more enhanced and proficient in no time!
In this article
01 [Facts About Animated Graphics You Need to Know](#Part 1)
02 [Why You Should Use Animated Graphics in Your Marketing](#Part 2)
03 [Why You Should Use Animated Graphics in Your Marketing](#Part 3)
Part 1 Facts About Animated Graphics You Need to Know
There are specific facts that are important for you to know if you want to work with animations and use graphic animated tools. The facts are as follows.
01 Can Vector Graphics Be Animated?
Precisely, yes. Vector graphics can readily be animated, and that, too, is better than pixels. Animation or movement in animations occurs due to either of the two components- pixels and vectors. One can readily be animated in vector graphics. There are software tools available that can assist in the animation of vector graphics ideally. Thus, with the help of various software, creating animated vector graphics is now effortless and fun!

02 How Do I Animate a Still Image Online?
The process to animate static images online is no big deal at all. You just have to be familiar with the various software that is available for this work. Along with being familiar with the software, you also have to know how each of them works. If you know how the animation tools in the software you are going to use, it becomes an effortless and easy task to animate still images online.
You can animate static images online with the help of some renowned software or app like - Wondershare Filmora, Plotagraph, StoryZ, GIFMaker.me, PixaMotion, Movepic, Photo Motion, and 3Dthis. Each of these software ideally provides you with all the tools and functions that you can choose for animating still images online.
Wondershare Filmora
Power Up Your Story with Filmora. Professional video editing is made easy.
03 How Do You Make Animated Vector Graphics?
There are specific steps involved that help you in creating animated graphics. And the steps are as follows.
Steps for creating animated graphics:
● Isolating the vector
This step involves the selection of the vector image that you want to animate.
● Making duplicates of the vector image
You need to duplicate the vector image that you have chosen to animate. The duplication will help you reflect the movement in the image.
● Making changes in the frames
Proceed to make minor changes in each of the frames to reflect movement in the images.
● Wash it, rinse it and continue the cycle
Make a duplication of the artboard. Then, perform the changes the same as done previously. And repeat this cycle.
● Copy the large artboard
Copy the large artboard to the software you are using for animation. And then utilize the available tools of animation in the software for animating vector graphics.

Part 2 Why You Should Use Animated Graphics in Your Marketing?
In a very precise way, we can answer as animated graphics propagate and amplify awareness of the brands that integrate their utility. However, this is a general way of answering the important question. There are several reasons that make it necessary and beneficial for you to integrate animated graphics for websites for marketing your brand name. And they are as follows.
01 Eye-catching
One of the most important reasons for your marketing to include animated graphics is that they catch the attention of the audience more than any other method of marketing. They are interesting and fun, and that is the feature that attracts the attention of the audience. They get to see your brand in a more exciting and exciting way. Consequently, marketing your brand becomes ideally effective.

02 Easily informative
The motive for marketing is to inform the audience and other people about different information about your brand or company. Often, conveying information about your brands, services, and products becomes uninteresting for the audience. To make it more appealing, animated graphics can do the perfect job. They are fascinating to watch and deliver all the required information in a new and novel way. This does not bore the audience. Instead, if the animations are unique and exciting, people can actually be interested in watching them at will.
03 Customize it based on your needs
Graphic animations can be created based on the requirements of your marketing. And it is not just about the needs; it can be based on the audience genre you have. For example, if your products or services are meant for the kids, the animation will be made according to those factors that appeal to the kids. If your brand is for senior citizens, the animations will be different. Most importantly, if your brand shifts its audience genre, animations can also be created in the genre that you are choosing to serve at present. Thus, the customization ability of graphics animation offers flexibility in marketing.

03 A most efficient method of marketing
Graphic animation delivers the required promotional information in no time and in the most attractive way possible. Thus, there can be no other method of marketing as efficient and quick as graphics animation.
Part 3How to Create Animated Graphics That Stand out?
Well, the aspect of animation has attained the attention of thousands of enthusiasts all around the globe. And so, you will find numerous people making animations. And for this reason, there is numerous animation software available too on the internet. But, what can you do to design your animation to stand out? There are a few software for graphic animation that are better than the rest. And one of them is Wondershare Filmora. It is one of the top software. And it will readily and effortlessly help you integrate your animation skills and make your animations unique among the crowd.
What are the key features of this software?
● Professional quality animation tools
Do you believe that you possess immense animation skills? Then, no other software can be as motivational for you as Filmora Pro because its tools and features help you create professional-quality animation. You can readily create animated graphics for youtube from this software.
● Option for import and export
There is no occurrence of graphics hardware acceleration while you export a file from Filmora Pro.
● Easy user interface
The tools present in this software for animation are of professional quality. You can make animations that will look highly proficient. But, that does not make this software a difficult-to-use tool.
Filmora Features →
● Limitless video tracks
● Availability in Windows and well Mac
● Auto color correction
Filmora Features →
● Audio Noise Reduction
● Motion Graphics animation support
● Automatic Audio Sync
Key Takeaways from This Episode
● This was all about the different aspects of choosing a suitable animated graphic maker.
● You can readily opt for one of the several free animated graphics maker software available.
● But, if you want to avail yourself of the best, Filmora is the best go-to software for animated graphic making and exploring your animation skills.


Are you an enthusiast of animations, too? Do you, too, want to create something fun and exciting and show your skills through animation?
It is a hundred percent possible, with the animated graphic maker software available in the present times. Let us know more about this fantastic world of animation and the suitable animated graphic maker that will make your animation dreams and skills more enhanced and proficient in no time!
In this article
01 [Facts About Animated Graphics You Need to Know](#Part 1)
02 [Why You Should Use Animated Graphics in Your Marketing](#Part 2)
03 [Why You Should Use Animated Graphics in Your Marketing](#Part 3)
Part 1 Facts About Animated Graphics You Need to Know
There are specific facts that are important for you to know if you want to work with animations and use graphic animated tools. The facts are as follows.
01 Can Vector Graphics Be Animated?
Precisely, yes. Vector graphics can readily be animated, and that, too, is better than pixels. Animation or movement in animations occurs due to either of the two components- pixels and vectors. One can readily be animated in vector graphics. There are software tools available that can assist in the animation of vector graphics ideally. Thus, with the help of various software, creating animated vector graphics is now effortless and fun!
02 How Do I Animate a Still Image Online?
The process to animate static images online is no big deal at all. You just have to be familiar with the various software that is available for this work. Along with being familiar with the software, you also have to know how each of them works. If you know how the animation tools in the software you are going to use, it becomes an effortless and easy task to animate still images online.
You can animate static images online with the help of some renowned software or app like - Wondershare Filmora, Plotagraph, StoryZ, GIFMaker.me, PixaMotion, Movepic, Photo Motion, and 3Dthis. Each of these software ideally provides you with all the tools and functions that you can choose for animating still images online.
Wondershare Filmora
Power Up Your Story with Filmora. Professional video editing is made easy.
03 How Do You Make Animated Vector Graphics?
There are specific steps involved that help you in creating animated graphics. And the steps are as follows.
Steps for creating animated graphics:
● Isolating the vector
This step involves the selection of the vector image that you want to animate.
● Making duplicates of the vector image
You need to duplicate the vector image that you have chosen to animate. The duplication will help you reflect the movement in the image.
● Making changes in the frames
Proceed to make minor changes in each of the frames to reflect movement in the images.
● Wash it, rinse it and continue the cycle
Make a duplication of the artboard. Then, perform the changes the same as done previously. And repeat this cycle.
● Copy the large artboard
Copy the large artboard to the software you are using for animation. And then utilize the available tools of animation in the software for animating vector graphics.
Part 2 Why You Should Use Animated Graphics in Your Marketing?
In a very precise way, we can answer as animated graphics propagate and amplify awareness of the brands that integrate their utility. However, this is a general way of answering the important question. There are several reasons that make it necessary and beneficial for you to integrate animated graphics for websites for marketing your brand name. And they are as follows.
01 Eye-catching
One of the most important reasons for your marketing to include animated graphics is that they catch the attention of the audience more than any other method of marketing. They are interesting and fun, and that is the feature that attracts the attention of the audience. They get to see your brand in a more exciting and exciting way. Consequently, marketing your brand becomes ideally effective.
02 Easily informative
The motive for marketing is to inform the audience and other people about different information about your brand or company. Often, conveying information about your brands, services, and products becomes uninteresting for the audience. To make it more appealing, animated graphics can do the perfect job. They are fascinating to watch and deliver all the required information in a new and novel way. This does not bore the audience. Instead, if the animations are unique and exciting, people can actually be interested in watching them at will.
03 Customize it based on your needs
Graphic animations can be created based on the requirements of your marketing. And it is not just about the needs; it can be based on the audience genre you have. For example, if your products or services are meant for the kids, the animation will be made according to those factors that appeal to the kids. If your brand is for senior citizens, the animations will be different. Most importantly, if your brand shifts its audience genre, animations can also be created in the genre that you are choosing to serve at present. Thus, the customization ability of graphics animation offers flexibility in marketing.
03 A most efficient method of marketing
Graphic animation delivers the required promotional information in no time and in the most attractive way possible. Thus, there can be no other method of marketing as efficient and quick as graphics animation.
Part 3How to Create Animated Graphics That Stand out?
Well, the aspect of animation has attained the attention of thousands of enthusiasts all around the globe. And so, you will find numerous people making animations. And for this reason, there is numerous animation software available too on the internet. But, what can you do to design your animation to stand out? There are a few software for graphic animation that are better than the rest. And one of them is Wondershare Filmora. It is one of the top software. And it will readily and effortlessly help you integrate your animation skills and make your animations unique among the crowd.
What are the key features of this software?
● Professional quality animation tools
Do you believe that you possess immense animation skills? Then, no other software can be as motivational for you as Filmora Pro because its tools and features help you create professional-quality animation. You can readily create animated graphics for youtube from this software.
● Option for import and export
There is no occurrence of graphics hardware acceleration while you export a file from Filmora Pro.
● Easy user interface
The tools present in this software for animation are of professional quality. You can make animations that will look highly proficient. But, that does not make this software a difficult-to-use tool.
Filmora Features →
● Limitless video tracks
● Availability in Windows and well Mac
● Auto color correction
Filmora Features →
● Audio Noise Reduction
● Motion Graphics animation support
● Automatic Audio Sync
Key Takeaways from This Episode
● This was all about the different aspects of choosing a suitable animated graphic maker.
● You can readily opt for one of the several free animated graphics maker software available.
● But, if you want to avail yourself of the best, Filmora is the best go-to software for animated graphic making and exploring your animation skills.
Also read:
- Updated How To Turn Yourself Into Anime Character for 2024
- Best 10 Video to GIF Converters Top Picks
- New In 2024, How to Make Photo 3D Cartoon Online
- Updated 2024 Approved How to Make 3D Cartoon of Yourself
- New The Best 8 Places for High-Quality Royalty Free Gifs
- 2024 Approved Obtain and Create Animated GIF Icons
- New How to Animate - Adobe Animate Tutorial for All
- In 2024, Guide on Creating GIF in WhatsApp iPhone
- New 12 Animation Video Maker That Can Triple Conversion Rates for 2024
- New In 2024, Learn Easy Blender Rigging in Only 2 Minutes
- 15 Best Pics Collage Apps Top Picks
- 2024 Approved Are You Ready to Animate Game Character From Scratch?
- Updated 2024 Approved 10 Cartoon Character Makers to Create Animated Characters
- New In 2024, Top 8 Anime Name Generators Online-Get Cool Anime Names
- Updated In 2024, Top 10 3D Text Animation Templates
- New Handy Tips From Adobe Animate Rigging Tutorial for All Learners for 2024
- Ways to Make Sure You Get the Most up to Date Cartoon Character Design Tips for 2024
- Updated In 2024, Convert Animated GIF From Video
- 2024 Approved Top 10 Animated DP for WhatsApp
- The Only Guide Youll Ever Need to Learn That Make 2D Rigging Clear to You
- 2024 Approved How I Animate Discord Profile Pictures
- Updated 2024 Approved Top Practices on Online 3D Avatar Creator
- Updated Have You Seen the Facebook Cartoon App Everyones Using Recently
- New The Secret Sauce for Making GIF Instagram Story More Stunning for 2024
- New 2024 Approved Best 10 Anime Series of All Time | Watch Anime Online
- Updated In 2024, 8 Best Motion Graphics Online Tools for Your Inspiration
- 6 Unexpected Ways Gif Animation Maker That Affect Your Marketing for 2024
- How to Convert Video to GIF Fast & Easy for 2024
- Learn Easy Blender Rigging in Only 2 Minutes for 2024
- New In 2024, 10 Stunning Stop Motion Movies You Should Not Miss
- Updated 2024 Approved How to Animate Picture Online Without Learning From Scratch
- All About Types of Motion Graphics
- 5 Websites with Animated Logos That Can Catch Your Eyes
- Updated 2024 Approved How to Make Your Own GIF on WhatsApp in Simple Ways
- New 2024 Approved You Can Turn a TikTok Into a GIF Now
- Updated 2024 Approved The Secret Sauce for Making GIF Instagram Story More Aesthetic
- Updated 15 Forgotten Cartoon Characters of All Time You Used to Love
- Updated OBS Animated Lower Thirds Alternatives for 2024
- In 2024, Top 10 Apps to Enhance Your Instagram Story Slideshow
- 2024 Approved How You Can Turn Yourself Into Anime Character Using Anime Filter
- 15 Horror Animes That Will Trigger a Heart Attack for 2024
- Updated In 2024, Easy Shortcut to Convert Videos to Gifs on iPhone
- How to Create a Whiteboard Video Step by Step 2023 Updated for 2024
- Secret Shortcut to Adobe Animate Character Tutorial
- Updated Everything You Need to Know About Becoming a Motion Graphic Designer
- How to Make GIF Stickers for WhatsApp 100 The Simple Way
- How to Fix Pokemon Go Route Not Working On Motorola Defy 2? | Dr.fone
- In 2024, 8 Ways to Transfer Photos from Motorola Moto G84 5G to iPhone Easily | Dr.fone
- All Things You Need to Know about Wipe Data/Factory Reset For Oppo A78 | Dr.fone
- In 2024, Full Guide to Bypass Asus ROG Phone 7 Ultimate FRP
- In 2024, How to Change Location On Facebook Dating for your Vivo V29e | Dr.fone
- 2024 Approved Top 10 Robotic Voice Generators (with Comparison Table)
- Full Tutorial to Bypass Your Xiaomi Redmi Note 13 Pro+ 5G Face Lock?
- 5 Ways to Track Motorola Moto G73 5G without App | Dr.fone
- In 2024, How to Bypass FRP on Xiaomi Redmi Note 13 Pro+ 5G?
- In 2024, iPogo will be the new iSpoofer On Vivo Y78t? | Dr.fone
- In 2024, The Best Android SIM Unlock Code Generators Unlock Your Lava Yuva 3 Phone Hassle-Free
- Title: New The Definitive Guide to Whiteboard Animation for 2024
- Author: Elon
- Created at : 2024-05-19 03:05:51
- Updated at : 2024-05-20 03:05:51
- Link: https://animation-videos.techidaily.com/new-the-definitive-guide-to-whiteboard-animation-for-2024/
- License: This work is licensed under CC BY-NC-SA 4.0.
