

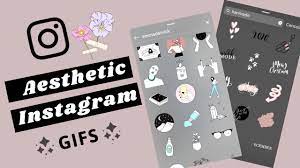
New The Secret Sauce for Making GIF Instagram Story More Aesthetic
The Secret Sauce for Making GIF Instagram Story More Aesthetic
The Secret Sauce for Making GIF Instagram Story More Aesthetic
An easy yet powerful editor
Numerous effects to choose from
Detailed tutorials provided by the official channel
Adding own gift stickers to an Instagram story is in trend. An Instagram story can be made more creative with an Instagram gif story. Make a powerful impact with a gif on an Instagram story.
In this article
01 [How to Post Gifs to Instagram Story](#Part 1)
02 [8 Cute Instagram Stickers to Make Your Stories Aesthetic](#Part 2)
03 [How to Create Custom Gifs for Instagram Stories](#Part 3)
Part 1 How to Post Gifs to Instagram Story
Instagram stories are one of the best mediums to get connected to people at large. To be in trends and grab maximum people’s attention, it is very necessary to be updated with the new elements of Instagram stories. Gif Instagram story is a new way to increase the followers and be in trends. Adding these gifs in Instagram stories will improve your business by creating more engaging content for business promotion. Let’s see how this can be done?
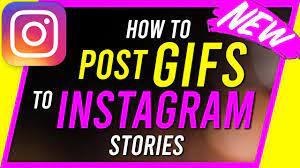
● Go to the Instagram app installed on your phone. While adding a sticker to a picture of videos in Instagram stories, a GIF option will appear.
● When you tap it, you can find several attractive gifs in the library powered by GIPHY.
● Tap add sticker button that appears on the top of the Instagram stories. Tap the ‘GIF’ icon; the library of trending gifs will appear.
● Look for the gif you need to add to your story. You also have a search option to find your favorite or trending gif.
● After selecting the desired gif, you can add it to your photo or video after resizing it as you desired.
● After finishing, tap on the ‘Your story’ icon.
So, this way, it is easy to create gif story instagram with just a few simple steps.
Part 2 Cute Instagram Stickers to Make Your Stories Aesthetic
Cute Instagram stickers are the best way to lift the creativity of your Instagram stories. Adding stickers are an amazing idea to add design to Instagram stories. Stickers make stories more creative and interesting. Some of the amazing stickers to beautify Instagram stories are:
01BOHO
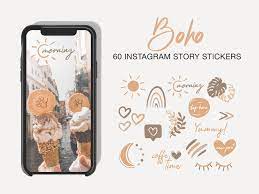
Boho stickers are good when you search for new stickers. They add fun to the story and give an amazing look for any lifestyle picture over an Instagram story. Boho white is also one type of sticker where are of them are white. Applying white boho to the picture background highlights the space and looks good. One has so many options from cute stars, hearts, lines, and flowers.
02FOOPKLO
For those who want words and saying gif on instagram story, there are some cute pink stickers available. These can be searched as FOOPKLO. Pink flowers, clusters, sayings, hearts, and some more cute stickers are there which can make Instagram stories lovelier.
03HALEYIVERS
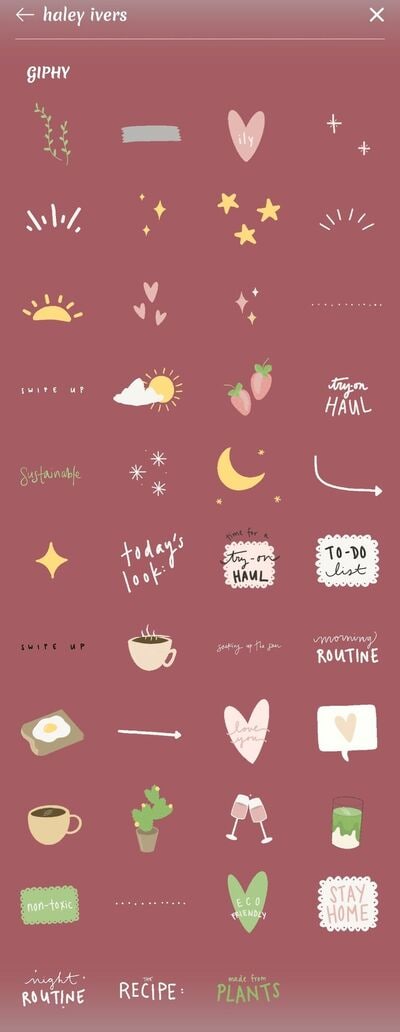
For those who are active Instagram users and update their stories every day, the old stickers may not entertain them. So, for those, there are HALEYIVERS stickers. Good morning, days, sunshine, coffee, stars, and hearts add a great style to the Instagram stories. So, next time you need some punch over Instagram stories add some HALEYIVERS stickers.
04OHLALALITA
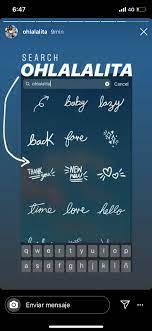
Instagram story gif is one of the great ways to even express your thoughts and moods in a summarized way. So, for those who wish to add a short story on Instagram, OHLALALITA has the best stickers. Loaded with so many cute words such as Tank you, Made with love, chill, glow, bye-bye, Wow, and many more, it makes any story in just simple words.
05SCARLETPIN
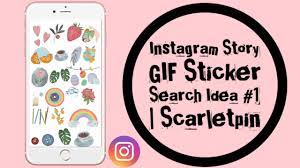
Instagram story gifs are a gift to those who are food lovers. Now with some new additions of gifs from GIPHY, they can post their food stories over their Instagram stories. The range of stickers that can help them is SCARLETPIN. These consist of some bright and colorful stickers of food. Red strawberries, tea, leaves, and oranges are great stuff to include in the morning Instagram stories.
06CURSIVE

Gif for Instagram story is also available in attractive writings. CURSIVE is the most attractive form of writing stories. Popular and cute sayings can be checked on CURSIVE and can be included in the stories. They can be searched and remembered easily. Cursive phrases can be added to the Instagram stories that look visually appealing to the viewers.
07EMOJIS
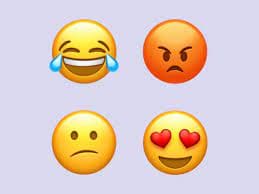
Emojis are the most lovable stickers available and can be part of any Instagram story. Typing on emojis can be done easily and they can be searched on the search bar. Perfect emojis gifs can be applied to an Instagram story that suits the situation. It can be moved or resized as per the requirement. These emojis gifs add a fun element to the Instagram stories.
08PAINT & BRUSH
Instagram gif story can be made creative with paint and brush. Earlier the users can add text with plain background only. But, paint and brush have enhanced it. Now users can add paint behind the text to make it more engaging. They are simple yet very attractive when added to the stories.
Part 3 How to Create Custom Gifs for Instagram Stories
Funny and expressive Instagram stories of your own always win the hearts of followers. Custom-made gif for Instagram is a great tool for business owners as it brings volume to their business by increasing leads. Custom-made gifs over Instagram stories are eye-catching and thus people get interested in the business. This helps in creating a good brand image for the business.
So, some of the ways to create fascinating custom Gifs Instagram stories for self and business are:
01Pin Instagram stories
Visiting a place and letting people know where you are through Instagram stories is always loved by all. Now, this can be done attractively by using the Pin feature. One can pin on the pictures and videos over the Instagram stories to a particular place. This is the most interesting element to make an Instagram story catchy. It can be done easily by tapping and holding it till it shows a pin at the little bar. This was one can pin gif at the desired location. This gif can pop up at a certain location only. It can be applied to videos one has made of a certain location by moving the gif to a place where one desires.
02Using Gif to give life to any image
To make gif Instagram story aesthetic, adding some moves with sparkles will be the right option. An Instagram user can give life to a picture by including animated elements. Gif adds a fun and surprising element to any Instagram story. When movement in any picture is added through gif, it catches the attention of the viewers and they follow it. A business can make its content engaging with gifs and can achieve its goal.
03Gifs Instagram story to catch viewer’s attention
Gif can be used effectively to create attractive Instagram stories. These gifs are good for the business to highlight their important elements. Gifs like the link in bio, sound on, and swipe up are created for a call to action from the viewers. Adding arrows and signals through gif in the Instagram stories direct the people to spend some minutes on the stories and find something new.
04Highlighting text with gif effects
A customized Instagram story can be made by highlighting text through adding gifs. Sparkle, stars, and highlights gifs can be searched easily and can be applied to any Instagram story. By adding a gif, the text looks stunning and grabs the attention of the viewers. GIPHY has several text-based gifs which can take an ordinary text over the story at a great level. It can be searched by mentioning related keywords.
05Adding gifs to customize selfies
Selfies to Instagram stories are very common. But they can be made even better with some amazing gifs from GIPHY. One can add sunglasses, hats, jewelry, and other fun props to the selfies. Filters can be added by creating their own story through a gif.
06Filmora V11 – A GIF resource
Wondershare Filmora Video Editor (The Filmora Meme maker) : Some many apps and websites offer beautiful gifs to beautify Instagram stories. One of the places where Instagram users can find a wide collection of attractive gifs is Filmora V11. It is a user-friendly tool that has media editing features. It can be used to add sound, light effects, and beautiful gifs to Instagram stories.

Wondershare Filmora - Best Video Editor for Mac/Windows
5,481,435 people have downloaded it.
Build unique custom animations without breaking a sweat.
Focus on creating epic stories and leave the details to Filmora’s auto features.
Start a creative adventure with drag & drop effects and endless possibilities.
Filmora simplifies advanced features to save you time and effort.
Filmora cuts out repetition so you can move on to your next creative breakthrough.
For creating gifs, Filmora V11 can be used and it can be made in a few simple steps. Filmora V11 app is required to be installed on the system and media files can be imported there. Files can be dragged for creating gifs. Filters, stickers, and other effects can be added. They can be further customized as per the requirement of the users. After adding background effects, music, and sound, the gif can be previewed also. The media can be saved as GIFs and can be easily exported also. To customize gifs, the Filmora Meme maker can be used. Captions can be added to GIFs and can be customized by using templates available at Filmora.
So, next time you need to know how to add your own gif to Instagram story, go to Filmora V11. This is one of the great platforms to create some amazing custom gifs to add to Instagram stories. If you want to surprise your viewers with some interesting gifs, try Filmora V11.
● Key Takeaways from This Episode →
● Instagram stories are the most effective way to mark a great impression on the viewers. It is also one of the effective tools to lift any business. Best results can be obtained when attractive and interesting gifs are added to Instagram stories.
● Instagram stories gifs are becoming trendy and there are so many cute and amazing gif stickers available to create Instagram stories. Some of the widely used gifs and stickers are Boho, FOOPKLO, HALEYIVERS, OHLALALITA, and EMOJIS. Instagram users can explore these cute and funny stickers and add them to beautify their Instagram stories.
● Customized gif has spiced up the Instagram stories and amazed the people. This feature helps a business to influence people towards their work and attract more people. The content becomes more engaging and interesting through a customized gif.
Adding own gift stickers to an Instagram story is in trend. An Instagram story can be made more creative with an Instagram gif story. Make a powerful impact with a gif on an Instagram story.
In this article
01 [How to Post Gifs to Instagram Story](#Part 1)
02 [8 Cute Instagram Stickers to Make Your Stories Aesthetic](#Part 2)
03 [How to Create Custom Gifs for Instagram Stories](#Part 3)
Part 1 How to Post Gifs to Instagram Story
Instagram stories are one of the best mediums to get connected to people at large. To be in trends and grab maximum people’s attention, it is very necessary to be updated with the new elements of Instagram stories. Gif Instagram story is a new way to increase the followers and be in trends. Adding these gifs in Instagram stories will improve your business by creating more engaging content for business promotion. Let’s see how this can be done?
● Go to the Instagram app installed on your phone. While adding a sticker to a picture of videos in Instagram stories, a GIF option will appear.
● When you tap it, you can find several attractive gifs in the library powered by GIPHY.
● Tap add sticker button that appears on the top of the Instagram stories. Tap the ‘GIF’ icon; the library of trending gifs will appear.
● Look for the gif you need to add to your story. You also have a search option to find your favorite or trending gif.
● After selecting the desired gif, you can add it to your photo or video after resizing it as you desired.
● After finishing, tap on the ‘Your story’ icon.
So, this way, it is easy to create gif story instagram with just a few simple steps.
Part 2 Cute Instagram Stickers to Make Your Stories Aesthetic
Cute Instagram stickers are the best way to lift the creativity of your Instagram stories. Adding stickers are an amazing idea to add design to Instagram stories. Stickers make stories more creative and interesting. Some of the amazing stickers to beautify Instagram stories are:
01BOHO
Boho stickers are good when you search for new stickers. They add fun to the story and give an amazing look for any lifestyle picture over an Instagram story. Boho white is also one type of sticker where are of them are white. Applying white boho to the picture background highlights the space and looks good. One has so many options from cute stars, hearts, lines, and flowers.
02FOOPKLO
For those who want words and saying gif on instagram story, there are some cute pink stickers available. These can be searched as FOOPKLO. Pink flowers, clusters, sayings, hearts, and some more cute stickers are there which can make Instagram stories lovelier.
03HALEYIVERS
For those who are active Instagram users and update their stories every day, the old stickers may not entertain them. So, for those, there are HALEYIVERS stickers. Good morning, days, sunshine, coffee, stars, and hearts add a great style to the Instagram stories. So, next time you need some punch over Instagram stories add some HALEYIVERS stickers.
04OHLALALITA
Instagram story gif is one of the great ways to even express your thoughts and moods in a summarized way. So, for those who wish to add a short story on Instagram, OHLALALITA has the best stickers. Loaded with so many cute words such as Tank you, Made with love, chill, glow, bye-bye, Wow, and many more, it makes any story in just simple words.
05SCARLETPIN
Instagram story gifs are a gift to those who are food lovers. Now with some new additions of gifs from GIPHY, they can post their food stories over their Instagram stories. The range of stickers that can help them is SCARLETPIN. These consist of some bright and colorful stickers of food. Red strawberries, tea, leaves, and oranges are great stuff to include in the morning Instagram stories.
06CURSIVE
Gif for Instagram story is also available in attractive writings. CURSIVE is the most attractive form of writing stories. Popular and cute sayings can be checked on CURSIVE and can be included in the stories. They can be searched and remembered easily. Cursive phrases can be added to the Instagram stories that look visually appealing to the viewers.
07EMOJIS
Emojis are the most lovable stickers available and can be part of any Instagram story. Typing on emojis can be done easily and they can be searched on the search bar. Perfect emojis gifs can be applied to an Instagram story that suits the situation. It can be moved or resized as per the requirement. These emojis gifs add a fun element to the Instagram stories.
08PAINT & BRUSH
Instagram gif story can be made creative with paint and brush. Earlier the users can add text with plain background only. But, paint and brush have enhanced it. Now users can add paint behind the text to make it more engaging. They are simple yet very attractive when added to the stories.
Part 3 How to Create Custom Gifs for Instagram Stories
Funny and expressive Instagram stories of your own always win the hearts of followers. Custom-made gif for Instagram is a great tool for business owners as it brings volume to their business by increasing leads. Custom-made gifs over Instagram stories are eye-catching and thus people get interested in the business. This helps in creating a good brand image for the business.
So, some of the ways to create fascinating custom Gifs Instagram stories for self and business are:
01Pin Instagram stories
Visiting a place and letting people know where you are through Instagram stories is always loved by all. Now, this can be done attractively by using the Pin feature. One can pin on the pictures and videos over the Instagram stories to a particular place. This is the most interesting element to make an Instagram story catchy. It can be done easily by tapping and holding it till it shows a pin at the little bar. This was one can pin gif at the desired location. This gif can pop up at a certain location only. It can be applied to videos one has made of a certain location by moving the gif to a place where one desires.
02Using Gif to give life to any image
To make gif Instagram story aesthetic, adding some moves with sparkles will be the right option. An Instagram user can give life to a picture by including animated elements. Gif adds a fun and surprising element to any Instagram story. When movement in any picture is added through gif, it catches the attention of the viewers and they follow it. A business can make its content engaging with gifs and can achieve its goal.
03Gifs Instagram story to catch viewer’s attention
Gif can be used effectively to create attractive Instagram stories. These gifs are good for the business to highlight their important elements. Gifs like the link in bio, sound on, and swipe up are created for a call to action from the viewers. Adding arrows and signals through gif in the Instagram stories direct the people to spend some minutes on the stories and find something new.
04Highlighting text with gif effects
A customized Instagram story can be made by highlighting text through adding gifs. Sparkle, stars, and highlights gifs can be searched easily and can be applied to any Instagram story. By adding a gif, the text looks stunning and grabs the attention of the viewers. GIPHY has several text-based gifs which can take an ordinary text over the story at a great level. It can be searched by mentioning related keywords.
05Adding gifs to customize selfies
Selfies to Instagram stories are very common. But they can be made even better with some amazing gifs from GIPHY. One can add sunglasses, hats, jewelry, and other fun props to the selfies. Filters can be added by creating their own story through a gif.
06Filmora V11 – A GIF resource
Wondershare Filmora Video Editor (The Filmora Meme maker) : Some many apps and websites offer beautiful gifs to beautify Instagram stories. One of the places where Instagram users can find a wide collection of attractive gifs is Filmora V11. It is a user-friendly tool that has media editing features. It can be used to add sound, light effects, and beautiful gifs to Instagram stories.
Wondershare Filmora - Best Video Editor for Mac/Windows
5,481,435 people have downloaded it.
Build unique custom animations without breaking a sweat.
Focus on creating epic stories and leave the details to Filmora’s auto features.
Start a creative adventure with drag & drop effects and endless possibilities.
Filmora simplifies advanced features to save you time and effort.
Filmora cuts out repetition so you can move on to your next creative breakthrough.
For creating gifs, Filmora V11 can be used and it can be made in a few simple steps. Filmora V11 app is required to be installed on the system and media files can be imported there. Files can be dragged for creating gifs. Filters, stickers, and other effects can be added. They can be further customized as per the requirement of the users. After adding background effects, music, and sound, the gif can be previewed also. The media can be saved as GIFs and can be easily exported also. To customize gifs, the Filmora Meme maker can be used. Captions can be added to GIFs and can be customized by using templates available at Filmora.
So, next time you need to know how to add your own gif to Instagram story, go to Filmora V11. This is one of the great platforms to create some amazing custom gifs to add to Instagram stories. If you want to surprise your viewers with some interesting gifs, try Filmora V11.
● Key Takeaways from This Episode →
● Instagram stories are the most effective way to mark a great impression on the viewers. It is also one of the effective tools to lift any business. Best results can be obtained when attractive and interesting gifs are added to Instagram stories.
● Instagram stories gifs are becoming trendy and there are so many cute and amazing gif stickers available to create Instagram stories. Some of the widely used gifs and stickers are Boho, FOOPKLO, HALEYIVERS, OHLALALITA, and EMOJIS. Instagram users can explore these cute and funny stickers and add them to beautify their Instagram stories.
● Customized gif has spiced up the Instagram stories and amazed the people. This feature helps a business to influence people towards their work and attract more people. The content becomes more engaging and interesting through a customized gif.
How to Get Started in Stop Motion Claymation
How to Get Started in Stop Motion Claymation
An easy yet powerful editor
Numerous effects to choose from
Detailed tutorials provided by the official channel
Stop Motion Claymation is not a new concept. It has been floating around the media industry since the 1950 and many creators have utilized it to tell their stories to the world. If you haven’t heard about claymations so far, you are not alone. Unfortunately, a wide range of the global population is unfamiliar with the concept of stop motion claymation.

But, if you are someone who wants to get into animation, but don’t have an expensive budget, claymations can be a great tool to share your story with the world and attract a global audience. In this guide, we are going to talk about claymations, some of the most popular claymation websites, and the best ways to get started with stop motion claymation. So, if you also want to explore your creative side and be unique with the approach, continue reading. By the end of this guide, you’ll be running out to buy clay and make some high-quality clay stop-motion animations.
In this article
01 [Ways to Make Stop Motion Videos with Clay Using Your Phone](#Part 1)
02 [How to Edit a Stop Motion Claymation Animation](#Part 2)
03 [Best 5 Clay for Stop Motion and Ways to Get Started](#Part 3)
Part 1 Ways to Make Stop Motion Videos with Clay Using Your Phone
So, now that you are familiar with the basic concept of clay stop animation, let’s understand how you can get started with claymation animations. Ideally, if you are an absolute beginner, you would want to start by understanding the dynamics of creating clay models first. Whether you are going to create a animation or a simple stop motion clip, the models will play a major role in the story and it would be important that these models look appealing.
When it comes to capturing the motion, you don’t need any expensive cameras. You can easily shoot the entire motion on your phone as well. Today, even the basic smartphones come with recording features and they are enough to capture the movement of your clay models. However, if you want to keep the production quality as high as possible, make sure to invest in a decent tripod. A tripod will ensure that your stop motion claymation doesn’t feel jerky at all.
After you have crafted the clay models and purchased the tripod, the next step would be to write down a script for the animation. Whether you are creating a short video or a 3-hour long movie, a script will ensure that you don’t miss out on any important scenes while recording the animation. There are multiple script writing software you can find online that’ll speed up the entire process. However, as a beginner, you can also pen down your script in a regular MS Word document. Lack of resources should never come between your creativity.
Once the script is final, the next phase would be to record the stop motion animation claymation. This is the stage where you have to be extra careful because you’ll practically be recording the storyline of your animation. Simply fire up the smartphone’s camera and start shooting each frame one-by-one. Keep in mind that shooting a stop motion animation is pretty time-consuming and it can even take up to 5-7 hours to get the job done. So, make sure to grab your cup of coffee and stay patient throughout the process.
Part 2 How to Edit a Stop Motion Claymation Animation
At this point, you would have several hundred photographs and a script in mind to make your stop motion claymation. So, the next part would be to turn these raw images into an animation. To do this, you can use different types of video editing applications. However, we recommend using Wondershare Wondershare Filmora Video Editor for the job.
It’s a full-scale cross-platform video editing tool that’s designed to help creators showcase their creativity by turning RAW images/clips into visually engaging videos. Filmora is targeted towards a wide variety of creators such as YouTubers, social media influencers, production artists, and even animators. For an animator, Filmora is nothing short of an oasis.
The tool comes with a built-in media library where you’ll find hundreds of ready-to-use animation templates. These templates could be integrated into your video with a single click. The best part is all these templates are fully customizable, which means you can modify them to meet the overall theme of your claymation.
Filmora boasts a timeline-based interface that makes the editing process a hassle-free task, especially when you have hundreds of images to edit. You can simply bring all the images to the timeline and merge them together to make a stunning animation within a few minutes. The tool also comes with a dedicated audio editing panel where you can add the voiceover or background tracks to bring life to your stop animation claymation. If you have edited any videos in the past, you may already know that the audio is the backbone for any video, even if you are editing a stop motion animation using clay.
Here’s a quick recap of all the features that make Wondershare Filmora an ideal video editing software for stop motion claymation animation.
● Timeline based user interface for more convenient editing
● Built-in media library to find graphic, animation, and audio templates
● Export videos directly to YouTube and other social media platforms
● Available for both Windows and macOS
So, if you are also ready with your clay models and smartphone’s camera, get started with the shooting process and use Filmora to turn the RAW images to a visually enticing stop motion claymation.
Part 3 Best 5 Clay for Stop Motion and Ways to Get Started
In case you are getting serious about stop motion claymations, you would also want to understand which clays are best for such animations. To be honest, you can find dozens of clays in the market. But, not every clay is worth using in a claymation. Here are 5 of the best clays for stop motion animations you can use in your projects.
01Puppet Putty
Puppet Putty is one of the most popular clay brands that’s specifically marketed towards claymation fanatics. As compared to other available options, the Puppet Putty is comparatively softer, which means you can easily mold it into different shapes using your hands only. While the Puppet Putty works great by itself, you can also combine it with other types of clay to make your clay models more appealing.
02Van Aken
Van Aken is another popular clay brand that’s ideal for claymation animations. It’s one of the inexpensive clays and that’s the reason why many claymation fanatics use it to create clay models for their projects. One of the best features of the Van Aken clay is that it’s available in different colors, which means you can get creative with your models by mixing different color combinations. Some animators also mix Van Aken with Pupper Putty to make the characters look more stunning under the perfect lighting conditions.
03Sargent Art
Sargent Art is a brand that primarily designs clays for sculpting. However, you can also use it to create clay models for your claymations. Sargent Art’s clay has the perfect blend of Wax and Oil, which makes it quite easier for the animator to sculpt different models.
04Sculpey
Sculpey is a clay brand that designs polymer-based clays that are relatively better than the traditional ceramic mud clays. This type of clay is made up of plastic and it’s comparatively more pliable than any regular clay. And, once you have your sculpture ready, you can simply place the cay model in an oven and make it rock solid within a few minutes.
05Plastilina
Finally, Plastilina is also a great option for stop motion claymation models. You can use Plastilina to design parts of the model that need to look as natural as possible. For example, you can use Plastilina to create parts such as teeth, eyes, and tongue so that your animation characters don’t contain any distortions.
● Key Takeaways from This Episode →
● Stop motion claymation animations are a great way to create stunning animations and share your creative stories with the world.
● To get started with claymations, you’ll need the right type of clay, an editing software like Wondershare Filmora Video Editor , and a storyline.
● There are different types of clays you can use to create clay models for your animations. To make your animations look more natural, you can also mix different types of clays together. This will also allow you to create personalized color combinations for your animation projects.
Stop Motion Claymation is not a new concept. It has been floating around the media industry since the 1950 and many creators have utilized it to tell their stories to the world. If you haven’t heard about claymations so far, you are not alone. Unfortunately, a wide range of the global population is unfamiliar with the concept of stop motion claymation.
But, if you are someone who wants to get into animation, but don’t have an expensive budget, claymations can be a great tool to share your story with the world and attract a global audience. In this guide, we are going to talk about claymations, some of the most popular claymation websites, and the best ways to get started with stop motion claymation. So, if you also want to explore your creative side and be unique with the approach, continue reading. By the end of this guide, you’ll be running out to buy clay and make some high-quality clay stop-motion animations.
In this article
01 [Ways to Make Stop Motion Videos with Clay Using Your Phone](#Part 1)
02 [How to Edit a Stop Motion Claymation Animation](#Part 2)
03 [Best 5 Clay for Stop Motion and Ways to Get Started](#Part 3)
Part 1 Ways to Make Stop Motion Videos with Clay Using Your Phone
So, now that you are familiar with the basic concept of clay stop animation, let’s understand how you can get started with claymation animations. Ideally, if you are an absolute beginner, you would want to start by understanding the dynamics of creating clay models first. Whether you are going to create a animation or a simple stop motion clip, the models will play a major role in the story and it would be important that these models look appealing.
When it comes to capturing the motion, you don’t need any expensive cameras. You can easily shoot the entire motion on your phone as well. Today, even the basic smartphones come with recording features and they are enough to capture the movement of your clay models. However, if you want to keep the production quality as high as possible, make sure to invest in a decent tripod. A tripod will ensure that your stop motion claymation doesn’t feel jerky at all.
After you have crafted the clay models and purchased the tripod, the next step would be to write down a script for the animation. Whether you are creating a short video or a 3-hour long movie, a script will ensure that you don’t miss out on any important scenes while recording the animation. There are multiple script writing software you can find online that’ll speed up the entire process. However, as a beginner, you can also pen down your script in a regular MS Word document. Lack of resources should never come between your creativity.
Once the script is final, the next phase would be to record the stop motion animation claymation. This is the stage where you have to be extra careful because you’ll practically be recording the storyline of your animation. Simply fire up the smartphone’s camera and start shooting each frame one-by-one. Keep in mind that shooting a stop motion animation is pretty time-consuming and it can even take up to 5-7 hours to get the job done. So, make sure to grab your cup of coffee and stay patient throughout the process.
Part 2 How to Edit a Stop Motion Claymation Animation
At this point, you would have several hundred photographs and a script in mind to make your stop motion claymation. So, the next part would be to turn these raw images into an animation. To do this, you can use different types of video editing applications. However, we recommend using Wondershare Wondershare Filmora Video Editor for the job.
It’s a full-scale cross-platform video editing tool that’s designed to help creators showcase their creativity by turning RAW images/clips into visually engaging videos. Filmora is targeted towards a wide variety of creators such as YouTubers, social media influencers, production artists, and even animators. For an animator, Filmora is nothing short of an oasis.
The tool comes with a built-in media library where you’ll find hundreds of ready-to-use animation templates. These templates could be integrated into your video with a single click. The best part is all these templates are fully customizable, which means you can modify them to meet the overall theme of your claymation.
Filmora boasts a timeline-based interface that makes the editing process a hassle-free task, especially when you have hundreds of images to edit. You can simply bring all the images to the timeline and merge them together to make a stunning animation within a few minutes. The tool also comes with a dedicated audio editing panel where you can add the voiceover or background tracks to bring life to your stop animation claymation. If you have edited any videos in the past, you may already know that the audio is the backbone for any video, even if you are editing a stop motion animation using clay.
Here’s a quick recap of all the features that make Wondershare Filmora an ideal video editing software for stop motion claymation animation.
● Timeline based user interface for more convenient editing
● Built-in media library to find graphic, animation, and audio templates
● Export videos directly to YouTube and other social media platforms
● Available for both Windows and macOS
So, if you are also ready with your clay models and smartphone’s camera, get started with the shooting process and use Filmora to turn the RAW images to a visually enticing stop motion claymation.
Part 3 Best 5 Clay for Stop Motion and Ways to Get Started
In case you are getting serious about stop motion claymations, you would also want to understand which clays are best for such animations. To be honest, you can find dozens of clays in the market. But, not every clay is worth using in a claymation. Here are 5 of the best clays for stop motion animations you can use in your projects.
01Puppet Putty
Puppet Putty is one of the most popular clay brands that’s specifically marketed towards claymation fanatics. As compared to other available options, the Puppet Putty is comparatively softer, which means you can easily mold it into different shapes using your hands only. While the Puppet Putty works great by itself, you can also combine it with other types of clay to make your clay models more appealing.
02Van Aken
Van Aken is another popular clay brand that’s ideal for claymation animations. It’s one of the inexpensive clays and that’s the reason why many claymation fanatics use it to create clay models for their projects. One of the best features of the Van Aken clay is that it’s available in different colors, which means you can get creative with your models by mixing different color combinations. Some animators also mix Van Aken with Pupper Putty to make the characters look more stunning under the perfect lighting conditions.
03Sargent Art
Sargent Art is a brand that primarily designs clays for sculpting. However, you can also use it to create clay models for your claymations. Sargent Art’s clay has the perfect blend of Wax and Oil, which makes it quite easier for the animator to sculpt different models.
04Sculpey
Sculpey is a clay brand that designs polymer-based clays that are relatively better than the traditional ceramic mud clays. This type of clay is made up of plastic and it’s comparatively more pliable than any regular clay. And, once you have your sculpture ready, you can simply place the cay model in an oven and make it rock solid within a few minutes.
05Plastilina
Finally, Plastilina is also a great option for stop motion claymation models. You can use Plastilina to design parts of the model that need to look as natural as possible. For example, you can use Plastilina to create parts such as teeth, eyes, and tongue so that your animation characters don’t contain any distortions.
● Key Takeaways from This Episode →
● Stop motion claymation animations are a great way to create stunning animations and share your creative stories with the world.
● To get started with claymations, you’ll need the right type of clay, an editing software like Wondershare Filmora Video Editor , and a storyline.
● There are different types of clays you can use to create clay models for your animations. To make your animations look more natural, you can also mix different types of clays together. This will also allow you to create personalized color combinations for your animation projects.
Thousands Already Found 15 Best Sites to Watch Cartoons Online Free And So Can You
Thousands Already Found 15 Best Sites to Watch Cartoons Online Free And So Can You
An easy yet powerful editor
Numerous effects to choose from
Detailed tutorials provided by the official channel
Some of the greatest cartoons are available on televisions or streamed at particular locations or channels only. In this case, you can watch cartoons online.
In this article
01 [Pow! Bam! Ka-Boom! 15 Ways to Watch Cartoons Online](#Part 1)
02 [How to Make Cartoon Animation, Even if You Are New to Animation](#Part 2)
Part 1 Pow! Bam! Ka-Boom! 15 Ways to Watch Cartoons Online
01Boomerang
Popular Cartoon Resources: Scooby-Doo, Looney Tunes, and the Flintstones to Dorothy and the Wizard of Oz and Bunnicula.
Date of establishment: 1992
Recommended reasons: Boomerang allows you to try their free plan first. If you like it, then you can move to purchase their plan for $4.99 per month or $39.99 per year. It has all the classic cartoons stored in it. You can enjoy any classic cartoon at any time. You can also watch it on a television subscription.

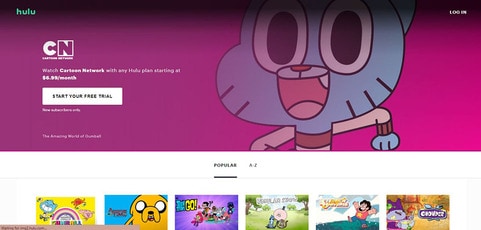
02Hulu
Popular Cartoon Resources: All types of cartoons and animations, including Jimmy Neutron, Rugrats, Doug, Arnolds, etc.
Average viewing capacity: 82M
Website traffic:
Date of establishment: October 29, 2007
Recommended reasons: Hulu offers unlimited instant streaming. It is an ad-free website. You can watch cartoons anytime from your choice of device. You can download them and view them later offline.
03YouTube
Popular Cartoon Resources: All cartoons from Disney, Cartoon Network, famous cartoons like Tom and Jerry, Pink Panther, Mickey Mouse, Talking Tom, and Friends are available here.
Average viewing capacity: 1B
Website traffic: 37% of all mobile traffic
Date of establishment: February 14, 2005
Recommended reasons: You can watch all cartoons free of cost. It supports videos at various resolutions and dimensions. YouTube also has a vast collection of animated films. You can share your favorite cartoons with friends directly from YouTube.

04Nick
Popular Cartoon Resources: Rocko’s Modern Life, All That, The Amanda Show, The Adventures of Pete & Pete, Double Dare, Kenan & Kel, etc.
Average viewing capacity: 1.231M
Website traffic:
Date of establishment: 1977
Recommended reasons: Nick is one of the most popular sites for watching cartoons online. It has a massive collection of Nickelodeon cartoons and animated shows. Not only that, Nick holds interesting contests for children with exciting prizes.
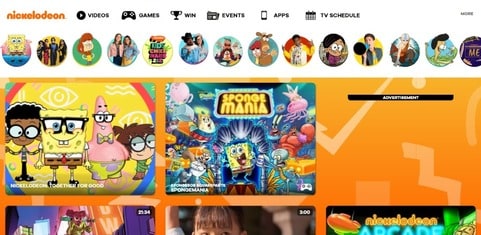
05Comedy Central
Popular Cartoon Resources: Ugly Americans, Lil’ Bush, Kid Notorious, Drawn Together, Futurama, etc.
Average viewing capacity: 1.3M
Website traffic:
Date of establishment: April 1, 1991
Recommended reasons: You can watch cartoons here for free. Signing up or downloading the app is not mandatory in Comedy Central. It has a vast collection of animated movies too.

06Fox
Popular Cartoon Resources: The Simpsons, Family Guy, Bob’s Burgers, and more
Average viewing capacity: 2.5M
Website traffic: 68.37% traffic
Date of establishment: October 9, 1986
Recommended reasons: Fox is an entertainment site that offers you free cartoons in HD. You can watch it from your mobile phone or connect it with television. Fox has other amazing shows too.
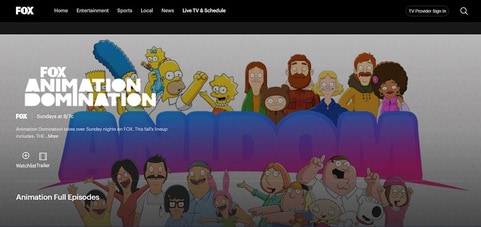
07AT & T TV
Popular Cartoon Resources: Cartoons from famous channels like Disney, cartoon networks, and Nick.
Average viewing capacity: 15M
Website traffic: 48.37% traffic from this channel
Date of establishment: November 30, 2016
Recommended reasons: Using this website, you can view three simultaneous devices. It allows you to watch your favorite cartoons and animated movies on any compatible device. It has parental control option too.

08Vudu
Popular Cartoon Resources: Finn collection, Jake collection, My little pony, Etc.
Average viewing capacity:
Website traffic: 52.70%
Date of establishment: January 1, 2004
Recommended reasons: Vudu offers free titles that release or updated every week. It allows a cloud-digital locker so that you can store all cartoons in one place. You can arrange cartoons based on their release date, Genres, etc.

09Disney+
Popular Cartoon Resources: The little mermaid, Lilo, Stitch, Pinocchio, Toy story, etc.
Average viewing capacity: 126M
Website traffic:
Date of establishment: November 12, 2019
Recommended reasons: This is the best website to watch all Disney classics, non-classics, animated, non-animated cartoons in one place. You will get access to short exclusives with their premium version.

10Cartoon Network
Popular Cartoon Resources: Tom & Jerry, Amazing world of Gumball, Teen Titans Go, etc.
Average viewing capacity: 94M
Website traffic:
Date of establishment: October 1, 1992
Recommended reasons: This is an entirely free website for mobile app and website users. It has a huge library of classic and modern cartoons for children and adults.
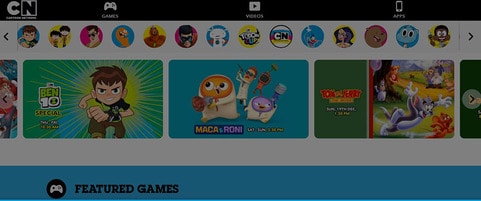
11SideReel
Popular Cartoon Resources: Road Runner, Tweety Bird, Speedy Gonzales, Porky Pig, and more
Average viewing capacity:
Website traffic:
Date of establishment: April 2007
Recommended reasons: SideReel has a collection of more than 1,000 cartoons that children love to watch daily. It gives you the latest episode alert of famous cartoons. You can track your favorite shows too from this website.

12SuperCartoons
Popular Cartoon Resources: Classic Disney cartoons, Looney Tunes, Tom & Jerry, Road Runner, etc.
Average viewing capacity:
Website traffic:
Date of establishment: 1923
Recommended reasons: This website has 1000+ classic cartoons. You can watch them at 0 costs. It views cartoons by genres, characters, and channels too.
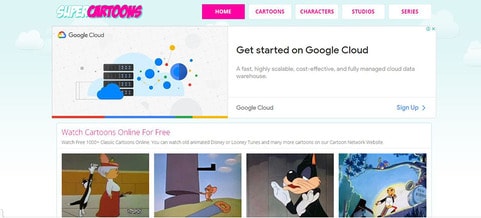
13Netflix
Popular Cartoon Resources: Big Mouth, BoJack Horseman, F Is For Family, etc.
Average viewing capacity: 192.25M
Website traffic: 15% of all internet traffic globally
Date of establishment: August 29, 1997
Recommended reasons: Netflix is one of the most-streamed websites. It has a huge collection of cartoons. All you need is their subscription, and you can enjoy thousands of cartoons, animated movies, etc.

14ToonJet
Popular Cartoon Resources: Betty Boop, Popeye, Looney Tunes, etc.
Average viewing capacity: 2.18M
Website traffic:
Date of establishment: 2005
Recommended reasons: Want to go down memory lane? ToonJet is the best place to watch your favorite old classics. You will get all types of cartons available here.

15Voot Kids
Popular Cartoon Resources: Motu Patlu, Ben10, Peppa Pig, Talking Tom, Pokemon, Paw Petrol, etc.
Average viewing capacity: 24M
Website traffic:
Date of establishment: March 26, 2016
Recommended reasons: Voot Kid is an animation cartoon streaming website. Children can listen to storybooks and learn a lot from this website. Here you can watch cartoons both online and offline.

16Crunchyroll
Popular Cartoon Resources: My hero academia, Naruto, Fate series, Toradora, etc.
Average viewing capacity:
Website traffic:
Date of establishment: 2006
Recommended reasons: Crunchyroll is the perfect place for your favorite cartoons and anime. You can stream them free. You can also put reviews on the anime series you are watching.

Part 2 How to Make Cartoon Animation, Even if You Are New to Animation
Do you wish to make cool and professional cartoon animations? Does the budget of making one make a step back? You need not worry about that anymore. With the advancement in technology, you can create cartoon animation easily, even if you are a newbie. Filmora Pro is right there for you. In Filmora Pro, you will get features to animate your video, adjust video clarity, sound, duration, add realistic effects, etc. And the best part is they offer you their free trial for a month. You can try the software for a month and then decide whether to purchase it or not. Here, we will discuss its key features that will help you quickly make a professional cartoon animation.
Animation
● Motion Tracking: Input graphics or texts at moving points of your video
● Animate: Customize your animation with preset motions or keyframes
● Pan and zoom: Create a realistic camera movement
● Ease in and Ease out feature: Create fluid motions by changing speed and durations.
Video editing
● Advanced editing: Filmora Pro has advanced editing features to ensure your work has a professional finish.
● Unlimited tracks: Add any track of your choice from the endless options.
● Automatic stabilization: It can fix your video.
● Preset Transition: The preset transition feature is built to give the video a realistic touch.
● Built-in screen recorder: Helps you in live-recording of games.
Sound editing
● Automatic Audio sync: You can replace the original audio with a different higher-quality audio file.
● Audio noise reduction: Eliminate the background noise and narrate your story with clarity.
● Audio compressor: Adjust the high and low in your audio and normalize the volume.
● Audio Transitions: Overlap audio or out in crossfades to create a smooth change in between clips.
Key Takeaways from This Episode
● With modern technology advancing, it is easy to stream cartoons online.
● Some multiple websites and apps offer both free and paid cartoon streaming.
● The websites are user-friendly and compatible with all devices.
Some of the greatest cartoons are available on televisions or streamed at particular locations or channels only. In this case, you can watch cartoons online.
In this article
01 [Pow! Bam! Ka-Boom! 15 Ways to Watch Cartoons Online](#Part 1)
02 [How to Make Cartoon Animation, Even if You Are New to Animation](#Part 2)
Part 1 Pow! Bam! Ka-Boom! 15 Ways to Watch Cartoons Online
01Boomerang
Popular Cartoon Resources: Scooby-Doo, Looney Tunes, and the Flintstones to Dorothy and the Wizard of Oz and Bunnicula.
Date of establishment: 1992
Recommended reasons: Boomerang allows you to try their free plan first. If you like it, then you can move to purchase their plan for $4.99 per month or $39.99 per year. It has all the classic cartoons stored in it. You can enjoy any classic cartoon at any time. You can also watch it on a television subscription.
02Hulu
Popular Cartoon Resources: All types of cartoons and animations, including Jimmy Neutron, Rugrats, Doug, Arnolds, etc.
Average viewing capacity: 82M
Website traffic:
Date of establishment: October 29, 2007
Recommended reasons: Hulu offers unlimited instant streaming. It is an ad-free website. You can watch cartoons anytime from your choice of device. You can download them and view them later offline.
03YouTube
Popular Cartoon Resources: All cartoons from Disney, Cartoon Network, famous cartoons like Tom and Jerry, Pink Panther, Mickey Mouse, Talking Tom, and Friends are available here.
Average viewing capacity: 1B
Website traffic: 37% of all mobile traffic
Date of establishment: February 14, 2005
Recommended reasons: You can watch all cartoons free of cost. It supports videos at various resolutions and dimensions. YouTube also has a vast collection of animated films. You can share your favorite cartoons with friends directly from YouTube.
04Nick
Popular Cartoon Resources: Rocko’s Modern Life, All That, The Amanda Show, The Adventures of Pete & Pete, Double Dare, Kenan & Kel, etc.
Average viewing capacity: 1.231M
Website traffic:
Date of establishment: 1977
Recommended reasons: Nick is one of the most popular sites for watching cartoons online. It has a massive collection of Nickelodeon cartoons and animated shows. Not only that, Nick holds interesting contests for children with exciting prizes.
05Comedy Central
Popular Cartoon Resources: Ugly Americans, Lil’ Bush, Kid Notorious, Drawn Together, Futurama, etc.
Average viewing capacity: 1.3M
Website traffic:
Date of establishment: April 1, 1991
Recommended reasons: You can watch cartoons here for free. Signing up or downloading the app is not mandatory in Comedy Central. It has a vast collection of animated movies too.
06Fox
Popular Cartoon Resources: The Simpsons, Family Guy, Bob’s Burgers, and more
Average viewing capacity: 2.5M
Website traffic: 68.37% traffic
Date of establishment: October 9, 1986
Recommended reasons: Fox is an entertainment site that offers you free cartoons in HD. You can watch it from your mobile phone or connect it with television. Fox has other amazing shows too.
07AT & T TV
Popular Cartoon Resources: Cartoons from famous channels like Disney, cartoon networks, and Nick.
Average viewing capacity: 15M
Website traffic: 48.37% traffic from this channel
Date of establishment: November 30, 2016
Recommended reasons: Using this website, you can view three simultaneous devices. It allows you to watch your favorite cartoons and animated movies on any compatible device. It has parental control option too.
08Vudu
Popular Cartoon Resources: Finn collection, Jake collection, My little pony, Etc.
Average viewing capacity:
Website traffic: 52.70%
Date of establishment: January 1, 2004
Recommended reasons: Vudu offers free titles that release or updated every week. It allows a cloud-digital locker so that you can store all cartoons in one place. You can arrange cartoons based on their release date, Genres, etc.
09Disney+
Popular Cartoon Resources: The little mermaid, Lilo, Stitch, Pinocchio, Toy story, etc.
Average viewing capacity: 126M
Website traffic:
Date of establishment: November 12, 2019
Recommended reasons: This is the best website to watch all Disney classics, non-classics, animated, non-animated cartoons in one place. You will get access to short exclusives with their premium version.
10Cartoon Network
Popular Cartoon Resources: Tom & Jerry, Amazing world of Gumball, Teen Titans Go, etc.
Average viewing capacity: 94M
Website traffic:
Date of establishment: October 1, 1992
Recommended reasons: This is an entirely free website for mobile app and website users. It has a huge library of classic and modern cartoons for children and adults.
11SideReel
Popular Cartoon Resources: Road Runner, Tweety Bird, Speedy Gonzales, Porky Pig, and more
Average viewing capacity:
Website traffic:
Date of establishment: April 2007
Recommended reasons: SideReel has a collection of more than 1,000 cartoons that children love to watch daily. It gives you the latest episode alert of famous cartoons. You can track your favorite shows too from this website.
12SuperCartoons
Popular Cartoon Resources: Classic Disney cartoons, Looney Tunes, Tom & Jerry, Road Runner, etc.
Average viewing capacity:
Website traffic:
Date of establishment: 1923
Recommended reasons: This website has 1000+ classic cartoons. You can watch them at 0 costs. It views cartoons by genres, characters, and channels too.
13Netflix
Popular Cartoon Resources: Big Mouth, BoJack Horseman, F Is For Family, etc.
Average viewing capacity: 192.25M
Website traffic: 15% of all internet traffic globally
Date of establishment: August 29, 1997
Recommended reasons: Netflix is one of the most-streamed websites. It has a huge collection of cartoons. All you need is their subscription, and you can enjoy thousands of cartoons, animated movies, etc.
14ToonJet
Popular Cartoon Resources: Betty Boop, Popeye, Looney Tunes, etc.
Average viewing capacity: 2.18M
Website traffic:
Date of establishment: 2005
Recommended reasons: Want to go down memory lane? ToonJet is the best place to watch your favorite old classics. You will get all types of cartons available here.
15Voot Kids
Popular Cartoon Resources: Motu Patlu, Ben10, Peppa Pig, Talking Tom, Pokemon, Paw Petrol, etc.
Average viewing capacity: 24M
Website traffic:
Date of establishment: March 26, 2016
Recommended reasons: Voot Kid is an animation cartoon streaming website. Children can listen to storybooks and learn a lot from this website. Here you can watch cartoons both online and offline.
16Crunchyroll
Popular Cartoon Resources: My hero academia, Naruto, Fate series, Toradora, etc.
Average viewing capacity:
Website traffic:
Date of establishment: 2006
Recommended reasons: Crunchyroll is the perfect place for your favorite cartoons and anime. You can stream them free. You can also put reviews on the anime series you are watching.
Part 2 How to Make Cartoon Animation, Even if You Are New to Animation
Do you wish to make cool and professional cartoon animations? Does the budget of making one make a step back? You need not worry about that anymore. With the advancement in technology, you can create cartoon animation easily, even if you are a newbie. Filmora Pro is right there for you. In Filmora Pro, you will get features to animate your video, adjust video clarity, sound, duration, add realistic effects, etc. And the best part is they offer you their free trial for a month. You can try the software for a month and then decide whether to purchase it or not. Here, we will discuss its key features that will help you quickly make a professional cartoon animation.
Animation
● Motion Tracking: Input graphics or texts at moving points of your video
● Animate: Customize your animation with preset motions or keyframes
● Pan and zoom: Create a realistic camera movement
● Ease in and Ease out feature: Create fluid motions by changing speed and durations.
Video editing
● Advanced editing: Filmora Pro has advanced editing features to ensure your work has a professional finish.
● Unlimited tracks: Add any track of your choice from the endless options.
● Automatic stabilization: It can fix your video.
● Preset Transition: The preset transition feature is built to give the video a realistic touch.
● Built-in screen recorder: Helps you in live-recording of games.
Sound editing
● Automatic Audio sync: You can replace the original audio with a different higher-quality audio file.
● Audio noise reduction: Eliminate the background noise and narrate your story with clarity.
● Audio compressor: Adjust the high and low in your audio and normalize the volume.
● Audio Transitions: Overlap audio or out in crossfades to create a smooth change in between clips.
Key Takeaways from This Episode
● With modern technology advancing, it is easy to stream cartoons online.
● Some multiple websites and apps offer both free and paid cartoon streaming.
● The websites are user-friendly and compatible with all devices.
5 Recommended Websites for Text GIF Maker
Versatile Video Editor - Wondershare Filmora
An easy yet powerful editor
Numerous effects to choose from
Detailed tutorials provided by the official channel
Arguably the hilarious moment of online communication, GIFs are a sequence of static images that throw a unique effect when strung together. They add excitement to social media posts, energy to email conversations, and even standard text, and usually create the internet (and this post) the funniest place to be.
Many people like to create GIFs on their websites, on digital platforms, or within their social media. We’ve collected a list of the best-animated GIF text makers around and reviewed them, so you don’t have to. You’ve come to the perfect article if you’re also one among them.
Top 7 Animated GIF Text Makers 2022
Without further ado, let’s jump in! Here are the five best-recommended websites or text GIF makers worth considering in 2021.
1. Bloggif
This site shows an appropriate GIF for just about anything you’re wondering. Based upon what you’re looking for, there are numerous ways to uncover a perfect match.
One way is to search among the dropdown menus on the main website’s interface. These menus allow users to surface GIFs such as animated text, resize a picture, GIF slideshow, GIF effect, and more.
2. Gfycat
Gfycat is another online text GIF maker with millions of GIFs to dive into as a GIF text generator. Not only is it one of the highly famous GIF sites, but it has a simple animated GIF text maker to turn your favorite Vimeo, Twitter, and Twitch streams into your library of memes.
You can easily navigate its wide variety of GIFs from the search bar or left menu, select from the latest “Explore” or “Trending” section to look for multiple categories of stickers or GIFs.
3. GIPHY
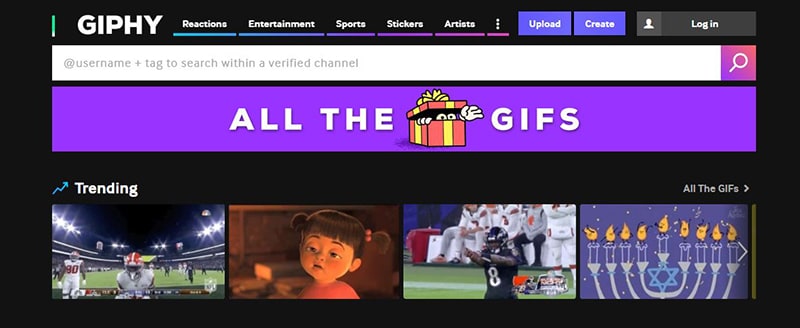
This is another go-to resource for text GIF maker hunting. Alex Chung and Jace Cooke launched it; GIPHY began as a search engine for GIFs. The platform has seen significant growth by introducing integrations, partnering with brands, and making browser extensions, and a lot more. (Check out GIPHY Labs to explore their expansion efforts.)
The best part? Looking for the database of GIFs couldn’t be easier: Users can browse categories — Music, Adjectives, Nature, Science, Nature, etc. — or seek out a specific phrase or a word using the search feature.
4. Make a GIF
Make A GIF allows you to create a GIF from many images, a video from your computer, a Facebook or YouTube video, or directly from your webcam.
With this tool, it’s pretty simple to customize the order of the photos and rearrange them via drag-and-drop editor. You can also resize its images and create a personalized animation speed. In addition, there is a captioning tool included to add text on top of your GIF, but you can’t preview it before creating the GIF or change where the text GIF maker is displayed.
You can save the GIF to your PC and copy its URL to find it online once created. It further consists of options for making your GIF public, private, or unlisted. You can even link directly to the GIF file.
5. ImgFlip

ImgFlip displays a preview of your GIF during the creation, which is valuable. You can develop these GIFs from images, a GIF URL, a video URL, or a video you upload yourself.
Besides, you can alter animation delay, width, height, photo order, and quality for a GIF created with images. There’s also a crop option, text tool, and the ability to rotate the GIF, change the play count, reverse it, and change the background color.
You can download your GIF and share it over a few social media sites once done, or not post it online while setting it as private.
A watermark displayed on all GIFs created is here at Imgflip. Also, most of the custom settings for making a GIF from this GIF text generator are usable only if you subscribe to ImgFlip Pro.
Tip: Make animated GIF Text in video
Now you may be wandering to create your GIF. The market comes loaded with many websites, tools, and the above-mentioned animated GIF text makers.
Additionally, you can use Adobe Photoshop too or some other popular software for the purpose. If we talk about online tools, the above-mentioned animated text generator GIFs are the standard options.
It is also relatively easier to find text GIF maker online applications for smartphones or mobile devices. It is possible to develop gifs from the collection of still images or even from moving videos, and this task is much easier than anyone can perform. To execute this task with simplicity, we would like to recommend Wondershare Filmora

Wondershare Filmora - Best Video Editor for Mac/Windows
5,481,435 people have downloaded it.
Build unique custom animations without breaking a sweat.
Focus on creating epic stories and leave the details to Filmora’s auto features.
Start a creative adventure with drag & drop effects and endless possibilities.
Filmora simplifies advanced features to save you time and effort.
Filmora cuts out repetition so you can move on to your next creative breakthrough.
This recommendation is the most interactive yet simple to understand interface of this software tool. You can easily combine various stills into GIFs using Filmora or turn small videos into GIFs. The more exciting thing is that Filmora also helps in easy Gifs customization as users can add elements, overlays, text, etc., to their GIFs using this platform as the ideal animated GIF text maker.
How to make GIFs with Wondershare Filmora
Here are a few easy to execute steps to accomplish this operation:
Step 1 Upload media files
The primary task is to import some editable video files or collections of photos to the Wondershare Filmora’s timeline. This software tool is compatible with more than 150 media file formats to easily upload any of your images ranging somewhere between png, jpg, avi, mpg, wav, mkv, mp4, or WMV, etc.
For Win 7 or later (64-bit)
For macOS 10.12 or later
Step 2 Drag to timeline
Users can drag their image/video file and drop it on the timeline of Wondershare Filmora. Once your file goes there, it will be easily edited using a wide range of tools.

Step 3 Edit media files
There are unlimited editing elements and tools with numerous exciting features of Filmora.
Users can easily select among options like slow down, speed up, combine, rotate, split, crop, etc., to develop eye-catching video as per available content.
Step 4 Add text effect to GIF files
It is the right time to update text-based GIFs. There are certain small messages used that always appear suitable in GIFs.

Step 5 Save and export
Once you complete all these steps, save your file with a GIF extension and get it uploaded on social media platforms, if you wish so.

Conclusion
Thus, there are plenty of websites to choose from among animated GIF text makers when it comes to searching for some genuine yet cool GIFs. Whether you must send one to the email chain of your coworker’s birthday, or make your brother, Zayn, laugh at the dinner table, we hope this list helps narrow down your search for the perfect maker to create text GIF.
Arguably the hilarious moment of online communication, GIFs are a sequence of static images that throw a unique effect when strung together. They add excitement to social media posts, energy to email conversations, and even standard text, and usually create the internet (and this post) the funniest place to be.
Many people like to create GIFs on their websites, on digital platforms, or within their social media. We’ve collected a list of the best-animated GIF text makers around and reviewed them, so you don’t have to. You’ve come to the perfect article if you’re also one among them.
Top 7 Animated GIF Text Makers 2022
Without further ado, let’s jump in! Here are the five best-recommended websites or text GIF makers worth considering in 2021.
1. Bloggif
This site shows an appropriate GIF for just about anything you’re wondering. Based upon what you’re looking for, there are numerous ways to uncover a perfect match.
One way is to search among the dropdown menus on the main website’s interface. These menus allow users to surface GIFs such as animated text, resize a picture, GIF slideshow, GIF effect, and more.
2. Gfycat
Gfycat is another online text GIF maker with millions of GIFs to dive into as a GIF text generator. Not only is it one of the highly famous GIF sites, but it has a simple animated GIF text maker to turn your favorite Vimeo, Twitter, and Twitch streams into your library of memes.
You can easily navigate its wide variety of GIFs from the search bar or left menu, select from the latest “Explore” or “Trending” section to look for multiple categories of stickers or GIFs.
3. GIPHY
This is another go-to resource for text GIF maker hunting. Alex Chung and Jace Cooke launched it; GIPHY began as a search engine for GIFs. The platform has seen significant growth by introducing integrations, partnering with brands, and making browser extensions, and a lot more. (Check out GIPHY Labs to explore their expansion efforts.)
The best part? Looking for the database of GIFs couldn’t be easier: Users can browse categories — Music, Adjectives, Nature, Science, Nature, etc. — or seek out a specific phrase or a word using the search feature.
4. Make a GIF
Make A GIF allows you to create a GIF from many images, a video from your computer, a Facebook or YouTube video, or directly from your webcam.
With this tool, it’s pretty simple to customize the order of the photos and rearrange them via drag-and-drop editor. You can also resize its images and create a personalized animation speed. In addition, there is a captioning tool included to add text on top of your GIF, but you can’t preview it before creating the GIF or change where the text GIF maker is displayed.
You can save the GIF to your PC and copy its URL to find it online once created. It further consists of options for making your GIF public, private, or unlisted. You can even link directly to the GIF file.
5. ImgFlip
ImgFlip displays a preview of your GIF during the creation, which is valuable. You can develop these GIFs from images, a GIF URL, a video URL, or a video you upload yourself.
Besides, you can alter animation delay, width, height, photo order, and quality for a GIF created with images. There’s also a crop option, text tool, and the ability to rotate the GIF, change the play count, reverse it, and change the background color.
You can download your GIF and share it over a few social media sites once done, or not post it online while setting it as private.
A watermark displayed on all GIFs created is here at Imgflip. Also, most of the custom settings for making a GIF from this GIF text generator are usable only if you subscribe to ImgFlip Pro.
Tip: Make animated GIF Text in video
Now you may be wandering to create your GIF. The market comes loaded with many websites, tools, and the above-mentioned animated GIF text makers.
Additionally, you can use Adobe Photoshop too or some other popular software for the purpose. If we talk about online tools, the above-mentioned animated text generator GIFs are the standard options.
It is also relatively easier to find text GIF maker online applications for smartphones or mobile devices. It is possible to develop gifs from the collection of still images or even from moving videos, and this task is much easier than anyone can perform. To execute this task with simplicity, we would like to recommend Wondershare Filmora
Wondershare Filmora - Best Video Editor for Mac/Windows
5,481,435 people have downloaded it.
Build unique custom animations without breaking a sweat.
Focus on creating epic stories and leave the details to Filmora’s auto features.
Start a creative adventure with drag & drop effects and endless possibilities.
Filmora simplifies advanced features to save you time and effort.
Filmora cuts out repetition so you can move on to your next creative breakthrough.
This recommendation is the most interactive yet simple to understand interface of this software tool. You can easily combine various stills into GIFs using Filmora or turn small videos into GIFs. The more exciting thing is that Filmora also helps in easy Gifs customization as users can add elements, overlays, text, etc., to their GIFs using this platform as the ideal animated GIF text maker.
How to make GIFs with Wondershare Filmora
Here are a few easy to execute steps to accomplish this operation:
Step 1 Upload media files
The primary task is to import some editable video files or collections of photos to the Wondershare Filmora’s timeline. This software tool is compatible with more than 150 media file formats to easily upload any of your images ranging somewhere between png, jpg, avi, mpg, wav, mkv, mp4, or WMV, etc.
For Win 7 or later (64-bit)
For macOS 10.12 or later
Step 2 Drag to timeline
Users can drag their image/video file and drop it on the timeline of Wondershare Filmora. Once your file goes there, it will be easily edited using a wide range of tools.
Step 3 Edit media files
There are unlimited editing elements and tools with numerous exciting features of Filmora.
Users can easily select among options like slow down, speed up, combine, rotate, split, crop, etc., to develop eye-catching video as per available content.
Step 4 Add text effect to GIF files
It is the right time to update text-based GIFs. There are certain small messages used that always appear suitable in GIFs.
Step 5 Save and export
Once you complete all these steps, save your file with a GIF extension and get it uploaded on social media platforms, if you wish so.
Conclusion
Thus, there are plenty of websites to choose from among animated GIF text makers when it comes to searching for some genuine yet cool GIFs. Whether you must send one to the email chain of your coworker’s birthday, or make your brother, Zayn, laugh at the dinner table, we hope this list helps narrow down your search for the perfect maker to create text GIF.
How to Create an Animated Sticky Navbar
How to Create an Animated Sticky Navbar
An easy yet powerful editor
Numerous effects to choose from
Detailed tutorials provided by the official channel
While there are different ways to enhance the overall user experience of a website, using an animated sticky navbar is the most ideal solution to get the job done.
In this article, we’ll walk you through some of the top benefits of animated sticky navbars and why you should incorporate them in your website’s design. So, without any further ado, let’s get started.
In this article
01 [What is an Animated Sticky Navbar?](#Part 1)
02 [What Are the Benefits of An Animated Sticky Navbar?](#Part 2)
03 [8 Fixed Sticky Navbars That’ll Grab Your Attention](#Part 3)
04 [Want To Create More Professional and Amazing Animations?](#Part 4)
Part 1 What is an Animated Sticky Navbar?
To put it in simple words, an animated sticky navbar is a dedicated header that stays fixed on the website, irrespective of the web page you’re accessing. Ideally, designers use a sticky navbar to allow website visitors to visit any web page within 2-3 clicks.
The animated navbar also incorporates a few animations that uplift the overall visual appearance of the website. It doesn’t matter if you are planning to design an e-commerce store or a simple service-based website, the animated navbar will allow you to make your website more user-friendly for the end-users.
Part 2 What Are the Benefits of An Animated Sticky Navbar?
Now, there are endless benefits of using an animated sticky navbar on your website. However, these are a few factors that make animated sticky navbars the most useful on-page element of a website.
01Quick Navigation
As we mentioned earlier, easy navigation is one of the key features of a sticky navbar. You can place links to all the other web pages within the navbar in the form of drop-down menus and ensure that users can visit any webpage within a single click. This will enhance the overall user experience and you’ll be able to encourage one-time visitors to spend more time on your website. Using the navbar will also improve your search engine rankings because the search engine crawler will be able to crawl all the web pages easily.
02Aesthetically Pleasing
The way your website looks has a huge impact on whether you’re going to retain the website visitors or not. An animated sticky navbar will make your website look aesthetically pleasing and captivate the visitors more effectively. You can add different animations and visual elements to the navbar and make them match your website’s overall color scheme.
03Better User Experience
Another reason why you would want to place an animated sticky navbar on your website is that it’ll uplift the overall user experience for the website visitors. From finding easy navigation to all the web pages to ensuring that all the web pages offer the same browsing experience, a navbar will make your website engaging and it’ll become easier to captivate the users.
Part 3 8 Fixed Sticky Navbars That’ll Grab Your Attention
So, now that you are familiar with the benefits of animated sticky navbars, here are the top examples that explain the best ways to use navigation bars on a website.
01Search Engine Journal

Search Engine Journal is an online knowledge hub where users can find every bit of information about digital marketing. The website publishes regular guides on SEO, PPC, Social Media Marketing, etc to help people get detailed insight into the benefits of digital marketing.
Since there are thousands of articles on the website, it could easily get chaotic for users to find the guide they are looking for. But, with an easy-to-navigate animated sticky navbar, Search Engine Journal has divided all the articles into their respective categories using simple drop-down menus
02AirBnB

Airbnb is one of the most popular platforms to find vacation homes in a different city/country to enjoy your holiday in complete comfort. One of the major reasons behind AirBnB’s immense success is its high-quality and easy-to-use website.
As you continue to scroll down the website, the sticky navbar stays fixed at the top with a dedicated search bar and a “Become a Host” Call-to-Action button. This way it doesn’t matter if a user is looking for a place to rent or simply wants to become a host, they’ll be able to get the job done within a few clicks.
03Graz Secrets
Graz Secrets is the perfect example of how you can use a sticky bar in the simplest manner and still grab users’ attention easily. The website uses a black-colored simple navigation bar with a “Download Now” button at the center. The button continues to illuminate due to the background animation even if you scroll to the end of the web page. The overall black design of the navbar adds more visual factors to the website and engages the visitors more effectively.
04Adobe
Adobe’s navigation bar is also a great example of how to use sticky navbars to uplift the overall user experience for website visitors. Even though the website doesn’t stay at its place when you scroll down, it immediately comes back as soon as you scroll up once.
Moreover, the navbar has links to all the Adobe products, which means users can visit any product page they want right away. It’s also worth understanding that Adobe has added a dedicated “Sign-in” button in the navigation bar to allow visitors to sign in to the Adobe cloud account straightaway.
05Daniel Filler
Daniel Filler’s website uses the navigation bar in the simplest way possible - yet manages to draw the viewers’ attention without any hassle. The designers have placed a pretty small navigation bar with links to all the important web pages.
The smaller size of the navigation bar doesn’t make the website look cluttered and still manages to do its job easily. In addition to this, the designers have also placed a dedicated logo and the “Up” button to allow users to directly go to the top of the web page with one click.
06Mind Inventory
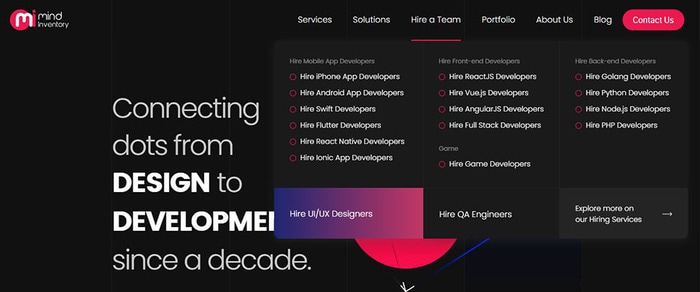
Mind Inventory is an Indian software development company working towards designing high-quality websites and mobile applications. Their website is a perfect example of how one should use navigation bars in a website to improve the overall design scheme. In addition to placing links to all the important web pages, Mind Inventory has also introduced dedicated animations to make the drop-down menu appearance more pleasing.
07FHOKE
FHOKE’s navigation bar is one of the most aesthetically pleasing animated navbars that you can replicate on your website to maximize its performance. A white-colored navbar automatically turns gray as soon as you scroll down to maintain the contrast of the entire web page.
There are dedicated links to other web pages as well. However, you won’t find any drop-down menus. In case your website also has limited web pages, you can also replicate this animated sticky navbar to make it more appealing.
08H&M
Last but certainly not least, H&M is a clothing brand that’s popular across the globe. At first, H&M’s official website may look pretty basic, but its navigation bar is backed by a great marketing strategy. The bar contains all the product page categories that’ll direct you to any product page within a single click.
Key Takeaways from This Episode
● Animated sticky navbars are one of the most useful on-page elements that could help you grab user’s attention easily
● There are different ways to use animated navbars and it mainly depends on your website requirements.
● Like your website, you can also uplift the quality of your videos by adding animations and high-quality transitions
While there are different ways to enhance the overall user experience of a website, using an animated sticky navbar is the most ideal solution to get the job done.
In this article, we’ll walk you through some of the top benefits of animated sticky navbars and why you should incorporate them in your website’s design. So, without any further ado, let’s get started.
In this article
01 [What is an Animated Sticky Navbar?](#Part 1)
02 [What Are the Benefits of An Animated Sticky Navbar?](#Part 2)
03 [8 Fixed Sticky Navbars That’ll Grab Your Attention](#Part 3)
04 [Want To Create More Professional and Amazing Animations?](#Part 4)
Part 1 What is an Animated Sticky Navbar?
To put it in simple words, an animated sticky navbar is a dedicated header that stays fixed on the website, irrespective of the web page you’re accessing. Ideally, designers use a sticky navbar to allow website visitors to visit any web page within 2-3 clicks.
The animated navbar also incorporates a few animations that uplift the overall visual appearance of the website. It doesn’t matter if you are planning to design an e-commerce store or a simple service-based website, the animated navbar will allow you to make your website more user-friendly for the end-users.
Part 2 What Are the Benefits of An Animated Sticky Navbar?
Now, there are endless benefits of using an animated sticky navbar on your website. However, these are a few factors that make animated sticky navbars the most useful on-page element of a website.
01Quick Navigation
As we mentioned earlier, easy navigation is one of the key features of a sticky navbar. You can place links to all the other web pages within the navbar in the form of drop-down menus and ensure that users can visit any webpage within a single click. This will enhance the overall user experience and you’ll be able to encourage one-time visitors to spend more time on your website. Using the navbar will also improve your search engine rankings because the search engine crawler will be able to crawl all the web pages easily.
02Aesthetically Pleasing
The way your website looks has a huge impact on whether you’re going to retain the website visitors or not. An animated sticky navbar will make your website look aesthetically pleasing and captivate the visitors more effectively. You can add different animations and visual elements to the navbar and make them match your website’s overall color scheme.
03Better User Experience
Another reason why you would want to place an animated sticky navbar on your website is that it’ll uplift the overall user experience for the website visitors. From finding easy navigation to all the web pages to ensuring that all the web pages offer the same browsing experience, a navbar will make your website engaging and it’ll become easier to captivate the users.
Part 3 8 Fixed Sticky Navbars That’ll Grab Your Attention
So, now that you are familiar with the benefits of animated sticky navbars, here are the top examples that explain the best ways to use navigation bars on a website.
01Search Engine Journal
Search Engine Journal is an online knowledge hub where users can find every bit of information about digital marketing. The website publishes regular guides on SEO, PPC, Social Media Marketing, etc to help people get detailed insight into the benefits of digital marketing.
Since there are thousands of articles on the website, it could easily get chaotic for users to find the guide they are looking for. But, with an easy-to-navigate animated sticky navbar, Search Engine Journal has divided all the articles into their respective categories using simple drop-down menus
02AirBnB
Airbnb is one of the most popular platforms to find vacation homes in a different city/country to enjoy your holiday in complete comfort. One of the major reasons behind AirBnB’s immense success is its high-quality and easy-to-use website.
As you continue to scroll down the website, the sticky navbar stays fixed at the top with a dedicated search bar and a “Become a Host” Call-to-Action button. This way it doesn’t matter if a user is looking for a place to rent or simply wants to become a host, they’ll be able to get the job done within a few clicks.
03Graz Secrets
Graz Secrets is the perfect example of how you can use a sticky bar in the simplest manner and still grab users’ attention easily. The website uses a black-colored simple navigation bar with a “Download Now” button at the center. The button continues to illuminate due to the background animation even if you scroll to the end of the web page. The overall black design of the navbar adds more visual factors to the website and engages the visitors more effectively.
04Adobe
Adobe’s navigation bar is also a great example of how to use sticky navbars to uplift the overall user experience for website visitors. Even though the website doesn’t stay at its place when you scroll down, it immediately comes back as soon as you scroll up once.
Moreover, the navbar has links to all the Adobe products, which means users can visit any product page they want right away. It’s also worth understanding that Adobe has added a dedicated “Sign-in” button in the navigation bar to allow visitors to sign in to the Adobe cloud account straightaway.
05Daniel Filler
Daniel Filler’s website uses the navigation bar in the simplest way possible - yet manages to draw the viewers’ attention without any hassle. The designers have placed a pretty small navigation bar with links to all the important web pages.
The smaller size of the navigation bar doesn’t make the website look cluttered and still manages to do its job easily. In addition to this, the designers have also placed a dedicated logo and the “Up” button to allow users to directly go to the top of the web page with one click.
06Mind Inventory
Mind Inventory is an Indian software development company working towards designing high-quality websites and mobile applications. Their website is a perfect example of how one should use navigation bars in a website to improve the overall design scheme. In addition to placing links to all the important web pages, Mind Inventory has also introduced dedicated animations to make the drop-down menu appearance more pleasing.
07FHOKE
FHOKE’s navigation bar is one of the most aesthetically pleasing animated navbars that you can replicate on your website to maximize its performance. A white-colored navbar automatically turns gray as soon as you scroll down to maintain the contrast of the entire web page.
There are dedicated links to other web pages as well. However, you won’t find any drop-down menus. In case your website also has limited web pages, you can also replicate this animated sticky navbar to make it more appealing.
08H&M
Last but certainly not least, H&M is a clothing brand that’s popular across the globe. At first, H&M’s official website may look pretty basic, but its navigation bar is backed by a great marketing strategy. The bar contains all the product page categories that’ll direct you to any product page within a single click.
Key Takeaways from This Episode
● Animated sticky navbars are one of the most useful on-page elements that could help you grab user’s attention easily
● There are different ways to use animated navbars and it mainly depends on your website requirements.
● Like your website, you can also uplift the quality of your videos by adding animations and high-quality transitions
8 Blender 3D Animation Tutorials for Beginners
8 Blender 3D Animation Tutorials for Beginners
An easy yet powerful editor
Numerous effects to choose from
Detailed tutorials provided by the official channel
Blender animation software is one of the open-source software chosen to create animations. It is easy to create animations, videos or graphics, etc. If you want to be an animation 3D artist, make creative universes, and meet each of the different characters moving around in your heart.
You will learn the step-by-step procedure to create animations and add other edits to the animation. And also a few tips to develop better Blender 3D animation effects.
In this article
01 [Is Blender best for animation?](#Part 1)
02 [How to Create 3D Animated Characters with Blender in 15 Minutes.](#Part 2)
03 [Become a Pro from Beginners in 8 Tutorials](#Part 3)
Part 1 Is Blender best for animation?
The answer to if the Blender is suitable for animation is yes. Blender animation is the best for making animations and bringing any living to animator. This software is mostly for professional works whose limitations will be learning the process, not any technical defects. Let’s talk about why Blender 3D animation software is the best and more helpful.
Character animation is an essential tool for animation, and Blender has developed this tool with no way less to other software.
There are many animation effects other than animating characters. Blender 3D for free has all the necessary tools to do all types of rigs and animations without any difficulty.
Blender is one software that has 2D animation inbuilt in it, like drawing and creating 2D animation.
Blender’s animation tools are making motion graphics possible by advancing the features than it was four years ago.
Nowadays, many people are using Blender to do professional works, including freelancers, small studios, and even game developers.
Part 2 How to Create 3D Animated Characters with Blender in 15 Minutes.
This is a series for people who want to learn how to create 3D blender animation characters from keeping a reference image. Blender’s ringing tools will be more helpful for this process.
01Step 1: Importing
Initially, import a Blender 3D animation character into the Blender to animate. Many free and paid characters are available in Vincent, and Rain v2.0 is present in Blender Cloud; above all, these characters are for free.
Steps to import the character either from Vincent or Rain v2.0
Download the character file from the cloud to any destination folder on the computer. Open the Blender and place the cursor on the origin point on the screen. Later select import present in the File menu and choose the file format. And now, allow the Python script to run for the selected character folder.

02Step 2: Add Keyframes
There will be a diamond-shaped icon below to choose the keyframe you want to add to the timeline, which you may also delete.
Adding a keyframe is simple. Open the timeline window in the animation editor. Press the alphabet ‘G’ on the keyboard, move the bone and place it. Then hit Shift+I and choose the channel LocRot and insert the keyframe. Likewise, you can adjust the keyframe by dragging, making it fast or slow to the requirements.
Moving the keyframe to 20 makes it faster, and moving to 40, slower.
03Step 3: Get Reference Materials
It will be challenging to add movements to the characters, so plenty of videos can get the moves right. There are various reference images and videos available on the Internet. You can either add the selected reference materials to the second screen or add them to the 3D space. Let’s discuss how to add it.
Hit Shift + A to add the reference material. Later select “Image” and then choose the “Background.” Scale the reference image onto the 3D space after it loads.
Afterward, you can leave it to the animation of the reference article, or you can further edit or amplify the movements.
04Step 4: Fine–Tuning and Sound
This step will add smooth movements by combining two keyframes for a more professional look. We have to use the Dope sheet to do complete this process. Let’s see how to add it.
Initially, split the window horizontally. Later switch over the dope sheet below the animation tab, where you can see keyframes of all axis. Now you can drag and edit to slow or amplify the speed.
There is a Graphic editor, which is more advanced to make the movements more accurately and directly to edit the curves.
Sound effects make any video or animation better. You can add and import the sound files. You can also create your sound and insert it into the Blender. Let’s discuss adding sound and making it sync to the character.
Download the audio file, hit shift + A to open Add menu, and choose the “Sound.” Now select the sound that you wish to add.
Drag the sound to keep it to the specific sections alone. Also, you can switch between “No Sync” to “AV Sync” in the playback to give the best synchronization to the characters. The volume and pitch can be adjusted using the sidebar.
05Step 5: Rendering
Before rendering, make sure you keep the FPS is same as that chosen during the keyframes to avoid unnecessary renders. After setting the frame correctly, causing the animation is easy.
Initially, click on “scene” and choose the file extension, file formats, and file colors (BW, RGB, or RGBA). Select the encoding container as “WebM” and video Codec as “WEBM/VP9. After adding the sound, set the audio codec to “Vorbis.” Choose output quality and speed.
After all the rendering, select Render from the top bar and select “Render Animation” in Blender Animation.
Awesome! We have successfully blended a character using Blender 3D animation software. With more practice and knowledge about more tools, one can easily use the Blender 3D mouse.
Part 3 Become a Pro from Beginners in 8 Tutorials.
01Fix 1: Complete Beginners Guide to Blender 2.8
This YouTube tutorial focuses on Blender version 2.8. The tutorial features the redesigned user interface and tools like 3D viewpoint and UV editor, which has new interactive tools. And about different 3D shapes and simple edits like adding colors and “G drag,” etc.
02Fix 2: Blender 2.9 for Absolute Beginners
This YouTube tutorial on Blender 3D animation software version 2.9 has the new advancement about denoiser interactivity in the 3D viewpoint. The YouTuber explains EEVEE, cycles, workbench, movements, rotate, and scale objects.
03Fix 3: Blender Day -1 Absolute Basics - Introduction Series for Beginners
This YouTube tutorial says about the introduction to the Blender 3D for free for beginners. He explains simple movements like rotating and scaling, shapes, and colors to the objects. He also says about the pivot plot and how to create a basic primitive using blender.
04Fix 4: Zoync TV’s Blender Beginners Series
The Blender Beginners video by ZoyncTV is on Blender 2.6. Indeed, even as hotkeys and terms change, the hidden ideas will forever be pertinent. Every video in this 11-section is somewhere between 10 and 20 minutes, split into five separate subjects: displaying, modifiers, materials, surfaces, and animations. It’s a beginner-level course.
05Fix 5: The Blender Survival Guide
The Blender Survival Guide series by Creative COW is outdated but the best video for somebody who has never utilized Blender. Each video in this 13-section series is somewhere in the range of 15 and 45 minutes in length, which means you’ll get 350 intense minutes of preparing. It is a survival reference that shows just the outright necessities.
06Fix 6: KatBit’s Blender Tutorial
The KatsBits site is home to lots of tutorials, video games. Its Blender animation tutorials are fantastic when you want a beginning stage for various 3D models. There are 45 Blender tutorials. Tutorials take you through the most common way of making a 3D level for Quake and tell you the best way to make a basic model.
07Fix 7: Daniel Krafft’s 100 Blender 2.8 Tips
While this is another Blender 2.8 tutorial, Daniel’s tips are overall for any Blender work process. He teaches simple stuff like vertex and edges and some technical parts in the Blender 3D animation software.
08Fix 8: Blender 3D: Noob to Pro
This last tutorial is a “wiki book” called Blender 3D: Noob to Pro that consists of important Blender animation tips and experiences. Start with an outline of 3D ideas and a top-to-bottom introduction to Blender.
Regarding Blender 3D mouse software, we would like to recommend one more tool to you the most. Yes, it is none other than Wondershare Filmora, a perfect alternative to Blender 3D animation software wherein you can get excellent 3D animation effects, 3D texts and animate it. There are some simple steps and various options to work in Filmora for creating 3D animated effects.
● Composition
● Creating our 3D text
● Creating the 3D look
● Basics of 3D animation
● Animating the text in 3D
There are countless YouTube tutorial videos for working with Wondershare Filmora Video Editor ‘s latest version.
Key Takeaways from This Episode
● We learned about Blender 3D animation software.
● How can you create characters using Blender animation?
● 8 Tutorials to move you from a beginner to a Pro.
Blender animation software is one of the open-source software chosen to create animations. It is easy to create animations, videos or graphics, etc. If you want to be an animation 3D artist, make creative universes, and meet each of the different characters moving around in your heart.
You will learn the step-by-step procedure to create animations and add other edits to the animation. And also a few tips to develop better Blender 3D animation effects.
In this article
01 [Is Blender best for animation?](#Part 1)
02 [How to Create 3D Animated Characters with Blender in 15 Minutes.](#Part 2)
03 [Become a Pro from Beginners in 8 Tutorials](#Part 3)
Part 1 Is Blender best for animation?
The answer to if the Blender is suitable for animation is yes. Blender animation is the best for making animations and bringing any living to animator. This software is mostly for professional works whose limitations will be learning the process, not any technical defects. Let’s talk about why Blender 3D animation software is the best and more helpful.
Character animation is an essential tool for animation, and Blender has developed this tool with no way less to other software.
There are many animation effects other than animating characters. Blender 3D for free has all the necessary tools to do all types of rigs and animations without any difficulty.
Blender is one software that has 2D animation inbuilt in it, like drawing and creating 2D animation.
Blender’s animation tools are making motion graphics possible by advancing the features than it was four years ago.
Nowadays, many people are using Blender to do professional works, including freelancers, small studios, and even game developers.
Part 2 How to Create 3D Animated Characters with Blender in 15 Minutes.
This is a series for people who want to learn how to create 3D blender animation characters from keeping a reference image. Blender’s ringing tools will be more helpful for this process.
01Step 1: Importing
Initially, import a Blender 3D animation character into the Blender to animate. Many free and paid characters are available in Vincent, and Rain v2.0 is present in Blender Cloud; above all, these characters are for free.
Steps to import the character either from Vincent or Rain v2.0
Download the character file from the cloud to any destination folder on the computer. Open the Blender and place the cursor on the origin point on the screen. Later select import present in the File menu and choose the file format. And now, allow the Python script to run for the selected character folder.
02Step 2: Add Keyframes
There will be a diamond-shaped icon below to choose the keyframe you want to add to the timeline, which you may also delete.
Adding a keyframe is simple. Open the timeline window in the animation editor. Press the alphabet ‘G’ on the keyboard, move the bone and place it. Then hit Shift+I and choose the channel LocRot and insert the keyframe. Likewise, you can adjust the keyframe by dragging, making it fast or slow to the requirements.
Moving the keyframe to 20 makes it faster, and moving to 40, slower.
03Step 3: Get Reference Materials
It will be challenging to add movements to the characters, so plenty of videos can get the moves right. There are various reference images and videos available on the Internet. You can either add the selected reference materials to the second screen or add them to the 3D space. Let’s discuss how to add it.
Hit Shift + A to add the reference material. Later select “Image” and then choose the “Background.” Scale the reference image onto the 3D space after it loads.
Afterward, you can leave it to the animation of the reference article, or you can further edit or amplify the movements.
04Step 4: Fine–Tuning and Sound
This step will add smooth movements by combining two keyframes for a more professional look. We have to use the Dope sheet to do complete this process. Let’s see how to add it.
Initially, split the window horizontally. Later switch over the dope sheet below the animation tab, where you can see keyframes of all axis. Now you can drag and edit to slow or amplify the speed.
There is a Graphic editor, which is more advanced to make the movements more accurately and directly to edit the curves.
Sound effects make any video or animation better. You can add and import the sound files. You can also create your sound and insert it into the Blender. Let’s discuss adding sound and making it sync to the character.
Download the audio file, hit shift + A to open Add menu, and choose the “Sound.” Now select the sound that you wish to add.
Drag the sound to keep it to the specific sections alone. Also, you can switch between “No Sync” to “AV Sync” in the playback to give the best synchronization to the characters. The volume and pitch can be adjusted using the sidebar.
05Step 5: Rendering
Before rendering, make sure you keep the FPS is same as that chosen during the keyframes to avoid unnecessary renders. After setting the frame correctly, causing the animation is easy.
Initially, click on “scene” and choose the file extension, file formats, and file colors (BW, RGB, or RGBA). Select the encoding container as “WebM” and video Codec as “WEBM/VP9. After adding the sound, set the audio codec to “Vorbis.” Choose output quality and speed.
After all the rendering, select Render from the top bar and select “Render Animation” in Blender Animation.
Awesome! We have successfully blended a character using Blender 3D animation software. With more practice and knowledge about more tools, one can easily use the Blender 3D mouse.
Part 3 Become a Pro from Beginners in 8 Tutorials.
01Fix 1: Complete Beginners Guide to Blender 2.8
This YouTube tutorial focuses on Blender version 2.8. The tutorial features the redesigned user interface and tools like 3D viewpoint and UV editor, which has new interactive tools. And about different 3D shapes and simple edits like adding colors and “G drag,” etc.
02Fix 2: Blender 2.9 for Absolute Beginners
This YouTube tutorial on Blender 3D animation software version 2.9 has the new advancement about denoiser interactivity in the 3D viewpoint. The YouTuber explains EEVEE, cycles, workbench, movements, rotate, and scale objects.
03Fix 3: Blender Day -1 Absolute Basics - Introduction Series for Beginners
This YouTube tutorial says about the introduction to the Blender 3D for free for beginners. He explains simple movements like rotating and scaling, shapes, and colors to the objects. He also says about the pivot plot and how to create a basic primitive using blender.
04Fix 4: Zoync TV’s Blender Beginners Series
The Blender Beginners video by ZoyncTV is on Blender 2.6. Indeed, even as hotkeys and terms change, the hidden ideas will forever be pertinent. Every video in this 11-section is somewhere between 10 and 20 minutes, split into five separate subjects: displaying, modifiers, materials, surfaces, and animations. It’s a beginner-level course.
05Fix 5: The Blender Survival Guide
The Blender Survival Guide series by Creative COW is outdated but the best video for somebody who has never utilized Blender. Each video in this 13-section series is somewhere in the range of 15 and 45 minutes in length, which means you’ll get 350 intense minutes of preparing. It is a survival reference that shows just the outright necessities.
06Fix 6: KatBit’s Blender Tutorial
The KatsBits site is home to lots of tutorials, video games. Its Blender animation tutorials are fantastic when you want a beginning stage for various 3D models. There are 45 Blender tutorials. Tutorials take you through the most common way of making a 3D level for Quake and tell you the best way to make a basic model.
07Fix 7: Daniel Krafft’s 100 Blender 2.8 Tips
While this is another Blender 2.8 tutorial, Daniel’s tips are overall for any Blender work process. He teaches simple stuff like vertex and edges and some technical parts in the Blender 3D animation software.
08Fix 8: Blender 3D: Noob to Pro
This last tutorial is a “wiki book” called Blender 3D: Noob to Pro that consists of important Blender animation tips and experiences. Start with an outline of 3D ideas and a top-to-bottom introduction to Blender.
Regarding Blender 3D mouse software, we would like to recommend one more tool to you the most. Yes, it is none other than Wondershare Filmora, a perfect alternative to Blender 3D animation software wherein you can get excellent 3D animation effects, 3D texts and animate it. There are some simple steps and various options to work in Filmora for creating 3D animated effects.
● Composition
● Creating our 3D text
● Creating the 3D look
● Basics of 3D animation
● Animating the text in 3D
There are countless YouTube tutorial videos for working with Wondershare Filmora Video Editor ‘s latest version.
Key Takeaways from This Episode
● We learned about Blender 3D animation software.
● How can you create characters using Blender animation?
● 8 Tutorials to move you from a beginner to a Pro.
Tips on How to Get Awesome Background for Slideshow in PowerPoint
Tips That Show Anybody How to Get Awesome Background for Slideshow in Powerpoint
An easy yet powerful editor
Numerous effects to choose from
Detailed tutorials provided by the official channel
Amazing slideshow background are an absolute attention grabber in the realm of creative PowerPoint presentations. If you wish to upgrade yours with the same, be here to learn how!
In this article
01 [How to Add Video Background in PowerPoint?](#Part 1)
02 [How to Create Moving Backgrounds in Microsoft PowerPoint?](#Part 2)
03 [Some Tips for You to Get Awesome PowerPoint Backgrounds & Templates](#Part 3)
Part 1 How to Add Video Background in PowerPoint?
When the talk is about engaging means to deliver a precise information, PowerPoint slideshows are an absolute stunner. While these are already a captivating utility to present your thing, the output and audience engagement is at par with the inclusion of attractive design elements in the presentation. As is evident, there are enormous diversities of supplementary elements to complement your presentation, let us centre our discussion to the application of video background for slideshow in PowerPoint.
User’s Guide to Add Video Background in a PowerPoint Slideshow
The following section presents a detailed explanation of the steps to supplement your PowerPoint presentations with classic video backgrounds in just a few quick steps:
Step 1: Launch Your Presentation
Start with opening the desired PowerPoint presentation to which you want to add the video background, in any of your preferred devices.
Step 2: Add a Video to Your Slide
Browse through your presentation slides to locate the one you want to add the video background to. When you have made your choice, navigate to the PowerPoint toolbar at the top and hit the ‘Insert’ tab and choose the ‘Video’ option.
You will now be presented with 2 choices, either uploading a video from your device or insert one from the web by pasting its YouTube URL into the slide. If you are uploading a video from your device, proceed with selecting the desired video and tap ‘Insert’.

Step 3: Move and Resize Your Video
After uploading your video to the slide, you need to make suitable adjustments in its size and alignment to synchronize the same with the contents of the slide. To do this, drag the top left corner of the video to that of the slide to set the top alignment ratio. In the same way, move the bottom right corner of the video to be in sync with that of the slide. You will see the video occupying the entire slide at the end of the adjustment process.

Step 4: Set the Video Background
You will now need to set the video as the background of your slide, so that the latter’s contents are displayed over the video. You can do this by right clicking on the video and choosing the ‘Send to Back’ option from the dropdown that follows. This will cause the contents of your slide to get displayed over the video.

Step 5: Playback Edit and Customization Choices
Before proceeding towards making changes in the video playback and formatting, prefer taking a quick preview of your work till here. Once you are satisfied, navigate to the PowerPoint Toolbar at the top, hit the ‘Video Tools’ tab, followed by clicking on the ‘Playback’ tab.
It is recommended to introduce the following changes in your video for the most affordable slideshow output:
● Loop Your Video
Creating a video loop will facilitate you with an automatic replay of your video without the need to restart it every time with a click. You can loop your video by navigating to the ‘Video Options’ section and choose ‘Loop Until Stopped’ by clicking within the checkbox next to it. The background video will now continue to play until you switch to a different slide.
● Automatically Start Your Video
To avoid clicking on the slide amid your presentation for the video loop to begin, adjust the latter’s settings for an automatic start. Navigate to the ‘Start’ dropdown menu and select ‘Automatically’.
● Trim Your Video
You can work with some basic video editing tools in PowerPoint, like trimming and cropping your background video to a desired length. If you wish to ward off certain portions of your video, reach to and click o the ‘Trim Video’ button. Following this, drag the slider of the video to select the desired portions of the clip and exclude the rest.
You can further work with some more editing effects to create the perfect video backgrounds for your presentation slides in line with your specific preferences.

Step 6: Annotate Your Video Background
When you are done with the video editing process, take a preview of the same to ensure that everything is set in the proper order and at the proper place. Lastly, if you wish to add suitable text annotations to your video, you can do this with the ‘ClassPoint’ tool to write over the video background. All you need to do is select a preferred pen colour and start writing on your slide screen. You can further, save the annotations for a work record.

Part 2 How to Create Moving Backgrounds in Microsoft PowerPoint?
Moving PowerPoint slideshow background is another aspect of graphic creativity at its best, which can be used in a number of ways to grab considerable viewer attention. When choosing to add moving backgrounds to your presentation, the latter can aid in improving the style of content presentation, making your audience curious about how and what happens next.
Having learnt about the utility and creation process of video backgrounds in the PowerPoint presentation tool, let us extend our discussion to the method of creating a moving slide show background in the same in the following section:
User’s Guide to Create Moving Backgrounds for PowerPoint Presentations
Discussed below is an explanatory procedure for designing moving backgrounds with an awesome appearance for slideshow presentations in Microsoft PowerPoint:
Step 1: Open Your Presentation
To begin with, launch the PowerPoint tool in your preferred device and open the presentation on which you will be working to add the moving background. After the presentation gets loaded, navigate through the same and select the desired slide to proceed with the aforesaid task.
Step 2: Choose a Video Location
To add your desired video to the slide, navigate to the PowerPoint ribbon at the top and click on the ‘Insert’ tab. Select ‘Video’ from the list of options that appears, followed by choosing one of the ‘Online Video’ or ‘Video on My PC’ options from the video selection prompt. It is further recommended to select a video in the MP4 format, as the latter gives best results of moving and video backgrounds.
Step 3: Insert Your Video
Choose the second option in the selection prompt to upload a video from your device. You will now be asked to browse through your device and locate the desired video in the ‘Insert Video’ dialog box that appears. Select your video and tap the ‘Insert’ button to add your video.
To upload videos from an online source, choose the ‘Online Video’ option in the selection prompt and proceed to search the video from PowerPoint or paste its embed code to recover the video. The chosen video will begin to download and can be added to the PowerPoint presentation after the download process comes to an end.

Step 4: Playback Editing and Video Customization
Before proceeding further, consider paying your video once by clicking on the ‘Start’ button. You can also add different effects, trim and crop or add a bookmark to your video by navigating to and clicking on the ‘Video Tools’ tab, followed by selecting the ‘Format’ option. To work with the start and playback options for the video, click on ‘Playback’ in the dropdown menu of the ‘Video Tools’ tab.

Part 3 Some Tips for You to Get Awesome PowerPoint Backgrounds & Templates
Now that you have developed a comprehensive understanding of the utility of adding video and moving background for slideshow presentation, let us look through some easy tips and tricks to conveniently access the top rated and the most popular PowerPoint slideshow templates and backgrounds in the following section:
01Cool Slide Backgrounds
Slideshow presentations in PowerPoint are supplemented with a visual spark through amazing and vibrant backgrounds that are a sign of excellent graphic creativity. When working with a PowerPoint presentation of your own, do take the liberty to use some cool slide backgrounds to your creative advantage.
When the talk is about complementing your presentation with a cohesive and upbeat background, you can either select the most suitable one from a heap of pre made slideshow templates available both in the PowerPoint slideshow creator tool as well as across the web. However, if you wish to take the excitement to another level, try hands at creating an awesome and cool backgrounds for PowerPoint slides of your own!
Talking about some really cool tips and tricks to design a slideshow presentation background in PowerPoint, start with including some specific shapes and color overlays to the background capture, experiment with a polygon background, work on enhancing the background image with classic and artistic effects and apply a mix of colors, textures and patterns to give a classy look to your slideshow backgrounds.

02Professional Slideshow Backgrounds
If you are aiming at creating a PowerPoint slideshow presentation with a business centered design approach, you will need to cut down on some extra elements that you would ideally choose to include in a personal purpose based slideshow. Paying attention to the fact that business and corporate centered presentations should be simple, subtle and to the point, it would be an intelligent step to avoid adding too many expressive elements in the background.
Whether you are creating a professional slideshow background of your own or working with a pre designed template, take care to include a complementary play of a light background theme with a maximum of 2 balancing shades.
Avoid too much vibrancy and abstain from applying over the top effects and quick transitions, lest your presentation may look a bit too crowed. If your slides have lot of written content, prefer using a white color background text in a professional font style.
If you have decided on picking a pre made template, you can browse through a diversity of suggestions across the web, while keeping the aforesaid constraints in mind. Consider taking a look at the figure given below to have a more comprehensive understating of the prerequisites of selecting a professional sideshow background template:

03Happy Birthday Slide Backgrounds
Birthday parties are the most appealing synonyms of fun and entertainment. If you are into the profession of organizing events that renders smiling and happy faces, slideshow presentations could be of great help to you in discussing about services, types of social gentries and event targets with your clients.
When looking through different options to select the perfect birthday template, either for a professional event, or just to go down the memory lane of your most cherished moments, take caution to search for a vibrant alternative with colorful images, different background designs and party oriented cool themes, wide aspect ratio with high screen resolution for a mass display and conveniently editable graphics.
If you are creating a happy birthday slide background of your own, there are variety of realms to explore your graphic design creativity, owing to the fact that the subject of creation is highly expressive and multi-dimensional. While you are free to extend your creativity to the next level, do pay attention to the above constraints for a more elusive and outstanding creation output, while maintaining the fun and entertainment quotient intact.

04Wedding Slide Backgrounds
Considering the fact that wedding events are pronounced means of fun, leisure, enjoyment and beautiful memories, anything that aims to be a part of the celebrations, should be equally ecstatic and engaging. Infusing festive occasions with technology, slideshow based wedding invitations and moment captures are the top rated modern trends of celebrating this significant life event.
If you are keen on designing the perfect slideshow presentation for wedding invitations, photo albums and thank you cards, prefer to choose a wedding slide background template with aesthetic layout and flowing element inclusions, like that of floral borders and scented candles. Look though the elements of a subtle thematic setup with soothing color combinations, preferably in complementary pastel shades, like pink and white.
Talking of template customizability, the latter should have placeholders to include names of the bride and groom, the wedding date and venue, and of course the wedding photographs. The beautiful slide background template should have enough design space to include the most elusive play of text colors and fonts to suit specific preferences of creating special memories of a cherished event.

05Slideshow Backgrounds and Templates in Filmora
When looking for the most convenient lead to an extensive variety of beautiful slideshow templates and background, the template library of Wondershare Filmora Video Editor slideshow creator program can be your most affordable destination. The aforesaid software library is known to possess the best and most perfect template choices to suit the creation constraints of almost every slideshow presentation style and objective you can possibly think of.
For Win 7 or later (64-bit)
For macOS 10.12 or later
The elusive templates are further supplemented with a plethora of design flexibilities and customization features that are all set to deliver you the most appreciable creation output. Stressing a bit on the template customization choices of the software, you can work with the tool to uplift your slideshow backgrounds with artistic image effects and overlays, annotate them with beautiful text formations in a variety of colors, fonts and sizes and lots more.
Moving a bit deeper into the creative aspect, you can upgrade the visual style of your presentations with the most perfect and seamless image and video transitions and text animations. The bottom line is, working with the aforesaid slideshow creator program, you are entitled to get jaw dropping applaud from your audience, while making a confident and a content delivery through your slideshow presentation.

● Ending Thoughts →
● Using an expressive and complementing background in your slideshow presentation uplifts its visual credibility in captivating your audience.
● Browsing through the web, you get to access a vast range of amazing slideshow backgrounds and templates to make your presentation, a visual masterpiece.
● When looking for the most distributed storehouse of slideshow backgrounds and templates, the Wondershare Filmora library is your ultimate solution.
Amazing slideshow background are an absolute attention grabber in the realm of creative PowerPoint presentations. If you wish to upgrade yours with the same, be here to learn how!
In this article
01 [How to Add Video Background in PowerPoint?](#Part 1)
02 [How to Create Moving Backgrounds in Microsoft PowerPoint?](#Part 2)
03 [Some Tips for You to Get Awesome PowerPoint Backgrounds & Templates](#Part 3)
Part 1 How to Add Video Background in PowerPoint?
When the talk is about engaging means to deliver a precise information, PowerPoint slideshows are an absolute stunner. While these are already a captivating utility to present your thing, the output and audience engagement is at par with the inclusion of attractive design elements in the presentation. As is evident, there are enormous diversities of supplementary elements to complement your presentation, let us centre our discussion to the application of video background for slideshow in PowerPoint.
User’s Guide to Add Video Background in a PowerPoint Slideshow
The following section presents a detailed explanation of the steps to supplement your PowerPoint presentations with classic video backgrounds in just a few quick steps:
Step 1: Launch Your Presentation
Start with opening the desired PowerPoint presentation to which you want to add the video background, in any of your preferred devices.
Step 2: Add a Video to Your Slide
Browse through your presentation slides to locate the one you want to add the video background to. When you have made your choice, navigate to the PowerPoint toolbar at the top and hit the ‘Insert’ tab and choose the ‘Video’ option.
You will now be presented with 2 choices, either uploading a video from your device or insert one from the web by pasting its YouTube URL into the slide. If you are uploading a video from your device, proceed with selecting the desired video and tap ‘Insert’.
Step 3: Move and Resize Your Video
After uploading your video to the slide, you need to make suitable adjustments in its size and alignment to synchronize the same with the contents of the slide. To do this, drag the top left corner of the video to that of the slide to set the top alignment ratio. In the same way, move the bottom right corner of the video to be in sync with that of the slide. You will see the video occupying the entire slide at the end of the adjustment process.
Step 4: Set the Video Background
You will now need to set the video as the background of your slide, so that the latter’s contents are displayed over the video. You can do this by right clicking on the video and choosing the ‘Send to Back’ option from the dropdown that follows. This will cause the contents of your slide to get displayed over the video.
Step 5: Playback Edit and Customization Choices
Before proceeding towards making changes in the video playback and formatting, prefer taking a quick preview of your work till here. Once you are satisfied, navigate to the PowerPoint Toolbar at the top, hit the ‘Video Tools’ tab, followed by clicking on the ‘Playback’ tab.
It is recommended to introduce the following changes in your video for the most affordable slideshow output:
● Loop Your Video
Creating a video loop will facilitate you with an automatic replay of your video without the need to restart it every time with a click. You can loop your video by navigating to the ‘Video Options’ section and choose ‘Loop Until Stopped’ by clicking within the checkbox next to it. The background video will now continue to play until you switch to a different slide.
● Automatically Start Your Video
To avoid clicking on the slide amid your presentation for the video loop to begin, adjust the latter’s settings for an automatic start. Navigate to the ‘Start’ dropdown menu and select ‘Automatically’.
● Trim Your Video
You can work with some basic video editing tools in PowerPoint, like trimming and cropping your background video to a desired length. If you wish to ward off certain portions of your video, reach to and click o the ‘Trim Video’ button. Following this, drag the slider of the video to select the desired portions of the clip and exclude the rest.
You can further work with some more editing effects to create the perfect video backgrounds for your presentation slides in line with your specific preferences.
Step 6: Annotate Your Video Background
When you are done with the video editing process, take a preview of the same to ensure that everything is set in the proper order and at the proper place. Lastly, if you wish to add suitable text annotations to your video, you can do this with the ‘ClassPoint’ tool to write over the video background. All you need to do is select a preferred pen colour and start writing on your slide screen. You can further, save the annotations for a work record.
Part 2 How to Create Moving Backgrounds in Microsoft PowerPoint?
Moving PowerPoint slideshow background is another aspect of graphic creativity at its best, which can be used in a number of ways to grab considerable viewer attention. When choosing to add moving backgrounds to your presentation, the latter can aid in improving the style of content presentation, making your audience curious about how and what happens next.
Having learnt about the utility and creation process of video backgrounds in the PowerPoint presentation tool, let us extend our discussion to the method of creating a moving slide show background in the same in the following section:
User’s Guide to Create Moving Backgrounds for PowerPoint Presentations
Discussed below is an explanatory procedure for designing moving backgrounds with an awesome appearance for slideshow presentations in Microsoft PowerPoint:
Step 1: Open Your Presentation
To begin with, launch the PowerPoint tool in your preferred device and open the presentation on which you will be working to add the moving background. After the presentation gets loaded, navigate through the same and select the desired slide to proceed with the aforesaid task.
Step 2: Choose a Video Location
To add your desired video to the slide, navigate to the PowerPoint ribbon at the top and click on the ‘Insert’ tab. Select ‘Video’ from the list of options that appears, followed by choosing one of the ‘Online Video’ or ‘Video on My PC’ options from the video selection prompt. It is further recommended to select a video in the MP4 format, as the latter gives best results of moving and video backgrounds.
Step 3: Insert Your Video
Choose the second option in the selection prompt to upload a video from your device. You will now be asked to browse through your device and locate the desired video in the ‘Insert Video’ dialog box that appears. Select your video and tap the ‘Insert’ button to add your video.
To upload videos from an online source, choose the ‘Online Video’ option in the selection prompt and proceed to search the video from PowerPoint or paste its embed code to recover the video. The chosen video will begin to download and can be added to the PowerPoint presentation after the download process comes to an end.
Step 4: Playback Editing and Video Customization
Before proceeding further, consider paying your video once by clicking on the ‘Start’ button. You can also add different effects, trim and crop or add a bookmark to your video by navigating to and clicking on the ‘Video Tools’ tab, followed by selecting the ‘Format’ option. To work with the start and playback options for the video, click on ‘Playback’ in the dropdown menu of the ‘Video Tools’ tab.
Part 3 Some Tips for You to Get Awesome PowerPoint Backgrounds & Templates
Now that you have developed a comprehensive understanding of the utility of adding video and moving background for slideshow presentation, let us look through some easy tips and tricks to conveniently access the top rated and the most popular PowerPoint slideshow templates and backgrounds in the following section:
01Cool Slide Backgrounds
Slideshow presentations in PowerPoint are supplemented with a visual spark through amazing and vibrant backgrounds that are a sign of excellent graphic creativity. When working with a PowerPoint presentation of your own, do take the liberty to use some cool slide backgrounds to your creative advantage.
When the talk is about complementing your presentation with a cohesive and upbeat background, you can either select the most suitable one from a heap of pre made slideshow templates available both in the PowerPoint slideshow creator tool as well as across the web. However, if you wish to take the excitement to another level, try hands at creating an awesome and cool backgrounds for PowerPoint slides of your own!
Talking about some really cool tips and tricks to design a slideshow presentation background in PowerPoint, start with including some specific shapes and color overlays to the background capture, experiment with a polygon background, work on enhancing the background image with classic and artistic effects and apply a mix of colors, textures and patterns to give a classy look to your slideshow backgrounds.
02Professional Slideshow Backgrounds
If you are aiming at creating a PowerPoint slideshow presentation with a business centered design approach, you will need to cut down on some extra elements that you would ideally choose to include in a personal purpose based slideshow. Paying attention to the fact that business and corporate centered presentations should be simple, subtle and to the point, it would be an intelligent step to avoid adding too many expressive elements in the background.
Whether you are creating a professional slideshow background of your own or working with a pre designed template, take care to include a complementary play of a light background theme with a maximum of 2 balancing shades.
Avoid too much vibrancy and abstain from applying over the top effects and quick transitions, lest your presentation may look a bit too crowed. If your slides have lot of written content, prefer using a white color background text in a professional font style.
If you have decided on picking a pre made template, you can browse through a diversity of suggestions across the web, while keeping the aforesaid constraints in mind. Consider taking a look at the figure given below to have a more comprehensive understating of the prerequisites of selecting a professional sideshow background template:
03Happy Birthday Slide Backgrounds
Birthday parties are the most appealing synonyms of fun and entertainment. If you are into the profession of organizing events that renders smiling and happy faces, slideshow presentations could be of great help to you in discussing about services, types of social gentries and event targets with your clients.
When looking through different options to select the perfect birthday template, either for a professional event, or just to go down the memory lane of your most cherished moments, take caution to search for a vibrant alternative with colorful images, different background designs and party oriented cool themes, wide aspect ratio with high screen resolution for a mass display and conveniently editable graphics.
If you are creating a happy birthday slide background of your own, there are variety of realms to explore your graphic design creativity, owing to the fact that the subject of creation is highly expressive and multi-dimensional. While you are free to extend your creativity to the next level, do pay attention to the above constraints for a more elusive and outstanding creation output, while maintaining the fun and entertainment quotient intact.
04Wedding Slide Backgrounds
Considering the fact that wedding events are pronounced means of fun, leisure, enjoyment and beautiful memories, anything that aims to be a part of the celebrations, should be equally ecstatic and engaging. Infusing festive occasions with technology, slideshow based wedding invitations and moment captures are the top rated modern trends of celebrating this significant life event.
If you are keen on designing the perfect slideshow presentation for wedding invitations, photo albums and thank you cards, prefer to choose a wedding slide background template with aesthetic layout and flowing element inclusions, like that of floral borders and scented candles. Look though the elements of a subtle thematic setup with soothing color combinations, preferably in complementary pastel shades, like pink and white.
Talking of template customizability, the latter should have placeholders to include names of the bride and groom, the wedding date and venue, and of course the wedding photographs. The beautiful slide background template should have enough design space to include the most elusive play of text colors and fonts to suit specific preferences of creating special memories of a cherished event.
05Slideshow Backgrounds and Templates in Filmora
When looking for the most convenient lead to an extensive variety of beautiful slideshow templates and background, the template library of Wondershare Filmora Video Editor slideshow creator program can be your most affordable destination. The aforesaid software library is known to possess the best and most perfect template choices to suit the creation constraints of almost every slideshow presentation style and objective you can possibly think of.
For Win 7 or later (64-bit)
For macOS 10.12 or later
The elusive templates are further supplemented with a plethora of design flexibilities and customization features that are all set to deliver you the most appreciable creation output. Stressing a bit on the template customization choices of the software, you can work with the tool to uplift your slideshow backgrounds with artistic image effects and overlays, annotate them with beautiful text formations in a variety of colors, fonts and sizes and lots more.
Moving a bit deeper into the creative aspect, you can upgrade the visual style of your presentations with the most perfect and seamless image and video transitions and text animations. The bottom line is, working with the aforesaid slideshow creator program, you are entitled to get jaw dropping applaud from your audience, while making a confident and a content delivery through your slideshow presentation.
● Ending Thoughts →
● Using an expressive and complementing background in your slideshow presentation uplifts its visual credibility in captivating your audience.
● Browsing through the web, you get to access a vast range of amazing slideshow backgrounds and templates to make your presentation, a visual masterpiece.
● When looking for the most distributed storehouse of slideshow backgrounds and templates, the Wondershare Filmora library is your ultimate solution.
Also read:
- Updated 2024 Approved Top 3 Ways to Create Gif Images with Great 3D Gif Maker
- Updated In 2024, Before You Learn Facebook Slideshow 5 Things You Should Know How-TOS
- 2024 Approved 10 Best Tools to Make Pic Collage for Windows
- New 15 Best Stop Motion Animation Kits to Fuel Creativity
- 2024 Approved 15 Best Pics Collage Apps Top Picks
- In 2024, Top 7 Best Free GIF Apps for Android
- New 2024 Approved How to Stop Animation From Looping in Unity
- Updated 10 Great Apps for Turning Funny Animated Images Into Comics
- How to Create a YouTube Intro Animation Like a Pro for 2024
- New 2024 Approved Top 7 Animated GIF Text Makers
- Tips on How to Learn Graphics Animation
- Updated In 2024, 15 Animated Characters We All Had A Crush On
- In 2024, Create or Find Good Morning/Night GIFs
- Updated 2024 Approved Some Techniques for Creating Animated Logo That Few People Know About
- New In 2024, How to Draw A Skeleton Cartoon – A Step by Step Guide
- New How To Turn Yourself Into Anime Character
- New In 2024, Uncensored Top 10 + Free Streaming Sites
- New A Beginners Guide to Explain What 3D Animation Is for 2024
- Updated In 2024, The Ultimate Cheatsheet to 15 Adobe Animate Alternatives
- 2024 Approved Learn Disney Cartoon Drawing to See More Disney Magic Moments
- New How To Create Animated Clipart in PowerPoint
- New 2024 Approved How to Make an Animation With 7 Steps
- New In 2024, How to Make Animated Videos for Business – an Ultimate Guide
- Updated 2024 Approved Popular Female & Male Disney Cartoon Characters To Empower You
- Updated Top 10 Classical Animated Cartoon Types With Examples for 2024
- New 2024 Approved Ways You Can Master to Make Claymation Videos
- How to Find & Make Animated Christmas GIFs?
- 12 Aesthetic GIF Instagram for Marketers for 2024
- 2024 Approved Best Claymation Shows That Make Your Memories Unforgettable
- New Learn What Are Differences Between 2D And 3D Animation for 2024
- Updated 2024 Approved How to Make a Video a Live Photo 2023
- New The 10 Best Batman Anime Movies- 2024 Updated
- New Samples of Cartoon Character Face to Inspire You for 2024
- In 2024, The Best 8 Places for High-Quality Royalty Free Gifs (Paid and Free)
- New The Best 20 Motion Graphics Companies & Studios for 2024
- Updated How To Remove The Endless Loop From Animated GIF
- New In 2024, How to Make Your Characters Interactive in Unity Animation Rigging
- In 2024, Creative Ways to Make iPhone Text GIF
- In 2024, 10 Best Tools to Make Pic Collage for Windows
- In 2024, How to Make 3D Cartoon of Yourself
- New 2024 Approved Secret Shortcut to Adobe Animate Character Tutorial
- Want to Uninstall Google Play Service from Itel S23? Here is How | Dr.fone
- How to retrieve erased videos from Reno 11 5G
- Why Is My ZTE Nubia Z60 Ultra Offline? Troubleshooting Guide | Dr.fone
- In 2024, 3 Ways to Erase Apple iPhone 15 When Its Locked Within Seconds
- How To Repair iOS System Issues of iPhone 6 Plus? | Dr.fone
- Can You Unlock iPhone 14 Pro After Forgetting the Passcode?
- How To Recover Data from iPhone 6s Plus? | Dr.fone
- Top 5 Oppo A78 5G Bypass FRP Tools for PC That Actually Work
- Top 12 Prominent Nubia Red Magic 9 Pro Fingerprint Not Working Solutions
- How to enter the iSpoofer discord server On Apple iPhone 7 Plus | Dr.fone
- 3 Ways to Fake GPS Without Root On Samsung Galaxy A14 4G | Dr.fone
- In 2024, Unlock Your Disabled iPhone 12 Without iTunes in 5 Ways | Dr.fone
- How to Change Spotify Location After Moving to Another Country On Xiaomi Mix Fold 3 | Dr.fone
- How To Unlock Apple iPhone XS Without Passcode? 4 Easy Methods
- Why Does My Realme V30T Keep Turning Off By Itself? 6 Fixes Are Here | Dr.fone
- In 2024, Full Guide to Unlock Your Xiaomi 14 Ultra
- In 2024, 5 Quick Methods to Bypass Nokia C22 FRP
- In 2024, Complete Tutorial to Use VPNa to Fake GPS Location On Honor X8b | Dr.fone
- 9 Solutions to Fix Process System Isnt Responding Error on OnePlus Nord CE 3 Lite 5G | Dr.fone
- Title: New The Secret Sauce for Making GIF Instagram Story More Aesthetic
- Author: Elon
- Created at : 2024-06-30 12:27:25
- Updated at : 2024-07-01 12:27:25
- Link: https://animation-videos.techidaily.com/new-the-secret-sauce-for-making-gif-instagram-story-more-aesthetic/
- License: This work is licensed under CC BY-NC-SA 4.0.
