
:max_bytes(150000):strip_icc():format(webp)/laptop-569944733df78cafda90169f.jpg)
Top Tips for Effortless Unity 3D Animation for 2024
Top Tips for Effortless Unity 3D Animation
Top Tips for Effortless Unity 3D Animation
An easy yet powerful editor
Numerous effects to choose from
Detailed tutorials provided by the official channel
Unity 3D animation will be our topic in this article. This will help develop your knowledge of the animation systems in Unity.
Unity 3D character animation is an enlisted brand name of Unity Technologies and game creation. With its peculiar highlights, strong evaluating, and extraordinary abilities for computer games, it has stood out enough to be noticed by the game development community.
In this article
01 [What’s Unity 3D Animation and Why is It Popular?](#Part 1)
02 [How to Create Animations in Unity 3D?](#Part 2)
Part 1 What’s Unity 3D Animation and Why is It Popular?
Animation Unity 3D is the most popular and powerful tool to animate any animation you like.
● Unity provides a more creative iteration platform to realize your vision as fast as possible.
● Unity has broader integration. It works out of the box and creates a real-time workflow custom-made for a project.
● Unity supports a more comprehensive production to make it possible to render shorts, videos, and films to create in days instead of months.
● Unity has an intelligent decision-making feature to discover the errors while doing the process and make corrections soon before it is too late.
● Unity animation 3Dhas a high creation scale like building, reusing and integrating to create more new projects quickly.
● Unity delivers smooth collaboration, allowing the artist to share the project and see their changes immediately, reducing error and miscommunications.
01Do You Think You Know What Unity Animation Is?
Animation unity 3D is a very vast tool with many new things to learn. Everyone can know Unity with proper basics, training, and experiences. There are various tutorials by Unity and many other people sharing their knowledge through the internet.
02Is Unity Good for 3D Animation?
Unity is used chiefly for Unity 3D skeletal animations and complex 3D animations like videos and games. There would be a retouch of Unity when you notice any video games or animation videos. It contains excellent inbuilt coding like C# and JavaScript for scripting. Easy and quick importing for audio, video, and text format as a complete package.
Part 2 How to Create Animations in Unity 3D?
Unity 3D animation highlights incorporate animations, complete control of movements, the occasion of animation playback, refined state machine hierarchies, transitions, mix shapes for facial animations.
01Fix 1: How to Animate Characters in Unity 3D
This YouTube channel explains more about Unity 3D. He starts with an introduction about Unity, tools about Unity 3D character animation like animation controller, looping animation, root motion, and different modes in animation with Unity 3D.
He focuses on Unity 3D character animation fundamentals and lets us understand how and why it works.
02Fix 2: Creating Character Animation in Unity
This video is all about creating procedural character animations in unity by using unity 3D skeletal animation. An archery game is the concept of this youtube video. He focuses on the movement of the bow to the target with rigging techniques.
Unity 3D Character animation mainly focuses on the avatar. Some default avatars, or others, can be imported as files into Unity.
03Fix 3: How to animate in Unity 3D
In this Unity tutorial, you’ll figure out how to animate from top to bottom the whole way. It will cover every one of the basics you want to get everything rolling with activity in Unity 3D.
04Fix 4: Unity 3D Animation for Beginners
This channel teaches Unity animation 3D to beginners, starting with importing a cube into the field and oscillating it. A brief video of 6 minutes but covers most of the tools and ideas about Unity.
05Fix 5: The Animator Controller
This tutorial is from the official Unity themselves explaining about Unity 3D character animation controller. Animation controllers are tools that determine the animations currently being played and blended. Unity channel demonstrates how to make animation controllers and apply different animations to different states.
06Fix 6: Creating simple and easy Animation
This tutorial by Jimmy Vegas on creating simple and easy animation using Unity 3D animation is approximately 7 minutes which explains unity version 2018.3 but mainly applies to almost all the new versions. The tutorial talks about simple animations and controls that will be helpful to learn many tools in unity.
Are you still looking for some other better 3D animation software? If you want to have many controls of 3D animation videos here, we introduce Wondershare Filmora. You simply have to create a white keyframe to start making an animation. Filmora offers six different keyframes to perform smooth and natural animation. And also, tools like autocorrect and auto mixer bring the animation to the next level. Various tutorial videos available on YouTube and Wondershare Filmora Video Editor wesbite have posted different manuals to guide the users.
For Win 7 or later (64-bit)
For macOS 10.12 or later
This video explains how to make an animation video in Fimora with a step-by-step procedure for defining the tools clearly. A 16 minutes video explained every process in many other videos that teach Filmora better and more informative.
Key Takeaways from This Episode
● We learned that Unity animation 3D is a toolset that enhances physics, entertainment, audio, graphic, interaction, and networking and has fast integrated game development speeds. Excellent and easy 3D grounded platform and audio engine. The disadvantage of Unity is it does not provide any source code, and performance issues are hard to find. It fines additional cost for a mobile pro license for practical deployments.
● Although there are many software’s available in the animation market, only a few can be trusted. So, whenever there is confusion regarding which 3D animation software to use, you can blindly choose Filmora. It has a wide range of assistance like preset animation effects, interface access, multiple tracks to add various videos, and totally as a package make Filmora the best alternative to Unity 3D skeletal animation. Just a little practice and experience can make you perfect.
How to Analyze an Editorial Cartoon Easily
How to Analyze an Editorial Cartoon
An easy yet powerful editor
Numerous effects to choose from
Detailed tutorials provided by the official channel
We all remember opening our daily newspaper and seeing a graphical representation of some new scoop or story that gives you a gist of what is happening, usually involving humor or sarcasm. That is what one would call and editorial cartoon and they are quite popular amongst newspapers, internet blogs and most recently, Social Media.
Some would even say that ‘Memes’ are an evolved form of editorial cartoons. They are funny, entertaining and can even portray some type of story. Editorial cartoons, in layman terms are a graphical approach to reflect the creator’s ideas. These are usually drawn on a tight deadline; hence feature simple caricatures and whimsical characters.
Cartoonists and hobbyists around the world can save on time using online tools to bring their ideas to life. Today, with some help from the right technology, anybody can try their hands in drawing amazing characters, combining both visual and verbal languages.
If you are someone who feels they have an amazing idea for a cartoon but lacks the skills to draw one can choose from a plethora of tools like Powtown, Photoshop or AI Artist to create amazing sketches and drawing, in half the time.
In this article
01 [Always Be Timely — Editorial Cartoons in a Snap](#Part 1)
02 [The 8 Best Apps to Turn Photos Into Cartoons and Sketches](#Part 2)
03 [How to Make 3D Cartoon From a Photo](#Part 3)
Part 1 Always Be Timely — Editorial Cartoons in a Snap
When a new idea pops into your head, we are usually overwhelmed or excited by its prospects of it that we forget to analyze its features before proceeding to turn it into a cartoon. Here are some tips to help you look into the details of your cartoon.
● Make a note of all the characters in your cartoon strip, what actions are they involved in and the dialogues that are being uttered.
● From which angle or whose angle the story is being told.
● Divide the cartoon design into four quadrants; Top Right & Left, Bottom Right & Left.
● Pay attention to key elements such as use of furniture, tools, technology or signs.
● Define traits like time of day, time of the year or time in history where the context is set.
● Keep in mind the audience you are reaching out to. You can ensure reliability the subtle use of intellect and humour.
Now that you have a clearer picture of what you are trying to depict it is best not to delay the idea and start cracking your creative eggs.
Beginners can use an easy tool like Powtoon, and its simple drag and drop interface to start making cartoons in just three simple steps. You can save up on a lot of time and get your cartoon ready for uploading to your new blog post.
Step 1: Set a Background for your Cartoon
Open the Powtoon Studio on your system and click on ‘Backgrounds’ located on the panel to your right. It will open up a vast library filled with ready to use backgrounds.
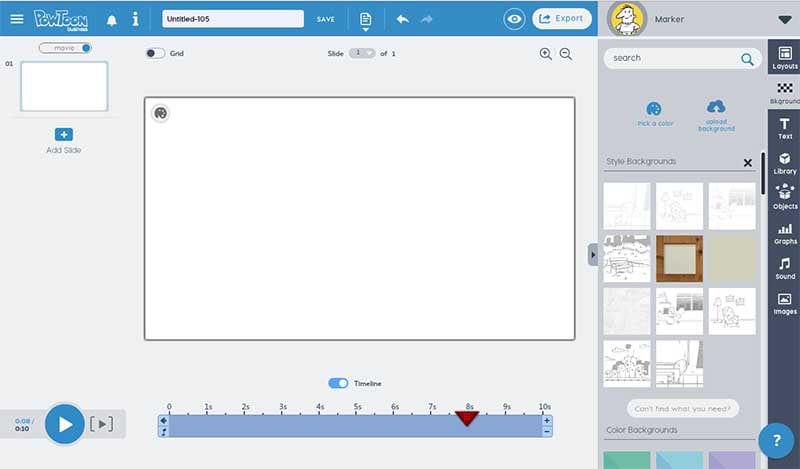
Select any you like to get started. It will intently appear on the board.
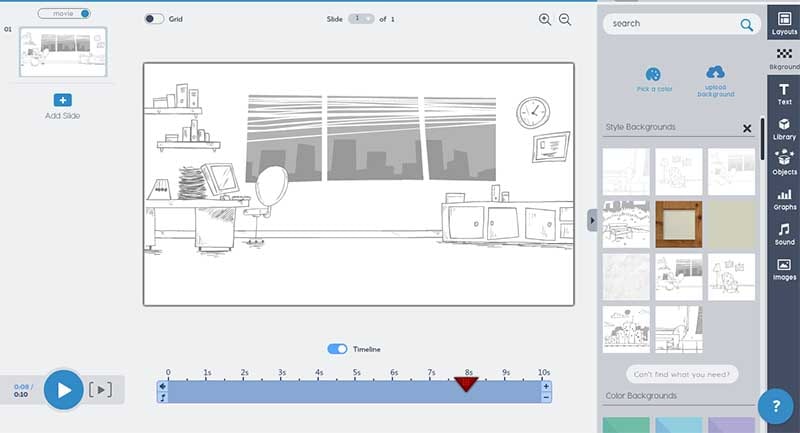
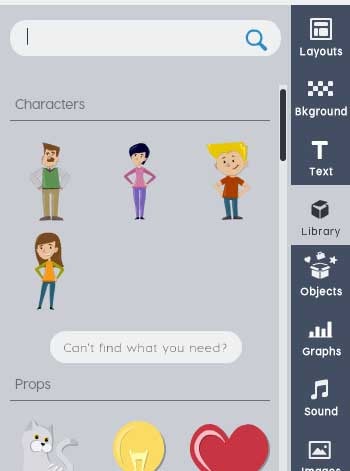
Step 2: Select the Characters for your Cartoon
Well, you have a setting and now it is time to place your characters in it. Click on the ‘Animated Character’ from the panel. Choose any template for your characters.
Step 3: Add the Text
There are various ways you can add dialogues, messages or texts to your cartoon. You can click on ‘Text’ and add a Quote Box or Dialogue Box. You can edit your text by simply clicking on the box.
Part 2 The 8 Best Apps to Turn Photos Into Cartoons and Sketches
01Photo Lab Picture Editor
Photolab is a great choice for turning your photos into a painting, sketch or a watercolor image. Along with filters you will get montages, borders and frames to make your art work more realistic. You will find all presets in the effects category. It also features filters like digital rain and jigsaw puzzle. Photolab can also be used as a photo editor as it is capable to perform color adjustment, rotate and crop.
Key Features:
● 800+ effects.
● E-card templates for special occasions.
● You can choose a photo from gallery or click one using the camera app.
02Prisma Photo Editor
Prisma has the magical ability to turn your photo or sketch into a Van Gogh or Picasso style painting. Wondering how? It has filters that are inspired by the eminent artist around the world. Choose a photo from your gallery and choose from exciting filters. Prisma also have cool editing tools that help you adjust the intensity of the filters applied if you want to.
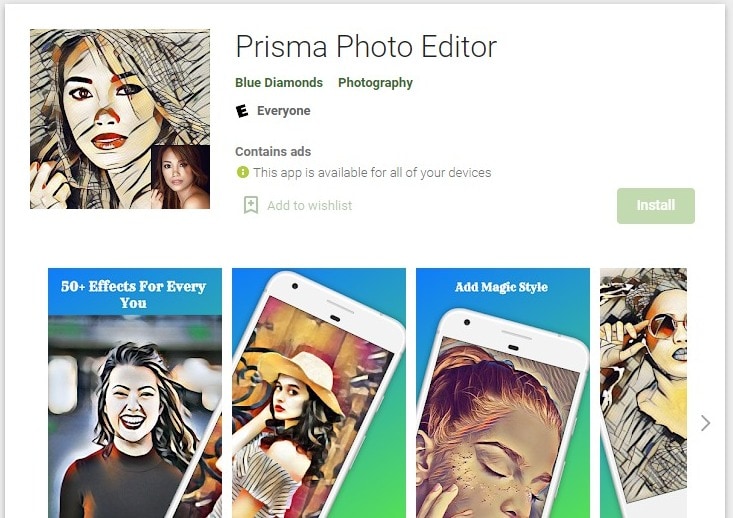
Key Features
● Online App community.
● Similar to Instagram
● artistic filters.
03Paint Lab – Photo Cartoon
Paintlab features an easy to use interface and wide range of filters. With it you can turn any photos into a cartoon or a drawing just in few seconds. Once you are done editing you can share your final work on any social media platform directly from paintlab. It is compatible only with androids.
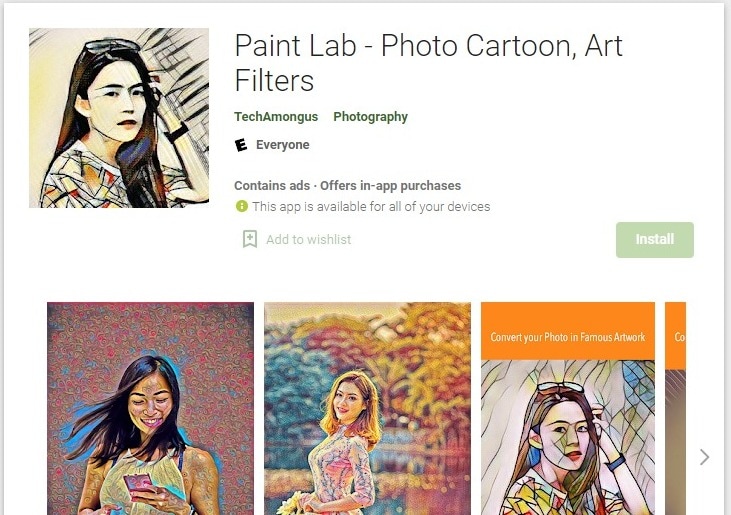
Key Fetaures
● Fast editing
● Perfect or beginners.
● Includes beautification and imperfection correction tools and effects.
04Cartoon Photo PRO
Using Cartoon Photo Pro alongside your photos you can also turn your videos into cartoon. Effects are artistic and customizable. Only downside it doesn’t come for free. It also has great ratings in Playstore.

Key Features
● User friendly interface
● Animates videos.
05Brushstroke
Brushstroke is ideal for editing and printing high resolution photos. The app comes with a paint directly option. It is not android compatible. The best feature is apart from filters and painting styles you can also pick the color palette and canvas surface.
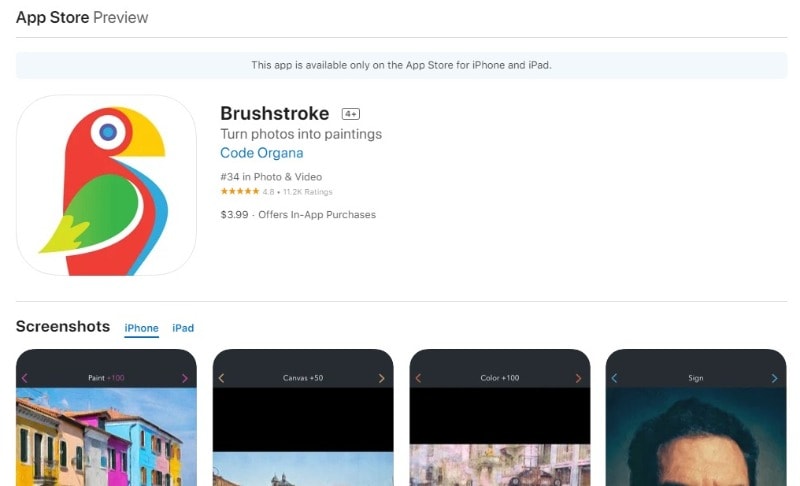
Key Features
● You can sign your photos before printing
● Wide range of styles and sub-styles.
06Clip2Comic
If you like having fun and playing around we bet you would love an photo editing app that turn your close ones’ photo into caricatures. One tap can give you comic-book style drawing and sketches. This is one of best sketch and animation apps suggested for iPhone users. User friendly interface is an added bonus.
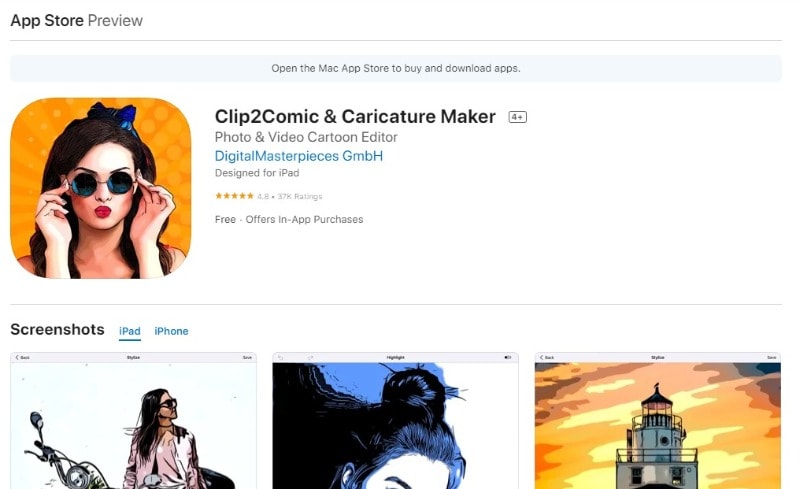
Key Features
● Live preview animation camera option.
● Carton-style photo effects.
07PhotoMania
PhotoMania is fun to use, if you want to try out different effects then you are at the right app. It has 400 presets in total including vintage looks and effects for sketches. PhotoMania has a collection of cool and exciting frames that you can add to your photos to make them more interesting. If you are someone who likes to send e-cards here you will get dozens of options. You can also utilize PhotoMania as a photo editor as it features the best exposure settings. And we know how important masking tool is, it helps you create neat photos, the app also has this amazing feature.
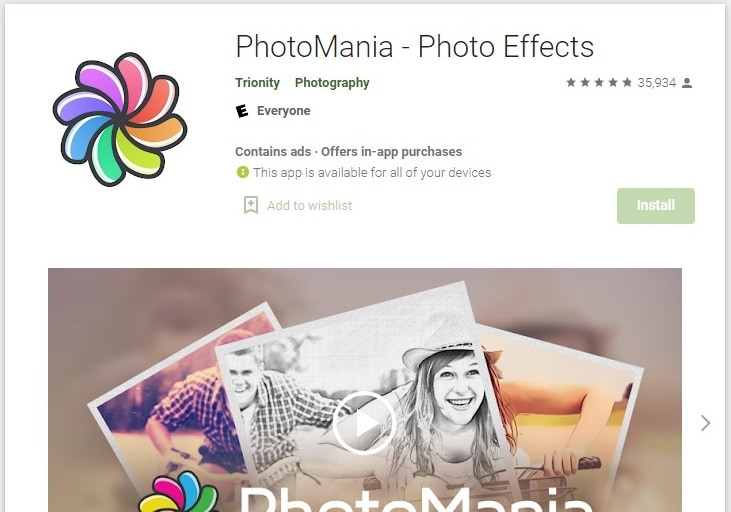
Key Features:
● Advanced photo editing tools and presets, for instance HDR and LOMO.
● It can also make your photo a painting.
● Adds textures and offers holiday templates.
08Toonme
Toonme has similar photo editing features like Clip2Comic. Only it is better. It has AI assistance that helps you create realistic effects. You can choose from the variety of styles and even tweak them to get a personalized style. Toonme is free to download but if you want use pro features you can subscribe to their monthly affordable package. Also, it is compatible with both iOS and Android devices.
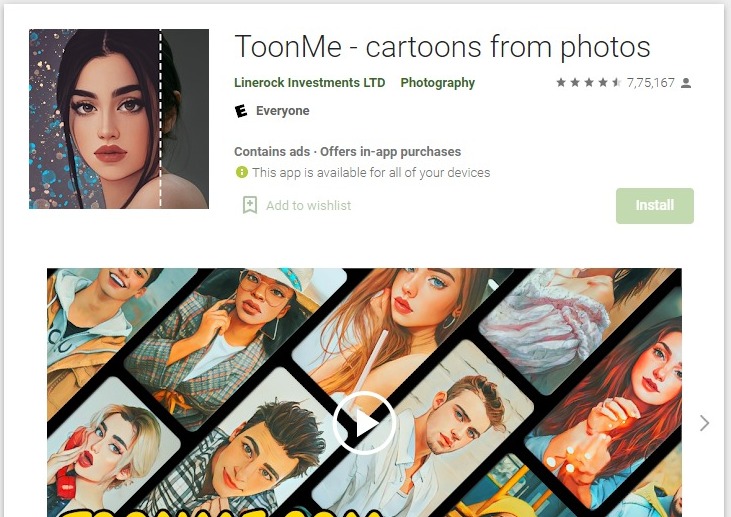
Key Features:
● Offers hand-drawn effects.
● Offers numerous layouts that goes well with profile pictures even instagram stories.
● You can share your work with other Toonme Users.
Part 3 How to Make 3D Cartoon From a Photo
Do you know that animators used to hand sketch every frame and every detail that too with continuation? Thanks to our modern day technology we can take a snap of any object or person and turn that into a cartoon within few seconds. With the right amount of help and creativity you can create characters that are entertaining and engaging at the same time. Wondershare Filmora Video Editor can be used to create animated videos. Amazing features and filters save editing time while making the entire process flexible. Though we have already mentioned eight apps for sketching, animating and caricaturing your photos, Filmora is a complete package. Motion tracking, easy zoom in and out, masking, panning and color correction are some of the best features offered by this editing software. It can run on both PC and Mac. User friendly interface suits both professionals as well as beginner.
For Win 7 or later (64-bit)
For macOS 10.12 or later
● Ending Thoughts →
● Creating an animated video that stands as an exception is now simple and hassle-free.
● Never be afraid to experiment and explore amazing ways of story-telling.
● Things discussed so far will help you analyze and understand cartoons and animation.
We all remember opening our daily newspaper and seeing a graphical representation of some new scoop or story that gives you a gist of what is happening, usually involving humor or sarcasm. That is what one would call and editorial cartoon and they are quite popular amongst newspapers, internet blogs and most recently, Social Media.
Some would even say that ‘Memes’ are an evolved form of editorial cartoons. They are funny, entertaining and can even portray some type of story. Editorial cartoons, in layman terms are a graphical approach to reflect the creator’s ideas. These are usually drawn on a tight deadline; hence feature simple caricatures and whimsical characters.
Cartoonists and hobbyists around the world can save on time using online tools to bring their ideas to life. Today, with some help from the right technology, anybody can try their hands in drawing amazing characters, combining both visual and verbal languages.
If you are someone who feels they have an amazing idea for a cartoon but lacks the skills to draw one can choose from a plethora of tools like Powtown, Photoshop or AI Artist to create amazing sketches and drawing, in half the time.
In this article
01 [Always Be Timely — Editorial Cartoons in a Snap](#Part 1)
02 [The 8 Best Apps to Turn Photos Into Cartoons and Sketches](#Part 2)
03 [How to Make 3D Cartoon From a Photo](#Part 3)
Part 1 Always Be Timely — Editorial Cartoons in a Snap
When a new idea pops into your head, we are usually overwhelmed or excited by its prospects of it that we forget to analyze its features before proceeding to turn it into a cartoon. Here are some tips to help you look into the details of your cartoon.
● Make a note of all the characters in your cartoon strip, what actions are they involved in and the dialogues that are being uttered.
● From which angle or whose angle the story is being told.
● Divide the cartoon design into four quadrants; Top Right & Left, Bottom Right & Left.
● Pay attention to key elements such as use of furniture, tools, technology or signs.
● Define traits like time of day, time of the year or time in history where the context is set.
● Keep in mind the audience you are reaching out to. You can ensure reliability the subtle use of intellect and humour.
Now that you have a clearer picture of what you are trying to depict it is best not to delay the idea and start cracking your creative eggs.
Beginners can use an easy tool like Powtoon, and its simple drag and drop interface to start making cartoons in just three simple steps. You can save up on a lot of time and get your cartoon ready for uploading to your new blog post.
Step 1: Set a Background for your Cartoon
Open the Powtoon Studio on your system and click on ‘Backgrounds’ located on the panel to your right. It will open up a vast library filled with ready to use backgrounds.
Select any you like to get started. It will intently appear on the board.
Step 2: Select the Characters for your Cartoon
Well, you have a setting and now it is time to place your characters in it. Click on the ‘Animated Character’ from the panel. Choose any template for your characters.
Step 3: Add the Text
There are various ways you can add dialogues, messages or texts to your cartoon. You can click on ‘Text’ and add a Quote Box or Dialogue Box. You can edit your text by simply clicking on the box.
Part 2 The 8 Best Apps to Turn Photos Into Cartoons and Sketches
01Photo Lab Picture Editor
Photolab is a great choice for turning your photos into a painting, sketch or a watercolor image. Along with filters you will get montages, borders and frames to make your art work more realistic. You will find all presets in the effects category. It also features filters like digital rain and jigsaw puzzle. Photolab can also be used as a photo editor as it is capable to perform color adjustment, rotate and crop.
Key Features:
● 800+ effects.
● E-card templates for special occasions.
● You can choose a photo from gallery or click one using the camera app.
02Prisma Photo Editor
Prisma has the magical ability to turn your photo or sketch into a Van Gogh or Picasso style painting. Wondering how? It has filters that are inspired by the eminent artist around the world. Choose a photo from your gallery and choose from exciting filters. Prisma also have cool editing tools that help you adjust the intensity of the filters applied if you want to.
Key Features
● Online App community.
● Similar to Instagram
● artistic filters.
03Paint Lab – Photo Cartoon
Paintlab features an easy to use interface and wide range of filters. With it you can turn any photos into a cartoon or a drawing just in few seconds. Once you are done editing you can share your final work on any social media platform directly from paintlab. It is compatible only with androids.
Key Fetaures
● Fast editing
● Perfect or beginners.
● Includes beautification and imperfection correction tools and effects.
04Cartoon Photo PRO
Using Cartoon Photo Pro alongside your photos you can also turn your videos into cartoon. Effects are artistic and customizable. Only downside it doesn’t come for free. It also has great ratings in Playstore.
Key Features
● User friendly interface
● Animates videos.
05Brushstroke
Brushstroke is ideal for editing and printing high resolution photos. The app comes with a paint directly option. It is not android compatible. The best feature is apart from filters and painting styles you can also pick the color palette and canvas surface.
Key Features
● You can sign your photos before printing
● Wide range of styles and sub-styles.
06Clip2Comic
If you like having fun and playing around we bet you would love an photo editing app that turn your close ones’ photo into caricatures. One tap can give you comic-book style drawing and sketches. This is one of best sketch and animation apps suggested for iPhone users. User friendly interface is an added bonus.
Key Features
● Live preview animation camera option.
● Carton-style photo effects.
07PhotoMania
PhotoMania is fun to use, if you want to try out different effects then you are at the right app. It has 400 presets in total including vintage looks and effects for sketches. PhotoMania has a collection of cool and exciting frames that you can add to your photos to make them more interesting. If you are someone who likes to send e-cards here you will get dozens of options. You can also utilize PhotoMania as a photo editor as it features the best exposure settings. And we know how important masking tool is, it helps you create neat photos, the app also has this amazing feature.
Key Features:
● Advanced photo editing tools and presets, for instance HDR and LOMO.
● It can also make your photo a painting.
● Adds textures and offers holiday templates.
08Toonme
Toonme has similar photo editing features like Clip2Comic. Only it is better. It has AI assistance that helps you create realistic effects. You can choose from the variety of styles and even tweak them to get a personalized style. Toonme is free to download but if you want use pro features you can subscribe to their monthly affordable package. Also, it is compatible with both iOS and Android devices.
Key Features:
● Offers hand-drawn effects.
● Offers numerous layouts that goes well with profile pictures even instagram stories.
● You can share your work with other Toonme Users.
Part 3 How to Make 3D Cartoon From a Photo
Do you know that animators used to hand sketch every frame and every detail that too with continuation? Thanks to our modern day technology we can take a snap of any object or person and turn that into a cartoon within few seconds. With the right amount of help and creativity you can create characters that are entertaining and engaging at the same time. Wondershare Filmora Video Editor can be used to create animated videos. Amazing features and filters save editing time while making the entire process flexible. Though we have already mentioned eight apps for sketching, animating and caricaturing your photos, Filmora is a complete package. Motion tracking, easy zoom in and out, masking, panning and color correction are some of the best features offered by this editing software. It can run on both PC and Mac. User friendly interface suits both professionals as well as beginner.
For Win 7 or later (64-bit)
For macOS 10.12 or later
● Ending Thoughts →
● Creating an animated video that stands as an exception is now simple and hassle-free.
● Never be afraid to experiment and explore amazing ways of story-telling.
● Things discussed so far will help you analyze and understand cartoons and animation.
How to Stop Animation From Looping in Unity
How to Stop Animation from Looping in Unity
An easy yet powerful editor
Numerous effects to choose from
Detailed tutorials provided by the official channel
Unity is an IDE interface all designed exclusively for game developers. However, you can do much more with Unity than game development. But, our main concern here is something else than this subject. You’re looking for easy tutorials on Unity stop animation!

And luckily, we’ve got you covered as we’ve briefly explained how to perform Unity stop animation from looping and the steps to make a smooth animation.
In this article
01 [What is Unity Used for?](#Part 1)
02 [How to Stop Animation Playing in Loop in Unity?](#Part 2)
03 [How to Smooth an Animation in Unity?](#Part 3)
Part 1 What is Unity Used for?
Unity is a software tool friendly to all the game developers out there. This tool is used by the large community of game developers to power and create their game development projects. And, the software is more of a professional means and not a simple pared-down ‘game builder .’Unity also offers one of the most significant inbuilt features like rendering, physics, and collision detection. Thus, one of the powerful aspects of Unity is that game developers need not go out of the box and create everything from scratch. Instead, they are available with the physics engine required to develop games quickly. Another robust feature of Unity is that it includes an excellent ‘Asset Store’ where developers can upload their creations and showcase them to the whole community. So, that’s Unity and its uses in a broader scope!
Before we take you through the next section, it’s important to mention that Unity is also known as cross-platform IDE, where IDE stands for ‘integrated development environment.’ So, it can be called more of an interface with access to all the tools and resources required to develop games.
Apart from the game development, Unity is known for other excellent usage purposes as:
● Simulations
● Animation
● Architectural Visualization
● Previsualization for Film
● Interactive Experiences
Among these features only, we’ll describe Unity stop animation from looping in detail.
Part 2 How to Stop Animation Playing in Loop in Unity?
As we said, we’ll describe to you the most accessible definition of how to stop Animation in Unity. Thus, there are simple steps that we’d like to define firsthand before explaining the whole procedure with an image-centric step-by-step guide.
So, those simple steps to stop motion animation in After Effects in the loop also go like below:
Step 1 Go to the Project tab and select Animation.
Step 2 Open the Inspector tab.
Step 3 Uncheck the checkbox Loop Time, and you’re good to go!
We’ll describe the same, i.e., Unity stop animation from looping through the step guide below.
In this guide, we’ll explain right from applying the Animation so that you’d understand better. So, let’s begin without any further ado!
01Step 1 Delete animation folder
We have already created an animation folder in the folder named as own Animation, so click that folder, click the animation folder, and then another folder along with as shown below. Hold the Shift key and click another folder. Then, right-click the Delete tab as depicted below.
Similarly, you can also delete the Animation if you wish.

02Step 2 Create an animation for the subject
Now, you may have different subjects. We’re creating Animation on Mobile Joystick for reference, as shown below.

Now, hit the Create tab on the Unity panel below. Then, proceed to save your Animation in the folder you’ve already created for the same.

03Step 3 Give positions to the animation
Firstly, hit the red-icon button used for recording, as shown below.

Give the position on the left side after you click the button. And, then, clicking almost near to 3you can give the position to the right-hand side as shown below.

Now, the animation has been set. You can see the animation from left to right if you click the Play button. So, here, you can see the results of infinite loop animation, which won’t stop.

You can follow two ways to stop this Animation in Unity from looping, and we’ll describe both methods below.
04Step 4 Stop animation Unity Way 1
Go to the animation folder where you’ve created the animation and click the New Animation icon as shown below.

Now, you have to uncheck the Loop Time tab on the top-right corner of the Unity panel.

05Step 5 Stop animation Unity Way 2
Alternatively, you can click the Animator tab on the top of the Unity panel and double-tap the New Animation button. Then, it will also delete or uncheck the loop time, as shown below.

These were all the steps to stop animation Unity.
Part 3 How to Smooth an Animation in Unity?
After done with Unity stop animation, it’s time to smooth your Unity animation. Again, we will describe it simply if you’re used to the Unity platform and then with a step guide with respective screenshots.
So, stay tuned until the end to reveal the easy steps of smoothing an animation in Unity.
Select the Dopesheet at the bottom of the animation window. Then, you need to switch to the ‘Curves’ view once you create your Animation in the Dopesheet. These animation curves help you accelerate and decelerate animations so that the movement and other things can stop and start smoothly.
So, let’s begin with the step guide tutorial on the same as follows:
For reference, take an example of a metronome object imported from Blender to Unity. Here, we’ve grouped all the pendulum objects under one rotation so that when we move the pendulum, it pivots to the correct point, as shown below.

01Add the animator
So, the first step begins with adding the Animator component to the parent object. You can do this by clicking the Add Component tab on the Unity panel’s left side, searching for Animator, and clicking the Animator.
You will also need a controller to control the animations. Go to your animation folder, right-click, and select Create> Animator Controller tab.

Let’s call or give it a name metronome animator as shown below.
Then, you need to drag this into your animator component. Again, you need to go to your animations folder, right-click, select Create> Animations tab.
Now, give this a name pendulum full swing.
02Open the animator tab
Now, open the animator tab, drag this pendulum swing animation to that panel, and double-tap the yellow-colored New Animation button.

03Create an animation
With the game object selected, the animated metronome pendulum, in this case, we’d like to animate the X component of the rotation. So, you need to click Add Property> Transform> Rotation tab and click the + sign on its right, as shown below.
Now, click the plus sign automatically to set two keyframes, one at the beginning and one at the end. Now, click on end select all, and then delete for now.

04Add keyframes to rotate the pendulum
With the first set of keyframes and the pendulum all way to the right, go halfway and change the rotation to the left on the left panel of Unity. Then, add another keyframe.

05Slow down the animation
As you can observe, the Animation of this pendulum is in a straight line and feels unnatural to the eyes. Thus, we’re required to smooth this Animation now! For this purpose, go to the Curves; you can see the pink properties of rotation as going from one side to another.

Now, you need to adjust these pink curves. Start by adding a key to one of its sides, as shown below. After that, it is all on you how slow or fasts you want these values to be.
Here, you’re all done smoothing the animation in Unity after learning the stop-animation Unity tutorial.
You can even stop motion animation on Photoshop with the above tutorial.
06Bonus Tip:
We want to introduce an excellent video editor software called Filmora Video Editor . It is from the house of Wondershare, a well-known software company worldwide.

Wondershare Filmora - Best Video Editor for Mac/Windows
5,481,435 people have downloaded it.
Build unique custom animations without breaking a sweat.
Focus on creating epic stories and leave the details to Filmora’s auto features.
Start a creative adventure with drag & drop effects and endless possibilities.
Filmora simplifies advanced features to save you time and effort.
Filmora cuts out repetition so you can move on to your next creative breakthrough.
With Filmora, you can easily add Animation and edit your videos to make them look world-class. The latest version and new updates are eye-candy and quick fix for beginner video editors.
So, please pay a visit to the Filmora website and check out its Mac and Windows version for free today.
● Key Takeaways from This Episode →
● Learning the concept and usage of Unity
● A tutorial on how to stop animation in Unity from looping
● A tutorial on how to smooth animation in Unity
● Introduction to Filmora, the top-most video editor software for beginners.
Unity is an IDE interface all designed exclusively for game developers. However, you can do much more with Unity than game development. But, our main concern here is something else than this subject. You’re looking for easy tutorials on Unity stop animation!
And luckily, we’ve got you covered as we’ve briefly explained how to perform Unity stop animation from looping and the steps to make a smooth animation.
In this article
01 [What is Unity Used for?](#Part 1)
02 [How to Stop Animation Playing in Loop in Unity?](#Part 2)
03 [How to Smooth an Animation in Unity?](#Part 3)
Part 1 What is Unity Used for?
Unity is a software tool friendly to all the game developers out there. This tool is used by the large community of game developers to power and create their game development projects. And, the software is more of a professional means and not a simple pared-down ‘game builder .’Unity also offers one of the most significant inbuilt features like rendering, physics, and collision detection. Thus, one of the powerful aspects of Unity is that game developers need not go out of the box and create everything from scratch. Instead, they are available with the physics engine required to develop games quickly. Another robust feature of Unity is that it includes an excellent ‘Asset Store’ where developers can upload their creations and showcase them to the whole community. So, that’s Unity and its uses in a broader scope!
Before we take you through the next section, it’s important to mention that Unity is also known as cross-platform IDE, where IDE stands for ‘integrated development environment.’ So, it can be called more of an interface with access to all the tools and resources required to develop games.
Apart from the game development, Unity is known for other excellent usage purposes as:
● Simulations
● Animation
● Architectural Visualization
● Previsualization for Film
● Interactive Experiences
Among these features only, we’ll describe Unity stop animation from looping in detail.
Part 2 How to Stop Animation Playing in Loop in Unity?
As we said, we’ll describe to you the most accessible definition of how to stop Animation in Unity. Thus, there are simple steps that we’d like to define firsthand before explaining the whole procedure with an image-centric step-by-step guide.
So, those simple steps to stop motion animation in After Effects in the loop also go like below:
Step 1 Go to the Project tab and select Animation.
Step 2 Open the Inspector tab.
Step 3 Uncheck the checkbox Loop Time, and you’re good to go!
We’ll describe the same, i.e., Unity stop animation from looping through the step guide below.
In this guide, we’ll explain right from applying the Animation so that you’d understand better. So, let’s begin without any further ado!
01Step 1 Delete animation folder
We have already created an animation folder in the folder named as own Animation, so click that folder, click the animation folder, and then another folder along with as shown below. Hold the Shift key and click another folder. Then, right-click the Delete tab as depicted below.
Similarly, you can also delete the Animation if you wish.
02Step 2 Create an animation for the subject
Now, you may have different subjects. We’re creating Animation on Mobile Joystick for reference, as shown below.
Now, hit the Create tab on the Unity panel below. Then, proceed to save your Animation in the folder you’ve already created for the same.
03Step 3 Give positions to the animation
Firstly, hit the red-icon button used for recording, as shown below.
Give the position on the left side after you click the button. And, then, clicking almost near to 3you can give the position to the right-hand side as shown below.
Now, the animation has been set. You can see the animation from left to right if you click the Play button. So, here, you can see the results of infinite loop animation, which won’t stop.
You can follow two ways to stop this Animation in Unity from looping, and we’ll describe both methods below.
04Step 4 Stop animation Unity Way 1
Go to the animation folder where you’ve created the animation and click the New Animation icon as shown below.
Now, you have to uncheck the Loop Time tab on the top-right corner of the Unity panel.
05Step 5 Stop animation Unity Way 2
Alternatively, you can click the Animator tab on the top of the Unity panel and double-tap the New Animation button. Then, it will also delete or uncheck the loop time, as shown below.
These were all the steps to stop animation Unity.
Part 3 How to Smooth an Animation in Unity?
After done with Unity stop animation, it’s time to smooth your Unity animation. Again, we will describe it simply if you’re used to the Unity platform and then with a step guide with respective screenshots.
So, stay tuned until the end to reveal the easy steps of smoothing an animation in Unity.
Select the Dopesheet at the bottom of the animation window. Then, you need to switch to the ‘Curves’ view once you create your Animation in the Dopesheet. These animation curves help you accelerate and decelerate animations so that the movement and other things can stop and start smoothly.
So, let’s begin with the step guide tutorial on the same as follows:
For reference, take an example of a metronome object imported from Blender to Unity. Here, we’ve grouped all the pendulum objects under one rotation so that when we move the pendulum, it pivots to the correct point, as shown below.
01Add the animator
So, the first step begins with adding the Animator component to the parent object. You can do this by clicking the Add Component tab on the Unity panel’s left side, searching for Animator, and clicking the Animator.
You will also need a controller to control the animations. Go to your animation folder, right-click, and select Create> Animator Controller tab.
Let’s call or give it a name metronome animator as shown below.
Then, you need to drag this into your animator component. Again, you need to go to your animations folder, right-click, select Create> Animations tab.
Now, give this a name pendulum full swing.
02Open the animator tab
Now, open the animator tab, drag this pendulum swing animation to that panel, and double-tap the yellow-colored New Animation button.
03Create an animation
With the game object selected, the animated metronome pendulum, in this case, we’d like to animate the X component of the rotation. So, you need to click Add Property> Transform> Rotation tab and click the + sign on its right, as shown below.
Now, click the plus sign automatically to set two keyframes, one at the beginning and one at the end. Now, click on end select all, and then delete for now.
04Add keyframes to rotate the pendulum
With the first set of keyframes and the pendulum all way to the right, go halfway and change the rotation to the left on the left panel of Unity. Then, add another keyframe.
05Slow down the animation
As you can observe, the Animation of this pendulum is in a straight line and feels unnatural to the eyes. Thus, we’re required to smooth this Animation now! For this purpose, go to the Curves; you can see the pink properties of rotation as going from one side to another.
Now, you need to adjust these pink curves. Start by adding a key to one of its sides, as shown below. After that, it is all on you how slow or fasts you want these values to be.
Here, you’re all done smoothing the animation in Unity after learning the stop-animation Unity tutorial.
You can even stop motion animation on Photoshop with the above tutorial.
06Bonus Tip:
We want to introduce an excellent video editor software called Filmora Video Editor . It is from the house of Wondershare, a well-known software company worldwide.
Wondershare Filmora - Best Video Editor for Mac/Windows
5,481,435 people have downloaded it.
Build unique custom animations without breaking a sweat.
Focus on creating epic stories and leave the details to Filmora’s auto features.
Start a creative adventure with drag & drop effects and endless possibilities.
Filmora simplifies advanced features to save you time and effort.
Filmora cuts out repetition so you can move on to your next creative breakthrough.
With Filmora, you can easily add Animation and edit your videos to make them look world-class. The latest version and new updates are eye-candy and quick fix for beginner video editors.
So, please pay a visit to the Filmora website and check out its Mac and Windows version for free today.
● Key Takeaways from This Episode →
● Learning the concept and usage of Unity
● A tutorial on how to stop animation in Unity from looping
● A tutorial on how to smooth animation in Unity
● Introduction to Filmora, the top-most video editor software for beginners.
12 Websites with Triggered Animate on Scroll Examples
12 Captivating Websites with Triggered Animate on Scroll Examples
An easy yet powerful editor
Numerous effects to choose from
Detailed tutorials provided by the official channel
It is impossible to imagine any website that doesn’t have any dynamic elements. It has almost become a compulsion to use dynamic elements in websites. Nowadays we look for websites that are more engaging and interactive.
This is where the popular Scroll-Triggered Animations in websites come in. Filmora Pro is one of the best website development companies that develops websites with a triggered animate scroll for customers all around the world. Filmora Pro wonderfully animate elements on scroll for the websites they develop.
In this article
01 [What Are Scroll-Triggered Animations?](#Part 1)
02 [Best 12 Websites With Triggered Animate On Scroll Examples](#Part 2)
Part 1 What Are Scroll-Triggered Animations?
Scroll-triggered animations are that strong trend that has been with us for many years. It is the most effective way to animate elements on scrolls like the graphics, texts, videos, and photos and bring all of them to life while you scroll down a website page. Scroll animations are used to grab the attention of the user and make a website more interesting and attractive.
Part 2 Best 12 Websites with triggered animate on scroll examples
Given below are the 12 best Websites with triggered animate on scroll examples.
01Joey Bada$ Political MC

The website of Joey Bada$ Political MC is considered to be one of the most exquisite examples of how scroll-triggered animations can be used effectively to say a story. This website is a collaboration between Shoes Up - The French magazine and American MC. This is a satirical website and resembles a political campaign. To build this website scroll-triggered animation was used all through. The scrolling is designed in such a way that it changes from horizontal to vertical. Each scroll delivers many interesting facts about Joey’s political beliefs.
02Vincent Saïsset

Vincent Saïsset, the first thing that you will see is a white background with a very big white letter V on it. The letter V symbolizes the artist’s initials. There is an arrow pointing downward that encourages you to start exploring the website. As you start to scroll you will see a wave of animated typefaces with a monochromatic interplay. The website is designed with horizontal and vertical scroll transitions. It also has a playful micro-interaction that is there between the letters and the cursor.
03Home Société

The website of Home Société amazingly depicts all the interior design work of the company. The design of this website is very simple but at the same rich with graphic elements, animations, and typography. The animated elements used are rhythmically intersecting and overlapping with each other. The images that are used in the background are changing constantly with eye-catching typefaces. The best part that it makes different from other websites is the horizontal scroll; this portrays a whole new dimension giving the users an experience of infinite scroll.
04Sally

This company is from NYC and they rent cars to Lyft, Via Juno, and Uber. The website of Sally might look minimal when it comes to color and designs or exquisite detailing. But what makes the website captivating is a car’s 3D model and seventy other animations which gives the look that the car is moving. It is the perfect example where you can animate elements on scroll one can move the model from one section to the other by moving the cursor or just scrolling. All the transitions used are synchronized eloquently and there is no hitch in the entire website.
05Yuto Takahashi

The website of Yuto Takahashi’s is that of a portfolio website. This website is another amazing example of scroll-triggered animations. The very first thing that one will notice is a rotating circle that is made with the words of the artist’s name. Then instructions will pop up and ask one to hold on to the mouse to access the artist’s works. The typefaces used are Serif that surrounds the photographs. With every new scroll, some sort of liquid animation can be viewed over the photographs. While if one clicks any of the featured works one can see scroll-triggered animations are used on every single work.
06Editorial New

The website of Editorial New is a collaboration between the Pangram Pangram Foundry and the Locomotive. The typeface of this website has a reflection of the designs of the ‘90s. The website starts with a newspaper look-alike section that keeps rotating as you scroll and stops until it covers the screen completely. You will then come across various typefaces showcasing their versatility. You will also find a magazine cover being created by using the beautiful font. While you click on the Randomize button you will see that the cover changes and shows font in various other sizes.
07Danilo De Marco

The website of Danilo De Marco’s is a collaboration with Studio K95. This website is developed with the view of promoting all these works. In this website, the scroll-triggered animations are used in some specific sections, yet they are prominent. The logo along with the font used is animated in an enchanting way. The vibrant green color used will not let you move away from the screen. The typography used is very dominant. And if you click on any of his featured work you will be directed to reach the page that is solely dedicated to that particular work. While scrolling the photographs it will seem as they are drifting further away.
08K24 Moscow

K24 Moscow is one of the most captivating websites built for a modern architectural project. The website recalls the spirit of Russian suprematism and avant-garde. Scroll-triggered animations are used to animate elements on scroll throughout the full presentation. With every new scroll, you will discover something new. The combination of white, black, and red color sections that move and overlap with changes in size make a distinct typeface. These combine to make it an exciting website while keeping the Russian avant-garde spirit.
09Green Chameleon

The website of Green Chameleon was created to showcase all of their cherished achievements and memories from 2018. On the website at the very beginning, you will be greeted with an introductory graphic and then you will begin exploring the site. You will have the feeling like you have entered into a time capsule. You will be able to see the works month by month. And when you click on any particular project the picture will get displayed right on the center of the screen. With it, you will find relevant information underneath. The background color keeps changing while navigating through a 3D space.
10Bewegen

The website of Bewegen is a showcase of animations, rich content, and interactions. Bewegen is a popular world-class system known for sharing bikes. The scroll-triggered animations along with the zoom shots give a detailed view of the popular Bewegen Pedelec bike. While one scroll down further one will get related information about the bike-sharing system and also get details on how to use it. There is also the option where anyone can create their sharing system just by choosing the city and the number of heads to be included in the project while choosing the color and other features of the bike.
11Wtower

The website of Wtower is built to an interactive virtual world that tells the story of the world’s largest water tower in past - Ural’s White Tower. This website is another amazing storytelling website where the scroll-triggered animation fits like puzzle pieces. The scrolling takes to a 3D space where you will be able to learn how the tower originated and what the current state is in present. You will find a progress bar at the bottom and this appears every time there is some useful element to be delivered. Also, you can check how much of the story you have listened to and how much is left.
12Parmigiani Fleurier

The website of Parmigiani Fleurier is a website for Swiss watchmakers. This website is also another amazing animate on scroll example. The layout of the website is elegant as well as demure. While one scroll one can explore the entire collection by using the rows used on both sides of the screen. After you find the model that attracts your eye, you can view the detailed information that shows in an asymmetrical pattern around the watch. You will also come to know about other details like the case, dial, strap, winding system, and other technical specifications. The animations used are very subtle and well-balanced.
Part 3 Advantages and Disadvantages of These 12 Websites
| Name of Website | Advantage | Disadvantage |
|---|---|---|
| Joey Bada$ Political MC | Scroll-triggered animation was used all through. The scrolling is designed in such a way that it changes from horizontal to vertical. | Resource intensive. |
| Vincent Saïsset | It has a playful micro-interaction that is there between the letters and the cursor. | Components use is intensive. |
| Home Société | The horizontal scroll portrays a whole new dimension giving the users an experience of infinite scroll. | Memory usage is high. |
| Sally | The captivating part is the car’s 3D model and seventy other animations which give the look that the car is moving. | Very resource intensive. |
| Yuto Takahashi | With every new scroll, some sort of liquid animation can be viewed over the photographs | Requires High Bandwidth. |
| Editorial New | While a click is made on the Randomize button it will be seen that the cover changes and shows font in various other sizes. | Needs good Internet. |
| Danilo De Marco | The typography used is very dominant. | Resource intensive. |
| K24 Moscow | The combination of white, black, and red color sections that move and overlap with changes in size make a distinct typeface. | Requires High Bandwidth. |
| Green Chameleon | One will have the feeling like one has entered into a time capsule. | The website is resource-intensive. |
| Bewegen | There is also the option where anyone can create their sharing system just by choosing the city and the number of heads to be included in the project while choosing the color and other features of the bike. | Components use is intensive. |
| Wtower | A progress bar at the bottom and appears every time there is some useful element to be delivered. | The website is resource-intensive. |
| Parmigiani Fleurier | One can explore the entire collection by using the rows used on both sides of the screen. | Very resource-intensive |
Key Takeaways from This Episode
● At the end of this article, you have understood what Scroll-triggered animations are all about.
● You also got the view as to why you need Scroll-triggered animations while you develop a website for yourself.
● The article also tells you about the 12 best captivating Scroll-triggered animation websites which will give you various ideas for your next website.
It is impossible to imagine any website that doesn’t have any dynamic elements. It has almost become a compulsion to use dynamic elements in websites. Nowadays we look for websites that are more engaging and interactive.
This is where the popular Scroll-Triggered Animations in websites come in. Filmora Pro is one of the best website development companies that develops websites with a triggered animate scroll for customers all around the world. Filmora Pro wonderfully animate elements on scroll for the websites they develop.
In this article
01 [What Are Scroll-Triggered Animations?](#Part 1)
02 [Best 12 Websites With Triggered Animate On Scroll Examples](#Part 2)
Part 1 What Are Scroll-Triggered Animations?
Scroll-triggered animations are that strong trend that has been with us for many years. It is the most effective way to animate elements on scrolls like the graphics, texts, videos, and photos and bring all of them to life while you scroll down a website page. Scroll animations are used to grab the attention of the user and make a website more interesting and attractive.
Part 2 Best 12 Websites with triggered animate on scroll examples
Given below are the 12 best Websites with triggered animate on scroll examples.
01Joey Bada$ Political MC
The website of Joey Bada$ Political MC is considered to be one of the most exquisite examples of how scroll-triggered animations can be used effectively to say a story. This website is a collaboration between Shoes Up - The French magazine and American MC. This is a satirical website and resembles a political campaign. To build this website scroll-triggered animation was used all through. The scrolling is designed in such a way that it changes from horizontal to vertical. Each scroll delivers many interesting facts about Joey’s political beliefs.
02Vincent Saïsset
Vincent Saïsset, the first thing that you will see is a white background with a very big white letter V on it. The letter V symbolizes the artist’s initials. There is an arrow pointing downward that encourages you to start exploring the website. As you start to scroll you will see a wave of animated typefaces with a monochromatic interplay. The website is designed with horizontal and vertical scroll transitions. It also has a playful micro-interaction that is there between the letters and the cursor.
03Home Société
The website of Home Société amazingly depicts all the interior design work of the company. The design of this website is very simple but at the same rich with graphic elements, animations, and typography. The animated elements used are rhythmically intersecting and overlapping with each other. The images that are used in the background are changing constantly with eye-catching typefaces. The best part that it makes different from other websites is the horizontal scroll; this portrays a whole new dimension giving the users an experience of infinite scroll.
04Sally
This company is from NYC and they rent cars to Lyft, Via Juno, and Uber. The website of Sally might look minimal when it comes to color and designs or exquisite detailing. But what makes the website captivating is a car’s 3D model and seventy other animations which gives the look that the car is moving. It is the perfect example where you can animate elements on scroll one can move the model from one section to the other by moving the cursor or just scrolling. All the transitions used are synchronized eloquently and there is no hitch in the entire website.
05Yuto Takahashi
The website of Yuto Takahashi’s is that of a portfolio website. This website is another amazing example of scroll-triggered animations. The very first thing that one will notice is a rotating circle that is made with the words of the artist’s name. Then instructions will pop up and ask one to hold on to the mouse to access the artist’s works. The typefaces used are Serif that surrounds the photographs. With every new scroll, some sort of liquid animation can be viewed over the photographs. While if one clicks any of the featured works one can see scroll-triggered animations are used on every single work.
06Editorial New
The website of Editorial New is a collaboration between the Pangram Pangram Foundry and the Locomotive. The typeface of this website has a reflection of the designs of the ‘90s. The website starts with a newspaper look-alike section that keeps rotating as you scroll and stops until it covers the screen completely. You will then come across various typefaces showcasing their versatility. You will also find a magazine cover being created by using the beautiful font. While you click on the Randomize button you will see that the cover changes and shows font in various other sizes.
07Danilo De Marco
The website of Danilo De Marco’s is a collaboration with Studio K95. This website is developed with the view of promoting all these works. In this website, the scroll-triggered animations are used in some specific sections, yet they are prominent. The logo along with the font used is animated in an enchanting way. The vibrant green color used will not let you move away from the screen. The typography used is very dominant. And if you click on any of his featured work you will be directed to reach the page that is solely dedicated to that particular work. While scrolling the photographs it will seem as they are drifting further away.
08K24 Moscow
K24 Moscow is one of the most captivating websites built for a modern architectural project. The website recalls the spirit of Russian suprematism and avant-garde. Scroll-triggered animations are used to animate elements on scroll throughout the full presentation. With every new scroll, you will discover something new. The combination of white, black, and red color sections that move and overlap with changes in size make a distinct typeface. These combine to make it an exciting website while keeping the Russian avant-garde spirit.
09Green Chameleon
The website of Green Chameleon was created to showcase all of their cherished achievements and memories from 2018. On the website at the very beginning, you will be greeted with an introductory graphic and then you will begin exploring the site. You will have the feeling like you have entered into a time capsule. You will be able to see the works month by month. And when you click on any particular project the picture will get displayed right on the center of the screen. With it, you will find relevant information underneath. The background color keeps changing while navigating through a 3D space.
10Bewegen
The website of Bewegen is a showcase of animations, rich content, and interactions. Bewegen is a popular world-class system known for sharing bikes. The scroll-triggered animations along with the zoom shots give a detailed view of the popular Bewegen Pedelec bike. While one scroll down further one will get related information about the bike-sharing system and also get details on how to use it. There is also the option where anyone can create their sharing system just by choosing the city and the number of heads to be included in the project while choosing the color and other features of the bike.
11Wtower
The website of Wtower is built to an interactive virtual world that tells the story of the world’s largest water tower in past - Ural’s White Tower. This website is another amazing storytelling website where the scroll-triggered animation fits like puzzle pieces. The scrolling takes to a 3D space where you will be able to learn how the tower originated and what the current state is in present. You will find a progress bar at the bottom and this appears every time there is some useful element to be delivered. Also, you can check how much of the story you have listened to and how much is left.
12Parmigiani Fleurier
The website of Parmigiani Fleurier is a website for Swiss watchmakers. This website is also another amazing animate on scroll example. The layout of the website is elegant as well as demure. While one scroll one can explore the entire collection by using the rows used on both sides of the screen. After you find the model that attracts your eye, you can view the detailed information that shows in an asymmetrical pattern around the watch. You will also come to know about other details like the case, dial, strap, winding system, and other technical specifications. The animations used are very subtle and well-balanced.
Part 3 Advantages and Disadvantages of These 12 Websites
| Name of Website | Advantage | Disadvantage |
|---|---|---|
| Joey Bada$ Political MC | Scroll-triggered animation was used all through. The scrolling is designed in such a way that it changes from horizontal to vertical. | Resource intensive. |
| Vincent Saïsset | It has a playful micro-interaction that is there between the letters and the cursor. | Components use is intensive. |
| Home Société | The horizontal scroll portrays a whole new dimension giving the users an experience of infinite scroll. | Memory usage is high. |
| Sally | The captivating part is the car’s 3D model and seventy other animations which give the look that the car is moving. | Very resource intensive. |
| Yuto Takahashi | With every new scroll, some sort of liquid animation can be viewed over the photographs | Requires High Bandwidth. |
| Editorial New | While a click is made on the Randomize button it will be seen that the cover changes and shows font in various other sizes. | Needs good Internet. |
| Danilo De Marco | The typography used is very dominant. | Resource intensive. |
| K24 Moscow | The combination of white, black, and red color sections that move and overlap with changes in size make a distinct typeface. | Requires High Bandwidth. |
| Green Chameleon | One will have the feeling like one has entered into a time capsule. | The website is resource-intensive. |
| Bewegen | There is also the option where anyone can create their sharing system just by choosing the city and the number of heads to be included in the project while choosing the color and other features of the bike. | Components use is intensive. |
| Wtower | A progress bar at the bottom and appears every time there is some useful element to be delivered. | The website is resource-intensive. |
| Parmigiani Fleurier | One can explore the entire collection by using the rows used on both sides of the screen. | Very resource-intensive |
Key Takeaways from This Episode
● At the end of this article, you have understood what Scroll-triggered animations are all about.
● You also got the view as to why you need Scroll-triggered animations while you develop a website for yourself.
● The article also tells you about the 12 best captivating Scroll-triggered animation websites which will give you various ideas for your next website.
How to Create an Animated Sticky Navbar
How to Create an Animated Sticky Navbar
An easy yet powerful editor
Numerous effects to choose from
Detailed tutorials provided by the official channel
While there are different ways to enhance the overall user experience of a website, using an animated sticky navbar is the most ideal solution to get the job done.
In this article, we’ll walk you through some of the top benefits of animated sticky navbars and why you should incorporate them in your website’s design. So, without any further ado, let’s get started.
In this article
01 [What is an Animated Sticky Navbar?](#Part 1)
02 [What Are the Benefits of An Animated Sticky Navbar?](#Part 2)
03 [8 Fixed Sticky Navbars That’ll Grab Your Attention](#Part 3)
04 [Want To Create More Professional and Amazing Animations?](#Part 4)
Part 1 What is an Animated Sticky Navbar?
To put it in simple words, an animated sticky navbar is a dedicated header that stays fixed on the website, irrespective of the web page you’re accessing. Ideally, designers use a sticky navbar to allow website visitors to visit any web page within 2-3 clicks.
The animated navbar also incorporates a few animations that uplift the overall visual appearance of the website. It doesn’t matter if you are planning to design an e-commerce store or a simple service-based website, the animated navbar will allow you to make your website more user-friendly for the end-users.
Part 2 What Are the Benefits of An Animated Sticky Navbar?
Now, there are endless benefits of using an animated sticky navbar on your website. However, these are a few factors that make animated sticky navbars the most useful on-page element of a website.
01Quick Navigation
As we mentioned earlier, easy navigation is one of the key features of a sticky navbar. You can place links to all the other web pages within the navbar in the form of drop-down menus and ensure that users can visit any webpage within a single click. This will enhance the overall user experience and you’ll be able to encourage one-time visitors to spend more time on your website. Using the navbar will also improve your search engine rankings because the search engine crawler will be able to crawl all the web pages easily.
02Aesthetically Pleasing
The way your website looks has a huge impact on whether you’re going to retain the website visitors or not. An animated sticky navbar will make your website look aesthetically pleasing and captivate the visitors more effectively. You can add different animations and visual elements to the navbar and make them match your website’s overall color scheme.
03Better User Experience
Another reason why you would want to place an animated sticky navbar on your website is that it’ll uplift the overall user experience for the website visitors. From finding easy navigation to all the web pages to ensuring that all the web pages offer the same browsing experience, a navbar will make your website engaging and it’ll become easier to captivate the users.
Part 3 8 Fixed Sticky Navbars That’ll Grab Your Attention
So, now that you are familiar with the benefits of animated sticky navbars, here are the top examples that explain the best ways to use navigation bars on a website.
01Search Engine Journal

Search Engine Journal is an online knowledge hub where users can find every bit of information about digital marketing. The website publishes regular guides on SEO, PPC, Social Media Marketing, etc to help people get detailed insight into the benefits of digital marketing.
Since there are thousands of articles on the website, it could easily get chaotic for users to find the guide they are looking for. But, with an easy-to-navigate animated sticky navbar, Search Engine Journal has divided all the articles into their respective categories using simple drop-down menus
02AirBnB

Airbnb is one of the most popular platforms to find vacation homes in a different city/country to enjoy your holiday in complete comfort. One of the major reasons behind AirBnB’s immense success is its high-quality and easy-to-use website.
As you continue to scroll down the website, the sticky navbar stays fixed at the top with a dedicated search bar and a “Become a Host” Call-to-Action button. This way it doesn’t matter if a user is looking for a place to rent or simply wants to become a host, they’ll be able to get the job done within a few clicks.
03Graz Secrets
Graz Secrets is the perfect example of how you can use a sticky bar in the simplest manner and still grab users’ attention easily. The website uses a black-colored simple navigation bar with a “Download Now” button at the center. The button continues to illuminate due to the background animation even if you scroll to the end of the web page. The overall black design of the navbar adds more visual factors to the website and engages the visitors more effectively.
04Adobe
Adobe’s navigation bar is also a great example of how to use sticky navbars to uplift the overall user experience for website visitors. Even though the website doesn’t stay at its place when you scroll down, it immediately comes back as soon as you scroll up once.
Moreover, the navbar has links to all the Adobe products, which means users can visit any product page they want right away. It’s also worth understanding that Adobe has added a dedicated “Sign-in” button in the navigation bar to allow visitors to sign in to the Adobe cloud account straightaway.
05Daniel Filler
Daniel Filler’s website uses the navigation bar in the simplest way possible - yet manages to draw the viewers’ attention without any hassle. The designers have placed a pretty small navigation bar with links to all the important web pages.
The smaller size of the navigation bar doesn’t make the website look cluttered and still manages to do its job easily. In addition to this, the designers have also placed a dedicated logo and the “Up” button to allow users to directly go to the top of the web page with one click.
06Mind Inventory
Mind Inventory is an Indian software development company working towards designing high-quality websites and mobile applications. Their website is a perfect example of how one should use navigation bars in a website to improve the overall design scheme. In addition to placing links to all the important web pages, Mind Inventory has also introduced dedicated animations to make the drop-down menu appearance more pleasing.
07FHOKE
FHOKE’s navigation bar is one of the most aesthetically pleasing animated navbars that you can replicate on your website to maximize its performance. A white-colored navbar automatically turns gray as soon as you scroll down to maintain the contrast of the entire web page.
There are dedicated links to other web pages as well. However, you won’t find any drop-down menus. In case your website also has limited web pages, you can also replicate this animated sticky navbar to make it more appealing.
08H&M
Last but certainly not least, H&M is a clothing brand that’s popular across the globe. At first, H&M’s official website may look pretty basic, but its navigation bar is backed by a great marketing strategy. The bar contains all the product page categories that’ll direct you to any product page within a single click.
Key Takeaways from This Episode
● Animated sticky navbars are one of the most useful on-page elements that could help you grab user’s attention easily
● There are different ways to use animated navbars and it mainly depends on your website requirements.
● Like your website, you can also uplift the quality of your videos by adding animations and high-quality transitions
While there are different ways to enhance the overall user experience of a website, using an animated sticky navbar is the most ideal solution to get the job done.
In this article, we’ll walk you through some of the top benefits of animated sticky navbars and why you should incorporate them in your website’s design. So, without any further ado, let’s get started.
In this article
01 [What is an Animated Sticky Navbar?](#Part 1)
02 [What Are the Benefits of An Animated Sticky Navbar?](#Part 2)
03 [8 Fixed Sticky Navbars That’ll Grab Your Attention](#Part 3)
04 [Want To Create More Professional and Amazing Animations?](#Part 4)
Part 1 What is an Animated Sticky Navbar?
To put it in simple words, an animated sticky navbar is a dedicated header that stays fixed on the website, irrespective of the web page you’re accessing. Ideally, designers use a sticky navbar to allow website visitors to visit any web page within 2-3 clicks.
The animated navbar also incorporates a few animations that uplift the overall visual appearance of the website. It doesn’t matter if you are planning to design an e-commerce store or a simple service-based website, the animated navbar will allow you to make your website more user-friendly for the end-users.
Part 2 What Are the Benefits of An Animated Sticky Navbar?
Now, there are endless benefits of using an animated sticky navbar on your website. However, these are a few factors that make animated sticky navbars the most useful on-page element of a website.
01Quick Navigation
As we mentioned earlier, easy navigation is one of the key features of a sticky navbar. You can place links to all the other web pages within the navbar in the form of drop-down menus and ensure that users can visit any webpage within a single click. This will enhance the overall user experience and you’ll be able to encourage one-time visitors to spend more time on your website. Using the navbar will also improve your search engine rankings because the search engine crawler will be able to crawl all the web pages easily.
02Aesthetically Pleasing
The way your website looks has a huge impact on whether you’re going to retain the website visitors or not. An animated sticky navbar will make your website look aesthetically pleasing and captivate the visitors more effectively. You can add different animations and visual elements to the navbar and make them match your website’s overall color scheme.
03Better User Experience
Another reason why you would want to place an animated sticky navbar on your website is that it’ll uplift the overall user experience for the website visitors. From finding easy navigation to all the web pages to ensuring that all the web pages offer the same browsing experience, a navbar will make your website engaging and it’ll become easier to captivate the users.
Part 3 8 Fixed Sticky Navbars That’ll Grab Your Attention
So, now that you are familiar with the benefits of animated sticky navbars, here are the top examples that explain the best ways to use navigation bars on a website.
01Search Engine Journal
Search Engine Journal is an online knowledge hub where users can find every bit of information about digital marketing. The website publishes regular guides on SEO, PPC, Social Media Marketing, etc to help people get detailed insight into the benefits of digital marketing.
Since there are thousands of articles on the website, it could easily get chaotic for users to find the guide they are looking for. But, with an easy-to-navigate animated sticky navbar, Search Engine Journal has divided all the articles into their respective categories using simple drop-down menus
02AirBnB
Airbnb is one of the most popular platforms to find vacation homes in a different city/country to enjoy your holiday in complete comfort. One of the major reasons behind AirBnB’s immense success is its high-quality and easy-to-use website.
As you continue to scroll down the website, the sticky navbar stays fixed at the top with a dedicated search bar and a “Become a Host” Call-to-Action button. This way it doesn’t matter if a user is looking for a place to rent or simply wants to become a host, they’ll be able to get the job done within a few clicks.
03Graz Secrets
Graz Secrets is the perfect example of how you can use a sticky bar in the simplest manner and still grab users’ attention easily. The website uses a black-colored simple navigation bar with a “Download Now” button at the center. The button continues to illuminate due to the background animation even if you scroll to the end of the web page. The overall black design of the navbar adds more visual factors to the website and engages the visitors more effectively.
04Adobe
Adobe’s navigation bar is also a great example of how to use sticky navbars to uplift the overall user experience for website visitors. Even though the website doesn’t stay at its place when you scroll down, it immediately comes back as soon as you scroll up once.
Moreover, the navbar has links to all the Adobe products, which means users can visit any product page they want right away. It’s also worth understanding that Adobe has added a dedicated “Sign-in” button in the navigation bar to allow visitors to sign in to the Adobe cloud account straightaway.
05Daniel Filler
Daniel Filler’s website uses the navigation bar in the simplest way possible - yet manages to draw the viewers’ attention without any hassle. The designers have placed a pretty small navigation bar with links to all the important web pages.
The smaller size of the navigation bar doesn’t make the website look cluttered and still manages to do its job easily. In addition to this, the designers have also placed a dedicated logo and the “Up” button to allow users to directly go to the top of the web page with one click.
06Mind Inventory
Mind Inventory is an Indian software development company working towards designing high-quality websites and mobile applications. Their website is a perfect example of how one should use navigation bars in a website to improve the overall design scheme. In addition to placing links to all the important web pages, Mind Inventory has also introduced dedicated animations to make the drop-down menu appearance more pleasing.
07FHOKE
FHOKE’s navigation bar is one of the most aesthetically pleasing animated navbars that you can replicate on your website to maximize its performance. A white-colored navbar automatically turns gray as soon as you scroll down to maintain the contrast of the entire web page.
There are dedicated links to other web pages as well. However, you won’t find any drop-down menus. In case your website also has limited web pages, you can also replicate this animated sticky navbar to make it more appealing.
08H&M
Last but certainly not least, H&M is a clothing brand that’s popular across the globe. At first, H&M’s official website may look pretty basic, but its navigation bar is backed by a great marketing strategy. The bar contains all the product page categories that’ll direct you to any product page within a single click.
Key Takeaways from This Episode
● Animated sticky navbars are one of the most useful on-page elements that could help you grab user’s attention easily
● There are different ways to use animated navbars and it mainly depends on your website requirements.
● Like your website, you can also uplift the quality of your videos by adding animations and high-quality transitions
10 Best Tools to Make Pic Collage for Windows
10 Best Tools to Make Pic Collage for Windows
An easy yet powerful editor
Numerous effects to choose from
Detailed tutorials provided by the official channel
Collages are a great way to assemble all your favorite pictures in one place. You can share these collages with your friends, relatives, and dear ones or can also use them for posting on social media sites and other online platforms. Though creating a collage may sound simple, a lot of considerations need to be taken for creating an interesting and eye-catchy collage, and for this, a help of a professional tool can be taken. In the following parts of the topic, you can learn about the best tools for photo collage Windows 10 and other OS.

In the following parts of the topic, you can learn about the best tools for photo collage Windows 10 and other OS.
In this article
01 [Top 10 Pic Collage for Windows Tools](#Part 1)
02 [The Best Tool to Get Stock Images for Creating Collages](#Part 2)
Part 1 Top 10 Pic Collage for Windows Tools
Checkout the best collage for Windows below.
01PhotoPad Photo Editing Software
This is a complete photo editing tool supporting an array of features including the creation of a photo collage. This software from NCH software can let you add the desired images manually and also support using the auto grid to add an unlimited number of pictures. The tool also lets you choose the collage orientation size and set the background as needed.
Pros:
● Create collage Windows manually or automatically.
● Allows adding a background color, image, or from the available background options.
● Spacing and corners between the images can be selected.
● The size of the tool is small.
Cons:
● Stickers and filters to individual images cannot be added.
● Cannot choose a custom collage size.

02PhotoScapeX
Available for download on Windows 10 and higher versions this is another widely used photo editing tool that can also let you create collages manually as well as automatically. Multiple frames are available that can be selected as desired and there are additional features like adding filters, and also edit them in multiple ways.
Pros:
● Allows creating collage manually and automatically.
● Multiple editing tools for customization like filters, crop, zoom, doodle, and more.
● Picture alignment can be done in 3 modes- vertical, horizontal, and tile.
● Option to change and customize image size, spacing, margin, and others.
Cons:
● Limited photos can be added.
● The size of the tool is large in comparison to other tools.

03Phototastic Collage
This is free to use Windows-based tool that can create impressive collages in no time. Multiple designs, frames, and other options are available to create a customized collage as needed.
Pros:
● Multiple customization options are available for creating the desired collage.
● User-friendly and simple interface.
● An array of templates is available.
Cons:
● The free version has limited features.
● Limitation to the number of images that can be added.
● Ads in the app.

04PicCollage
Unleash your creativity by creating an interesting collage using this excellent collage-making app. There are multiple templates and customization options supports.
Pros
● Create collage manually or automatically
● The earlier created collage can be edited.
● Allows creating a collage in 3 options- grid, template, freestyle.
Cons
● Watermark on the created collage.
● The image size cannot be customized.

05Collage Maker-Photo Grid and Montage
Using this free Windows tool, you can create an interesting photo collage or a free-styled montage as needed. A wide range of layouts and templates are available that can be further customized to get the desired collage.
Pros:
● Free Windows software.
● Come with multiple filters, layout, and editing tools.
● The user interface is easy.
● Preview option available.
Cons:
● Performance glitches due to bugs.
● Custom collage size cannot be set.
● Watermark on the collage.

06Fotor
If you are looking for a simple and basic collage-making tool, Fotor is the right choice. Collage in the grid, freestyle, and photo-stitch style can be created and basic customization features are supported.
Pros:
● Simple to use tool that is apt for beginners.
● Border can be changed from a solid color to a background.
Cons:
● Customization options are limited.
● Border and the image size cannot be changed.

07El Collagero
Just like its name, this is an interesting Windows-based tool for creating a collage of your choice. A wide range of options for customization is available that can let you edit the images, choose a template and then also edit the file.
Pros:
● A wide range of templates and designs for collages is available.
● Allows adding text, symbols, and other elements.
● Created collage can be shared on social media sites.
Cons:
● In comparison to other professional tools, the functions are limited.

08Atlantas Photo Collage Studio
This Windows-based tool will let you create collages of all types and for all occasions. You can choose from over 100 templates that best match your collage theme and image content.
Pros:
● More than 100 templates for collage designs are available.
● The size of the layout can be changed.
● Multiple editing and customization options are supported like zoom, opacity selection, and more.
Cons:
● Limitation of adding 45 images.
● For the advanced functions, need to subscribe to the paid version.

09PhotoJoiner
Using this Windows tool, pick up your favorite images and turn them into a beautiful collage with customized design and style.
Pros:
● A simple and basic tool for creating a collage.
● Created collage can be saved or shared to the social media site.
● Change the order of the images, margins, and other aspects.
Cons
● Collage templates are limited.
● Advanced features are missing.

1010. Blend Photo
To create a collage of images with a blending effect, this is the right tool to use. Available for download on the Windows system this tool lets you create collages telling interesting stories.
Pros:
● Simple and easy collage-making tool.
● Add blending effect to your collages.
● Over 50 custom shapes for image cropping are available along with the option for free-hand cropping.
● Multiple filters can be added.
Cons:
● Limited Editing and customization options.

Part 2 The Best Tool to Get Stock Images for Creating Collages
Several times, the captured and stored images may not fit in the collage theme you wish to create and, in such situations, you can use the stock images available online at several sites. One of the best tools where you can check out the images in different categories is Wondershare Filmora. This versatile software from Wondershare Filmora Video Editor is an advanced video editing tool that also has a huge collection of stock media including images.
Additionally, the split-screen feature of the software can be used for creating a video collage. Available for Windows and Mac systems, Wondershare Filmora will look after all your advanced video editing and customized requirements.
Wondershare Filmora - Best Video Editor for Mac/Windows
5,481,435 people have downloaded it.
Build unique custom animations without breaking a sweat.
Focus on creating epic stories and leave the details to Filmora’s auto features.
Start a creative adventure with drag & drop effects and endless possibilities.
Filmora simplifies advanced features to save you time and effort.
Filmora cuts out repetition so you can move on to your next creative breakthrough.
● Key Takeaways from This Episode →
● Collage-making tools help in creating an interesting and eye-catchy collage in a hassle-free manner.
●Several Windows-based tools are available for quick download.
●Wondershare Filmora is a great software to find a collection of stock images in different categories.
Collages are a great way to assemble all your favorite pictures in one place. You can share these collages with your friends, relatives, and dear ones or can also use them for posting on social media sites and other online platforms. Though creating a collage may sound simple, a lot of considerations need to be taken for creating an interesting and eye-catchy collage, and for this, a help of a professional tool can be taken. In the following parts of the topic, you can learn about the best tools for photo collage Windows 10 and other OS.
In the following parts of the topic, you can learn about the best tools for photo collage Windows 10 and other OS.
In this article
01 [Top 10 Pic Collage for Windows Tools](#Part 1)
02 [The Best Tool to Get Stock Images for Creating Collages](#Part 2)
Part 1 Top 10 Pic Collage for Windows Tools
Checkout the best collage for Windows below.
01PhotoPad Photo Editing Software
This is a complete photo editing tool supporting an array of features including the creation of a photo collage. This software from NCH software can let you add the desired images manually and also support using the auto grid to add an unlimited number of pictures. The tool also lets you choose the collage orientation size and set the background as needed.
Pros:
● Create collage Windows manually or automatically.
● Allows adding a background color, image, or from the available background options.
● Spacing and corners between the images can be selected.
● The size of the tool is small.
Cons:
● Stickers and filters to individual images cannot be added.
● Cannot choose a custom collage size.
02PhotoScapeX
Available for download on Windows 10 and higher versions this is another widely used photo editing tool that can also let you create collages manually as well as automatically. Multiple frames are available that can be selected as desired and there are additional features like adding filters, and also edit them in multiple ways.
Pros:
● Allows creating collage manually and automatically.
● Multiple editing tools for customization like filters, crop, zoom, doodle, and more.
● Picture alignment can be done in 3 modes- vertical, horizontal, and tile.
● Option to change and customize image size, spacing, margin, and others.
Cons:
● Limited photos can be added.
● The size of the tool is large in comparison to other tools.
03Phototastic Collage
This is free to use Windows-based tool that can create impressive collages in no time. Multiple designs, frames, and other options are available to create a customized collage as needed.
Pros:
● Multiple customization options are available for creating the desired collage.
● User-friendly and simple interface.
● An array of templates is available.
Cons:
● The free version has limited features.
● Limitation to the number of images that can be added.
● Ads in the app.
04PicCollage
Unleash your creativity by creating an interesting collage using this excellent collage-making app. There are multiple templates and customization options supports.
Pros
● Create collage manually or automatically
● The earlier created collage can be edited.
● Allows creating a collage in 3 options- grid, template, freestyle.
Cons
● Watermark on the created collage.
● The image size cannot be customized.
05Collage Maker-Photo Grid and Montage
Using this free Windows tool, you can create an interesting photo collage or a free-styled montage as needed. A wide range of layouts and templates are available that can be further customized to get the desired collage.
Pros:
● Free Windows software.
● Come with multiple filters, layout, and editing tools.
● The user interface is easy.
● Preview option available.
Cons:
● Performance glitches due to bugs.
● Custom collage size cannot be set.
● Watermark on the collage.
06Fotor
If you are looking for a simple and basic collage-making tool, Fotor is the right choice. Collage in the grid, freestyle, and photo-stitch style can be created and basic customization features are supported.
Pros:
● Simple to use tool that is apt for beginners.
● Border can be changed from a solid color to a background.
Cons:
● Customization options are limited.
● Border and the image size cannot be changed.
07El Collagero
Just like its name, this is an interesting Windows-based tool for creating a collage of your choice. A wide range of options for customization is available that can let you edit the images, choose a template and then also edit the file.
Pros:
● A wide range of templates and designs for collages is available.
● Allows adding text, symbols, and other elements.
● Created collage can be shared on social media sites.
Cons:
● In comparison to other professional tools, the functions are limited.
08Atlantas Photo Collage Studio
This Windows-based tool will let you create collages of all types and for all occasions. You can choose from over 100 templates that best match your collage theme and image content.
Pros:
● More than 100 templates for collage designs are available.
● The size of the layout can be changed.
● Multiple editing and customization options are supported like zoom, opacity selection, and more.
Cons:
● Limitation of adding 45 images.
● For the advanced functions, need to subscribe to the paid version.
09PhotoJoiner
Using this Windows tool, pick up your favorite images and turn them into a beautiful collage with customized design and style.
Pros:
● A simple and basic tool for creating a collage.
● Created collage can be saved or shared to the social media site.
● Change the order of the images, margins, and other aspects.
Cons
● Collage templates are limited.
● Advanced features are missing.
1010. Blend Photo
To create a collage of images with a blending effect, this is the right tool to use. Available for download on the Windows system this tool lets you create collages telling interesting stories.
Pros:
● Simple and easy collage-making tool.
● Add blending effect to your collages.
● Over 50 custom shapes for image cropping are available along with the option for free-hand cropping.
● Multiple filters can be added.
Cons:
● Limited Editing and customization options.
Part 2 The Best Tool to Get Stock Images for Creating Collages
Several times, the captured and stored images may not fit in the collage theme you wish to create and, in such situations, you can use the stock images available online at several sites. One of the best tools where you can check out the images in different categories is Wondershare Filmora. This versatile software from Wondershare Filmora Video Editor is an advanced video editing tool that also has a huge collection of stock media including images.
Additionally, the split-screen feature of the software can be used for creating a video collage. Available for Windows and Mac systems, Wondershare Filmora will look after all your advanced video editing and customized requirements.
Wondershare Filmora - Best Video Editor for Mac/Windows
5,481,435 people have downloaded it.
Build unique custom animations without breaking a sweat.
Focus on creating epic stories and leave the details to Filmora’s auto features.
Start a creative adventure with drag & drop effects and endless possibilities.
Filmora simplifies advanced features to save you time and effort.
Filmora cuts out repetition so you can move on to your next creative breakthrough.
● Key Takeaways from This Episode →
● Collage-making tools help in creating an interesting and eye-catchy collage in a hassle-free manner.
●Several Windows-based tools are available for quick download.
●Wondershare Filmora is a great software to find a collection of stock images in different categories.
Christmas Is Coming! How to Find & Make Animated Christmas GIFs?
Versatile Video Editor - Wondershare Filmora
An easy yet powerful editor
Numerous effects to choose from
Detailed tutorials provided by the official channel
Since Christmas is just around the corner, you must be looking for all kinds of GIFs and video greetings to wish your loved ones on this special occasion. Ideally, sending an animated Christmas GIF is one of the best ways to expect them during the festive season. If you are running short on time, then you can find a readily available Merry Christmas funny GIF or can come up with a customized Christmas wishes GIF as well. Here, I will let you know how to find and make free Christmas GIFs like a pro.

In this article
01 [5 Best Places to Find Animated Christmas GIFs for Free](#Part 1)
02 [How to Create your Animated Christmas GIFs (with Music): A DIY Guide](#Part 2)
03 [Pro Tip: Customize your GIFs on the Go with Filmora Meme Maker](#Part 3)
Part 1 5 Best Places to Find Animated Christmas GIFs for Free
While there are plenty of websites and apps, I would recommend exploring the following sources to find Merry Christmas animated GIFs for free.
1. Pinterest
Pinterest has to be one of the best sources to get free Christmas GIFs of all kinds. While some GIFs can readily be downloaded from Pinterest, you might be redirected to third-party websites at times. Also, before you use any GIF from Pinterest, make sure you check its copyright policy.
Mostly, you would find aesthetically pleasing Merry Christmas wishes GIFs on Pinterest about DIY activities, food, animations, and so on. The only issue is that the range of GIFs at Pinterest is pretty extensive, and there are no inbuilt categories or filters.
2. Giphy
If you are looking for funny Christmas GIFs, then Giphy would be one of the best places to explore. It has some of the most extensive GIFs collections of all styles, including Christmas wishes GIFs.
You can head to the website of Giphy or use its mobile application to find all sorts of animated Christmas GIFs as per your needs. There are tons of stickers, animated stories, and funny GIFs related to pop cultures that you would also find on Giphy.
3. Tenor
Tenor is another clean and user-friendly website where you can find different types of funny Merry Christmas GIFs for free. You can look for stickers and GIFs by simply entering keywords of your choice on Tenor.
Once you load an animated Christmas GIF, you can save it offline or generate its shareable link. In this way, you can directly share the Merry Christmas wishes GIF to your loved ones on platforms like WhatsApp, Telegram, Messenger, and so on.
4. GyfCat
Having thousands of anime Christmas GIFs, GyfCat is another popular online source that you should check out. Most of the free Christmas GIFs here are animated or related to pop culture videos.
You can enter multiple keywords and hashtags on the search bar of GyfCat to find specific Christmas wishes GIFs. Most of the results here are ideal for funny Xmas GIFs that are bound to make your friends and family smile.
5. Funimada
From elves to Santa Claus and reindeers to fireworks, you can find funny Christmas GIFs of all kinds in Funimada. Unlike other places, Funimada has a curated list of animated Christmas GIFs that you can explore on its website.
Once you find a perfect anime Christmas GIF at Funimada, you can download it on your device or system and share it with others however you like.
Part 2 How to Create your Animated Christmas GIFs (with Music): A DIY Guide
Most of these readily available animated Christmas GIFs are quite generic and lack a customized appeal. Therefore, if you want to come up with some customized Christmas wishes GIFs, then consider using a dedicated editing tool like Wondershare Filmora.
Since it is a user-friendly video and media editing tool, you won’t encounter issues working on an animated Christmas GIF. You can explore and use the wide range of media assets of Filmora or import anything from your system. Besides that, tons of transitions, filters, captions, and other effects would let you come up with some customized Merry Christmas wishes GIFs via Filmora in the following way.
Step 1 Load the Media Files of your Choice on Filmora
You can start by installing Wondershare Filmora on your system and launch it whenever you want to work on any animated Christmas GIF. Afterward, you can drag and drop your media files to it or go to its Menu > File > Import Media to browse and load your files.
For Win 7 or later (64-bit)
For macOS 10.12 or later

Step2 Create your Animated Christmas GIFs with Filmora
Great! Once you have loaded your media files, you can drag and drop them to the timeline at the bottom to start editing them. If you want to clip out any unwanted parts from a video, then hover the mouse at the end. This will let you use its trimming tool to clip out any part of the file.

There are tons of other editing options that are available on Filmora. For instance, once you select a video, you can go to its properties to apply all sorts of transformations such as rotation, flipping, scaling, repositioning, and so on.

Many people would like to add captions to their animated Christmas GIFs to wish others personally. You can do the same by visiting the “Titles” section of Filmora and exploring different styles of caption effects. You can drag and drop any caption effect and add your text here to customize it.

To further improve the visual appeal of your Christmas wishes GIF, you can explore and apply tons of transitions, filters, overlays, and other effects that are available in Filmora.

If you want to add music to your Merry Christmas wishes GIF, you can add any soundtrack to your project. You can also go to the “Audio” section of Filmora, where you can browse several sound effects and drag and drop your media files. If you want, you can also record voiceovers for your videos using the native feature on Filmora.

Step 3 Export your Christmas Wishes GIFs from Filmora
Lastly, you can get a preview of your funny Merry Christmas GIF on Filmora and can click on the “Export” button to save it. Here, you can select a preferred format (like GIF or MP4) in which you want to keep your media file on your system. If you have included music in your project, consider exporting it as an MP4 file instead of a GIF.

Part 3 Pro Tip: Customize your GIFs on the Go with Filmora Meme Maker
If you already have a Merry Christmas GIF and want to customize it further, you can also check the online Filmora Meme Maker . You can go to its website and upload a video, GIF, or image of your choice. If you have found a funny Christmas GIF online, you can paste its exact URL. Later, you can add texts to your GIFs and export them to your system in a preferred format.
Wondershare Filmora
Get started easily with Filmora’s powerful performance, intuitive interface, and countless effects!
Try It Free Try It Free Try It Free Learn More >

AI Portrait – The best feature of Wondershare Filmora for gameplay editing
The AI Portrait is a new add-on in Wondershare Filmora. It can easily remove video backgrounds without using a green screen or chroma key, allowing you to add borders, glitch effects, pixelated, noise, or segmentation video effects.

Conclusion
So, what are you waiting for? Now when you know where to find animated Christmas GIFs, you can explore the above-listed websites on your own. Apart from using these readily available options, you can also create some customized, funny Merry Christmas GIFs. For that, you can take the assistance of Wondershare Filmora and make the most of its professional features to create, customize, and export your GIFs with music and tons of other effects. Feel free to explore Filmora and wish your loved ones a joyous Christmas in style!
Since Christmas is just around the corner, you must be looking for all kinds of GIFs and video greetings to wish your loved ones on this special occasion. Ideally, sending an animated Christmas GIF is one of the best ways to expect them during the festive season. If you are running short on time, then you can find a readily available Merry Christmas funny GIF or can come up with a customized Christmas wishes GIF as well. Here, I will let you know how to find and make free Christmas GIFs like a pro.
In this article
01 [5 Best Places to Find Animated Christmas GIFs for Free](#Part 1)
02 [How to Create your Animated Christmas GIFs (with Music): A DIY Guide](#Part 2)
03 [Pro Tip: Customize your GIFs on the Go with Filmora Meme Maker](#Part 3)
Part 1 5 Best Places to Find Animated Christmas GIFs for Free
While there are plenty of websites and apps, I would recommend exploring the following sources to find Merry Christmas animated GIFs for free.
1. Pinterest
Pinterest has to be one of the best sources to get free Christmas GIFs of all kinds. While some GIFs can readily be downloaded from Pinterest, you might be redirected to third-party websites at times. Also, before you use any GIF from Pinterest, make sure you check its copyright policy.
Mostly, you would find aesthetically pleasing Merry Christmas wishes GIFs on Pinterest about DIY activities, food, animations, and so on. The only issue is that the range of GIFs at Pinterest is pretty extensive, and there are no inbuilt categories or filters.
2. Giphy
If you are looking for funny Christmas GIFs, then Giphy would be one of the best places to explore. It has some of the most extensive GIFs collections of all styles, including Christmas wishes GIFs.
You can head to the website of Giphy or use its mobile application to find all sorts of animated Christmas GIFs as per your needs. There are tons of stickers, animated stories, and funny GIFs related to pop cultures that you would also find on Giphy.
3. Tenor
Tenor is another clean and user-friendly website where you can find different types of funny Merry Christmas GIFs for free. You can look for stickers and GIFs by simply entering keywords of your choice on Tenor.
Once you load an animated Christmas GIF, you can save it offline or generate its shareable link. In this way, you can directly share the Merry Christmas wishes GIF to your loved ones on platforms like WhatsApp, Telegram, Messenger, and so on.
4. GyfCat
Having thousands of anime Christmas GIFs, GyfCat is another popular online source that you should check out. Most of the free Christmas GIFs here are animated or related to pop culture videos.
You can enter multiple keywords and hashtags on the search bar of GyfCat to find specific Christmas wishes GIFs. Most of the results here are ideal for funny Xmas GIFs that are bound to make your friends and family smile.
5. Funimada
From elves to Santa Claus and reindeers to fireworks, you can find funny Christmas GIFs of all kinds in Funimada. Unlike other places, Funimada has a curated list of animated Christmas GIFs that you can explore on its website.
Once you find a perfect anime Christmas GIF at Funimada, you can download it on your device or system and share it with others however you like.
Part 2 How to Create your Animated Christmas GIFs (with Music): A DIY Guide
Most of these readily available animated Christmas GIFs are quite generic and lack a customized appeal. Therefore, if you want to come up with some customized Christmas wishes GIFs, then consider using a dedicated editing tool like Wondershare Filmora.
Since it is a user-friendly video and media editing tool, you won’t encounter issues working on an animated Christmas GIF. You can explore and use the wide range of media assets of Filmora or import anything from your system. Besides that, tons of transitions, filters, captions, and other effects would let you come up with some customized Merry Christmas wishes GIFs via Filmora in the following way.
Step 1 Load the Media Files of your Choice on Filmora
You can start by installing Wondershare Filmora on your system and launch it whenever you want to work on any animated Christmas GIF. Afterward, you can drag and drop your media files to it or go to its Menu > File > Import Media to browse and load your files.
For Win 7 or later (64-bit)
For macOS 10.12 or later
Step2 Create your Animated Christmas GIFs with Filmora
Great! Once you have loaded your media files, you can drag and drop them to the timeline at the bottom to start editing them. If you want to clip out any unwanted parts from a video, then hover the mouse at the end. This will let you use its trimming tool to clip out any part of the file.
There are tons of other editing options that are available on Filmora. For instance, once you select a video, you can go to its properties to apply all sorts of transformations such as rotation, flipping, scaling, repositioning, and so on.
Many people would like to add captions to their animated Christmas GIFs to wish others personally. You can do the same by visiting the “Titles” section of Filmora and exploring different styles of caption effects. You can drag and drop any caption effect and add your text here to customize it.
To further improve the visual appeal of your Christmas wishes GIF, you can explore and apply tons of transitions, filters, overlays, and other effects that are available in Filmora.
If you want to add music to your Merry Christmas wishes GIF, you can add any soundtrack to your project. You can also go to the “Audio” section of Filmora, where you can browse several sound effects and drag and drop your media files. If you want, you can also record voiceovers for your videos using the native feature on Filmora.
Step 3 Export your Christmas Wishes GIFs from Filmora
Lastly, you can get a preview of your funny Merry Christmas GIF on Filmora and can click on the “Export” button to save it. Here, you can select a preferred format (like GIF or MP4) in which you want to keep your media file on your system. If you have included music in your project, consider exporting it as an MP4 file instead of a GIF.
Part 3 Pro Tip: Customize your GIFs on the Go with Filmora Meme Maker
If you already have a Merry Christmas GIF and want to customize it further, you can also check the online Filmora Meme Maker . You can go to its website and upload a video, GIF, or image of your choice. If you have found a funny Christmas GIF online, you can paste its exact URL. Later, you can add texts to your GIFs and export them to your system in a preferred format.
Wondershare Filmora
Get started easily with Filmora’s powerful performance, intuitive interface, and countless effects!
Try It Free Try It Free Try It Free Learn More >
AI Portrait – The best feature of Wondershare Filmora for gameplay editing
The AI Portrait is a new add-on in Wondershare Filmora. It can easily remove video backgrounds without using a green screen or chroma key, allowing you to add borders, glitch effects, pixelated, noise, or segmentation video effects.
Conclusion
So, what are you waiting for? Now when you know where to find animated Christmas GIFs, you can explore the above-listed websites on your own. Apart from using these readily available options, you can also create some customized, funny Merry Christmas GIFs. For that, you can take the assistance of Wondershare Filmora and make the most of its professional features to create, customize, and export your GIFs with music and tons of other effects. Feel free to explore Filmora and wish your loved ones a joyous Christmas in style!
Also read:
- Updated How to Create Animated Video on Canva, In 2024
- Top 10 Best Photo to Animation Converters That Give You an Advantage for 2024
- Updated In 2024, 18 Best Tools and Services to Create Animated Videos for Business 2023
- New 2024 Approved Learn All About 3D Logo Animation and Templates
- New 2024 Approved 15 Best Stop Motion Animation Kits to Fuel Creativity
- New Beginners Guide for Learning 3D Animation
- Updated How to Make an Animated Travel Map Video, In 2024
- Updated 20 Free After Effects Logo Reveal Templates
- How To Remove The Endless Loop From Animated GIF for 2024
- Updated In 2024, Guide on How to Create GIF in WhatsApp iPhone
- Complete Guide to Send Gif WhatsApp on Android for 2024
- 2024 Approved What Is the Meaning of Motion Graphics
- New 2024 Approved Secrets to Make 2D Game Animation
- Updated Top 8 Anime Name & Title Generators Online-Get Cool Anime Names for 2024
- 2024 Approved Is It That Easy to Make My Own Animated Character?
- New 2024 Approved Best 8 Tools Tell You How to Make Slideshows for Instagram
- Updated Whats Music Video GIF & How to Add Music to GIF Files
- Updated Best 10 Animated DP for WhatsApp for 2024
- 2024 Approved The 15 Most Efficient Photo to Cartoon Apps for Android
- In 2024, 5 Different Animation Styles A Simple but Complete Guide
- The 15 Most Efficient Photo to Cartoon Software for Android
- In 2024, How To Make Pinterest Slideshow in Simple Ways
- 10 Great Apps for Turning Funny Animated Images Into Comics
- Updated 2024 Approved Top 7 Animated GIF Text Makers
- In 2024, 15 Types of Cartoon Drawing Styles with Examples
- 12 Top Stop Motion Studios Worth Recommending for 2024
- Tips on How to Learn Graphics Animation
- New 2024 Approved Best 12 Evil Cartoon Characters of All Time
- Updated Best 10 Anime Series of All Time | Watch Anime Online for 2024
- Updated 2024 Approved Incredible Ways to Find Suitable Animated Graphic Maker
- New In 2024, 5 Recommended Websites for Text GIF Maker
- In 2024, 12 Animated Slideshow PowerPoint Templates
- Updated 2024 Approved Types of Cartoon Styles You May Use for Your Next Marketing Project
- Tips That Show Anybody How to Get Awesome Background for Slideshow in PowerPoint for 2024
- How to Create a Whiteboard Video Step by Step
- New In 2024, Techniques on How to Make After Effects 2D Animation
- Easy Shortcut to Convert Videos to Gifs on iPhone for 2024
- Updated In 2024, Best 10 Animoji Apps You Can Use to Edit Animoji
- In 2024, The Best 8 Places for High-Quality Royalty Free Gifs (Paid and Free)
- Updated 10 Amazing Cartoon Music Examples You Need to Bookmark
- In 2024, How to Convert Animated GIF From Video
- New 2024 Approved How to Make a Photoshop Collage in Simple Steps
- New In 2024, 10 Stunning Stop Motion Movies That You Should Not Miss
- Updated Are You Ready to Animate Game Character From Scratch?
- New 2024 Approved Easy Cartoon Characters Drawing Tutorials for You Who Are Learning to Draw
- How To Create Pinterest Slideshow in Simple Ways
- New DP Animation Maker Tutorial for Finding The Best Animated Profile Picture Maker
- In 2024, Top 10 Popular Cartoons You Forgot Existed
- Have You Seen the Facebook Cartoon App Everyones Using Recently for 2024
- Lenovo ThinkPhone Not Connecting to Wi-Fi? 12 Quick Ways to Fix | Dr.fone
- In 2024, Disabled iPhone SE How to Unlock a Disabled iPhone SE?
- How to Share Location in Messenger On Tecno Pova 5? | Dr.fone
- Best Ways on How to Unlock/Bypass/Swipe/Remove Poco C55 Fingerprint Lock
- How To Bypass iCloud Activation Lock on Mac For Apple iPhone 15 Plus?
- Disabling iPhone 14 Pro Parental Restrictions With/Without Password | Dr.fone
- How to Flash Dead Huawei Nova Y71 Safely | Dr.fone
- How to get back lost photos from Tecno Camon 20 Pro 5G.
- How to Bypass iPhone 6s Plus Passcode Easily Video Inside
- In 2024, Top-Notch Solutions for Disabled Apple ID On Apple iPhone 6s Making It Possible
- In 2024, How to Mirror Vivo V29e to Mac? | Dr.fone
- 7 Ways to Unlock a Locked Samsung Galaxy F15 5G Phone
- Easy Ways to Manage Your Nokia C110 Location Settings | Dr.fone
- 5 Ways to Track Apple iPhone 6s Plus without App | Dr.fone
- Undelete lost music from Honor Magic Vs 2
- Recover your contacts after Realme GT Neo 5 SE has been deleted.
- In 2024, Bypass Activation Lock On iPhone 14 Plus - 4 Easy Ways
- In 2024, How To Bypass the Required Apple Store Verification For Apple iPhone 11
- How do I reset my Poco F5 5G Phone without technical knowledge? | Dr.fone
- 6 Fixes to Unfortunately WhatsApp has stopped Error Popups On Vivo Y02T | Dr.fone
- Title: Top Tips for Effortless Unity 3D Animation for 2024
- Author: Elon
- Created at : 2024-05-19 03:05:06
- Updated at : 2024-05-20 03:05:06
- Link: https://animation-videos.techidaily.com/top-tips-for-effortless-unity-3d-animation-for-2024/
- License: This work is licensed under CC BY-NC-SA 4.0.
