

Updated 2024 Approved 10 Scary Anime Girls That Will Make You Creepy
10 Scary Anime Girls That Will Make You Creepy
10 Scary Anime Girls That Will Make You Creepy

Shanoon Cox
Mar 27, 2024• Proven solutions
Animes have been one of the widely enjoyed forms of entertainment by people all over the world for decades. There are certain animes that attract people due to their scariness and the characters in them.
Even though girls are usually displayed as cute and pinkish and lovely, some animes display them as creepy. And believe me, these creepy anime girls have a huge fan base and are capable of giving the audience a chill over the spine while watching them.
The creepiness of the anime girls adds to the horror of animes and people enjoy watching them. So let’s find out more about these scary anime girls and why their scary character is loved by the fans.
10 Scary Anime Girls in the Scary Animes
There are a lot of animes with different genres. But some of the animes have some characters that stand out due to their weirdness and creepiness. Let’s talk about 10 such scary anime girls that still give the audience creeps:
- 1. Ai Enma (Hell Girl)
- 2. Shion Sonozaki (Higurashi: When They Cry)
- 3. Sachiko Shinozaki (Corpse Party)
- 4. Shiro (Deadman Wonderland)
- 5. Megumi Shimizu (Shiki)
- 6. Esdeath (Akame Ga Kill!)
- 7. Himiko Toga (My Hero Academia)
- 8. Hana Midorikawa (Prison School)
- 9. Isabella (The Promised Neverland)
- 10. Lucy (Elfen Lied)
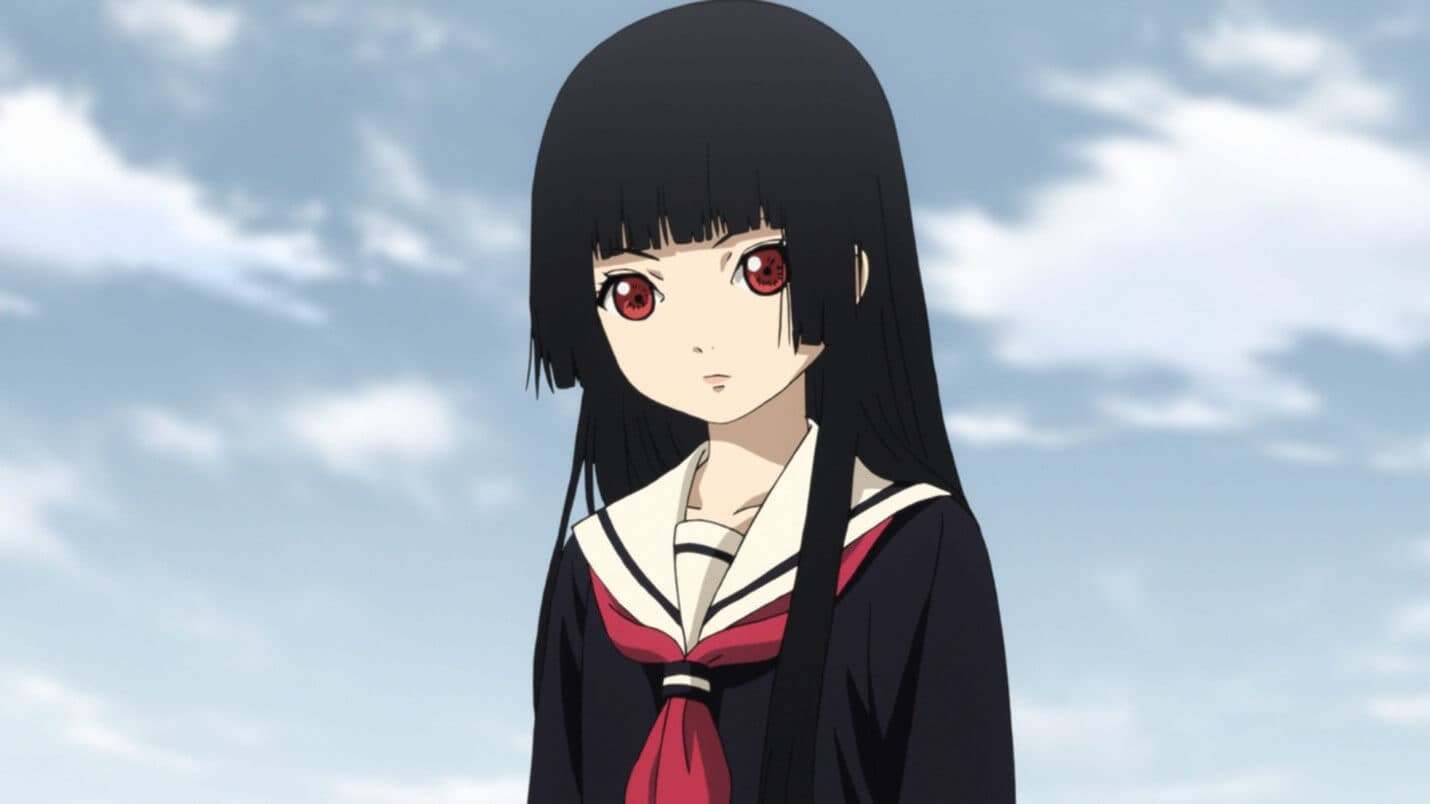
1. Ai Enma (Hell Girl)
Ai Enma is one of the cute-looking characters in Hell Girl, but do not be deceived by her looks. She was a girl who was buried alive when she was seven, by her own villagers. Enma crawled out of the ground and burned the entire village, killing every single person living there as an act of vengeance.
Later as a punishment for her horrific doings, she was cast out and sentenced to live out her afterlife as Hell Girl. Still, in her childhood, Ai was assigned the job of dragging dead souls to hell, whether they deserved it or not. The coldness in her eyes and the way she does things without a shiver is what makes her creepy.
2. Shion Sonozaki (Higurashi: When They Cry)
Shion Sonozaki from Higurashi: When They Cry is a dark character who is not exactly what she seems outside. The town she lives in is cursed and she is trying to break that dark cycle that offers only death and tragedy.
There is too much to the story, and saying more about it may reveal the suspense. The story is filled with horror and adventure, and the character of Shion absorbs some of the darkness of the town, which gives a scary impact on the audience.
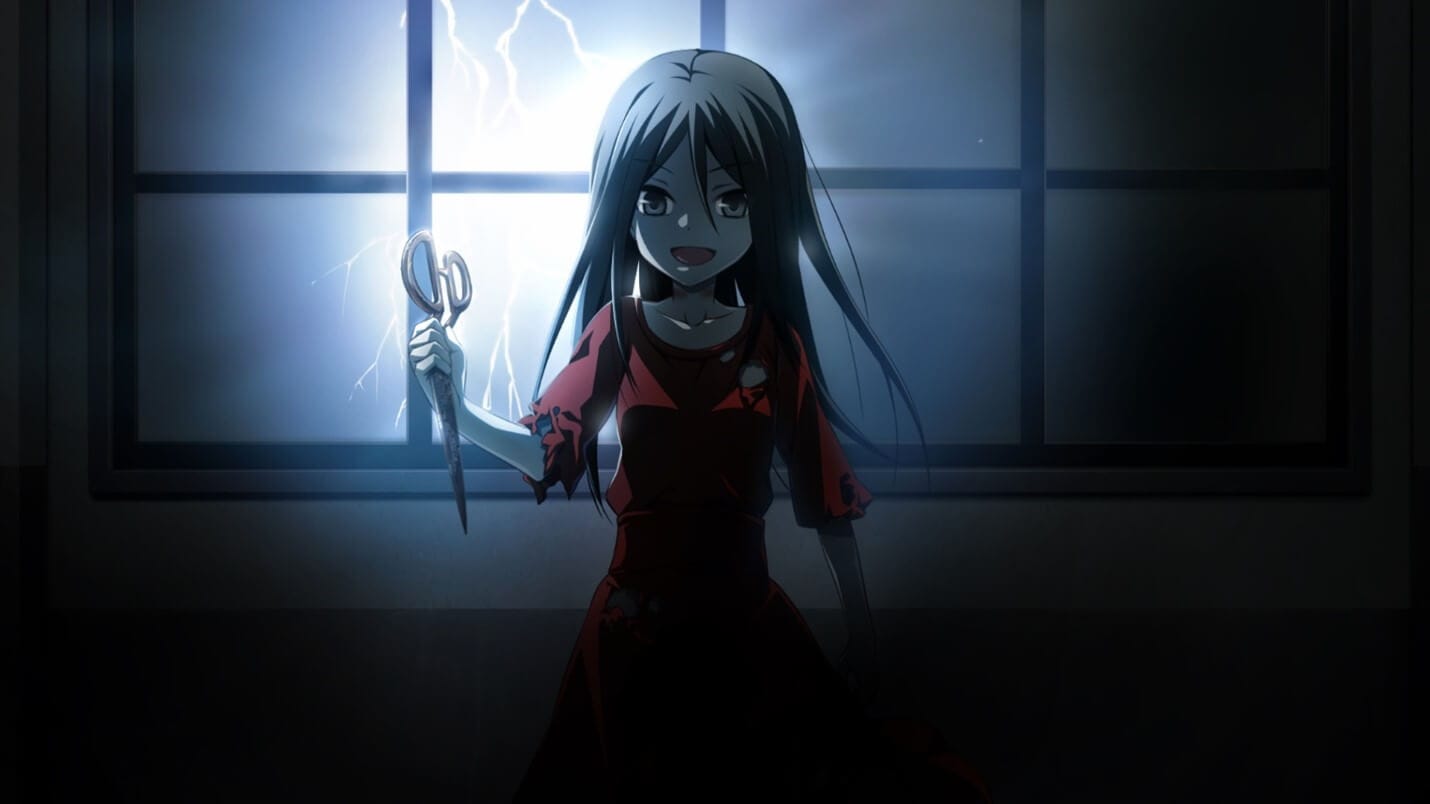
3. Sachiko Shinozaki (Corpse Party)
Sachiko from Corpse Party is a friendly-looking but scary character who loves to rip out the tongues of some of her fellow characters. She tortures students in Heavenly Host Elementry School which is a living hell in the anime.
Sachiko unleashes a lot of horror in the series and she plays the part of an elementary school ghost breaking all the expectations of the audience. Torturing her fellow mates and cutting their tongues out before death is something that makes Sachiko a perfect scary anime girl.
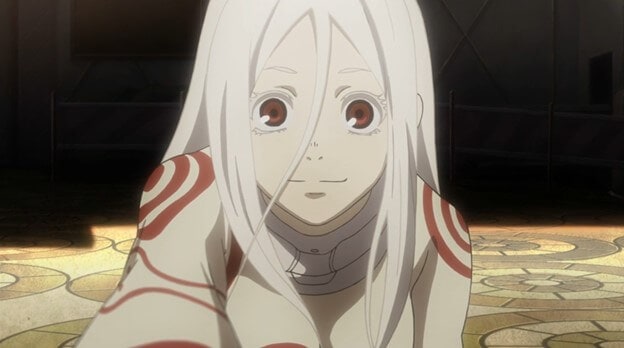
4. Shiro (Deadman Wonderland)
Shiro, the creepy-looking girl from Deadman Wonderland is another character to be scared of. She was adopted for the only purpose of being used as a human experiment in her childhood. The experiments instilled a very scary character in her which gives a horror nature to the anime in total.
The experiments on here were very painful and multiple personalities called “The Wretched Egg” were developed by her to cope up with torture. The creepy nature and the use of her special skills to murder some characters in the anime and frame her adopted brother for it is very dark and scary.
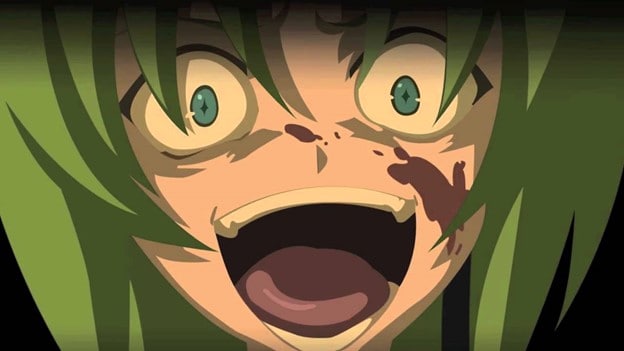
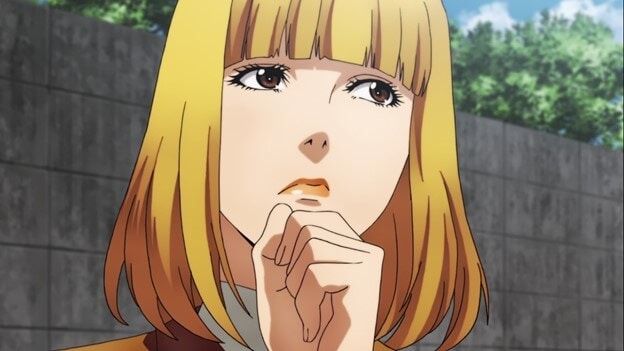
5. Megumi Shimizu (Shiki)
Megumi Shimizu of Shiki is a young girl and the first of all to be killed by the Kirishiki family. She was the first person who died who was not Yamairi and also the first to rise as Shiki.
After becoming a Shiki Megumi became very malicious and attacked the villagers. She enjoyed attacking them and that is very creepy. She also was ready to kill Tohru Mutou and Kaori’s father due to some small reasons. Her character without a drop of sympathy or care for the people around her is very scary and makes her very unpredictable.

6. Esdeath (Akame Ga Kill!)
Esdeath in Akame Ga Kill who is also known as the ice queen of the empire is a very manipulative character and a sadist. She follows the motto, the strong survive and the weak die, and justifies killing innocents and torturing enemies because of it.
Esdeath once made a prince who lost to strip naked before her and lick her boots, before killing his which is a different level of dark. She keeps her sadistic character in check to be in power which is very scary and dangerous for someone with power. She unleashing her cruelty on defenseless people is another thing that makes her a perfect scary anime girl.

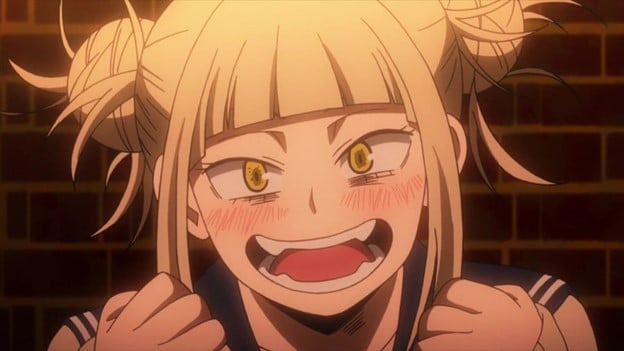
7. Himiko Toga (My Hero Academia)
Himiko is a cute-looking girl that possesses the ability to shapeshift to anything she wants. The creepy part is, in order to shapeshift she has to ingest another person’s blood.
Though Himiko appears to be a typical funny school girl, she can turn into a murderous beast in the blink of an eye. Her twister view of relationships and her trying to befriend people while trying to kill them at the same time all give us creepy chills while watching the anime.
8. Hana Midorikawa (Prison School)
Though Hana Midorikawa looks very cute and innocent she is as creepy as any girl can get. The story evolves in an underground prison school which is an explainable aspect that made Hana the sadist she is.
At first, Hana might seem to be a cute girl who does not belong at the place she currently is, but going deeper the opinion of the audience changes extremely. Hana happens to be a violent sociopath with a lot of dangerous thoughts and a urination fetish, and that is just the beginning of her creepiness.
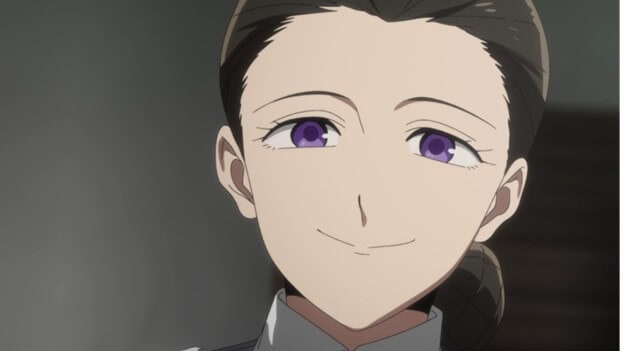
9. Isabella (The Promised Neverland)
Isabella who is also known as Mama is one of the main characters in the Promised Land. Being a caretaker to children, though she appears to be loving and affectionate to her children, that’s not the real case.
Isabella has a twisted character and shows detachment to her tragedies. This character shows antagonism, betrayal, and a twisted nature enough for the fans to feel creepy about her.
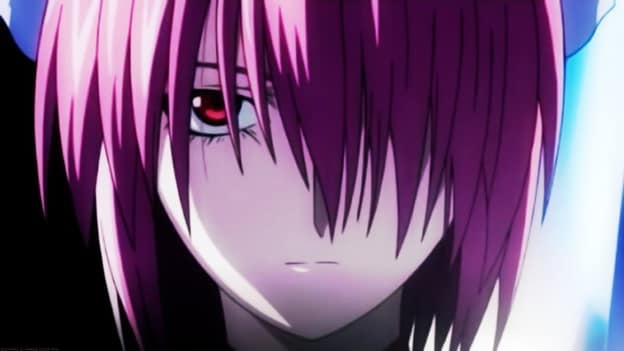
10. Lucy (Elfen Lied)
Lucy in Elfen Lied is a character that sometimes gets sympathy and other times creeps the audience out. She has difficulty drawing a line between good and evil. She can be seen as being sadistically tormented and ruthlessly tormenting about the cruelty around her.
Her surroundings and the people are responsible for how she is and that is why despite being creepy she is loved by a lot of people.
Final thoughts
Though most animes are fun to watch, horror animes are also enjoyed by a lot of people. The main aspect of these horror animes is the scary characters that make the audience wonder.
We have listed the top 10 scary anime girls of different animes that are equally liked and hated by the audience all over the world. The way they act, their cruelty, sadism all define their scary character. These scary anime girls have created such a huge impact that a fan might forget the anime name but never the name of the scary anime girl who gives him/her chills all over the body.
Shanoon Cox
Shanoon Cox is a writer and a lover of all things video.
Follow @Shanoon Cox
Shanoon Cox
Mar 27, 2024• Proven solutions
Animes have been one of the widely enjoyed forms of entertainment by people all over the world for decades. There are certain animes that attract people due to their scariness and the characters in them.
Even though girls are usually displayed as cute and pinkish and lovely, some animes display them as creepy. And believe me, these creepy anime girls have a huge fan base and are capable of giving the audience a chill over the spine while watching them.
The creepiness of the anime girls adds to the horror of animes and people enjoy watching them. So let’s find out more about these scary anime girls and why their scary character is loved by the fans.
10 Scary Anime Girls in the Scary Animes
There are a lot of animes with different genres. But some of the animes have some characters that stand out due to their weirdness and creepiness. Let’s talk about 10 such scary anime girls that still give the audience creeps:
- 1. Ai Enma (Hell Girl)
- 2. Shion Sonozaki (Higurashi: When They Cry)
- 3. Sachiko Shinozaki (Corpse Party)
- 4. Shiro (Deadman Wonderland)
- 5. Megumi Shimizu (Shiki)
- 6. Esdeath (Akame Ga Kill!)
- 7. Himiko Toga (My Hero Academia)
- 8. Hana Midorikawa (Prison School)
- 9. Isabella (The Promised Neverland)
- 10. Lucy (Elfen Lied)
1. Ai Enma (Hell Girl)
Ai Enma is one of the cute-looking characters in Hell Girl, but do not be deceived by her looks. She was a girl who was buried alive when she was seven, by her own villagers. Enma crawled out of the ground and burned the entire village, killing every single person living there as an act of vengeance.
Later as a punishment for her horrific doings, she was cast out and sentenced to live out her afterlife as Hell Girl. Still, in her childhood, Ai was assigned the job of dragging dead souls to hell, whether they deserved it or not. The coldness in her eyes and the way she does things without a shiver is what makes her creepy.
2. Shion Sonozaki (Higurashi: When They Cry)
Shion Sonozaki from Higurashi: When They Cry is a dark character who is not exactly what she seems outside. The town she lives in is cursed and she is trying to break that dark cycle that offers only death and tragedy.
There is too much to the story, and saying more about it may reveal the suspense. The story is filled with horror and adventure, and the character of Shion absorbs some of the darkness of the town, which gives a scary impact on the audience.
3. Sachiko Shinozaki (Corpse Party)
Sachiko from Corpse Party is a friendly-looking but scary character who loves to rip out the tongues of some of her fellow characters. She tortures students in Heavenly Host Elementry School which is a living hell in the anime.
Sachiko unleashes a lot of horror in the series and she plays the part of an elementary school ghost breaking all the expectations of the audience. Torturing her fellow mates and cutting their tongues out before death is something that makes Sachiko a perfect scary anime girl.
4. Shiro (Deadman Wonderland)
Shiro, the creepy-looking girl from Deadman Wonderland is another character to be scared of. She was adopted for the only purpose of being used as a human experiment in her childhood. The experiments instilled a very scary character in her which gives a horror nature to the anime in total.
The experiments on here were very painful and multiple personalities called “The Wretched Egg” were developed by her to cope up with torture. The creepy nature and the use of her special skills to murder some characters in the anime and frame her adopted brother for it is very dark and scary.
5. Megumi Shimizu (Shiki)
Megumi Shimizu of Shiki is a young girl and the first of all to be killed by the Kirishiki family. She was the first person who died who was not Yamairi and also the first to rise as Shiki.
After becoming a Shiki Megumi became very malicious and attacked the villagers. She enjoyed attacking them and that is very creepy. She also was ready to kill Tohru Mutou and Kaori’s father due to some small reasons. Her character without a drop of sympathy or care for the people around her is very scary and makes her very unpredictable.
6. Esdeath (Akame Ga Kill!)
Esdeath in Akame Ga Kill who is also known as the ice queen of the empire is a very manipulative character and a sadist. She follows the motto, the strong survive and the weak die, and justifies killing innocents and torturing enemies because of it.
Esdeath once made a prince who lost to strip naked before her and lick her boots, before killing his which is a different level of dark. She keeps her sadistic character in check to be in power which is very scary and dangerous for someone with power. She unleashing her cruelty on defenseless people is another thing that makes her a perfect scary anime girl.
7. Himiko Toga (My Hero Academia)
Himiko is a cute-looking girl that possesses the ability to shapeshift to anything she wants. The creepy part is, in order to shapeshift she has to ingest another person’s blood.
Though Himiko appears to be a typical funny school girl, she can turn into a murderous beast in the blink of an eye. Her twister view of relationships and her trying to befriend people while trying to kill them at the same time all give us creepy chills while watching the anime.
8. Hana Midorikawa (Prison School)
Though Hana Midorikawa looks very cute and innocent she is as creepy as any girl can get. The story evolves in an underground prison school which is an explainable aspect that made Hana the sadist she is.
At first, Hana might seem to be a cute girl who does not belong at the place she currently is, but going deeper the opinion of the audience changes extremely. Hana happens to be a violent sociopath with a lot of dangerous thoughts and a urination fetish, and that is just the beginning of her creepiness.
9. Isabella (The Promised Neverland)
Isabella who is also known as Mama is one of the main characters in the Promised Land. Being a caretaker to children, though she appears to be loving and affectionate to her children, that’s not the real case.
Isabella has a twisted character and shows detachment to her tragedies. This character shows antagonism, betrayal, and a twisted nature enough for the fans to feel creepy about her.
10. Lucy (Elfen Lied)
Lucy in Elfen Lied is a character that sometimes gets sympathy and other times creeps the audience out. She has difficulty drawing a line between good and evil. She can be seen as being sadistically tormented and ruthlessly tormenting about the cruelty around her.
Her surroundings and the people are responsible for how she is and that is why despite being creepy she is loved by a lot of people.
Final thoughts
Though most animes are fun to watch, horror animes are also enjoyed by a lot of people. The main aspect of these horror animes is the scary characters that make the audience wonder.
We have listed the top 10 scary anime girls of different animes that are equally liked and hated by the audience all over the world. The way they act, their cruelty, sadism all define their scary character. These scary anime girls have created such a huge impact that a fan might forget the anime name but never the name of the scary anime girl who gives him/her chills all over the body.
Shanoon Cox
Shanoon Cox is a writer and a lover of all things video.
Follow @Shanoon Cox
Tutorial Guide to Animate Pictures in Canva
Versatile Video Editor - Wondershare Filmora
An easy yet powerful editor
Numerous effects to choose from
Detailed tutorials provided by the official channel
With the rapid rise of social media worldwide, animated posts (like GIFs) are becoming famous. They have become a replacement to other modes like JPEG and .Png
Famous designing tools like Canva introduced an animation feature in the light of its popularity. The feature allows you to step up your social media game and creates animated visuals in a blink! It is also efficient for both professional and amateur users.
Besides social media content, Canva is also useful to design birthday cards, event invites, inspirational quotes, and more! Let’s learn about how to animate pictures in Canva in detail.
In this article
01 What Canva Pictures Can Be Used For?
02 How to Animate Pictures in Canva?
03 Tips: Animate Pictures In Video
Part 1: What Canva Pictures Can Be Used For?
Be it for marketing campaigns or projects, Canva is the best tool for all designing work. It is a foolproof platform where you do not need prior designing experience. Canva is useful for

Social media/Instagram Posts: You can build your Instagram presence by creating posts through Canva. It has multiple templates and features to make alluring Instagram posts. It also has drag-and-drop free images to add customized designs to the template.
Facebook Covers: You can make Facebook covers on Canva by choosing a layout and adding other elements. You can include colors, fonts, and pictures on the cover. Canva has templates for all themes, moods, and styles!
Event Invites: Canva has hundreds of free layouts and libraries to create event invites. You can choose the appropriate template and incorporate party-oriented photos, icons, stickers, illustrations, and graphics. It also has a personalizing option to add personal pictures and artwork in the editor.
Inspirational Quotes: Canva allows you to curate inspirational quotes and dispense motivation in people. It has templates to modify the elements like font size, text size, borders, images, and more!
Collages: It helps create a collage where you can combine multiple pictures in one frame. Canva offers various grids with a capacity of 12 pictures and different sizes.
Part 2: How to Animate Pictures in Canva?
Canva helps you add instant animation in presentations, social media posts, and more. To know how to animate images in Canva, follow the below steps:

Step 1: Add Static Elements
Start by creating an image through static elements. To make the design attractive, you can add sample texts, illustrations, doodles, and other entities.
Try to stimulate your creativity and come up with a layout beforehand. If possible, sketch on paper and replicate the same.
Step 2: Animate Your Design
Take a final glance at the layout. Make sure it’s perfect. Once all the elements are placed as per your design, it’s time to animate them. For that:
- Click on the white background page
- Go to the “Toolbar” section
- Select the “Animate” button
Step 3: Select Page Animation Style
Canva offers six animation styles, where five are for free users, and one is for pro users. To access the five animation styles, follow these steps.
- Press the “Animate” Button
- Select “Page Animations”
- There you will find options like Block, Pan, Fade, Rise, and Tumble
- Select the style as per your design
Step 4: Preview and Download
After selecting a page animation style, it will preview the effect. If you find it good, move on to downloading the GIF. Here’s how to do so
- Go to the “Toolbar” option (present on your upper right hand)
- Choose GIF as the file type
- Check the page number and verify if it’s correct
- Press the “Done” button
Step 5: Final GIF
After clicking on the “Done” button, your GIF will be downloaded. You will be able to see a display for five seconds. If you want to edit the image after this, click on the time button (near the “Animate” button).
So, that was all about how to animate a photo in Canva.
Drawbacks of Canva
Despite efficient features and easy interface, there are certain areas where Canva lacks. This includes
- It does not have any local file storage.
- As too many people use Canva, your template may look the same as others.
- Some of its best features are not free to access.
- The mobile app version lacks certain elements and features.
Out of all these drawbacks, repetitions of templates are a big issue. That’s because everyone wants their posts to look unique and irreplaceable. However, common Canva templates may prevent that from happening.
Fortunately, there are ways to combat such issues. Let’s learn about them in the next section.
Tips: Animate Pictures In Video
You can also animate pictures in the video to make them more lively. For that, you can use Wondershare Filmora Pro Video Editor. It’s also efficient if you don’t know how to animate a picture in Canva:
Wondershare Filmora Video Editor
Filmora by Wondershare is a video editing software that helps you build custom animations easily. It has auto features to make epic stories and posts.
Wondershare Filmora
Get started easily with Filmora’s powerful performance, intuitive interface, and countless effects!
Try It Free Try It Free Try It Free Learn More about Filmora>

Its drag and drop effect makes designing simple and quick. Due to its outstanding attributes, options, and styles, Filmora has 77+ million happy users!
It’s a power-packed integration of functionality, performance, and more! In fact, it resolves the repeated template issue of Canva. The software has top-notch functions and innovative filters that add authenticity to the designs.
Till now, you learned about how to animate a picture on Canva. Now, let’s comprehend the right way to use Filmora for animating and adding images in the video.
Before using, make sure to update the software to its latest version. Follow separate methods for both Windows and Mac.
For Win
Step 1: Adding Image to Video Track
With Filmora, adding images to video is a matter of seconds! Start by:
- Identify the position where you want to add the image and place the Playhead there.
- Right-click on the picture from the media library. Click on the “Insert” option. Your image will be added. Select the “Append” option, if you want to add an image at the video end.

Note: How to Remove Black Bars around the Image?
- Go to “Settings” from the File section.
- Click on the “Editing” tab and select “Photo Placement.”
- Choose from the “Crop to Fit” or “Pan To Zoom” option. The black bars will be removed.
To add the image in between the video clip, split them. Now, add the image between the split parts.
Step 2: Add Images as Overlays
To add images as overlays, drag the image to a video track above the main track. The main track consists of your video.
Track 1 (or the track with a video clip) is the base of your video. If you add anything else, it will be displayed above this track as video track 2, 3, and so on. Overall, you can add 100 video tracks.
Step 3: Edit Your Image
If you know how to animate an image in Canva, editing images on Filmora is even easier. You can try the following methods:
Animate Your Images
- To add animation presets to the image, click on the image twice.
- Go to the “Animation Tab” and look for an animation preset.
- Drag the presets to the image for its effect

Make Image Color Adjustments
- Double-click on the image
- Go to the “Color” tab and then the “Color” section
- Customize the temperature, saturation, brightness, etc., as per your need.
- Press Ok.
Change Image Duration
You can increase the image duration to more than the default timing of 5 seconds. For that:
- Click on the image and select the “Duration” option.
- Go to the “Duration Setting” panel.
- Add the new duration timing.

Adjust Position, Rotate/Flip, and Opacity
- You can resize the image position through the circles and squares at the image edges.
- To flip or rotate the image, double-click on the picture. From the “Image Panel,” go to “Transform” and then click on “Rotate.” You can choose either “Horizontal Flip” or “Vertical Flip” to flip the images.
- Double-click on the image and click on the “Composting” option to add opacity. You can choose the blending mode or adjust the “Opacity” accordingly.

For Mac
Filmora for Mac comes with a drag and drop feature to add transitions, animated titles, and effects. You can start a new project from scratch by clicking on “New Project”. The entire process is the same as that for Windows users.
To apply animation in the images, use the motion effects option. For that,
- Click on the Image
- Go to Motion Tab
- Select a motion effect
- Double-click to apply the effect

Conclusion
So that’s how to animate photos in Canva. Hopefully, our steps will help you revamp your posts like a pro! If not Canva, you can use its alternative Filmora. It’s equally prominent, user-friendly, and feature-rich.
Versatile Video Editor - Wondershare Filmora
An easy yet powerful editor
Numerous effects to choose from
Detailed tutorials provided by the official channel
With the rapid rise of social media worldwide, animated posts (like GIFs) are becoming famous. They have become a replacement to other modes like JPEG and .Png
Famous designing tools like Canva introduced an animation feature in the light of its popularity. The feature allows you to step up your social media game and creates animated visuals in a blink! It is also efficient for both professional and amateur users.
Besides social media content, Canva is also useful to design birthday cards, event invites, inspirational quotes, and more! Let’s learn about how to animate pictures in Canva in detail.
In this article
01 What Canva Pictures Can Be Used For?
02 How to Animate Pictures in Canva?
03 Tips: Animate Pictures In Video
Part 1: What Canva Pictures Can Be Used For?
Be it for marketing campaigns or projects, Canva is the best tool for all designing work. It is a foolproof platform where you do not need prior designing experience. Canva is useful for
Social media/Instagram Posts: You can build your Instagram presence by creating posts through Canva. It has multiple templates and features to make alluring Instagram posts. It also has drag-and-drop free images to add customized designs to the template.
Facebook Covers: You can make Facebook covers on Canva by choosing a layout and adding other elements. You can include colors, fonts, and pictures on the cover. Canva has templates for all themes, moods, and styles!
Event Invites: Canva has hundreds of free layouts and libraries to create event invites. You can choose the appropriate template and incorporate party-oriented photos, icons, stickers, illustrations, and graphics. It also has a personalizing option to add personal pictures and artwork in the editor.
Inspirational Quotes: Canva allows you to curate inspirational quotes and dispense motivation in people. It has templates to modify the elements like font size, text size, borders, images, and more!
Collages: It helps create a collage where you can combine multiple pictures in one frame. Canva offers various grids with a capacity of 12 pictures and different sizes.
Part 2: How to Animate Pictures in Canva?
Canva helps you add instant animation in presentations, social media posts, and more. To know how to animate images in Canva, follow the below steps:
Step 1: Add Static Elements
Start by creating an image through static elements. To make the design attractive, you can add sample texts, illustrations, doodles, and other entities.
Try to stimulate your creativity and come up with a layout beforehand. If possible, sketch on paper and replicate the same.
Step 2: Animate Your Design
Take a final glance at the layout. Make sure it’s perfect. Once all the elements are placed as per your design, it’s time to animate them. For that:
- Click on the white background page
- Go to the “Toolbar” section
- Select the “Animate” button
Step 3: Select Page Animation Style
Canva offers six animation styles, where five are for free users, and one is for pro users. To access the five animation styles, follow these steps.
- Press the “Animate” Button
- Select “Page Animations”
- There you will find options like Block, Pan, Fade, Rise, and Tumble
- Select the style as per your design
Step 4: Preview and Download
After selecting a page animation style, it will preview the effect. If you find it good, move on to downloading the GIF. Here’s how to do so
- Go to the “Toolbar” option (present on your upper right hand)
- Choose GIF as the file type
- Check the page number and verify if it’s correct
- Press the “Done” button
Step 5: Final GIF
After clicking on the “Done” button, your GIF will be downloaded. You will be able to see a display for five seconds. If you want to edit the image after this, click on the time button (near the “Animate” button).
So, that was all about how to animate a photo in Canva.
Drawbacks of Canva
Despite efficient features and easy interface, there are certain areas where Canva lacks. This includes
- It does not have any local file storage.
- As too many people use Canva, your template may look the same as others.
- Some of its best features are not free to access.
- The mobile app version lacks certain elements and features.
Out of all these drawbacks, repetitions of templates are a big issue. That’s because everyone wants their posts to look unique and irreplaceable. However, common Canva templates may prevent that from happening.
Fortunately, there are ways to combat such issues. Let’s learn about them in the next section.
Tips: Animate Pictures In Video
You can also animate pictures in the video to make them more lively. For that, you can use Wondershare Filmora Pro Video Editor. It’s also efficient if you don’t know how to animate a picture in Canva:
Wondershare Filmora Video Editor
Filmora by Wondershare is a video editing software that helps you build custom animations easily. It has auto features to make epic stories and posts.
Wondershare Filmora
Get started easily with Filmora’s powerful performance, intuitive interface, and countless effects!
Try It Free Try It Free Try It Free Learn More about Filmora>
Its drag and drop effect makes designing simple and quick. Due to its outstanding attributes, options, and styles, Filmora has 77+ million happy users!
It’s a power-packed integration of functionality, performance, and more! In fact, it resolves the repeated template issue of Canva. The software has top-notch functions and innovative filters that add authenticity to the designs.
Till now, you learned about how to animate a picture on Canva. Now, let’s comprehend the right way to use Filmora for animating and adding images in the video.
Before using, make sure to update the software to its latest version. Follow separate methods for both Windows and Mac.
For Win
Step 1: Adding Image to Video Track
With Filmora, adding images to video is a matter of seconds! Start by:
- Identify the position where you want to add the image and place the Playhead there.
- Right-click on the picture from the media library. Click on the “Insert” option. Your image will be added. Select the “Append” option, if you want to add an image at the video end.
Note: How to Remove Black Bars around the Image?
- Go to “Settings” from the File section.
- Click on the “Editing” tab and select “Photo Placement.”
- Choose from the “Crop to Fit” or “Pan To Zoom” option. The black bars will be removed.
To add the image in between the video clip, split them. Now, add the image between the split parts.
Step 2: Add Images as Overlays
To add images as overlays, drag the image to a video track above the main track. The main track consists of your video.
Track 1 (or the track with a video clip) is the base of your video. If you add anything else, it will be displayed above this track as video track 2, 3, and so on. Overall, you can add 100 video tracks.
Step 3: Edit Your Image
If you know how to animate an image in Canva, editing images on Filmora is even easier. You can try the following methods:
Animate Your Images
- To add animation presets to the image, click on the image twice.
- Go to the “Animation Tab” and look for an animation preset.
- Drag the presets to the image for its effect
Make Image Color Adjustments
- Double-click on the image
- Go to the “Color” tab and then the “Color” section
- Customize the temperature, saturation, brightness, etc., as per your need.
- Press Ok.
Change Image Duration
You can increase the image duration to more than the default timing of 5 seconds. For that:
- Click on the image and select the “Duration” option.
- Go to the “Duration Setting” panel.
- Add the new duration timing.
Adjust Position, Rotate/Flip, and Opacity
- You can resize the image position through the circles and squares at the image edges.
- To flip or rotate the image, double-click on the picture. From the “Image Panel,” go to “Transform” and then click on “Rotate.” You can choose either “Horizontal Flip” or “Vertical Flip” to flip the images.
- Double-click on the image and click on the “Composting” option to add opacity. You can choose the blending mode or adjust the “Opacity” accordingly.
For Mac
Filmora for Mac comes with a drag and drop feature to add transitions, animated titles, and effects. You can start a new project from scratch by clicking on “New Project”. The entire process is the same as that for Windows users.
To apply animation in the images, use the motion effects option. For that,
- Click on the Image
- Go to Motion Tab
- Select a motion effect
- Double-click to apply the effect
Conclusion
So that’s how to animate photos in Canva. Hopefully, our steps will help you revamp your posts like a pro! If not Canva, you can use its alternative Filmora. It’s equally prominent, user-friendly, and feature-rich.
Versatile Video Editor - Wondershare Filmora
An easy yet powerful editor
Numerous effects to choose from
Detailed tutorials provided by the official channel
Amazing Ways to Find Suitable Animated Graphic Maker
Incredible Ways to Find Suitable Animated Graphic Maker
An easy yet powerful editor
Numerous effects to choose from
Detailed tutorials provided by the official channel
Are you an enthusiast of animations, too? Do you, too, want to create something fun and exciting and show your skills through animation?
It is a hundred percent possible, with the animated graphic maker software available in the present times. Let us know more about this fantastic world of animation and the suitable animated graphic maker that will make your animation dreams and skills more enhanced and proficient in no time!
In this article
01 [Facts About Animated Graphics You Need to Know](#Part 1)
02 [Why You Should Use Animated Graphics in Your Marketing](#Part 2)
03 [Why You Should Use Animated Graphics in Your Marketing](#Part 3)
Part 1 Facts About Animated Graphics You Need to Know
There are specific facts that are important for you to know if you want to work with animations and use graphic animated tools. The facts are as follows.
01 Can Vector Graphics Be Animated?
Precisely, yes. Vector graphics can readily be animated, and that, too, is better than pixels. Animation or movement in animations occurs due to either of the two components- pixels and vectors. One can readily be animated in vector graphics. There are software tools available that can assist in the animation of vector graphics ideally. Thus, with the help of various software, creating animated vector graphics is now effortless and fun!

02 How Do I Animate a Still Image Online?
The process to animate static images online is no big deal at all. You just have to be familiar with the various software that is available for this work. Along with being familiar with the software, you also have to know how each of them works. If you know how the animation tools in the software you are going to use, it becomes an effortless and easy task to animate still images online.
You can animate static images online with the help of some renowned software or app like - Wondershare Filmora, Plotagraph, StoryZ, GIFMaker.me, PixaMotion, Movepic, Photo Motion, and 3Dthis. Each of these software ideally provides you with all the tools and functions that you can choose for animating still images online.
Wondershare Filmora
Power Up Your Story with Filmora. Professional video editing is made easy.
03 How Do You Make Animated Vector Graphics?
There are specific steps involved that help you in creating animated graphics. And the steps are as follows.
Steps for creating animated graphics:
● Isolating the vector
This step involves the selection of the vector image that you want to animate.
● Making duplicates of the vector image
You need to duplicate the vector image that you have chosen to animate. The duplication will help you reflect the movement in the image.
● Making changes in the frames
Proceed to make minor changes in each of the frames to reflect movement in the images.
● Wash it, rinse it and continue the cycle
Make a duplication of the artboard. Then, perform the changes the same as done previously. And repeat this cycle.
● Copy the large artboard
Copy the large artboard to the software you are using for animation. And then utilize the available tools of animation in the software for animating vector graphics.

Part 2 Why You Should Use Animated Graphics in Your Marketing?
In a very precise way, we can answer as animated graphics propagate and amplify awareness of the brands that integrate their utility. However, this is a general way of answering the important question. There are several reasons that make it necessary and beneficial for you to integrate animated graphics for websites for marketing your brand name. And they are as follows.
01 Eye-catching
One of the most important reasons for your marketing to include animated graphics is that they catch the attention of the audience more than any other method of marketing. They are interesting and fun, and that is the feature that attracts the attention of the audience. They get to see your brand in a more exciting and exciting way. Consequently, marketing your brand becomes ideally effective.

02 Easily informative
The motive for marketing is to inform the audience and other people about different information about your brand or company. Often, conveying information about your brands, services, and products becomes uninteresting for the audience. To make it more appealing, animated graphics can do the perfect job. They are fascinating to watch and deliver all the required information in a new and novel way. This does not bore the audience. Instead, if the animations are unique and exciting, people can actually be interested in watching them at will.

03 Customize it based on your needs
Graphic animations can be created based on the requirements of your marketing. And it is not just about the needs; it can be based on the audience genre you have. For example, if your products or services are meant for the kids, the animation will be made according to those factors that appeal to the kids. If your brand is for senior citizens, the animations will be different. Most importantly, if your brand shifts its audience genre, animations can also be created in the genre that you are choosing to serve at present. Thus, the customization ability of graphics animation offers flexibility in marketing.

03 A most efficient method of marketing
Graphic animation delivers the required promotional information in no time and in the most attractive way possible. Thus, there can be no other method of marketing as efficient and quick as graphics animation.
Part 3How to Create Animated Graphics That Stand out?
Well, the aspect of animation has attained the attention of thousands of enthusiasts all around the globe. And so, you will find numerous people making animations. And for this reason, there is numerous animation software available too on the internet. But, what can you do to design your animation to stand out? There are a few software for graphic animation that are better than the rest. And one of them is Wondershare Filmora. It is one of the top software. And it will readily and effortlessly help you integrate your animation skills and make your animations unique among the crowd.
What are the key features of this software?
● Professional quality animation tools
Do you believe that you possess immense animation skills? Then, no other software can be as motivational for you as Filmora Pro because its tools and features help you create professional-quality animation. You can readily create animated graphics for youtube from this software.
● Option for import and export
There is no occurrence of graphics hardware acceleration while you export a file from Filmora Pro.
● Easy user interface
The tools present in this software for animation are of professional quality. You can make animations that will look highly proficient. But, that does not make this software a difficult-to-use tool.
Filmora Features →
● Limitless video tracks
● Availability in Windows and well Mac
● Auto color correction
Filmora Features →
● Audio Noise Reduction
● Motion Graphics animation support
● Automatic Audio Sync
Key Takeaways from This Episode
● This was all about the different aspects of choosing a suitable animated graphic maker.
● You can readily opt for one of the several free animated graphics maker software available.
● But, if you want to avail yourself of the best, Filmora is the best go-to software for animated graphic making and exploring your animation skills.


Are you an enthusiast of animations, too? Do you, too, want to create something fun and exciting and show your skills through animation?
It is a hundred percent possible, with the animated graphic maker software available in the present times. Let us know more about this fantastic world of animation and the suitable animated graphic maker that will make your animation dreams and skills more enhanced and proficient in no time!
In this article
01 [Facts About Animated Graphics You Need to Know](#Part 1)
02 [Why You Should Use Animated Graphics in Your Marketing](#Part 2)
03 [Why You Should Use Animated Graphics in Your Marketing](#Part 3)
Part 1 Facts About Animated Graphics You Need to Know
There are specific facts that are important for you to know if you want to work with animations and use graphic animated tools. The facts are as follows.
01 Can Vector Graphics Be Animated?
Precisely, yes. Vector graphics can readily be animated, and that, too, is better than pixels. Animation or movement in animations occurs due to either of the two components- pixels and vectors. One can readily be animated in vector graphics. There are software tools available that can assist in the animation of vector graphics ideally. Thus, with the help of various software, creating animated vector graphics is now effortless and fun!
02 How Do I Animate a Still Image Online?
The process to animate static images online is no big deal at all. You just have to be familiar with the various software that is available for this work. Along with being familiar with the software, you also have to know how each of them works. If you know how the animation tools in the software you are going to use, it becomes an effortless and easy task to animate still images online.
You can animate static images online with the help of some renowned software or app like - Wondershare Filmora, Plotagraph, StoryZ, GIFMaker.me, PixaMotion, Movepic, Photo Motion, and 3Dthis. Each of these software ideally provides you with all the tools and functions that you can choose for animating still images online.
Wondershare Filmora
Power Up Your Story with Filmora. Professional video editing is made easy.
03 How Do You Make Animated Vector Graphics?
There are specific steps involved that help you in creating animated graphics. And the steps are as follows.
Steps for creating animated graphics:
● Isolating the vector
This step involves the selection of the vector image that you want to animate.
● Making duplicates of the vector image
You need to duplicate the vector image that you have chosen to animate. The duplication will help you reflect the movement in the image.
● Making changes in the frames
Proceed to make minor changes in each of the frames to reflect movement in the images.
● Wash it, rinse it and continue the cycle
Make a duplication of the artboard. Then, perform the changes the same as done previously. And repeat this cycle.
● Copy the large artboard
Copy the large artboard to the software you are using for animation. And then utilize the available tools of animation in the software for animating vector graphics.
Part 2 Why You Should Use Animated Graphics in Your Marketing?
In a very precise way, we can answer as animated graphics propagate and amplify awareness of the brands that integrate their utility. However, this is a general way of answering the important question. There are several reasons that make it necessary and beneficial for you to integrate animated graphics for websites for marketing your brand name. And they are as follows.
01 Eye-catching
One of the most important reasons for your marketing to include animated graphics is that they catch the attention of the audience more than any other method of marketing. They are interesting and fun, and that is the feature that attracts the attention of the audience. They get to see your brand in a more exciting and exciting way. Consequently, marketing your brand becomes ideally effective.
02 Easily informative
The motive for marketing is to inform the audience and other people about different information about your brand or company. Often, conveying information about your brands, services, and products becomes uninteresting for the audience. To make it more appealing, animated graphics can do the perfect job. They are fascinating to watch and deliver all the required information in a new and novel way. This does not bore the audience. Instead, if the animations are unique and exciting, people can actually be interested in watching them at will.
03 Customize it based on your needs
Graphic animations can be created based on the requirements of your marketing. And it is not just about the needs; it can be based on the audience genre you have. For example, if your products or services are meant for the kids, the animation will be made according to those factors that appeal to the kids. If your brand is for senior citizens, the animations will be different. Most importantly, if your brand shifts its audience genre, animations can also be created in the genre that you are choosing to serve at present. Thus, the customization ability of graphics animation offers flexibility in marketing.
03 A most efficient method of marketing
Graphic animation delivers the required promotional information in no time and in the most attractive way possible. Thus, there can be no other method of marketing as efficient and quick as graphics animation.
Part 3How to Create Animated Graphics That Stand out?
Well, the aspect of animation has attained the attention of thousands of enthusiasts all around the globe. And so, you will find numerous people making animations. And for this reason, there is numerous animation software available too on the internet. But, what can you do to design your animation to stand out? There are a few software for graphic animation that are better than the rest. And one of them is Wondershare Filmora. It is one of the top software. And it will readily and effortlessly help you integrate your animation skills and make your animations unique among the crowd.
What are the key features of this software?
● Professional quality animation tools
Do you believe that you possess immense animation skills? Then, no other software can be as motivational for you as Filmora Pro because its tools and features help you create professional-quality animation. You can readily create animated graphics for youtube from this software.
● Option for import and export
There is no occurrence of graphics hardware acceleration while you export a file from Filmora Pro.
● Easy user interface
The tools present in this software for animation are of professional quality. You can make animations that will look highly proficient. But, that does not make this software a difficult-to-use tool.
Filmora Features →
● Limitless video tracks
● Availability in Windows and well Mac
● Auto color correction
Filmora Features →
● Audio Noise Reduction
● Motion Graphics animation support
● Automatic Audio Sync
Key Takeaways from This Episode
● This was all about the different aspects of choosing a suitable animated graphic maker.
● You can readily opt for one of the several free animated graphics maker software available.
● But, if you want to avail yourself of the best, Filmora is the best go-to software for animated graphic making and exploring your animation skills.
How to Draw Cartoons Step by Step with This Guide
Learn How to Draw Cartoons Step by Step with This Guide
An easy yet powerful editor
Numerous effects to choose from
Detailed tutorials provided by the official channel
Cartoon character drawing is usually a vital aspect of any child’s life who loves to watch cartoon series and can sometimes be someone’s favorite thing in the world.

A cartoon character is a series of single drawings that tell a joke or story. Although cartoons are mostly drawn, they can sometimes be animated. Kids like comics which makes them an essential part of every child’s life. Cartoons are not only used for entertainment purposes but also help kids and young children learn more about the world around them. For example, children learn about love, loss, friendship, and other essential life issues about life by watching cartoons.
However, cartoons are not only limited to children but are also for adults. In addition, cartoons created for an adult audience go deeper into real-life problems and explore darker themes. They aim to create content that matches the maturity and age of the audience. Watching cartoons is fun. But what if you could make them? This article will provide you with a guide on producing cool cartoon drawings that will match different audiences, both older and younger.
In this article
01 [How to Draw Cartoon Characters Step by Step](#Part 1)
02 [Cartoon Easy Drawing with Colour Step by Step](#Part 2)
03 [Cartoon Easy Sketch Drawing Step by Step](#Part 3)
Part 1 How to Draw Cartoon Characters Step by Step
Note that in the world we live in, Professionals were once students, and experts were once beginners. This means that everyone has a starting point, and they all have one thing in common: “learning.” Whether you are aspiring to become an English teacher, an astrophysicist, an artist, or a physician’s assistant, you must first learn the ins and outs of the field.
Those aspiring to become animators and cartoonists must first learn the basics of cartoon character drawing and practice some easy, simple cartoon drawing before cranking out the Mickey-Mouses of the entertainment world. However, we will cover the basic principles of easy cartoon drawing for beginners step by step to get your learning process started. Here is how to draw a Micky-Mouse perfectly:

Step 1:
● Use a pencil to begin your drawing.
● First, create a circle for the head and a curved line on the left side.
● Draw a horizontal line at the center.
Step 2: Next, draw an oval shape for the mouth and a “U” shape added to the bottom, and then you can add another parallel “U” shape and connect it with the oval.
Step 3: Draw the eye using two upside-down “U” shapes, and then you add his large ear on the right and a small one at the top of the head.
Step 4: You can draw a bean shape and another smaller one inside for the body.
Step 5: Add oval shapes for his feet to draw his legs and draw his tail on the right side just above the leg.
Step 6: Draw two elongated shapes for his arms, a small oval for the hand and a basic shape of his fingers.
Step 7: Draw the cheese and add a few small circles inside.
Step 8: Also include the facial features by drawing the inside of the nose, eyebrows, eyes, and whiskers.
Step 9:
● Draw his fingers and hair between his ears.
● Trace your pencil lines with a sharpie.
● Erase the pencil afterward.
Step 10: Finally, you can color your drawing and upload it to your website.
Part 1 Cartoon Easy Drawing with Colour Step by Step
Applying color to a drawing is very important to beautify your drawing and make it look stunning and attractive. Here is how to cartoon easy drawing a flower using a colored pencil:
Step 1: Using a color photocopy of a reference photo, crop and rearrange elements of the poppy composition. With light pressure and HB pencil, draw a composition onto a four-ply, 100% cotton museum board frequently found among framing supplies.
Step 2: With very light pressure, apply the first colored pencil layer and add more emphasis where the values will be deeper. While doing this, note that the pencil application will still appear granular, and the texture of the museum board is still visible.

Step 3: Create the veins in the leaves and the fuzzy texture of the stem and pod, and also, as the individual strands of stamens, put down a sheet of translucent drafting paper. Use heavy tracing paper with a very sharp 7H graphite pencil and apply heavy pressure in drawing the lines for stamens, fuzz, and veins on the drafting paper and impress them into the surface of the museum board. Then, with a contrasting layer of darker color, these features dramatically show up on the stem, leaves, center of the flower, pod, and center of the flower. Then add deeper values of rose in the shadowed areas of the flower petals.

Step 4: To make them appear less granular and intensify the colors, start by blending with a clear, alcohol-based blending marker. The solvent, wax, or vegetable oil then dissolves the binder in the colored pencil layer and fluidly releases the pigment. This will also help to “fill in” the dots of the tooth of the paper and make the color appear denser.

Step 5: Continue to intensify the color by using a non-pigmented blending pencil over a previous layer and repeat a layer or two of color, much like a “color sandwich.” Repeat this “ burnishing “ process for subsequent layerings of color, like a double-decker or triple-decker sandwich.
Also, make sure the rich, dark negative space is carried out the same way, layering colors and burnishing, then repeating the colors for deep, rich saturation.
Render the deep, smeary flecks of pollen by heavily applying “freckles” of burgundy, then slightly smudge them with the tip of a blending marker. Lastly, scratch a few of the tiny wisps of fuzz on the pod and stem carefully into the board via a sharp X-acto knife for a striking contrast of light against the deep background.

Part 2 Cartoon Easy Sketch Drawing Step by Step
This is the initial stage of the drawing process. It requires you to create an outline of the concept you want to draw before adding color. However, it is also referred to as a technique in shading. For example, if you’re going to sketch a cherry fruit, there are a few things to note here.
Try not to look at the cherry as a whole but look at its shapes and name them. This way, you are looking at the parts to the whole and not the entire piece.

Step 1: Draw two overlapping circles and draw two curved lines from each of the circles.
Step 2: Make a small rectangle at the top to join the two stems and draw a second set of curved lines.
Step 3: Draw thick lines inside the rectangle for the bumps and darken the lines and use your finger to smudge them a bit for the shaded effect.
Step 4: Draw a curved line from the stem on the right to the circle’s edge to create the bump.
Step 5: Holding your pencil at an angle, make light strokes going across the front of both cherries. Take note of the places where there is no light. This is where the light source is hitting the cherry the most.
Step 6: To darken, a shade over those places again, keep layering the shading technique until you get the effect you see on the cherries.
Step 7: Use the same technique to shade under the cherries, but use your finger to smudge it to smoother the shadow.
●Bonus:
You can add color, effect, or animate to your cartoon character drawing by using Wondershare Filmora Video Editor , the best editor on the internet. Filmora is a free software program with the same creating abilities and imaging editing similar to Adobe Illustrator. It is open software that runs on various programs, such as Windows, Mac, and Linux. Please get to know more about this exclusive tool from Wondershare on their official website.
For Win 7 or later (64-bit)
For macOS 10.12 or later
● Ending Thoughts →
● A step-by-step guide on drawing easy cartoons for painting and how to sketch your drawing correctly.
● Cartoon character drawings in easy and quick steps.
● Easy cartoon drawing for beginners.
● Lastly, to add color to your drawing, use Filmora software.
● So, use the tips and tricks to make your presentation’s best cartoon characters come alive and be a pro with Filmora.
Cartoon character drawing is usually a vital aspect of any child’s life who loves to watch cartoon series and can sometimes be someone’s favorite thing in the world.
A cartoon character is a series of single drawings that tell a joke or story. Although cartoons are mostly drawn, they can sometimes be animated. Kids like comics which makes them an essential part of every child’s life. Cartoons are not only used for entertainment purposes but also help kids and young children learn more about the world around them. For example, children learn about love, loss, friendship, and other essential life issues about life by watching cartoons.
However, cartoons are not only limited to children but are also for adults. In addition, cartoons created for an adult audience go deeper into real-life problems and explore darker themes. They aim to create content that matches the maturity and age of the audience. Watching cartoons is fun. But what if you could make them? This article will provide you with a guide on producing cool cartoon drawings that will match different audiences, both older and younger.
In this article
01 [How to Draw Cartoon Characters Step by Step](#Part 1)
02 [Cartoon Easy Drawing with Colour Step by Step](#Part 2)
03 [Cartoon Easy Sketch Drawing Step by Step](#Part 3)
Part 1 How to Draw Cartoon Characters Step by Step
Note that in the world we live in, Professionals were once students, and experts were once beginners. This means that everyone has a starting point, and they all have one thing in common: “learning.” Whether you are aspiring to become an English teacher, an astrophysicist, an artist, or a physician’s assistant, you must first learn the ins and outs of the field.
Those aspiring to become animators and cartoonists must first learn the basics of cartoon character drawing and practice some easy, simple cartoon drawing before cranking out the Mickey-Mouses of the entertainment world. However, we will cover the basic principles of easy cartoon drawing for beginners step by step to get your learning process started. Here is how to draw a Micky-Mouse perfectly:
Step 1:
● Use a pencil to begin your drawing.
● First, create a circle for the head and a curved line on the left side.
● Draw a horizontal line at the center.
Step 2: Next, draw an oval shape for the mouth and a “U” shape added to the bottom, and then you can add another parallel “U” shape and connect it with the oval.
Step 3: Draw the eye using two upside-down “U” shapes, and then you add his large ear on the right and a small one at the top of the head.
Step 4: You can draw a bean shape and another smaller one inside for the body.
Step 5: Add oval shapes for his feet to draw his legs and draw his tail on the right side just above the leg.
Step 6: Draw two elongated shapes for his arms, a small oval for the hand and a basic shape of his fingers.
Step 7: Draw the cheese and add a few small circles inside.
Step 8: Also include the facial features by drawing the inside of the nose, eyebrows, eyes, and whiskers.
Step 9:
● Draw his fingers and hair between his ears.
● Trace your pencil lines with a sharpie.
● Erase the pencil afterward.
Step 10: Finally, you can color your drawing and upload it to your website.
Part 1 Cartoon Easy Drawing with Colour Step by Step
Applying color to a drawing is very important to beautify your drawing and make it look stunning and attractive. Here is how to cartoon easy drawing a flower using a colored pencil:
Step 1: Using a color photocopy of a reference photo, crop and rearrange elements of the poppy composition. With light pressure and HB pencil, draw a composition onto a four-ply, 100% cotton museum board frequently found among framing supplies.
Step 2: With very light pressure, apply the first colored pencil layer and add more emphasis where the values will be deeper. While doing this, note that the pencil application will still appear granular, and the texture of the museum board is still visible.
Step 3: Create the veins in the leaves and the fuzzy texture of the stem and pod, and also, as the individual strands of stamens, put down a sheet of translucent drafting paper. Use heavy tracing paper with a very sharp 7H graphite pencil and apply heavy pressure in drawing the lines for stamens, fuzz, and veins on the drafting paper and impress them into the surface of the museum board. Then, with a contrasting layer of darker color, these features dramatically show up on the stem, leaves, center of the flower, pod, and center of the flower. Then add deeper values of rose in the shadowed areas of the flower petals.
Step 4: To make them appear less granular and intensify the colors, start by blending with a clear, alcohol-based blending marker. The solvent, wax, or vegetable oil then dissolves the binder in the colored pencil layer and fluidly releases the pigment. This will also help to “fill in” the dots of the tooth of the paper and make the color appear denser.
Step 5: Continue to intensify the color by using a non-pigmented blending pencil over a previous layer and repeat a layer or two of color, much like a “color sandwich.” Repeat this “ burnishing “ process for subsequent layerings of color, like a double-decker or triple-decker sandwich.
Also, make sure the rich, dark negative space is carried out the same way, layering colors and burnishing, then repeating the colors for deep, rich saturation.
Render the deep, smeary flecks of pollen by heavily applying “freckles” of burgundy, then slightly smudge them with the tip of a blending marker. Lastly, scratch a few of the tiny wisps of fuzz on the pod and stem carefully into the board via a sharp X-acto knife for a striking contrast of light against the deep background.
Part 2 Cartoon Easy Sketch Drawing Step by Step
This is the initial stage of the drawing process. It requires you to create an outline of the concept you want to draw before adding color. However, it is also referred to as a technique in shading. For example, if you’re going to sketch a cherry fruit, there are a few things to note here.
Try not to look at the cherry as a whole but look at its shapes and name them. This way, you are looking at the parts to the whole and not the entire piece.
Step 1: Draw two overlapping circles and draw two curved lines from each of the circles.
Step 2: Make a small rectangle at the top to join the two stems and draw a second set of curved lines.
Step 3: Draw thick lines inside the rectangle for the bumps and darken the lines and use your finger to smudge them a bit for the shaded effect.
Step 4: Draw a curved line from the stem on the right to the circle’s edge to create the bump.
Step 5: Holding your pencil at an angle, make light strokes going across the front of both cherries. Take note of the places where there is no light. This is where the light source is hitting the cherry the most.
Step 6: To darken, a shade over those places again, keep layering the shading technique until you get the effect you see on the cherries.
Step 7: Use the same technique to shade under the cherries, but use your finger to smudge it to smoother the shadow.
●Bonus:
You can add color, effect, or animate to your cartoon character drawing by using Wondershare Filmora Video Editor , the best editor on the internet. Filmora is a free software program with the same creating abilities and imaging editing similar to Adobe Illustrator. It is open software that runs on various programs, such as Windows, Mac, and Linux. Please get to know more about this exclusive tool from Wondershare on their official website.
For Win 7 or later (64-bit)
For macOS 10.12 or later
● Ending Thoughts →
● A step-by-step guide on drawing easy cartoons for painting and how to sketch your drawing correctly.
● Cartoon character drawings in easy and quick steps.
● Easy cartoon drawing for beginners.
● Lastly, to add color to your drawing, use Filmora software.
● So, use the tips and tricks to make your presentation’s best cartoon characters come alive and be a pro with Filmora.
Adobe Animate CC: Everything You Need to Know
Adobe Animate CC: Everything You Need to Know

Liza Brown
Mar 27, 2024• Proven solutions
In this article, we are going to clue you in on the new features of 2D animation maker Adobe Animate CC. So, if you are confused about flash animation tool and you are up to a project, just go for Animate CC.
You might also like: 10 Best 2D Animation Software in 2020 [Free/Paid]
What is Adobe Animate CC?
The animation lovers when seeking to serve the purpose, must have used and heard about Adobe Flash, but now we would here inform you that Adobe Animate CC has now replaced the old Adobe Flash.
Along with renaming the tool, the evolution from Flash to Adobe Animate CC has added a wide range of advanced functionalities like support to WebGL and HTML5 canvas.
You will not regret your decision after reading this article and will find that using Adobe Animate CC is a wise choice. Hence, let’s begin to get enlightened on the features.
New features of Adobe Animate CC
1. Adobe Animate Camera
Adobe Animate CC introduces virtual camera functionality unlike other animation software . With the help of this feature, you can easily stimulate your camera’s movement giving your animation a more realistic view.
Making it simpler, you can effortlessly execute panning, zooming and rotating to your animations if you wish. Using the virtual camera in Animate CC, you will be enabling to add more dramatic effects while creating an animation.
For instance, if there’s a fighting scene in our animated movie, you can rotate at the moment the scene shows destruction to give it a dramatic effect or you can zoom in or out and change the viewer’s attention from one point to the other.
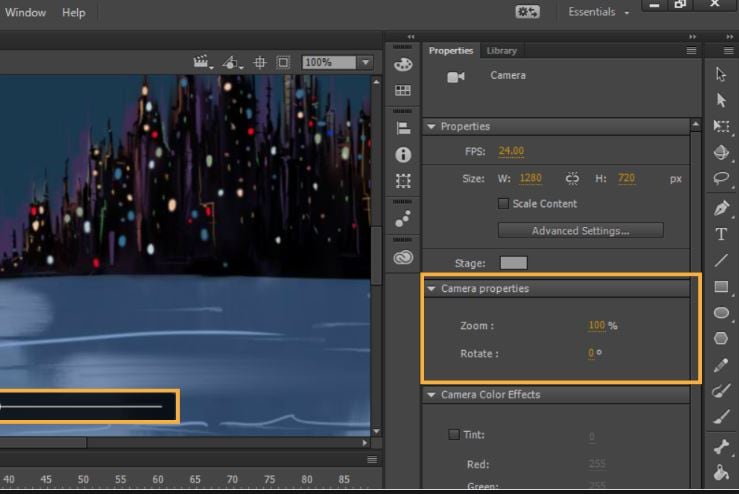
2. Export format
Adobe Animate CC has adapted the web standards for the exporting your animation which makes it easier for everyone to view it from desktop to mobile device.
This tweak has revolutionized the web based flash animation by simply eliminating the annoying “need to install a flash player plug-in” which was in case of Flash Professional Platform. With Adobe Animate, users can export content for WebGL, HTML5 Canvas, 4k video easily.
Moreover, you can generate the keyframes based sprite-sheet and animate them accordingly using the CSS. Adapting web standards doesn’t mean that Adobe Animate CC has entirely abandoned the SWF format.
Users do have a privilege to export their files to Flash Player format. Furthermore, a new OAM packaging is also introduced by new Adobe Animate CC which enables you to package assets in .zip format.

3. Vector brushes
Another important functionality that Adobe Animate has brought is giving the opportunity to create vector brushes. This is kind of same as that used in Adobe Illustrator. With this update in brushing tools, one can have pressure and tilt functionalities on drawing of lines and strokes with the help of pen or stylus.
This is helpful in creating strokes in touch-sensitive devices. The width can be changed according to how much pressure you apply when creating patterns. So, if you wish to create 2D vector graphics using shapes, patterns, curves etc. Animate CC would be a good choice.
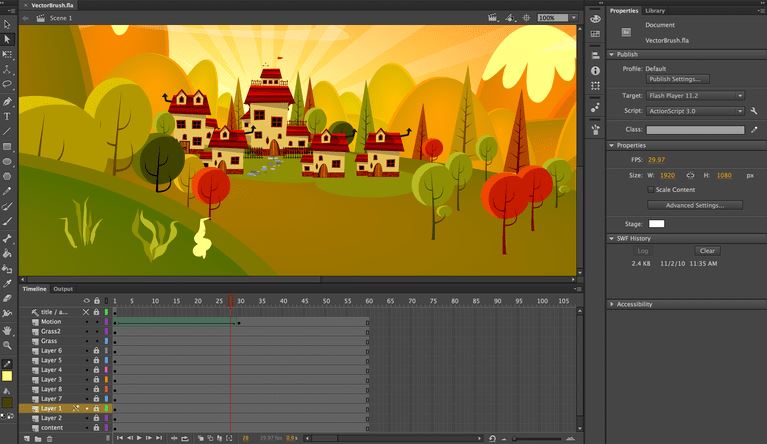
4. Audio Syncing
The timeline feature of the tool will now allow the users to sync audios in their animations and this is a yet another feature that Animate CC has added. This means you can do audio synchronization for your animation series.
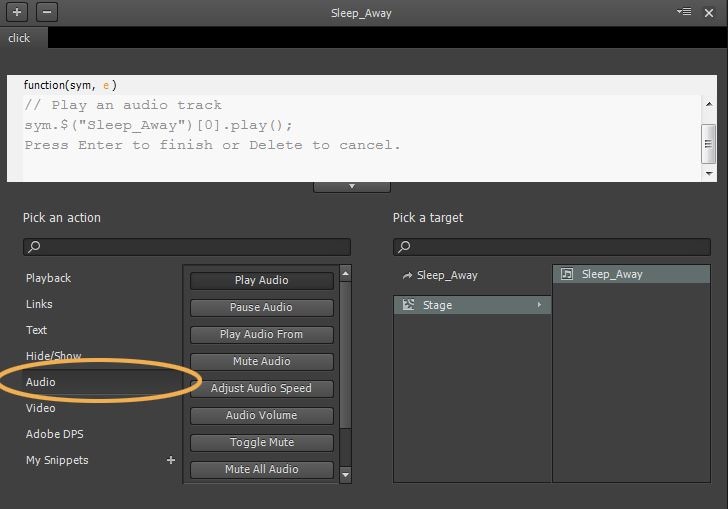
Nevertheless, doing this can be a little demanding as well as time-consuming with HTML5 alone. In addition, you also get enabled for audio loop control with the Adobe Animate CC’s timeline feature.
5. Font
Adobe Animate CC comes now with integration of Typekit where you get countless premium web fonts. These web fonts will be present for HTML5 canvas documents in the tool. Users can pick out from thousands of high-quality fonts via a subscription plan.
Putting in different words, first you can try some selected fonts available in the Typekit library via any level of Creative Cloud plan. Then when you subscribe by spending some money, you can then get access to complete Typekit library where there are thousands of premium fonts for HTML5 canvas.

Final Verdict
Animation industry is no doubt a very interesting one and having the best tool can make it more interesting and fun. After making you familiarize with the top functionalities that are coming with Adobe Animate CC, we feel it would be fair to end the discussion here. Hope you will not give a second thought on Animate CC when need to do flash animation.
Before ending, one more thing that we would like to give the other thought by introducing you Filmora.
No, this is a not another feature, but an interesting yet powerful video editing software created by Wondershare, one of the leading brand in multimedia field. You can use this tool and get your animated videos edited using its extraordinary effects.
Liza Brown
Liza Brown is a writer and a lover of all things video.
Follow @Liza Brown
Liza Brown
Mar 27, 2024• Proven solutions
In this article, we are going to clue you in on the new features of 2D animation maker Adobe Animate CC. So, if you are confused about flash animation tool and you are up to a project, just go for Animate CC.
You might also like: 10 Best 2D Animation Software in 2020 [Free/Paid]
What is Adobe Animate CC?
The animation lovers when seeking to serve the purpose, must have used and heard about Adobe Flash, but now we would here inform you that Adobe Animate CC has now replaced the old Adobe Flash.
Along with renaming the tool, the evolution from Flash to Adobe Animate CC has added a wide range of advanced functionalities like support to WebGL and HTML5 canvas.
You will not regret your decision after reading this article and will find that using Adobe Animate CC is a wise choice. Hence, let’s begin to get enlightened on the features.
New features of Adobe Animate CC
1. Adobe Animate Camera
Adobe Animate CC introduces virtual camera functionality unlike other animation software . With the help of this feature, you can easily stimulate your camera’s movement giving your animation a more realistic view.
Making it simpler, you can effortlessly execute panning, zooming and rotating to your animations if you wish. Using the virtual camera in Animate CC, you will be enabling to add more dramatic effects while creating an animation.
For instance, if there’s a fighting scene in our animated movie, you can rotate at the moment the scene shows destruction to give it a dramatic effect or you can zoom in or out and change the viewer’s attention from one point to the other.
2. Export format
Adobe Animate CC has adapted the web standards for the exporting your animation which makes it easier for everyone to view it from desktop to mobile device.
This tweak has revolutionized the web based flash animation by simply eliminating the annoying “need to install a flash player plug-in” which was in case of Flash Professional Platform. With Adobe Animate, users can export content for WebGL, HTML5 Canvas, 4k video easily.
Moreover, you can generate the keyframes based sprite-sheet and animate them accordingly using the CSS. Adapting web standards doesn’t mean that Adobe Animate CC has entirely abandoned the SWF format.
Users do have a privilege to export their files to Flash Player format. Furthermore, a new OAM packaging is also introduced by new Adobe Animate CC which enables you to package assets in .zip format.
3. Vector brushes
Another important functionality that Adobe Animate has brought is giving the opportunity to create vector brushes. This is kind of same as that used in Adobe Illustrator. With this update in brushing tools, one can have pressure and tilt functionalities on drawing of lines and strokes with the help of pen or stylus.
This is helpful in creating strokes in touch-sensitive devices. The width can be changed according to how much pressure you apply when creating patterns. So, if you wish to create 2D vector graphics using shapes, patterns, curves etc. Animate CC would be a good choice.
4. Audio Syncing
The timeline feature of the tool will now allow the users to sync audios in their animations and this is a yet another feature that Animate CC has added. This means you can do audio synchronization for your animation series.
Nevertheless, doing this can be a little demanding as well as time-consuming with HTML5 alone. In addition, you also get enabled for audio loop control with the Adobe Animate CC’s timeline feature.
5. Font
Adobe Animate CC comes now with integration of Typekit where you get countless premium web fonts. These web fonts will be present for HTML5 canvas documents in the tool. Users can pick out from thousands of high-quality fonts via a subscription plan.
Putting in different words, first you can try some selected fonts available in the Typekit library via any level of Creative Cloud plan. Then when you subscribe by spending some money, you can then get access to complete Typekit library where there are thousands of premium fonts for HTML5 canvas.
Final Verdict
Animation industry is no doubt a very interesting one and having the best tool can make it more interesting and fun. After making you familiarize with the top functionalities that are coming with Adobe Animate CC, we feel it would be fair to end the discussion here. Hope you will not give a second thought on Animate CC when need to do flash animation.
Before ending, one more thing that we would like to give the other thought by introducing you Filmora.
No, this is a not another feature, but an interesting yet powerful video editing software created by Wondershare, one of the leading brand in multimedia field. You can use this tool and get your animated videos edited using its extraordinary effects.
Liza Brown
Liza Brown is a writer and a lover of all things video.
Follow @Liza Brown
Top 10 Apps to Enhance Your Instagram Story Slideshow
Best 10 Apps to Enhance Your Instagram Story Slideshow
An easy yet powerful editor
Numerous effects to choose from
Detailed tutorials provided by the official channel
Instagram reels and stories have turned into convenient ways of exploring your video creation skills with fun. Read further to know about the top 10 apps to create amazing Insta story slideshows!
In this article
01 [What’s Instagram Story Slideshow](#Part 1)
02 [How to Use Instagram Slideshow?](#Part 2)
03 [Top 10 Apps for Making Instagram Story Slideshow (iOS & Android)](#Part 3)
04 [Tips for Enhancing Your Insta Story Slideshow](#Part 4)
Part 1 What’s Instagram Story Slideshow
With the growing influence of social media on the global life and work culture in today’s times, each and every event on such platforms becomes the new trend of the current IT impacted society. Speaking in the light of the newest developments, Instagram story slideshows have become the latest talk of the diverse range of social media communities across the web.
Since its entry into the communication galore, the Instagram application has emerged as an absolute favourite of social media freaks, thanks to its already captivating features. Moving ahead with its customary user appealing efforts, the latter has recently introduced the slideshow feature to upgrade and improvise its content stories and reels.
Working with the same, you can now integrate your otherwise simple and elementary Instagram stories into awesome slideshows. This visibly means that your conventional stories and reels on the app are now going to get that missing spark with a plethora of customizable motion graphic features. An Instagram story slideshow can work to earn you a huge number of followers, thus uplifting your social creativity quotient and entertainment appeal.
These creative 15 second snippets are appreciably the most amazing trends to increase your audience backup as a market organization, business enterprise, an influencer or as a rising star, all because of an excellent content presentation strategy and catchy outlook. Try hands at using this high end graphic presentation utility to attract the most awaited jaw dropping appreciation of your social media posts.
Part 2 How to Use Instagram Slideshow
Now that you are aware about the excitement and social buzz that your Instagram story slideshows can create with an immediate effect, the aforesaid reason is sufficient enough to motivate you towards diving deeper into the interesting ways of working with the feature to your maximum advantage. Adhering to the concern, let us proceed with learning about the most appealing trends to use an Instagram slideshow in the following section:
● Stepwise Tutorials and Visual Guides
The utility of Instagram slideshows to merge multiple images and videos together has blocked the interruption of additional feeds amid the content presentation, thus giving you the liberty to post a set of related videos and stills in one go, which can be of great help when you encounter a need to share tutorial videos, recipe follow ups and alike content that essentially requires a sequential presentation.
The Instagram stories slideshow can be useful to DIY creators who wish to demonstrate or guide their followers to create stunning examples of self-designed masterpieces. Posting step wise guides with clear cut instructions to work upon or use something, like that of a new product, can also be catered with an Instagram slideshow story.
● Product Advertising and Sale
If you are looking for impressive and cost effective solutions to launch your products among potential customers, consider taking the help of Instagram slideshows. The feature is known to deliver excellent results in the brand promotion of some particular products, such as jewelry and apparel design.
Jewelers, furniture retailers and textile designers can work with the slideshow to upload a series of images and videos for a clear and vivid demonstration of the product. Considering the fact that such commodities may greatly differ in their visual and actual appearance, the products can be shown through a variety of angles to facilitate viewers with the most comprehensive and an almost exact presentation of the different aspects that a product claims to have.
Part 3 Top 10 Apps for Making Instagram Story Slideshow (iOS & Android)
By now, you must have had a comprehensive understanding of the significance of Instagram story slideshows in uplifting different aspects of your content delivery, along with effectively addressing your diverse and large scale information sharing needs. Moving ahead with our discussion, let us browse through some of the best software solutions to create the most appealing Instagram story slideshows in the following section:
01SlideLab
Starting with the list the first application to look forward on creating over the top Instagram story slideshows with utmost ease. The software package is loaded with an extensive range of editing effects and filters, audio-visual transitions and supplementary design elements, that promise you of a high resolution, professional quality slideshow output.
Working with the software, you get the flexibility to conveniently customize the sequence in which the images would appear in the slideshow, with allowing a maximum screen display time of 3 seconds to each image. The created slideshows can be easily shared on various media handles and platforms, including Instagram, Facebook and YouTube.
While you can undertake a free trial of the tool, a paid subscription of the same costing $ 4.99 is required for accessing the complete range of features associated with the program. The software is however, exclusively compatible with iOS supported devices.

02VivaVideo
This one is an excellent video editor and graphic designer tool, which you can use to create and share amazing slideshows to complement your Instagram stories and feeds. Working with the aforesaid software program, you don’t need to worry about the concerns of device compatibility, as the program works well with your favorite MacOs and Windows supported systems and devices.
Talking of the specific features that the software promises to offer, you can use its built in camera to capture high resolution videos and supplement them with over 60 high end customization utilities, like sound effects and transitions, along with dubbing the video. The basic version of the tool is available for free usage and allows you to choose between the Pro and Quick modes, respectively for a high flexibility and an escalated automated response.
The free version is however, known to leave watermarks on the created videos, is stuffed with frequently appearing ads and permits a 5-minute presentation time. You can escape these hustles anytime by subscribing to the paid version of VivaVideo for $ 2.99.

03InShot
The InShot image and video editor program is another potential candidate to be employed as an Instagram story slideshow creator. The software’s effect library is packed with a heap of conveniently usable design elements and features to create the most beautiful Instagram slideshows. The app can be put to use for efficiently designing Instagram stories to address personal and professional concerns.
Some over the top features of the tool include, the flexibility to crop, trim, cut and merge video files, and uplift them with a range of effects, filters, transitions and backgrounds. The exclusive audio flexibility of the software allows you to add upbeat sound and music, while enabling a choice of fading music in and out.
The software additionally permits to adjust the speed control of your videos, making them run in a slow or fast motion as per the content requirement. There are also a variety of graphic elements, like, texts, emojis, stickers, etc., which you can add to your images and videos to make them more pronounced.

04StoryArt
Enjoying the highest user ratings on a number of leading software review platforms, the StoryArt software package lands among the most popular and preferred applications to work with creating slideshows for Instagram stories. The most appealing features of the software program include, an extensive range of more than 200 premade slideshow templates which can be directly edited to create amazing Instagram feeds and stories.
Other attractive features of the slideshow creator tool include, a plethora of design effects with varying diversities of fonts, colors, filters and around 20 elusive background themes, that are updated weekly with new additions. The program comes with a clean and responsive interface, is free to use and conforms with Windows and MacOs devices.
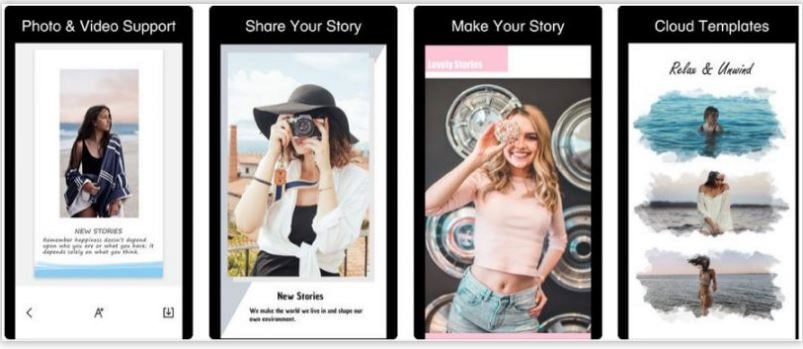
05Unfold
Unfold is quite a reliable software tool for creating elegant Instagram story slideshows from a storehouse of preset design templates, while adding a series of inline video and image editing effects to the same. The tool’s slideshow creator package comes with a mix of free and premium features, and does not require the account creation formality to begin working.
Major attractions of the program consist of 25 free and more than 60 premium slideshow design templates, 5 different font styles and upgraded text customizations, high resolution slideshow output and a direct share facility. You can prefer to download the software application from the various iOS and Android app stores, and work with the same on your preferred laptops, desktops and smartphones, without worrying about device compatibility.

06Canva
Canva is conveniently counted among the best Instagram slideshow maker tools and has the possibly the vastest inventory of over 60, 000 beautiful premade slideshow templates to create the mot captivating Instagram stories. Working with the tool, you are granted the liberty to select from a hoard of around 1 million stock images to set the most perfect background for the slideshow being created.
Additional features of the software comprise of high end image customization effects, fonts, transitions, texts and filters, with a never ending variety of frames, textures, icons, badges and stickers. If this is not enough, you get to access a diverse library of high end design elements, like, photo vignette, design grids, image enhancer and photo blur, to compliment your Instagram slideshow stories with the most cherished visual effects.
Talking of the platform cohesiveness, you can work with the tool through its desktop download as well as a free installation from any of the Android or Apple app stores.

07Adobe Spark
This one is a family of graphic design software and tools that conveniently boasts of its extensive credibility towards facilitating the creation of high resolution and engaging image and video slideshows to uplift the conventional feeds and stories of Instagram. Post the creation process, you can add a diversity of audio-visual effects, like, animations, sounds, fonts, text layouts, cutouts and design elements to further enhance your graphic artwork.
The application greets you with the most pleasing and easy to use workspace, which would never require you to be a graphic design expert to start working on the slideshows. If you are into creating video centered Instagram story slideshows, you can choose to work with animated videos and prefer to select the media from your device gallery as well as the software’s huge in-house video collection. The tool’s template library is a further amusement, with a countless number of story and message centered themes.
08PhotoGrid
If you are explicitly keen on creating video and photo collages for a jaw dropping Instagram story, consider working with the aforesaid application without a second thought. What’s more exciting is that the software comes with a huge set of over 300 pre made design templates to exclusively craft beautiful slideshows for Instagram stories on any iOS and Android device.
Talking of the app’s set of editing features, apart from being packed with multiple text fonts, over 60 image filters and 90 slideshow backgrounds, the most striking characteristic of the tool is, it permits you to clip an object from an image and remove the latter’s background. Other utilities of the software comprise of a real-time selfie camera, that clicks and automatically beautifies the captured image, beauty enhancing features that can apply and remove makeup from profile shots and selfies.
09Typorama
The next entry in the list is the Typorama software tool, which you can use to create text based slideshows for your Instagram stories. The software’s fonts library is full of elusive typographic designs to choose the best one that suits your content style and arrangement within the slideshow. When opting to work with this feature of the software, you will only need to select a suitable background and begin typing. That’s it!
Extending the text styling credibility of the tool a bit more, you can select from over 50 different typographic layouts and more than 100 typeface and font choices, a huge collection of story based quotes and a diversity of shadows, distortion effects and gradients to improvise your text. The program additionally consists of over 1000 stock templates, image filters, overlays and correction tools to enhance your slideshow background.
10Microsoft Hyperlapse
This one is an advanced slideshow creator program that allows you to design Instagram stories slideshow in time lapse. You can work with the tool to modify the slideshow speed up to 32 times ahead of the normal and create time lapse stories for a maximum of 20 minutes directly on your smartphone.
The app specializes in creating high end video slideshows for Instagram stories and feeds, while showing a great compatibility with high resolution videos. The working interface is super easy to understand and use, without requiring any over the top technical expertise. Feel free to use the app on any iOS or Android supported smartphone.
Part 4 Tips for Enhancing Your Insta Story Slideshow
By far, you have come a long way reading through the credibility, usage and tools to create Instagram story slideshow free of cost as well as though paid subscriptions. In the following section of this article, let us keep our focus on learning about some of the most amazing tips and tricks to upgrade your Insta story slideshow to the next level:
● A Compact Photo Album
Do you land among those social media freaks how want to share just every moment of your day with your peers, or are you confused on selecting the best photos and videos of a cherished event, vacation or bringing home a new utility and end up posting a heap of media on your social media handles?
If your answer is a guilty ‘Yes’, you can try on giving up the habit now by creating an Instagram story photo slideshow to share mini album of your most loved images from the event or vacation. You can use the feature to create a collection of amazing videos as well and share it too with your friends on social media without the guilt of becoming a feed-hog.
Want a practical experience of using Instagram slideshows? See through the following tutorial to understand the exact creation process:
Step 1: Choose the First Image
Begin with selecting the first image for your slideshow, just as you would ideally do for a normal, single image Instagram feed and long press the same.
Step 2: Confirming the Selection
Navigate to the bottom right corner of your selected image to locate a button similar to a photo slideshow. Tap the button to see a ‘1’ inscribed in a blue circle appear on your chosen image.
Step 3: Make Further Selections
You can now proceed to select other images or videos for the slideshow, in a similar fashion as the first one. You are allowed to include a maximum of 10 media files within the slideshow.
Step 4: Customize Your Creation
Tap the ‘Next’ button when you have finished making the required selections. The editor interface will now open to let you customize the selected images with a series of effects and filters, both one at a time, as well as the entire set altogether. You can also work with modifying the order of appearance of the photos and videos if required.
Step 5: The Final Touches
Once you are done with the editing process, continue to follow the remaining steps, as you would do to create a normal Instagram post. You can include captions, locations and tag your peers on the platform.
Step 6: Time to Share!
Your Instagram slideshow is ready to be posted. Upload it either to your feed or story to receive a hoard of likes and comments!
● Animated Text Overlays
If your Instagram story slideshows are missing out on the visual spunk, try complimenting their images and videos with animated transitions and text overlays. Short and quick animations are the best ways to enhance a slideshow story with an eye catching effect. Applying a variety of text overlays would help to keep the audience curious about the next visual delight.
● Prefer a Vertical Aspect Ratio
While the landscape mode tends to ward off certain portions of the visual media from a slideshow being played across multiple sized screens, using the portrait mode with a vertical aspect ratio suits best to almost every screen size. Taking care of this fact will ensure that your audience does not get distracted with the semi visible contents of the slideshow story.
● Choose Your Editing Effects Wisely
Regardless of the slideshow creation tool you prefer, there are a diversity of effects, templates, design elements and filters to uplift your craft with the perfect look. However, you should be cautious enough while making your choice so that the balance of colors, fonts and themes is affordably maintained, lest you would end up with a messy and loud Instagram story slideshow, that would not gather much appeal.
● Creating Instagram Story Slideshows with Wondershare Filmora
Wondershare Filmora Video Editor is the undisputed leader in creating awesome slideshows for Instagram stories, packed with a diverse number of graphic design tools. Beginning to discuss about the reserve of features that the software promises to offer, the app’s template library is a trunk of the most expressive and elegant slideshow backgrounds, themes and images.
For Win 7 or later (64-bit)
For macOS 10.12 or later
Moving further, the app has recently added the 1:1 aspect ratio to its image and video resolution alternatives to exclusively adhere to the slideshow design concern, allowing the perfect display of your craft across a variety of screen dimensions. Filmora, an advanced version of the basic Filmora editor program is known to most effectively cater to the concern of creating Instagram story slideshows.
Working with this slideshow creator program, you can explore your editing skills to your heart’s content and supplement the images and videos of your slideshow with the most expanded range of audio-visual effects, seamless animated transitions, text overlays, thematic backgrounds and creative image filters. The app comes to you absolutely free of cost and welcomes you with a pleasing and clean interface, and is compatible with all of your Mac, iOS and Windows supported devices and Android smartphones.
● Ending Thoughts →
● Instagram story slideshows are the newest trends of professional and commercial information sharing and personalized fun and entertainment.
● When looking through alternatives to create Instagram slideshow online or through an application software, there is a heap of creator tools.
● Pick the Wondershare Filmora slideshow creator program to design the most sparked up slideshows for your Instagram stories.
Instagram reels and stories have turned into convenient ways of exploring your video creation skills with fun. Read further to know about the top 10 apps to create amazing Insta story slideshows!
In this article
01 [What’s Instagram Story Slideshow](#Part 1)
02 [How to Use Instagram Slideshow?](#Part 2)
03 [Top 10 Apps for Making Instagram Story Slideshow (iOS & Android)](#Part 3)
04 [Tips for Enhancing Your Insta Story Slideshow](#Part 4)
Part 1 What’s Instagram Story Slideshow
With the growing influence of social media on the global life and work culture in today’s times, each and every event on such platforms becomes the new trend of the current IT impacted society. Speaking in the light of the newest developments, Instagram story slideshows have become the latest talk of the diverse range of social media communities across the web.
Since its entry into the communication galore, the Instagram application has emerged as an absolute favourite of social media freaks, thanks to its already captivating features. Moving ahead with its customary user appealing efforts, the latter has recently introduced the slideshow feature to upgrade and improvise its content stories and reels.
Working with the same, you can now integrate your otherwise simple and elementary Instagram stories into awesome slideshows. This visibly means that your conventional stories and reels on the app are now going to get that missing spark with a plethora of customizable motion graphic features. An Instagram story slideshow can work to earn you a huge number of followers, thus uplifting your social creativity quotient and entertainment appeal.
These creative 15 second snippets are appreciably the most amazing trends to increase your audience backup as a market organization, business enterprise, an influencer or as a rising star, all because of an excellent content presentation strategy and catchy outlook. Try hands at using this high end graphic presentation utility to attract the most awaited jaw dropping appreciation of your social media posts.
Part 2 How to Use Instagram Slideshow
Now that you are aware about the excitement and social buzz that your Instagram story slideshows can create with an immediate effect, the aforesaid reason is sufficient enough to motivate you towards diving deeper into the interesting ways of working with the feature to your maximum advantage. Adhering to the concern, let us proceed with learning about the most appealing trends to use an Instagram slideshow in the following section:
● Stepwise Tutorials and Visual Guides
The utility of Instagram slideshows to merge multiple images and videos together has blocked the interruption of additional feeds amid the content presentation, thus giving you the liberty to post a set of related videos and stills in one go, which can be of great help when you encounter a need to share tutorial videos, recipe follow ups and alike content that essentially requires a sequential presentation.
The Instagram stories slideshow can be useful to DIY creators who wish to demonstrate or guide their followers to create stunning examples of self-designed masterpieces. Posting step wise guides with clear cut instructions to work upon or use something, like that of a new product, can also be catered with an Instagram slideshow story.
● Product Advertising and Sale
If you are looking for impressive and cost effective solutions to launch your products among potential customers, consider taking the help of Instagram slideshows. The feature is known to deliver excellent results in the brand promotion of some particular products, such as jewelry and apparel design.
Jewelers, furniture retailers and textile designers can work with the slideshow to upload a series of images and videos for a clear and vivid demonstration of the product. Considering the fact that such commodities may greatly differ in their visual and actual appearance, the products can be shown through a variety of angles to facilitate viewers with the most comprehensive and an almost exact presentation of the different aspects that a product claims to have.
Part 3 Top 10 Apps for Making Instagram Story Slideshow (iOS & Android)
By now, you must have had a comprehensive understanding of the significance of Instagram story slideshows in uplifting different aspects of your content delivery, along with effectively addressing your diverse and large scale information sharing needs. Moving ahead with our discussion, let us browse through some of the best software solutions to create the most appealing Instagram story slideshows in the following section:
01SlideLab
Starting with the list the first application to look forward on creating over the top Instagram story slideshows with utmost ease. The software package is loaded with an extensive range of editing effects and filters, audio-visual transitions and supplementary design elements, that promise you of a high resolution, professional quality slideshow output.
Working with the software, you get the flexibility to conveniently customize the sequence in which the images would appear in the slideshow, with allowing a maximum screen display time of 3 seconds to each image. The created slideshows can be easily shared on various media handles and platforms, including Instagram, Facebook and YouTube.
While you can undertake a free trial of the tool, a paid subscription of the same costing $ 4.99 is required for accessing the complete range of features associated with the program. The software is however, exclusively compatible with iOS supported devices.
02VivaVideo
This one is an excellent video editor and graphic designer tool, which you can use to create and share amazing slideshows to complement your Instagram stories and feeds. Working with the aforesaid software program, you don’t need to worry about the concerns of device compatibility, as the program works well with your favorite MacOs and Windows supported systems and devices.
Talking of the specific features that the software promises to offer, you can use its built in camera to capture high resolution videos and supplement them with over 60 high end customization utilities, like sound effects and transitions, along with dubbing the video. The basic version of the tool is available for free usage and allows you to choose between the Pro and Quick modes, respectively for a high flexibility and an escalated automated response.
The free version is however, known to leave watermarks on the created videos, is stuffed with frequently appearing ads and permits a 5-minute presentation time. You can escape these hustles anytime by subscribing to the paid version of VivaVideo for $ 2.99.
03InShot
The InShot image and video editor program is another potential candidate to be employed as an Instagram story slideshow creator. The software’s effect library is packed with a heap of conveniently usable design elements and features to create the most beautiful Instagram slideshows. The app can be put to use for efficiently designing Instagram stories to address personal and professional concerns.
Some over the top features of the tool include, the flexibility to crop, trim, cut and merge video files, and uplift them with a range of effects, filters, transitions and backgrounds. The exclusive audio flexibility of the software allows you to add upbeat sound and music, while enabling a choice of fading music in and out.
The software additionally permits to adjust the speed control of your videos, making them run in a slow or fast motion as per the content requirement. There are also a variety of graphic elements, like, texts, emojis, stickers, etc., which you can add to your images and videos to make them more pronounced.
04StoryArt
Enjoying the highest user ratings on a number of leading software review platforms, the StoryArt software package lands among the most popular and preferred applications to work with creating slideshows for Instagram stories. The most appealing features of the software program include, an extensive range of more than 200 premade slideshow templates which can be directly edited to create amazing Instagram feeds and stories.
Other attractive features of the slideshow creator tool include, a plethora of design effects with varying diversities of fonts, colors, filters and around 20 elusive background themes, that are updated weekly with new additions. The program comes with a clean and responsive interface, is free to use and conforms with Windows and MacOs devices.
05Unfold
Unfold is quite a reliable software tool for creating elegant Instagram story slideshows from a storehouse of preset design templates, while adding a series of inline video and image editing effects to the same. The tool’s slideshow creator package comes with a mix of free and premium features, and does not require the account creation formality to begin working.
Major attractions of the program consist of 25 free and more than 60 premium slideshow design templates, 5 different font styles and upgraded text customizations, high resolution slideshow output and a direct share facility. You can prefer to download the software application from the various iOS and Android app stores, and work with the same on your preferred laptops, desktops and smartphones, without worrying about device compatibility.
06Canva
Canva is conveniently counted among the best Instagram slideshow maker tools and has the possibly the vastest inventory of over 60, 000 beautiful premade slideshow templates to create the mot captivating Instagram stories. Working with the tool, you are granted the liberty to select from a hoard of around 1 million stock images to set the most perfect background for the slideshow being created.
Additional features of the software comprise of high end image customization effects, fonts, transitions, texts and filters, with a never ending variety of frames, textures, icons, badges and stickers. If this is not enough, you get to access a diverse library of high end design elements, like, photo vignette, design grids, image enhancer and photo blur, to compliment your Instagram slideshow stories with the most cherished visual effects.
Talking of the platform cohesiveness, you can work with the tool through its desktop download as well as a free installation from any of the Android or Apple app stores.
07Adobe Spark
This one is a family of graphic design software and tools that conveniently boasts of its extensive credibility towards facilitating the creation of high resolution and engaging image and video slideshows to uplift the conventional feeds and stories of Instagram. Post the creation process, you can add a diversity of audio-visual effects, like, animations, sounds, fonts, text layouts, cutouts and design elements to further enhance your graphic artwork.
The application greets you with the most pleasing and easy to use workspace, which would never require you to be a graphic design expert to start working on the slideshows. If you are into creating video centered Instagram story slideshows, you can choose to work with animated videos and prefer to select the media from your device gallery as well as the software’s huge in-house video collection. The tool’s template library is a further amusement, with a countless number of story and message centered themes.
08PhotoGrid
If you are explicitly keen on creating video and photo collages for a jaw dropping Instagram story, consider working with the aforesaid application without a second thought. What’s more exciting is that the software comes with a huge set of over 300 pre made design templates to exclusively craft beautiful slideshows for Instagram stories on any iOS and Android device.
Talking of the app’s set of editing features, apart from being packed with multiple text fonts, over 60 image filters and 90 slideshow backgrounds, the most striking characteristic of the tool is, it permits you to clip an object from an image and remove the latter’s background. Other utilities of the software comprise of a real-time selfie camera, that clicks and automatically beautifies the captured image, beauty enhancing features that can apply and remove makeup from profile shots and selfies.
09Typorama
The next entry in the list is the Typorama software tool, which you can use to create text based slideshows for your Instagram stories. The software’s fonts library is full of elusive typographic designs to choose the best one that suits your content style and arrangement within the slideshow. When opting to work with this feature of the software, you will only need to select a suitable background and begin typing. That’s it!
Extending the text styling credibility of the tool a bit more, you can select from over 50 different typographic layouts and more than 100 typeface and font choices, a huge collection of story based quotes and a diversity of shadows, distortion effects and gradients to improvise your text. The program additionally consists of over 1000 stock templates, image filters, overlays and correction tools to enhance your slideshow background.
10Microsoft Hyperlapse
This one is an advanced slideshow creator program that allows you to design Instagram stories slideshow in time lapse. You can work with the tool to modify the slideshow speed up to 32 times ahead of the normal and create time lapse stories for a maximum of 20 minutes directly on your smartphone.
The app specializes in creating high end video slideshows for Instagram stories and feeds, while showing a great compatibility with high resolution videos. The working interface is super easy to understand and use, without requiring any over the top technical expertise. Feel free to use the app on any iOS or Android supported smartphone.
Part 4 Tips for Enhancing Your Insta Story Slideshow
By far, you have come a long way reading through the credibility, usage and tools to create Instagram story slideshow free of cost as well as though paid subscriptions. In the following section of this article, let us keep our focus on learning about some of the most amazing tips and tricks to upgrade your Insta story slideshow to the next level:
● A Compact Photo Album
Do you land among those social media freaks how want to share just every moment of your day with your peers, or are you confused on selecting the best photos and videos of a cherished event, vacation or bringing home a new utility and end up posting a heap of media on your social media handles?
If your answer is a guilty ‘Yes’, you can try on giving up the habit now by creating an Instagram story photo slideshow to share mini album of your most loved images from the event or vacation. You can use the feature to create a collection of amazing videos as well and share it too with your friends on social media without the guilt of becoming a feed-hog.
Want a practical experience of using Instagram slideshows? See through the following tutorial to understand the exact creation process:
Step 1: Choose the First Image
Begin with selecting the first image for your slideshow, just as you would ideally do for a normal, single image Instagram feed and long press the same.
Step 2: Confirming the Selection
Navigate to the bottom right corner of your selected image to locate a button similar to a photo slideshow. Tap the button to see a ‘1’ inscribed in a blue circle appear on your chosen image.
Step 3: Make Further Selections
You can now proceed to select other images or videos for the slideshow, in a similar fashion as the first one. You are allowed to include a maximum of 10 media files within the slideshow.
Step 4: Customize Your Creation
Tap the ‘Next’ button when you have finished making the required selections. The editor interface will now open to let you customize the selected images with a series of effects and filters, both one at a time, as well as the entire set altogether. You can also work with modifying the order of appearance of the photos and videos if required.
Step 5: The Final Touches
Once you are done with the editing process, continue to follow the remaining steps, as you would do to create a normal Instagram post. You can include captions, locations and tag your peers on the platform.
Step 6: Time to Share!
Your Instagram slideshow is ready to be posted. Upload it either to your feed or story to receive a hoard of likes and comments!
● Animated Text Overlays
If your Instagram story slideshows are missing out on the visual spunk, try complimenting their images and videos with animated transitions and text overlays. Short and quick animations are the best ways to enhance a slideshow story with an eye catching effect. Applying a variety of text overlays would help to keep the audience curious about the next visual delight.
● Prefer a Vertical Aspect Ratio
While the landscape mode tends to ward off certain portions of the visual media from a slideshow being played across multiple sized screens, using the portrait mode with a vertical aspect ratio suits best to almost every screen size. Taking care of this fact will ensure that your audience does not get distracted with the semi visible contents of the slideshow story.
● Choose Your Editing Effects Wisely
Regardless of the slideshow creation tool you prefer, there are a diversity of effects, templates, design elements and filters to uplift your craft with the perfect look. However, you should be cautious enough while making your choice so that the balance of colors, fonts and themes is affordably maintained, lest you would end up with a messy and loud Instagram story slideshow, that would not gather much appeal.
● Creating Instagram Story Slideshows with Wondershare Filmora
Wondershare Filmora Video Editor is the undisputed leader in creating awesome slideshows for Instagram stories, packed with a diverse number of graphic design tools. Beginning to discuss about the reserve of features that the software promises to offer, the app’s template library is a trunk of the most expressive and elegant slideshow backgrounds, themes and images.
For Win 7 or later (64-bit)
For macOS 10.12 or later
Moving further, the app has recently added the 1:1 aspect ratio to its image and video resolution alternatives to exclusively adhere to the slideshow design concern, allowing the perfect display of your craft across a variety of screen dimensions. Filmora, an advanced version of the basic Filmora editor program is known to most effectively cater to the concern of creating Instagram story slideshows.
Working with this slideshow creator program, you can explore your editing skills to your heart’s content and supplement the images and videos of your slideshow with the most expanded range of audio-visual effects, seamless animated transitions, text overlays, thematic backgrounds and creative image filters. The app comes to you absolutely free of cost and welcomes you with a pleasing and clean interface, and is compatible with all of your Mac, iOS and Windows supported devices and Android smartphones.
● Ending Thoughts →
● Instagram story slideshows are the newest trends of professional and commercial information sharing and personalized fun and entertainment.
● When looking through alternatives to create Instagram slideshow online or through an application software, there is a heap of creator tools.
● Pick the Wondershare Filmora slideshow creator program to design the most sparked up slideshows for your Instagram stories.
Secret Source to Make a Great Stop Motion Puppet
Secret Source to Make a Stop Motion Puppetd
An easy yet powerful editor
Numerous effects to choose from
Detailed tutorials provided by the official channel
The significant difference between a stop-motion puppet and other types is that they have an armature inside. An armature is the puppet’s skeleton, a must to hold its position without sleeping for each captured frame. The stop motion puppet makeover should be precise to prevent it from breaking down or falling quickly. In addition, buying a stop-motion puppet armature might be pretty expensive, so making them by yourself is much more fun and cheaper.

To prevent any mishap during your stop-motion puppet making, your pupils should be as durable and lightweight as possible, and they must be designed based on what you will be doing and what kind of movement will be required of them. In essence, your story’s overall purpose for creating the animation will be the ultimate factor in how your character is built and designed.
In this article
01 [8 Popular Stop Motion Puppet Examples](#Part 1)
02 [How to Make a Stop Motion Puppet](#Part 2)
Part 1 8 Popular Stop Motion Puppet Examples
While wandering all through the web world, you will encounter many famous stop motion puppets. Some of them are very popular stop-motion puppets for sale, and this section of the article is about to explore eight (of them and what they stand for:
01Rudolph the Red-Nosed Reindeer

Rudolph, the Red-Nosed Reindeer, is a pleasant Christmas stop motion animated TV special in 19produced by video craft international limited. These figures starred in the perennially beloved stop motion animation Christmas special.
02Nestor the Long-Eared Christmas Donkey

The Long-Eared Christmas Donkey, Nestor is a Christmas stop motion animated TV special in 19produced by Rankin-Bass productions. The story is back in the Roman Empire days when miniature donkeys were born with very long years and kept getting into trouble. When the owner decides to throw him out of the stable, his mother sacrifices her life to save him from a blizzard.
03Santa Claus is Comin’ to Town

This is a stop-motion animation TV special in 19made by Rankin-bass productions. The story tells all about Santa Claus when he was a baby and growing up with the Kringles. The story is told and sang by a special delivery Kluger voiced by Fred Astaire.
04Negative Space
This one is one of the world’s wide appreciated and Oscar-nominated stop motion puppet animations that reflect the son and father relationship in an interactive way. It is a must to watch animation effects.

05Fantastic Mr. Fox

Fantastic Mr. Fox is a 20puppet animation movie that talks about an urban fox that cannot resist returning to his farm and must help his community survive the farmer’s retaliation.
06Coraline

Coraline is a 20Pope x animation TV series that talks about an adventurous 11-year-old girl that finds another strange world that is an idealized version of her frustrating home.
07The Nightmare before Christmas

The nightmare before Christmas is a puppet animation TV series that talks about Jack Skellington, the king of Halloween Town, and discovers Christmas town but his attempts to bring Christmas to his home result in confusion.
07Corpse bride

Corpse Bride is a puppet animated family TV series in 20talks about a shy groom practicing his wedding vow in the inadvertent presence of a deceased young woman as she rises from the grave, assuming that he has married her.
Part 2 How to Make a Stop Motion Puppet
Do you have a story, and you need some puppets to take the place of your actors, and you want to double in stop motion animation. The fact is there are different ways to create your Stop Motion Puppet, and as per your storyboard requirement, you can go with other methods. Such as, you can either use tools to build your puppet armature, otherwise can make some puppets from clothes and threads to give it a structure, else can use clay to assign a static puppet structure. It’s all your choice, so all in all what you need is:
● A Storyboard
● Puppet armature tools
● Camera setup
● Editing Software (in our case, we are going to use Wondershare Filmora Video Editor )
In this tutorial, we will be teaching you how to make stop-motion puppets in a way that is relatively cost-effective to produce durable means whose construction requires little or no time or extra equipment:

Wondershare Filmora - Best Video Editor for Mac/Windows
5,481,435 people have downloaded it.
Build unique custom animations without breaking a sweat.
Focus on creating epic stories and leave the details to Filmora’s auto features.
Start a creative adventure with drag & drop effects and endless possibilities.
Filmora simplifies advanced features to save you time and effort.
Filmora cuts out repetition so you can move on to your next creative breakthrough.
Materials:
● Ball head screws (M2.5)
● Small screws (M3)
● Ball head screws (2xand brass pipes whose diameter is less than ball head screws
● Brass plate (strips 2mm thick)
Tools:
● M3 thread tap
● M2.5 thread tap
● Screwdriver
● Pliers
● Drill press
● Drills of 2.5 mm, 2 mm, 3 mm
● Power sander
● Loctite
● File
● Bandsaw
Step
● Use the brass to mark the length of the bone
● Cut the tube according to the length
● Sandpaper or file it Square
● On both sides of the tube, use the tap to cause the tread
● Use the screws in the brass tube to screw the ball head

Step 2:
● On each sides of the brass strip, drill 2.5 mm holes
● Then, between holes of the holes you drill, drill 2.5 mm holes
● Between the other 2.5 mm holes, drill 3mm holes

Step 3:
● On the 2.5 mm holes on the sides, use the 3mm drill to create some cup
● With the 3 mm tap, cut the thread in the 2 mm holes in the middle

Step 4:
● Without damaging the holes, file the end of the strip with all the holes as close to the first 3
● From the strip, cut the parts with the first three holes
● Also, as close to the most used flyer to file the other side.
Note: Make sure you are careful while filing as this will get very hot

**Step 5:**Join all the parts together and make sure that the cup on the outer holes of the two plates is two words each other and tighten the bolts to hold the bones

Step 6: Join to strip of bras together and form a torso. Then cut the torso and form the feet

Step 7: When your puppet is the way you want it, lock teeth styles by fixing the ball head screw in place

Animation Editing:
Also, you can make a stop motion video on Filmora by considering the following factors:
● Camera Steadiness is a must for every shot you plan for Stop Motion Video. Shaking a camera is not good. Else, your video won’t be smooth.
● Ensure capture the shot under consistent light and prevent light exposure from changing on the object; otherwise, there will be inconsistency in the video.
● To make it easier, play the film in advance, as the more friends your video, the smoother the video will be.
Here are steps to make a stop motion video on Filmora:
Step 1 Place the camera steady and bring your object in the frame. Lightly move your things and capture the movement frame by frame.

Step 2 Download and start, or if you have already installed, run the Filmora program and choose a suitable frame rate in the project settings. After selecting the resolution, click on the file and go to the project setting.

Step 3 Now import the media file using the import option from the file menu and import the captured images.

Step 4 Adjust the menu’s preference or press the shortcut key Ctrl+Shift+, and a window will appear on your screen. Select the editing panel and change the photo duration between 0.2 to 0.5 seconds.

Step 5 Once done with all the settings and satisfied with the results, click on export and select your desired video format. Your video will be exported and saved in your library so you can share it with friends.

● Key Takeaways from This Episode →
● Get to know about what is stop motion puppets.
● Different examples of how dinosaur stop motion puppet or other puppet animation form works.
● The process to create your stop motion puppet and how Filmora will assist you in it.
The significant difference between a stop-motion puppet and other types is that they have an armature inside. An armature is the puppet’s skeleton, a must to hold its position without sleeping for each captured frame. The stop motion puppet makeover should be precise to prevent it from breaking down or falling quickly. In addition, buying a stop-motion puppet armature might be pretty expensive, so making them by yourself is much more fun and cheaper.
To prevent any mishap during your stop-motion puppet making, your pupils should be as durable and lightweight as possible, and they must be designed based on what you will be doing and what kind of movement will be required of them. In essence, your story’s overall purpose for creating the animation will be the ultimate factor in how your character is built and designed.
In this article
01 [8 Popular Stop Motion Puppet Examples](#Part 1)
02 [How to Make a Stop Motion Puppet](#Part 2)
Part 1 8 Popular Stop Motion Puppet Examples
While wandering all through the web world, you will encounter many famous stop motion puppets. Some of them are very popular stop-motion puppets for sale, and this section of the article is about to explore eight (of them and what they stand for:
01Rudolph the Red-Nosed Reindeer
Rudolph, the Red-Nosed Reindeer, is a pleasant Christmas stop motion animated TV special in 19produced by video craft international limited. These figures starred in the perennially beloved stop motion animation Christmas special.
02Nestor the Long-Eared Christmas Donkey
The Long-Eared Christmas Donkey, Nestor is a Christmas stop motion animated TV special in 19produced by Rankin-Bass productions. The story is back in the Roman Empire days when miniature donkeys were born with very long years and kept getting into trouble. When the owner decides to throw him out of the stable, his mother sacrifices her life to save him from a blizzard.
03Santa Claus is Comin’ to Town
This is a stop-motion animation TV special in 19made by Rankin-bass productions. The story tells all about Santa Claus when he was a baby and growing up with the Kringles. The story is told and sang by a special delivery Kluger voiced by Fred Astaire.
04Negative Space
This one is one of the world’s wide appreciated and Oscar-nominated stop motion puppet animations that reflect the son and father relationship in an interactive way. It is a must to watch animation effects.
05Fantastic Mr. Fox
Fantastic Mr. Fox is a 20puppet animation movie that talks about an urban fox that cannot resist returning to his farm and must help his community survive the farmer’s retaliation.
06Coraline
Coraline is a 20Pope x animation TV series that talks about an adventurous 11-year-old girl that finds another strange world that is an idealized version of her frustrating home.
07The Nightmare before Christmas
The nightmare before Christmas is a puppet animation TV series that talks about Jack Skellington, the king of Halloween Town, and discovers Christmas town but his attempts to bring Christmas to his home result in confusion.
07Corpse bride
Corpse Bride is a puppet animated family TV series in 20talks about a shy groom practicing his wedding vow in the inadvertent presence of a deceased young woman as she rises from the grave, assuming that he has married her.
Part 2 How to Make a Stop Motion Puppet
Do you have a story, and you need some puppets to take the place of your actors, and you want to double in stop motion animation. The fact is there are different ways to create your Stop Motion Puppet, and as per your storyboard requirement, you can go with other methods. Such as, you can either use tools to build your puppet armature, otherwise can make some puppets from clothes and threads to give it a structure, else can use clay to assign a static puppet structure. It’s all your choice, so all in all what you need is:
● A Storyboard
● Puppet armature tools
● Camera setup
● Editing Software (in our case, we are going to use Wondershare Filmora Video Editor )
In this tutorial, we will be teaching you how to make stop-motion puppets in a way that is relatively cost-effective to produce durable means whose construction requires little or no time or extra equipment:
Wondershare Filmora - Best Video Editor for Mac/Windows
5,481,435 people have downloaded it.
Build unique custom animations without breaking a sweat.
Focus on creating epic stories and leave the details to Filmora’s auto features.
Start a creative adventure with drag & drop effects and endless possibilities.
Filmora simplifies advanced features to save you time and effort.
Filmora cuts out repetition so you can move on to your next creative breakthrough.
Materials:
● Ball head screws (M2.5)
● Small screws (M3)
● Ball head screws (2xand brass pipes whose diameter is less than ball head screws
● Brass plate (strips 2mm thick)
Tools:
● M3 thread tap
● M2.5 thread tap
● Screwdriver
● Pliers
● Drill press
● Drills of 2.5 mm, 2 mm, 3 mm
● Power sander
● Loctite
● File
● Bandsaw
Step
● Use the brass to mark the length of the bone
● Cut the tube according to the length
● Sandpaper or file it Square
● On both sides of the tube, use the tap to cause the tread
● Use the screws in the brass tube to screw the ball head
Step 2:
● On each sides of the brass strip, drill 2.5 mm holes
● Then, between holes of the holes you drill, drill 2.5 mm holes
● Between the other 2.5 mm holes, drill 3mm holes
Step 3:
● On the 2.5 mm holes on the sides, use the 3mm drill to create some cup
● With the 3 mm tap, cut the thread in the 2 mm holes in the middle
Step 4:
● Without damaging the holes, file the end of the strip with all the holes as close to the first 3
● From the strip, cut the parts with the first three holes
● Also, as close to the most used flyer to file the other side.
Note: Make sure you are careful while filing as this will get very hot
**Step 5:**Join all the parts together and make sure that the cup on the outer holes of the two plates is two words each other and tighten the bolts to hold the bones
Step 6: Join to strip of bras together and form a torso. Then cut the torso and form the feet
Step 7: When your puppet is the way you want it, lock teeth styles by fixing the ball head screw in place
Animation Editing:
Also, you can make a stop motion video on Filmora by considering the following factors:
● Camera Steadiness is a must for every shot you plan for Stop Motion Video. Shaking a camera is not good. Else, your video won’t be smooth.
● Ensure capture the shot under consistent light and prevent light exposure from changing on the object; otherwise, there will be inconsistency in the video.
● To make it easier, play the film in advance, as the more friends your video, the smoother the video will be.
Here are steps to make a stop motion video on Filmora:
Step 1 Place the camera steady and bring your object in the frame. Lightly move your things and capture the movement frame by frame.
Step 2 Download and start, or if you have already installed, run the Filmora program and choose a suitable frame rate in the project settings. After selecting the resolution, click on the file and go to the project setting.
Step 3 Now import the media file using the import option from the file menu and import the captured images.
Step 4 Adjust the menu’s preference or press the shortcut key Ctrl+Shift+, and a window will appear on your screen. Select the editing panel and change the photo duration between 0.2 to 0.5 seconds.
Step 5 Once done with all the settings and satisfied with the results, click on export and select your desired video format. Your video will be exported and saved in your library so you can share it with friends.
● Key Takeaways from This Episode →
● Get to know about what is stop motion puppets.
● Different examples of how dinosaur stop motion puppet or other puppet animation form works.
● The process to create your stop motion puppet and how Filmora will assist you in it.
Also read:
- New In 2024, How to Make GIF Stickers for WhatsApp 100 The Simple Way
- New Top 7 Animated GIF Text Makers
- 6 Types of Animation You May Like
- New Before You Learn Facebook Slideshow 5 Things You Should Know for 2024
- In 2024, How You Can Turn Yourself Into Anime Character Using Anime Filter
- New Top 15 Male Anime Characters By Voting for 2024
- New Amazing Ideas About Creating Personalised WhatsApp GIF Sticker for 2024
- Updated 2024 Approved 12 Animation Video Maker That Can Triple Conversion Rates
- New 10 Cartoon Photo Converters
- New How to Draw A Skeleton Cartoon – A Step by Step Guide
- Updated Tips on How to Get Awesome Background for Slideshow in PowerPoint
- The 10 Most Adorable Aesthetic Cartoon Characters for 2024
- Updated In 2024, Make Creative Animation Videos
- New Learn How to Make Your Characters Interactive in Unity Animation Rigging for 2024
- New 2024 Approved How to Create a YouTube Intro Animation Like a Pro
- 2024 Approved The Top Free 12 GIF Meme Maker at a Glance
- New Whats Rigging Animation and Why It Matters for 2024
- Ways to Create Animated Clipart in PowerPoint
- Updated Top 10 Animated Photo Collage Apps You Should Know for 2024
- New 21 Top Free Anime Websites to Watch Anime Online-Anime for 2024
- New In 2024, Best 12 Illusion Gifs Top Picks
- Updated Make Creative Animation Videos for 2024
- Updated 26 Cool Anime Girl Names and Their Meanings for 2024
- Updated In 2024, 15 Forgotten Cartoon Characters of All Time You Used to Love
- New In 2024, 5 Best Adobe Animate Courses & Classes
- New In 2024, Learn What Are Differences Between 2D And 3D Animation
- In 2024, Adobe Animate Riggings Tutorial for You
- What This Post Can Teach You About Clay Animation for 2024
- 2024 Approved What Is Still Motion Animation?
- 5 Techniques You Never Heard of for Converting MP4 to GIF in Photoshop for 2024
- In 2024, How to Create A GIF with Sound?
- New 2024 Approved How to Make My Photo 3D Cartoon Online
- 2024 Approved What Wikipedia Cant Tell You About the 10 Batman Cartoons
- Updated The Coolest Anime Characters Ever| List of Top Favorites for 2024
- New 2024 Approved How to Make Whiteboard Animation Videos
- New Convert Animated GIF From Video
- New In 2024, How to Make Photo 3D Cartoon Online
- Updated How to Make Your Own GIF on WhatsApp in Simple Ways
- Top 4 Websites to Get Anime Footage for Free for 2024
- Updated In 2024, Best 15 Anime Fonts-Find Your Favorite One
- Updated How to Send and Add Snapchat GIFs 100 in Easy Way
- New In 2024, Tips for GIF to Animated PNG You Should Know
- Easy steps to recover deleted data from GT 5
- Easy steps to recover deleted data from Samsung
- In 2024, Easy Steps on How To Create a New Apple ID Account On iPhone SE (2022)
- Does find my friends work on Xiaomi Redmi 12 5G | Dr.fone
- Pokemon Go No GPS Signal? Heres Every Possible Solution On Vivo T2 Pro 5G | Dr.fone
- new A Comprehensive Guide to Video and Subtitle Translation with Veed.io
- Full Guide to Bypass Vivo Y27 4G FRP
- Easy steps to recover deleted call history from Itel A60
- In 2024, How to use Snapchat Location Spoofer to Protect Your Privacy On Nubia Red Magic 8S Pro+? | Dr.fone
- In 2024, 4 Most-Known Ways to Find Someone on Tinder For HTC U23 Pro by Name | Dr.fone
- In 2024, Best Samsung Galaxy A15 4G Pattern Lock Removal Tools Remove Android Pattern Lock Without Losing Data
- Title: Updated 2024 Approved 10 Scary Anime Girls That Will Make You Creepy
- Author: Elon
- Created at : 2024-06-30 12:28:18
- Updated at : 2024-07-01 12:28:18
- Link: https://animation-videos.techidaily.com/updated-2024-approved-10-scary-anime-girls-that-will-make-you-creepy/
- License: This work is licensed under CC BY-NC-SA 4.0.
