
:max_bytes(150000):strip_icc():format(webp)/GettyImages-919006240-ee5ef631cb6f4e4997bce403b8bafa77.jpg)
Updated 5 Different Animation Styles A Simple but Comprehensive Guide for 2024
5 Different Animation Styles: A Simple but Complete Guide
5 Different Animation Styles: A Simple but Comprehensive Guide

Shanoon Cox
Mar 27, 2024• Proven solutions
To whatever generation or kind one could belong to, animation style videos attract people of all ages, and you will be one of them for sure. Rather than ordinary videos, animated ones provoke diverse impacts on the audience utilizing kinesthetic, illustration, and aural. But the reality or fact is, due to overexposure to social media sites and technological advancements, we have forgotten its importance. They are on the verge of existence at present. Are you an art lover who wishes to know more about animation styles? Want to know some of the software tools that can bring out the artist in you? Here is a complete guide that is all you need.
- Part 1: 5 Different Animation Styles
- Part 2: Create Your Animation Videos with Professional Video Editor
5 Different Animation Styles
Ready to enter into the world of animation along with us? We are all set to take you through a ride of different animation styles, their importance, and some of the videos that one should give a try!
1. 2D Animation
Let’s start with 2D as our fist animation style, which is the traditional or oldest form in practice for more than 100 years since 1908. 2D has widely been in usage to create animated short films, cartoon characters, games, marketing videos, and educational materials. In 2D animation, the characters or items, creatures, and backgrounds get crafted in a two-dimensional space. It produces a graphic of movement with the drawings played serially one after another.
Recommended Software: At present, various free animator tools like Creatoon, Blender, and Pencil 2D, whereas, for professionals, Encore, Flash, Toon Boom Harmony, and Adobe Photoshop can be handy!
The above 2D animation style video is a short film “Dark Dark Woods” directed by the students at “The Animation Workshop.” It is all about the young princess, Maria, drenched, and tired of living a royal life being filled with rules, duties, lessons, responsibilities, and customs. One night, she enters into an adventurous event where she finds herself in a mysterious monster-filled dark wood. Watch the film and find did she find out there!
2. 3D Animation
As the next version of 2D, in the animation industry, 3D revolutionized the market since its first appearance in 1972. Like 2D, 3D finds applications in varied platforms like a business, education, and entertainment. Still, the difference is they are unique and created in three-dimensional space using computer graphics and cinematography techniques as well. The pictures or characters look perfected with cutting-edge technology where toy story movie is an outstanding example.
Recommended Software: One can try some of the 3D modeling software packs like Maya, Houdini, Modo, ZBrush, and Lightwave 3D.
Do you know how it feels if you are trapped alone on a deserted island? “It’s a Cinch!” is a fantastic, funny 3D short film that is an adventurous movie made by the ESMA team at CGI. For sure, you will like this funny movie all about atrocities happening with a man and a pelican and enjoy it as much as I did!
3. Motion Graphics
Our next animation style is motion graphics of the animated graphic design, where text appears to be the main enhancing factor. It is a piece of animation or digital footage that illuminates a motion or notation incorporated with audio. It is a new way of communicating to the audience and in driving them deep into the story. You can categorize it under the visual effect technique, which involves the movement of graphic images or elements like logos or text, sound, music, and motion. Motion graphics are best to be found in action and finds a place in multimedia projects, advertising agencies, branding, television title making, and storytelling.
Recommended Software: Tools that are best for motion graphics is Mocha AE, After Effects, Illustrator, and Cinema 4D.
The world is a great place, but we always forget another beautiful hidden green world behind the fantastic buildings we reside in. Yes, “Beautiful World” is a motion graphic video by Blasterjaxx & DBSTF feat. Ryder presents how we humans have developed a great empire by destroying the other beautiful part of the world.
4. Stop Motion
Stop motion is one of the traditional animation styles that is the most popular filmmaking technique that uses hand-crafted or manipulated objects, mostly clay models. Puppets, silhouettes, and cut-outs can also be implemented as stop motion aids to produce animation. It is labor-intensive, a form of art, and has its flavor in animation, although 3D and visual effects have replaced it quite a long time before. But still, filmmakers like Tim Burton use stop motion in their films, making it to withstand the animation industry.
Recommended Software: You can make your stop motion video with software like Dragon frame, Stop Motion Pro Eclipse, and IKITMovie.
Although stop motion has gone before ages, there is still a fantastic introduction. Here is an award-winning short film, “Tokri (the basket),” which is a clumsy accident that leads a juvenile girl onto Mumbai’s streets with the trust of making things correct. Studio Eeksaurus, an Indian bastion animation company, has depicted a father and daughter’s tender emotive tale.
5. Paint-On-Glass Animation
Here is a Paint-on-Glass animation style that is a technique used for making animated films that gives a lot of fun. Artists paint short stories on glasses using oil paints and film them by recording it frame-by-frame. Russian animator Aleksandr Petrov is a famous artist well known for making award-winning paint-on-glass animation. Animators use different objects like brick dust, sand, pastels, and charcoal, to create outstanding drama in their films.
Recommended Software: You can also become a paint-on-glass animator now with tools like Pencil 2D, Blender, Krita, and GIMP.
Suppose you are wondering whether you could find any paint-on-glass animated movie on social media sites. In that case, there are numerous animated films, like “The Old Man and the Sea,” and “My Love,” produced by the experts of pictures of Aleksandr Petrov animation. Surprisingly, this bind-blowing introduction is a result of oil paints on a sheet of glass.
Conclusion
Do you aspire to become an animator and come up painting bright colors to videos? Choose animation styles that you most enjoy, find attractive today, and start working on it. Lastly, do not forget to give Filmora a chance to uplift your creation and give your animation style a life!
Shanoon Cox
Shanoon Cox is a writer and a lover of all things video.
Follow @Shanoon Cox
Shanoon Cox
Mar 27, 2024• Proven solutions
To whatever generation or kind one could belong to, animation style videos attract people of all ages, and you will be one of them for sure. Rather than ordinary videos, animated ones provoke diverse impacts on the audience utilizing kinesthetic, illustration, and aural. But the reality or fact is, due to overexposure to social media sites and technological advancements, we have forgotten its importance. They are on the verge of existence at present. Are you an art lover who wishes to know more about animation styles? Want to know some of the software tools that can bring out the artist in you? Here is a complete guide that is all you need.
- Part 1: 5 Different Animation Styles
- Part 2: Create Your Animation Videos with Professional Video Editor
5 Different Animation Styles
Ready to enter into the world of animation along with us? We are all set to take you through a ride of different animation styles, their importance, and some of the videos that one should give a try!
1. 2D Animation
Let’s start with 2D as our fist animation style, which is the traditional or oldest form in practice for more than 100 years since 1908. 2D has widely been in usage to create animated short films, cartoon characters, games, marketing videos, and educational materials. In 2D animation, the characters or items, creatures, and backgrounds get crafted in a two-dimensional space. It produces a graphic of movement with the drawings played serially one after another.
Recommended Software: At present, various free animator tools like Creatoon, Blender, and Pencil 2D, whereas, for professionals, Encore, Flash, Toon Boom Harmony, and Adobe Photoshop can be handy!
The above 2D animation style video is a short film “Dark Dark Woods” directed by the students at “The Animation Workshop.” It is all about the young princess, Maria, drenched, and tired of living a royal life being filled with rules, duties, lessons, responsibilities, and customs. One night, she enters into an adventurous event where she finds herself in a mysterious monster-filled dark wood. Watch the film and find did she find out there!
2. 3D Animation
As the next version of 2D, in the animation industry, 3D revolutionized the market since its first appearance in 1972. Like 2D, 3D finds applications in varied platforms like a business, education, and entertainment. Still, the difference is they are unique and created in three-dimensional space using computer graphics and cinematography techniques as well. The pictures or characters look perfected with cutting-edge technology where toy story movie is an outstanding example.
Recommended Software: One can try some of the 3D modeling software packs like Maya, Houdini, Modo, ZBrush, and Lightwave 3D.
Do you know how it feels if you are trapped alone on a deserted island? “It’s a Cinch!” is a fantastic, funny 3D short film that is an adventurous movie made by the ESMA team at CGI. For sure, you will like this funny movie all about atrocities happening with a man and a pelican and enjoy it as much as I did!
3. Motion Graphics
Our next animation style is motion graphics of the animated graphic design, where text appears to be the main enhancing factor. It is a piece of animation or digital footage that illuminates a motion or notation incorporated with audio. It is a new way of communicating to the audience and in driving them deep into the story. You can categorize it under the visual effect technique, which involves the movement of graphic images or elements like logos or text, sound, music, and motion. Motion graphics are best to be found in action and finds a place in multimedia projects, advertising agencies, branding, television title making, and storytelling.
Recommended Software: Tools that are best for motion graphics is Mocha AE, After Effects, Illustrator, and Cinema 4D.
The world is a great place, but we always forget another beautiful hidden green world behind the fantastic buildings we reside in. Yes, “Beautiful World” is a motion graphic video by Blasterjaxx & DBSTF feat. Ryder presents how we humans have developed a great empire by destroying the other beautiful part of the world.
4. Stop Motion
Stop motion is one of the traditional animation styles that is the most popular filmmaking technique that uses hand-crafted or manipulated objects, mostly clay models. Puppets, silhouettes, and cut-outs can also be implemented as stop motion aids to produce animation. It is labor-intensive, a form of art, and has its flavor in animation, although 3D and visual effects have replaced it quite a long time before. But still, filmmakers like Tim Burton use stop motion in their films, making it to withstand the animation industry.
Recommended Software: You can make your stop motion video with software like Dragon frame, Stop Motion Pro Eclipse, and IKITMovie.
Although stop motion has gone before ages, there is still a fantastic introduction. Here is an award-winning short film, “Tokri (the basket),” which is a clumsy accident that leads a juvenile girl onto Mumbai’s streets with the trust of making things correct. Studio Eeksaurus, an Indian bastion animation company, has depicted a father and daughter’s tender emotive tale.
5. Paint-On-Glass Animation
Here is a Paint-on-Glass animation style that is a technique used for making animated films that gives a lot of fun. Artists paint short stories on glasses using oil paints and film them by recording it frame-by-frame. Russian animator Aleksandr Petrov is a famous artist well known for making award-winning paint-on-glass animation. Animators use different objects like brick dust, sand, pastels, and charcoal, to create outstanding drama in their films.
Recommended Software: You can also become a paint-on-glass animator now with tools like Pencil 2D, Blender, Krita, and GIMP.
Suppose you are wondering whether you could find any paint-on-glass animated movie on social media sites. In that case, there are numerous animated films, like “The Old Man and the Sea,” and “My Love,” produced by the experts of pictures of Aleksandr Petrov animation. Surprisingly, this bind-blowing introduction is a result of oil paints on a sheet of glass.
Conclusion
Do you aspire to become an animator and come up painting bright colors to videos? Choose animation styles that you most enjoy, find attractive today, and start working on it. Lastly, do not forget to give Filmora a chance to uplift your creation and give your animation style a life!
Shanoon Cox
Shanoon Cox is a writer and a lover of all things video.
Follow @Shanoon Cox
2D Character Animation: Everything You Should Know About It
2D Character Animation: Everything You Should Know About It
An easy yet powerful editor
Numerous effects to choose from
Detailed tutorials provided by the official channel
2D character animation is one of the significant kinds of animation popularly used for creating animated movies, marketing videos, cartoons, advertisements, educational content, corporate presentations, video games, etc.
With the popularity of video content, more and more businesses tend to use animation for promotion, as they magnify conversion rates by 20%. Some companies hire 2D character animation services; others try to make them online with software help.
In this article
01 [What is 2D Character Animation and What Does 2D Animation Do?](#Part 1)
02 [2D Character Animation Tips and Tricks](#Part 2)
03 [An Ultimate Guide to Create 2D Character Animation Online](#Part 3)
04 [5 Great 2D Character Animation Templates](#Part 4)
Part 1 What is 2D Character Animation and What Does 2D Animation Do?
2D animation is identified by having its characters and objects created in a 2D space. It means that they only have height and width to specify.
However, 2D animation is considered a traditional style, known from the 1800s. Initially, it was designed by merging the frames in which one drawing was followed by another and making them different; every second consists of 24 frames.
We all remember the classic Disney animations. Snow White and the Seven Dwarfs, The Little Mermaid, Bambi, etc. They are some of the highly famous 2D animation styles.
With the advancement of computer technologies, this process also got digitized through various 2D character animation software.
In this guide, we’ll talk about everything relatable to 2D character animation, and let’s proceed with the expert tips and tricks to create inspirational style within animation character 2D.
Part 2 2D Character Animation Tips and Tricks
01Look for a real-time reference
Using a real-world reference for 2D character animation can help you effectively animate faces. For example, when studios collaborate with voice-over artists, they often record their facial movements. It further helps 2D animators to ensure their expressions get captured convincingly.
If it seems impossible, you can consider using your face, so you have something to refer back to. You could also use a mirror and utter the words your character will speak. It will display the correct animated expressions.
02Observe real life
You need to use observation a lot more. One of the primary aspects of 2D character animation is bringing life to animate objections. Therefore, you must carefully consider how emotion can get portrayed and select each movement accordingly.
Take time watching how people in real-life environments talk and interact with each other, how they express emotions, how they move, etc. Please don’t spend much time doing this, as it is valuable to research.
03Simplicity is the key
2D character animation is never complex compared with 3D. Think carefully before creating a scene too complicated. You must not include too much information, which is hard to digest, and you may even find yourself compromising the scene’s realism. Try not to heavy the stage with too many pose changes or other elements, and keep it genuine.
04Draw animation again and again
Drawing animation consumes a lot of time. You can’t complete it within one day, so you better know deep down that one task only can be done after you have revamped it various times. For 2D character animation, you may need to draw objects on paper several times.
You can’t master the skill of animation character 2D quickly. Luckily, all pains will be relieved someday.
05Feedback is important
Feedback is an essential element of artistic development. It’s wise to actively seek out feedback from familiar figures who can help you enhance. Naturally, we may see work we have invested a great deal of time and effort indifferently to someone not so involved in the creative process. Feedback can equate to a valuable learning opportunity that will assist you produce the results hit the spot much more appropriately.
Part 3 An Ultimate Guide to Create 2D Character Animation Online
Let’s now look at making an illustrated 2D character animation move on a screen.
While there are nearly numerous options for 2D character animation tools and software, this tutorial will animate a character in Adobe After Effects.
Steps to create 2D character animation After Effects
01Step 1: Download and Install Duik
You need to install the Duik animation plugin for Adobe After Effects to simplify the whole process. You can animate and rig characters’ entire limbs with Duik using just the placement of their feet and hands.
While this isn’t an essential step, it can be valuable for beginners, as you’ll see in this tutorial. Luckily, Duik is available for free from Rainbox Laboratory.
02Step 2: Design Your Character
You need a moving character before you’re able to start animating. You can create this character in Adobe Illustrator and import it into After Effects.
Try creating a straightforward character with an aim on the character’s limbs.
In the example mentioned below, you can see that the body is a very rudimentary shape—a circle—with long legs that make it simple to consider the animation process.

Check the character’s joints. Making a round joint between the lower and upper parts of the legs, for instance, will help the character move more smoothly.

03Step 3: Make and Import Your Character Artwork
Now, you’ll need to make a few final adjustments before moving your character artwork. Break your character out into layers firstly. Every section of the character that will move independently needs a separate layer.
So, layers include his circular body, face, and the leg’s segments (i.e., lower leg, upper leg, and foot).

To import your character artwork, go to File, click the Import tab, and choose your character file. Ensure that you need to import it as a composition to ensure it includes the layers you just created.
04Step 4: Establish Initial Character Rigging
Now, the 2D character animation is almost over by the initial rigging.
Firstly, lower the opacity of all your layers to above 50% to see the critical joints within the character.
Next, you must ensure that the joints hinge in the ideal direction. It’s simple to do with the anchor point tool. For each character’s layer, place the anchor point at the center of gravity for each layer of the 2D character animation.
The anchor point would probably go between the eyes for the layer of the face (i.e., the nose, eyes, and mouth). For each legs’ section, hold the anchor point where the leg will hinge (e.g., the anchor point would be at the highest point for the leg’s upper portion, where it meets the body).

Then, use the parent tool to join the limbs’ sections. For instance, the parent of the foot would be the lower leg, and the upper portion is the parent of the lower leg.
It makes sure that the leg moves together as one unit with multiple hinge points.
Finally, use the Duik toolbar to create character controllers. Controllers control the rotation and position of critical elements within your character. For the ankles of the 2D character animation, you would select the controller that encompasses both the rotation and position.
05Step 5: Create Your Rig
Use the Duik toolbar to create a rig. Select each layer from the extremities inward from each limb, lasting with your controllers.
You would select the ankle for a leg, followed by the upper portion, the lower leg, and conclusively, the controller at the ankle. Then, select auto-rig within the Rigging area of the Duik toolbar.
The entire leg will move when you move that ankle controller. If your character contains them, repeat the process for the other leg, along with other limbs.
Before proceeding, test the limbs to make sure they hinge and move correctly. You need to adjust the opacity of the character back to 100% once you are satisfied with the movements.

06Step 6: Start Animating Your Character
You can begin animating after completing a rig. First, create keyframes—the ending and beginning points of the character’s movement. The character’s legs are at their most magnified are thus the endpoints for a walk cycle. Make sure that the beginning and ending of keyframes are identical to get an ideal loop.
Start adding in-between frames from there, like when one leg crosses over the other in the middle of a walking stride.
Moreover, you can add ‘easing” to the animation via 2D character animation After Effects’ Easy Ease tab, located under the Animation button, and Keyframe Assistant.
It will smoothen the transition between the keyframes. You will have a primary walking sequence at this instance.

Now, you can make further refinements to add detail and secondary movement, like a bobbing motion of the head. You can also modify elements like the keyframe velocity, further smoothing out the animation.
As you practice, you’ll get a better feel for your animation preferences and develop more advanced realistic 2D animation character design capabilities.
Part 4 5 Great 2D Character Animation Templates
1 – FrameStory Character Animation Toolkit
2 – Explainer Video Character Animation ToolKit
3 – 2D Character Animation After Effects Template
4 – Character Animation ToolKit
5 – Rigged Character Animation Mockup Template
Given above is a list of the best 2D character animation templates worth considering. Yet, if you are tired of using After Effects Templates, why not select Wondershare Filmora Template Mode?
It is a brand-new mode recently launched by Filmora to ramp up your story. It is a simplistic way to use compared with After Effects.
****Wondershare Filmora Video Editor Template Mode**
For Win 7 or later (64-bit)
For macOS 10.12 or later
Filmora Template Mode is a bold breakthrough that helps you create incredible videos in a minute. Forget about dragging n dropping the video clips into a timeline; Filmora template Mode provides you a new way of generating videos automatically by using various stylish video templates.
Steps to create a stunning animated video in 3 levels
01Step 1: Choose a template
Pick up a video template that best suits your needs.

02Step 2: Import Media
Import at least three video clips or images and let AI assist you in ramping the production process without hassle.

03Step 3: Export Project
Export media among multiple social media platforms.

● Key Takeaways from This Episode →
● Understanding 2D character animation tips and tricks
● A step by step guide to creating 2D character animation online
● Five best 2D character animation templates
● The best alternative of using the Template mode directly within the Wondershare Filmora
2D character animation is one of the significant kinds of animation popularly used for creating animated movies, marketing videos, cartoons, advertisements, educational content, corporate presentations, video games, etc.
With the popularity of video content, more and more businesses tend to use animation for promotion, as they magnify conversion rates by 20%. Some companies hire 2D character animation services; others try to make them online with software help.
In this article
01 [What is 2D Character Animation and What Does 2D Animation Do?](#Part 1)
02 [2D Character Animation Tips and Tricks](#Part 2)
03 [An Ultimate Guide to Create 2D Character Animation Online](#Part 3)
04 [5 Great 2D Character Animation Templates](#Part 4)
Part 1 What is 2D Character Animation and What Does 2D Animation Do?
2D animation is identified by having its characters and objects created in a 2D space. It means that they only have height and width to specify.
However, 2D animation is considered a traditional style, known from the 1800s. Initially, it was designed by merging the frames in which one drawing was followed by another and making them different; every second consists of 24 frames.
We all remember the classic Disney animations. Snow White and the Seven Dwarfs, The Little Mermaid, Bambi, etc. They are some of the highly famous 2D animation styles.
With the advancement of computer technologies, this process also got digitized through various 2D character animation software.
In this guide, we’ll talk about everything relatable to 2D character animation, and let’s proceed with the expert tips and tricks to create inspirational style within animation character 2D.
Part 2 2D Character Animation Tips and Tricks
01Look for a real-time reference
Using a real-world reference for 2D character animation can help you effectively animate faces. For example, when studios collaborate with voice-over artists, they often record their facial movements. It further helps 2D animators to ensure their expressions get captured convincingly.
If it seems impossible, you can consider using your face, so you have something to refer back to. You could also use a mirror and utter the words your character will speak. It will display the correct animated expressions.
02Observe real life
You need to use observation a lot more. One of the primary aspects of 2D character animation is bringing life to animate objections. Therefore, you must carefully consider how emotion can get portrayed and select each movement accordingly.
Take time watching how people in real-life environments talk and interact with each other, how they express emotions, how they move, etc. Please don’t spend much time doing this, as it is valuable to research.
03Simplicity is the key
2D character animation is never complex compared with 3D. Think carefully before creating a scene too complicated. You must not include too much information, which is hard to digest, and you may even find yourself compromising the scene’s realism. Try not to heavy the stage with too many pose changes or other elements, and keep it genuine.
04Draw animation again and again
Drawing animation consumes a lot of time. You can’t complete it within one day, so you better know deep down that one task only can be done after you have revamped it various times. For 2D character animation, you may need to draw objects on paper several times.
You can’t master the skill of animation character 2D quickly. Luckily, all pains will be relieved someday.
05Feedback is important
Feedback is an essential element of artistic development. It’s wise to actively seek out feedback from familiar figures who can help you enhance. Naturally, we may see work we have invested a great deal of time and effort indifferently to someone not so involved in the creative process. Feedback can equate to a valuable learning opportunity that will assist you produce the results hit the spot much more appropriately.
Part 3 An Ultimate Guide to Create 2D Character Animation Online
Let’s now look at making an illustrated 2D character animation move on a screen.
While there are nearly numerous options for 2D character animation tools and software, this tutorial will animate a character in Adobe After Effects.
Steps to create 2D character animation After Effects
01Step 1: Download and Install Duik
You need to install the Duik animation plugin for Adobe After Effects to simplify the whole process. You can animate and rig characters’ entire limbs with Duik using just the placement of their feet and hands.
While this isn’t an essential step, it can be valuable for beginners, as you’ll see in this tutorial. Luckily, Duik is available for free from Rainbox Laboratory.
02Step 2: Design Your Character
You need a moving character before you’re able to start animating. You can create this character in Adobe Illustrator and import it into After Effects.
Try creating a straightforward character with an aim on the character’s limbs.
In the example mentioned below, you can see that the body is a very rudimentary shape—a circle—with long legs that make it simple to consider the animation process.
Check the character’s joints. Making a round joint between the lower and upper parts of the legs, for instance, will help the character move more smoothly.
03Step 3: Make and Import Your Character Artwork
Now, you’ll need to make a few final adjustments before moving your character artwork. Break your character out into layers firstly. Every section of the character that will move independently needs a separate layer.
So, layers include his circular body, face, and the leg’s segments (i.e., lower leg, upper leg, and foot).
To import your character artwork, go to File, click the Import tab, and choose your character file. Ensure that you need to import it as a composition to ensure it includes the layers you just created.
04Step 4: Establish Initial Character Rigging
Now, the 2D character animation is almost over by the initial rigging.
Firstly, lower the opacity of all your layers to above 50% to see the critical joints within the character.
Next, you must ensure that the joints hinge in the ideal direction. It’s simple to do with the anchor point tool. For each character’s layer, place the anchor point at the center of gravity for each layer of the 2D character animation.
The anchor point would probably go between the eyes for the layer of the face (i.e., the nose, eyes, and mouth). For each legs’ section, hold the anchor point where the leg will hinge (e.g., the anchor point would be at the highest point for the leg’s upper portion, where it meets the body).
Then, use the parent tool to join the limbs’ sections. For instance, the parent of the foot would be the lower leg, and the upper portion is the parent of the lower leg.
It makes sure that the leg moves together as one unit with multiple hinge points.
Finally, use the Duik toolbar to create character controllers. Controllers control the rotation and position of critical elements within your character. For the ankles of the 2D character animation, you would select the controller that encompasses both the rotation and position.
05Step 5: Create Your Rig
Use the Duik toolbar to create a rig. Select each layer from the extremities inward from each limb, lasting with your controllers.
You would select the ankle for a leg, followed by the upper portion, the lower leg, and conclusively, the controller at the ankle. Then, select auto-rig within the Rigging area of the Duik toolbar.
The entire leg will move when you move that ankle controller. If your character contains them, repeat the process for the other leg, along with other limbs.
Before proceeding, test the limbs to make sure they hinge and move correctly. You need to adjust the opacity of the character back to 100% once you are satisfied with the movements.
06Step 6: Start Animating Your Character
You can begin animating after completing a rig. First, create keyframes—the ending and beginning points of the character’s movement. The character’s legs are at their most magnified are thus the endpoints for a walk cycle. Make sure that the beginning and ending of keyframes are identical to get an ideal loop.
Start adding in-between frames from there, like when one leg crosses over the other in the middle of a walking stride.
Moreover, you can add ‘easing” to the animation via 2D character animation After Effects’ Easy Ease tab, located under the Animation button, and Keyframe Assistant.
It will smoothen the transition between the keyframes. You will have a primary walking sequence at this instance.
Now, you can make further refinements to add detail and secondary movement, like a bobbing motion of the head. You can also modify elements like the keyframe velocity, further smoothing out the animation.
As you practice, you’ll get a better feel for your animation preferences and develop more advanced realistic 2D animation character design capabilities.
Part 4 5 Great 2D Character Animation Templates
1 – FrameStory Character Animation Toolkit
2 – Explainer Video Character Animation ToolKit
3 – 2D Character Animation After Effects Template
4 – Character Animation ToolKit
5 – Rigged Character Animation Mockup Template
Given above is a list of the best 2D character animation templates worth considering. Yet, if you are tired of using After Effects Templates, why not select Wondershare Filmora Template Mode?
It is a brand-new mode recently launched by Filmora to ramp up your story. It is a simplistic way to use compared with After Effects.
****Wondershare Filmora Video Editor Template Mode**
For Win 7 or later (64-bit)
For macOS 10.12 or later
Filmora Template Mode is a bold breakthrough that helps you create incredible videos in a minute. Forget about dragging n dropping the video clips into a timeline; Filmora template Mode provides you a new way of generating videos automatically by using various stylish video templates.
Steps to create a stunning animated video in 3 levels
01Step 1: Choose a template
Pick up a video template that best suits your needs.
02Step 2: Import Media
Import at least three video clips or images and let AI assist you in ramping the production process without hassle.
03Step 3: Export Project
Export media among multiple social media platforms.
● Key Takeaways from This Episode →
● Understanding 2D character animation tips and tricks
● A step by step guide to creating 2D character animation online
● Five best 2D character animation templates
● The best alternative of using the Template mode directly within the Wondershare Filmora
12 Best Stop Motion Studios Worth Recommending
12 Best Stop Motion Studios Worth Recommending
An easy yet powerful editor
Numerous effects to choose from
Detailed tutorials provided by the official channel
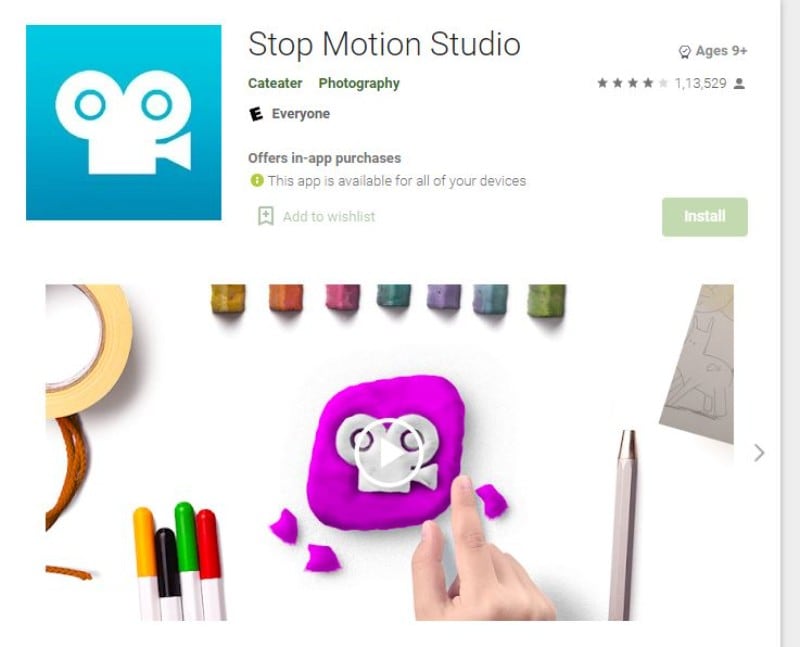
Since people are getting more aware of innovative and creative ideas, the tools like stop motion studio are also emerging. This tool or software, or you can call an app, is mainly concerned with animation and is recognized to create very magical outputs.
This guide will teach what to consider about the Stop Motion Studio, how it works, and a deep look at animation movies to realize the magic of such tools on a broader scale. So, let’s start the article on stop motion studio Pro without any further ado.
In this article
01 [What is Stop Motion Studio and How Does It Work?](#Part 1)
02 [How to Use Stop Motion Studio on PC?](#Part 2)
03 [A Roster of 12 Best Stop-Motion Companies](#Part 3)
04 [How To Make A Stop Motion Video Super Easily?](#Part 4)
Part 1 What is Stop Motion Studio and How Does It Work?
Like the name, stop motion studio creates compelling stop-action movies. It is a terrific app with a whole set of unique features used mainly to turn images and audio into videos in an exciting way that is a fun process for everyone. The app is for Android and iOS. The app is a breeze to use with the camera since it’s operable through smartphones.
However, the students are highly reputed and engaged with this app. They are known to create educational videos over the platform, useful for presentations, etc. Yet, the benefits can also apply to teachers, and in fact, everyone out there.
Now, it’s time to look at the working procedure of stop motion studio pro. To begin with, you have to download the app over your operating system primarily. You can start the project right away after the installation. It’s optional to Sign Up on the app, but you will need it in the future to unlock certain features. The app consists of a simple user interface with a big plus icon that will directly take you to the capture and editing panel. After clicking the picture, a video will be available, which you can play or edit via features such as adding audio, adding effects, cutting sections, and more.
Once you finish the project, you can export and share stop motion studio on Android and other devices.
Part 2 How to Use Stop Motion Studio on PC?
Now, let’s look at the guide on using stop motion studio pro on a PC that generally uses stop motion studio on Windows or stop motion studio on Mac.
We can use stop motion studio online on both the Windows and Mac operating systems but given below is a guide of using the tool on Mac OS.
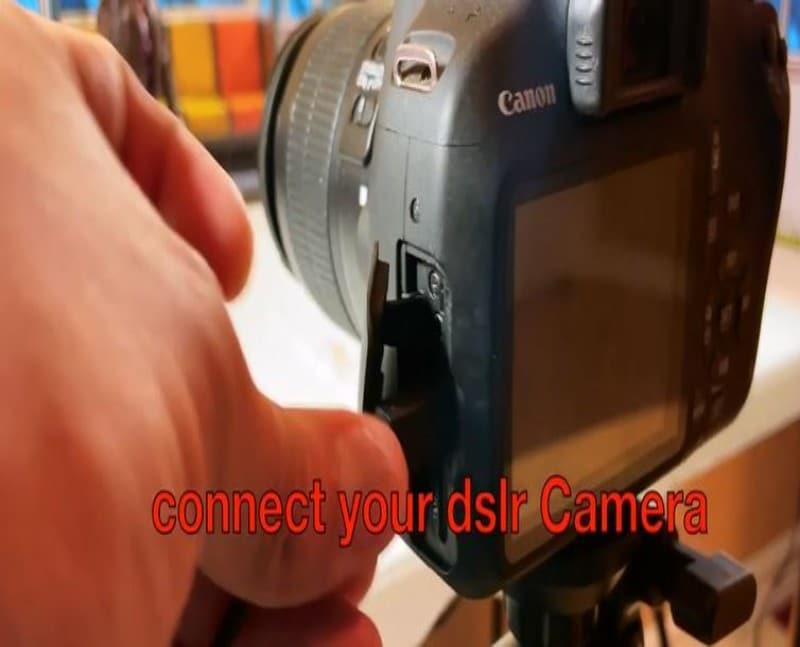
1. Set up your equipment
To get started, connect your DSLR camera with the PC.
2. Open Stop Motion software
Now, download, and launch the Stop Motion Studio for Mac. Open the software and name your project after double-clicking the New Movie tab.
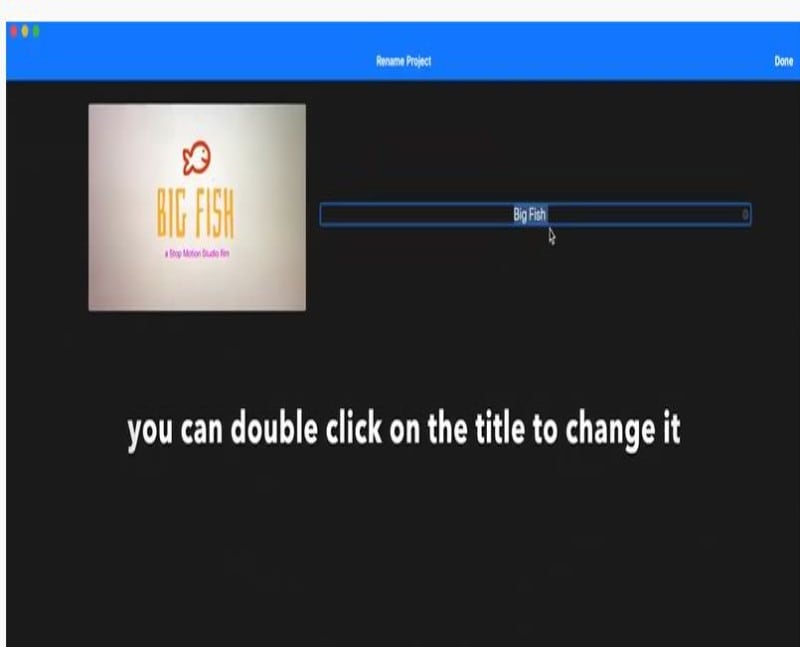
Here, you can organize your projects by name, date, or duration.
3. Connect the camera to your software
To connect the DSLR camera to the software, click the lines icon and check for the name of your camera, which should display here.
After you click your camera option, the camera will get connected.
4. Proceed with the basic settings.
As shown below, our setting will take this dot three steps back.
5. Capture images
The big red button will capture the shots, and there’s an option along its side to time the shots.
Here, you can also explore settings to proceed with. For example, you can change the texture, ISO, shutter speed, aperture, green screen, blue screen, etc. You can also rotate or flip the images from here. And, there are lots for the list goes on.
6. Start shooting.
It would help if you pressed Enter key on your PC to start shooting the images. Then, after clicking pictures, you can click the + icon and get features as follows.
You can record your audio and change the frame rate of images as per your requirements.
7. Export project
Finally, hit the Export icon on the top-right corner to export the project and get the following features.
So, wasn’t it an easy stop motion studio on PC?
Part 3 A Roster of Best Stop-Motion Studio Movies
Since the start of the first half of the 20th century, the animation industry has grown drastically. Understanding market needs, a highly aware knowledge base, and consistent innovative ideas allow such movies to grow exponentially. And, it’s our luck to have such companies in our era that are a great source of entertainment in this chaotic generation.
This section will look at the top 12 stop-motion animation studio movies by the recognized stop motion animation companies with their critical specs, including the ideal vital specs. So, let’s begin with the magic below.
01A Town Called Panic (2009)

Rotten Tomatoes Score: 81%
Critics Consensus: A Town called Panic is an endlessly creative, raucous, animated romp with an adult and quirky sense of humor.
Starring: Jeanne Balibar, Stephane Aubier, Nicolas Buyer, Veronique Dumont
Directed by: Vincent Patar, Stephane Aubier
Synopsis: The film revolves around Indian (Bruce Ellison) and Cowboy (Stephane Aubier), where they plan to create a barbeque pit for their friend’s birthday, Horse (Vincent Patar). The accidental purchase delivery of million bricks than the intended deconstructs their house—also, the attempts to rebuild drop when their walls get continually stolen. The trio then travels to the Earth’s center with a determination to track down the thieves. They also discovered the culprits, who are a group of mad scientists.
022 - Consuming Spirits (2012)
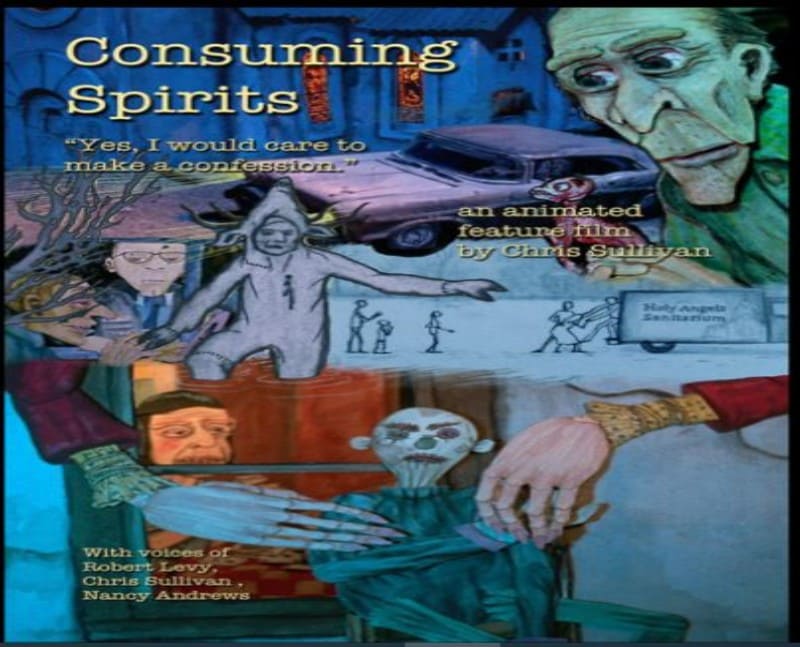
Rotten Tomatoes Score: 89%
Critics Consensus: Not available yet.
Starring: Nancy Andrews, Chris Harris, Robert Levy, Chris Sullivan
Directed by: Chris Sullivan
Synopsis: Three residents (Chris Sullivan, Nancy Andrews, Robert Levy) of a small town live interconnected, sad lives.
03The Boxtrolls (2014)
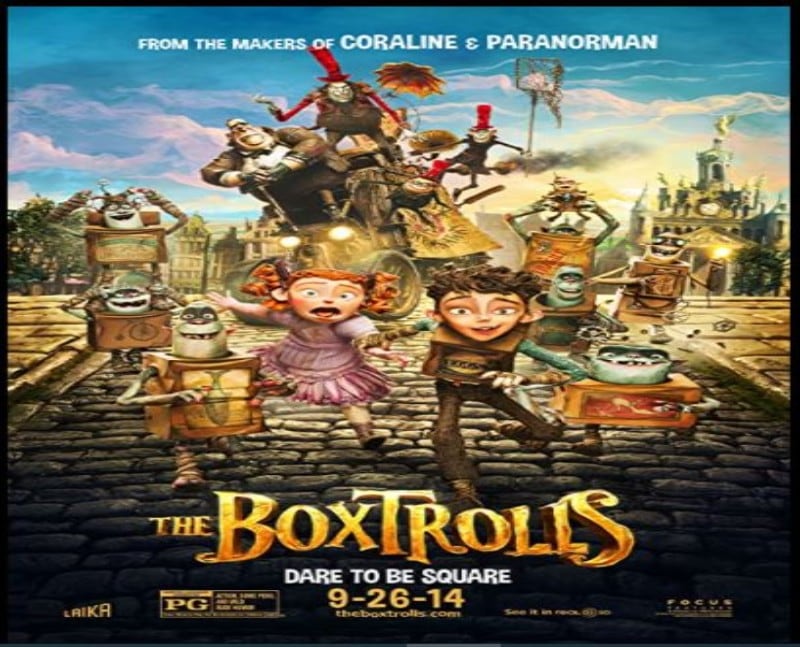
Rotten Tomatoes Score: 81%
Critics Consensus: The Boxtrolls is a visual splendor and enough offbeat wit, yet it’s far from Laika’s best offerings. It still provides a healthy dose of all-age entertainment.
Starring: Elle Fanning, Ben Kingsley, Toni Collete, Isaac Hempstead-Wright
Directed by: Anthony Stacchi, Graham Annable
Synopsis: The movie leads to saving the Box trolley from extermination. It began with the Eggs (Isaac Hempstead-Wright), an orphan living under the community of mischievous and quirky creatures. These creatures have inhabited a cavern below the city of Cheesebridge. Eggs decided to go above the ground when villainous Archibald Snatcher (Ben Kingsley) made a plan to get rid of these pretty harmless beings. When Eggs went above the ground, he met and befriended feisty Winnifred (Elle Fanning). Together, they made a daring plan to save the Boxtrolls.
04The Year Without a Santa Claus (2006)
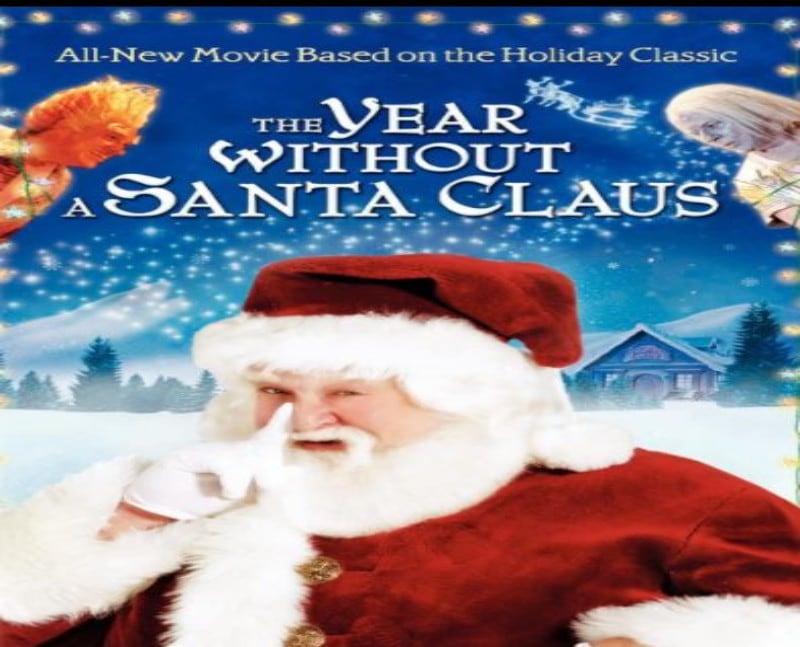
Rotten Tomatoes Score: 90%
Critics Consensus: No worries and fear. Mrs. Claus spreads all her cheers in the movie, presenting a holiday classic full of unforgettable characters and songs that are true to the Christmas spirit.
Starring: Chris Jattan, Ethan Suplee, Eddie Griffin, John Goodman
Directed by: Ron Underwood
Synopsis: Here, two elves try to save Christmas after John Goodman, a disgruntled Saint Nick, decided to take the year off.
05Fantastic Planet (1930)
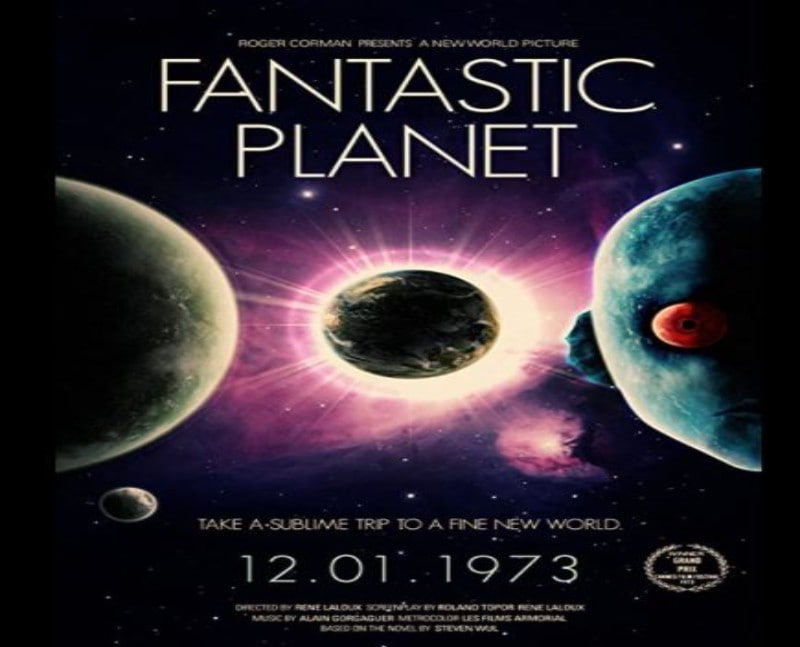
Rotten Tomatoes Score: 91%
Critics Consensus: The movie is an animated epic that transforms into a surreal, fantastic, lovely, and graceful.
Starring: Mark Gruner, Marvin Miller, Hal Smith, Barry Bostwick
Directed by: Rene Laloux
Synopsis: The animated tale displays a relationship between small human-like Oms and their large creatures, blue-skinned oppressors, the Draags, also the rulers of planet Ygam. All thanks to the young female Draag, when an Om boy gets educated, the hierarchy of Draags keeping the Oms as illiterate pets have also shifted. This weakens the Draags control over Oms rebellion. So will they now co-exist or destroy each other?
06The Burton’s Corpse Bride (2005)
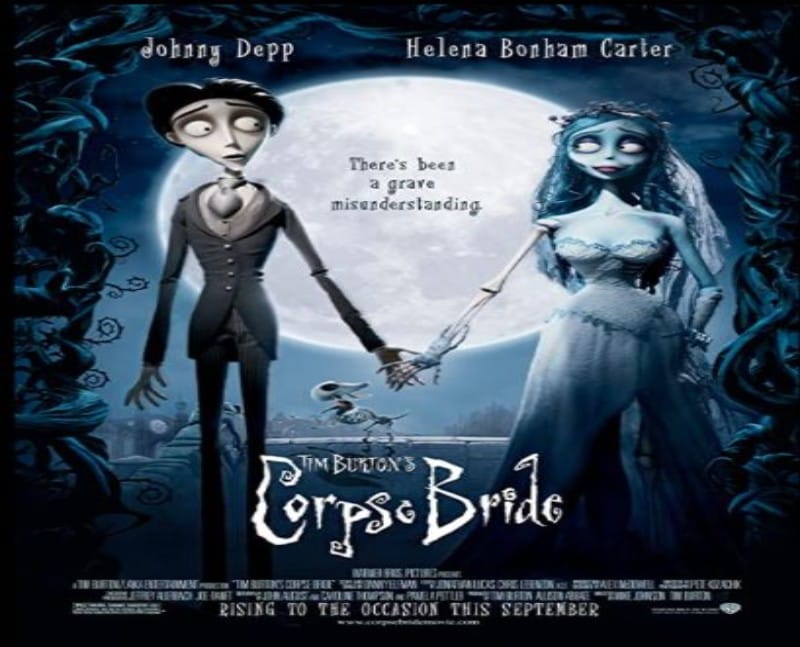
Rotten Tomatoes Score: 84%
Critics Consensus: The Burton’s Corpse Bride is a visually imaginative, bitter-sweet, whimsical macabre movie expected from Tim Burton.
Starring: Helena Bonham Carter, Johny Depp, Tracey Ullman, Emily Watson
Directed by: Tim Burton, Mike Johnson
Synopsis: A marriage was arranged for Victor and Victoria by their families. Victor is pretty nervous though they both like each other. Victor went to practice the lines to utter to Victoria in the forest where his intended arm of Victoria as a tree’s branch led him to the land of the dead. The land belongs to Emily, a dead creature, and now she wants to marry Victor. Victor must get rid of her and go to Victoria before marrying a villainous Barkis Bittern.
07The Pirates. Band of Misfits (2012)
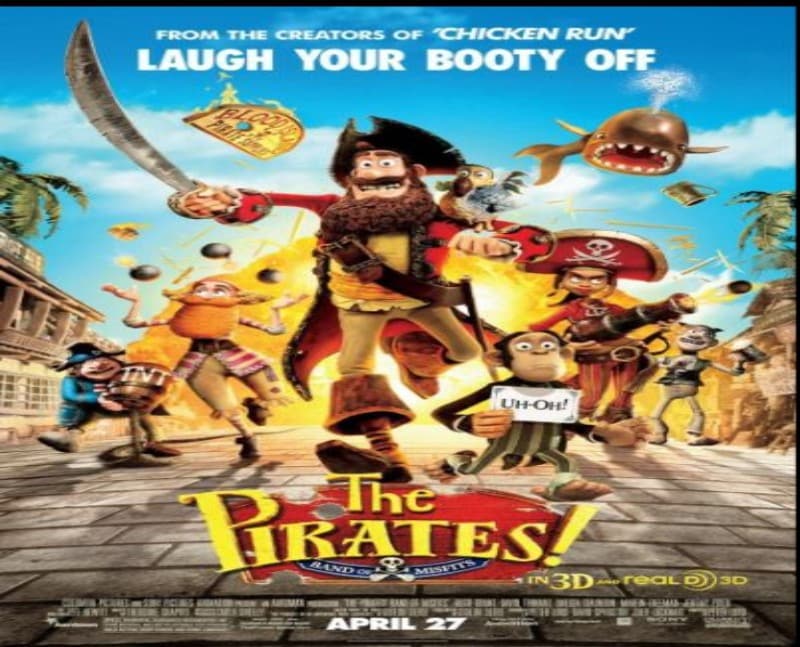
Rotten Tomatoes Score: 86%
Critics Consensus: The Pirates showcases some skillfully animated fares with modern cinema’s smartness. However, the movie may not appropriately scale the customary delights of Aardman.
Starring: Martin Freeman, Imelda Staunton, David Tennant, Hugh Grant.
Directed by: Peter Lord
Synopsis: An enthusiastic pirate captain sails the high seas accompanied by his ragtag crew and dreams of becoming the year’s pirate by beating his rivals. The journey takes him through the exotic shores of Blood Island to the foggy streets of Victorian London. They also battle with a clever queen along the way and join forces with a scientist named Charles Darwin.
08James And The Giant Peach (1996)

Rotten Tomatoes Score: 91%
Critics Consensus: The dynamic and arresting visuals, light as air story, and offbeat details make this stop motion studio movie solid family entertainment.
Starring: Joanna Lumley, Paul Terry, Miriam Margolyes, Pete Postlethwaite
Directed by: Henry Selick
Synopsis: This children’s tale featuring live-action and stop motion animation takes through the adventures of James, an orphaned young British boy. He is forced to live with cruel aunts where he finds a way to hide his existence when he discovers a giant peach. He rolls it into the sea and sails for New York accompanied by friendly insects.
09Missing Link (2019)
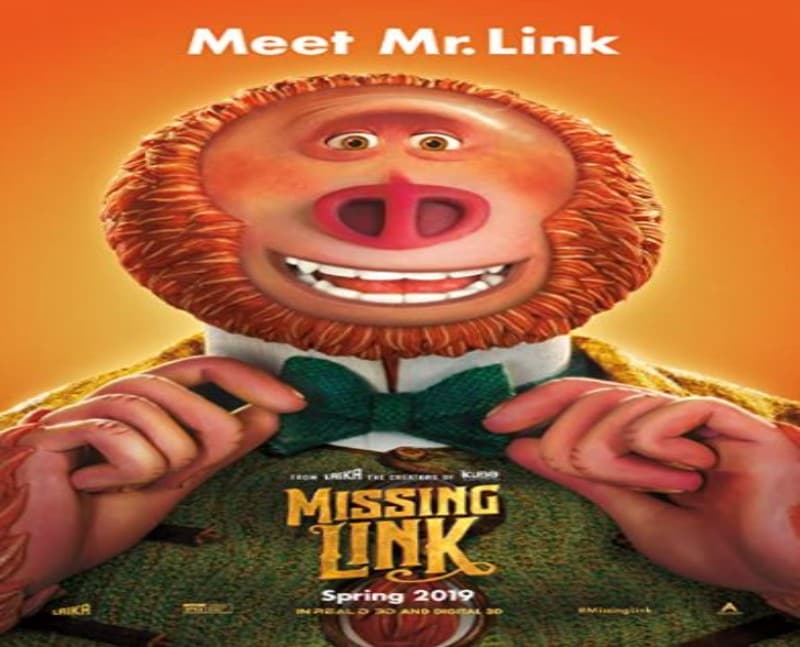
Rotten Tomatoes Score: 88%
Critics Consensus: It’s a beautifully animated triumph for Laika with plenty of heart, lots of humor, and even a little food thought.
Starring: Zach Galifianakis, Zoe Saldana, Hugh Jackman, David Walliams
Directed by: Chris Butler
Synopsis: Mr. Link, an 8-feet furry creature after being tired of living a solitary life in the Pacific Northwest, recruits a fearless explorer to guide him on a journey of the fabled valley of Shangri-La. The trio encounters their share of peril as they travel to far extremities of the world and adventurer Adelina Fortnight. They learn the family that one always expects in their companionship through all this.
10Mary and Max (2009)
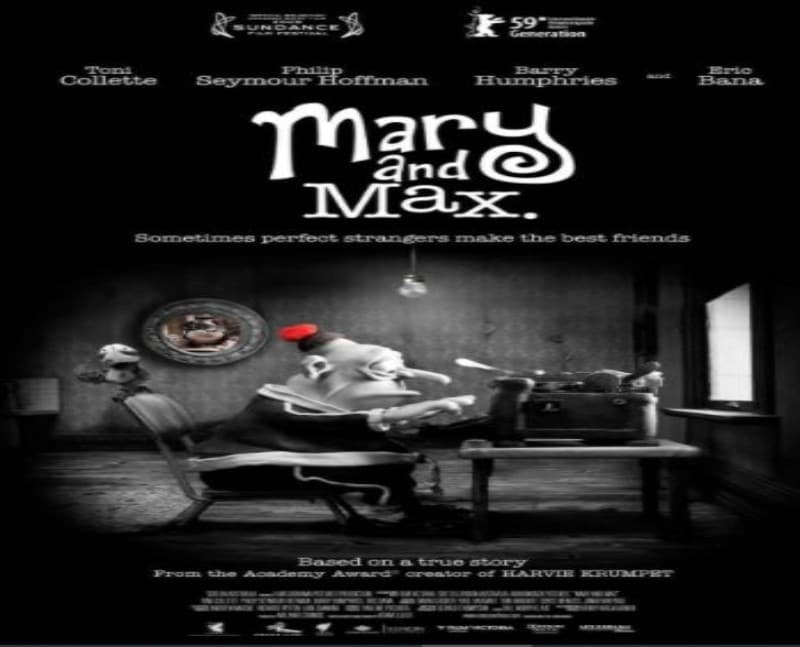
Rotten Tomatoes Score: 95%
Critics Consensus: Mary and Max is a startlingly inventive and lovingly crafted animation whose technical craft equals emotional resonance.
Starring: Philip Seymour Hoffman, Eric Bana, Barry Humphries, Toni Collette
Directed by: Adam Elliot
Synopsis: A Jewish man and a lonely Australian girl developed an unlikely friendship in New York through letters.
11The Little Prince (2015)
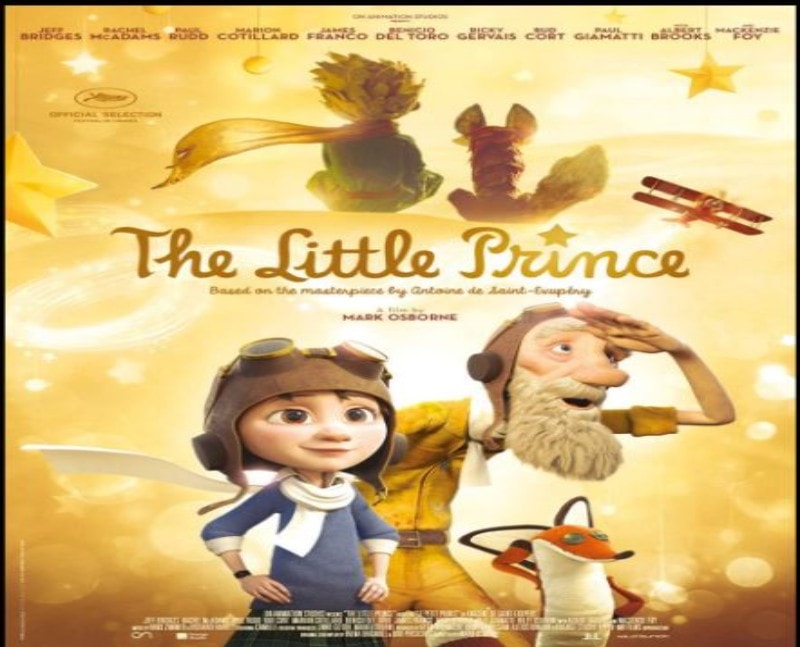
Rotten Tomatoes Score: 93%
Critics Consensus: Again, a faithful and beautiful made stop animation studio movie that sticks to the spirit of its classic source material. It is a family-friendly treat that throws thrilling visuals with a satisfying story.
Starring: Rachel McAdams, James Franco, Marion Cottilard, Jeff Bridges
Directed by: Mark Osborne
Synopsis: The Aviator introduces a girl to a world where she learns that human connections matter the most and where she rediscovered her childhood as well. It’s only with the heart that one can see rightly and can be seen as essential what is invisible to the eyes otherwise.
12Alice (1989)
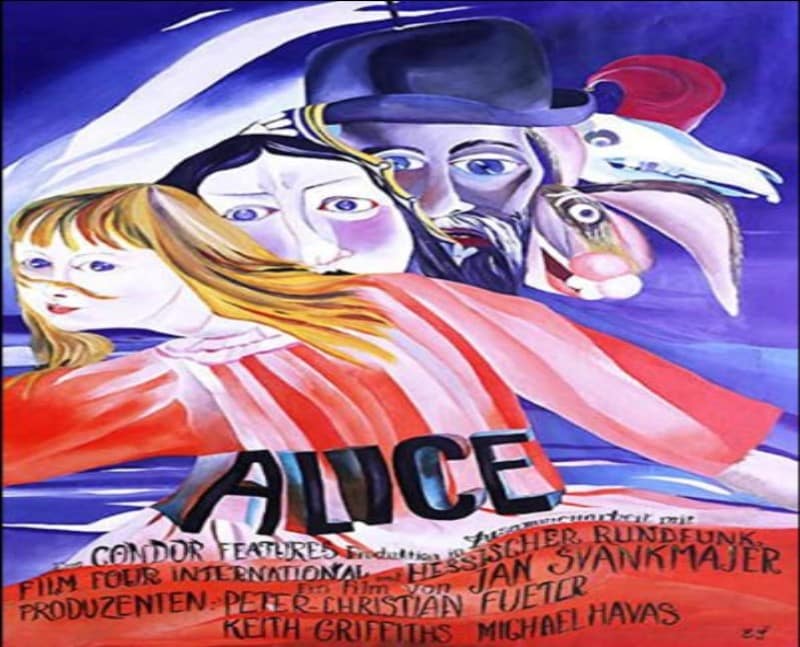
Rotten Tomatoes Score: 95%
Critics Consensus: No consensus yet.
Starring: Kristyna Kohoutova
Directed by: Jan Svankmajeru
Synopsis: In a classic children’s book by Lewis Carroll, Alice follows her stuffed rabbit via a portal inside her dresser to be whisked away to Wonderland. While the Mad Hatter, White Rabbit, and Cheshire Cat are still present, the bizarre characters and familiar magical world have undergone an unsettling transformation.
Here, we end our discussion on the best picks by stop motion animation companies. Of course, you can always refer to such fantastic pieces to take inspiration from.
Part 4 How To Make A Stop Motion Video Super Easily?
Once done with the production stage, it is time to transition to post-production. Here, your stop motion animation will get its final posture. You need to place all the images you wish to include in the video’s final cut into a folder and arrange them the same way as they should appear in the video. Even though Wondershare Filmora Video Editor provides powerful video editing tools that enable you to improve the colors in the footage you are syncing with, it is best to edit your photos via dedicated photo editing software.
For Win 7 or later (64-bit)
For macOS 10.12 or later
Afterward, you should go and launch Filmora, do a new project and add the folder to Filmora’s Media tab. Moreover, you should also import all audio files you would like to use in your project before doing any actual editing. When finished, head over to the File tab, and choose the Preferences option.
Once the option pops up on the screen, hit the Edit tab to set the max duration of a image in a video you’re making.
The value you insert into the Photo Duration box is based upon the number of frames your video contains. Filmora doesn’t let you minimize a project’s frame rate below 23.97fps. Thus, if you want your animation to have frames per second, you need to set the value of the Photo Duration to 00:00:04.
You can then add your media assets to the timeline, hit the Play button to preview the results, and export the video from Filmora if you like the results.
Image Name: stop-motion-studio-14
Image Alt: stop motion video Wondershare Filmora
● Key Takeaways from This Episode →
● The concept and working on stop motion studio pro
● Top Stop Motion Animation Movies
● How to create a stop-animation studio via Wondershare Filmora
Since people are getting more aware of innovative and creative ideas, the tools like stop motion studio are also emerging. This tool or software, or you can call an app, is mainly concerned with animation and is recognized to create very magical outputs.
This guide will teach what to consider about the Stop Motion Studio, how it works, and a deep look at animation movies to realize the magic of such tools on a broader scale. So, let’s start the article on stop motion studio Pro without any further ado.
In this article
01 [What is Stop Motion Studio and How Does It Work?](#Part 1)
02 [How to Use Stop Motion Studio on PC?](#Part 2)
03 [A Roster of 12 Best Stop-Motion Companies](#Part 3)
04 [How To Make A Stop Motion Video Super Easily?](#Part 4)
Part 1 What is Stop Motion Studio and How Does It Work?
Like the name, stop motion studio creates compelling stop-action movies. It is a terrific app with a whole set of unique features used mainly to turn images and audio into videos in an exciting way that is a fun process for everyone. The app is for Android and iOS. The app is a breeze to use with the camera since it’s operable through smartphones.
However, the students are highly reputed and engaged with this app. They are known to create educational videos over the platform, useful for presentations, etc. Yet, the benefits can also apply to teachers, and in fact, everyone out there.
Now, it’s time to look at the working procedure of stop motion studio pro. To begin with, you have to download the app over your operating system primarily. You can start the project right away after the installation. It’s optional to Sign Up on the app, but you will need it in the future to unlock certain features. The app consists of a simple user interface with a big plus icon that will directly take you to the capture and editing panel. After clicking the picture, a video will be available, which you can play or edit via features such as adding audio, adding effects, cutting sections, and more.
Once you finish the project, you can export and share stop motion studio on Android and other devices.
Part 2 How to Use Stop Motion Studio on PC?
Now, let’s look at the guide on using stop motion studio pro on a PC that generally uses stop motion studio on Windows or stop motion studio on Mac.
We can use stop motion studio online on both the Windows and Mac operating systems but given below is a guide of using the tool on Mac OS.
1. Set up your equipment
To get started, connect your DSLR camera with the PC.
2. Open Stop Motion software
Now, download, and launch the Stop Motion Studio for Mac. Open the software and name your project after double-clicking the New Movie tab.
Here, you can organize your projects by name, date, or duration.
3. Connect the camera to your software
To connect the DSLR camera to the software, click the lines icon and check for the name of your camera, which should display here.
After you click your camera option, the camera will get connected.
4. Proceed with the basic settings.
As shown below, our setting will take this dot three steps back.
5. Capture images
The big red button will capture the shots, and there’s an option along its side to time the shots.
Here, you can also explore settings to proceed with. For example, you can change the texture, ISO, shutter speed, aperture, green screen, blue screen, etc. You can also rotate or flip the images from here. And, there are lots for the list goes on.
6. Start shooting.
It would help if you pressed Enter key on your PC to start shooting the images. Then, after clicking pictures, you can click the + icon and get features as follows.
You can record your audio and change the frame rate of images as per your requirements.
7. Export project
Finally, hit the Export icon on the top-right corner to export the project and get the following features.
So, wasn’t it an easy stop motion studio on PC?
Part 3 A Roster of Best Stop-Motion Studio Movies
Since the start of the first half of the 20th century, the animation industry has grown drastically. Understanding market needs, a highly aware knowledge base, and consistent innovative ideas allow such movies to grow exponentially. And, it’s our luck to have such companies in our era that are a great source of entertainment in this chaotic generation.
This section will look at the top 12 stop-motion animation studio movies by the recognized stop motion animation companies with their critical specs, including the ideal vital specs. So, let’s begin with the magic below.
01A Town Called Panic (2009)
Rotten Tomatoes Score: 81%
Critics Consensus: A Town called Panic is an endlessly creative, raucous, animated romp with an adult and quirky sense of humor.
Starring: Jeanne Balibar, Stephane Aubier, Nicolas Buyer, Veronique Dumont
Directed by: Vincent Patar, Stephane Aubier
Synopsis: The film revolves around Indian (Bruce Ellison) and Cowboy (Stephane Aubier), where they plan to create a barbeque pit for their friend’s birthday, Horse (Vincent Patar). The accidental purchase delivery of million bricks than the intended deconstructs their house—also, the attempts to rebuild drop when their walls get continually stolen. The trio then travels to the Earth’s center with a determination to track down the thieves. They also discovered the culprits, who are a group of mad scientists.
022 - Consuming Spirits (2012)
Rotten Tomatoes Score: 89%
Critics Consensus: Not available yet.
Starring: Nancy Andrews, Chris Harris, Robert Levy, Chris Sullivan
Directed by: Chris Sullivan
Synopsis: Three residents (Chris Sullivan, Nancy Andrews, Robert Levy) of a small town live interconnected, sad lives.
03The Boxtrolls (2014)
Rotten Tomatoes Score: 81%
Critics Consensus: The Boxtrolls is a visual splendor and enough offbeat wit, yet it’s far from Laika’s best offerings. It still provides a healthy dose of all-age entertainment.
Starring: Elle Fanning, Ben Kingsley, Toni Collete, Isaac Hempstead-Wright
Directed by: Anthony Stacchi, Graham Annable
Synopsis: The movie leads to saving the Box trolley from extermination. It began with the Eggs (Isaac Hempstead-Wright), an orphan living under the community of mischievous and quirky creatures. These creatures have inhabited a cavern below the city of Cheesebridge. Eggs decided to go above the ground when villainous Archibald Snatcher (Ben Kingsley) made a plan to get rid of these pretty harmless beings. When Eggs went above the ground, he met and befriended feisty Winnifred (Elle Fanning). Together, they made a daring plan to save the Boxtrolls.
04The Year Without a Santa Claus (2006)
Rotten Tomatoes Score: 90%
Critics Consensus: No worries and fear. Mrs. Claus spreads all her cheers in the movie, presenting a holiday classic full of unforgettable characters and songs that are true to the Christmas spirit.
Starring: Chris Jattan, Ethan Suplee, Eddie Griffin, John Goodman
Directed by: Ron Underwood
Synopsis: Here, two elves try to save Christmas after John Goodman, a disgruntled Saint Nick, decided to take the year off.
05Fantastic Planet (1930)
Rotten Tomatoes Score: 91%
Critics Consensus: The movie is an animated epic that transforms into a surreal, fantastic, lovely, and graceful.
Starring: Mark Gruner, Marvin Miller, Hal Smith, Barry Bostwick
Directed by: Rene Laloux
Synopsis: The animated tale displays a relationship between small human-like Oms and their large creatures, blue-skinned oppressors, the Draags, also the rulers of planet Ygam. All thanks to the young female Draag, when an Om boy gets educated, the hierarchy of Draags keeping the Oms as illiterate pets have also shifted. This weakens the Draags control over Oms rebellion. So will they now co-exist or destroy each other?
06The Burton’s Corpse Bride (2005)
Rotten Tomatoes Score: 84%
Critics Consensus: The Burton’s Corpse Bride is a visually imaginative, bitter-sweet, whimsical macabre movie expected from Tim Burton.
Starring: Helena Bonham Carter, Johny Depp, Tracey Ullman, Emily Watson
Directed by: Tim Burton, Mike Johnson
Synopsis: A marriage was arranged for Victor and Victoria by their families. Victor is pretty nervous though they both like each other. Victor went to practice the lines to utter to Victoria in the forest where his intended arm of Victoria as a tree’s branch led him to the land of the dead. The land belongs to Emily, a dead creature, and now she wants to marry Victor. Victor must get rid of her and go to Victoria before marrying a villainous Barkis Bittern.
07The Pirates. Band of Misfits (2012)
Rotten Tomatoes Score: 86%
Critics Consensus: The Pirates showcases some skillfully animated fares with modern cinema’s smartness. However, the movie may not appropriately scale the customary delights of Aardman.
Starring: Martin Freeman, Imelda Staunton, David Tennant, Hugh Grant.
Directed by: Peter Lord
Synopsis: An enthusiastic pirate captain sails the high seas accompanied by his ragtag crew and dreams of becoming the year’s pirate by beating his rivals. The journey takes him through the exotic shores of Blood Island to the foggy streets of Victorian London. They also battle with a clever queen along the way and join forces with a scientist named Charles Darwin.
08James And The Giant Peach (1996)
Rotten Tomatoes Score: 91%
Critics Consensus: The dynamic and arresting visuals, light as air story, and offbeat details make this stop motion studio movie solid family entertainment.
Starring: Joanna Lumley, Paul Terry, Miriam Margolyes, Pete Postlethwaite
Directed by: Henry Selick
Synopsis: This children’s tale featuring live-action and stop motion animation takes through the adventures of James, an orphaned young British boy. He is forced to live with cruel aunts where he finds a way to hide his existence when he discovers a giant peach. He rolls it into the sea and sails for New York accompanied by friendly insects.
09Missing Link (2019)
Rotten Tomatoes Score: 88%
Critics Consensus: It’s a beautifully animated triumph for Laika with plenty of heart, lots of humor, and even a little food thought.
Starring: Zach Galifianakis, Zoe Saldana, Hugh Jackman, David Walliams
Directed by: Chris Butler
Synopsis: Mr. Link, an 8-feet furry creature after being tired of living a solitary life in the Pacific Northwest, recruits a fearless explorer to guide him on a journey of the fabled valley of Shangri-La. The trio encounters their share of peril as they travel to far extremities of the world and adventurer Adelina Fortnight. They learn the family that one always expects in their companionship through all this.
10Mary and Max (2009)
Rotten Tomatoes Score: 95%
Critics Consensus: Mary and Max is a startlingly inventive and lovingly crafted animation whose technical craft equals emotional resonance.
Starring: Philip Seymour Hoffman, Eric Bana, Barry Humphries, Toni Collette
Directed by: Adam Elliot
Synopsis: A Jewish man and a lonely Australian girl developed an unlikely friendship in New York through letters.
11The Little Prince (2015)
Rotten Tomatoes Score: 93%
Critics Consensus: Again, a faithful and beautiful made stop animation studio movie that sticks to the spirit of its classic source material. It is a family-friendly treat that throws thrilling visuals with a satisfying story.
Starring: Rachel McAdams, James Franco, Marion Cottilard, Jeff Bridges
Directed by: Mark Osborne
Synopsis: The Aviator introduces a girl to a world where she learns that human connections matter the most and where she rediscovered her childhood as well. It’s only with the heart that one can see rightly and can be seen as essential what is invisible to the eyes otherwise.
12Alice (1989)
Rotten Tomatoes Score: 95%
Critics Consensus: No consensus yet.
Starring: Kristyna Kohoutova
Directed by: Jan Svankmajeru
Synopsis: In a classic children’s book by Lewis Carroll, Alice follows her stuffed rabbit via a portal inside her dresser to be whisked away to Wonderland. While the Mad Hatter, White Rabbit, and Cheshire Cat are still present, the bizarre characters and familiar magical world have undergone an unsettling transformation.
Here, we end our discussion on the best picks by stop motion animation companies. Of course, you can always refer to such fantastic pieces to take inspiration from.
Part 4 How To Make A Stop Motion Video Super Easily?
Once done with the production stage, it is time to transition to post-production. Here, your stop motion animation will get its final posture. You need to place all the images you wish to include in the video’s final cut into a folder and arrange them the same way as they should appear in the video. Even though Wondershare Filmora Video Editor provides powerful video editing tools that enable you to improve the colors in the footage you are syncing with, it is best to edit your photos via dedicated photo editing software.
For Win 7 or later (64-bit)
For macOS 10.12 or later
Afterward, you should go and launch Filmora, do a new project and add the folder to Filmora’s Media tab. Moreover, you should also import all audio files you would like to use in your project before doing any actual editing. When finished, head over to the File tab, and choose the Preferences option.
Once the option pops up on the screen, hit the Edit tab to set the max duration of a image in a video you’re making.
The value you insert into the Photo Duration box is based upon the number of frames your video contains. Filmora doesn’t let you minimize a project’s frame rate below 23.97fps. Thus, if you want your animation to have frames per second, you need to set the value of the Photo Duration to 00:00:04.
You can then add your media assets to the timeline, hit the Play button to preview the results, and export the video from Filmora if you like the results.
Image Name: stop-motion-studio-14
Image Alt: stop motion video Wondershare Filmora
● Key Takeaways from This Episode →
● The concept and working on stop motion studio pro
● Top Stop Motion Animation Movies
● How to create a stop-animation studio via Wondershare Filmora
Useful Tips for Canva Animated Elements
Versatile Video Editor - Wondershare Filmora
An easy yet powerful editor
Numerous effects to choose from
Detailed tutorials provided by the official channel
Thanks to the progress of graphic design, users are no longer simply satisfied with everyday designs, no matter how complex the design itself. They want innovation, they want a fresh and mesmerizing new idea. This becomes increasingly harder to achieve and helps push the boundaries of what designers want.
This is where motion can come into play. Movement in graphic design has emerged as a recent design trend. This is where users benefit from valuable tips for Canva animated elements.
Without further ado, let’s dive into everything you need to know to design animated elements in Canva.
In this article
01 [What is Canva?](#Part 1)
02 [Animate An Element In Canva ](#Part 2)
03 [Make Elements Move In Canva](#Part 3)
04 [How About Making Animated Elements On Video](#Part 4)
Part 1 What is Canva?
Canva has become a buzzword in the designing and animation world. It’s a graphic design platform that allows users to create graphic designs for social media, for presentations, documents, cards for any memorable occasion. It was founded by Melanie Perkins, an Australian technology entrepreneur.
Canva has become a buzzword in the designing and animation world. It’s a graphic design platform that allows users to create graphic designs for social media, for presentations, documents, cards for any memorable occasion. It was founded by Melanie Perkins, an Australian technology entrepreneur.
It allows users to work individually or across teams. With real-time live changes made available, Canva is pushing the boundary of what is possible and making it more accessible. With the introduction of animated elements in Canva, the possibilities for design horizons have expanded significantly.
Part 2 Animate An Element In Canva
There are one of two ways to go about creating an animation. You can work off an existing template or create a custom template. If you’re wondering how to animate individual elements in Canva then this guide is for you.
The first step to animation is building your custom static design. For that you need to go to Canva and select “Create a Design” option. Once you do, select the type of content you’re attempting to create- from Instagram posts to a presentation or an A4 document.
Think of the text font you’re going to use.

Then you should look into adding elements that suit your text on the design.

You can upload photographs into your creation with the upload button. This also extends to uploading audio that you want to use on video clips.

Once you’re done with these steps, you should have a customized static design that you can use. Let’s now look at how to animate individual elements in Canva. These elements are the text, the image, audio, and video.
2.1 Image
To add an image to Canva, you need to upload it in the ‘Upload’ tab on Canva. Once you do, the image can then be selected for display on your presentation.
For images, you can also choose to frame them within the “elements” tab. There are two kinds of elements. One which allows photographs to be embedded in them and ones which don’t. You can choose any element as a frame for your embedded image.
The next thing is to choose the “Animate” button. This will open up different options for animation features. The animate button allows a preview of what each animation does in real-time.

The ones with the crown are premium features exclusive to Canva Pro, the paid subscription.
2.2 Text
Add in the text you want to see to the image. The text can be in any style that you choose. Canva offers a variety of fonts that you can use to customize the color, size, and duration of the display.

2.3 Video
If you’re ready to take your content creation skills to the next level, this section is for you. You have the option of adding videos to Canva as well. Just load the video you have on hand to the Canva “Uploads” section. Introduce the video clip to the design.
Another way to embed the video is by using an element and embedding your video within it.
With video, you also have options like cropping, adjusting the playback. With playback, you can choose “Autoplay Video” and “Loop Video.” These are basic options for how the video can be played. The crop function allows you to trim the video to any point in time.
On top of this, you can use the animate button, which can create options for how the video is introduced to the backdrop.

If you want to remove the animation, you need to go to the “Animate” button and select the ‘None’ option to delete the animation from the design.
You can opt to animate either just the elements or you can animate the slide on the whole with “Page Animations.”
Part 3 Make Elements Move In Canva
How To Arrange The Order Of An Animation?
The brilliant thing about Canva is that you can decide the order you want to create your animation. The component elements of a Canva backdrop are the text, audio, images, video. These form the basis for the animated elements in Canva.
You can work on whichever component feels more accessible to you. Canva also allows users to make videos for title sequences and end-cards for video sharing platforms.
How to Change The Duration Of Animated Graphic In Canva
Once you’ve added a video element to your presentation, you’ll notice that the timer disappears from the production. This is because the presentation only lasts the duration of the video.
If you go to the next slide of the presentation, you can often notice a timer available. It has a default duration of five seconds. If you click on the clock symbol, a menu with “Timing” will appear with a slider. You can adjust the timing from 0.1 seconds up to a maximum of 30 seconds.
Part 4 How About Making Animated Elements On Video
If you’ve decided Canva is not the tool for you, you can choose any video editing software to make your animation.
Wondershare Filmora is the tool that can help you level up your content creation. It allows users to increase precision and provides professional video editing options.
AI Portrait – The best feature of Wondershare Filmora for gameplay editing
The AI Portrait is a new add-on in Wondershare Filmora. It can easily remove video backgrounds without using a green screen or chroma key, allowing you to add borders, glitch effects, pixelated, noise, or segmentation video effects.

Conclusion
Now that you understand how to build an animation and the software required, you should differentiate between average and extraordinary editing tools.
Filmora and Canva are the best editing tools in this case. Like you can animate individual elements Canva, you can do the same in the other tool also. It may be used to produce animation videos by introducing keyframes, resulting in a seamless and realistic animation. Aside from that, using color correction and an audio processor can help take your animations to the next tier.
Download it today to make your videos better.
Thanks to the progress of graphic design, users are no longer simply satisfied with everyday designs, no matter how complex the design itself. They want innovation, they want a fresh and mesmerizing new idea. This becomes increasingly harder to achieve and helps push the boundaries of what designers want.
This is where motion can come into play. Movement in graphic design has emerged as a recent design trend. This is where users benefit from valuable tips for Canva animated elements.
Without further ado, let’s dive into everything you need to know to design animated elements in Canva.
In this article
01 [What is Canva?](#Part 1)
02 [Animate An Element In Canva ](#Part 2)
03 [Make Elements Move In Canva](#Part 3)
04 [How About Making Animated Elements On Video](#Part 4)
Part 1 What is Canva?
Canva has become a buzzword in the designing and animation world. It’s a graphic design platform that allows users to create graphic designs for social media, for presentations, documents, cards for any memorable occasion. It was founded by Melanie Perkins, an Australian technology entrepreneur.
Canva has become a buzzword in the designing and animation world. It’s a graphic design platform that allows users to create graphic designs for social media, for presentations, documents, cards for any memorable occasion. It was founded by Melanie Perkins, an Australian technology entrepreneur.
It allows users to work individually or across teams. With real-time live changes made available, Canva is pushing the boundary of what is possible and making it more accessible. With the introduction of animated elements in Canva, the possibilities for design horizons have expanded significantly.
Part 2 Animate An Element In Canva
There are one of two ways to go about creating an animation. You can work off an existing template or create a custom template. If you’re wondering how to animate individual elements in Canva then this guide is for you.
The first step to animation is building your custom static design. For that you need to go to Canva and select “Create a Design” option. Once you do, select the type of content you’re attempting to create- from Instagram posts to a presentation or an A4 document.
Think of the text font you’re going to use.
Then you should look into adding elements that suit your text on the design.
You can upload photographs into your creation with the upload button. This also extends to uploading audio that you want to use on video clips.
Once you’re done with these steps, you should have a customized static design that you can use. Let’s now look at how to animate individual elements in Canva. These elements are the text, the image, audio, and video.
2.1 Image
To add an image to Canva, you need to upload it in the ‘Upload’ tab on Canva. Once you do, the image can then be selected for display on your presentation.
For images, you can also choose to frame them within the “elements” tab. There are two kinds of elements. One which allows photographs to be embedded in them and ones which don’t. You can choose any element as a frame for your embedded image.
The next thing is to choose the “Animate” button. This will open up different options for animation features. The animate button allows a preview of what each animation does in real-time.
The ones with the crown are premium features exclusive to Canva Pro, the paid subscription.
2.2 Text
Add in the text you want to see to the image. The text can be in any style that you choose. Canva offers a variety of fonts that you can use to customize the color, size, and duration of the display.
2.3 Video
If you’re ready to take your content creation skills to the next level, this section is for you. You have the option of adding videos to Canva as well. Just load the video you have on hand to the Canva “Uploads” section. Introduce the video clip to the design.
Another way to embed the video is by using an element and embedding your video within it.
With video, you also have options like cropping, adjusting the playback. With playback, you can choose “Autoplay Video” and “Loop Video.” These are basic options for how the video can be played. The crop function allows you to trim the video to any point in time.
On top of this, you can use the animate button, which can create options for how the video is introduced to the backdrop.
If you want to remove the animation, you need to go to the “Animate” button and select the ‘None’ option to delete the animation from the design.
You can opt to animate either just the elements or you can animate the slide on the whole with “Page Animations.”
Part 3 Make Elements Move In Canva
How To Arrange The Order Of An Animation?
The brilliant thing about Canva is that you can decide the order you want to create your animation. The component elements of a Canva backdrop are the text, audio, images, video. These form the basis for the animated elements in Canva.
You can work on whichever component feels more accessible to you. Canva also allows users to make videos for title sequences and end-cards for video sharing platforms.
How to Change The Duration Of Animated Graphic In Canva
Once you’ve added a video element to your presentation, you’ll notice that the timer disappears from the production. This is because the presentation only lasts the duration of the video.
If you go to the next slide of the presentation, you can often notice a timer available. It has a default duration of five seconds. If you click on the clock symbol, a menu with “Timing” will appear with a slider. You can adjust the timing from 0.1 seconds up to a maximum of 30 seconds.
Part 4 How About Making Animated Elements On Video
If you’ve decided Canva is not the tool for you, you can choose any video editing software to make your animation.
Wondershare Filmora is the tool that can help you level up your content creation. It allows users to increase precision and provides professional video editing options.
AI Portrait – The best feature of Wondershare Filmora for gameplay editing
The AI Portrait is a new add-on in Wondershare Filmora. It can easily remove video backgrounds without using a green screen or chroma key, allowing you to add borders, glitch effects, pixelated, noise, or segmentation video effects.
Conclusion
Now that you understand how to build an animation and the software required, you should differentiate between average and extraordinary editing tools.
Filmora and Canva are the best editing tools in this case. Like you can animate individual elements Canva, you can do the same in the other tool also. It may be used to produce animation videos by introducing keyframes, resulting in a seamless and realistic animation. Aside from that, using color correction and an audio processor can help take your animations to the next tier.
Download it today to make your videos better.
10 Cartoon Photo Converters You Couldn’t Do Without
D:\【内容】文章录入资料\20220321 Cartoon\35. 10 Cartoon Photo Converters You Couldn’t Do Without
An easy yet powerful editor
Numerous effects to choose from
Detailed tutorials provided by the official channel
We all love to edit our images. Undoubtedly right now, the innovation in technology or day the editing tools available put us at a point where we can do more than editing the photograph. Well, here we are discussing convert picture to cartoon. Yes, you understand it right. This conversion can be done for various projects. We are not saying you to confine this ultimate option to your photos only. If you are a part of social media and create content, these tools will help you to get the best outcome in return.
Well, keep reading till the last as here we explore photo to cartoon online free, and some paid versions that you can try. Let’s get started!
In this article
01 [5 Online Picture to Cartoon Converters](#Part 1)
02 [5 Picture to Cartoon Converters on Your Phone](#Part 2)
03 [How to convert photo to cartoon with the help of FotoSketcher](#Part 3)
Part 1 Online Picture to Cartoon Converters
In this section, we are discussing the best online photo to cartoon converter that you can use and complete this tedious task within a few minutes. The best tools that you can consider include: -
01Befunky
Befunky, an online picture converter, offers a unique way of transforming your photographs into cartoon-like images. You can choose from a 50+ range of styles and adjust the size of the image before you start. The website lets you choose the style of cartoon you want, such as traditional or modern. You can also choose the size of your cartoon and even change the background color.

02Cartoonize
Cartoonize is an online tool that converts pictures into cartoon-style images. It is a free online service that allows users to convert any image into a cartoon-style image in seconds. It has been widely used by bloggers, teachers, and artists for the quick and easy creation of cartoons. This online tool can be used for many purposes, including Blogging, Teaching, Social Media Marketing, and other portals.

03PhotoCartoon
PhotoCartoon is an online image-to cartoon converter that converts photos into cartoons. This tool is helpful for people who want to create a cartoon from an image without having to draw it by hand. The website also provides users with the ability to add text, color, and other effects to the images they have converted into comics. It can be used for creating memes or advertisements as well as personal projects like comics and illustrations.

04Free Photo to cartoon
This online Free Photo to Cartoon Converter allows users to convert a photo into an animated cartoon. It is an easy-to-use tool that provides high-quality results in a short amount of time. It has been proven to be more effective than using traditional methods. The site also offers users the option of using different filters and uploading images from Facebook or Instagram for conversion. Within no time, a user will be able to get the outcome of their choice.

05Picsart
Picsart is a website that lets users draw pictures and make them into cartoons. It offers an easy interface to create personalized cartoons, which can be shared on social media. It has a free version for drawing and sharing custom images, as well as paid subscriptions for more features like making animated GIFs, drawing with your webcam, or using the site’s editor.

Part 2 5 Picture to Cartoon Converters on Your Phone
Well, above, we have discussed the tools that can be used through the website or, say, on the computer. But when you don’t have a computer, you can do it with the help of your phone as well. Now cartoon photo converter for phones is also available that one can try. These are as follows: -
01**Wondershare Filmora Video Editor **
Filmora is an app for users to create videos, collages, and other types of images. It is a free app that comes with different features. It has been downloaded over 100 million times and has been used by numerous industries for completing the editing part. This acts as the best video to cartoon converter online free. It is available on iOS, Android, Windows 10, and Mac OS X.
For Win 7 or later (64-bit)
For macOS 10.12 or later
In general, it allows users to take pictures or videos from their phones and then convert them into a cartoon. The app also allows users to edit their images before converting them into cartoons as they want. The effects added in this tool are so awesome that any can love trying this out.
02Cartoon Photo Editor
This is a photo editor that allows users to turn photos into cartoon drawings. Users can choose from a range of styles and colors to create their own unique cartoons. The app offers different drawing styles, and accordingly, a user can choose one and do the editing easily. It also features abstract designs that lack realism but are still recognizable as cartoons. Users feel great using this app because of its interface and the features available.
03Art Camera – Cartoon, Pencil Sketch Art Effect Photo
Art Camera is a new photo app that allows taking photos that look like pencil drawings or sketches. It uses a sophisticated algorithm and the latest machine learning technology to transform your photos into cartoon-like images. This app is perfect for those who are looking for an artistic way of capturing memories, portraits, or even creating art from their own imagination. It is widely is available on iOS, Android, and Windows Phone devices.
04Tooncam – Cartoon, Pencil Sketch Pic
Tooncam is a free app that helps you to create cartoon images. You can use it on your phone or tablet. It is one of the best apps for creating cartoons on your phone with images with just one click. With this app, you can also share your cartoons with friends or family members and make them laugh out loud with funny pictures.
The app uses the camera of your device and its powerful photo editing tools to convert any photo into a cartoon image in just a few steps.
05Photo To Cartoon Yourself Edit
The app is a picture to cartoon converter on your phone that lets you transform a photo into a cartoon in just one tap. You can use this app to create an animated movie, comic strip, or comic book. The app works by converting the image into vector graphics and then adding colors and shading, and finally exporting it as an animated GIF. The app is available for iOS platforms.
Part 3 How to convert photo to cartoon
We are sure you might be thinking about how you can use these tools. Well, firstly, understand that every tool we have discussed above have the somewhere same interface, and you need to follow some steps to convert photo to cartoon. To help you more, here we are discussing the steps you need to follow while using FotoSketcher for the same purpose.
FotoSketcher is one of the best tools available free of cost for you. You can simply convert the photos into a cartoon and use them over different portals as per your need. There will be no need for you to engage in any complicated process to complete the editing task. The steps are also very simple to follow for this tool, and these are as follows: -
Step 1: firstly, get the FotoSketcher tool on your device.
Step 2: Wait until the installation of the tool gets completed. It is compatible with Windows and Mac both.
Step 3: Now, open the tool and upload the photo you wish to convert.
Step 4: Here, it asks you to select the type. You can either select cartoon 1 or Cartoon 2. These are the special effects being part of this software.
Step 5: Now, from the list of features, select the type of editing you wish to apply. There are multiple options available to choose from. You can choose any of them as per your preference.
Step 6: Blend the colors as needed for the edited photo. Along with it, there are some other parameters too need to look out for editing, and accordingly, you can set them.
Step 7: After setting up the changes, click on “Draw” to apply the changes. Wait until it applies the effects.
Step 8: The resulted image will appear, and you can download it in the required format from here.
● Ending Thoughts →
● Do convert photo to cartoon online in just simple steps without being part of any complicated process.
● Filmora is the best cartoon image converter online available, helping in converting the images as required.
● The photo to cartoon software is quite simple to use and does not require any particular technical knowledge.
We all love to edit our images. Undoubtedly right now, the innovation in technology or day the editing tools available put us at a point where we can do more than editing the photograph. Well, here we are discussing convert picture to cartoon. Yes, you understand it right. This conversion can be done for various projects. We are not saying you to confine this ultimate option to your photos only. If you are a part of social media and create content, these tools will help you to get the best outcome in return.
Well, keep reading till the last as here we explore photo to cartoon online free, and some paid versions that you can try. Let’s get started!
In this article
01 [5 Online Picture to Cartoon Converters](#Part 1)
02 [5 Picture to Cartoon Converters on Your Phone](#Part 2)
03 [How to convert photo to cartoon with the help of FotoSketcher](#Part 3)
Part 1 Online Picture to Cartoon Converters
In this section, we are discussing the best online photo to cartoon converter that you can use and complete this tedious task within a few minutes. The best tools that you can consider include: -
01Befunky
Befunky, an online picture converter, offers a unique way of transforming your photographs into cartoon-like images. You can choose from a 50+ range of styles and adjust the size of the image before you start. The website lets you choose the style of cartoon you want, such as traditional or modern. You can also choose the size of your cartoon and even change the background color.
02Cartoonize
Cartoonize is an online tool that converts pictures into cartoon-style images. It is a free online service that allows users to convert any image into a cartoon-style image in seconds. It has been widely used by bloggers, teachers, and artists for the quick and easy creation of cartoons. This online tool can be used for many purposes, including Blogging, Teaching, Social Media Marketing, and other portals.
03PhotoCartoon
PhotoCartoon is an online image-to cartoon converter that converts photos into cartoons. This tool is helpful for people who want to create a cartoon from an image without having to draw it by hand. The website also provides users with the ability to add text, color, and other effects to the images they have converted into comics. It can be used for creating memes or advertisements as well as personal projects like comics and illustrations.
04Free Photo to cartoon
This online Free Photo to Cartoon Converter allows users to convert a photo into an animated cartoon. It is an easy-to-use tool that provides high-quality results in a short amount of time. It has been proven to be more effective than using traditional methods. The site also offers users the option of using different filters and uploading images from Facebook or Instagram for conversion. Within no time, a user will be able to get the outcome of their choice.
05Picsart
Picsart is a website that lets users draw pictures and make them into cartoons. It offers an easy interface to create personalized cartoons, which can be shared on social media. It has a free version for drawing and sharing custom images, as well as paid subscriptions for more features like making animated GIFs, drawing with your webcam, or using the site’s editor.
Part 2 5 Picture to Cartoon Converters on Your Phone
Well, above, we have discussed the tools that can be used through the website or, say, on the computer. But when you don’t have a computer, you can do it with the help of your phone as well. Now cartoon photo converter for phones is also available that one can try. These are as follows: -
01**Wondershare Filmora Video Editor **
Filmora is an app for users to create videos, collages, and other types of images. It is a free app that comes with different features. It has been downloaded over 100 million times and has been used by numerous industries for completing the editing part. This acts as the best video to cartoon converter online free. It is available on iOS, Android, Windows 10, and Mac OS X.
For Win 7 or later (64-bit)
For macOS 10.12 or later
In general, it allows users to take pictures or videos from their phones and then convert them into a cartoon. The app also allows users to edit their images before converting them into cartoons as they want. The effects added in this tool are so awesome that any can love trying this out.
02Cartoon Photo Editor
This is a photo editor that allows users to turn photos into cartoon drawings. Users can choose from a range of styles and colors to create their own unique cartoons. The app offers different drawing styles, and accordingly, a user can choose one and do the editing easily. It also features abstract designs that lack realism but are still recognizable as cartoons. Users feel great using this app because of its interface and the features available.
03Art Camera – Cartoon, Pencil Sketch Art Effect Photo
Art Camera is a new photo app that allows taking photos that look like pencil drawings or sketches. It uses a sophisticated algorithm and the latest machine learning technology to transform your photos into cartoon-like images. This app is perfect for those who are looking for an artistic way of capturing memories, portraits, or even creating art from their own imagination. It is widely is available on iOS, Android, and Windows Phone devices.
04Tooncam – Cartoon, Pencil Sketch Pic
Tooncam is a free app that helps you to create cartoon images. You can use it on your phone or tablet. It is one of the best apps for creating cartoons on your phone with images with just one click. With this app, you can also share your cartoons with friends or family members and make them laugh out loud with funny pictures.
The app uses the camera of your device and its powerful photo editing tools to convert any photo into a cartoon image in just a few steps.
05Photo To Cartoon Yourself Edit
The app is a picture to cartoon converter on your phone that lets you transform a photo into a cartoon in just one tap. You can use this app to create an animated movie, comic strip, or comic book. The app works by converting the image into vector graphics and then adding colors and shading, and finally exporting it as an animated GIF. The app is available for iOS platforms.
Part 3 How to convert photo to cartoon
We are sure you might be thinking about how you can use these tools. Well, firstly, understand that every tool we have discussed above have the somewhere same interface, and you need to follow some steps to convert photo to cartoon. To help you more, here we are discussing the steps you need to follow while using FotoSketcher for the same purpose.
FotoSketcher is one of the best tools available free of cost for you. You can simply convert the photos into a cartoon and use them over different portals as per your need. There will be no need for you to engage in any complicated process to complete the editing task. The steps are also very simple to follow for this tool, and these are as follows: -
Step 1: firstly, get the FotoSketcher tool on your device.
Step 2: Wait until the installation of the tool gets completed. It is compatible with Windows and Mac both.
Step 3: Now, open the tool and upload the photo you wish to convert.
Step 4: Here, it asks you to select the type. You can either select cartoon 1 or Cartoon 2. These are the special effects being part of this software.
Step 5: Now, from the list of features, select the type of editing you wish to apply. There are multiple options available to choose from. You can choose any of them as per your preference.
Step 6: Blend the colors as needed for the edited photo. Along with it, there are some other parameters too need to look out for editing, and accordingly, you can set them.
Step 7: After setting up the changes, click on “Draw” to apply the changes. Wait until it applies the effects.
Step 8: The resulted image will appear, and you can download it in the required format from here.
● Ending Thoughts →
● Do convert photo to cartoon online in just simple steps without being part of any complicated process.
● Filmora is the best cartoon image converter online available, helping in converting the images as required.
● The photo to cartoon software is quite simple to use and does not require any particular technical knowledge.
Easy Shortcut to Convert Videos to Gifs on iPhone
Simple Shortcut to Convert Videos to Gifs on iPhone
An easy yet powerful editor
Numerous effects to choose from
Detailed tutorials provided by the official channel
To create iPhone video to GIF there are several third-party apps available. You can even choose the online sites for the task, but the editing and other options will be limited. The GIFs on your iPhone can be created using videos as well as Live photos.

One of the best ways to create a GIF is using the Shortcuts app that comes pre-installed on devices running on iOS 13 and later versions of the OS. The app has shortcuts to accomplish several tasks on your iPhone including GIF creation. Learn about using Shortcuts and other tools for creating a GIF on iPhone.
In this article
01 [How to make GIF from Video on iPhone using Shortcut App](#Part 1)
02 [How to save Live Photos as GIF on iPhone](#Part 2)
03 [How to save Live Photos as GIF on iPhone](#Part 3)
04 [How to save videos as live photos on your iPhone?](#Part 4)
05 [Best tool for creating GIFs and video editing on your Windows and Mac- Wondershare Filmora](#Part 5)
Part 1 How to make GIF from Video on iPhone using Shortcut App
One of the easiest ways to convert video GIF iPhone is by using the Shortcuts app. If you have deleted the app, you can reinstall it from the app store. Once the app is installed, you would next need to allow the untrusted shortcuts and for this go to Settings > Shortcuts> toggle Add Untrusted Shortcuts to add the shortcuts created by the user. The further steps for converting video to GIF iPhone are as follows.
Step 1. On your iPhone, download the Video to GIF shortcut. You can download it using iCloud or RoutineHub. Find the shortcut and click on Get Shortcut will let you check the action of the shortcut.
Move down and click on the red Add Untrusted Shortcut button that will add the shortcut for the library.

Step 2. Go to the My Shortcuts tab and click on the Video to GIF section. If you are using it for the first time, you need to grant permission to use the videos and photos. Click on the OK button and continue.

Step 3. Next, browse and add the video from which you wish to create the GIF. Since GIF animations are short, it is always recommended to use short videos.
Step 4. Video processing will start and during this, the Video to GIF shortcut will be greyed out.

Step 5. Once done, the preview of the GIF will appear on the screen. Finally, you can save the GIF to your Photos app on iPhone or can also share it through email, AirDrop, iMessage, and other third-party services as needed.

Part 2 How to save Live Photos as GIF on iPhone
Live Photo is an interesting feature of the iPhone where an image is captured in an animated form for a couple of seconds. These Live Photos can be easily converted to GIFs using the steps below.
Step 1. On your iPhone Photo app, open the Live Photo that you want to save as GIF.
Step 2. Darg the selected photo upwards and will see multiple effects options along with other image details.
Step 3 To save the selected image as GIF, choose Loop or Bounce animation. Once done, share the image on mail and other services listed or save it to the device.

Part 3 How to save Live Photo as video on iPhone
You can also convert your live photos to videos and then use them for making GIFs and for other uses. The steps for iPhone live photo to video are as follows.
Step 1. On your iPhone, open the Photos app and choose the Live Photo that you want to convert.
Step 2. Next, click on the share button at the bottom of the screen and multiple options will be seen.
Step 3. Scroll down and choose Save as Video option and with this, the live photo will be saved as a Video.
Additionally, you can also convert the LivePhotos to videos using the shortcut app.

Part 4 How to save videos as live photos on your iPhone?
If you need to convert your videos to live photos on iPhone, there are several third-party tools available and one of the widely used is IntoLive. Using this app, videos, as well as GIFs, can be converted into live photos.
Steps on how to turn a video into a live photo iPhone
Step 1. Download, install and launch the IntoLive app from the app store.
Step 2. Next, browse and add the desired video.
Step 3. If needed, the added video can be customized using several supported features.
Step 4. Next, click on the Make option at the top-right corner and then choose the repeats you want for a Live Photo.
Step 5. Finally, click on the Live Photo and your Live Photo will be saved to the device.

Part 5 Best tool for creating GIFs and video editing on your Windows and Mac- Wondershare Filmora
Above we have listed several ways to create GIFs on your iPhone and also to convert videos to LivePhotos and vice-versa. Installing different tools for different tasks is a hassle and also a time-consuming task. So, if you are looking for an all-in-one tool that allows you to create GIFs, and professionally edit your media files, Wondershare Filmora Video Editor is the best tool to consider. Available for quick download on your Windows and Mac system, this feature-packed software has an intuitive and user-friendly interface.
Wondershare Filmora
Get started easily with Filmora’s powerful performance, intuitive interface, and countless effects!
Try It Free Try It Free Try It Free Learn More >

Media files in all key formats are supported by the tool and there are multiple options for editing and video creation like splitting, rotating, cutting, adding effects, sounds, text, and other elements. In a few simple steps, your customized GIF and other professional-looking media files will be ready.
Steps to create GIF using Wondershare Filmora
Step 1. Launch the installed software on your system and add the video or images from the system.
Step 2. The added media files next need to be dragged and dropped to the timeline at the bottom of the interface.
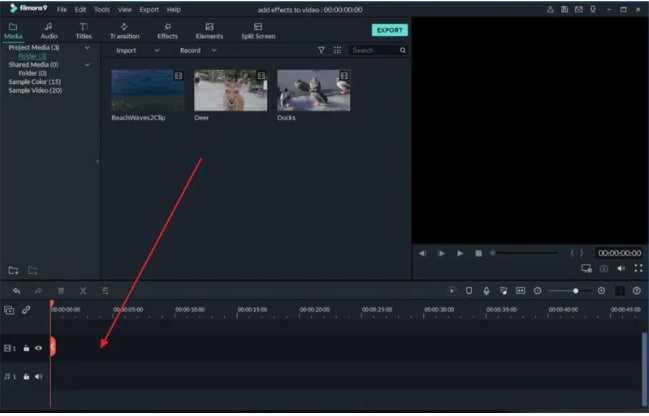
Step 3. After the files are moved, you can customize them using several editing tools like rotate, crop, cut, and more.
Step 4. Next, add text, effects, sound, and other elements as needed.

Step 5. Finally choose to export the file and then from the Local tab, select the GIF option. Choose a file name and location and then finally click on the EXPORT button.

● Key Takeaways from This Episode →
●There are several ways to turn video into GIF iPhone.
●Using shortcuts is one of the most straightforward methods for creating GIFs using videos.
●You can also convert videos to LivePhoto and vice versa on your iPhone using third-party apps.
●Wondershare Filmora is an excellent software to make GIFs and professionally edit media files.
To create iPhone video to GIF there are several third-party apps available. You can even choose the online sites for the task, but the editing and other options will be limited. The GIFs on your iPhone can be created using videos as well as Live photos.
One of the best ways to create a GIF is using the Shortcuts app that comes pre-installed on devices running on iOS 13 and later versions of the OS. The app has shortcuts to accomplish several tasks on your iPhone including GIF creation. Learn about using Shortcuts and other tools for creating a GIF on iPhone.
In this article
01 [How to make GIF from Video on iPhone using Shortcut App](#Part 1)
02 [How to save Live Photos as GIF on iPhone](#Part 2)
03 [How to save Live Photos as GIF on iPhone](#Part 3)
04 [How to save videos as live photos on your iPhone?](#Part 4)
05 [Best tool for creating GIFs and video editing on your Windows and Mac- Wondershare Filmora](#Part 5)
Part 1 How to make GIF from Video on iPhone using Shortcut App
One of the easiest ways to convert video GIF iPhone is by using the Shortcuts app. If you have deleted the app, you can reinstall it from the app store. Once the app is installed, you would next need to allow the untrusted shortcuts and for this go to Settings > Shortcuts> toggle Add Untrusted Shortcuts to add the shortcuts created by the user. The further steps for converting video to GIF iPhone are as follows.
Step 1. On your iPhone, download the Video to GIF shortcut. You can download it using iCloud or RoutineHub. Find the shortcut and click on Get Shortcut will let you check the action of the shortcut.
Move down and click on the red Add Untrusted Shortcut button that will add the shortcut for the library.
Step 2. Go to the My Shortcuts tab and click on the Video to GIF section. If you are using it for the first time, you need to grant permission to use the videos and photos. Click on the OK button and continue.
Step 3. Next, browse and add the video from which you wish to create the GIF. Since GIF animations are short, it is always recommended to use short videos.
Step 4. Video processing will start and during this, the Video to GIF shortcut will be greyed out.
Step 5. Once done, the preview of the GIF will appear on the screen. Finally, you can save the GIF to your Photos app on iPhone or can also share it through email, AirDrop, iMessage, and other third-party services as needed.
Part 2 How to save Live Photos as GIF on iPhone
Live Photo is an interesting feature of the iPhone where an image is captured in an animated form for a couple of seconds. These Live Photos can be easily converted to GIFs using the steps below.
Step 1. On your iPhone Photo app, open the Live Photo that you want to save as GIF.
Step 2. Darg the selected photo upwards and will see multiple effects options along with other image details.
Step 3 To save the selected image as GIF, choose Loop or Bounce animation. Once done, share the image on mail and other services listed or save it to the device.
Part 3 How to save Live Photo as video on iPhone
You can also convert your live photos to videos and then use them for making GIFs and for other uses. The steps for iPhone live photo to video are as follows.
Step 1. On your iPhone, open the Photos app and choose the Live Photo that you want to convert.
Step 2. Next, click on the share button at the bottom of the screen and multiple options will be seen.
Step 3. Scroll down and choose Save as Video option and with this, the live photo will be saved as a Video.
Additionally, you can also convert the LivePhotos to videos using the shortcut app.
Part 4 How to save videos as live photos on your iPhone?
If you need to convert your videos to live photos on iPhone, there are several third-party tools available and one of the widely used is IntoLive. Using this app, videos, as well as GIFs, can be converted into live photos.
Steps on how to turn a video into a live photo iPhone
Step 1. Download, install and launch the IntoLive app from the app store.
Step 2. Next, browse and add the desired video.
Step 3. If needed, the added video can be customized using several supported features.
Step 4. Next, click on the Make option at the top-right corner and then choose the repeats you want for a Live Photo.
Step 5. Finally, click on the Live Photo and your Live Photo will be saved to the device.
Part 5 Best tool for creating GIFs and video editing on your Windows and Mac- Wondershare Filmora
Above we have listed several ways to create GIFs on your iPhone and also to convert videos to LivePhotos and vice-versa. Installing different tools for different tasks is a hassle and also a time-consuming task. So, if you are looking for an all-in-one tool that allows you to create GIFs, and professionally edit your media files, Wondershare Filmora Video Editor is the best tool to consider. Available for quick download on your Windows and Mac system, this feature-packed software has an intuitive and user-friendly interface.
Wondershare Filmora
Get started easily with Filmora’s powerful performance, intuitive interface, and countless effects!
Try It Free Try It Free Try It Free Learn More >
Media files in all key formats are supported by the tool and there are multiple options for editing and video creation like splitting, rotating, cutting, adding effects, sounds, text, and other elements. In a few simple steps, your customized GIF and other professional-looking media files will be ready.
Steps to create GIF using Wondershare Filmora
Step 1. Launch the installed software on your system and add the video or images from the system.
Step 2. The added media files next need to be dragged and dropped to the timeline at the bottom of the interface.
Step 3. After the files are moved, you can customize them using several editing tools like rotate, crop, cut, and more.
Step 4. Next, add text, effects, sound, and other elements as needed.
Step 5. Finally choose to export the file and then from the Local tab, select the GIF option. Choose a file name and location and then finally click on the EXPORT button.
● Key Takeaways from This Episode →
●There are several ways to turn video into GIF iPhone.
●Using shortcuts is one of the most straightforward methods for creating GIFs using videos.
●You can also convert videos to LivePhoto and vice versa on your iPhone using third-party apps.
●Wondershare Filmora is an excellent software to make GIFs and professionally edit media files.
Techniques on Making After Effects 2D Animation
Adobe After Effects is probably the most versatile software you can add to your arsenal of skills on your journey to learn After Effects 2D animation. Both beginners and professionals can brush up their animation skills on After Effects with some help from tutorials and videos. When it comes to experimenting with visual effects, motion graphics, and 3D composting, Adobe After Effects is recommended as an industry-standard software. So it should come as no surprise that there is a surplus of After Effects tutorials and information on the internet. To help simplify things, here’s a compiled list of Adobe After Effects courses along with a few tips to get started.
In this article
01 [Practical Online 2D Animation Courses](#Part 1)
02 [How to Create 2D Motion Graphics with After Effects](#Part 2)
03 [5 Best Animation After Effects that you must know](#Part 3)
04 [5 Character Animation Tools for After Effects](#Part 4)
Part 1 Practical Online 2D Animation Courses
Learning After Effects need not be complicated. You can use this tool to help you create amazing designs from your sheer imagination. Here is a list of the best courses which are self-paced so you don’t need to worry about fitting them into your schedule. Some of these courses are primarily for beginners who are seeking to orient themselves to the basics. While other courses have recent insights into the latest techniques curated by the industry experts. The courses in this list are diverse and are from different platforms like Domestika, Coursera, Adobe, and YouTube.
1. Getting Started - Adobe
The official Adobe learning site has its own course for introducing After Effects. After all, the software is a product of Adobe itself. This tutorial is purely for complete beginners and is designed to briefly introduce the interface and basic functioning of Adobe After Effects. It takes you through the manual control and menu options which you will need to familiarize yourself with.
2. The Basics – YouTube
This free-to-watch After Effects tutorial is presented by a very passionate photographer and YouTuber Peter Meckinnon. He walks you through the various elements the Adobe interface puts at your disposal. These elements are quite artistically introduced by Peter as he animates a basic title project on Adobe.
3. How to Animate a line - YouTube
When you are introduced to a vast world of possibilities, it can be a bit overwhelming. Which is why starting from the very basics is always a good idea. This next YouTube tutorial shows you step by step how to animate a line on Adobe After Effects from one point to another.
4. Introduction and Advanced After Effects – Domestika
Domestika is an online learning platform that is great for freelancers and independent artists who can purchase self-paced lessons on topics like graphic design and animation. The Introduction and Advanced After Effects tutorials by Carlos Zensuke Albarran are a comprehensive bundle of lessons that quench your thirst for 2D effects animation a bit further.
5. Typography Animation – Domestika
The mark of a professional is his specialization. As you gain more experience in practicing Adobe After Effects, you can begin trying out more bold and stylistic animations with simple typographic techniques. It would not only make you more confident as a motion graphics designer but also equip you with fluid skills as a freelancer. Typographic motion graphics is a cash cow for many After Effect animators.
6. Vectorial Animation – Domestika
Cartoonist animated videos and motion designs are quite interesting to animate. Vectorial 2D animation is quite popular among YouTube tutorials and explainer videos. They make for excellent corporate animations. You can find an amazing Domestika tutorial on Vectorial that walks you through in simple steps on Frame by Frame style animations.
7. Getting Started with Motion Graphics - Coursera
Coursera is another amazing online learning platform for gaining access to Beginner to Advanced courses on Adobe After Effects. This one tutorial introduces you to Beginner level motion graphics where you can learn from short self-paced videos.
8. Getting Started with Motion Graphics - SkillShare
SkillShare is another amazing online learning platform for gaining access to Beginner to Advanced courses on Adobe After Effects. This one tutorial introduces you to Beginner level motion graphics where you can learn from short self-paced videos. It is guided by a leading professional in motion graphics and visual effects who covers all the bases alongside hands-projects.
9. Make Simple Logo Intro in After Effects – YouTube
Creating Intros for your videos is probably the most cost-effective marketing gizmos employed today. This free tutorial on YouTube from Tech Infusion is a simple-to-follow video that sheds some light on how to create eye-catching intros that instantly catches your audience’s attention.
10. Work with Composition - Adobe
Working with After Effects is all about creating gorgeous compositions that pop. This Adobe tutorial equips you with the basics of creating animation on Adobe After Effects with multiple layers and keyframes.
Part 2 How to Create 2D Motion Graphics with After Effects
The astonishing world of intriguing after-effects is vast. Whether you do it as a profession or simply as a hobby, learning how to add after-effects to your 2d motion graphics is always an amazing idea. Worried how you’d understand the tools to add after-effects to your animation? Well, we’ve got you covered! Today we’ll be looking at how you can add after-effects to your 2d animation.

●To make a new 2D graphics in after effects, you need to make a new composition. To do so, head to the composition menu in the menu bar. Upon clicking on the composition menu, a new drop-down menu would open up. From the drop-down menu, click on “new composition”.

●A new setting box would pop up, in this settings box you can alter the settings of the composition. If you do not wish to change any setting, simply click on “ok” and proceed ahead.

●Next, you need to find the tool panel in the main menu bar. Upon clicking on it, a new drop-down menu will appear, click on “star tool”. We’re simply taking the star shape, for instance, alternatively, you can select and another shape too…

●Once you’ve selected the shape you want, draw by clicking your mouse and dragging

●Click on the shape and the layers will appear on the left of your screen. From the popped up screen, click on “properties”. Here you can find multiple animation options and you can even edit frame by frame. Add frames at regular intervals and move according to your wish

Part 3 5 Best Animation After Effects that you must know
1. Stacking animation – YouTube
Stacking animation is an excellent and simple trick that can make any animation look cool and complex. The stacking animation is nothing but the use of the stacking template multiple times. To do so, you just need to duplicate a few of the base layers. Next, you need to offset the duplicated frames by a few frames and finally add some effects. The Adding of stacking animation will result in a slight extension of your animation layers. You can further customize your frames by adding effects or color to enhance the animation.

2. Light sweeps
An advantage of using the after effects software is that it offers several drag and drop features which you can simply drag and drop to your animation to enhance its looks. A light sweep animation is one such animation that can add great value to your animation. You can add this effect by following the steps given below
●Head to “effects” from your main interface
●Here you need to find “generate”
●Now from the list of drag and drop animations, drag and drop “light sweeps” onto your workspace
You can then change and customize almost any aspect of the animation simply by clicking on it and changing the settings

3. Quick shape animation
This is a very cool trick that you can use on your 2d objects! This includes the creation of your own layer(you can use any 2d shape). Further, you need to duplicate your shape and the stagger the animation. This gives the entire animation an interesting and engaging effect. The trick is very resourceful while dealing with 2d objects.

4. Animate your background
When your entire animation looks slightly basic and you wish to give your animation a zest, this trick is highly useful! If you’re working with colored backgrounds, this animation trick can help make it more attractive. This animation is simply just adding motion to your background making it look like it’s moving in or out.

5. Graphics reflection
Although this method is slightly complicated, it could enhance the animation by leaps and bounds. To do so, you need to write a fancy text of your choice, then you need to duplicate this text, and further, you need to flip it vertically. To make it look more realistic, you can add the blur effect. This will make it look like the duplicated text is a reflection of the original text

Part 4 5 Character Animation Tools for After Effects
1. Rubber hose 2
Rubber hose is one of the primitive tools for adding animations. This is mainly because it was found in the early 2000s and back then, animations had wobbly legs and an absurd body structure. This tool has several cool inbuilt functions that make the animation so much simpler. The robust tool. makes animation pretty simple and hassle-free. Rubber hose 2 is an advanced version of rubber hose, it has several advanced features. The plug-in is however not free, you’d need to purchase it at $45 in order to gain a lifetime access.
2. Duik
Duik is one of the most advanced and comprehensive character animation tools in the market. It was initially launched in 2008, but since then there’s been a vast improvement in the tool’s features and today it’s one of the picks to perform animation using rigging and other animation techniques. Duik has several tools that make the animation so convenient. The tool has features such as auto rig, which helps save time while animating. Other tools include effects such as bones, rigging, various filters, and effects.
3. Joystick ‘n sliders
Joystick’n sliders is another highly utilitarian tool for animators. Along with key animation features such as rigging and boning, the tool has other cool and highly useful features to make your animation interesting! The user interface of this tool is a big plus, the simplicity of the user interface makes the tool perfect for beginners and advanced level animators. The tool is simple to use and has a plethora of cool features which could help you make your animation highly engaging.
4. Puppet tool 3
Puppet tool 3 is an after effects plugin that could help you create character animations. The plug-in is different from the in-built puppet tool in after effects. The puppet tool inbuilt into after effects are the Rigging tool for animation, however using the inbuilt tool is slightly sophisticated. Puppet tool 3 is not an individual tool but works in coordination with the inbuilt the puppet tool. Since using the inbuilt tool was complex, puppet tool 3 made it simple. Apart from rigging, the plugin also allows you to work with a few additional features. You can buy the plug-in for only $39.95!
5. Adobe animate character
Adobe character animation is the in-house plugin of Adobe to animate characters. However, the tool is probably still in development. Adobe has been working on releasing this tool for a while now, and in the latest version of after effects, Adobe added the beta version of the character animator. Character animator is probably the most efficient and advanced animation tool. It uses facial recognition for animations and allows you to perform almost all basic animations. The software is perfect when you’re trying to create a complex animated character.
Key Takeaways from This Episode
● Today we’ve dwelled a lot into animation and the tools available for animation.
● We’ve seen how animation could be enhanced using the inbuilt tools available in Adobe after effects.
● We’ve also gone a step further and seen the external plugin tools that you can use to make character animations and highly advanced 2d effects ok animations.
● We’ve also taken an overview on how to create a simple basic 2d motion animation, all in all, we’ve gone from understanding the beginner level animation to understanding advanced animation
02 [How to Create 2D Motion Graphics with After Effects](#Part 2)
03 [5 Best Animation After Effects that you must know](#Part 3)
04 [5 Character Animation Tools for After Effects](#Part 4)
Part 1 Practical Online 2D Animation Courses
Learning After Effects need not be complicated. You can use this tool to help you create amazing designs from your sheer imagination. Here is a list of the best courses which are self-paced so you don’t need to worry about fitting them into your schedule. Some of these courses are primarily for beginners who are seeking to orient themselves to the basics. While other courses have recent insights into the latest techniques curated by the industry experts. The courses in this list are diverse and are from different platforms like Domestika, Coursera, Adobe, and YouTube.
1. Getting Started - Adobe
The official Adobe learning site has its own course for introducing After Effects. After all, the software is a product of Adobe itself. This tutorial is purely for complete beginners and is designed to briefly introduce the interface and basic functioning of Adobe After Effects. It takes you through the manual control and menu options which you will need to familiarize yourself with.
2. The Basics – YouTube
This free-to-watch After Effects tutorial is presented by a very passionate photographer and YouTuber Peter Meckinnon. He walks you through the various elements the Adobe interface puts at your disposal. These elements are quite artistically introduced by Peter as he animates a basic title project on Adobe.
3. How to Animate a line - YouTube
When you are introduced to a vast world of possibilities, it can be a bit overwhelming. Which is why starting from the very basics is always a good idea. This next YouTube tutorial shows you step by step how to animate a line on Adobe After Effects from one point to another.
4. Introduction and Advanced After Effects – Domestika
Domestika is an online learning platform that is great for freelancers and independent artists who can purchase self-paced lessons on topics like graphic design and animation. The Introduction and Advanced After Effects tutorials by Carlos Zensuke Albarran are a comprehensive bundle of lessons that quench your thirst for 2D effects animation a bit further.
5. Typography Animation – Domestika
The mark of a professional is his specialization. As you gain more experience in practicing Adobe After Effects, you can begin trying out more bold and stylistic animations with simple typographic techniques. It would not only make you more confident as a motion graphics designer but also equip you with fluid skills as a freelancer. Typographic motion graphics is a cash cow for many After Effect animators.
6. Vectorial Animation – Domestika
Cartoonist animated videos and motion designs are quite interesting to animate. Vectorial 2D animation is quite popular among YouTube tutorials and explainer videos. They make for excellent corporate animations. You can find an amazing Domestika tutorial on Vectorial that walks you through in simple steps on Frame by Frame style animations.
7. Getting Started with Motion Graphics - Coursera
Coursera is another amazing online learning platform for gaining access to Beginner to Advanced courses on Adobe After Effects. This one tutorial introduces you to Beginner level motion graphics where you can learn from short self-paced videos.
8. Getting Started with Motion Graphics - SkillShare
SkillShare is another amazing online learning platform for gaining access to Beginner to Advanced courses on Adobe After Effects. This one tutorial introduces you to Beginner level motion graphics where you can learn from short self-paced videos. It is guided by a leading professional in motion graphics and visual effects who covers all the bases alongside hands-projects.
9. Make Simple Logo Intro in After Effects – YouTube
Creating Intros for your videos is probably the most cost-effective marketing gizmos employed today. This free tutorial on YouTube from Tech Infusion is a simple-to-follow video that sheds some light on how to create eye-catching intros that instantly catches your audience’s attention.
10. Work with Composition - Adobe
Working with After Effects is all about creating gorgeous compositions that pop. This Adobe tutorial equips you with the basics of creating animation on Adobe After Effects with multiple layers and keyframes.
Part 2 How to Create 2D Motion Graphics with After Effects
The astonishing world of intriguing after-effects is vast. Whether you do it as a profession or simply as a hobby, learning how to add after-effects to your 2d motion graphics is always an amazing idea. Worried how you’d understand the tools to add after-effects to your animation? Well, we’ve got you covered! Today we’ll be looking at how you can add after-effects to your 2d animation.
●To make a new 2D graphics in after effects, you need to make a new composition. To do so, head to the composition menu in the menu bar. Upon clicking on the composition menu, a new drop-down menu would open up. From the drop-down menu, click on “new composition”.
●A new setting box would pop up, in this settings box you can alter the settings of the composition. If you do not wish to change any setting, simply click on “ok” and proceed ahead.
●Next, you need to find the tool panel in the main menu bar. Upon clicking on it, a new drop-down menu will appear, click on “star tool”. We’re simply taking the star shape, for instance, alternatively, you can select and another shape too…
●Once you’ve selected the shape you want, draw by clicking your mouse and dragging
●Click on the shape and the layers will appear on the left of your screen. From the popped up screen, click on “properties”. Here you can find multiple animation options and you can even edit frame by frame. Add frames at regular intervals and move according to your wish
Part 3 5 Best Animation After Effects that you must know
1. Stacking animation – YouTube
Stacking animation is an excellent and simple trick that can make any animation look cool and complex. The stacking animation is nothing but the use of the stacking template multiple times. To do so, you just need to duplicate a few of the base layers. Next, you need to offset the duplicated frames by a few frames and finally add some effects. The Adding of stacking animation will result in a slight extension of your animation layers. You can further customize your frames by adding effects or color to enhance the animation.
2. Light sweeps
An advantage of using the after effects software is that it offers several drag and drop features which you can simply drag and drop to your animation to enhance its looks. A light sweep animation is one such animation that can add great value to your animation. You can add this effect by following the steps given below
●Head to “effects” from your main interface
●Here you need to find “generate”
●Now from the list of drag and drop animations, drag and drop “light sweeps” onto your workspace
You can then change and customize almost any aspect of the animation simply by clicking on it and changing the settings
3. Quick shape animation
This is a very cool trick that you can use on your 2d objects! This includes the creation of your own layer(you can use any 2d shape). Further, you need to duplicate your shape and the stagger the animation. This gives the entire animation an interesting and engaging effect. The trick is very resourceful while dealing with 2d objects.
4. Animate your background
When your entire animation looks slightly basic and you wish to give your animation a zest, this trick is highly useful! If you’re working with colored backgrounds, this animation trick can help make it more attractive. This animation is simply just adding motion to your background making it look like it’s moving in or out.
5. Graphics reflection
Although this method is slightly complicated, it could enhance the animation by leaps and bounds. To do so, you need to write a fancy text of your choice, then you need to duplicate this text, and further, you need to flip it vertically. To make it look more realistic, you can add the blur effect. This will make it look like the duplicated text is a reflection of the original text
Part 4 5 Character Animation Tools for After Effects
1. Rubber hose 2
Rubber hose is one of the primitive tools for adding animations. This is mainly because it was found in the early 2000s and back then, animations had wobbly legs and an absurd body structure. This tool has several cool inbuilt functions that make the animation so much simpler. The robust tool. makes animation pretty simple and hassle-free. Rubber hose 2 is an advanced version of rubber hose, it has several advanced features. The plug-in is however not free, you’d need to purchase it at $45 in order to gain a lifetime access.
2. Duik
Duik is one of the most advanced and comprehensive character animation tools in the market. It was initially launched in 2008, but since then there’s been a vast improvement in the tool’s features and today it’s one of the picks to perform animation using rigging and other animation techniques. Duik has several tools that make the animation so convenient. The tool has features such as auto rig, which helps save time while animating. Other tools include effects such as bones, rigging, various filters, and effects.
3. Joystick ‘n sliders
Joystick’n sliders is another highly utilitarian tool for animators. Along with key animation features such as rigging and boning, the tool has other cool and highly useful features to make your animation interesting! The user interface of this tool is a big plus, the simplicity of the user interface makes the tool perfect for beginners and advanced level animators. The tool is simple to use and has a plethora of cool features which could help you make your animation highly engaging.
4. Puppet tool 3
Puppet tool 3 is an after effects plugin that could help you create character animations. The plug-in is different from the in-built puppet tool in after effects. The puppet tool inbuilt into after effects are the Rigging tool for animation, however using the inbuilt tool is slightly sophisticated. Puppet tool 3 is not an individual tool but works in coordination with the inbuilt the puppet tool. Since using the inbuilt tool was complex, puppet tool 3 made it simple. Apart from rigging, the plugin also allows you to work with a few additional features. You can buy the plug-in for only $39.95!
5. Adobe animate character
Adobe character animation is the in-house plugin of Adobe to animate characters. However, the tool is probably still in development. Adobe has been working on releasing this tool for a while now, and in the latest version of after effects, Adobe added the beta version of the character animator. Character animator is probably the most efficient and advanced animation tool. It uses facial recognition for animations and allows you to perform almost all basic animations. The software is perfect when you’re trying to create a complex animated character.
Key Takeaways from This Episode
● Today we’ve dwelled a lot into animation and the tools available for animation.
● We’ve seen how animation could be enhanced using the inbuilt tools available in Adobe after effects.
● We’ve also gone a step further and seen the external plugin tools that you can use to make character animations and highly advanced 2d effects ok animations.
● We’ve also taken an overview on how to create a simple basic 2d motion animation, all in all, we’ve gone from understanding the beginner level animation to understanding advanced animation
Also read:
- Updated In 2024, 12+ Stunning Instagram GIF Stickers and How to Make & Find
- 2024 Approved FREE Top 21 Best Anime Websites to Watch Anime Online
- New In 2024, The 15 Most Efficient Photo to Cartoon Software for Android
- Updated 2024 Approved You Can Turn a TikTok Into a GIF Now. Heres How
- Updated 10 Cartoon Character Makers to Create Animated Characters
- Updated Most Effective Tactics to Set WhatsApp Status for 2024
- New How to Make Your Characters Interactive in Unity Animation Rigging for 2024
- Updated In 2024, 10 Must Watch Netflix Cartoon Series For You
- The Ultimate Cheatsheet to 15 Adobe Animate Alternatives for 2024
- Updated 2024 Approved How to Convert Video to GIF Fast & Easy
- Updated Some Techniques for Creating Animated Logo That Few People Know About
- New Ways to Make Sure You Get the Most up to Date Cartoon Character Design Tips for 2024
- The Only Guide Youll Need to Learn About GIF Video Downloader
- Updated In 2024, Cartoon Fundamentals How to Learn Cartoon Characters Sketch Quickly
- New 2024 Approved OBS Animated Alternatives
- Updated In 2024, Guide on How to Create GIF in WhatsApp iPhone
- In 2024, 10 Trendy & Stylish Free Logo Animation Templates
- FREE Top 21 Best Anime Websites to Watch Anime Online for 2024
- Updated In 2024, Is It That Easy to Make My Animated Character
- Updated The Only Guide Youll Need to Learn About GIF Video Downloader for 2024
- 2024 Approved Is It That Easy to Make My Animated Character
- Updated In 2024, Guide on Creating GIF in WhatsApp iPhone
- New Best 10 Anime Series of All Time | Watch Anime Online for 2024
- New Whats Music Video GIF & How to Add Music to Your GIF Files for 2024
- Updated 10 Stunning Stop Motion Movies You Should Not Miss for 2024
- Create or Find Good Morning/Night GIFs for 2024
- Have You Seen the Facebook Cartoon App Everyones Using Lately
- New In 2024, 5 Photoshop Alternatives to Animate Your Logo
- New How to Make Creative Animation Videos for 2024
- Updated 2024 Approved 15 Types of Cartoon Drawing Styles Examples
- Make Well Done Animated GIF
- Updated In-Depth Study of Cartoon Painting Starts From Learning to Draw It
- New 10 Best Animation Makers for Kids to Have Fun
- New Ways to Master to Find 10 Best Free Animated Text Generator for 2024
- Updated A Roster of 15 Top Disney Channel Cartoons for 2024
- Updated 2024 Approved Top 10 Best Photo to Animation Converters
- Updated 2024 Approved Amazing Techniques of Motion Graphics in Premiere Pro
- 12 Best Stop Motion Studios Worth Recommending
- Updated 2024 Approved 12 Websites with Triggered Animate on Scroll Examples
- New 2024 Approved 15 Best Apps to Turn Photos Into Cartoons and Sketches
- In 2024, 5 Free Animated Gif Sources You Must Check
- 2024 Approved How to Convert Animated GIF From Video
- 26 Cool Anime Girl Names and Their Meanings
- Samsung Galaxy S23 FE won’t play MP4 files
- 4 Most-Known Ways to Find Someone on Tinder For Motorola Moto E13 by Name | Dr.fone
- In 2024, How to Detect and Stop mSpy from Spying on Your Apple iPhone 8 Plus | Dr.fone
- How Can We Unlock Our Vivo Y36 Phone Screen?
- Latest way to get Shiny Meltan Box in Pokémon Go Mystery Box On Asus ROG Phone 8 Pro | Dr.fone
- Why is iPogo not working On Tecno Pova 6 Pro 5G? Fixed | Dr.fone
- Spotify Keeps Crashing A Complete List of Fixes You Can Use on Poco C55 | Dr.fone
- In 2024, How to Remove a Previously Synced Google Account from Your Itel S23+
- How to Stop Life360 from Tracking You On Vivo Y17s? | Dr.fone
- Planning to Use a Pokemon Go Joystick on Samsung Galaxy Z Fold 5? | Dr.fone
- In 2024, The Ultimate Guide How to Bypass Swipe Screen to Unlock on Infinix Device
- How to sign .docm file document electronically
- How to Screen Mirroring Nokia C210 to PC? | Dr.fone
- Title: Updated 5 Different Animation Styles A Simple but Comprehensive Guide for 2024
- Author: Elon
- Created at : 2024-05-19 03:05:15
- Updated at : 2024-05-20 03:05:15
- Link: https://animation-videos.techidaily.com/updated-5-different-animation-styles-a-simple-but-comprehensive-guide-for-2024/
- License: This work is licensed under CC BY-NC-SA 4.0.
