
:max_bytes(150000):strip_icc():format(webp)/samsung-unveils-new-products-at-its-annual-unpacked-event-1200186175-0a17180ae84e47f488f43d3afbb7daa6.jpg)
Updated 5 Ways You Never Heard of for Converting MP4 to GIF in Photoshop for 2024
5 Ways You Never Heard of for Converting MP4 to GIF in Photoshop
5 Techniques You Never heard of for Converting MP4 to GIF in Photoshop
An easy yet powerful editor
Numerous effects to choose from
Detailed tutorials provided by the official channel
When someone mentions a GIF, what comes to your mind? Some people can picture what it means but wouldn’t describe that match. So, before we discuss how to convert mp4 to gif in Photoshop, it would be wise to define it briefly. First of all, GIF stands for Graphics Interchange Format. Its file format is a compressed image, and it is most suitable for animation. We all know that an animated GIF comprises a series of many still images. However, since these images play sequentially, it may appear as if they are in motion. It is that movement illusion that makes the animation effect come about.
When someone mentions a GIF, what comes to your mind? Some people can picture what it means but wouldn’t describe that match. So, before we discuss how to convert mp4 to gif in Photoshop, it would be wise to define it briefly. First of all, GIF stands for Graphics Interchange Format. Its file format is a compressed image, and it is most suitable for animation. We all know that an animated GIF comprises a series of many still images. However, since these images play sequentially, it may appear as if they are in motion. It is that movement illusion that makes the animation effect come about.
In this article
01 [How to Convert Video to GIF in Photoshop - Easy Way](#Part 1)
02 [How to Create Animated GIFs from Video without Photoshop](#Part 2)
Part 1 How to Convert Video to GIF in Photoshop - Easy Way
If you want to convert video to GIF in Photoshop, here is a discussion of the easy way to go about it.
Step 1: Ensure that the Dimensions are Right
When you start to convert mp4 to GIF using Photoshop, it is important to highlight some things that need to be done before anything else. Ensure that you set the resolution and dimensions right. Failure to do saw will see the size of your video determine that of your GIF. Beneath such occurrences, you may find yourself having a GIF that’s too large, and its quality leaves a lot to be desired.
The dimensions you choose will depend on what you are working on at any one particular time. For instance, a 720 x 300 layout is recommended for a banner ad GIF. If there is something that one can’t stress enough is the importance of ensuring that you use pixels. As for the resolution, keep in mind that a low resolution translates to a small file size. In this case, you are at privilege to choose between two units, pixels and inches.
Additionally, set the color mode. Since GIFs are meant for screens, ensure that you select the RGB color mode. Finally, click on Create, which opens a new document, and start following these steps to convert Mp4 to GIF Photoshop.
Step 2: Import the Video you want to convert from MP4 to GIF Photoshop
Remember that we already opened Photoshop by pressing Create. Now, the next thing would be to navigate to File followed by Import before selecting the Video Frames to Layers option.

Step 3: Set Up the Following Settings Accordingly
After choosing the video file, choose Open, and a dialogue box with several options and a preview of the video appears.

The radio buttons give you two options to choose from. The “From Beginning to End” is the ideal choice if you want the whole video to be converted to GIF. However, if you want to focus on a section of the video, select “Selected Range Only.” On the other hand, the checkbox allows you to limit the video to 2 frames. Simply tick it, and Photoshop will automatically ensure that only two frames of the video are left.
Last but not least, check the “Make Frame Animation” checkbox. Once all these settings are set as recommended and depending on preference, Photoshop will export your video as several frames. In the event that the program crashes, all is not lost. You can fix it by reducing the video’s quality and then try importing it.
Step 4: Edit the GIF
Photoshop also gives you several options to help you edit your frames to perfection. In most cases, these settings are ideal for manipulating the quality of your GIF. Interestingly, it is possible to preview how the GIF will look before committing to any change. So expect two panes, right and left. The left one allows you to see the preview, whereas its right counterpart helps you edit.

Alternatively, select one of the preset choices. If you do so, there is no requirement The bottom line is that the tool makes to make any changes. That doesn’t mean you can’t choose a Preset option and then edit it to your preferences. Expect the quality of the GIF to decrease and the size to be relatively small. Right below the Preset, don’t forget to confirm that the selected option is GIF.
Step 5: Save the GIF
Once satisfied by the GIF created, save these frames as animated GIFs. Go to File, then Export, followed by Save for Web (Legacy).

That’s how to convert Mp4 to GIF in simple steps.
Part 2 How to Create Animated GIFs from Video without Photoshop
Alternatively, you can opt to convert Mp4 to GIF using Wondershare Filmora Video Editor . It is yet another tool suitable for creating animated GIFs using videos and photos. It allows the user to customize GIF images using overlays, text, animation, and elements. When it is over, you are at liberty to export it to your computer or any other common portable storage device. The bottommost line is that the tool makes it easy to use whenever necessary. The icing on the cake is the fact that you don’t have to sign up or pay a premium. In case you are wondering, it is also easy to use. All you got to do is to follow these steps.

Wondershare Filmora - Best Video Editor for Mac/Windows
5,481,435 people have downloaded it.
Build unique custom animations without breaking a sweat.
Focus on creating epic stories and leave the details to Filmora’s auto features.
Start a creative adventure with drag & drop effects and endless possibilities.
Filmora simplifies advanced features to save you time and effort.
Filmora cuts out repetition so you can move on to your next creative breakthrough.
Step 1: Import the Videos
Ensure that the videos you import are editable lest that will be a waste of time. Its design makes it compatible with a wide range of formats, including wmv, mkv, mp4, wav, mpeg, avi, jpg, and png. Since it is among the compatible formats, don’t hesitate to use Filmora to convert GIF to mp4 and vice versa instead of Photoshop.
Step 2: Drag the videos to Filmora timeline
Keep in mind that Filmora has a long list of tools you can use to edit your videos. However, you can also use them on a video that’s on its timeline. To drop them there, all you have to do is drag them to the timeline.

Step 3: Edit the File
The list of ways of editing your videos is long. Some of your options are split, crop, combine, slow down, and speed up the GIFs, to mention a few. So, pick the options that fit your situation the best. Ensure that the end product is as good as possible by using these features to the best level.
Step 4: Add Various Text Effects
In most cases, images and videos aren’t enough. You may want to add text to enhance what you want to achieve with the GIF. To do so, you can always introduce text, and trust me, it never disappoints. In addition to text, you can also add sound at this stage. Again, it is something that does GIFs the justice they deserve.

Step 5: Save and Export the GIF
When all is stated and done, you will have to save and export the GIFs so that you can use them accordingly. For instance, you can share them with friends via social media. Ensure that the extension you use is the GIF.
● Key Takeaways from This Episode →
● Based on the above discussion, it is possible to convert mp4 to GIF. As a matter of fact, it is quite easy, and you don’t need to be an expert to get it done.
●Rest assured that the video will become a GIF with a few clicks. Then, you can go ahead and use it as you may wish.
●On one side, you can use Photoshop. It is a tool designed to perform such tasks.
●If you choose it, use the above guide and follow each of the steps. It is quite detailed to the extent that you won’t get stuck along the way.
●On the other hand, you can also use Wondershare Filmora. It is yet another application that converts MP4 to GIF excellently.
When someone mentions a GIF, what comes to your mind? Some people can picture what it means but wouldn’t describe that match. So, before we discuss how to convert mp4 to gif in Photoshop, it would be wise to define it briefly. First of all, GIF stands for Graphics Interchange Format. Its file format is a compressed image, and it is most suitable for animation. We all know that an animated GIF comprises a series of many still images. However, since these images play sequentially, it may appear as if they are in motion. It is that movement illusion that makes the animation effect come about.
When someone mentions a GIF, what comes to your mind? Some people can picture what it means but wouldn’t describe that match. So, before we discuss how to convert mp4 to gif in Photoshop, it would be wise to define it briefly. First of all, GIF stands for Graphics Interchange Format. Its file format is a compressed image, and it is most suitable for animation. We all know that an animated GIF comprises a series of many still images. However, since these images play sequentially, it may appear as if they are in motion. It is that movement illusion that makes the animation effect come about.
In this article
01 [How to Convert Video to GIF in Photoshop - Easy Way](#Part 1)
02 [How to Create Animated GIFs from Video without Photoshop](#Part 2)
Part 1 How to Convert Video to GIF in Photoshop - Easy Way
If you want to convert video to GIF in Photoshop, here is a discussion of the easy way to go about it.
Step 1: Ensure that the Dimensions are Right
When you start to convert mp4 to GIF using Photoshop, it is important to highlight some things that need to be done before anything else. Ensure that you set the resolution and dimensions right. Failure to do saw will see the size of your video determine that of your GIF. Beneath such occurrences, you may find yourself having a GIF that’s too large, and its quality leaves a lot to be desired.
The dimensions you choose will depend on what you are working on at any one particular time. For instance, a 720 x 300 layout is recommended for a banner ad GIF. If there is something that one can’t stress enough is the importance of ensuring that you use pixels. As for the resolution, keep in mind that a low resolution translates to a small file size. In this case, you are at privilege to choose between two units, pixels and inches.
Additionally, set the color mode. Since GIFs are meant for screens, ensure that you select the RGB color mode. Finally, click on Create, which opens a new document, and start following these steps to convert Mp4 to GIF Photoshop.
Step 2: Import the Video you want to convert from MP4 to GIF Photoshop
Remember that we already opened Photoshop by pressing Create. Now, the next thing would be to navigate to File followed by Import before selecting the Video Frames to Layers option.
Step 3: Set Up the Following Settings Accordingly
After choosing the video file, choose Open, and a dialogue box with several options and a preview of the video appears.
The radio buttons give you two options to choose from. The “From Beginning to End” is the ideal choice if you want the whole video to be converted to GIF. However, if you want to focus on a section of the video, select “Selected Range Only.” On the other hand, the checkbox allows you to limit the video to 2 frames. Simply tick it, and Photoshop will automatically ensure that only two frames of the video are left.
Last but not least, check the “Make Frame Animation” checkbox. Once all these settings are set as recommended and depending on preference, Photoshop will export your video as several frames. In the event that the program crashes, all is not lost. You can fix it by reducing the video’s quality and then try importing it.
Step 4: Edit the GIF
Photoshop also gives you several options to help you edit your frames to perfection. In most cases, these settings are ideal for manipulating the quality of your GIF. Interestingly, it is possible to preview how the GIF will look before committing to any change. So expect two panes, right and left. The left one allows you to see the preview, whereas its right counterpart helps you edit.
Alternatively, select one of the preset choices. If you do so, there is no requirement The bottom line is that the tool makes to make any changes. That doesn’t mean you can’t choose a Preset option and then edit it to your preferences. Expect the quality of the GIF to decrease and the size to be relatively small. Right below the Preset, don’t forget to confirm that the selected option is GIF.
Step 5: Save the GIF
Once satisfied by the GIF created, save these frames as animated GIFs. Go to File, then Export, followed by Save for Web (Legacy).
That’s how to convert Mp4 to GIF in simple steps.
Part 2 How to Create Animated GIFs from Video without Photoshop
Alternatively, you can opt to convert Mp4 to GIF using Wondershare Filmora Video Editor . It is yet another tool suitable for creating animated GIFs using videos and photos. It allows the user to customize GIF images using overlays, text, animation, and elements. When it is over, you are at liberty to export it to your computer or any other common portable storage device. The bottommost line is that the tool makes it easy to use whenever necessary. The icing on the cake is the fact that you don’t have to sign up or pay a premium. In case you are wondering, it is also easy to use. All you got to do is to follow these steps.
Wondershare Filmora - Best Video Editor for Mac/Windows
5,481,435 people have downloaded it.
Build unique custom animations without breaking a sweat.
Focus on creating epic stories and leave the details to Filmora’s auto features.
Start a creative adventure with drag & drop effects and endless possibilities.
Filmora simplifies advanced features to save you time and effort.
Filmora cuts out repetition so you can move on to your next creative breakthrough.
Step 1: Import the Videos
Ensure that the videos you import are editable lest that will be a waste of time. Its design makes it compatible with a wide range of formats, including wmv, mkv, mp4, wav, mpeg, avi, jpg, and png. Since it is among the compatible formats, don’t hesitate to use Filmora to convert GIF to mp4 and vice versa instead of Photoshop.
Step 2: Drag the videos to Filmora timeline
Keep in mind that Filmora has a long list of tools you can use to edit your videos. However, you can also use them on a video that’s on its timeline. To drop them there, all you have to do is drag them to the timeline.
Step 3: Edit the File
The list of ways of editing your videos is long. Some of your options are split, crop, combine, slow down, and speed up the GIFs, to mention a few. So, pick the options that fit your situation the best. Ensure that the end product is as good as possible by using these features to the best level.
Step 4: Add Various Text Effects
In most cases, images and videos aren’t enough. You may want to add text to enhance what you want to achieve with the GIF. To do so, you can always introduce text, and trust me, it never disappoints. In addition to text, you can also add sound at this stage. Again, it is something that does GIFs the justice they deserve.
Step 5: Save and Export the GIF
When all is stated and done, you will have to save and export the GIFs so that you can use them accordingly. For instance, you can share them with friends via social media. Ensure that the extension you use is the GIF.
● Key Takeaways from This Episode →
● Based on the above discussion, it is possible to convert mp4 to GIF. As a matter of fact, it is quite easy, and you don’t need to be an expert to get it done.
●Rest assured that the video will become a GIF with a few clicks. Then, you can go ahead and use it as you may wish.
●On one side, you can use Photoshop. It is a tool designed to perform such tasks.
●If you choose it, use the above guide and follow each of the steps. It is quite detailed to the extent that you won’t get stuck along the way.
●On the other hand, you can also use Wondershare Filmora. It is yet another application that converts MP4 to GIF excellently.
Cartoon Fundamentals: How to Learn Cartoon Characters Sketch Quickly
Cartoon Fundamentals: How to Learn Cartoon Characters Sketch Quickly
An easy yet powerful editor
Numerous effects to choose from
Detailed tutorials provided by the official channel
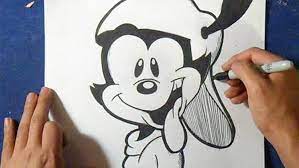
Whether your favourite Cartoon character Bugs-bunny comes from space or beyond your imagination, whether nostalgic Tom and Jerry are young, eternal or old, knowing the process to draw cute, funny, adorable cartoon-characters is a kind of special feeling always & looks essential incase you desire to become quality professional artist. Cartoon Characters are more challenging to draw while taking care of their weird postures, body-parts like legs, hands.Cartoons characters are the easiest ones to draw as it involved simplistic shapes and doesn’t needed a hard core practice.
In this article, you will be able to get access to drawing amazing characters with a wide range of characters featuring ordinary people, fictional-characters, creatures, monsters, or your favourite cute little ones in easy way.
In this article
01 [Basics of Cartoon Characters Sketch](#Part 1)
02 [Cartoon Characters Sketch Anyone Can Draw (With Free Video Tutorials)](#Part 2)
Part 1 Basics of Cartoon Characters Sketch
Before going ahead with the process of learning step by step how to draw cartoon characters, you need to understand the methodology behind sketching. It is easy to draw multiple cartoon characters but at the same time, you need to figure out sketching techniques involved in making that happen. If you want to extract few details of your central character, you need to represent cartoon characters sketch with the help of shapes. The main goal here is to recognize drawing & let it be attractive as children are the main audience and cartoon characters like Disney, Chuck Jones, Walter-Lantz and others have truly enchanted this world with eternal character & their magical appearance.
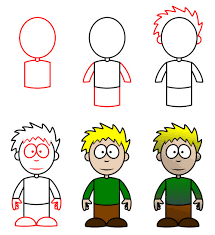
01Concentrating on circle
One of the most basic and interesting shape for any cartoon sketch is circle. All you need is to clearly define basic proportion of your character and that can be happened with desired character’s head. Later on you can trace its charm with face axis.
02Draw Cartoon Eyes
In order to make eyes, one needs to take care of oval shape sketch with slight tilt to side at top position. You have to note that, it is always important to leave good gap between each one of them of approximately similar size as the eye.
03Drawing Cartoon Hair
There is nothing to fear when it comes to draw cartoon hair. You don’t need stylist or a fashion designer in order to make them look perfect. With ideal haircut and matching personality of the desired character, you can do this thing pretty awesome. Hair can represent age, conservatism, rebellion etc. and comes in incredible features.
One of the most accurate & a faster way to do that is by taking references from a fashion magazine, Google Search or cartoon magazine. Once you are done with your findings of ideal styling, you can later on simplify your hair version.
04Sketching for Older Character
Sometimes older characters can be pretty easy to draw as it all begins with their eyes, facial expressions, addition of wrinkles, eyebrows, eye pupils etc. You just need to expand eyebrow a little bit. The older characters have thicker-eyebrows, large forehead space etc.
05Drawing a female character
It’s simple, just focus around delicacy in facial structures, like:-
● Thin eyebrows
● Larger & expressive eyelashes
● Thinner-chin
● Small-nose under fewer-details
● Long hair or depends on your choice
That’s it. Also, you need to give comfort feeling to your character, the more you draw the more realistic it will look.
● Filmora for learning new drawing skills
For Win 7 or later (64-bit)
For macOS 10.12 or later
If you want to showcase your talent to this world without any extravagant apps or software then FIlmora is the best choice that you can consider for drawing some amazing cartoon at your own. This app has its own fun loving designing features and you can add varieties of stickers, images and text to your drawings.
What exactly Filmora can do your drawings:
● For your Pencil sketch of cartoon characters, this app has a lot of text, images and fun loving stickers to showcase more highlighting features of your cartoon character.
● You can share your cartoon with your friends and other community over the web through Twitter, Facebook, and WhatsApp etc.
● This will let you access video editing and image editing features also, to give your cartoon a life.
Part 2 Cartoon Characters Sketch Anyone Can Draw (With Free Video Tutorials)
Now, it’s time to move on with thinking about which cartoon characters to put in your papers with emotions, facial expressions and other features. We are now moving towards the process to include more and more emotions to the same.
Let’s begin drawing 8 amazing characters that are not only famous but also living in heart of children.
01Bugs Bunny
Who doesn’t live Bugs Bunny? Well, it is among the list of most iconic characters that you can imagine and it is certainly the most funnies and interesting character to draw. Right from drawing its big feet to attractive teeth just made for cutting carrots, a lot of things are included in Bugs bunny.
Let’s Draw it:-
● Draw a circle & a “noodle” shaped object as per the imagination. The circle will be its head & pear shape will be its body. You need to make bottom pear fatter as compared to upper portion and also upper-part has to overlap head circle only a little.
● Include perspective guidelines at around the head as this thing can correctly position eyes as well as nose of your bunny.
● You need to draw the eyes at Horizontal guideline and nose where guidelines crosses.
● Draw cheeks and include ears, arms. At the time of drawing arms, you have to give natural curve to arms.
● The arm curves together with the legs-curves might look little difficult, therefore you have to make use of your pencil tenderly without pushing it harder.
● Draw inner lines in ear & iris ellipse at inner portion of eyes.
● Add nose & draw mouth, teeth.
● Your Bunny starts taking its shape and here you can add colors as per your choice
Your cartoon Bugs-Bunny is now ready.
02Popeye
One of the most famous cartoon character of Disney Popeye also appeared on the cinema screens and this belongs to the list of famous classic cartoon-characters.
Let’s draw this amazing character:-
● First Sketch few basic shapes like head, chest, belly.
● It’s a comic character so give it a grotesque-look
● Slightly include other body-parts with shapes like ellipses, noodles in the form of contours.
● Draw one centre-line across the head with well-balanced facial features.
● Draw nose, mouth, ears for the face to form.
● Sketch contours of Popeye’s fists, and arms.
● You can begin giving colors to this shape with flat layers of colorings
03Barney Rubble
As a next door friend and neighbor of Flintstone-house, Barney is kind of a quirky character. This contains features like ears & big feet in the form of angles.
Here is an amazing video tutorial for your Barnet Rubble Cartoon Character:-
04Scrooge McDuck
This cartoon character has wealthy features with fun-loving designs to draw in the form of top-hat, a-cane, as well as few small reading glasses. When it comes to drawing this cartoon characters sketch you need to come up with funny and slightly challenging features.
05Drawing a Ninja For Amazing Action
● Step 1
Work on the head first with nice & precise circle in order to illustrate head portion. Inside this, you can add two more tiny circles for eyes. Once you are done with the eyes, you need to add large & thin rectangle that represents headband. At one portion of headband draw tiny circle with small triangles in numbers 2.
● Step 2
Left arm of our ninja can be sketched through a long & thin rectangle. In order to showcase right arm, draw two rectangles and later on both hands has to be represented in terms of circles.
● Step 3
Two Legs are also need to draw in terms of unusual position. So total of 5 rectangles has to be drawn for both legs & feet.
● Step 4
Add accessories like sabre with basic shapes like circle or rectangle for the same.
● Step 5
Now refine it with an outline and work upon head to make sure both eyes will be clear & visible and also keep the head round & tight.
● Step 6
For upper portion, use nice curved lines and illustrate chest & arms. For showing a discipline make use of good contour likes that highlights posture & gesture.
● Step 7
Repeat the process for the lower portion of your Action ninja.
● Step 8
Now throw some colors’ either black, brown & red to finish the masterpiece!
06Morty Smith
Morty is a lot easy and occupies t-shirt & jeans in its overall appearance and it is much smaller & way more natural than you usually think.
07Helga G. Pataki
If you want to add some crazy cartoon characters in your list then Helga is a good choice. While drawing its cartoon, you need to pay close attention to head as this thing can be little strange with her rectangle hairdo.
08Kim Possible
The design of Kim Possible looks easy at first appearance but when you actually begin with the process of draw its shape, you may get confused. You need to add varieties of features in her face with crazy parachute pants right from the 1980s.
09Shaggy Rogers
The companion of Scooby Shaggy also love its treats & also like to run-away from the monsters at first sight. He can solve mysteries and fun to watch.
● Ending Thoughts →
● Well, drawing cartoons is always a fun loving thing to do. You can pick any one cartoon for drawing some favorite designs.
● You can make use of professional apps to give proper background to your poster or sketch making.
● For Fictional creatures, you can illustrate their styling features, fun facts and lot more to make it much more interesting.
Whether your favourite Cartoon character Bugs-bunny comes from space or beyond your imagination, whether nostalgic Tom and Jerry are young, eternal or old, knowing the process to draw cute, funny, adorable cartoon-characters is a kind of special feeling always & looks essential incase you desire to become quality professional artist. Cartoon Characters are more challenging to draw while taking care of their weird postures, body-parts like legs, hands.Cartoons characters are the easiest ones to draw as it involved simplistic shapes and doesn’t needed a hard core practice.
In this article, you will be able to get access to drawing amazing characters with a wide range of characters featuring ordinary people, fictional-characters, creatures, monsters, or your favourite cute little ones in easy way.
In this article
01 [Basics of Cartoon Characters Sketch](#Part 1)
02 [Cartoon Characters Sketch Anyone Can Draw (With Free Video Tutorials)](#Part 2)
Part 1 Basics of Cartoon Characters Sketch
Before going ahead with the process of learning step by step how to draw cartoon characters, you need to understand the methodology behind sketching. It is easy to draw multiple cartoon characters but at the same time, you need to figure out sketching techniques involved in making that happen. If you want to extract few details of your central character, you need to represent cartoon characters sketch with the help of shapes. The main goal here is to recognize drawing & let it be attractive as children are the main audience and cartoon characters like Disney, Chuck Jones, Walter-Lantz and others have truly enchanted this world with eternal character & their magical appearance.
01Concentrating on circle
One of the most basic and interesting shape for any cartoon sketch is circle. All you need is to clearly define basic proportion of your character and that can be happened with desired character’s head. Later on you can trace its charm with face axis.
02Draw Cartoon Eyes
In order to make eyes, one needs to take care of oval shape sketch with slight tilt to side at top position. You have to note that, it is always important to leave good gap between each one of them of approximately similar size as the eye.
03Drawing Cartoon Hair
There is nothing to fear when it comes to draw cartoon hair. You don’t need stylist or a fashion designer in order to make them look perfect. With ideal haircut and matching personality of the desired character, you can do this thing pretty awesome. Hair can represent age, conservatism, rebellion etc. and comes in incredible features.
One of the most accurate & a faster way to do that is by taking references from a fashion magazine, Google Search or cartoon magazine. Once you are done with your findings of ideal styling, you can later on simplify your hair version.
04Sketching for Older Character
Sometimes older characters can be pretty easy to draw as it all begins with their eyes, facial expressions, addition of wrinkles, eyebrows, eye pupils etc. You just need to expand eyebrow a little bit. The older characters have thicker-eyebrows, large forehead space etc.
05Drawing a female character
It’s simple, just focus around delicacy in facial structures, like:-
● Thin eyebrows
● Larger & expressive eyelashes
● Thinner-chin
● Small-nose under fewer-details
● Long hair or depends on your choice
That’s it. Also, you need to give comfort feeling to your character, the more you draw the more realistic it will look.
● Filmora for learning new drawing skills
For Win 7 or later (64-bit)
For macOS 10.12 or later
If you want to showcase your talent to this world without any extravagant apps or software then FIlmora is the best choice that you can consider for drawing some amazing cartoon at your own. This app has its own fun loving designing features and you can add varieties of stickers, images and text to your drawings.
What exactly Filmora can do your drawings:
● For your Pencil sketch of cartoon characters, this app has a lot of text, images and fun loving stickers to showcase more highlighting features of your cartoon character.
● You can share your cartoon with your friends and other community over the web through Twitter, Facebook, and WhatsApp etc.
● This will let you access video editing and image editing features also, to give your cartoon a life.
Part 2 Cartoon Characters Sketch Anyone Can Draw (With Free Video Tutorials)
Now, it’s time to move on with thinking about which cartoon characters to put in your papers with emotions, facial expressions and other features. We are now moving towards the process to include more and more emotions to the same.
Let’s begin drawing 8 amazing characters that are not only famous but also living in heart of children.
01Bugs Bunny
Who doesn’t live Bugs Bunny? Well, it is among the list of most iconic characters that you can imagine and it is certainly the most funnies and interesting character to draw. Right from drawing its big feet to attractive teeth just made for cutting carrots, a lot of things are included in Bugs bunny.
Let’s Draw it:-
● Draw a circle & a “noodle” shaped object as per the imagination. The circle will be its head & pear shape will be its body. You need to make bottom pear fatter as compared to upper portion and also upper-part has to overlap head circle only a little.
● Include perspective guidelines at around the head as this thing can correctly position eyes as well as nose of your bunny.
● You need to draw the eyes at Horizontal guideline and nose where guidelines crosses.
● Draw cheeks and include ears, arms. At the time of drawing arms, you have to give natural curve to arms.
● The arm curves together with the legs-curves might look little difficult, therefore you have to make use of your pencil tenderly without pushing it harder.
● Draw inner lines in ear & iris ellipse at inner portion of eyes.
● Add nose & draw mouth, teeth.
● Your Bunny starts taking its shape and here you can add colors as per your choice
Your cartoon Bugs-Bunny is now ready.
02Popeye
One of the most famous cartoon character of Disney Popeye also appeared on the cinema screens and this belongs to the list of famous classic cartoon-characters.
Let’s draw this amazing character:-
● First Sketch few basic shapes like head, chest, belly.
● It’s a comic character so give it a grotesque-look
● Slightly include other body-parts with shapes like ellipses, noodles in the form of contours.
● Draw one centre-line across the head with well-balanced facial features.
● Draw nose, mouth, ears for the face to form.
● Sketch contours of Popeye’s fists, and arms.
● You can begin giving colors to this shape with flat layers of colorings
03Barney Rubble
As a next door friend and neighbor of Flintstone-house, Barney is kind of a quirky character. This contains features like ears & big feet in the form of angles.
Here is an amazing video tutorial for your Barnet Rubble Cartoon Character:-
04Scrooge McDuck
This cartoon character has wealthy features with fun-loving designs to draw in the form of top-hat, a-cane, as well as few small reading glasses. When it comes to drawing this cartoon characters sketch you need to come up with funny and slightly challenging features.
05Drawing a Ninja For Amazing Action
● Step 1
Work on the head first with nice & precise circle in order to illustrate head portion. Inside this, you can add two more tiny circles for eyes. Once you are done with the eyes, you need to add large & thin rectangle that represents headband. At one portion of headband draw tiny circle with small triangles in numbers 2.
● Step 2
Left arm of our ninja can be sketched through a long & thin rectangle. In order to showcase right arm, draw two rectangles and later on both hands has to be represented in terms of circles.
● Step 3
Two Legs are also need to draw in terms of unusual position. So total of 5 rectangles has to be drawn for both legs & feet.
● Step 4
Add accessories like sabre with basic shapes like circle or rectangle for the same.
● Step 5
Now refine it with an outline and work upon head to make sure both eyes will be clear & visible and also keep the head round & tight.
● Step 6
For upper portion, use nice curved lines and illustrate chest & arms. For showing a discipline make use of good contour likes that highlights posture & gesture.
● Step 7
Repeat the process for the lower portion of your Action ninja.
● Step 8
Now throw some colors’ either black, brown & red to finish the masterpiece!
06Morty Smith
Morty is a lot easy and occupies t-shirt & jeans in its overall appearance and it is much smaller & way more natural than you usually think.
07Helga G. Pataki
If you want to add some crazy cartoon characters in your list then Helga is a good choice. While drawing its cartoon, you need to pay close attention to head as this thing can be little strange with her rectangle hairdo.
08Kim Possible
The design of Kim Possible looks easy at first appearance but when you actually begin with the process of draw its shape, you may get confused. You need to add varieties of features in her face with crazy parachute pants right from the 1980s.
09Shaggy Rogers
The companion of Scooby Shaggy also love its treats & also like to run-away from the monsters at first sight. He can solve mysteries and fun to watch.
● Ending Thoughts →
● Well, drawing cartoons is always a fun loving thing to do. You can pick any one cartoon for drawing some favorite designs.
● You can make use of professional apps to give proper background to your poster or sketch making.
● For Fictional creatures, you can illustrate their styling features, fun facts and lot more to make it much more interesting.
6 Unexpected Ways Gif Animation Maker Can Affect Your Marketing
6 Unexpected Ways Gif Animation Maker Can Affect Your Marketing
An easy yet powerful editor
Numerous effects to choose from
Detailed tutorials provided by the official channel
Well, if what you’re looking for is a GIF animation maker or software for GIF Animation, we’ve got your back This article starts off with a list of some GIF animation maker tools that you can use to turn your videos into a GIF file (just to give you an idea of how those can help you move forward in your GIF marketing attempts more easily.)
Before ending in a quick rundown, a couple of reasons why GIFs are worth the investment in the first place.
In this article
01 [In What Ways Can You turn videos into a GIF?](#Part 1)
02 [How Gif Animation Maker Affect Your Marketing](#Part 2)
Part 1 In What Ways Can You turn videos into a GIF?
As promised, we’ll be starting off with the tools that you’ll need in order to create GIFs easily (or GIF Animation Maker tools, if you’d prefer). We’ve made sure to pick out a variety for you so that you won’t have to go looking elsewhere for other options We also included what people tend to like and dislike about each option so that you can make a choice as to what you think is the best GIF animation maker more easily.
01**Wondershare Filmora **
If what you’re looking for is software for GIF animation, then Filmora is your best bet This software is available for both Mac and Windows users (with options for both a perpetual license and subscription packages for you to choose from.) This is a video editing tool that is capable of making incredibly professional results. And, perhaps more importantly (considering the subject of this article), it will allow you easily turn a video into a 2D Animation GIF that you can use for your marketing
URL: https://filmora.wondershare.com/
What People Like About The Maker
●Comes with advanced video editing functions
●Easily turns videos into 2D Animation GIFs
●Produces High-Quality Results each time
What People Don’t Like About The Maker
●It is a software, which requires download and installation
●The FREE version is limited
●Must pay either a subscription fee or one-time fee for full access

02Canva
If you’ve created marketing projects before, then you’ve no doubt already heard of Canva. This is what a lot of content creators use in order to easily create content for marketing online In this case, of course, we’re looking at it as an online GIF animation maker, one that, unlike Filmora, requires no download (but will require sign-up) for you to use. Canva has its own GIF Animation Maker that you can use (different from the regular Canva you might be more familiar with, as is shown in the UI screenshot below).
URL: https://www.canva.com/create/gif-maker/
What People Like About The Maker
●It is an online tool, no download or installation is required
●Built-in media library for convenient project creation
●Intuitive 2D Animation GIF interface
What People Don’t Like About The Maker
●Not as advanced when it comes to video editing functions
●Limited FREE trial version
●Must unlock Premium version (subscription-based) for full access

03PicMonkey
The next tool on this is another online GIF Animation maker, this time by the name of PicMonkey This tool is very similar to Canva in that many people know it primarily as a photo-editor tool that is great to use for creating content (as it comes with a built-in media library that you can use to quickly finish projects). But it still earned a spot on this list of ours because it allows users to create 2D animation GIFs as well
URL: https://www.picmonkey.com/
What People Like About The Maker
●Built-in media library with animated shapes and images
●GIF Animation editor and creator all-at-once
●FREE trial is available to test out its GIF animation maker functions
What People Don’t Like About The Maker
●In order to have full access, one must pay for the premium solution
●Custom animation is limited in scope
●No advanced video editing functions

04Kapwing
Kapwing is a free GIF animation creator that will allow you to create GIFs from videos easily The best part about is that it has a FREE version available for use (one that allows you to download finished video projects without watermarks so long as they are under 5 minutes). This should allow you to test out its GIF maker functions before you commit to their premium version (which is subscription-based).
URL: https://www.kapwing.com/gif-maker
What People Like About The Maker
●FREE to use with some limitations
●Quick and easy video-to-GIF conversion
●No watermark on images or video projects under 5 minutes
What People Don’t Like About The Maker
●Full access can only be unlocked by paying for the premium version
●Premium version is subscription-based and expensive
●There is an upload limit
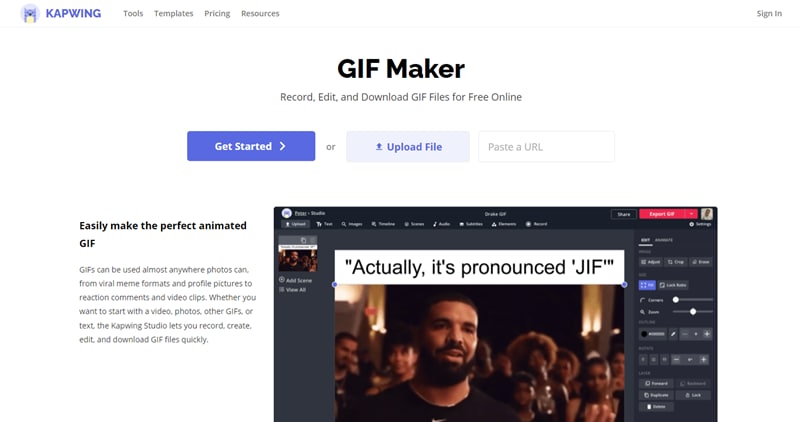
05MakeAGif
MakeAGif is the last GIF animation maker on this list, and it just so happens that it’s one of the easiest to use as well This one is more of a converter tool in that it transforms already-finished videos into a GIF that you can share. A lot of people use it to convert their favorite videos from social media (YouTube, Facebook, etc.) into a GIF that they can share on other platforms.
URL: https://makeagif.com/video-to-gif
What People Like About The Maker
●Free to use with some limitations
●Quick and easy-to-use Video to GIF converter
●Converts pictures, YouTube videos, Facebook videos, etc. to GIF
What People Don’t Like About The Maker
●The tool is more limited in scope than the rest of the tools on this list
●The FREE version is limited
●Premium version requires paying a subscription fee
Part 2 How Gif Animation Maker Affect Your Marketing
Alright, now that you’ve been introduced to what we consider the best GIF Animation maker tools available right now (be they software or online tools), we can move on to actually discussing how you can use GIFs for your marketing efforts We’ve compiled six different ways here, but there are plenty of others, of course. It’s a very open subject.
01GIFs Are Easy to Share Ads
The best part of GIFs is that they are easily consumable media that you can share just about everywhere. For example, you can include them in your email marketing to bring a little life to what could have otherwise been a very dry message You can also have it play out on social media without prompting (different from videos, which the user usually has to play before it starts going.)
GIF LINK: https://media.giphy.com/media/fEkpR6rfmXmZHeVQ22/giphy.gif

02GIFs Can Be Used for Promoting Events
GIFs are also great for promoting events or holiday sales It’s basically just a moving 2D advertisement (like the one that is shown below). Eye-catching in a way that keeps you looking to catch the movement — in compared to if you were just looking at a still image (which might catch your attention for a moment, but usually bores you the next)
GIF LINK: https://media.giphy.com/media/WtUMnz9ZUuzwojWwij/giphy.gif
03GIFs Can Be Used for Call-to-Action Pop-Ups
Perhaps you’ve seen this already in some YouTube videos (see the GIF attached for an example), but a lot of content creators now include GIFs on their content to prompt their audience to complete an action — be it subscribing, sharing, downloading a link, buying a product, etc. It’s a great way of getting a message across in a way that is both fun and straightforward
GIF: https://media.giphy.com/media/73oSygWJFG9K1ha75z/giphy.gif
04GIFs Can Be Used to Set the Scene and Express Emotion
GIFs are also a great way to just generally set the scene or express emotion. Text is…very very difficult to make sound like anything but dry reading. Pictures are a little better, but GIFs??? Well, GIFs are great ‘moving’ pictures that offer you more leeway to set the scene by expressing emotion, intent, etc.
GIF: https://media.giphy.com/media/keizDG1zD7Q38yWm3x/giphy.gif
05GIFs Can Be Used to Tell a Story
You know the saying, “A picture can speak a thousand words?” Well, it’s true, but in comparison to GIFs??? Pictures definitely lose out in telling a story. See the attached GIF for example. With just one look, you can probably create an entire story in your head about the woman that is featured This can be very useful for future marketing prospects.
GIF: https://media.giphy.com/media/Kb5zI3B9D7cCulbNOg/giphy.gif

06GIFs Can Be Used to Explain or Share Instructions
In the same way that you can create long infographics to offer instructions or teach a lesson on a particular subject, GIFs can be used to educate your audience. Only, it’s a lot easier to use for this reason No complicated infographics formatting is required You can just put together several stills showing the step-by-step process or record a silent video like the one shown in the GIF below
GIF: https://media.giphy.com/media/FgiHOQyKUJmwg/giphy.gif
● Key Takeaways from This Episode →
● GIFs have been used for years in order to share fun moments and memes, but it has much more potential than that
● With a carefully designed GIF, not only can you catch the attention of your audience, but you can also keep that attention for much longer than you would have been able to if you were just sharing text or a still image Making it a perfect vessel for future marketing efforts
● Now, in order to make sure that you get a good story on your marketing efforts via GIF, we’ve listed some of the best GIF animation maker tools for you in the first part of this article
● A second part has also been added where we discussed all the different ways that you can use 2D Animation GIFs in your future marketing endeavors.
Well, if what you’re looking for is a GIF animation maker or software for GIF Animation, we’ve got your back This article starts off with a list of some GIF animation maker tools that you can use to turn your videos into a GIF file (just to give you an idea of how those can help you move forward in your GIF marketing attempts more easily.)
Before ending in a quick rundown, a couple of reasons why GIFs are worth the investment in the first place.
In this article
01 [In What Ways Can You turn videos into a GIF?](#Part 1)
02 [How Gif Animation Maker Affect Your Marketing](#Part 2)
Part 1 In What Ways Can You turn videos into a GIF?
As promised, we’ll be starting off with the tools that you’ll need in order to create GIFs easily (or GIF Animation Maker tools, if you’d prefer). We’ve made sure to pick out a variety for you so that you won’t have to go looking elsewhere for other options We also included what people tend to like and dislike about each option so that you can make a choice as to what you think is the best GIF animation maker more easily.
01**Wondershare Filmora **
If what you’re looking for is software for GIF animation, then Filmora is your best bet This software is available for both Mac and Windows users (with options for both a perpetual license and subscription packages for you to choose from.) This is a video editing tool that is capable of making incredibly professional results. And, perhaps more importantly (considering the subject of this article), it will allow you easily turn a video into a 2D Animation GIF that you can use for your marketing
URL: https://filmora.wondershare.com/
What People Like About The Maker
●Comes with advanced video editing functions
●Easily turns videos into 2D Animation GIFs
●Produces High-Quality Results each time
What People Don’t Like About The Maker
●It is a software, which requires download and installation
●The FREE version is limited
●Must pay either a subscription fee or one-time fee for full access
02Canva
If you’ve created marketing projects before, then you’ve no doubt already heard of Canva. This is what a lot of content creators use in order to easily create content for marketing online In this case, of course, we’re looking at it as an online GIF animation maker, one that, unlike Filmora, requires no download (but will require sign-up) for you to use. Canva has its own GIF Animation Maker that you can use (different from the regular Canva you might be more familiar with, as is shown in the UI screenshot below).
URL: https://www.canva.com/create/gif-maker/
What People Like About The Maker
●It is an online tool, no download or installation is required
●Built-in media library for convenient project creation
●Intuitive 2D Animation GIF interface
What People Don’t Like About The Maker
●Not as advanced when it comes to video editing functions
●Limited FREE trial version
●Must unlock Premium version (subscription-based) for full access
03PicMonkey
The next tool on this is another online GIF Animation maker, this time by the name of PicMonkey This tool is very similar to Canva in that many people know it primarily as a photo-editor tool that is great to use for creating content (as it comes with a built-in media library that you can use to quickly finish projects). But it still earned a spot on this list of ours because it allows users to create 2D animation GIFs as well
URL: https://www.picmonkey.com/
What People Like About The Maker
●Built-in media library with animated shapes and images
●GIF Animation editor and creator all-at-once
●FREE trial is available to test out its GIF animation maker functions
What People Don’t Like About The Maker
●In order to have full access, one must pay for the premium solution
●Custom animation is limited in scope
●No advanced video editing functions
04Kapwing
Kapwing is a free GIF animation creator that will allow you to create GIFs from videos easily The best part about is that it has a FREE version available for use (one that allows you to download finished video projects without watermarks so long as they are under 5 minutes). This should allow you to test out its GIF maker functions before you commit to their premium version (which is subscription-based).
URL: https://www.kapwing.com/gif-maker
What People Like About The Maker
●FREE to use with some limitations
●Quick and easy video-to-GIF conversion
●No watermark on images or video projects under 5 minutes
What People Don’t Like About The Maker
●Full access can only be unlocked by paying for the premium version
●Premium version is subscription-based and expensive
●There is an upload limit
05MakeAGif
MakeAGif is the last GIF animation maker on this list, and it just so happens that it’s one of the easiest to use as well This one is more of a converter tool in that it transforms already-finished videos into a GIF that you can share. A lot of people use it to convert their favorite videos from social media (YouTube, Facebook, etc.) into a GIF that they can share on other platforms.
URL: https://makeagif.com/video-to-gif
What People Like About The Maker
●Free to use with some limitations
●Quick and easy-to-use Video to GIF converter
●Converts pictures, YouTube videos, Facebook videos, etc. to GIF
What People Don’t Like About The Maker
●The tool is more limited in scope than the rest of the tools on this list
●The FREE version is limited
●Premium version requires paying a subscription fee
Part 2 How Gif Animation Maker Affect Your Marketing
Alright, now that you’ve been introduced to what we consider the best GIF Animation maker tools available right now (be they software or online tools), we can move on to actually discussing how you can use GIFs for your marketing efforts We’ve compiled six different ways here, but there are plenty of others, of course. It’s a very open subject.
01GIFs Are Easy to Share Ads
The best part of GIFs is that they are easily consumable media that you can share just about everywhere. For example, you can include them in your email marketing to bring a little life to what could have otherwise been a very dry message You can also have it play out on social media without prompting (different from videos, which the user usually has to play before it starts going.)
GIF LINK: https://media.giphy.com/media/fEkpR6rfmXmZHeVQ22/giphy.gif
02GIFs Can Be Used for Promoting Events
GIFs are also great for promoting events or holiday sales It’s basically just a moving 2D advertisement (like the one that is shown below). Eye-catching in a way that keeps you looking to catch the movement — in compared to if you were just looking at a still image (which might catch your attention for a moment, but usually bores you the next)
GIF LINK: https://media.giphy.com/media/WtUMnz9ZUuzwojWwij/giphy.gif
03GIFs Can Be Used for Call-to-Action Pop-Ups
Perhaps you’ve seen this already in some YouTube videos (see the GIF attached for an example), but a lot of content creators now include GIFs on their content to prompt their audience to complete an action — be it subscribing, sharing, downloading a link, buying a product, etc. It’s a great way of getting a message across in a way that is both fun and straightforward
GIF: https://media.giphy.com/media/73oSygWJFG9K1ha75z/giphy.gif
04GIFs Can Be Used to Set the Scene and Express Emotion
GIFs are also a great way to just generally set the scene or express emotion. Text is…very very difficult to make sound like anything but dry reading. Pictures are a little better, but GIFs??? Well, GIFs are great ‘moving’ pictures that offer you more leeway to set the scene by expressing emotion, intent, etc.
GIF: https://media.giphy.com/media/keizDG1zD7Q38yWm3x/giphy.gif
05GIFs Can Be Used to Tell a Story
You know the saying, “A picture can speak a thousand words?” Well, it’s true, but in comparison to GIFs??? Pictures definitely lose out in telling a story. See the attached GIF for example. With just one look, you can probably create an entire story in your head about the woman that is featured This can be very useful for future marketing prospects.
GIF: https://media.giphy.com/media/Kb5zI3B9D7cCulbNOg/giphy.gif
06GIFs Can Be Used to Explain or Share Instructions
In the same way that you can create long infographics to offer instructions or teach a lesson on a particular subject, GIFs can be used to educate your audience. Only, it’s a lot easier to use for this reason No complicated infographics formatting is required You can just put together several stills showing the step-by-step process or record a silent video like the one shown in the GIF below
GIF: https://media.giphy.com/media/FgiHOQyKUJmwg/giphy.gif
● Key Takeaways from This Episode →
● GIFs have been used for years in order to share fun moments and memes, but it has much more potential than that
● With a carefully designed GIF, not only can you catch the attention of your audience, but you can also keep that attention for much longer than you would have been able to if you were just sharing text or a still image Making it a perfect vessel for future marketing efforts
● Now, in order to make sure that you get a good story on your marketing efforts via GIF, we’ve listed some of the best GIF animation maker tools for you in the first part of this article
● A second part has also been added where we discussed all the different ways that you can use 2D Animation GIFs in your future marketing endeavors.
The Only Guide to Make 2D Rigging Clear to You
The Only Guide You’ll Ever Need to Learn That Make 2D Rigging Clear to You
An easy yet powerful editor
Numerous effects to choose from
Detailed tutorials provided by the official channel
If you’re looking to get a head start in 2D Rigging or 2D Animation in general, then this guide should get you to where you need to go.
We’ll be introducing 2D Rigging in a comprehensive way — perfect for beginners who aren’t familiar with the subject and want something more solid as their foundation.
In this article
01 [All You Need to Know About 2D Rigging](#Part 1)
02 [What is the Difference and Connection Between 2D and 3D](#Part 2)
03 [What Are the Best 2D Rigging Animation Tools?](#Part 3)
Part 1 All You Need to Know About Rigging
For this first part, we’re going to talk about Rigging in a general way. Think of it as an introduction to the subject. One that should, hopefully, set you off on the right foot. It should also help clarify things that you might need to know as we delve into deeper and more advanced subjects in the next sections of this article.
01What is the Meaning of Rigging in Animation?
Alright, so what does rigging 2D characters actually do? What meaning, or effect, does it have? These questions can be quickly answered with this: Rigging (whether it’s or 3D) is the practice of attaching ‘bones’ to a character model. Bones that, in the future, you can use to create motion.
If you’re an artist, then you’re probably familiar with the concept of creating an initial sketch that you put the final drawing on top of — done with the sole purpose of creating a structure that will allow you to move forward more easily in your art.
That’s exactly what you do when Rigging. You’re building a structure that will allow you to easily create animated characters that you can move at will in the future.
02Why Use Animation?
Alright, so what’s the difference between creating a Face Rig and a Face Rig? Is there any? To answer this, the simple answer is, yes. There is quite the difference.
A lot of animators prefer to practice Animation over Animation because it is more traditional and requires less complicated software (not that it doesn’t come with complications of its own.) Specifically, animation requires quite a lengthy character creation and rigging process.
You should consider the subject more based on what project you’re working on. Things that you might want to keep in mind include your project timeline, project budget, character rig usability in the future, length of the project, and so on.
(There’s also a more in-depth breakdown of this in of this guide.)
03What is Animation Rigging Software?
Now, for the last section of this Rigging overview, let’s talk about Rigging Animation Software. You should be able to guess what it’s meant for, but how you can use it is a little different, especially with the many different varieties of Rigging Animation Software available.
We’ll be introducing some in the third part of this guide — so you can learn more about the differences there. For now, all you need to know is that it usually comes with advanced rigging and character deformer tools that you can use to easily (and efficiently) animate your characters.
Part 2 What is the Difference and Connection Between and 3D
As promised, this next section will be devoted to clarifying the differences and similarities between Animation and Animation. As we mentioned previously, most animators prefer Animation. But, more often than not, they switch between both forms in order to create something suitable for their current project.
01How and Animations Are Created
First, let’s talk about the process involved. In the end, this can be described simply as: it starts off the same, but then becomes significantly more and more dissimilar the further you go along. More specifically, whether you’re working on a or Animation, you usually start with working through your vision for the project.
That means exploring ideas and creating hand-illustrated storyboards (which will serve as the foundation for the project as a whole). Then, the next steps involve media gathering (i.e., character creation, sound clips, voice-overs, sound effects, etc.) So that everything would be ready for the project.
This is when the difference starts. Animation involves hand-drawing characters in different poses and angles (with the standard being frames for a second) and can be completed with basic rigging (i.e., face rig for moving mouths or eyes). It’s normal in Animation as well for characters to remain static for several frames. While, with 3D, it is the exact opposite — the characters must be in constant motion so as to remain realistic (which can be done with extensive rigging.)
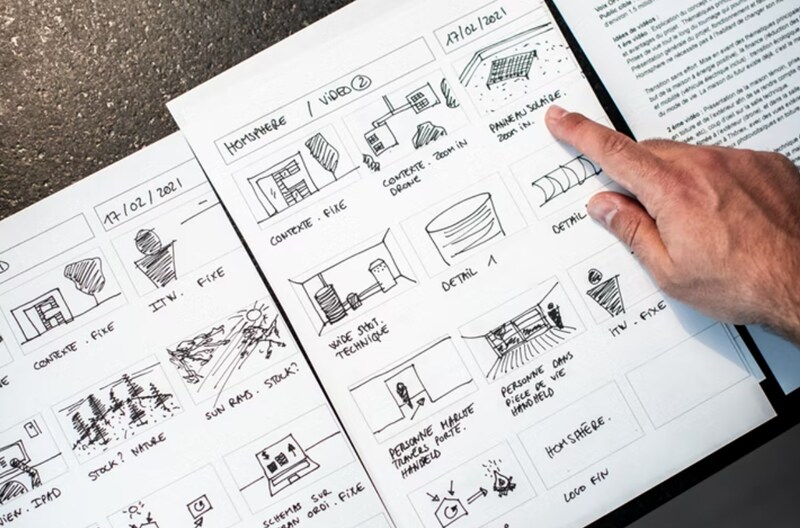
02Time Investments for Creating and Animations
Next, let’s talk about time investments. This can be a bit tricky to differentiate. Animations, as mentioned, are generally easier to create because it requires less rigging (but more drawings for certain scenes and angles makes it take more time). Meanwhile, Animation usually involves a front-heavy timeline — since you’re looking at intensive character creation and rigging. Once all this is set up though? The rest of the process is much faster than Animation.
You’ll also have to consider the work that you have to put in after your animations have been created. For example, the work you’ll need to put into finalizing your project with a video editor like Wondershare Filmora Video Editor (which would work great with animations especially, as it will allow you to actively add into the timeline as you go.)
For Win 7 or later (64-bit)
For macOS 10.12 or later
Part 3 What Are the Best Rigging Animation Tools?
For this final section of the guide, we’re finally moving on to our introduction to Rigging Animation Software. As mentioned, we’ve picked quite the variety to make sure that you have a good idea of how each will work. (A sample video has also been attached to make sure that you know what kind of projects can be created with these Rigging tools. Take the opportunity to explore those, too. If only for further edification.)
01Reallusion – Cartoon Animator 4
The first of the Rigging Animation Software on this list is Reallusion’s Cartoon Animator 4 (previously known as CrazyTalk Animator). This software was originally developed in order to allow everyone (from beginners to professionals) to create advanced animations with very little effort. To that end, it comes with a lot of motion templates and Auto Rig functions (i.e., audio lip-syncing) that the user can use to seriously cut down on the work required.
02Harmony ToonBoom
Harmony ToonBoom is well-known in the Rigging Animation Software industry. It’s the software that is used by many professionals. According to the Toon Boom Harmony website, this software was even used to create popular television shows like Rick and Morty, Bob’s Burgers, The Simpsons, and Futurama. It’s considerably more difficult to use for beginners, but it comes with many advanced functions that allow its users to create truly complex and beautiful Animations.
03Synfig Studio
The best thing about Synfig Studio (right from the onset), is that it is FREE. There are two versions of this tool — one that is ‘stable’ and the other in ‘development.’ The developmental version offers more advanced functions, of course, but for most beginners, the ‘stable’ version would serve just as well.
04Adobe Animate
Adobe Animate is software that belongs in Adobe’s long line of professional-level products. It’s a part of the classic ‘Adobe Suite.’ As a professional software, however, keep in mind that it might be more difficult to get used to at first (there’s a steep, learning curve right off the bat). But, if used correctly, it can be used to create quite impressive and eye-catching interactive animations (i.e., game content or website elements.)
05Animaker
Animaker is quite popular for beginners. It offers templates, so you can start off with an easy project if that’s what you’d like. But it also offers a lot of custom-creation tools that can be used for creating complex and professional Animations — although perhaps not at the level as the ones you might see from other alternatives (this software is most suitable for simple animations.)
06Moho Pro
Moho Pro (previously known as Anime Studio Pro) is a popular Animation program that fans of anime really love. This is one of the best software to use if you’re more interested in traditional animation (which involves a lot of free-hand drawing). Although, despite that fact, it has many advanced rigging functions as well (so you can create a mix of traditional and modern animation if you wish.)
07Pencil 2D
Pencil 2D, much like Synfig Studio, is FREE, cross-platform software. It’s quite old, but it’s matured over the years to include more and more functions (you might already be personally aware of it, in fact. It had its time to shine in the early 2010s.) The important thing to remember though is the fact that this is definitely more of a ‘traditional animation’ software. It does offer some basic rigging, but it’s best used by those who would prefer to practice the art of frame-by-frame animation.
08OpenToonz
OpenToonz is another free Rigging Animation Software (although it should be noted that there is a premium version, called Toonz, that is quite well known.) The best part about it is that it is a combination of software. One that you can use both for traditional animation and Animation. It’s also pretty easy to use, making it a good option for those just starting out.
● Key Takeaways from This Episode →
● 2D Rigging is the practice of creating ‘structure’ or ‘bones’ from which you can move characters or models. In these are usually ‘pins’ placed in bendable areas (i.e., the elbow, for bending the arm.)
● There are many differences between Animation and Animation. What you end up choosing should be decided by your project.
● Remember though, that Animations usually take longer to create even though Animations require more complex riggings.
● If you’re serious about getting into Rigging, make sure to consider the Rigging Animation Software that you choose to use very carefully. Each one has its own pros and cons.
If you’re looking to get a head start in 2D Rigging or 2D Animation in general, then this guide should get you to where you need to go.
We’ll be introducing 2D Rigging in a comprehensive way — perfect for beginners who aren’t familiar with the subject and want something more solid as their foundation.
In this article
01 [All You Need to Know About 2D Rigging](#Part 1)
02 [What is the Difference and Connection Between 2D and 3D](#Part 2)
03 [What Are the Best 2D Rigging Animation Tools?](#Part 3)
Part 1 All You Need to Know About Rigging
For this first part, we’re going to talk about Rigging in a general way. Think of it as an introduction to the subject. One that should, hopefully, set you off on the right foot. It should also help clarify things that you might need to know as we delve into deeper and more advanced subjects in the next sections of this article.
01What is the Meaning of Rigging in Animation?
Alright, so what does rigging 2D characters actually do? What meaning, or effect, does it have? These questions can be quickly answered with this: Rigging (whether it’s or 3D) is the practice of attaching ‘bones’ to a character model. Bones that, in the future, you can use to create motion.
If you’re an artist, then you’re probably familiar with the concept of creating an initial sketch that you put the final drawing on top of — done with the sole purpose of creating a structure that will allow you to move forward more easily in your art.
That’s exactly what you do when Rigging. You’re building a structure that will allow you to easily create animated characters that you can move at will in the future.
02Why Use Animation?
Alright, so what’s the difference between creating a Face Rig and a Face Rig? Is there any? To answer this, the simple answer is, yes. There is quite the difference.
A lot of animators prefer to practice Animation over Animation because it is more traditional and requires less complicated software (not that it doesn’t come with complications of its own.) Specifically, animation requires quite a lengthy character creation and rigging process.
You should consider the subject more based on what project you’re working on. Things that you might want to keep in mind include your project timeline, project budget, character rig usability in the future, length of the project, and so on.
(There’s also a more in-depth breakdown of this in of this guide.)
03What is Animation Rigging Software?
Now, for the last section of this Rigging overview, let’s talk about Rigging Animation Software. You should be able to guess what it’s meant for, but how you can use it is a little different, especially with the many different varieties of Rigging Animation Software available.
We’ll be introducing some in the third part of this guide — so you can learn more about the differences there. For now, all you need to know is that it usually comes with advanced rigging and character deformer tools that you can use to easily (and efficiently) animate your characters.
Part 2 What is the Difference and Connection Between and 3D
As promised, this next section will be devoted to clarifying the differences and similarities between Animation and Animation. As we mentioned previously, most animators prefer Animation. But, more often than not, they switch between both forms in order to create something suitable for their current project.
01How and Animations Are Created
First, let’s talk about the process involved. In the end, this can be described simply as: it starts off the same, but then becomes significantly more and more dissimilar the further you go along. More specifically, whether you’re working on a or Animation, you usually start with working through your vision for the project.
That means exploring ideas and creating hand-illustrated storyboards (which will serve as the foundation for the project as a whole). Then, the next steps involve media gathering (i.e., character creation, sound clips, voice-overs, sound effects, etc.) So that everything would be ready for the project.
This is when the difference starts. Animation involves hand-drawing characters in different poses and angles (with the standard being frames for a second) and can be completed with basic rigging (i.e., face rig for moving mouths or eyes). It’s normal in Animation as well for characters to remain static for several frames. While, with 3D, it is the exact opposite — the characters must be in constant motion so as to remain realistic (which can be done with extensive rigging.)
02Time Investments for Creating and Animations
Next, let’s talk about time investments. This can be a bit tricky to differentiate. Animations, as mentioned, are generally easier to create because it requires less rigging (but more drawings for certain scenes and angles makes it take more time). Meanwhile, Animation usually involves a front-heavy timeline — since you’re looking at intensive character creation and rigging. Once all this is set up though? The rest of the process is much faster than Animation.
You’ll also have to consider the work that you have to put in after your animations have been created. For example, the work you’ll need to put into finalizing your project with a video editor like Wondershare Filmora Video Editor (which would work great with animations especially, as it will allow you to actively add into the timeline as you go.)
For Win 7 or later (64-bit)
For macOS 10.12 or later
Part 3 What Are the Best Rigging Animation Tools?
For this final section of the guide, we’re finally moving on to our introduction to Rigging Animation Software. As mentioned, we’ve picked quite the variety to make sure that you have a good idea of how each will work. (A sample video has also been attached to make sure that you know what kind of projects can be created with these Rigging tools. Take the opportunity to explore those, too. If only for further edification.)
01Reallusion – Cartoon Animator 4
The first of the Rigging Animation Software on this list is Reallusion’s Cartoon Animator 4 (previously known as CrazyTalk Animator). This software was originally developed in order to allow everyone (from beginners to professionals) to create advanced animations with very little effort. To that end, it comes with a lot of motion templates and Auto Rig functions (i.e., audio lip-syncing) that the user can use to seriously cut down on the work required.
02Harmony ToonBoom
Harmony ToonBoom is well-known in the Rigging Animation Software industry. It’s the software that is used by many professionals. According to the Toon Boom Harmony website, this software was even used to create popular television shows like Rick and Morty, Bob’s Burgers, The Simpsons, and Futurama. It’s considerably more difficult to use for beginners, but it comes with many advanced functions that allow its users to create truly complex and beautiful Animations.
03Synfig Studio
The best thing about Synfig Studio (right from the onset), is that it is FREE. There are two versions of this tool — one that is ‘stable’ and the other in ‘development.’ The developmental version offers more advanced functions, of course, but for most beginners, the ‘stable’ version would serve just as well.
04Adobe Animate
Adobe Animate is software that belongs in Adobe’s long line of professional-level products. It’s a part of the classic ‘Adobe Suite.’ As a professional software, however, keep in mind that it might be more difficult to get used to at first (there’s a steep, learning curve right off the bat). But, if used correctly, it can be used to create quite impressive and eye-catching interactive animations (i.e., game content or website elements.)
05Animaker
Animaker is quite popular for beginners. It offers templates, so you can start off with an easy project if that’s what you’d like. But it also offers a lot of custom-creation tools that can be used for creating complex and professional Animations — although perhaps not at the level as the ones you might see from other alternatives (this software is most suitable for simple animations.)
06Moho Pro
Moho Pro (previously known as Anime Studio Pro) is a popular Animation program that fans of anime really love. This is one of the best software to use if you’re more interested in traditional animation (which involves a lot of free-hand drawing). Although, despite that fact, it has many advanced rigging functions as well (so you can create a mix of traditional and modern animation if you wish.)
07Pencil 2D
Pencil 2D, much like Synfig Studio, is FREE, cross-platform software. It’s quite old, but it’s matured over the years to include more and more functions (you might already be personally aware of it, in fact. It had its time to shine in the early 2010s.) The important thing to remember though is the fact that this is definitely more of a ‘traditional animation’ software. It does offer some basic rigging, but it’s best used by those who would prefer to practice the art of frame-by-frame animation.
08OpenToonz
OpenToonz is another free Rigging Animation Software (although it should be noted that there is a premium version, called Toonz, that is quite well known.) The best part about it is that it is a combination of software. One that you can use both for traditional animation and Animation. It’s also pretty easy to use, making it a good option for those just starting out.
● Key Takeaways from This Episode →
● 2D Rigging is the practice of creating ‘structure’ or ‘bones’ from which you can move characters or models. In these are usually ‘pins’ placed in bendable areas (i.e., the elbow, for bending the arm.)
● There are many differences between Animation and Animation. What you end up choosing should be decided by your project.
● Remember though, that Animations usually take longer to create even though Animations require more complex riggings.
● If you’re serious about getting into Rigging, make sure to consider the Rigging Animation Software that you choose to use very carefully. Each one has its own pros and cons.
You Can Turn a TikTok Into a GIF Now. Here’s How
You Can Turn a TikTok Into a GIF Now. Here’s How
An easy yet powerful editor
Numerous effects to choose from
Detailed tutorials provided by the official channel
Want to add sharing flexibility to TikTok videos? Convert them into GIFs!
In this article
01 [What is GIF TikTok?](#Part 1)
02 [How to Make a GIF From a TikTok Video](#Part 2)
Part 1 What Is TikTok GIF?
In today’s IT enhanced lifestyle, having a profound reach on social media is the new name of popularity. Everyone out there is profusely keen on creating and sharing a plethora of content varieties; memes, videos, animations and what not, across social communities. However, TikTok videos lag behind in this race; often lack the ‘Share’ flexibility.
To match up, there are solutions to convert TikTok video into GIFs. A TikTok GIF is a short, impactful and to the point clip that’s here to share fun and exciting content in the most interesting ways. If you have a bunch of TikTok videos to share with your peers, but missing out on an effective sharing solution, you can conveniently look forward to convert those videos into catchy and interesting GIFs that will definitely hold the attention of your viewers.
Feel motivated? See through the rest of this article to know some quick and easy TikTok to GIF conversion tools and software!
Part 2 How to Make a GIF From a TikTok Video
When looking through solutions to create GIF TikTok videos, you will find a pool of methods and tools available on the internet. All you need to do is select the best one for yourself and get started with converting TikTok Videos into GIFs. Given below are some of the best solutions adhering to the aforesaid concern:
01Filmora
Wondershare Filmora Video Editor is one of the best application software to create a TikTok GIF. This is a simple and smart converter application that caters to your concern in just a few minutes. What’s best is that this app is absolutely free to use and is compatible with your PC, smartphone and a variety of other devices. Here’s how you can use Filmora to convert your TikTok videos into GIFs:

Step 1: Import Your Video
Start with importing a desired TikTok video file to the Filmora timeline. You can also ‘Drag and Drop’ the video file to the editor timeline. Using this application, you have the flexibility to import your clip in almost any video format.

Step 2: Edit Your Clip
Suited to your content preferences, you can edit and enhance your clips with a variety of effects, like, cut, trim, rotate, split, etc., and make appropriate speed adjustments. You can even include text messages to make your GIF more impactful.

Wondershare Filmora
Get started easily with Filmora’s powerful performance, intuitive interface, and countless effects!
Try It Free Try It Free Try It Free Learn More >

Step 3: Let’s Save and Share!
When you are happy, save your work using the .gif file extension. That’s it! You are ready to share your creation with your social media peers.

02TikTok’s Inbuilt GIF Converter
TikTok allows you to directly convert its videos into GIFs. You can use the TikTok application in your smartphone to take up the conversion process. All you need to do is follow the steps given below:
Step 1: Select Your TikTok Video
To get started, open the TikTok application in your smartphone and select the video you want to convert into GIF.
Step 2: Share the Video
Click the ‘Share’ icon at the right of the video screen.

Step 3: Format Selection
Scroll down to the bottom of the screen and choose the ‘Share as GIF’ option. This will automatically convert your TikTok video into GIF in a few seconds.

Step 4: Save and Export
Click on the ‘Save Image’ option to save the GIF in your phone’s gallery. You can also export your creation to different social media platforms.
03Wondershare UniConverter
This one is a handy toolbox loaded with a variety of features that allow you to play with your video creativity. Using this tool, you can quickly create GIF for TikTok and also fix the size and duration of the same. This software supports almost all video formats and comes with an inbuilt editor that you can use to add effects and make your GIFs all the more interesting. This is compatible with your Windows or MacOS PC.
Take the following steps to create GIFs from TikTok videos using this software:

Step 1: Download and Launch the Application
Download the Wondershare UniConverter application to your PC from the software’s official website.
Step 2: Open GIF Maker
In the app’s welcome screen, navigate to the ‘Toolbox’ tab and select ‘GIF Maker’ from the panel that gets displayed.
Step 3: Upload Your TikTok Video
In the next pop-up window, select ‘Video to GIF’ and click on the (+) icon in the centre. You can also click on ‘Add Files’ in the top left and choose a saved TikTok video from your PC to upload.

Step 4: Trim Your Video
Trim the uploaded video to the desired portion from where you wish to create the GIF and set adequate time frames for the same. You can even drag the video thumbnail slider to trim the video.

Step 5: Let’s Get Creating!
Set the final size and frame rate from the ‘Output Size’ and ‘Frame Rate’ tabs respectively. To save your creation, browse and choose the desired system folder by clicking on the ‘Save to:’ tab. Lastly, select ‘Create GIF’ to start the conversion process.

04Kapwing GIF Maker
There may be instances where you cannot save or share TikTok videos. To cut the rush in such cases, you can use Kapwing’s GIF Maker to convert videos from TikTok to GIF online. This one is a free video editing tool that works with almost all internet enabled smartphones and supports almost all common video formats. Here’s what you need to do for making GIFs from TikTok videos using this tool:
Step 1: Copy a Video Link
Search your desired TikTok video and click on the ‘Share’ icon. In the drop down menu, select ‘Copy Link’ to save the video link in your device memory. Once this happens, you will get a confirmation message that says, ‘Copied’.

Step 2: Open GIF Maker
Open the GIF Maker tool in your browser and paste the saved TikTok video link in the editor’s URL bar. This will automatically redirect you to the Kapwing Studio, where you have the liberty to trim, crop or split your video clip to the desired time frame. It is better to set a play span of 3-5 seconds.
You can trim the clip by dragging its ends or introduce cuts at specific points using the split button above the editor timeline. To make volume adjustments, select the video layer and click on ‘Edit Video’ and move the adjuster circle to the left or right to decrease, increase and mute the video volume.


Step 3: Download and Share Your Creation
To save your work, tap ‘Export Video’ at the top and select ‘Export as GIF’ from the drop down menu. Wait for the conversion process to finish and click ‘Download’. This will save the GIF to your device.
You will find a watermark at the corner of your clip. Click ‘Sign In to Remove the Watermark’ to remove it. A workspace for the present and later projects will be created, where you can save you work for a couple of days with Kapwing’s free version. To export your work to social media, click ‘Share’. You can even host your creation on websites. Just copy the video link and select ‘Embed’.

05TT Downloader
This one is another online tool you can use to create GIFs from TikTok videos. This is a quick converter tool that transforms TikTok videos to GIFs in 5 easy steps within minutes. It is a browser tool and does not require a software download. All you need to do is explained in the following steps:

Step 1:
Visit the official site of the tool.
Step 2:
Select ‘TikTok to GIF’ to get redirected to the TikTok to GIF Converter home page.
Step 3:
Copy and paste the desired TikTok video link in the converter’s URL bar. To proceed further, click on ‘Get Video’.

Step 4:
Trim your clip within a time frame of 1-10 seconds.
Step 5:
Click ‘Done’ to initiate the conversion process. Once it finishes, you can download the converted GIF to your device.
06MiniTool MovieMaker
You can prefer this tool to convert TikTok videos in your PC into GIFs. This tool gives you the liberty to trim, cut, reverse and rotate GIFs and even add text and filters to them. Here’s how you can use this tool to transform TikTok videos into interesting GIFs:
Step 1:
Download and install this GIF maker tool in your PC. Launch the same when you are done with the installation process.
Step 2:
In the converter window, import and add your desired TikTok clip into the converter timeline.

Step 3:
You are now free to edit and add text to your video.
Step 4:
Once you finish, tap ‘Export’ and choose your output format as GIF.
Step 5:
Hit ‘Export’ to let the conversion process begin.
● Key Takeaways from This Episode →
● TikTok videos often lack the save and share features, which is an obvious necessity of today’s social outlook.
● Varieties of online tools and software are available for converting TikTok videos to GIFs to increase the sharing flexibility.
● Filmora is a quick and intelligent choice to take up the conversion process within a catch of few clicks.
Want to add sharing flexibility to TikTok videos? Convert them into GIFs!
In this article
01 [What is GIF TikTok?](#Part 1)
02 [How to Make a GIF From a TikTok Video](#Part 2)
Part 1 What Is TikTok GIF?
In today’s IT enhanced lifestyle, having a profound reach on social media is the new name of popularity. Everyone out there is profusely keen on creating and sharing a plethora of content varieties; memes, videos, animations and what not, across social communities. However, TikTok videos lag behind in this race; often lack the ‘Share’ flexibility.
To match up, there are solutions to convert TikTok video into GIFs. A TikTok GIF is a short, impactful and to the point clip that’s here to share fun and exciting content in the most interesting ways. If you have a bunch of TikTok videos to share with your peers, but missing out on an effective sharing solution, you can conveniently look forward to convert those videos into catchy and interesting GIFs that will definitely hold the attention of your viewers.
Feel motivated? See through the rest of this article to know some quick and easy TikTok to GIF conversion tools and software!
Part 2 How to Make a GIF From a TikTok Video
When looking through solutions to create GIF TikTok videos, you will find a pool of methods and tools available on the internet. All you need to do is select the best one for yourself and get started with converting TikTok Videos into GIFs. Given below are some of the best solutions adhering to the aforesaid concern:
01Filmora
Wondershare Filmora Video Editor is one of the best application software to create a TikTok GIF. This is a simple and smart converter application that caters to your concern in just a few minutes. What’s best is that this app is absolutely free to use and is compatible with your PC, smartphone and a variety of other devices. Here’s how you can use Filmora to convert your TikTok videos into GIFs:
Step 1: Import Your Video
Start with importing a desired TikTok video file to the Filmora timeline. You can also ‘Drag and Drop’ the video file to the editor timeline. Using this application, you have the flexibility to import your clip in almost any video format.
Step 2: Edit Your Clip
Suited to your content preferences, you can edit and enhance your clips with a variety of effects, like, cut, trim, rotate, split, etc., and make appropriate speed adjustments. You can even include text messages to make your GIF more impactful.
Wondershare Filmora
Get started easily with Filmora’s powerful performance, intuitive interface, and countless effects!
Try It Free Try It Free Try It Free Learn More >
Step 3: Let’s Save and Share!
When you are happy, save your work using the .gif file extension. That’s it! You are ready to share your creation with your social media peers.
02TikTok’s Inbuilt GIF Converter
TikTok allows you to directly convert its videos into GIFs. You can use the TikTok application in your smartphone to take up the conversion process. All you need to do is follow the steps given below:
Step 1: Select Your TikTok Video
To get started, open the TikTok application in your smartphone and select the video you want to convert into GIF.
Step 2: Share the Video
Click the ‘Share’ icon at the right of the video screen.
Step 3: Format Selection
Scroll down to the bottom of the screen and choose the ‘Share as GIF’ option. This will automatically convert your TikTok video into GIF in a few seconds.
Step 4: Save and Export
Click on the ‘Save Image’ option to save the GIF in your phone’s gallery. You can also export your creation to different social media platforms.
03Wondershare UniConverter
This one is a handy toolbox loaded with a variety of features that allow you to play with your video creativity. Using this tool, you can quickly create GIF for TikTok and also fix the size and duration of the same. This software supports almost all video formats and comes with an inbuilt editor that you can use to add effects and make your GIFs all the more interesting. This is compatible with your Windows or MacOS PC.
Take the following steps to create GIFs from TikTok videos using this software:
Step 1: Download and Launch the Application
Download the Wondershare UniConverter application to your PC from the software’s official website.
Step 2: Open GIF Maker
In the app’s welcome screen, navigate to the ‘Toolbox’ tab and select ‘GIF Maker’ from the panel that gets displayed.
Step 3: Upload Your TikTok Video
In the next pop-up window, select ‘Video to GIF’ and click on the (+) icon in the centre. You can also click on ‘Add Files’ in the top left and choose a saved TikTok video from your PC to upload.
Step 4: Trim Your Video
Trim the uploaded video to the desired portion from where you wish to create the GIF and set adequate time frames for the same. You can even drag the video thumbnail slider to trim the video.
Step 5: Let’s Get Creating!
Set the final size and frame rate from the ‘Output Size’ and ‘Frame Rate’ tabs respectively. To save your creation, browse and choose the desired system folder by clicking on the ‘Save to:’ tab. Lastly, select ‘Create GIF’ to start the conversion process.
04Kapwing GIF Maker
There may be instances where you cannot save or share TikTok videos. To cut the rush in such cases, you can use Kapwing’s GIF Maker to convert videos from TikTok to GIF online. This one is a free video editing tool that works with almost all internet enabled smartphones and supports almost all common video formats. Here’s what you need to do for making GIFs from TikTok videos using this tool:
Step 1: Copy a Video Link
Search your desired TikTok video and click on the ‘Share’ icon. In the drop down menu, select ‘Copy Link’ to save the video link in your device memory. Once this happens, you will get a confirmation message that says, ‘Copied’.
Step 2: Open GIF Maker
Open the GIF Maker tool in your browser and paste the saved TikTok video link in the editor’s URL bar. This will automatically redirect you to the Kapwing Studio, where you have the liberty to trim, crop or split your video clip to the desired time frame. It is better to set a play span of 3-5 seconds.
You can trim the clip by dragging its ends or introduce cuts at specific points using the split button above the editor timeline. To make volume adjustments, select the video layer and click on ‘Edit Video’ and move the adjuster circle to the left or right to decrease, increase and mute the video volume.
Step 3: Download and Share Your Creation
To save your work, tap ‘Export Video’ at the top and select ‘Export as GIF’ from the drop down menu. Wait for the conversion process to finish and click ‘Download’. This will save the GIF to your device.
You will find a watermark at the corner of your clip. Click ‘Sign In to Remove the Watermark’ to remove it. A workspace for the present and later projects will be created, where you can save you work for a couple of days with Kapwing’s free version. To export your work to social media, click ‘Share’. You can even host your creation on websites. Just copy the video link and select ‘Embed’.
05TT Downloader
This one is another online tool you can use to create GIFs from TikTok videos. This is a quick converter tool that transforms TikTok videos to GIFs in 5 easy steps within minutes. It is a browser tool and does not require a software download. All you need to do is explained in the following steps:
Step 1:
Visit the official site of the tool.
Step 2:
Select ‘TikTok to GIF’ to get redirected to the TikTok to GIF Converter home page.
Step 3:
Copy and paste the desired TikTok video link in the converter’s URL bar. To proceed further, click on ‘Get Video’.
Step 4:
Trim your clip within a time frame of 1-10 seconds.
Step 5:
Click ‘Done’ to initiate the conversion process. Once it finishes, you can download the converted GIF to your device.
06MiniTool MovieMaker
You can prefer this tool to convert TikTok videos in your PC into GIFs. This tool gives you the liberty to trim, cut, reverse and rotate GIFs and even add text and filters to them. Here’s how you can use this tool to transform TikTok videos into interesting GIFs:
Step 1:
Download and install this GIF maker tool in your PC. Launch the same when you are done with the installation process.
Step 2:
In the converter window, import and add your desired TikTok clip into the converter timeline.
Step 3:
You are now free to edit and add text to your video.
Step 4:
Once you finish, tap ‘Export’ and choose your output format as GIF.
Step 5:
Hit ‘Export’ to let the conversion process begin.
● Key Takeaways from This Episode →
● TikTok videos often lack the save and share features, which is an obvious necessity of today’s social outlook.
● Varieties of online tools and software are available for converting TikTok videos to GIFs to increase the sharing flexibility.
● Filmora is a quick and intelligent choice to take up the conversion process within a catch of few clicks.
Create Animated Video on Canva
Canva is a simple way—without any graphic design experience—to make professional graphics for social media, newsletters, presentations, business cards, gift certificates, brochures, and more. Flexible design templates offer the ideal layout for your target destination, letting you aim over the design, not the file formatting or the size.
So, can you make an animated video on Canva?
Yes, because Canva lives on the cloud, you can access your graphics from anywhere you can get online while using Canva on the cloud. Learn how you can play, get up, and run with Canva in this short, fun tutorial guide. We’ll discuss adding and editing images, using inbuilt design templates, and working with typography to build your next project with Canva.
In the subsequent sections, we shall learn more about Canva animated videos and how to create one easily on your PC.
In this article
01 [Create an animated video with a Canva template](#Part 1)
02 [Create Canva animated video with your video](#Part 2)
Part 1 Create an animated video with a Canva template
In this section, we’ll explore how to make animated video on Canva, which applies to both the free and pro account of Canva. However, the steps given below got created from Canva’s free account. We suppose that you’ve already created an account on Canva and logged into the platform. So, further steps will proceed as follows:
Go to the Video tab given in the top front panel of Canva and choose any template of your desire. Let’s say we’ve selected the very first template, 1920 × 1080 pixels. There are lots of options provided by Canva from where you can choose your favorites. You can also create a template with a custom size.

After you enter the editing panel, you have the choice of different templates on the left-hand panel. You can search for a template of your choice among them and can create other pages, as shown below. To preview the templates, you can click the Play button with mentioned time duration on the top right corner of the editing screen.

Now, it’s time to add creativity and explore more editing elements within the Canva. You can modify the entire template given and add something of your own.

Now, you can explore various editing Elements given on the left-hand panel, as shown below. There are multiple options available here as well.

You can add some text within the Canva template, and you can search from the left-hand panel. Given above are various options by which you can bold, italicize, and underline the text.

Now, let’s add some music to the video. So, go to the Audio tab and select any one of the options among them. There are different choices for you to explore here as well.

After you’re done, you can hit the Preview Play button on the top and see your project, as shown below.
It’s all done, and you can proceed with the next section.
Part 2 Create Canva animated video with your video
We’ll discuss how to create an animated video by uploading our video in Canva without using any template in this section. After logging in to the Canva account credentials, select the Video tab and choose the different templates offered.
We’ve selected a blank template for the purpose as follows.

Now, you need to head directly towards the Uploads tab and upload your video created over here.

By now, you have most probably got over with uploading your media. Click the uploaded video, and it will automatically enter within the editing panel of Canva, as shown below.

You’re all done now, and it’s all finished! Even though template usage is quite simple, it’s pretty straightforward when you don’t use any ready-made template. However, you can still beautify this simple video with different elements like text, music, etc.
Animation style videos influence people of all ages to whatever generation, or the kind you belong to will be one of them for sure.
Animated ones provoke diverse impacts instead of ordinary videos on the audience utilizing illustration, kinesthetic, etc. But the fact is, due to technological advancements and overexposure to social media sites, we have forgotten its significance.
Want to know some other most accessible software tools that can bring out the artist in you? Here is an alternative that is all you need.
Are you surprised to find that you can go with various animation styles to boost your business or bring out your talents? But are you confused about how to revamp your story and effectively film it? Why should you worry when the best animation maker and Canva’s alternative Wondershare Filmora is here exclusively for you to create fantastic animation videos that could stand out of the box?
Conclusion
Do you aspire to paint with bright colors to videos or want to become an animator? Then, choose animation styles that you most enjoy, find attractive today, start working on them, or create Canva animated videos as the tutorial indicates above. Lastly, don’t forget to give Filmora a chance to upscale your creation and give your animation style a life!
02 [Create Canva animated video with your video](#Part 2)
Part 1 Create an animated video with a Canva template
In this section, we’ll explore how to make animated video on Canva, which applies to both the free and pro account of Canva. However, the steps given below got created from Canva’s free account. We suppose that you’ve already created an account on Canva and logged into the platform. So, further steps will proceed as follows:
Go to the Video tab given in the top front panel of Canva and choose any template of your desire. Let’s say we’ve selected the very first template, 1920 × 1080 pixels. There are lots of options provided by Canva from where you can choose your favorites. You can also create a template with a custom size.
After you enter the editing panel, you have the choice of different templates on the left-hand panel. You can search for a template of your choice among them and can create other pages, as shown below. To preview the templates, you can click the Play button with mentioned time duration on the top right corner of the editing screen.
Now, it’s time to add creativity and explore more editing elements within the Canva. You can modify the entire template given and add something of your own.
Now, you can explore various editing Elements given on the left-hand panel, as shown below. There are multiple options available here as well.
You can add some text within the Canva template, and you can search from the left-hand panel. Given above are various options by which you can bold, italicize, and underline the text.
Now, let’s add some music to the video. So, go to the Audio tab and select any one of the options among them. There are different choices for you to explore here as well.
After you’re done, you can hit the Preview Play button on the top and see your project, as shown below.
It’s all done, and you can proceed with the next section.
Part 2 Create Canva animated video with your video
We’ll discuss how to create an animated video by uploading our video in Canva without using any template in this section. After logging in to the Canva account credentials, select the Video tab and choose the different templates offered.
We’ve selected a blank template for the purpose as follows.
Now, you need to head directly towards the Uploads tab and upload your video created over here.
By now, you have most probably got over with uploading your media. Click the uploaded video, and it will automatically enter within the editing panel of Canva, as shown below.
You’re all done now, and it’s all finished! Even though template usage is quite simple, it’s pretty straightforward when you don’t use any ready-made template. However, you can still beautify this simple video with different elements like text, music, etc.
Animation style videos influence people of all ages to whatever generation, or the kind you belong to will be one of them for sure.
Animated ones provoke diverse impacts instead of ordinary videos on the audience utilizing illustration, kinesthetic, etc. But the fact is, due to technological advancements and overexposure to social media sites, we have forgotten its significance.
Want to know some other most accessible software tools that can bring out the artist in you? Here is an alternative that is all you need.
Are you surprised to find that you can go with various animation styles to boost your business or bring out your talents? But are you confused about how to revamp your story and effectively film it? Why should you worry when the best animation maker and Canva’s alternative Wondershare Filmora is here exclusively for you to create fantastic animation videos that could stand out of the box?
Conclusion
Do you aspire to paint with bright colors to videos or want to become an animator? Then, choose animation styles that you most enjoy, find attractive today, start working on them, or create Canva animated videos as the tutorial indicates above. Lastly, don’t forget to give Filmora a chance to upscale your creation and give your animation style a life!
How You Can Turn Yourself Into Anime Character Using Anime Filter
How You Can Turn Yourself into Anime Character Using Anime Filter
An easy yet powerful editor
Numerous effects to choose from
Detailed tutorials provided by the official channel
Everyone is looking for the Anime Filter that allows you to turn yourself into an animated character. All in an effort to join in on the TikTok trend that’s been awakening the inner anime enthusiast in everyone.

In this post, we’ll be sharing with you all that we know about this elusive anime filter (along with some bonuses along the way)
In this article
01 [Let’s Figure out What’s Anime Filter First](#Part 1)
02 [More Tutorials on Anime Filter That You Should Not Miss](#Part 2)
Part 1 Let’s Figure out What’s Anime Filter First
01What is the Anime Filter on TikTok?
Okay, first off What even is this anime filter everyone is talking about and how can you use it to turn yourself into an animated character? We’ve attached a helpful YouTube Video below from @Kapwing who has a more comprehensive explanation for you.
But, as for the basics? It works just like most filters in that it can be used in both video and picture mode (allowing you to also make your own animated profile picture if you’d like). All you have to do is turn it on, and it’ll turn you into the most fitting anime character of your style immediately
02How to Get the TikTok Anime Filter?
Now to finally get down to business How exactly can you get the anime filter for your TikTok? Well, here’s the trick Despite having earned its popularity on TikTok, the Anime Style filter actually comes from Snapchat So, if you do want to animate yourself like you’ve seen all the other popular TikTok-ers do, you’ll need to record the video (or take the picture) on the Snapchat App first and then upload it to TikTok.
03A step-by-step breakdown of this process has been provided below (pictures included)
Step 1Download the Snapchat App
Alright, to start off with, you’ll need to download the Snapchat app on your smartphone (it’s available for both Android and iOS devices)

Step 2Open Snapchat App on your mobile device
Once you have the Snapchat app downloaded and installed on your device, open it

Step 3Search for the Anime Style Filter on Snapchat
Once you have the Snapchat app open, click on the search bar at the top of the interface, type ‘anime style’, and search
You might find that there are multiple versions of the filter (like as is shown in the image below), but the one that you need to select is the one titled Anime Style and created by Snapchat (it should appear first, as it does in the example)

Step 4Turn Yourself into an Animated Character
Finally You should be moved to the video recorder or the profile picture taker, where you can see yourself animated once and for all

Step 5Upload your anime filter-ed video to TikTok
Now, in order to get your Anime-fied self on TikTok, all you need to do is upload your video creation (either on your mobile device or your computer) We’ve provided a URL for you below that will take you directly to the TikTok upload page.

Part 2 More Tutorials on Anime Filter That You Should Not Miss
The Anime Style filter that we introduced in the previous section isn’t the only ‘animated’ filter available, of course It’s the one that caught the attention of a lot of people, thanks, in large part, to the participation of a couple of some of the bigger TikTok-ers on the platform. However, you can always expand your selection a bit by checking out some of the other interesting anime filters in the market:
0112 Anime Filters to Turn Yourself into an Anime Character
Anime Filter #1: Anime Style Realistic

In order to fix some of the more glaring issues with the regular Anime Style filter, Snapchat created a second filter, called Anime Style Realistic This one has a distinctively less anime style when it comes to looks. But it does allow for more skin colors, better hair integration, and accessories
Pros
FREE Snapchat lens that you can use at any time.
Works with most skin tones.
Better hair/accessory integration.
Cons
The style is more realistic than anime.
It is not available anywhere else; you’ll need to be on Snapchat to use it.
Not great at capturing motion.
This is a fun filter to use for those looking to spice up their timeline with something a little different (OR for those having a bad day and would like the almost-anonymity the filter can provide).
Anime Filter #2: Cartoon Style

Next, we have another Snapchat original lens called Cartoon Style This filter is more reminiscent of the older animated cartoon styles (think Pocahontas, Lilo & Stitch, etc.), but it doesn’t make it any less fun
Pros
FREE Snapchat lens.
Works with all skin tones.
Works with accessories.
Cons
More of a cartoon animated style than anime.
Not available anywhere else, you can only use it with Snapchat.
Not great at capturing motion.
Again, just like the Anime Filter, this is good for slapping on just to have fun or to sneakily erase a couple of blemishes
Anime Filter #3: Anime Filter

Now, although we mentioned that TikTok doesn’t have any anime-style filters, the Chinese version of it (surprisingly) does You can see it being used in the image above, rendering the user into an animated (albeit not classically Japanese animated) character.
Pros
Free Chinese TikTok filter.
Great at capturing motion.
Chinese animated drawing style.
Cons
Only available for the foreign version of the TikTok app.
Not the best with skin tones.
It doesn’t use the classic Japanese-animation style.
This has seen a popularity boost recently, with many TikTok users using it to show a ‘before’ and ‘after’ (like the image shown above), of their dance being animated.
Filter URL: https://www.douyin.com/
Anime Filter #4: Anime Eyes

This next filter is the first unofficial anime filter on this list. It was created by one of the users of Snapchat and can be found there if you want to use it This one doesn’t animate the whole face of the user, but it does apply a sticker of various ‘anime eyes’ that you can use as a semi-animated profile picture maker (free)
Pros
FREE Snapchat filter
Anime-eyes sticker to cover the eyes
Useful as an animated profile picture maker
Cons
Only available on the Snapchat app
Does not capture motion
Does not animate the entire face
This really is best used for profile pictures only You’ve probably seen it around as such, although some users also find it useful for hiding tired eyes
Anime Filter #5: Wondershare Filmora

If you’re looking to step up your game ‘editing-wise’ and give your pictures and videos an even more anime feel, then you can also consider the anime filters that the video editing tool, Wondershare Filmora Video Editor , offers. (You can also skip the pre-made filters altogether and create your own animated video with stickers and other effects.)
Pros
Variety of anime filters for videos
Comes with advanced video editing tools
Creates high-quality videos
Cons
Premium Software
No face animation
This particular option is for those looking for something a step above what everyone else is doing. All while allowing a more flexible experience
For Win 7 or later (64-bit)
For macOS 10.12 or later
Anime Filter #6: MHA Anime Filter (Instagram)

Continuing on from our trend of ‘out-there’ options, there’s also the MHA filter from Instagram This one has been especially popular with the anime fanbase as it offers plenty of opportunities for hilarious, pointed responses
Pros
FREE with Instagram
Anime-themed sticker
Trending on TikTok
Cons
Not a face animator filter
Not a profile picture animator
Limited anime options
It’s definitely not what you might have initially been looking for. But its popularity on TikTok is undeniable
Anime Filter #7: Anime Filter

Our second recommended anime-themed filter is the basic Anime Filter on Instagram This one flicks through dozens of some of the most popular animes to find out which one suits you best And, just like the previous, is currently trending on Tiktok
Pros
FREE with Instagram
Anime-themed sticker filter
Trending on TikTok
Cons
Sticker, not face animator
Available only on Instagram
Limited options
Anime Filter #8: Cartoon

This next animation filter pick of ours brings us back to Snapchat It’s called the Cartoon lens. And, just like our initial picks, it will change your pictures to that of a cartoon This one is closer to the cartoon-style popular around the 2000s (think Frozen & Tangled)
Pros
Available on Snapchat
Animated profile picture maker (free)
Works for various skin types
Cons
Not the best at motion capturing
Only available on Snapchat
Doesn’t use classic Japanese style
It’s not quite the anime filter that you’re probably looking for, but it does still work if all you want is a way of cartoon-ifying yourself to spice up your timeline It’ll clear up any blemishes too
Anime Filter #9: Comics Style

Again, we’re moving towards a different kind of animation style with this next filter from Snapchat, but the Comics Style filter does have its own promises of fun as well Especially for those who are long-time fans of American comics (or, even, your average modern-day Avengers fan)
Pros
FREE on Snapchat
Video face animator
Works with a variety of skin tones
Cons
Awkward with some face shapes
Does not work with all face accessories
Available only on Snapchat
Anime Filter #10: Cartoon 3D Style

Now, this might get confusing, but for our last picks, we actually have a set of filters all called Cartoon 3D Style But trust us They’re all different This first version is one you would probably relate more to the DreamWorks motion picture, Ratatouille
Pros
FREE profile picture animator on Snapchat
Compatible with a variety of face shapes
Compatible with a variety of skin tones
Cons
Set features (i.e., pointed nose)
Non-anime drawing style
Not compatible with some facial accessories
Anime Filter #11: Cartoon 3D Style

For our next Cartoon 3D Style lens from Snapchat, we have a face animator that can help you turn into something very close to another dreamwork’s motion picture (think the Despicable me or the Minions)
Pros
Cartoon style animator that is FREE to use
Great for motion capturing
Compatible with a variety of skin colors
Cons
Available only on Snapchat
Not compatible with certain face accessories
Limited face warping effect
Anime Filter #12: Cartoon 3D Style

And finally, for the last of our recommended anime filters, we have the Cartoon 3D Style lens from Snapchat that makes you look like your favorite Disney character (In this case, the obvious inspiration comes from Disney’s Frozen or Tangled)
Pros
Disney face animator that is FREE on Snapchat
Compatible with all skin tones
Trending on TikTok
Cons
It can only be used on Snapchat
Not great at capturing motion
02Steps to Download the Anime Filter App and Turn Yourself into an Anime Character
Now, if those filters weren’t enough for you, we’ve also included this next tutorial on how you can find apps on your mobile device that will allow you to get the same effect without having to use Snapchat, TikTok, or Instagram
Step 1Go to the App Store
The first step, of course, is to go to the app store on your mobile device.

Step 2Search for Anime Filter App
Next, search ‘Anime Filter’ on your phone’s app store.

Step 3Select Anime Filter App
There are multiple types of anime filter apps available in the market. Pick the one that you think will work best for you.

Step 4Install Anime Filter App
Finally, once you’ve found the anime filter app for you, install it.

Step 5Open Anime Filter App
The app that we used for our example, Anime Camera, offers several different animation styles However, this app does come with a subscription fee, so keep that in mind.

03Anime Filter Has a Sadly Unsurprising Problem
You might have noticed this while we were introducing all the different types of anime-style filters available, but the popular Anime Filter has its shortcomings. Which includes:
PROBLEM 1: Dark Skin Tones
The anime filter’s inability to capture darker skin tones accurately is one of the biggest issues users have with the filter.
PROBLEM 2: Hair Style
Hairstyle options are also very limited. And, as for black hairstyles? Well, the options are pretty much non-existent.
PROBLEM 3: Face Accessories
Do you wear glasses? How about piercings? Well, this won’t translate for you either, unfortunately
Key Takeaways from This Episode
● The Anime Filter is a hot, trending topic in platforms like Tiktok, Instagram, and Snapchat It’s also a fun way of engaging with the anime community
● There are other, similar face-animation filters available (The Cartoon 3D Styles, especially, were quite popular for a time)
● Unsurprisingly, the anime filter does have its problems… And it left a big chunk of the TikTok community pretty flabbergasted — and disappointed. But that didn’t stop them from joining in the fun to provide some empowering commentary
Everyone is looking for the Anime Filter that allows you to turn yourself into an animated character. All in an effort to join in on the TikTok trend that’s been awakening the inner anime enthusiast in everyone.
In this post, we’ll be sharing with you all that we know about this elusive anime filter (along with some bonuses along the way)
In this article
01 [Let’s Figure out What’s Anime Filter First](#Part 1)
02 [More Tutorials on Anime Filter That You Should Not Miss](#Part 2)
Part 1 Let’s Figure out What’s Anime Filter First
01What is the Anime Filter on TikTok?
Okay, first off What even is this anime filter everyone is talking about and how can you use it to turn yourself into an animated character? We’ve attached a helpful YouTube Video below from @Kapwing who has a more comprehensive explanation for you.
But, as for the basics? It works just like most filters in that it can be used in both video and picture mode (allowing you to also make your own animated profile picture if you’d like). All you have to do is turn it on, and it’ll turn you into the most fitting anime character of your style immediately
02How to Get the TikTok Anime Filter?
Now to finally get down to business How exactly can you get the anime filter for your TikTok? Well, here’s the trick Despite having earned its popularity on TikTok, the Anime Style filter actually comes from Snapchat So, if you do want to animate yourself like you’ve seen all the other popular TikTok-ers do, you’ll need to record the video (or take the picture) on the Snapchat App first and then upload it to TikTok.
03A step-by-step breakdown of this process has been provided below (pictures included)
Step 1Download the Snapchat App
Alright, to start off with, you’ll need to download the Snapchat app on your smartphone (it’s available for both Android and iOS devices)
Step 2Open Snapchat App on your mobile device
Once you have the Snapchat app downloaded and installed on your device, open it
Step 3Search for the Anime Style Filter on Snapchat
Once you have the Snapchat app open, click on the search bar at the top of the interface, type ‘anime style’, and search
You might find that there are multiple versions of the filter (like as is shown in the image below), but the one that you need to select is the one titled Anime Style and created by Snapchat (it should appear first, as it does in the example)
Step 4Turn Yourself into an Animated Character
Finally You should be moved to the video recorder or the profile picture taker, where you can see yourself animated once and for all
Step 5Upload your anime filter-ed video to TikTok
Now, in order to get your Anime-fied self on TikTok, all you need to do is upload your video creation (either on your mobile device or your computer) We’ve provided a URL for you below that will take you directly to the TikTok upload page.
Part 2 More Tutorials on Anime Filter That You Should Not Miss
The Anime Style filter that we introduced in the previous section isn’t the only ‘animated’ filter available, of course It’s the one that caught the attention of a lot of people, thanks, in large part, to the participation of a couple of some of the bigger TikTok-ers on the platform. However, you can always expand your selection a bit by checking out some of the other interesting anime filters in the market:
0112 Anime Filters to Turn Yourself into an Anime Character
Anime Filter #1: Anime Style Realistic
In order to fix some of the more glaring issues with the regular Anime Style filter, Snapchat created a second filter, called Anime Style Realistic This one has a distinctively less anime style when it comes to looks. But it does allow for more skin colors, better hair integration, and accessories
Pros
FREE Snapchat lens that you can use at any time.
Works with most skin tones.
Better hair/accessory integration.
Cons
The style is more realistic than anime.
It is not available anywhere else; you’ll need to be on Snapchat to use it.
Not great at capturing motion.
This is a fun filter to use for those looking to spice up their timeline with something a little different (OR for those having a bad day and would like the almost-anonymity the filter can provide).
Anime Filter #2: Cartoon Style
Next, we have another Snapchat original lens called Cartoon Style This filter is more reminiscent of the older animated cartoon styles (think Pocahontas, Lilo & Stitch, etc.), but it doesn’t make it any less fun
Pros
FREE Snapchat lens.
Works with all skin tones.
Works with accessories.
Cons
More of a cartoon animated style than anime.
Not available anywhere else, you can only use it with Snapchat.
Not great at capturing motion.
Again, just like the Anime Filter, this is good for slapping on just to have fun or to sneakily erase a couple of blemishes
Anime Filter #3: Anime Filter
Now, although we mentioned that TikTok doesn’t have any anime-style filters, the Chinese version of it (surprisingly) does You can see it being used in the image above, rendering the user into an animated (albeit not classically Japanese animated) character.
Pros
Free Chinese TikTok filter.
Great at capturing motion.
Chinese animated drawing style.
Cons
Only available for the foreign version of the TikTok app.
Not the best with skin tones.
It doesn’t use the classic Japanese-animation style.
This has seen a popularity boost recently, with many TikTok users using it to show a ‘before’ and ‘after’ (like the image shown above), of their dance being animated.
Filter URL: https://www.douyin.com/
Anime Filter #4: Anime Eyes
This next filter is the first unofficial anime filter on this list. It was created by one of the users of Snapchat and can be found there if you want to use it This one doesn’t animate the whole face of the user, but it does apply a sticker of various ‘anime eyes’ that you can use as a semi-animated profile picture maker (free)
Pros
FREE Snapchat filter
Anime-eyes sticker to cover the eyes
Useful as an animated profile picture maker
Cons
Only available on the Snapchat app
Does not capture motion
Does not animate the entire face
This really is best used for profile pictures only You’ve probably seen it around as such, although some users also find it useful for hiding tired eyes
Anime Filter #5: Wondershare Filmora
If you’re looking to step up your game ‘editing-wise’ and give your pictures and videos an even more anime feel, then you can also consider the anime filters that the video editing tool, Wondershare Filmora Video Editor , offers. (You can also skip the pre-made filters altogether and create your own animated video with stickers and other effects.)
Pros
Variety of anime filters for videos
Comes with advanced video editing tools
Creates high-quality videos
Cons
Premium Software
No face animation
This particular option is for those looking for something a step above what everyone else is doing. All while allowing a more flexible experience
For Win 7 or later (64-bit)
For macOS 10.12 or later
Anime Filter #6: MHA Anime Filter (Instagram)
Continuing on from our trend of ‘out-there’ options, there’s also the MHA filter from Instagram This one has been especially popular with the anime fanbase as it offers plenty of opportunities for hilarious, pointed responses
Pros
FREE with Instagram
Anime-themed sticker
Trending on TikTok
Cons
Not a face animator filter
Not a profile picture animator
Limited anime options
It’s definitely not what you might have initially been looking for. But its popularity on TikTok is undeniable
Anime Filter #7: Anime Filter
Our second recommended anime-themed filter is the basic Anime Filter on Instagram This one flicks through dozens of some of the most popular animes to find out which one suits you best And, just like the previous, is currently trending on Tiktok
Pros
FREE with Instagram
Anime-themed sticker filter
Trending on TikTok
Cons
Sticker, not face animator
Available only on Instagram
Limited options
Anime Filter #8: Cartoon
This next animation filter pick of ours brings us back to Snapchat It’s called the Cartoon lens. And, just like our initial picks, it will change your pictures to that of a cartoon This one is closer to the cartoon-style popular around the 2000s (think Frozen & Tangled)
Pros
Available on Snapchat
Animated profile picture maker (free)
Works for various skin types
Cons
Not the best at motion capturing
Only available on Snapchat
Doesn’t use classic Japanese style
It’s not quite the anime filter that you’re probably looking for, but it does still work if all you want is a way of cartoon-ifying yourself to spice up your timeline It’ll clear up any blemishes too
Anime Filter #9: Comics Style
Again, we’re moving towards a different kind of animation style with this next filter from Snapchat, but the Comics Style filter does have its own promises of fun as well Especially for those who are long-time fans of American comics (or, even, your average modern-day Avengers fan)
Pros
FREE on Snapchat
Video face animator
Works with a variety of skin tones
Cons
Awkward with some face shapes
Does not work with all face accessories
Available only on Snapchat
Anime Filter #10: Cartoon 3D Style
Now, this might get confusing, but for our last picks, we actually have a set of filters all called Cartoon 3D Style But trust us They’re all different This first version is one you would probably relate more to the DreamWorks motion picture, Ratatouille
Pros
FREE profile picture animator on Snapchat
Compatible with a variety of face shapes
Compatible with a variety of skin tones
Cons
Set features (i.e., pointed nose)
Non-anime drawing style
Not compatible with some facial accessories
Anime Filter #11: Cartoon 3D Style
For our next Cartoon 3D Style lens from Snapchat, we have a face animator that can help you turn into something very close to another dreamwork’s motion picture (think the Despicable me or the Minions)
Pros
Cartoon style animator that is FREE to use
Great for motion capturing
Compatible with a variety of skin colors
Cons
Available only on Snapchat
Not compatible with certain face accessories
Limited face warping effect
Anime Filter #12: Cartoon 3D Style
And finally, for the last of our recommended anime filters, we have the Cartoon 3D Style lens from Snapchat that makes you look like your favorite Disney character (In this case, the obvious inspiration comes from Disney’s Frozen or Tangled)
Pros
Disney face animator that is FREE on Snapchat
Compatible with all skin tones
Trending on TikTok
Cons
It can only be used on Snapchat
Not great at capturing motion
02Steps to Download the Anime Filter App and Turn Yourself into an Anime Character
Now, if those filters weren’t enough for you, we’ve also included this next tutorial on how you can find apps on your mobile device that will allow you to get the same effect without having to use Snapchat, TikTok, or Instagram
Step 1Go to the App Store
The first step, of course, is to go to the app store on your mobile device.
Step 2Search for Anime Filter App
Next, search ‘Anime Filter’ on your phone’s app store.
Step 3Select Anime Filter App
There are multiple types of anime filter apps available in the market. Pick the one that you think will work best for you.
Step 4Install Anime Filter App
Finally, once you’ve found the anime filter app for you, install it.
Step 5Open Anime Filter App
The app that we used for our example, Anime Camera, offers several different animation styles However, this app does come with a subscription fee, so keep that in mind.
03Anime Filter Has a Sadly Unsurprising Problem
You might have noticed this while we were introducing all the different types of anime-style filters available, but the popular Anime Filter has its shortcomings. Which includes:
PROBLEM 1: Dark Skin Tones
The anime filter’s inability to capture darker skin tones accurately is one of the biggest issues users have with the filter.
PROBLEM 2: Hair Style
Hairstyle options are also very limited. And, as for black hairstyles? Well, the options are pretty much non-existent.
PROBLEM 3: Face Accessories
Do you wear glasses? How about piercings? Well, this won’t translate for you either, unfortunately
Key Takeaways from This Episode
● The Anime Filter is a hot, trending topic in platforms like Tiktok, Instagram, and Snapchat It’s also a fun way of engaging with the anime community
● There are other, similar face-animation filters available (The Cartoon 3D Styles, especially, were quite popular for a time)
● Unsurprisingly, the anime filter does have its problems… And it left a big chunk of the TikTok community pretty flabbergasted — and disappointed. But that didn’t stop them from joining in the fun to provide some empowering commentary
Also read:
- Updated Nurturing Mind, Heart, and Soul on the Top 5 Anime Streaming Sanctuaries for 2024
- New What Wikipedia Wont Tell You Specifically About Character Rigging for 2024
- New In 2024, Adobe Animate Text Effects Skills That You Need to Know
- New In 2024, 8 Best Motion Graphics Online Tools for Your Inspiration
- In 2024, In-Depth Study of Cartoon Painting Starts From Learning to Draw It
- Updated In 2024, 15 Top Pics Collage Apps
- Updated What Is A GIF for 2024
- New Types of Cartoon Styles You May Use for The Next Marketing Project for 2024
- Techniques on Making After Effects 2D Animation
- Updated In 2024, 15 Best Video to GIF App on iPhone and Android
- New Handy Tip From Adobe Animate Rigging Tutorial for All Learners for 2024
- Updated 12 Dubbed Anime Websites to Watch for Free for 2024
- 2024 Approved Beginner Tutorial on Making Unity 2D Animation
- Updated Tips for Canva Animated Elements
- Updated The Secret Sauce for Making GIF Instagram Story More Stunning
- Updated Most Effective Ways to Set WhatsApp Status for 2024
- New In 2024, 10 Top Memorable Japanese Cat Cartoons
- New 2024 Approved Are You Ready to Animate Game Character From Scratch?
- How to Turn Yourself Into WhatsApp Cartoon
- New 10 Great Apps to Turn Funny Animated Images Into Comics
- New 10 Options for Your Need on Animation Makers for 2024
- New 2024 Approved 15 Best Collage Makers to Create Aesthetic Collages
- Updated In 2024, 12 Best Stop Motion Studios Worth Recommending
- Updated Creative Ways to Create iPhone Text GIF
- In 2024, 10 Awesome Moving Animation PowerPoint Techniques
- New 2024 Approved How to Reduce GIF Size and Best GIF Resizers
- How to Create Benime Whiteboard Animation on Android for 2024
- In 2024, Methods to Make Photo Motion Effect Online?
- Updated In 2024, Tips for GIF to Animated PNG
- New Top 15 Male Anime Characters By Voting
- In 2024, 15 Horror Animes That Will Trigger a Heart Attack
- 2024 Approved Best 12 2D Animation Studios All Should Check Out
- New 2024 Approved The 15 Most Efficient Photo to Cartoon Software for Android
- New The 10 Most Adorable Aesthetic Cartoon Characters of All Time
- In 2024, Samples of Cartoon Character Face
- Updated In 2024, Best 10 Popular Cartoons You Forgot Existed
- New In 2024, 20 Free After Effects Logo Reveal Templates
- New 15 Iconic Cartoon Characters of All Time
- In 2024, Ways on How to Liven Up Your Animate Website on Scroll
- Whats the Best 10 Photo Animator Templates That Bring Your Images to Life for 2024
- 2024 Approved Learn What Are Differences Between 2D And 3D Animation
- Updated 2024 Approved Most Popular Tips on Learning Animate Rigging
- New 2024 Approved Secrets to Make 2D Game Animation
- New In 2024, What Wikipedia Cant Tell You About the 10 Batman Cartoons
- New 2024 Approved How to Find & Make Animated Christmas GIFs?
- New 2024 Approved 15 Types of Cartoon Drawing Styles Examples
- New 15 Horror Animes That Will Trigger a Heart Attack for 2024
- New 2024 Approved OBS Animated Lower Thirds Alternatives
- New All About Types of Motion Graphics
- Ultimate guide to get the meltan box pokemon go For Vivo S17t | Dr.fone
- How to Track a Lost Motorola Moto G Stylus (2023) for Free? | Dr.fone
- Full Guide to Unlock Your Samsung Galaxy M34
- Spotify Keeps Crashing A Complete List of Fixes You Can Use on Xiaomi Redmi A2+ | Dr.fone
- In 2024, Unlock Your Poco X5 Pro Phone with Ease The 3 Best Lock Screen Removal Tools
- Latest Guide How To Bypass Xiaomi Redmi A2+ FRP Without Computer
- How Can I Catch the Regional Pokémon without Traveling On Oppo Reno 10 Pro 5G | Dr.fone
- How to Mirror Apple iPhone 8 to Roku? | Dr.fone
- How to sign a PDF v2.0 document with electronic signature software
- In 2024, How to Unlock iCloud Activation Lock and iCloud Account From iPhone 6s?
- Top 8 Text-to-Video AI Generators to Produce Video Easily
- All Must-Knows to Use Fake GPS GO Location Spoofer On Vivo V29 Pro | Dr.fone
- 2024 Approved How To Reach More Users by Using Instagram Live Shopping
- Top 15 Apps To Hack WiFi Password On Vivo X Flip
- Different Methods for Resetting Nokia C300 Phones with Screen Locked and Not | Dr.fone
- How to Fake Snapchat Location without Jailbreak On Samsung Galaxy A05 | Dr.fone
- How to Find iSpoofer Pro Activation Key On Oppo F25 Pro 5G? | Dr.fone
- In 2024, How to Unlock T-Mobile Apple iPhone 15 Plus online without SIM Card?
- How To Update or Downgrade Apple iPhone 13 Pro Max Without iTunes? | Dr.fone
- Proven Ways to Fix There Was A Problem Parsing the Package on Honor X50 | Dr.fone
- Title: Updated 5 Ways You Never Heard of for Converting MP4 to GIF in Photoshop for 2024
- Author: Elon
- Created at : 2024-05-19 03:05:45
- Updated at : 2024-05-20 03:05:45
- Link: https://animation-videos.techidaily.com/updated-5-ways-you-never-heard-of-for-converting-mp4-to-gif-in-photoshop-for-2024/
- License: This work is licensed under CC BY-NC-SA 4.0.
