
:max_bytes(150000):strip_icc():format(webp)/5-best-texting-apps-for-android-tablets-in-2023-a5a6329d6b744167acf0a02f6a413ff2.jpg)
Updated 8 Blender 3D Animation Tutorials for 2024
8 Blender 3D Animation Tutorials for Beginners
8 Blender 3D Animation Tutorials for Beginners
An easy yet powerful editor
Numerous effects to choose from
Detailed tutorials provided by the official channel
Blender animation software is one of the open-source software chosen to create animations. It is easy to create animations, videos or graphics, etc. If you want to be an animation 3D artist, make creative universes, and meet each of the different characters moving around in your heart.
You will learn the step-by-step procedure to create animations and add other edits to the animation. And also a few tips to develop better Blender 3D animation effects.
In this article
01 [Is Blender best for animation?](#Part 1)
02 [How to Create 3D Animated Characters with Blender in 15 Minutes.](#Part 2)
03 [Become a Pro from Beginners in 8 Tutorials](#Part 3)
Part 1 Is Blender best for animation?
The answer to if the Blender is suitable for animation is yes. Blender animation is the best for making animations and bringing any living to animator. This software is mostly for professional works whose limitations will be learning the process, not any technical defects. Let’s talk about why Blender 3D animation software is the best and more helpful.
Character animation is an essential tool for animation, and Blender has developed this tool with no way less to other software.
There are many animation effects other than animating characters. Blender 3D for free has all the necessary tools to do all types of rigs and animations without any difficulty.
Blender is one software that has 2D animation inbuilt in it, like drawing and creating 2D animation.
Blender’s animation tools are making motion graphics possible by advancing the features than it was four years ago.
Nowadays, many people are using Blender to do professional works, including freelancers, small studios, and even game developers.
Part 2 How to Create 3D Animated Characters with Blender in 15 Minutes.
This is a series for people who want to learn how to create 3D blender animation characters from keeping a reference image. Blender’s ringing tools will be more helpful for this process.
01Step 1: Importing
Initially, import a Blender 3D animation character into the Blender to animate. Many free and paid characters are available in Vincent, and Rain v2.0 is present in Blender Cloud; above all, these characters are for free.
Steps to import the character either from Vincent or Rain v2.0
Download the character file from the cloud to any destination folder on the computer. Open the Blender and place the cursor on the origin point on the screen. Later select import present in the File menu and choose the file format. And now, allow the Python script to run for the selected character folder.

02Step 2: Add Keyframes
There will be a diamond-shaped icon below to choose the keyframe you want to add to the timeline, which you may also delete.
Adding a keyframe is simple. Open the timeline window in the animation editor. Press the alphabet ‘G’ on the keyboard, move the bone and place it. Then hit Shift+I and choose the channel LocRot and insert the keyframe. Likewise, you can adjust the keyframe by dragging, making it fast or slow to the requirements.
Moving the keyframe to 20 makes it faster, and moving to 40, slower.
03Step 3: Get Reference Materials
It will be challenging to add movements to the characters, so plenty of videos can get the moves right. There are various reference images and videos available on the Internet. You can either add the selected reference materials to the second screen or add them to the 3D space. Let’s discuss how to add it.
Hit Shift + A to add the reference material. Later select “Image” and then choose the “Background.” Scale the reference image onto the 3D space after it loads.
Afterward, you can leave it to the animation of the reference article, or you can further edit or amplify the movements.
04Step 4: Fine–Tuning and Sound
This step will add smooth movements by combining two keyframes for a more professional look. We have to use the Dope sheet to do complete this process. Let’s see how to add it.
Initially, split the window horizontally. Later switch over the dope sheet below the animation tab, where you can see keyframes of all axis. Now you can drag and edit to slow or amplify the speed.
There is a Graphic editor, which is more advanced to make the movements more accurately and directly to edit the curves.
Sound effects make any video or animation better. You can add and import the sound files. You can also create your sound and insert it into the Blender. Let’s discuss adding sound and making it sync to the character.
Download the audio file, hit shift + A to open Add menu, and choose the “Sound.” Now select the sound that you wish to add.
Drag the sound to keep it to the specific sections alone. Also, you can switch between “No Sync” to “AV Sync” in the playback to give the best synchronization to the characters. The volume and pitch can be adjusted using the sidebar.
05Step 5: Rendering
Before rendering, make sure you keep the FPS is same as that chosen during the keyframes to avoid unnecessary renders. After setting the frame correctly, causing the animation is easy.
Initially, click on “scene” and choose the file extension, file formats, and file colors (BW, RGB, or RGBA). Select the encoding container as “WebM” and video Codec as “WEBM/VP9. After adding the sound, set the audio codec to “Vorbis.” Choose output quality and speed.
After all the rendering, select Render from the top bar and select “Render Animation” in Blender Animation.
Awesome! We have successfully blended a character using Blender 3D animation software. With more practice and knowledge about more tools, one can easily use the Blender 3D mouse.
Part 3 Become a Pro from Beginners in 8 Tutorials.
01Fix 1: Complete Beginners Guide to Blender 2.8
This YouTube tutorial focuses on Blender version 2.8. The tutorial features the redesigned user interface and tools like 3D viewpoint and UV editor, which has new interactive tools. And about different 3D shapes and simple edits like adding colors and “G drag,” etc.
02Fix 2: Blender 2.9 for Absolute Beginners
This YouTube tutorial on Blender 3D animation software version 2.9 has the new advancement about denoiser interactivity in the 3D viewpoint. The YouTuber explains EEVEE, cycles, workbench, movements, rotate, and scale objects.
03Fix 3: Blender Day -1 Absolute Basics - Introduction Series for Beginners
This YouTube tutorial says about the introduction to the Blender 3D for free for beginners. He explains simple movements like rotating and scaling, shapes, and colors to the objects. He also says about the pivot plot and how to create a basic primitive using blender.
04Fix 4: Zoync TV’s Blender Beginners Series
The Blender Beginners video by ZoyncTV is on Blender 2.6. Indeed, even as hotkeys and terms change, the hidden ideas will forever be pertinent. Every video in this 11-section is somewhere between 10 and 20 minutes, split into five separate subjects: displaying, modifiers, materials, surfaces, and animations. It’s a beginner-level course.
05Fix 5: The Blender Survival Guide
The Blender Survival Guide series by Creative COW is outdated but the best video for somebody who has never utilized Blender. Each video in this 13-section series is somewhere in the range of 15 and 45 minutes in length, which means you’ll get 350 intense minutes of preparing. It is a survival reference that shows just the outright necessities.
06Fix 6: KatBit’s Blender Tutorial
The KatsBits site is home to lots of tutorials, video games. Its Blender animation tutorials are fantastic when you want a beginning stage for various 3D models. There are 45 Blender tutorials. Tutorials take you through the most common way of making a 3D level for Quake and tell you the best way to make a basic model.
07Fix 7: Daniel Krafft’s 100 Blender 2.8 Tips
While this is another Blender 2.8 tutorial, Daniel’s tips are overall for any Blender work process. He teaches simple stuff like vertex and edges and some technical parts in the Blender 3D animation software.
08Fix 8: Blender 3D: Noob to Pro
This last tutorial is a “wiki book” called Blender 3D: Noob to Pro that consists of important Blender animation tips and experiences. Start with an outline of 3D ideas and a top-to-bottom introduction to Blender.
Regarding Blender 3D mouse software, we would like to recommend one more tool to you the most. Yes, it is none other than Wondershare Filmora, a perfect alternative to Blender 3D animation software wherein you can get excellent 3D animation effects, 3D texts and animate it. There are some simple steps and various options to work in Filmora for creating 3D animated effects.
● Composition
● Creating our 3D text
● Creating the 3D look
● Basics of 3D animation
● Animating the text in 3D
There are countless YouTube tutorial videos for working with Wondershare Filmora Video Editor ‘s latest version.
Key Takeaways from This Episode
● We learned about Blender 3D animation software.
● How can you create characters using Blender animation?
● 8 Tutorials to move you from a beginner to a Pro.
Blender animation software is one of the open-source software chosen to create animations. It is easy to create animations, videos or graphics, etc. If you want to be an animation 3D artist, make creative universes, and meet each of the different characters moving around in your heart.
You will learn the step-by-step procedure to create animations and add other edits to the animation. And also a few tips to develop better Blender 3D animation effects.
In this article
01 [Is Blender best for animation?](#Part 1)
02 [How to Create 3D Animated Characters with Blender in 15 Minutes.](#Part 2)
03 [Become a Pro from Beginners in 8 Tutorials](#Part 3)
Part 1 Is Blender best for animation?
The answer to if the Blender is suitable for animation is yes. Blender animation is the best for making animations and bringing any living to animator. This software is mostly for professional works whose limitations will be learning the process, not any technical defects. Let’s talk about why Blender 3D animation software is the best and more helpful.
Character animation is an essential tool for animation, and Blender has developed this tool with no way less to other software.
There are many animation effects other than animating characters. Blender 3D for free has all the necessary tools to do all types of rigs and animations without any difficulty.
Blender is one software that has 2D animation inbuilt in it, like drawing and creating 2D animation.
Blender’s animation tools are making motion graphics possible by advancing the features than it was four years ago.
Nowadays, many people are using Blender to do professional works, including freelancers, small studios, and even game developers.
Part 2 How to Create 3D Animated Characters with Blender in 15 Minutes.
This is a series for people who want to learn how to create 3D blender animation characters from keeping a reference image. Blender’s ringing tools will be more helpful for this process.
01Step 1: Importing
Initially, import a Blender 3D animation character into the Blender to animate. Many free and paid characters are available in Vincent, and Rain v2.0 is present in Blender Cloud; above all, these characters are for free.
Steps to import the character either from Vincent or Rain v2.0
Download the character file from the cloud to any destination folder on the computer. Open the Blender and place the cursor on the origin point on the screen. Later select import present in the File menu and choose the file format. And now, allow the Python script to run for the selected character folder.
02Step 2: Add Keyframes
There will be a diamond-shaped icon below to choose the keyframe you want to add to the timeline, which you may also delete.
Adding a keyframe is simple. Open the timeline window in the animation editor. Press the alphabet ‘G’ on the keyboard, move the bone and place it. Then hit Shift+I and choose the channel LocRot and insert the keyframe. Likewise, you can adjust the keyframe by dragging, making it fast or slow to the requirements.
Moving the keyframe to 20 makes it faster, and moving to 40, slower.
03Step 3: Get Reference Materials
It will be challenging to add movements to the characters, so plenty of videos can get the moves right. There are various reference images and videos available on the Internet. You can either add the selected reference materials to the second screen or add them to the 3D space. Let’s discuss how to add it.
Hit Shift + A to add the reference material. Later select “Image” and then choose the “Background.” Scale the reference image onto the 3D space after it loads.
Afterward, you can leave it to the animation of the reference article, or you can further edit or amplify the movements.
04Step 4: Fine–Tuning and Sound
This step will add smooth movements by combining two keyframes for a more professional look. We have to use the Dope sheet to do complete this process. Let’s see how to add it.
Initially, split the window horizontally. Later switch over the dope sheet below the animation tab, where you can see keyframes of all axis. Now you can drag and edit to slow or amplify the speed.
There is a Graphic editor, which is more advanced to make the movements more accurately and directly to edit the curves.
Sound effects make any video or animation better. You can add and import the sound files. You can also create your sound and insert it into the Blender. Let’s discuss adding sound and making it sync to the character.
Download the audio file, hit shift + A to open Add menu, and choose the “Sound.” Now select the sound that you wish to add.
Drag the sound to keep it to the specific sections alone. Also, you can switch between “No Sync” to “AV Sync” in the playback to give the best synchronization to the characters. The volume and pitch can be adjusted using the sidebar.
05Step 5: Rendering
Before rendering, make sure you keep the FPS is same as that chosen during the keyframes to avoid unnecessary renders. After setting the frame correctly, causing the animation is easy.
Initially, click on “scene” and choose the file extension, file formats, and file colors (BW, RGB, or RGBA). Select the encoding container as “WebM” and video Codec as “WEBM/VP9. After adding the sound, set the audio codec to “Vorbis.” Choose output quality and speed.
After all the rendering, select Render from the top bar and select “Render Animation” in Blender Animation.
Awesome! We have successfully blended a character using Blender 3D animation software. With more practice and knowledge about more tools, one can easily use the Blender 3D mouse.
Part 3 Become a Pro from Beginners in 8 Tutorials.
01Fix 1: Complete Beginners Guide to Blender 2.8
This YouTube tutorial focuses on Blender version 2.8. The tutorial features the redesigned user interface and tools like 3D viewpoint and UV editor, which has new interactive tools. And about different 3D shapes and simple edits like adding colors and “G drag,” etc.
02Fix 2: Blender 2.9 for Absolute Beginners
This YouTube tutorial on Blender 3D animation software version 2.9 has the new advancement about denoiser interactivity in the 3D viewpoint. The YouTuber explains EEVEE, cycles, workbench, movements, rotate, and scale objects.
03Fix 3: Blender Day -1 Absolute Basics - Introduction Series for Beginners
This YouTube tutorial says about the introduction to the Blender 3D for free for beginners. He explains simple movements like rotating and scaling, shapes, and colors to the objects. He also says about the pivot plot and how to create a basic primitive using blender.
04Fix 4: Zoync TV’s Blender Beginners Series
The Blender Beginners video by ZoyncTV is on Blender 2.6. Indeed, even as hotkeys and terms change, the hidden ideas will forever be pertinent. Every video in this 11-section is somewhere between 10 and 20 minutes, split into five separate subjects: displaying, modifiers, materials, surfaces, and animations. It’s a beginner-level course.
05Fix 5: The Blender Survival Guide
The Blender Survival Guide series by Creative COW is outdated but the best video for somebody who has never utilized Blender. Each video in this 13-section series is somewhere in the range of 15 and 45 minutes in length, which means you’ll get 350 intense minutes of preparing. It is a survival reference that shows just the outright necessities.
06Fix 6: KatBit’s Blender Tutorial
The KatsBits site is home to lots of tutorials, video games. Its Blender animation tutorials are fantastic when you want a beginning stage for various 3D models. There are 45 Blender tutorials. Tutorials take you through the most common way of making a 3D level for Quake and tell you the best way to make a basic model.
07Fix 7: Daniel Krafft’s 100 Blender 2.8 Tips
While this is another Blender 2.8 tutorial, Daniel’s tips are overall for any Blender work process. He teaches simple stuff like vertex and edges and some technical parts in the Blender 3D animation software.
08Fix 8: Blender 3D: Noob to Pro
This last tutorial is a “wiki book” called Blender 3D: Noob to Pro that consists of important Blender animation tips and experiences. Start with an outline of 3D ideas and a top-to-bottom introduction to Blender.
Regarding Blender 3D mouse software, we would like to recommend one more tool to you the most. Yes, it is none other than Wondershare Filmora, a perfect alternative to Blender 3D animation software wherein you can get excellent 3D animation effects, 3D texts and animate it. There are some simple steps and various options to work in Filmora for creating 3D animated effects.
● Composition
● Creating our 3D text
● Creating the 3D look
● Basics of 3D animation
● Animating the text in 3D
There are countless YouTube tutorial videos for working with Wondershare Filmora Video Editor ‘s latest version.
Key Takeaways from This Episode
● We learned about Blender 3D animation software.
● How can you create characters using Blender animation?
● 8 Tutorials to move you from a beginner to a Pro.
Ways You Can Master to Find 10 Best Free Animated Text Generator
Ways You Can Master to Find 10 Best Free Animated Text Generator
An easy yet powerful editor
Numerous effects to choose from
Detailed tutorials provided by the official channel
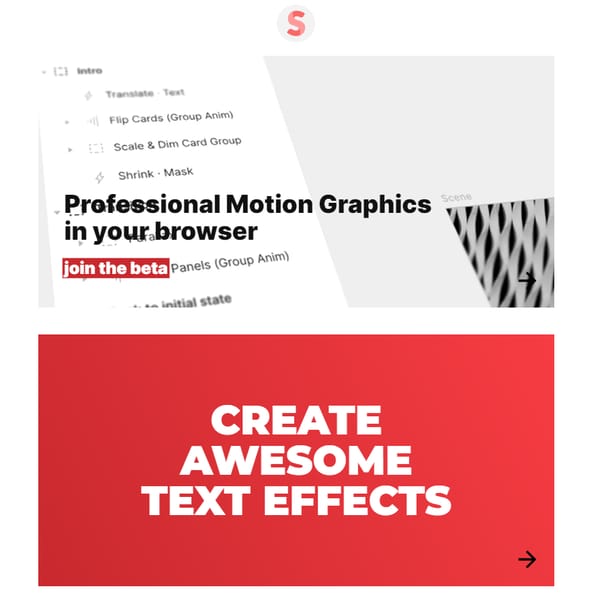
We’ve compiled a list of some of the best text animation software and tools out there!
One for general, animated text generators, and the other for online text gif maker tools. Pick whichever suits your project and start working on a more professional look today.
In this article
01 [10 Best Animated Text Generators for 2021](#Part 1)
02 [8 Best Online Text GIF Generators to Make Animated Word GIFs](#Part 2)
03 [How to Use an Animated Text Generator to Make Stunning Videos?](#Part 3)
Part 1 10 Best Animated Text Generators for 2021
For our first list, as promised, we’ve compiled a list of some of the best-animated text generators for 2021. This is a general list of text animation software that you have to either download or install to use! If you want the online text animation maker list, that would be the one after this!
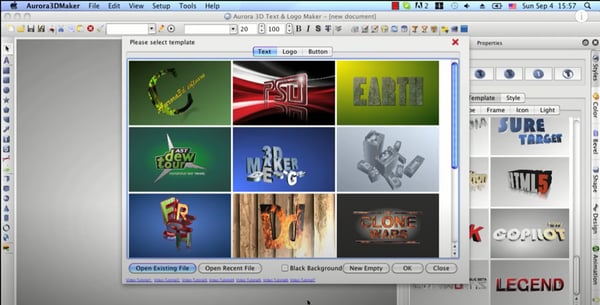
01Aurora: 3D Text Logo Maker
PRICE: FREE!
RATING: 4.5/5
The first animated text generator on our list is Aurora 3D. Aurora offers several different products, but the one that we’re focusing on today is their 3D Text & Logo maker, which you can use to create some pretty advanced text animations with no sweat (as well as logos, of course, as the name implies)! The software is available for both Mac and Windows OS computers and desktops.
02Animaker
PRICE: Basic Plan = $10 per month!
RATING: 4.9/5
If you’re looking for a more modern text animation maker, then Animaker might just be the one that you want! With this, you can create your 3D text animations from scratch, or choose from the dozens of templates and presets that they have for text, animated characters, icons, and other properties. This is more of a video editor than a strict text tool, but we thought it was important to give you a good variety. It’s also not FREE, but you can try it for free for a time so that you can check if it’s the one for you.

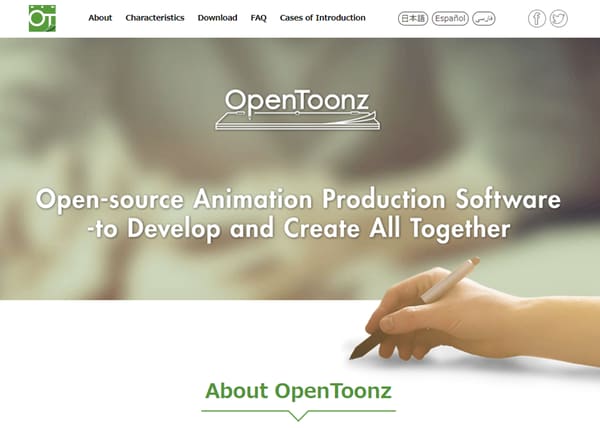
03OpenToonz
PRICE: Free
RATING: 4/5
OpenToonz is a free text animation software that you can use for both basic and advanced 2D animation. It comes in several different languages (including Spanish and Japanese) and is very useful for creating simple text animation from scratch — no complicated tools. Just create and go! (It is also available in both Mac and Windows!)
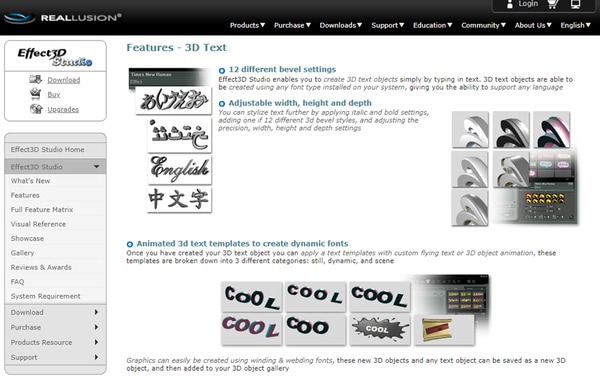
04Reallusion
PRICE: Free
RATING: 4/5
Reallusion is another open-source text gif maker that you can use if you’re looking for something quick-and-easy. It supports a ton of different fonts, as well as ways to control the width, height, dimension, and style of every single object inside of their 3D properties gallery — giving you a lot of options for customization without any added cost!
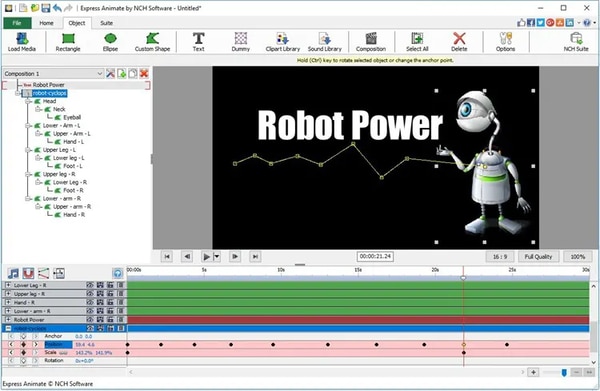
05Express Animate
PRICE: $60 (full license)
RATING: 4/5
Express Animate, just like Open Toonz, it is more of an animation tool than one strictly created for text animation. However, it does work for that purpose as well. So, if you’re willing to pay for the full license (which will cost $60), it could be a fairly good tool for you. Especially if you’re interested in trying out more complex animations in the future.
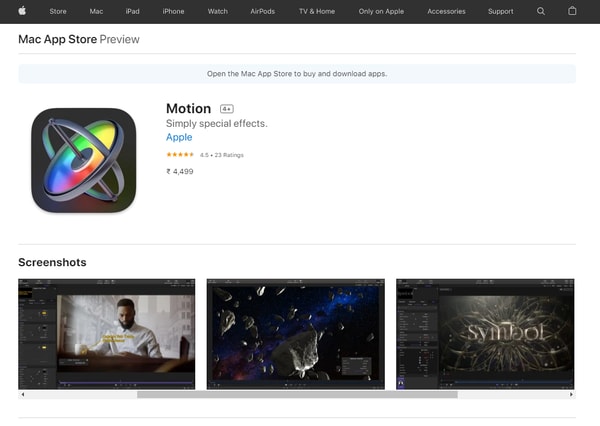
06Motion
PRICE: $47
RATING: 3.9/5
Motion is a Mac-only software. It is, just like some of the other options on this list, a great option for those looking for a tool that can help them with general animations (not just text animation — although it provides tools for that as well). The best part of Motion is undoubtedly its graphic library, where you have access to a ton of different presets and templates that you can use to simplify your text-animation-making.
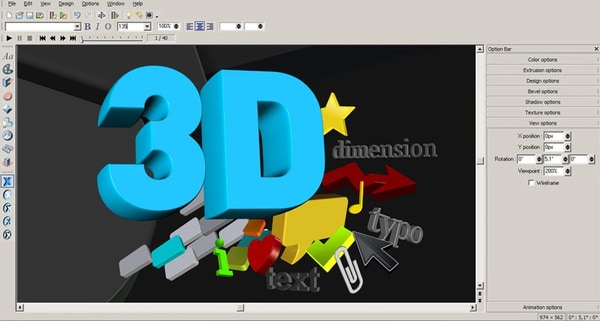
07Xara 3D Maker
PRICE: $39.99
RATING: 3.9/5
Xara is another one of our paid options. It also comes complete with a range of different templates and presets that you can use in order to simplify your animation-generating. And, if you end up disliking the product after you try it, they do offer a 30-day money-back guarantee that you can take advantage of to make sure that you get the most out of your purchase.
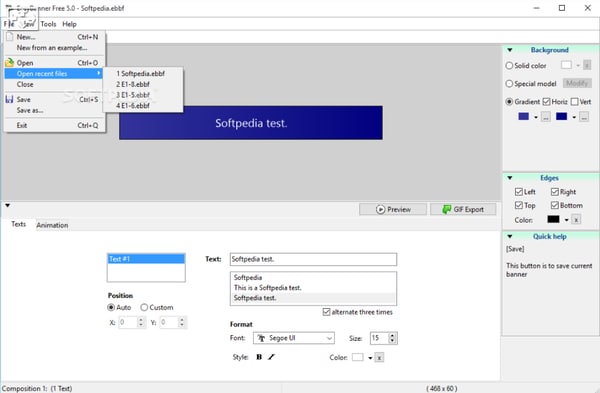
08Easy Banner
PRICE: FREE
RATING: 3.5/5
Easy Banner is a free animated text-banner-making software. It’s only available in Windows, and its uses are limited to created banners. However, if that’s what you’re looking for? Then there’s no reason not to try it out! Especially since it’s free, and it comes with some pretty advanced customization options for getting the exact look that you want on your text banners.
09Falco GIF Animator
PRICE: FREE
RATING: 3.5/5
Falco Gif Animator is from the same creators of the previous item on this list (Softpedia!) The two offer similar tools, but for different purposes. Whilst the previous tool was for the creation of animated-text banners, this one is a GIF maker for icons, cursors, logos, etc. It’s also FREE! So, if the project you’re working on is applicable to its available features? Then you should definitely try it!

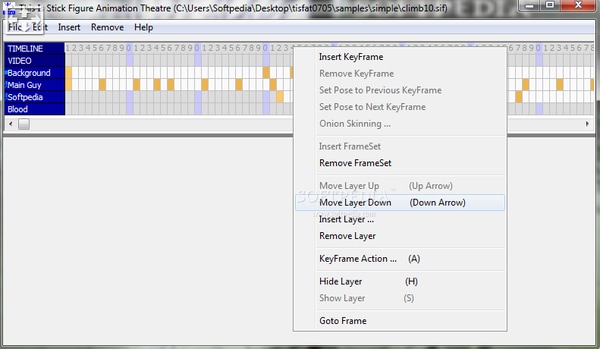
10TISFAT
PRICE: Free
RATING: 3/5
TISFAT is the last of the tools that we have for you. It’s an open-source stick animation tool that you can use to create text animations in whatever style or format that you desire. Making it more customizable than some of the other Softpedia options we just introduced, but still, one to consider based on your own circumstances.
Part 2 8 Best Online Text GIF Generators to Make Animated Word GIFs
And so, we move on to our next list! Here’s where we introduce online solutions for animated text generation needs! So, all the tools on this list will not require any downloading, but they will require that you have internet while working!
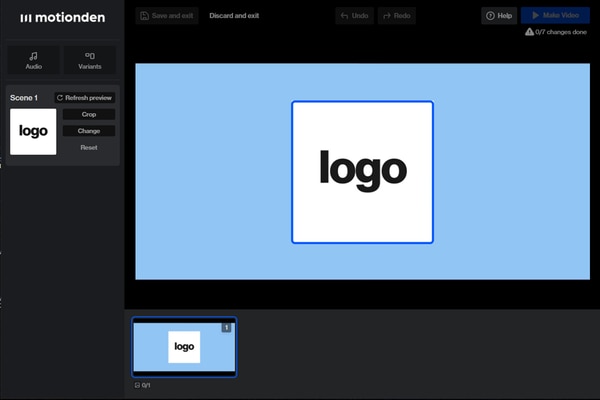
01MotionDen
| PROS | CONS |
|---|---|
| ● FREE version available● Large resources library● Easy-to-use video templates | ● Must upgrade to the premium version to export high-quality projects without a watermark.● The FREE version has a 5-video limit (you cannot work on any more projects than that).● Difficult to use for creating text animation from scratch. |
RATING: 4.8/5
MotionDen is a good entry point for text animation online solutions! It comes with tons of different templates that you can choose from to start working on your project immediately. MotionDen also offers a free version that you can test out for a limited number of times (one that gives you access to all their tools and their large resource library). So, you can decide to upgrade to their premium version whenever you want to (which will cost you around $29 per month!)
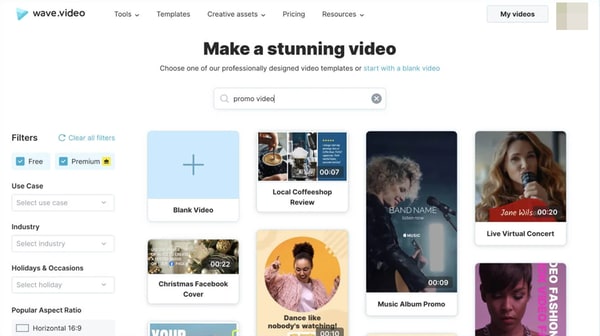
02Wave.Video
| PROS | CONS |
|---|---|
| ● FREE version is available for trying out its tools.● Vast library of animation properties for you to play around with.● Vast library of animation properties for you to play around with. | ● FREE version limits the length of your projects to 15 seconds.● You can also only create five video projects with the free version.● You can also only create five video projects with the free version. |
RATING: 4.5/5
Wave.Video, just like MotionDen, is a freemium software. You can try it out for free and start using their online video editing tools immediately to create short promos, logos, text gifs, etc. If you want access to some of its more advanced tools, however, you’ll need to pay the premium price ($24-48), which, to you, may or may not be worth the vast library of polished animation properties.
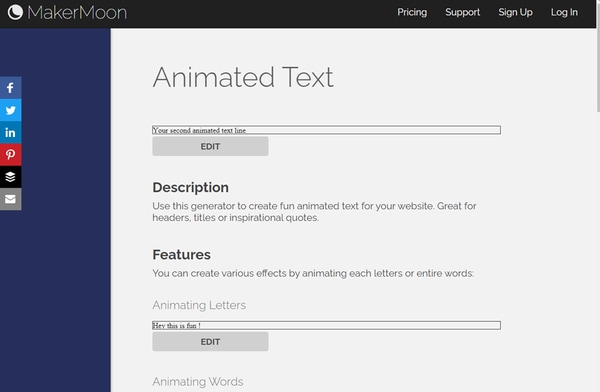
03MakerMoon
| PROS | CONS |
|---|---|
| ● Easy-to-use, and comes with templates and presets!● Advanced video editing tools that you can use to personalize your projects.● FREE plan is available. | ● The FREE version is limited in use.● You also cannot download high-quality projects without a watermark with the free version.● Basic animations only. |
RATING: 4.3/5
If you want to keep things simple, then MakerMoon might be your preferred choice for text animation. It is, like the previous picks, an online video maker, but one with the focus on creating text-centric projects, which you can personalize in a number of ways to create logos, banners, short videos, gifs, etc.
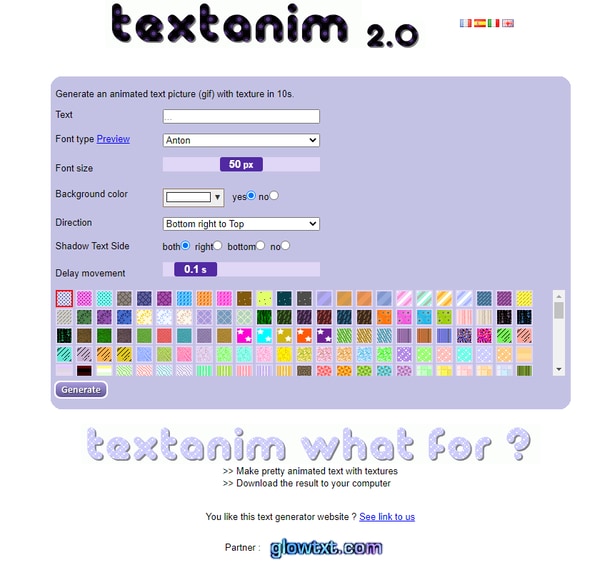
04Textanim
| PROS | CONS |
|---|---|
| ● FREE online GIF maker● A variety of different font style options● Animated Effects options | ● Output is GIF only.● Limited animations options.● Limited resource library. |
RATING: 4/5
Textanim is a very bubbly and glittery kind of gif-maker, made for a more specific kind of project. But, if it works, it works! Plus, it’s also the first completely FREE online gif maker on this list. So, you can test it out without having to make any commitments and use it literally anytime you feel like it. Unfortunately, though, it should be said that the animations here are mainly for effects (i.e., glowing, sparkling, etc.). The text won’t actually move. So, if that’s not what you’re looking for? Then it might not be for you.
05SnackThis
| PROS | CONS |
|---|---|
| ● FREE version for testing its tools and resources is available.● Lots of modern templates are available.● Editing tools for polishing projects. | ● If you’re using the FREE version, you will not be able to actually download your project.● You will also need to register to use it.● The customization options are limited. |
RATING: 4/5
SnackThis, unlike Textanim, is the type to cater to a wider array of users. Its templates are all very modern and professional-looking. So, if what you’re looking for is to create text banners, logos, icons, etc. for your business? Then this definitely is an option that you may want to consider. It’s pretty easy to use too! All you have to do is select the template that you want to use, and then edit it to match what you need.
06Animatron Studio
| PROS | CONS |
|---|---|
| ● More customizable functions.● Advanced video editing options.● Pre-made templates are available for easier animating. | ● FREE Version is limited.● Might be difficult for inexperienced animators.● Output formats are MP4 and GIF only. |
RATING: 3.9/5
Animatron Studio is the tool to use if what you’re looking for is customization. This tool is really better described as animation software, rather than a simple text generator. That means that you have more options than what you might see from other online text animation tools, but it also means that you’ll need to put in more effort to come up with a polished-looking end-product.

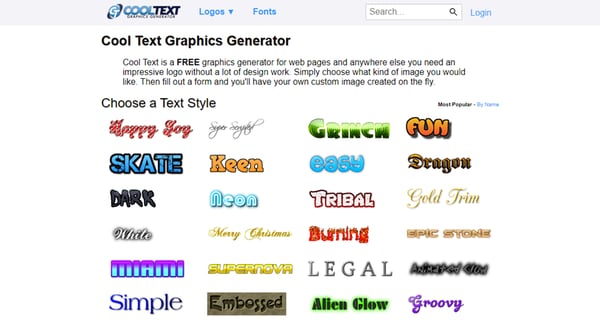
07Cool Text
| PROS | CONS |
|---|---|
| ● Easy and quick to use.● Various font customization options.● FREE to use. | ● Limited customizability.● Old-fashioned fonts. |
RATING: 3.5/5
As a departure from the previous pick, we have Cool Text, which is its complete opposite! This is an older software and is definitely best described strictly as an animated text generator. With Cool Text, you can make logos or icons very easily. The options are, of course, more limited because of that, but it may very well be all you need based on the kind of project you’re working on.
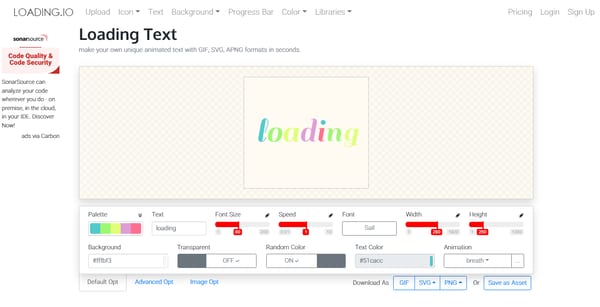
08Loading.io
| PROS | CONS |
|---|---|
| ● Lots of fonts customization options.● Three different output formats (svg., png., and gif).● Also pre-set animations to choose from. | ● The FREE version is limited.● It isn’t as advanced as some of the other tools on this list. |
RATING: 3.5/5
For our last online text animator, we have Loading.io. This one is a very simple, and very straightforward kind of tool. It’s also a freemium one, so you’ll have to pay in order to unlock some of its features, but it’s a solid contender for its customization tools, which gives a lot more options to choose from.
Part 3 How to Use an Animated Text Generator to Make Stunning Videos?
Now, if you need help making use of your finished animated text, icons, etc. Then you’ll probably need a video editor like Wondershare Filmora !
For Win 7 or later (64-bit)
For macOS 10.14 or later
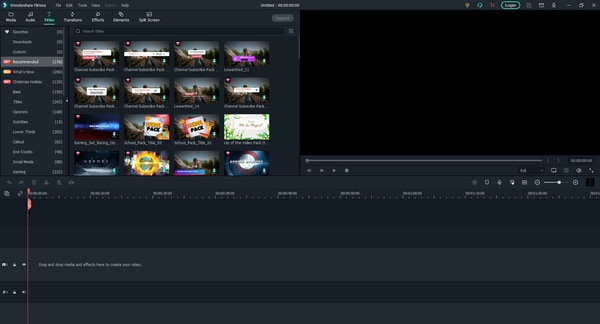
As you can see from the image shown above, Wondershare Filmora is a very sleek video editing software. It’s used by all sorts of professionals as well, as it comes with all kinds of resources and tools that you can use in order to create stunning videos (including, believe it or not, templates for animated text! So, if you want, you can even skip the animated text maker altogether and just get straight to using Filmora.)
Key Takeaways from This Episode
● There are various text animation generators in the market! Some of which you can download straight to your desktop or computer!
● There are also online GIF makers that you can use straight from your browser, leaving out all the hassle of having to download or install anything and helping you get straight to work!
● If you want to polish up your project some more, then consider using an advanced video editor like Filmora Pro to make sure that your work is sparkly clean!
We’ve compiled a list of some of the best text animation software and tools out there!
One for general, animated text generators, and the other for online text gif maker tools. Pick whichever suits your project and start working on a more professional look today.
In this article
01 [10 Best Animated Text Generators for 2021](#Part 1)
02 [8 Best Online Text GIF Generators to Make Animated Word GIFs](#Part 2)
03 [How to Use an Animated Text Generator to Make Stunning Videos?](#Part 3)
Part 1 10 Best Animated Text Generators for 2021
For our first list, as promised, we’ve compiled a list of some of the best-animated text generators for 2021. This is a general list of text animation software that you have to either download or install to use! If you want the online text animation maker list, that would be the one after this!
01Aurora: 3D Text Logo Maker
PRICE: FREE!
RATING: 4.5/5
The first animated text generator on our list is Aurora 3D. Aurora offers several different products, but the one that we’re focusing on today is their 3D Text & Logo maker, which you can use to create some pretty advanced text animations with no sweat (as well as logos, of course, as the name implies)! The software is available for both Mac and Windows OS computers and desktops.
02Animaker
PRICE: Basic Plan = $10 per month!
RATING: 4.9/5
If you’re looking for a more modern text animation maker, then Animaker might just be the one that you want! With this, you can create your 3D text animations from scratch, or choose from the dozens of templates and presets that they have for text, animated characters, icons, and other properties. This is more of a video editor than a strict text tool, but we thought it was important to give you a good variety. It’s also not FREE, but you can try it for free for a time so that you can check if it’s the one for you.
03OpenToonz
PRICE: Free
RATING: 4/5
OpenToonz is a free text animation software that you can use for both basic and advanced 2D animation. It comes in several different languages (including Spanish and Japanese) and is very useful for creating simple text animation from scratch — no complicated tools. Just create and go! (It is also available in both Mac and Windows!)
04Reallusion
PRICE: Free
RATING: 4/5
Reallusion is another open-source text gif maker that you can use if you’re looking for something quick-and-easy. It supports a ton of different fonts, as well as ways to control the width, height, dimension, and style of every single object inside of their 3D properties gallery — giving you a lot of options for customization without any added cost!
05Express Animate
PRICE: $60 (full license)
RATING: 4/5
Express Animate, just like Open Toonz, it is more of an animation tool than one strictly created for text animation. However, it does work for that purpose as well. So, if you’re willing to pay for the full license (which will cost $60), it could be a fairly good tool for you. Especially if you’re interested in trying out more complex animations in the future.
06Motion
PRICE: $47
RATING: 3.9/5
Motion is a Mac-only software. It is, just like some of the other options on this list, a great option for those looking for a tool that can help them with general animations (not just text animation — although it provides tools for that as well). The best part of Motion is undoubtedly its graphic library, where you have access to a ton of different presets and templates that you can use to simplify your text-animation-making.
07Xara 3D Maker
PRICE: $39.99
RATING: 3.9/5
Xara is another one of our paid options. It also comes complete with a range of different templates and presets that you can use in order to simplify your animation-generating. And, if you end up disliking the product after you try it, they do offer a 30-day money-back guarantee that you can take advantage of to make sure that you get the most out of your purchase.
08Easy Banner
PRICE: FREE
RATING: 3.5/5
Easy Banner is a free animated text-banner-making software. It’s only available in Windows, and its uses are limited to created banners. However, if that’s what you’re looking for? Then there’s no reason not to try it out! Especially since it’s free, and it comes with some pretty advanced customization options for getting the exact look that you want on your text banners.
09Falco GIF Animator
PRICE: FREE
RATING: 3.5/5
Falco Gif Animator is from the same creators of the previous item on this list (Softpedia!) The two offer similar tools, but for different purposes. Whilst the previous tool was for the creation of animated-text banners, this one is a GIF maker for icons, cursors, logos, etc. It’s also FREE! So, if the project you’re working on is applicable to its available features? Then you should definitely try it!
10TISFAT
PRICE: Free
RATING: 3/5
TISFAT is the last of the tools that we have for you. It’s an open-source stick animation tool that you can use to create text animations in whatever style or format that you desire. Making it more customizable than some of the other Softpedia options we just introduced, but still, one to consider based on your own circumstances.
Part 2 8 Best Online Text GIF Generators to Make Animated Word GIFs
And so, we move on to our next list! Here’s where we introduce online solutions for animated text generation needs! So, all the tools on this list will not require any downloading, but they will require that you have internet while working!
01MotionDen
| PROS | CONS |
|---|---|
| ● FREE version available● Large resources library● Easy-to-use video templates | ● Must upgrade to the premium version to export high-quality projects without a watermark.● The FREE version has a 5-video limit (you cannot work on any more projects than that).● Difficult to use for creating text animation from scratch. |
RATING: 4.8/5
MotionDen is a good entry point for text animation online solutions! It comes with tons of different templates that you can choose from to start working on your project immediately. MotionDen also offers a free version that you can test out for a limited number of times (one that gives you access to all their tools and their large resource library). So, you can decide to upgrade to their premium version whenever you want to (which will cost you around $29 per month!)
02Wave.Video
| PROS | CONS |
|---|---|
| ● FREE version is available for trying out its tools.● Vast library of animation properties for you to play around with.● Vast library of animation properties for you to play around with. | ● FREE version limits the length of your projects to 15 seconds.● You can also only create five video projects with the free version.● You can also only create five video projects with the free version. |
RATING: 4.5/5
Wave.Video, just like MotionDen, is a freemium software. You can try it out for free and start using their online video editing tools immediately to create short promos, logos, text gifs, etc. If you want access to some of its more advanced tools, however, you’ll need to pay the premium price ($24-48), which, to you, may or may not be worth the vast library of polished animation properties.
03MakerMoon
| PROS | CONS |
|---|---|
| ● Easy-to-use, and comes with templates and presets!● Advanced video editing tools that you can use to personalize your projects.● FREE plan is available. | ● The FREE version is limited in use.● You also cannot download high-quality projects without a watermark with the free version.● Basic animations only. |
RATING: 4.3/5
If you want to keep things simple, then MakerMoon might be your preferred choice for text animation. It is, like the previous picks, an online video maker, but one with the focus on creating text-centric projects, which you can personalize in a number of ways to create logos, banners, short videos, gifs, etc.
04Textanim
| PROS | CONS |
|---|---|
| ● FREE online GIF maker● A variety of different font style options● Animated Effects options | ● Output is GIF only.● Limited animations options.● Limited resource library. |
RATING: 4/5
Textanim is a very bubbly and glittery kind of gif-maker, made for a more specific kind of project. But, if it works, it works! Plus, it’s also the first completely FREE online gif maker on this list. So, you can test it out without having to make any commitments and use it literally anytime you feel like it. Unfortunately, though, it should be said that the animations here are mainly for effects (i.e., glowing, sparkling, etc.). The text won’t actually move. So, if that’s not what you’re looking for? Then it might not be for you.
05SnackThis
| PROS | CONS |
|---|---|
| ● FREE version for testing its tools and resources is available.● Lots of modern templates are available.● Editing tools for polishing projects. | ● If you’re using the FREE version, you will not be able to actually download your project.● You will also need to register to use it.● The customization options are limited. |
RATING: 4/5
SnackThis, unlike Textanim, is the type to cater to a wider array of users. Its templates are all very modern and professional-looking. So, if what you’re looking for is to create text banners, logos, icons, etc. for your business? Then this definitely is an option that you may want to consider. It’s pretty easy to use too! All you have to do is select the template that you want to use, and then edit it to match what you need.
06Animatron Studio
| PROS | CONS |
|---|---|
| ● More customizable functions.● Advanced video editing options.● Pre-made templates are available for easier animating. | ● FREE Version is limited.● Might be difficult for inexperienced animators.● Output formats are MP4 and GIF only. |
RATING: 3.9/5
Animatron Studio is the tool to use if what you’re looking for is customization. This tool is really better described as animation software, rather than a simple text generator. That means that you have more options than what you might see from other online text animation tools, but it also means that you’ll need to put in more effort to come up with a polished-looking end-product.
07Cool Text
| PROS | CONS |
|---|---|
| ● Easy and quick to use.● Various font customization options.● FREE to use. | ● Limited customizability.● Old-fashioned fonts. |
RATING: 3.5/5
As a departure from the previous pick, we have Cool Text, which is its complete opposite! This is an older software and is definitely best described strictly as an animated text generator. With Cool Text, you can make logos or icons very easily. The options are, of course, more limited because of that, but it may very well be all you need based on the kind of project you’re working on.
08Loading.io
| PROS | CONS |
|---|---|
| ● Lots of fonts customization options.● Three different output formats (svg., png., and gif).● Also pre-set animations to choose from. | ● The FREE version is limited.● It isn’t as advanced as some of the other tools on this list. |
RATING: 3.5/5
For our last online text animator, we have Loading.io. This one is a very simple, and very straightforward kind of tool. It’s also a freemium one, so you’ll have to pay in order to unlock some of its features, but it’s a solid contender for its customization tools, which gives a lot more options to choose from.
Part 3 How to Use an Animated Text Generator to Make Stunning Videos?
Now, if you need help making use of your finished animated text, icons, etc. Then you’ll probably need a video editor like Wondershare Filmora !
For Win 7 or later (64-bit)
For macOS 10.14 or later
As you can see from the image shown above, Wondershare Filmora is a very sleek video editing software. It’s used by all sorts of professionals as well, as it comes with all kinds of resources and tools that you can use in order to create stunning videos (including, believe it or not, templates for animated text! So, if you want, you can even skip the animated text maker altogether and just get straight to using Filmora.)
Key Takeaways from This Episode
● There are various text animation generators in the market! Some of which you can download straight to your desktop or computer!
● There are also online GIF makers that you can use straight from your browser, leaving out all the hassle of having to download or install anything and helping you get straight to work!
● If you want to polish up your project some more, then consider using an advanced video editor like Filmora Pro to make sure that your work is sparkly clean!
10 Trendy & Stylish Free Logo Animation Templates
10 Trendy & Stylish Free Logo Animation Templates in 2024
An easy yet powerful editor
Numerous effects to choose from
Detailed tutorials provided by the official channel
The logo animation of your video or presentation sets the tone for how your audience will perceive your brand. There are many stylish and trendy free logo animation templates that you can use to create an inspiring impression of your brand. The basic is to make sure your logo animation grabs your viewer’s attention and is catchy to make them remember your company’s name. This article will guide you through complete logo animation
![]()
This article will guide you through complete logo animation templates. We have also included various logo animations that you can choose from for your brand. Along with that, you will also see how logo motion graphics and 3D logo effects come out to be a wonder to promote your business to the next level following After Effects logo templates and free logo intro templates. The article also guides you through proper steps to apply logo motion effectively with respective screenshots.
In this article
01 [What an Animated Logo Can Do for Your Business](#Part 1)
02 [10 Top Quality Free Logo Animation Templates](#Part 2)
03 [5 Techniques for Custom Logo Animation in After Effects](#Part 3)
04 [How to Make a Logo Animation for Free in Just 3 Minutes](#Part 4)
Part 1 What an Animated Logo Can Do for Your Business
It is widespread info that logo animation is often an effective promotional tool. Here are some of the fantastic purposes or benefits of an animated logo to your Business is that:
● It helps to increase the memorability of the brand.
● Stop motion logo helps in advertising and creating brand awareness.
● Logo animation on YouTube can improve storytelling, i.e., your animated video can tell a story about your brand.
● logo intro starts an original image for your brand’s growth.
To make animated logo work for your Business perfectly and efficiently, consider the following factors:
● Critically analyze the business goal and think of the brand’s personality.
● The logo animation should orient to the user’s preference. Therefore make sure you carry out user research.
● Create an unpredictable animation logo. Try to make your audience surprised so that the final results are unexpected in the first few seconds.
● After Effects logo animation templates should not be too long; therefore, try not to make your animated logo complex and keep it short. The recommendation is for it to stay under seconds.
![]()
Part 1 Top Quality Free Logo Animation Templates
This article section will provide a top-quality template for free logo animation on YouTube and other platforms for your business growth. From the list, you can select the logo animation templates free download that matches your need:
![]()
01Web Series
Web Series logo animation can be helpful on a web series Project. The pictures include some cool effects with minimal and captivating design to wow your audience.
02VHS 8Logo Intro
VHS 8Logo templates will take you back to the time of kung-fu movies and arcade 8-bit games. It is easy to edit and comes with a video tutorial featuring distortion effects, broken videotape, and lousy TV.
03Comic Logo
Comic Logo can be used in cartoons, comics, and kids theme video projects and comes in very handy. It has a cartoon style animation, is very colorful, and will be appreciated and loved by your audience
04Zero Glitch
Zero GlitchCan be used to give a glitch introduction to your video. It has an industrial and unique draft design that can perfectly fit any project that needs a techno logo opening.
05Quick bling
Quick bling is an elegant and simple logo animation template for upcoming projects. This logo template is easily customized and has a tutorial if you encounter any problems.
06Rise From The Dark
Rise from Dark comes up with some eye-grabbing yet simple After Effect logo animation template free download that can fit any video content. This logo template is perfect whether you need a logo intro for an event opener, TV show, or promo.
07Sports Logo Template
Sports Logo Template includes pre-rendering footage with an easy customization option. It doesn’t require any plugins.
08Holi Festival Logo Templates
Holi Festival Logo Templates are perfect when you want to grab your audience’s attention. A juicy bright explosion of color and features seven sounds of vibrant animation. It is super easy to use in animating your logo.
09Light City Logo Templates
Light City Logo Templates is a stunning logo animation template that features a luminescent cityscape and golden lions against a dark background specially designed for a dramatic and mysterious luxurious feel.
10Drifting Car Logo Templates
Drifting Car Logo Templates is the perfect answer for a movie project. It has seconds of footage with a funky sports car.
Part 3 5 Techniques for Custom Logo Animation in After Effects
A perfect way to capture your viewers’ attention and remind them who made the video is by creating a striking and simple logo animation After Effects template free download for your video project and using the After Effects logo animation template in an absolute sense. In this article, we will throw away tools that you will need to animate your logo from scratch in After Effects:
![]()
01Technique 1: Separate the Layers
Separate the layers in Photoshop or illustrator and check if they are all separated and correctly named
![]()
Steps: Next, import your logo into after-effects as footage correctly. Otherwise, cannot access the individual layers in your logo:
● For illustrator make sure the logo elements are on a separate layer.
● If the element is grouped, that is the same way they will be in After Effect.
● To simplify this process, select the group in AI. Using the layer menu, click on the release to layers>sequence.
● Click on import and select your logo design file.
● Select composition>retain layer sizes
● Click on import, and your logo will appear in your media browser as a comp containing its layer and include the folder of those layers.
02Technique 2: Editing Properly
If you made a mistake and important your file as a footer is better than a composition, here is how to fix it:
● Drag your single a high elements to the timeline from the browser media
● Right click>create>convert to layered comp
● Now your Design file will be accessible in layers
03Technique 3: Transitions
You can opt for different available transitions out of the logo intro template After Effects to modify your logo. Then, you can go with the dual Effect of logo animation with a transition effect.
![]()
04Technique 4: Logo Animation
Animate each layer using the straight-forward property scale, rotation, position, and opacity properties
● Select the layer in the timeline to add a keyframe to your layers
● Create and finish a keyframe by placing your Playhead on the frame you want
● Create where you want the animation to start by moving several frames backward from your first keyframe
● Change the value of the keyframe property until you are satisfied with the look
● Continue with each of the layers in turn until you feel happy with the effects
![]()
05Technique 5: Title Animation
Animate the title using the varieties of animation styles in After Effects if you can edit a text layer.
● Remove any AI text objects that you want to replace with after effects text layer.
● Create a fresh After Effects text layer.
● Copy-paste the text from AI to after-effects. In doing this, it will use the same font, color, and sizes is when you paste it in
● Go to the effects browser, choose your title animation, and drag and drop it to your new title.
● View all keyframes by pressing U and select the layer in the timeline, then adjust as you like.
Part 4 How to Make a Logo Animation for Free in Just 3 Minutes
Filmora is one of the best software editing tools for beginners to design logo animation and logo intro template free download easily and quickly with keyframing. It produces high-quality and smoothly animated logos with motion blur that gives your logo animation more touch-up. The logo intro-free animation in Filmora is simple to replicate if you get some logo inspiration and then conclude how you will execute your animation. All the editing tools like shape, elements, etc., are available in Filmora software.
![]()
01Step 1: Create Logo
First, you need to create the logo or have a png logo image using any photo editing software like Photoshop or Canva.

Wondershare Filmora - Best Video Editor for Mac/Windows
5,481,435 people have downloaded it.
Build unique custom animations without breaking a sweat.
Focus on creating epic stories and leave the details to Filmora’s auto features.
Start a creative adventure with drag & drop effects and endless possibilities.
Filmora simplifies advanced features to save you time and effort.
Filmora cuts out repetition so you can move on to your next creative breakthrough.
02Step 2: Import background
After you have edited your logo on Photoshop, import background video and logo in Filmora and Use the key-framing feature to animate your logo
03Step 3: Add effects
Add other effects to your logo animation to make it perfect by adding colors, text, etc., to wow your logo animations. Add shapes to the image to give it some effect then add the motions to these shapes.
04Step 4: Export
Once you are satisfied with the trendy and stylish free logo, you can export and share them on your social media platform.
● Key Takeaways from This Episode →
● Impact of animated logo for business
● Top-quality free logo animation
● Steps to make logo through Premiere Pro logo animation template for free.
The logo animation of your video or presentation sets the tone for how your audience will perceive your brand. There are many stylish and trendy free logo animation templates that you can use to create an inspiring impression of your brand. The basic is to make sure your logo animation grabs your viewer’s attention and is catchy to make them remember your company’s name. This article will guide you through complete logo animation
![]()
This article will guide you through complete logo animation templates. We have also included various logo animations that you can choose from for your brand. Along with that, you will also see how logo motion graphics and 3D logo effects come out to be a wonder to promote your business to the next level following After Effects logo templates and free logo intro templates. The article also guides you through proper steps to apply logo motion effectively with respective screenshots.
In this article
01 [What an Animated Logo Can Do for Your Business](#Part 1)
02 [10 Top Quality Free Logo Animation Templates](#Part 2)
03 [5 Techniques for Custom Logo Animation in After Effects](#Part 3)
04 [How to Make a Logo Animation for Free in Just 3 Minutes](#Part 4)
Part 1 What an Animated Logo Can Do for Your Business
It is widespread info that logo animation is often an effective promotional tool. Here are some of the fantastic purposes or benefits of an animated logo to your Business is that:
● It helps to increase the memorability of the brand.
● Stop motion logo helps in advertising and creating brand awareness.
● Logo animation on YouTube can improve storytelling, i.e., your animated video can tell a story about your brand.
● logo intro starts an original image for your brand’s growth.
To make animated logo work for your Business perfectly and efficiently, consider the following factors:
● Critically analyze the business goal and think of the brand’s personality.
● The logo animation should orient to the user’s preference. Therefore make sure you carry out user research.
● Create an unpredictable animation logo. Try to make your audience surprised so that the final results are unexpected in the first few seconds.
● After Effects logo animation templates should not be too long; therefore, try not to make your animated logo complex and keep it short. The recommendation is for it to stay under seconds.
![]()
Part 1 Top Quality Free Logo Animation Templates
This article section will provide a top-quality template for free logo animation on YouTube and other platforms for your business growth. From the list, you can select the logo animation templates free download that matches your need:
![]()
01Web Series
Web Series logo animation can be helpful on a web series Project. The pictures include some cool effects with minimal and captivating design to wow your audience.
02VHS 8Logo Intro
VHS 8Logo templates will take you back to the time of kung-fu movies and arcade 8-bit games. It is easy to edit and comes with a video tutorial featuring distortion effects, broken videotape, and lousy TV.
03Comic Logo
Comic Logo can be used in cartoons, comics, and kids theme video projects and comes in very handy. It has a cartoon style animation, is very colorful, and will be appreciated and loved by your audience
04Zero Glitch
Zero GlitchCan be used to give a glitch introduction to your video. It has an industrial and unique draft design that can perfectly fit any project that needs a techno logo opening.
05Quick bling
Quick bling is an elegant and simple logo animation template for upcoming projects. This logo template is easily customized and has a tutorial if you encounter any problems.
06Rise From The Dark
Rise from Dark comes up with some eye-grabbing yet simple After Effect logo animation template free download that can fit any video content. This logo template is perfect whether you need a logo intro for an event opener, TV show, or promo.
07Sports Logo Template
Sports Logo Template includes pre-rendering footage with an easy customization option. It doesn’t require any plugins.
08Holi Festival Logo Templates
Holi Festival Logo Templates are perfect when you want to grab your audience’s attention. A juicy bright explosion of color and features seven sounds of vibrant animation. It is super easy to use in animating your logo.
09Light City Logo Templates
Light City Logo Templates is a stunning logo animation template that features a luminescent cityscape and golden lions against a dark background specially designed for a dramatic and mysterious luxurious feel.
10Drifting Car Logo Templates
Drifting Car Logo Templates is the perfect answer for a movie project. It has seconds of footage with a funky sports car.
Part 3 5 Techniques for Custom Logo Animation in After Effects
A perfect way to capture your viewers’ attention and remind them who made the video is by creating a striking and simple logo animation After Effects template free download for your video project and using the After Effects logo animation template in an absolute sense. In this article, we will throw away tools that you will need to animate your logo from scratch in After Effects:
![]()
01Technique 1: Separate the Layers
Separate the layers in Photoshop or illustrator and check if they are all separated and correctly named
![]()
Steps: Next, import your logo into after-effects as footage correctly. Otherwise, cannot access the individual layers in your logo:
● For illustrator make sure the logo elements are on a separate layer.
● If the element is grouped, that is the same way they will be in After Effect.
● To simplify this process, select the group in AI. Using the layer menu, click on the release to layers>sequence.
● Click on import and select your logo design file.
● Select composition>retain layer sizes
● Click on import, and your logo will appear in your media browser as a comp containing its layer and include the folder of those layers.
02Technique 2: Editing Properly
If you made a mistake and important your file as a footer is better than a composition, here is how to fix it:
● Drag your single a high elements to the timeline from the browser media
● Right click>create>convert to layered comp
● Now your Design file will be accessible in layers
03Technique 3: Transitions
You can opt for different available transitions out of the logo intro template After Effects to modify your logo. Then, you can go with the dual Effect of logo animation with a transition effect.
![]()
04Technique 4: Logo Animation
Animate each layer using the straight-forward property scale, rotation, position, and opacity properties
● Select the layer in the timeline to add a keyframe to your layers
● Create and finish a keyframe by placing your Playhead on the frame you want
● Create where you want the animation to start by moving several frames backward from your first keyframe
● Change the value of the keyframe property until you are satisfied with the look
● Continue with each of the layers in turn until you feel happy with the effects
![]()
05Technique 5: Title Animation
Animate the title using the varieties of animation styles in After Effects if you can edit a text layer.
● Remove any AI text objects that you want to replace with after effects text layer.
● Create a fresh After Effects text layer.
● Copy-paste the text from AI to after-effects. In doing this, it will use the same font, color, and sizes is when you paste it in
● Go to the effects browser, choose your title animation, and drag and drop it to your new title.
● View all keyframes by pressing U and select the layer in the timeline, then adjust as you like.
Part 4 How to Make a Logo Animation for Free in Just 3 Minutes
Filmora is one of the best software editing tools for beginners to design logo animation and logo intro template free download easily and quickly with keyframing. It produces high-quality and smoothly animated logos with motion blur that gives your logo animation more touch-up. The logo intro-free animation in Filmora is simple to replicate if you get some logo inspiration and then conclude how you will execute your animation. All the editing tools like shape, elements, etc., are available in Filmora software.
![]()
01Step 1: Create Logo
First, you need to create the logo or have a png logo image using any photo editing software like Photoshop or Canva.
Wondershare Filmora - Best Video Editor for Mac/Windows
5,481,435 people have downloaded it.
Build unique custom animations without breaking a sweat.
Focus on creating epic stories and leave the details to Filmora’s auto features.
Start a creative adventure with drag & drop effects and endless possibilities.
Filmora simplifies advanced features to save you time and effort.
Filmora cuts out repetition so you can move on to your next creative breakthrough.
02Step 2: Import background
After you have edited your logo on Photoshop, import background video and logo in Filmora and Use the key-framing feature to animate your logo
03Step 3: Add effects
Add other effects to your logo animation to make it perfect by adding colors, text, etc., to wow your logo animations. Add shapes to the image to give it some effect then add the motions to these shapes.
04Step 4: Export
Once you are satisfied with the trendy and stylish free logo, you can export and share them on your social media platform.
● Key Takeaways from This Episode →
● Impact of animated logo for business
● Top-quality free logo animation
● Steps to make logo through Premiere Pro logo animation template for free.
What Is the Best Collage Photo Grid Maker - Experts Choice
What is the Best Collage Photo Grid Maker - Experts Choice
An easy yet powerful editor
Numerous effects to choose from
Detailed tutorials provided by the official channel
Whether it is an Instagram collage grid, other social media sites, an online platform, a greeting card, or even a wall of your room, collages are everywhere. It is a great way to assemble multiple pictures into a single frame. Depending on your purpose, theme, and other factors, there are several different styles of collages that can be created like photo grid, shaped collage, polaroid collage, and more. One of the most classic and traditional styles is a photo grid collage. Taking the help of a dedicated collage-making app or a tool can help you create an amazing and eye-catchy collage in no time. Keep reading to learn more about collage photo grid and the best tools to create them.

In this article
01 [What is a photo grid?](#Part 1)
02 [Need for using special tools and apps to create a photo grid collage](#Part 2)
03 [Top 5 tools to create photo grid](#Part 3)
04 [Use stock images to enhance your photo grid](#Part 4)
Part 1 What is a photo grid?
When a special grid frame having a specific number of rows and columns is used for arranging photos, the created collage is known as a photo grid collage. These multiple added images will make them look like a single picture in a frame. A photo grid is one of the most classic styles of creating a collage that is also the most widely used one. You can never go wrong with a collage while arranging the pictures in a photo grid.
Part 2 Need for using special tools and apps to create a photo grid collage
Though creating a photo grid may look like a simple process which it is also, there are a lot of elements that go into creating an impressive and attractive collage. Adding the images of the correct size and orientation, adjusting the borders, customizing the frames, adding filters, adding text, are some of the many factors that help in creating a wonderful collage, and for this good collage-making tool or an app is required.
These special photo grid collage maker tools have built-in templates, designs, and support other features that help you create an interesting photo grid of your choice. Moreover, some of these programs also come with high-quality stock images that can be used in the grid to further enhance their overall looks.
Part 3 Top 5 tools to create photo grid
We have selected the top 5 grid collage maker tools that can be used to create a customized photo grid.
01Fotor
This is one of the best tools available for creating a photo grid using one of the several templates available. It is the Classic Collage style of this app that will let you create a customized grid where you can add the desired number of images and then edit the background, borders, and other elements. You can even add text, stickers, effects, and other interesting filters. Fotor is a free online tool that can be used from your browser and you just need to free sign-up using your Google, Facebook, or Apple account.

02FotoJet
This is another free-to-use browser-based tool that can be used for creating a photo grid. The interface of the tool is simple and there are multiple grid options to choose from depending on the number of images to be added. The spacing between the grids as well as the roundness of the margins can also be adjusted as desired. The tool also gives you the option to choose the added image file resolution. Text, clipart, and background to the collage can also be added and there is also a library of images that can be used. The created collage can be saved or can also be shared directly to Twitter, Pinterest, and Tumblr.

03Adobe Spark
This is one of the top collages making tools that can be used to design the desired collage in different styles including photo grid. Unlike other Adobe tools, the collage-making program is simple and quick to use and does not require advanced technical know-how. You simply need to create a free account for Adobe Creative Cloud and the collage-making features can be easily used. There are pre-set designs and templates available to match your theme and requirements. You can further make customization to other collage elements as needed.

04Photo Collage
This free-to-use online tool requires no software download or installation and allows creating a grid quickly and easily. The interface of the tool is user-friendly where you just need to browse and add the images or can simply drag and drop them as well. You can choose from multiple template options available and can also add text, effects, and stickers to the collage. Multiple image editing options are also supported like zoom, flip, transparency, and more.

05Canva
Free and simple to use, this is one of the most widely used collage-making tools that is available as a browser-based program as well as Android and iOS app. Several photo-grid templates in different styles are available at the site that lets you create the desired collage in no time. You can customize the selected templates by adding filters, texts, effects, and more elements available. A paid version of the tool with advanced features is also available.

Part 4 Use stock images to enhance your photo grid
Adding high-quality and interesting images to your photo grid will level up its overall look and make it eye-catchy. If you are running short of such interesting and bright images, no need to worry as several sites have a good collection of images that can be used. One such program that we recommend here to check the stock images is Wondershare Filmora. Though Filmora is an advanced Windows and Mac-based video editing software, there are multiple additional features supported one of them is a collection of images in an array of categories.
Depending on the theme of your photo grid, you can select the desired images and other media from Wondershare Filmora Video Editor . Additionally, the split-screen feature of the software will let you add and play multiple videos in a single frame that makes it look like a video collage.
Wondershare Filmora - Best Video Editor for Mac/Windows
5,481,435 people have downloaded it.
Build unique custom animations without breaking a sweat.
Focus on creating epic stories and leave the details to Filmora’s auto features.
Start a creative adventure with drag & drop effects and endless possibilities.
Filmora simplifies advanced features to save you time and effort.
Filmora cuts out repetition so you can move on to your next creative breakthrough.
● Key Takeaways from This Episode →
● A photo grid is a classic and traditional style of creating a collage.
● There are several online tools, software, and mobile apps available for creating interesting photo grids.
● Wondershare Filmora is a great site to get stock of images in different categories and for all types of video editing requirements.
Whether it is an Instagram collage grid, other social media sites, an online platform, a greeting card, or even a wall of your room, collages are everywhere. It is a great way to assemble multiple pictures into a single frame. Depending on your purpose, theme, and other factors, there are several different styles of collages that can be created like photo grid, shaped collage, polaroid collage, and more. One of the most classic and traditional styles is a photo grid collage. Taking the help of a dedicated collage-making app or a tool can help you create an amazing and eye-catchy collage in no time. Keep reading to learn more about collage photo grid and the best tools to create them.
In this article
01 [What is a photo grid?](#Part 1)
02 [Need for using special tools and apps to create a photo grid collage](#Part 2)
03 [Top 5 tools to create photo grid](#Part 3)
04 [Use stock images to enhance your photo grid](#Part 4)
Part 1 What is a photo grid?
When a special grid frame having a specific number of rows and columns is used for arranging photos, the created collage is known as a photo grid collage. These multiple added images will make them look like a single picture in a frame. A photo grid is one of the most classic styles of creating a collage that is also the most widely used one. You can never go wrong with a collage while arranging the pictures in a photo grid.
Part 2 Need for using special tools and apps to create a photo grid collage
Though creating a photo grid may look like a simple process which it is also, there are a lot of elements that go into creating an impressive and attractive collage. Adding the images of the correct size and orientation, adjusting the borders, customizing the frames, adding filters, adding text, are some of the many factors that help in creating a wonderful collage, and for this good collage-making tool or an app is required.
These special photo grid collage maker tools have built-in templates, designs, and support other features that help you create an interesting photo grid of your choice. Moreover, some of these programs also come with high-quality stock images that can be used in the grid to further enhance their overall looks.
Part 3 Top 5 tools to create photo grid
We have selected the top 5 grid collage maker tools that can be used to create a customized photo grid.
01Fotor
This is one of the best tools available for creating a photo grid using one of the several templates available. It is the Classic Collage style of this app that will let you create a customized grid where you can add the desired number of images and then edit the background, borders, and other elements. You can even add text, stickers, effects, and other interesting filters. Fotor is a free online tool that can be used from your browser and you just need to free sign-up using your Google, Facebook, or Apple account.
02FotoJet
This is another free-to-use browser-based tool that can be used for creating a photo grid. The interface of the tool is simple and there are multiple grid options to choose from depending on the number of images to be added. The spacing between the grids as well as the roundness of the margins can also be adjusted as desired. The tool also gives you the option to choose the added image file resolution. Text, clipart, and background to the collage can also be added and there is also a library of images that can be used. The created collage can be saved or can also be shared directly to Twitter, Pinterest, and Tumblr.
03Adobe Spark
This is one of the top collages making tools that can be used to design the desired collage in different styles including photo grid. Unlike other Adobe tools, the collage-making program is simple and quick to use and does not require advanced technical know-how. You simply need to create a free account for Adobe Creative Cloud and the collage-making features can be easily used. There are pre-set designs and templates available to match your theme and requirements. You can further make customization to other collage elements as needed.
04Photo Collage
This free-to-use online tool requires no software download or installation and allows creating a grid quickly and easily. The interface of the tool is user-friendly where you just need to browse and add the images or can simply drag and drop them as well. You can choose from multiple template options available and can also add text, effects, and stickers to the collage. Multiple image editing options are also supported like zoom, flip, transparency, and more.
05Canva
Free and simple to use, this is one of the most widely used collage-making tools that is available as a browser-based program as well as Android and iOS app. Several photo-grid templates in different styles are available at the site that lets you create the desired collage in no time. You can customize the selected templates by adding filters, texts, effects, and more elements available. A paid version of the tool with advanced features is also available.
Part 4 Use stock images to enhance your photo grid
Adding high-quality and interesting images to your photo grid will level up its overall look and make it eye-catchy. If you are running short of such interesting and bright images, no need to worry as several sites have a good collection of images that can be used. One such program that we recommend here to check the stock images is Wondershare Filmora. Though Filmora is an advanced Windows and Mac-based video editing software, there are multiple additional features supported one of them is a collection of images in an array of categories.
Depending on the theme of your photo grid, you can select the desired images and other media from Wondershare Filmora Video Editor . Additionally, the split-screen feature of the software will let you add and play multiple videos in a single frame that makes it look like a video collage.
Wondershare Filmora - Best Video Editor for Mac/Windows
5,481,435 people have downloaded it.
Build unique custom animations without breaking a sweat.
Focus on creating epic stories and leave the details to Filmora’s auto features.
Start a creative adventure with drag & drop effects and endless possibilities.
Filmora simplifies advanced features to save you time and effort.
Filmora cuts out repetition so you can move on to your next creative breakthrough.
● Key Takeaways from This Episode →
● A photo grid is a classic and traditional style of creating a collage.
● There are several online tools, software, and mobile apps available for creating interesting photo grids.
● Wondershare Filmora is a great site to get stock of images in different categories and for all types of video editing requirements.
10 Cartoon Character Makers to Create Animated Characters
10 Cartoon Character Makers to Create Animated Characters
An easy yet powerful editor
Numerous effects to choose from
Detailed tutorials provided by the official channel
Learning cartoon making is easy through various application or makers online. Draw cartoon characters sketch in easy steps.

With the changing marketing and business trends, people and business owners are adopting different patterns in the pictures to make them visually good and attractive. Videos and pictures with animated characters look so amazing and gain maximum customers views. This ultimately helps the business owners to generate more leads for their business.
Not only business, but the presence of animated characters is also seen in the stories and status of the people over social media accounts. People impress others through making their own cartoon characters and animated pictures or characters. Earlier it has very tough to create cartoon character, but with so many online makers today, one can easily draw and create cartoon characters. There are various platforms that use software to turn a picture into a cartoon character or even animated picture. There are easy and interesting ways to create cartoon characters. If you love to see and are interested in drawing cartoon characters, then you can make it through various platforms. Let’s see some easy way to create own cartoon character.
In this article
01 [5 Easy Ways to Create Your Own Cartoon Character [For Non-illustrators] ](#Part 1)
02 [5 Create Cartoon Characters to Create Animated Characters for PRO](#Part 2)
03 [How to Create a Cartoon Character: A General Guide](#Part 3)
Part 1 5 Easy Ways to Create Your Own Cartoon Character [For Non-illustrators]
01Through Online Avatar Builders
Avatar building is an extraordinary way of presenting yourself. The best thing with avatar builders is that there is no need to download any application. You can easily do it in your device through online websites. They are the easiest and economical way of creating cartoon. You can add fun elements with these Avatar builders. Some of the websites that offer avatar building tools are:
Cartoonize: You can instantly make cartoon or avatar characters through Cartoonize. It can be used for face customization and adding colors. Face features like eyes, nose, hair style and expressions can be perfectly drawn with this tool. You can learn more by going to their official website.
The process is simple. You can upload your picture, go to cartoonize option at the top of the menu, do the necessary edits and features. Save it and your avatar cartoon is ready.
The other avatar building platforms are charatoon and Face your Manga. For Face your Manga, Adobe Flash Player is required. The gallery can be explored with some famous avatar of popular personalities.
02Character builders
The other way to create your own cartoon character is through character builders. The difference of this cartoon making is that one can create a complete cartoon with complete features. Like from head to toe. GraphicMama Character Maker Packs is one that offers kit to make customized cartoons.
03Tools for converting pictures into cartoons
A perfect cartoon can be made when it resemble truly as you are. The best method for doing that is using software to turn a picture into a cartoon. Filters, facial expressions and styles can be added through this way. Adobe Character Animator is a tool that can be used to convert a picture, catch the facial expression and voice.
You can learn to create cartoon character from photo by following the video
The other two ways are related to taking help of others in making the cartoon characters. Some of them are:
04Outsourcing designers or illustrators
When the perfection level is not achieved through own creation, the other option is to get it done through designers or illustrators. There are freelancers and studio who offer such services. They create cartoon as per the requirement of the customers.
05Modification in Stock cartoon characters
Those who are not having any experience of making cartoons, they can use the stocks cartoon characters and can change them with the use of software.
Part 2 5 Create Cartoon Characters to Create Animated Characters for PRO
A professional cartoon maker need some advance tools and features to give a unique and perfect look to his cartoon drawn. So, for them some applications or cartoon character maker is good. Let’s see some of the makers that are specifically designed for professionals:
01Animaker
This has various themes to make your cartoon look great. It brings life to a character. The steps involve in making a cartoon character is as under:
● As required, select the animated template.
● You can add customized features as such as backgrounds, pictures and animated text.
● Music can also be added and can be selected from the library.
● After the character is ready, you can share or download the video.
02Adobe
This is the most widely platform or maker for creating high quality contents, cartoon avatar and games. Sketch and drawing tool are there in the maker that gives real experience to the cartoon. The platform facilitates exploring the file to WebGL, SVG and Adobe AIR.
You can view how it works and the process in the video-
03Reallusion
Text and voice has given a new definition to the cartoon world. If you desire to add some interesting elements in cartoon through text and voices, then Reallusion is a good option for you. It has 3D head creation tool which can be used to make animated cartoons for mails and e-cards.
You can view how it works and the process in the video-
04Renderforest
This cartoon maker has some great collection of professionally designed templates, to make cartoon making process easy and perfect. Templates for kids, education, character adventure, healthcare and iconic animation are some of the collections one can find in this maker.
The process of cartoon creation is easy with following steps:
● Choose the most excellent cartoon templates or start from zero through sketch,
● You can edit the already available stories. Even animated characters can be used.
● Add some customized features like voice or music, style or colors.
● This is how you can create exclusive vibrant cartoons.
Video can be watched at-
05Biteable
Biteable has several templates like leadership skill tips, travel agent explainer and many more. The video clips, music, animated templates of this maker create engaging cartoon characters.
The process to develop a cartoon video through Biteable is as under:
● Open the maker Biteable
● As per your requirement, pick the one cartoon template
● Log in the account
● You can add many effects like backing music, clips and text.
● As made in the website, you can share on social media and emails.
Part 3 How to Create a Cartoon Character: A General Guide
A professional cartoon expert becomes an expert after a continuous practice. It’s not easy to learn making cartoons. Therefore to be an expert one need to learn the basics and other important principles for cartoon making. A general guide for the same is as under:
● Begin with basic steps
Learn the basic shapes like making ovals, circles and other shapes. This will help you to be perfection in making the basic outline of the cartoon. This will improve you skill and you can explore more possibilities with the basic outlines.
● Shape improvement
This is an advance stage of basic step. This step will help you to define the shape of the cartoon character you are going to draw. It gives structure and design to a character.
● Including details
This stage is more about designing a character. Pose, expression, attires, props are selected in this step. The personality of a character is made better. It makes the character more interesting and engaging.
● Shadow of cartoon character
Before giving a final touch to the character, it is necessary to check the shadow of the picture drawn. It will show whether you are on right path or not.
● Final touch
The last step is adding all details in the character. It may be straight teeth, big smile, messy hairs or anything. Lines can be made fine and clean. You can add colors of your choice.
The other platform or cartoon maker that can be checked out is Filmora.
Wondershare Filmora Video Editor is software used for making, editing and adding effects to pictures or videos. It is easy to use application loaded with many advanced tools and features to make picture and video editing simple. Those who are looking for a robust application for capturing some precious moments through picture and videos, then Filmora is a perfect application.
Filmora can be used to draw and insert cartoon characters in any video. Animation, text and music can be added effectively with Filmora. A beginner can easily learn to create cartoon character online.
Wondershare Filmora
Get started easily with Filmora’s powerful performance, intuitive interface, and countless effects!
Try It Free Try It Free Try It Free Learn More >

● Ending Thoughts →
● Cartoon characters making is not an easy task. But now there are cartoon character maker free which has made easy to learn cartoon making. The various tools used are Avatar maker, cartoon making, turning picture into cartoon and through experts support.
● The different professional cartoon character maker online are Animaker, Reallusion, Biteable and Adobe. Through these cartoon makers making cartoon characters are easy with advanced features.
● Filmora is one of the popular picture and video making and editing software which can also be used for making amazing cartoon characters.
Learning cartoon making is easy through various application or makers online. Draw cartoon characters sketch in easy steps.
With the changing marketing and business trends, people and business owners are adopting different patterns in the pictures to make them visually good and attractive. Videos and pictures with animated characters look so amazing and gain maximum customers views. This ultimately helps the business owners to generate more leads for their business.
Not only business, but the presence of animated characters is also seen in the stories and status of the people over social media accounts. People impress others through making their own cartoon characters and animated pictures or characters. Earlier it has very tough to create cartoon character, but with so many online makers today, one can easily draw and create cartoon characters. There are various platforms that use software to turn a picture into a cartoon character or even animated picture. There are easy and interesting ways to create cartoon characters. If you love to see and are interested in drawing cartoon characters, then you can make it through various platforms. Let’s see some easy way to create own cartoon character.
In this article
01 [5 Easy Ways to Create Your Own Cartoon Character [For Non-illustrators] ](#Part 1)
02 [5 Create Cartoon Characters to Create Animated Characters for PRO](#Part 2)
03 [How to Create a Cartoon Character: A General Guide](#Part 3)
Part 1 5 Easy Ways to Create Your Own Cartoon Character [For Non-illustrators]
01Through Online Avatar Builders
Avatar building is an extraordinary way of presenting yourself. The best thing with avatar builders is that there is no need to download any application. You can easily do it in your device through online websites. They are the easiest and economical way of creating cartoon. You can add fun elements with these Avatar builders. Some of the websites that offer avatar building tools are:
Cartoonize: You can instantly make cartoon or avatar characters through Cartoonize. It can be used for face customization and adding colors. Face features like eyes, nose, hair style and expressions can be perfectly drawn with this tool. You can learn more by going to their official website.
The process is simple. You can upload your picture, go to cartoonize option at the top of the menu, do the necessary edits and features. Save it and your avatar cartoon is ready.
The other avatar building platforms are charatoon and Face your Manga. For Face your Manga, Adobe Flash Player is required. The gallery can be explored with some famous avatar of popular personalities.
02Character builders
The other way to create your own cartoon character is through character builders. The difference of this cartoon making is that one can create a complete cartoon with complete features. Like from head to toe. GraphicMama Character Maker Packs is one that offers kit to make customized cartoons.
03Tools for converting pictures into cartoons
A perfect cartoon can be made when it resemble truly as you are. The best method for doing that is using software to turn a picture into a cartoon. Filters, facial expressions and styles can be added through this way. Adobe Character Animator is a tool that can be used to convert a picture, catch the facial expression and voice.
You can learn to create cartoon character from photo by following the video
The other two ways are related to taking help of others in making the cartoon characters. Some of them are:
04Outsourcing designers or illustrators
When the perfection level is not achieved through own creation, the other option is to get it done through designers or illustrators. There are freelancers and studio who offer such services. They create cartoon as per the requirement of the customers.
05Modification in Stock cartoon characters
Those who are not having any experience of making cartoons, they can use the stocks cartoon characters and can change them with the use of software.
Part 2 5 Create Cartoon Characters to Create Animated Characters for PRO
A professional cartoon maker need some advance tools and features to give a unique and perfect look to his cartoon drawn. So, for them some applications or cartoon character maker is good. Let’s see some of the makers that are specifically designed for professionals:
01Animaker
This has various themes to make your cartoon look great. It brings life to a character. The steps involve in making a cartoon character is as under:
● As required, select the animated template.
● You can add customized features as such as backgrounds, pictures and animated text.
● Music can also be added and can be selected from the library.
● After the character is ready, you can share or download the video.
02Adobe
This is the most widely platform or maker for creating high quality contents, cartoon avatar and games. Sketch and drawing tool are there in the maker that gives real experience to the cartoon. The platform facilitates exploring the file to WebGL, SVG and Adobe AIR.
You can view how it works and the process in the video-
03Reallusion
Text and voice has given a new definition to the cartoon world. If you desire to add some interesting elements in cartoon through text and voices, then Reallusion is a good option for you. It has 3D head creation tool which can be used to make animated cartoons for mails and e-cards.
You can view how it works and the process in the video-
04Renderforest
This cartoon maker has some great collection of professionally designed templates, to make cartoon making process easy and perfect. Templates for kids, education, character adventure, healthcare and iconic animation are some of the collections one can find in this maker.
The process of cartoon creation is easy with following steps:
● Choose the most excellent cartoon templates or start from zero through sketch,
● You can edit the already available stories. Even animated characters can be used.
● Add some customized features like voice or music, style or colors.
● This is how you can create exclusive vibrant cartoons.
Video can be watched at-
05Biteable
Biteable has several templates like leadership skill tips, travel agent explainer and many more. The video clips, music, animated templates of this maker create engaging cartoon characters.
The process to develop a cartoon video through Biteable is as under:
● Open the maker Biteable
● As per your requirement, pick the one cartoon template
● Log in the account
● You can add many effects like backing music, clips and text.
● As made in the website, you can share on social media and emails.
Part 3 How to Create a Cartoon Character: A General Guide
A professional cartoon expert becomes an expert after a continuous practice. It’s not easy to learn making cartoons. Therefore to be an expert one need to learn the basics and other important principles for cartoon making. A general guide for the same is as under:
● Begin with basic steps
Learn the basic shapes like making ovals, circles and other shapes. This will help you to be perfection in making the basic outline of the cartoon. This will improve you skill and you can explore more possibilities with the basic outlines.
● Shape improvement
This is an advance stage of basic step. This step will help you to define the shape of the cartoon character you are going to draw. It gives structure and design to a character.
● Including details
This stage is more about designing a character. Pose, expression, attires, props are selected in this step. The personality of a character is made better. It makes the character more interesting and engaging.
● Shadow of cartoon character
Before giving a final touch to the character, it is necessary to check the shadow of the picture drawn. It will show whether you are on right path or not.
● Final touch
The last step is adding all details in the character. It may be straight teeth, big smile, messy hairs or anything. Lines can be made fine and clean. You can add colors of your choice.
The other platform or cartoon maker that can be checked out is Filmora.
Wondershare Filmora Video Editor is software used for making, editing and adding effects to pictures or videos. It is easy to use application loaded with many advanced tools and features to make picture and video editing simple. Those who are looking for a robust application for capturing some precious moments through picture and videos, then Filmora is a perfect application.
Filmora can be used to draw and insert cartoon characters in any video. Animation, text and music can be added effectively with Filmora. A beginner can easily learn to create cartoon character online.
Wondershare Filmora
Get started easily with Filmora’s powerful performance, intuitive interface, and countless effects!
Try It Free Try It Free Try It Free Learn More >
● Ending Thoughts →
● Cartoon characters making is not an easy task. But now there are cartoon character maker free which has made easy to learn cartoon making. The various tools used are Avatar maker, cartoon making, turning picture into cartoon and through experts support.
● The different professional cartoon character maker online are Animaker, Reallusion, Biteable and Adobe. Through these cartoon makers making cartoon characters are easy with advanced features.
● Filmora is one of the popular picture and video making and editing software which can also be used for making amazing cartoon characters.
How to Make 3D Cartoon of Yourself
How to Make a 3D Cartoon of Yourself
An easy yet powerful editor
Numerous effects to choose from
Detailed tutorials provided by the official channel
From among the several trends that emerged on Social Media, making a 3D cartoon of yourself is probably the most popular.
Learning how to make 3D cartoons may just be in the height of demand in the near future.
In this article
01 [What is AI Artist? Plus how to cartoon yourself with it ](#Part 1)
02 [How to Create a 3D Cartoon of Yourself for Meta ](#Part 2)
03 [How to make 3D Cartoon From a Photo ](#Part 3)
04 [Five 3D cartoon Disney-Fied yourself apps ](#Part 4)
05 [More New Useful Tools to Upgrade Your Animation/Cartoon](#Part 5)
Part 1 What is AI Artist? Plus how to cartoon yourself with it
We all remember the Cartoon filter challenge on Facebook, right? Everyone was excited to transform themselves into a cartoon. The options of making personalized cartoon representations of yourself was pretty limited back then. With the Voila AI artist app you can choose at least 3 different cartoon variations of yourself.

The Voila AI artist app can be downloaded from the Apple App store and Android Play Store. You can use the app for free but for faster editing and an ad free experience, you will need to upgrade to the paid version. Other than just creating a cartoon of yourself, you can also create renaissance portraits and caricatures.
● Step 1: Download the Voila AI artist App for your device, and complete the installation process. Allow the app to access your Phone’s Camera rolling permission.
● Step 2: Select the style option you want to use. What we are using here is 3D cartoon (other options: 2D Cartoon, Caricature & and the rest). Touch the arrow and start.
● Step 3: Now, with your camera roll open, click a new one or choose from your gallery. You can also find a celebrities option where you can search for celebrities. This generates a four-grid choice. If you are using the free version, then be prepared to encounter one or two ads. After a few seconds, you can exit out and get back to your images.
● Step 4: You will receive a composite grid of four options; your original image, plus three cartoon representations (Royalty 3D, Baby 3D & Cartoon 3D). Here, you can select the option you like the most and start editing. Locate the up arrow button to immediately share on your preferred social media or simply save a copy in your device.
If the AI artist app has any paid and premium version, upon subscribing you will get ad free & watermark free animated representations.
Part 2 How to Create a 3D Cartoon of Yourself for Meta
Facebook only recently rebranded themselves as Meta. This has now started the rush to create a live virtual interaction space, and big companies like Microsoft and Nvidia are now competing with each other to bridge the gap.
Soon, activities like convening meetings, attending live events or even dating online would take place in virtual environments. So best be prepared for the future by creating a 3D avatar for yourself.
Your virtual avatar would be able to interact with the real world through a virtual platform by using VR headsets and other tech. Sensing your virtual presence would be almost the same as the real world for your peers and colleagues. You can attend a meeting without ever having to travel.
The process behind creating a 3D cartoon of yourself for Meta platforms starts by establishing a facial rig which is like a framework for the cartoon animations to sit on. These days, most apps come with automatic FACS facial rigging which is why certain Instagram filters like the Puppy nose filter was possible.
Presently, creating a complete 3D virtual model of yourself is a bit complicated to do on your own but soon this service will be automated in an app for you.
Part 3 How to make 3D Cartoon From a Photo
Photoshop is no doubt one of the most influential digital assets that allow you to do virtually anything with your photos. Of course, this includes turning your photos into 3D cartoon.
There are advanced techniques and tools you can use to retouch your image to achieve an animated like look for your portraits.
Of course, you can find multiple Photoshop hacks online but the following guide can give you an easy to follow idea of how to go about creating your own 3D cartoon out of an image.

Note; These steps are to be perceived as a simplified overview of your objectives when editing on Photoshop;
● To start out on turning your image into a 3D character, you need to learn how to create layers and then stack them on each other.
● You can then ‘liquify’ these layers to form a mould for your image.
● Apply skin softening techniques to take away the realistic features of the photo before working on turning it into a cartoon.
● Now you can start focus on applying the details to features like eyes, hair, nose and facial lines on your cartoon image.
● You can also change the colour of any individual features on your image. This method is applicable in making caricatures of your photo as well.
Part 4 Five 3D cartoon Disney-Fied yourself apps
Vibrant colours, gorgeous large eyes and shiny hair – pretty much sums up every Disney character you have ever seen. Now, everyone is obsessed with making their own Disney avatar and for good reason. You can use it as filter or upload it on your profile. Here are some of the most in-trend AI powered 3D Disneyfied apps you can use;
01Voila AI Artist

The Voila AI Artist app was released back in March of 2021 and has been the rage among Disneyfied apps. To clarify, the app has nothing to do with the Disney animation company but is perceived by users as the most successful app for disneyfication. Its on-board AI can create 3D and 2D renderings for your image along with hand drawn caricatures. You can download the app on App Store and Google Play.
02ToonMe

The next best app on our Disneyfied list is ToonMe. It also uses AI to turn photos into Disney Characters. The app keeps updating new cartoonish filters which you can use over your images. There are various other features which you can try as well like recreating your photos into classic vectors. The results are of extraordinary quality and can be uploaded on Instagram. You can download the app for free from Play store and App store.
03Snapchat

Snapchat has been around for some time now so you might already have it on your phone. Snapchat offers a vast range of filters and effects that of course includes Disneyfied filters and 3D cartoon images. You can look for them on the Snapchat search bar. New filters keep popping up every day which you can apply over your own images.
04Prisma

Prisma is a notoriously well know pop photo editor – which means it makes your photos ‘pop’. You can use it to edit photos on both Android and iPhone. It also comes with its own range of filters for turning your photos into cartoon images. There are hundreds of variations to choose from so you will definitely be spoilt for choices.
05Clip2Comic Cartoon

This app is only available on the App stores and is well known among iPhone users for turning photos into cartoons and caricatures. It is not exactly a Disneyfied app but it has a plethora of filters and a combination of editing tools to help personalize your 3D photos and comics. You can also directly upload these photos to your Social Media Accounts.
Key Takeaways from This Episode
● With the help of AI and other amazing features, you can use your everyday pictures to make a 3D cartoon of yourself.
● The Metaverse is her and soon we all will be interacting in a virtual space. So best learn how to rig your face with an animation filter.
● Apps like Voila AI artist, you can disneyfy your images quite easily. Explore dozens of such filters and effects with Disneyfied apps.
From among the several trends that emerged on Social Media, making a 3D cartoon of yourself is probably the most popular.
Learning how to make 3D cartoons may just be in the height of demand in the near future.
In this article
01 [What is AI Artist? Plus how to cartoon yourself with it ](#Part 1)
02 [How to Create a 3D Cartoon of Yourself for Meta ](#Part 2)
03 [How to make 3D Cartoon From a Photo ](#Part 3)
04 [Five 3D cartoon Disney-Fied yourself apps ](#Part 4)
05 [More New Useful Tools to Upgrade Your Animation/Cartoon](#Part 5)
Part 1 What is AI Artist? Plus how to cartoon yourself with it
We all remember the Cartoon filter challenge on Facebook, right? Everyone was excited to transform themselves into a cartoon. The options of making personalized cartoon representations of yourself was pretty limited back then. With the Voila AI artist app you can choose at least 3 different cartoon variations of yourself.
The Voila AI artist app can be downloaded from the Apple App store and Android Play Store. You can use the app for free but for faster editing and an ad free experience, you will need to upgrade to the paid version. Other than just creating a cartoon of yourself, you can also create renaissance portraits and caricatures.
● Step 1: Download the Voila AI artist App for your device, and complete the installation process. Allow the app to access your Phone’s Camera rolling permission.
● Step 2: Select the style option you want to use. What we are using here is 3D cartoon (other options: 2D Cartoon, Caricature & and the rest). Touch the arrow and start.
● Step 3: Now, with your camera roll open, click a new one or choose from your gallery. You can also find a celebrities option where you can search for celebrities. This generates a four-grid choice. If you are using the free version, then be prepared to encounter one or two ads. After a few seconds, you can exit out and get back to your images.
● Step 4: You will receive a composite grid of four options; your original image, plus three cartoon representations (Royalty 3D, Baby 3D & Cartoon 3D). Here, you can select the option you like the most and start editing. Locate the up arrow button to immediately share on your preferred social media or simply save a copy in your device.
If the AI artist app has any paid and premium version, upon subscribing you will get ad free & watermark free animated representations.
Part 2 How to Create a 3D Cartoon of Yourself for Meta
Facebook only recently rebranded themselves as Meta. This has now started the rush to create a live virtual interaction space, and big companies like Microsoft and Nvidia are now competing with each other to bridge the gap.
Soon, activities like convening meetings, attending live events or even dating online would take place in virtual environments. So best be prepared for the future by creating a 3D avatar for yourself.
Your virtual avatar would be able to interact with the real world through a virtual platform by using VR headsets and other tech. Sensing your virtual presence would be almost the same as the real world for your peers and colleagues. You can attend a meeting without ever having to travel.
The process behind creating a 3D cartoon of yourself for Meta platforms starts by establishing a facial rig which is like a framework for the cartoon animations to sit on. These days, most apps come with automatic FACS facial rigging which is why certain Instagram filters like the Puppy nose filter was possible.
Presently, creating a complete 3D virtual model of yourself is a bit complicated to do on your own but soon this service will be automated in an app for you.
Part 3 How to make 3D Cartoon From a Photo
Photoshop is no doubt one of the most influential digital assets that allow you to do virtually anything with your photos. Of course, this includes turning your photos into 3D cartoon.
There are advanced techniques and tools you can use to retouch your image to achieve an animated like look for your portraits.
Of course, you can find multiple Photoshop hacks online but the following guide can give you an easy to follow idea of how to go about creating your own 3D cartoon out of an image.
Note; These steps are to be perceived as a simplified overview of your objectives when editing on Photoshop;
● To start out on turning your image into a 3D character, you need to learn how to create layers and then stack them on each other.
● You can then ‘liquify’ these layers to form a mould for your image.
● Apply skin softening techniques to take away the realistic features of the photo before working on turning it into a cartoon.
● Now you can start focus on applying the details to features like eyes, hair, nose and facial lines on your cartoon image.
● You can also change the colour of any individual features on your image. This method is applicable in making caricatures of your photo as well.
Part 4 Five 3D cartoon Disney-Fied yourself apps
Vibrant colours, gorgeous large eyes and shiny hair – pretty much sums up every Disney character you have ever seen. Now, everyone is obsessed with making their own Disney avatar and for good reason. You can use it as filter or upload it on your profile. Here are some of the most in-trend AI powered 3D Disneyfied apps you can use;
01Voila AI Artist
The Voila AI Artist app was released back in March of 2021 and has been the rage among Disneyfied apps. To clarify, the app has nothing to do with the Disney animation company but is perceived by users as the most successful app for disneyfication. Its on-board AI can create 3D and 2D renderings for your image along with hand drawn caricatures. You can download the app on App Store and Google Play.
02ToonMe
The next best app on our Disneyfied list is ToonMe. It also uses AI to turn photos into Disney Characters. The app keeps updating new cartoonish filters which you can use over your images. There are various other features which you can try as well like recreating your photos into classic vectors. The results are of extraordinary quality and can be uploaded on Instagram. You can download the app for free from Play store and App store.
03Snapchat
Snapchat has been around for some time now so you might already have it on your phone. Snapchat offers a vast range of filters and effects that of course includes Disneyfied filters and 3D cartoon images. You can look for them on the Snapchat search bar. New filters keep popping up every day which you can apply over your own images.
04Prisma
Prisma is a notoriously well know pop photo editor – which means it makes your photos ‘pop’. You can use it to edit photos on both Android and iPhone. It also comes with its own range of filters for turning your photos into cartoon images. There are hundreds of variations to choose from so you will definitely be spoilt for choices.
05Clip2Comic Cartoon
This app is only available on the App stores and is well known among iPhone users for turning photos into cartoons and caricatures. It is not exactly a Disneyfied app but it has a plethora of filters and a combination of editing tools to help personalize your 3D photos and comics. You can also directly upload these photos to your Social Media Accounts.
Key Takeaways from This Episode
● With the help of AI and other amazing features, you can use your everyday pictures to make a 3D cartoon of yourself.
● The Metaverse is her and soon we all will be interacting in a virtual space. So best learn how to rig your face with an animation filter.
● Apps like Voila AI artist, you can disneyfy your images quite easily. Explore dozens of such filters and effects with Disneyfied apps.
Also read:
- New In 2024, Adobe Auto Rigger Is AWESOME
- Updated Something About Types of Motion Graphics
- Updated In 2024, Adobe Animate Text Effects Skills That You Need to Know
- What This Post Can Teach You About Clay Animation
- New 2024 Approved Most Effective Ways to Set WhatsApp Status
- Updated Adobe Animate Text Effects Skills You Need to Know
- 2024 Approved 10 Stunning Stop Motion Movies You Should Not Miss
- Updated Types of Cartoon Styles You May Use for The Next Marketing Project for 2024
- In 2024, Top 10 Online Animated Logo Makers Everyone Should Know
- Updated 10 Caricature Makers to Turn Your Photo to Caricature Effects for 2024
- New In 2024, How to Create a Whiteboard Video Step by Step 2023 Updated
- Updated In 2024, Methods to Make Photo Motion Effect Online?
- New How to Make a Video a Live Photo
- 2024 Approved How to Make 3D Cartoon of Yourself
- New Best GIF Resizers to Reduce GIF Size for 2024
- Best 12 Illusion Gifs Top Picks
- New Ways You Can Master to Find 10 Best Free Animated Text Generator for 2024
- What Is Anime? Anime VS Manga VS Cartoon for 2024
- 2024 Approved Top 10 Popular Cartoons You Forgot Existed
- In 2024, The Only Guide Youll Ever Need to Learn About GIF Video Downloader
- 12 Aesthetic GIF Instagram for Marketers for 2024
- New Best 10 Apps to Enhance Your Instagram Story Slideshow for 2024
- Updated In 2024, Know All About Animated Business Logos and the Best Tools to Create One
- Adobe Animate Riggings Tutorial for You
- 2024 Approved How to Make GIF Stickers for WhatsApp 100 The Easy Way
- New 2024 Approved How to Make a Video a Live Photo
- 2024 Approved Top 10 Animated DP for WhatsApp
- Updated 2024 Approved Best 10 Popular Cartoons You Forgot Existed
- 10 Popular Cartoon Characters That You Wont Want to Miss
- New How to Find & Make Animated Christmas GIFs, In 2024
- New 2024 Approved Top 8 Tools Tell You How to Make Slideshows for Instagram
- Updated Top 10 Popular Cartoons You Forgot Existed for 2024
- New 15 Types of Cartoon Drawing Styles Examples for 2024
- 2024 Approved Learn Pencil2D Animation Tutorial Overview
- Updated Learn All About Lip-Syncing in Animation
- Updated 12+ Stunning Instagram GIF Stickers and How to Make & Find
- In 2024, A Beginners Guide to Explain What 3D Animation Is
- New 2024 Approved 10 2D/3D Animation Tips & Tricks for You
- In 2024, How to Make a Photoshop Collage in Simple Steps
- Updated Are You Ready to Animate Game Character From Scratch?
- New 2024 Approved How to Reduce GIF Size and Best GIF Resizers
- Updated Apps to Animate Still Pictures Which Could Make Your Pictures Become Internet Sensation for 2024
- 2024 Approved 10 Best Free GIF Apps for iPhone and iPad
- New In 2024, Handy Tip From Adobe Animate Rigging Tutorial for All Learners
- Updated 2024 Approved Top 10 Popular Cartoons You Forgot Existed
- New Apps to Animate Still Pictures Which Could Make Your Pictures Become Internet Sensation for 2024
- In 2024, Best 10 Animated DP for WhatsApp
- Updated A Beginners Guide to Explain What 3D Animation Is
- Updated 2024 Approved 15 Forgotten Cartoon Characters of All Time You Used to Love
- Updated Learn Disney Cartoon Drawing to See More Disney Magic Moments for 2024
- Reasons why Pokémon GPS does not Work On Meizu 21 Pro? | Dr.fone
- The Ultimate Guide to Nokia C02 Pattern Lock Screen Everything You Need to Know
- In 2024, Full Guide to Fix iToolab AnyGO Not Working On Infinix Note 30 VIP | Dr.fone
- Bricked Your Infinix Hot 40? Heres A Full Solution | Dr.fone
- How to Upgrade Apple iPhone 12 Pro without Losing Any Data? | Dr.fone
- In 2024, How PGSharp Save You from Ban While Spoofing Pokemon Go On Motorola Razr 40? | Dr.fone
- Easy steps to recover deleted music from Realme 11X 5G
- In 2024, Dose Life360 Notify Me When Someone Checks My Location On Samsung Galaxy F04? | Dr.fone
- In 2024, 8 Ways to Transfer Photos from Nokia C210 to iPhone Easily | Dr.fone
- In 2024, Trouble with iPhone 7 Plus Swipe-Up? Try These 11 Solutions
- Top 7 Skype Hacker to Hack Any Skype Account On your Samsung Galaxy A34 5G | Dr.fone
- In 2024, Easiest Guide How to Clone Vivo Y100i Phone? | Dr.fone
- The Best Android Unlock Software For Vivo Y28 5G Device Top 5 Picks to Remove Android Locks
- How to Recover Deleted Photos, Videos & Music Files from iPhone 12 mini | Stellar
- Can I play MKV movies on Xiaomi Redmi 12 5G?
- In 2024, The Ultimate Guide to Get the Rare Candy on Pokemon Go Fire Red On Samsung Galaxy A24 | Dr.fone
- How to Wipe iPhone SE (2022) Data Permanently? | Stellar
- How to Change Your Location on Apple iPhone XS Max | Dr.fone
- Two Ways to Track My Boyfriends Motorola Moto G73 5G without Him Knowing | Dr.fone
- Here are Some Pro Tips for Pokemon Go PvP Battles On Apple iPhone 12 | Dr.fone
- In 2024, How To Enable USB Debugging on a Locked Infinix Smart 7 HD Phone
- In 2024, How to Bypass Android Lock Screen Using Emergency Call On Vivo S17 Pro?
- In 2024, Mastering Android Device Manager The Ultimate Guide to Unlocking Your Vivo Y200 Device
- How to Track WhatsApp Messages on Asus ROG Phone 8 Pro Without Them Knowing? | Dr.fone
- How To Fix Unresponsive Touch Screen on Xiaomi Redmi Note 13 Pro+ 5G | Dr.fone
- Repair broken or corrupt video files of Xiaomi
- 3 Ways to Fake GPS Without Root On Xiaomi Civi 3 | Dr.fone
- In 2024, How to Transfer Apps from Realme C67 5G to Another | Dr.fone
- In 2024, Dose Life360 Notify Me When Someone Checks My Location On Honor Magic 6? | Dr.fone
- How To Reset Your iPhone 12 Pro Max? | Dr.fone
- In 2024, How to Transfer Data from Infinix Zero 5G 2023 Turbo to Any iOS Devices | Dr.fone
- Overview of the Best Vivo S17e Screen Mirroring App | Dr.fone
- In 2024, Network Locked SIM Card Inserted On Your Huawei Nova Y71 Phone? Unlock It Now
- In 2024, Android to Apple How To Transfer Photos From Oppo A78 5G to iPad Easily | Dr.fone
- Unlock Poco C50 Phone Password Without Factory Reset Full Guide Here
- Three Ways to Sim Unlock Sony Xperia 5 V
- In 2024, Complete Guide on Unlocking iPhone SE (2022) with a Broken Screen? | Dr.fone
- The Complete Guide to Vivo V27 Pro FRP Bypass Everything You Need to Know
- Unlock iPhone 13 Pro With Forgotten Passcode Different Methods You Can Try
- How to Fix Pokemon Go Route Not Working On Tecno Spark 20 Pro? | Dr.fone
- How To Change Your iPhone 11 Apple ID on MacBook
- Ultimate Guide to Catch the Regional-Located Pokemon For Xiaomi 13 Ultra | Dr.fone
- A Step-by-Step Guide on Using ADB and Fastboot to Remove FRP Lock from your Huawei
- How to Recover Deleted Screenshots on iPhone 11 Pro Max? | Stellar
- How To Repair System of Apple iPhone 13? | Dr.fone
- Title: Updated 8 Blender 3D Animation Tutorials for 2024
- Author: Elon
- Created at : 2024-05-19 03:05:27
- Updated at : 2024-05-20 03:05:27
- Link: https://animation-videos.techidaily.com/updated-8-blender-3d-animation-tutorials-for-2024/
- License: This work is licensed under CC BY-NC-SA 4.0.
