

Updated How to Convert Video to GIF Fast & Easy for 2024
How to Convert Video to GIF Fast & Easy
How to Convert Video to GIF (Fast & Easy!)
An easy yet powerful editor
Numerous effects to choose from
Detailed tutorials provided by the official channel
The use of GIFs has increased over time and not only on social media platforms, these interesting animations are used for various purposes like marketing, blogging, WhatsApp chats, and much more.

Though there are several online sites from where you can download the desired GIF, there is also an option to create a customized one using videos of images. So, if you too are keen to create a customized GIF, the article will look after your concerns. Learn how to make video to GIF Photoshop and using other tools. Keep reading!!
In this article
01 [Simple Alternative to Photoshop for creating a GIF from Videos- Wondershare Filmora](#Part 1)
02 [Simple Alternative to Photoshop for creating a GIF from Videos- Wondershare Filmora](#Part 2)
Part 1 Creating GIFs from videos using Photoshop
When it comes to any type of video editing task, the first software that comes to mind is Photoshop. Developed by Adobe, this is an excellent editing tool available for Windows and Mac. The software comes loaded with a wide range of functions that help you create desired graphics including GIFs.
Though the interface and the use of the software are a little complicated, once you get a hang of it, professional-looking files can be created in no time.
Steps to convert video to GIF Photoshop
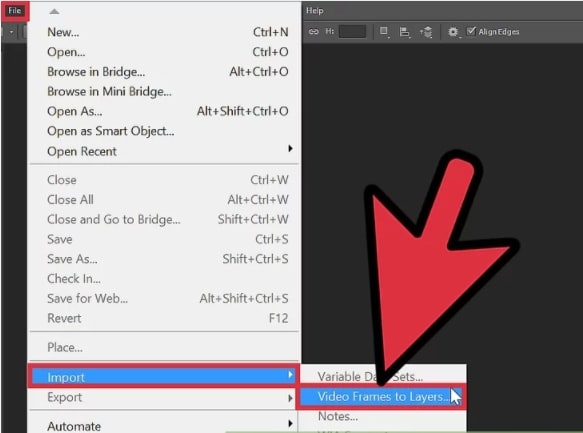
Step 1. Launch the Photoshop software on your system and select File > Import. Next tap on the “Video Frames to Layers” option. Choose the desired video (compatible format) and tap on Load.
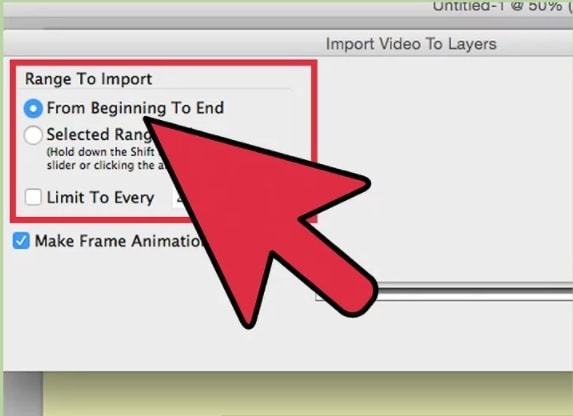
Step 2. Next, you need to select the Range to Import. For a few frames, choose the “Selected Frames Only” option.
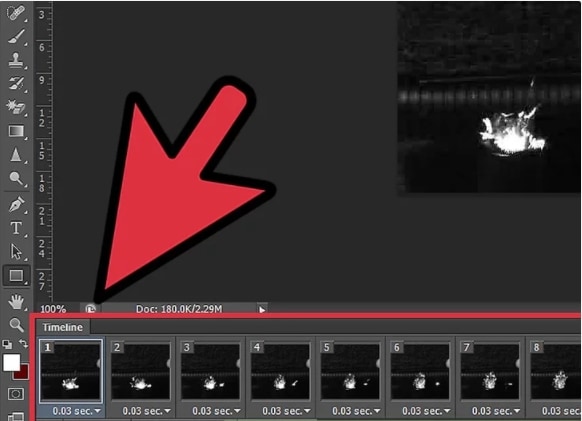
Step 3. You now need to cut the frames that are not needed by going to Window and then selecting the Animation. If needed, new frames can also be added here.
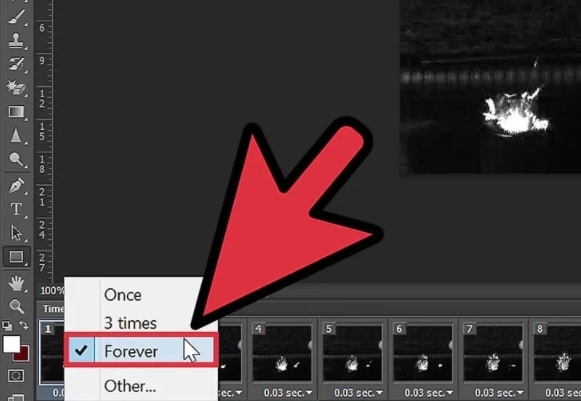
Step 4. To make your animation loop forever, select Forever from the bottom left side of the animation frames.
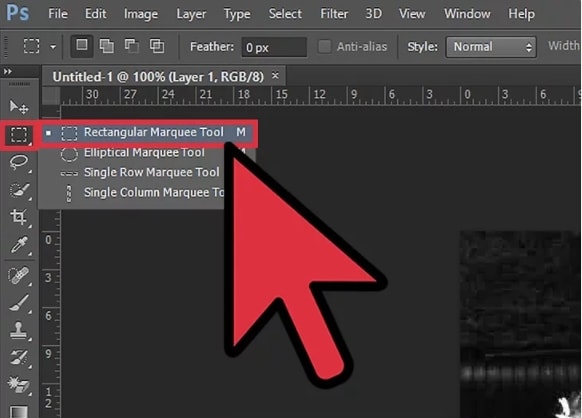
Step 5. Next, at the upper-left corner, go to the Rectangle marquee tool and choose the section you wish to focus on
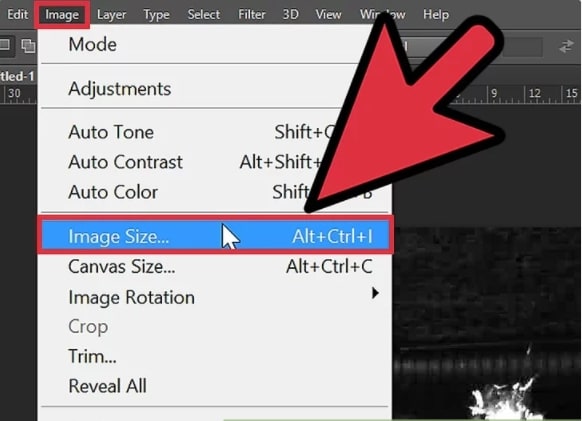
Step 6. Select the image size of the video that will make your GIF look appealing.
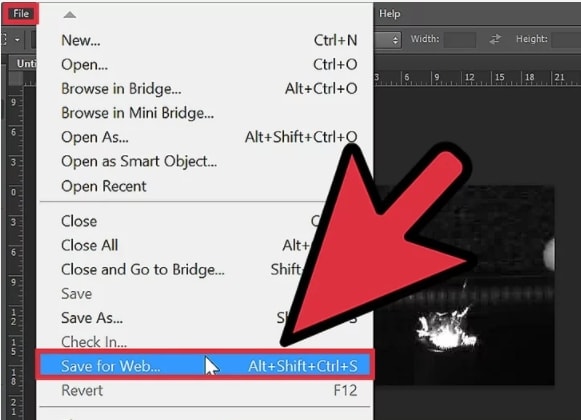
Step 7. Next, go to File > Save for Web & Devices for optimizing the image.
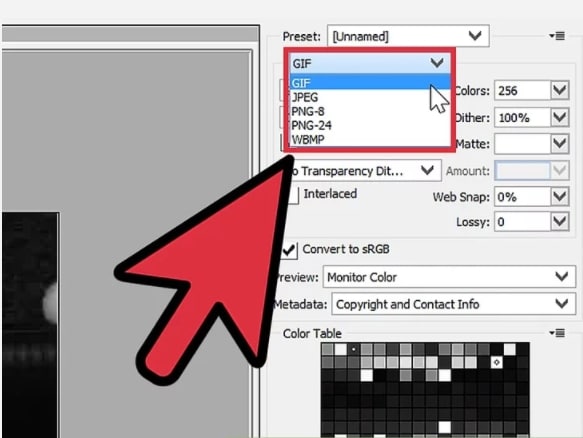
Step 8. Now select GIF at the preset section and check if the animation created is right by clicking on the Preview button.
Step 9. Finally, when all is done, click on the Save button and give a desired name to the file.
With the above steps you can make gif from video Photoshop.
Part 2 Simple Alternative to Photoshop for creating a GIF from Videos- Wondershare Filmora
The learning curve of Photoshop is quite steep and to create a GIF from videos using the tool is a complicated process involving multiple steps and especially if you are a beginner and have no prior experience of working with Photoshop software.
So, if you are looking for an alternative that is simple and fast, we suggest Wondershare Filmora Video Editor as the best option.
Wondershare Filmora
Get started easily with Filmora’s powerful performance, intuitive interface, and countless effects!
Try It Free Try It Free Try It Free Learn More >

Using the software videos and images in all key formats can be added to the interface for creating GIF animations. An array of editing options is available like cropping, splitting, rotating, cutting, and more. You can even add text, sound, effects, and other elements for further customization.
In a few simple steps, the software will let you create GIFs of high quality that can be used on several social media and other online platforms.
Steps to create GIF using Wondershare Filmora
Step 1. Download, install, and launch the Wondershare Filmora software on your system and then browse to import the media files from which you want to create a GIF.
Step 2. After the files are added to the interface, move them to the timeline at the bottom by dragging and dropping.
Step 3. Using the editing options you can trim, crop, rotate, and perform other functions.
Step 4. You can even add text, effects, and other elements for further customization.
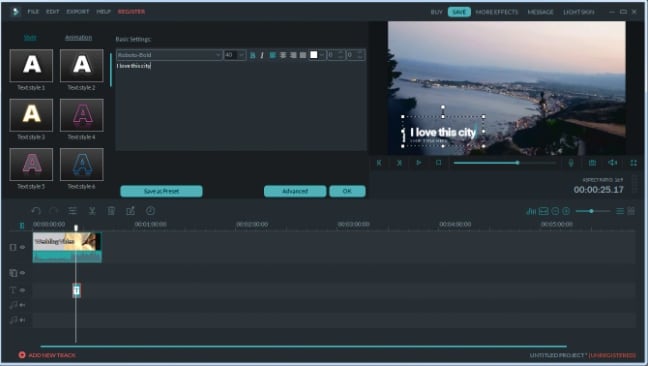
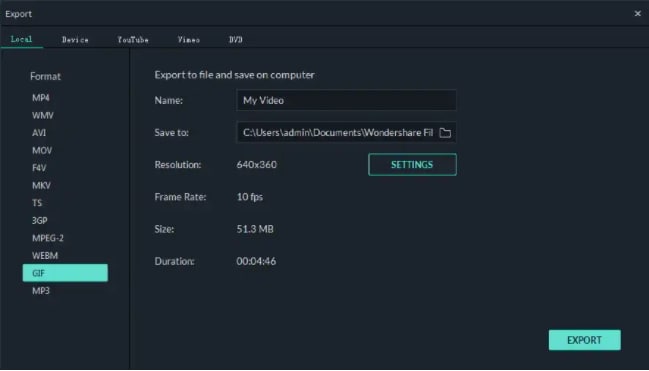
Step 5. Next, choose to save the created file as GIF under the Local tab. Choose the file name and the location, and then finally tap on the EXPORT button to start the processing.
● Key Takeaways from This Episode →
●GIFs are the latest trend that is used all over social media and other online sites.
●Several software and tools can help in creating the desired GIF.
●Adobe Photoshop is one of the widely used software that can create a GIF using videos as well as images, but the process is quite complicated.
●For a simpler and quicker process of creating a GIF, we suggest using Wondershare Filmora.
The use of GIFs has increased over time and not only on social media platforms, these interesting animations are used for various purposes like marketing, blogging, WhatsApp chats, and much more.
Though there are several online sites from where you can download the desired GIF, there is also an option to create a customized one using videos of images. So, if you too are keen to create a customized GIF, the article will look after your concerns. Learn how to make video to GIF Photoshop and using other tools. Keep reading!!
In this article
01 [Simple Alternative to Photoshop for creating a GIF from Videos- Wondershare Filmora](#Part 1)
02 [Simple Alternative to Photoshop for creating a GIF from Videos- Wondershare Filmora](#Part 2)
Part 1 Creating GIFs from videos using Photoshop
When it comes to any type of video editing task, the first software that comes to mind is Photoshop. Developed by Adobe, this is an excellent editing tool available for Windows and Mac. The software comes loaded with a wide range of functions that help you create desired graphics including GIFs.
Though the interface and the use of the software are a little complicated, once you get a hang of it, professional-looking files can be created in no time.
Steps to convert video to GIF Photoshop
Step 1. Launch the Photoshop software on your system and select File > Import. Next tap on the “Video Frames to Layers” option. Choose the desired video (compatible format) and tap on Load.
Step 2. Next, you need to select the Range to Import. For a few frames, choose the “Selected Frames Only” option.
Step 3. You now need to cut the frames that are not needed by going to Window and then selecting the Animation. If needed, new frames can also be added here.
Step 4. To make your animation loop forever, select Forever from the bottom left side of the animation frames.
Step 5. Next, at the upper-left corner, go to the Rectangle marquee tool and choose the section you wish to focus on
Step 6. Select the image size of the video that will make your GIF look appealing.
Step 7. Next, go to File > Save for Web & Devices for optimizing the image.
Step 8. Now select GIF at the preset section and check if the animation created is right by clicking on the Preview button.
Step 9. Finally, when all is done, click on the Save button and give a desired name to the file.
With the above steps you can make gif from video Photoshop.
Part 2 Simple Alternative to Photoshop for creating a GIF from Videos- Wondershare Filmora
The learning curve of Photoshop is quite steep and to create a GIF from videos using the tool is a complicated process involving multiple steps and especially if you are a beginner and have no prior experience of working with Photoshop software.
So, if you are looking for an alternative that is simple and fast, we suggest Wondershare Filmora Video Editor as the best option.
Wondershare Filmora
Get started easily with Filmora’s powerful performance, intuitive interface, and countless effects!
Try It Free Try It Free Try It Free Learn More >
Using the software videos and images in all key formats can be added to the interface for creating GIF animations. An array of editing options is available like cropping, splitting, rotating, cutting, and more. You can even add text, sound, effects, and other elements for further customization.
In a few simple steps, the software will let you create GIFs of high quality that can be used on several social media and other online platforms.
Steps to create GIF using Wondershare Filmora
Step 1. Download, install, and launch the Wondershare Filmora software on your system and then browse to import the media files from which you want to create a GIF.
Step 2. After the files are added to the interface, move them to the timeline at the bottom by dragging and dropping.
Step 3. Using the editing options you can trim, crop, rotate, and perform other functions.
Step 4. You can even add text, effects, and other elements for further customization.
Step 5. Next, choose to save the created file as GIF under the Local tab. Choose the file name and the location, and then finally tap on the EXPORT button to start the processing.
● Key Takeaways from This Episode →
●GIFs are the latest trend that is used all over social media and other online sites.
●Several software and tools can help in creating the desired GIF.
●Adobe Photoshop is one of the widely used software that can create a GIF using videos as well as images, but the process is quite complicated.
●For a simpler and quicker process of creating a GIF, we suggest using Wondershare Filmora.
Tutorials to Make Animated Images – Even if You’re Just Starting Out
Tutorials to Make Animated Images – Even if You’re Just Starting out
An easy yet powerful editor
Numerous effects to choose from
Detailed tutorials provided by the official channel
Not to mention, if you animate pictures, you’ll be able to stand apart in the crowd and maximize your brand exposure. By creating animated happy birthday images, you’ll be able to bring life to the still images.
In this guide, we’ll walk you through different ways to make animated images. Read this guide and you’ll be able to animate your images without any hassle.
In this article
01 [What are Animated Pictures?](#Part 1)
02 [Is It Possible to Animate Pictures On Your Own?](#Part 2)
03 [5 Best Tools to Make Animated Pictures](#Part 3)
Part 1 What are Animated Pictures?
For readers who aren’t familiar with animated images, here’s what you need to know. An animated image (also referred to as GIF) is designed by adding motion to a still image. Remember all the funny cat memes you see on Instagram? Well, they are a great example of animated images.
However, it’s important to understand that the applications of animated images aren’t only limited to social media and marketing. You can even animate your family photos and add life to those 20-year old pictures you’ve been saving forever. Not to mention, you can also create animated images of your favorite superhero movie. Love the Justice League starcast? Simply pick your favorite superhero and you’ll get stunning Justice League animated images.
Part 2 Is It Possible to Animate Pictures On Your Own?
When it comes to animating images, the majority of users want to know if it’s at all possible to create animated images by themselves. Even though animating an image is a tedious task, it’s safe to say that you can do it without any external help.
Of course, if you choose a tool like Adobe Photoshop to do the job, you’ll be out of luck because of the steep learning curve. But, there are hundreds of other alternatives you can use to animate pictures. There are ready-to-use 3D photo animators online that’ll allow you to animate any image within a few seconds. These tools are equipped with pre-installed animation templates that you can apply to any image and bring life to them.
Part 3 4 Best Tools to Make Animated Pictures
So, now that you know the key benefits of animated pictures, let’s take a look at the seven best tools you can use to create stunning animated images. To ensure we provide you with a diverse list of photo animators, we have included both platform-dependent and cross-platform solutions to the list.
01Motion Leap
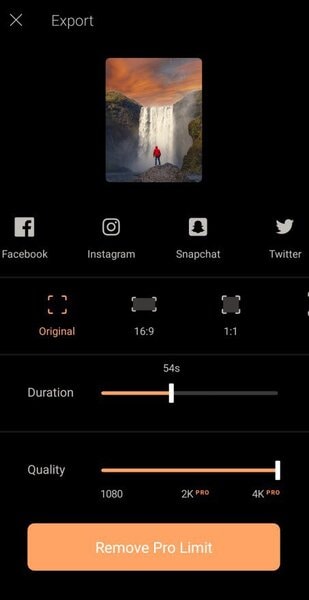
Motion Leap is a free 3D motion graphics generator that works on the Android platform. The tool offers an easy-to-use interface that editors can utilize to turn their still images into dedicated videos that play in loop. One of the major advantages of using Motion Leap for animating images is that it doesn’t leave a watermark on your pictures, even if you are using the free version of the tool. In fact, the free version offers all the necessary tools you’ll need to create animated pictures.
Since Motion Leap works on mobile, you don’t have to fire up your laptop every time you want to create an animated picture. Simply launch the app on your smartphone and you’ll be able to animate pictures right away. As of now, the only downside of Motion Leap is that it doesn’t save the output in GIF format, unless you have purchased the premium version.
Key Features:
● Add motion graphics by simply dragging objects on your screen
● Freeze specific areas within the image and apply dedicated filters
● Built-in editing panel to adjust different elements such as exposure, contrast, highlights, etc.
● Motion Leap is affordable
02Animate Me
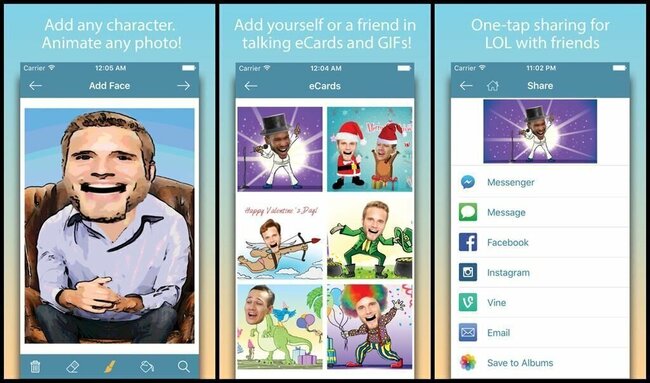
Animate Me is an exclusive iOS 3D photo animator that you can install on your iDevices and animate different types of images instantly. Though the app isn’t targeted towards professional marketers, it’s a fun tool if you want to animate your family photos or create happy birthday animated images. The app is available for free, which means you can create fun animated pictures without paying a single penny.
In addition to animating pictures, you can also use Animate Me to animate videos and create visually appealing eCards. In case you don’t know, e-Cards are used to communicate with others in a fun manner. With dozens of built-in e-card templates, you’ll be able to create high-quality e-cards right away. These templates support complete customization - so you can also use your face to customize the e-card.
Key Features of Animate Me:
● Hundreds of ready-to-use e-card templates
● Add sound effects to the characters used in an e-card
● Animate images and videos right on your smartphone
03Gyazo
Gyazo is a desktop-based screen capture tool that’s primarily designed to capture full or a specific portion of the screen. The tool is available for Windows, macOS, and Linux, which means you can use it across all desktop platforms without any hassle.
Apart from capturing screens, you can also use Gyazo to turn screen captures into dedicated GIFs with a single click. It’s worth noting that you won’t get any advanced editing options like other tools mentioned in the list, but Gyazo is still a reliable tool for users who want to animate screenshots.
Key Features:
● Capture screens and turn them into GIFs
● Animate pictures for free
● Available for Windows, macOS, and Linux
04GIFmaker.me
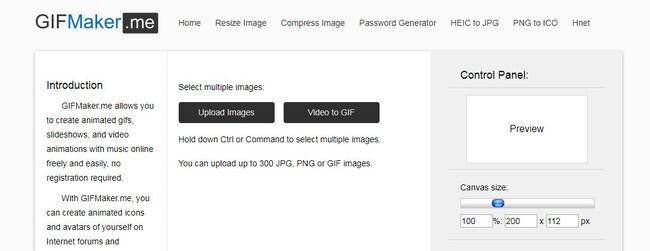
GIFMaker.me is an online 3D photo animator that’s primarily designed to turn regular images into GIFs. Being an online tool, you have the liberty to access GIFmaker.me across different platforms, be it mobile or desktop. The online editor offers an easy-to-use interface and provides an array of built-in features that you can use to create stunning GIFs.
All you have to do is decide the motion by dragging the subjects across the screen and the tool will automatically replicate it in a loop. Apart from creating GIFs from still images, you can also use GIFmaker to add animations to your videos. The tool has several ready-to-use animation templates that you can apply to your videos with the simple drag-&-drop functionality.
Key Features:
● Merge multiple images to create a custom GIF
● Reduce the size or reverse the motion of a particular GIF
● No sign-in required. You can start creating animated images directly with GIFmaker.me
Key Takeaways from This Episode
● Animated pictures can be used in different situations, be it for marketing purposes or simply for fun
● With dedicated tools, you can animate pictures all by yourself - without any professional assistance
● Wondershare Filmora Pro is an ideal video editing tool that provides a plethora of animation templates that you can apply to both videos and images.
Not to mention, if you animate pictures, you’ll be able to stand apart in the crowd and maximize your brand exposure. By creating animated happy birthday images, you’ll be able to bring life to the still images.
In this guide, we’ll walk you through different ways to make animated images. Read this guide and you’ll be able to animate your images without any hassle.
In this article
01 [What are Animated Pictures?](#Part 1)
02 [Is It Possible to Animate Pictures On Your Own?](#Part 2)
03 [5 Best Tools to Make Animated Pictures](#Part 3)
Part 1 What are Animated Pictures?
For readers who aren’t familiar with animated images, here’s what you need to know. An animated image (also referred to as GIF) is designed by adding motion to a still image. Remember all the funny cat memes you see on Instagram? Well, they are a great example of animated images.
However, it’s important to understand that the applications of animated images aren’t only limited to social media and marketing. You can even animate your family photos and add life to those 20-year old pictures you’ve been saving forever. Not to mention, you can also create animated images of your favorite superhero movie. Love the Justice League starcast? Simply pick your favorite superhero and you’ll get stunning Justice League animated images.
Part 2 Is It Possible to Animate Pictures On Your Own?
When it comes to animating images, the majority of users want to know if it’s at all possible to create animated images by themselves. Even though animating an image is a tedious task, it’s safe to say that you can do it without any external help.
Of course, if you choose a tool like Adobe Photoshop to do the job, you’ll be out of luck because of the steep learning curve. But, there are hundreds of other alternatives you can use to animate pictures. There are ready-to-use 3D photo animators online that’ll allow you to animate any image within a few seconds. These tools are equipped with pre-installed animation templates that you can apply to any image and bring life to them.
Part 3 4 Best Tools to Make Animated Pictures
So, now that you know the key benefits of animated pictures, let’s take a look at the seven best tools you can use to create stunning animated images. To ensure we provide you with a diverse list of photo animators, we have included both platform-dependent and cross-platform solutions to the list.
01Motion Leap
Motion Leap is a free 3D motion graphics generator that works on the Android platform. The tool offers an easy-to-use interface that editors can utilize to turn their still images into dedicated videos that play in loop. One of the major advantages of using Motion Leap for animating images is that it doesn’t leave a watermark on your pictures, even if you are using the free version of the tool. In fact, the free version offers all the necessary tools you’ll need to create animated pictures.
Since Motion Leap works on mobile, you don’t have to fire up your laptop every time you want to create an animated picture. Simply launch the app on your smartphone and you’ll be able to animate pictures right away. As of now, the only downside of Motion Leap is that it doesn’t save the output in GIF format, unless you have purchased the premium version.
Key Features:
● Add motion graphics by simply dragging objects on your screen
● Freeze specific areas within the image and apply dedicated filters
● Built-in editing panel to adjust different elements such as exposure, contrast, highlights, etc.
● Motion Leap is affordable
02Animate Me
Animate Me is an exclusive iOS 3D photo animator that you can install on your iDevices and animate different types of images instantly. Though the app isn’t targeted towards professional marketers, it’s a fun tool if you want to animate your family photos or create happy birthday animated images. The app is available for free, which means you can create fun animated pictures without paying a single penny.
In addition to animating pictures, you can also use Animate Me to animate videos and create visually appealing eCards. In case you don’t know, e-Cards are used to communicate with others in a fun manner. With dozens of built-in e-card templates, you’ll be able to create high-quality e-cards right away. These templates support complete customization - so you can also use your face to customize the e-card.
Key Features of Animate Me:
● Hundreds of ready-to-use e-card templates
● Add sound effects to the characters used in an e-card
● Animate images and videos right on your smartphone
03Gyazo
Gyazo is a desktop-based screen capture tool that’s primarily designed to capture full or a specific portion of the screen. The tool is available for Windows, macOS, and Linux, which means you can use it across all desktop platforms without any hassle.
Apart from capturing screens, you can also use Gyazo to turn screen captures into dedicated GIFs with a single click. It’s worth noting that you won’t get any advanced editing options like other tools mentioned in the list, but Gyazo is still a reliable tool for users who want to animate screenshots.
Key Features:
● Capture screens and turn them into GIFs
● Animate pictures for free
● Available for Windows, macOS, and Linux
04GIFmaker.me
GIFMaker.me is an online 3D photo animator that’s primarily designed to turn regular images into GIFs. Being an online tool, you have the liberty to access GIFmaker.me across different platforms, be it mobile or desktop. The online editor offers an easy-to-use interface and provides an array of built-in features that you can use to create stunning GIFs.
All you have to do is decide the motion by dragging the subjects across the screen and the tool will automatically replicate it in a loop. Apart from creating GIFs from still images, you can also use GIFmaker to add animations to your videos. The tool has several ready-to-use animation templates that you can apply to your videos with the simple drag-&-drop functionality.
Key Features:
● Merge multiple images to create a custom GIF
● Reduce the size or reverse the motion of a particular GIF
● No sign-in required. You can start creating animated images directly with GIFmaker.me
Key Takeaways from This Episode
● Animated pictures can be used in different situations, be it for marketing purposes or simply for fun
● With dedicated tools, you can animate pictures all by yourself - without any professional assistance
● Wondershare Filmora Pro is an ideal video editing tool that provides a plethora of animation templates that you can apply to both videos and images.
Top 20+ Best Free GIF Makers Online to Quickly Edit GIF
Top 20+ Best Free GIF Makers Online to Quickly Edit GIF

Shanoon Cox
Mar 27, 2024• Proven solutions
GIF sharing images are gaining more and more popularity these days because of their lesser loading time and small file size. The best part is that they can be constructed with ease using a few editing tools online. Most of the online GIF editors are available for free and they allow users to develop customized interactive images with the advanced feature sets, which simplify the creation process of GIF images and videos. However, there are still some GIF makers online that are not easy to use.
We need an easy to use and free GIF editor online to use for quickly making a GIF and share it with friends to have fun. The following list are great makers to edit GIF from video or image. Check it out!
Recommendation – Filmora: Easy GIF Maker Software Free Download for PC and Mac
Wondershare Filmora is often recommended due to its rich feature set that allows easy customization, editing and conversion. If you are looking forward to working on GIF images and videos then probably Filmora can solve all your troubles. You can add text/title to edit your GIF. Besides, various stickers and overlays are also available to use. Below are few incredible features of Wondershare Filmora .
- This GIF editor can process all popular media file formats with ease and it works perfectly on Windows as well as Mac devices.
- Export images and videos to GIF format directly, or save the gif to the mobile device for sharing.
- Share the GIF Video to YouTube or Vimeo directly.
- It does not demand any active internet connection. Users simply need to download their tool and start working offline.
- It is possible to edit already created GIF images in Filmora and you can access inbuilt tools for this purpose. The list of commonly used editing tools includes overlays, elements and text etc.
- Users need not waste time uploading or downloading images because its drag and drop tools make everything much easier and laborious tasks can be completed within a fraction of seconds.
Check this video tutorial to know more details:
 Download Mac Version ](https://tools.techidaily.com/wondershare/filmora/download/ )
The article below includes the list of best online GIF maker tools that you can use to make GIF from images or videos with ease online.
Top 20+ Best Free GIF Makers Online
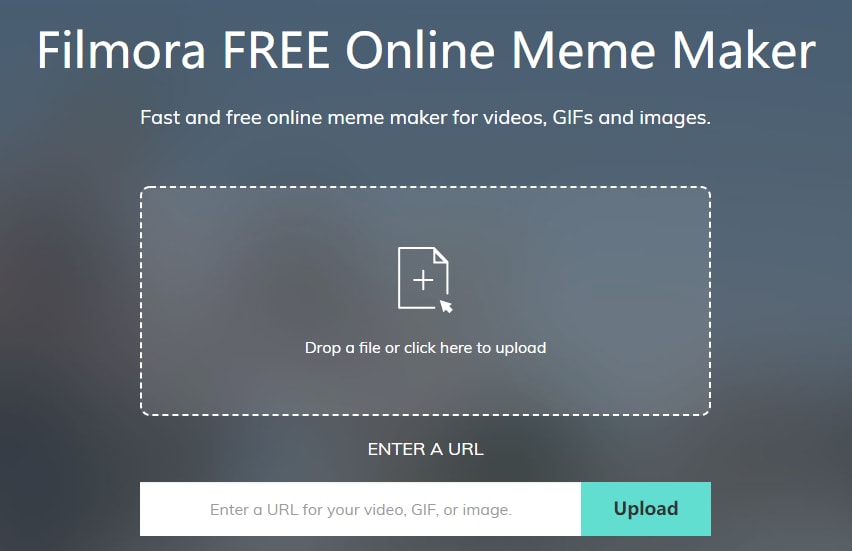
1. Filmora meme maker

Filmora meme maker is your ultimate solution. It helps you make image, GIF and video memes directly without watermark. It is totally FREE to use and no sign up. You can change text size, color and position to create caption when you are using this online GIF editor. You can also put text inside or outside in GIF. Just with a few clicks, your GIF is done . Try it now!
How to make a GIF online?
Some people are wondering how do I make a GIF online? Well, don’t worry. We will let you know the steps to make a GIF online with Filmora meme maker. You just need to open it and then follow the steps below. Check it out!
1. Import video/image first
To make a gif online, you need to import your media and gif material to Filmora meme maker. You can make a GIF from video or image, and Filmora meme maker supports all. You can drag gif resource to the center of the page, or directly click it to upload.
2. Edit the GIF online
If you want to make GIF from video. Just import the video to this tool. The file size must be under 50MB size. After it is uploaded, you need to trim one part you like. Drag the slider to left or right to get it. If your uploaded file is image, you can flip and rotate it first. You can enter your text from inside and outside. Besides, you can change font type, size and color. Just position your text field to anywhere.
3. Export the GIF file
After selecting the format you want, click create to export this GIF. You can preview it online. Click download if you like it. It may take a while according to your file size.

See, make gif online with Filmora online maker is easy.
3. GIFMaker.me:
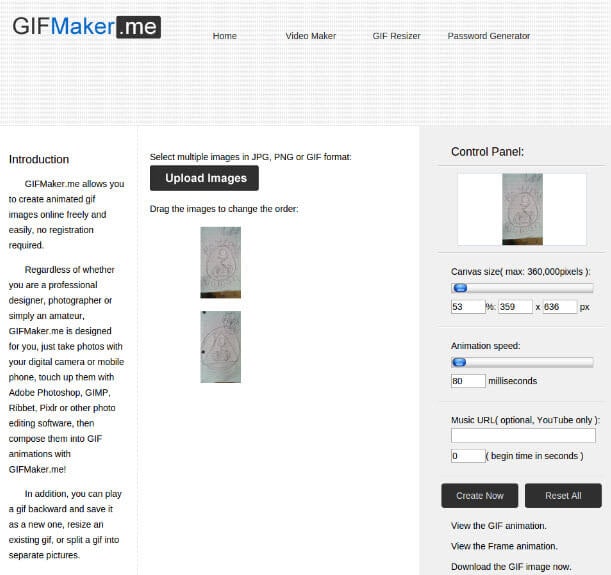
This photo to GIF online maker can easily process almost all media file formats like JPG, GIF and PNG so that interactive GIFs can be created. Users can also enjoy live preview of all changes before exporting created GIF image to device, so it is a great GIF editor online to use.
4. Giphy:

This popular GIF search engine and interactive design tool can develop results of your choice instantly. Giphy allows you to make GIF slideshow with images as well as videos. You can add multiple images or paste the YouTube, Vimeo or Giphy URL to upload the video. You can adjust the duration of each frame/image, and add captions, stickers, filters to the GIF file or draw on it. And you can choose different styles and animations when adding captions when editing GIF.
5. GIFMakerOnline.com:

You can use it to make GIF online. Those who are searching for a super quick way to develops GIFs with additional watermarks and image quality settings can prefer to move t GIFMakerOnline.com. It can directly upload your resulting GIF files on popular social media sites.
6. GIFMake.com:
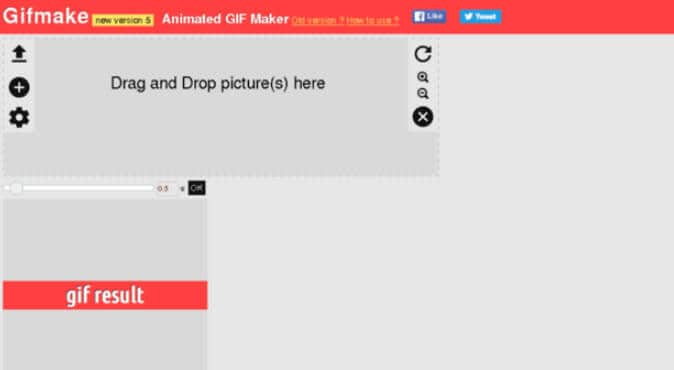
If you have already collected images in png, jpeg and gif format and now want to create one interesting animated GIF image by merging them then GIFMake.com can help you better. You can this online gif editor to make a GIF with dragging and dropping.
7. ImgFlip:
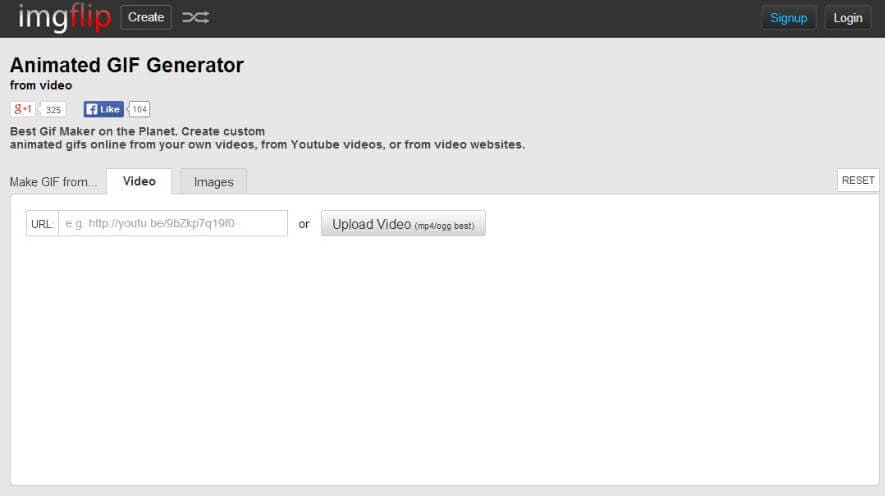
This online animated GIF maker allows users to create GIFs from images, photos and videos. You can add a MP4/OGG video from computer or paste a video URL to upload the video footage. You can upload several images to make a GIF and adjust the width, height and quality.
It will help you to watch preview of your GIF before it is created and that is definitely important for generating good results. Users can alter quality of GIF with animations, photo order adjustments and resizing features. Besides that, you can also add text to GIF or crop and rotate GIFs.
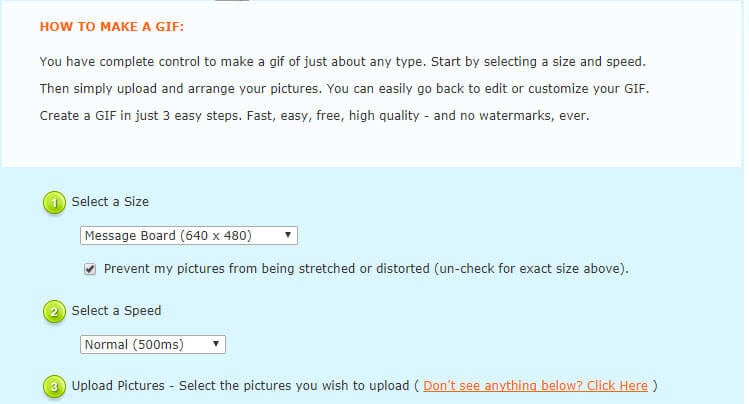
8. MakeaGIF.com:
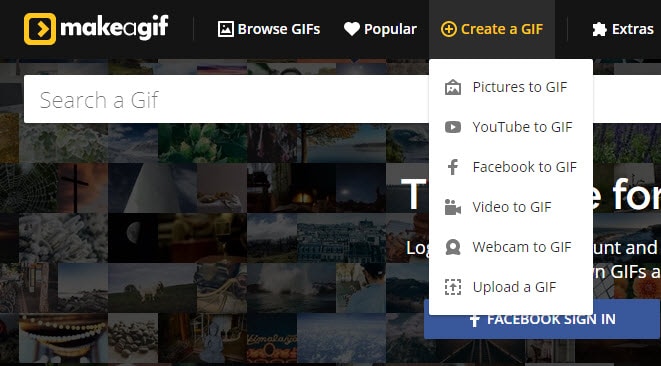
This GIF editor can help users to develop a high quality GIF from collection of images or from a video file. It can also process webcam recordings or YouTube videos for creation of GIFs.
9. Animated GIF Maker:
This animated GIF maker is a portable solution for all GIF creators with only 2MB file size. It is designed with intuitive and easier to use interface that can develop classic GIFs for you with better adjustments over quality, frame delays and size, though it still provides the Size and Speed preset. However, this GIF Maker only allows you to upload images to make GIF.
10. Convertio:
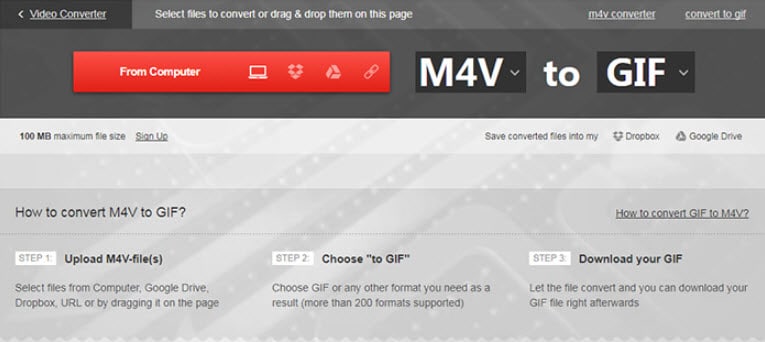
Convertio is an online GIF maker which is able to easily process all file formats so that users can easily upload any image or video for development of application specific GIFs.
This online GIF editor allows you to upload image or videos in several ways: uploading from your computer, from Dropbox, from Google Drive, or pasting the file URL or website URL. The maximum file size is 100MB. Besides converting image or videos to GIF, you can also convert GIF files to MP4 videos.
11. Convert Image:
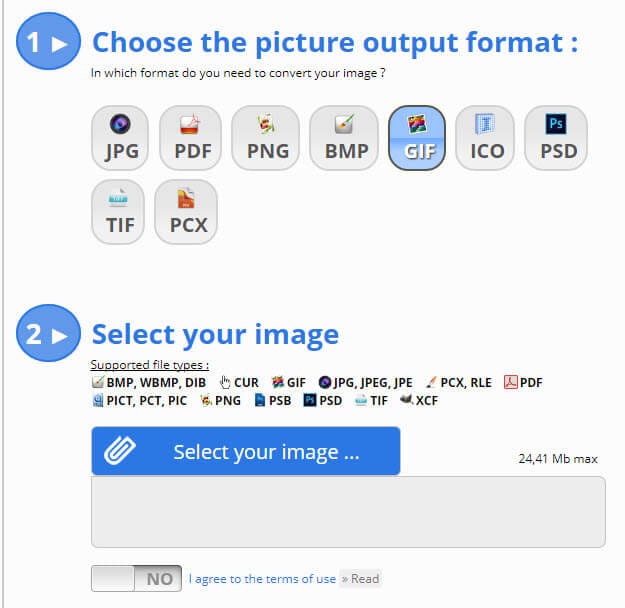
This GIF maker tool is be used to convert png, jpg and many other images formats into animated GIFs with ease. However, you can upload one image at a time and the maximum file size is 24MB.
12. CreateGIF.net:
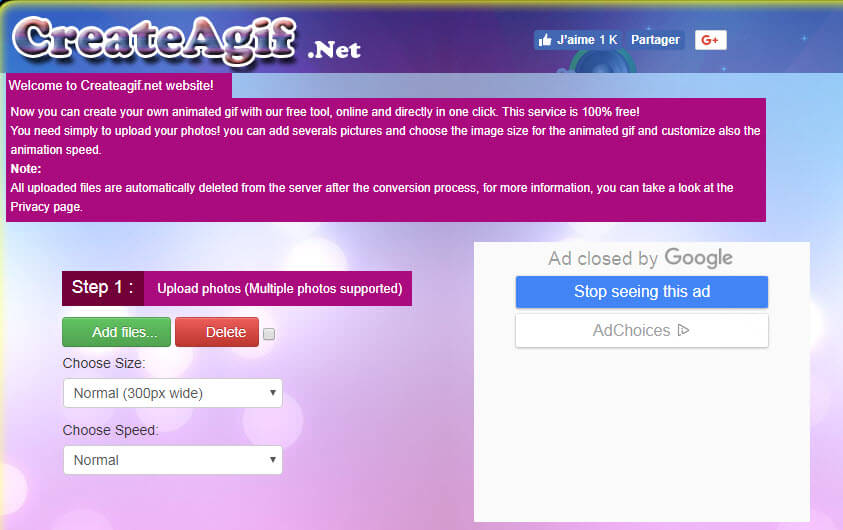
Here is a free and easy to use online GIF animator tool that helps users to select multiple images from computer. After manipulating details about speed and size of GIFs, it can help you to generate quality GIF images.
This online GIF Maker allows you to re-order the multiple images and compose several images into one GIF file. However, the biggest pixel is 450px wide. There is no indication about the maximum file size that you can upload, but when I upload a 700KB, it reports error.
13. EditPhotoForFree.com:
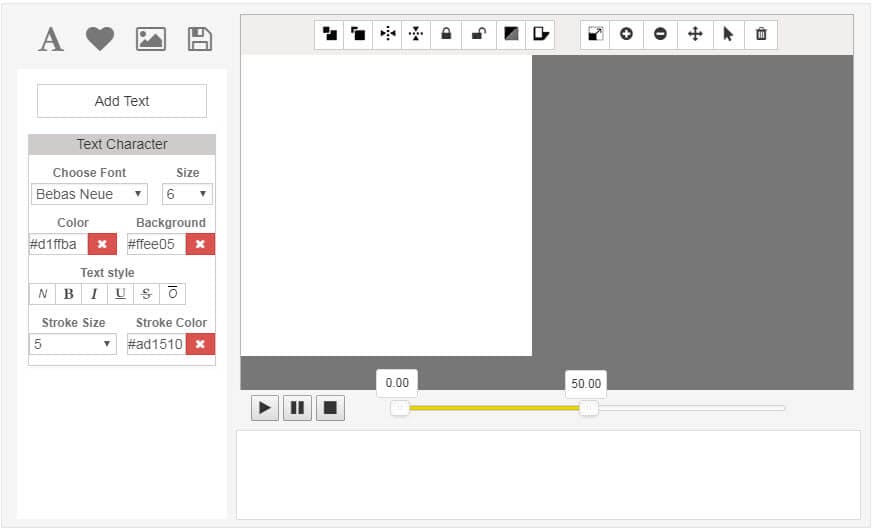
There are so many unique features and colour manipulation options on EditPhotoForFree.com. Users can easily access to many customizable features on this platform for development of application specific GIFs.
This online GIF creator allows you to add images in JPG and PNG formats, animated gif and video in Mp4, WebM and OGG formats to make a GIF. It also allows you to record webcam to make a GIF and add shapes in SVG format. You can add GIF effects like text and background. There are some editing features built in, such as flip horizontal and flip vertical, and shadow and opacity settings. But the preview window is not reacted timely.
14. GIFPal:

This creative GIF maker can show you effect of all changes that you made to your imported files before saving the final results. One can customize GIF content with hue, saturation, contrast, text and drawing tools. You also can edit GIF by adding text.
15. GIFNinja:
It can easily split or create animated GIF files as per user’s specifications. This online GIF editor can help you make GIF in a minute.
16. GIFGear.com:
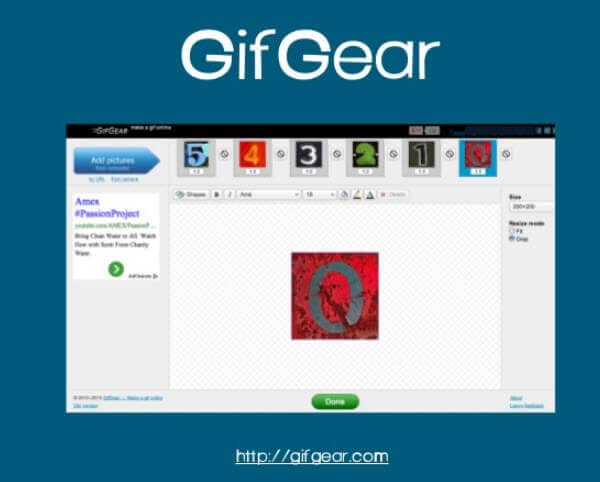
GIFGear.com allows users to develop interactive GIF images with particular size and customization options. One can also decide duration of animation and several effects can be added in form of frames, overlays, pixelations and fade etc.
17. Gickr.com:
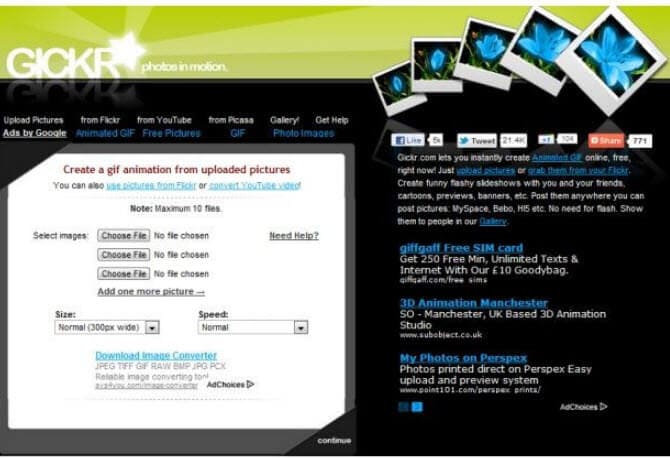
Gickr.com allows users to develop animated GIFs within few seconds and this platform can be accessed by anyone for free. Users simply need to uploaded images, add desired effects and convert project to GIF extension.
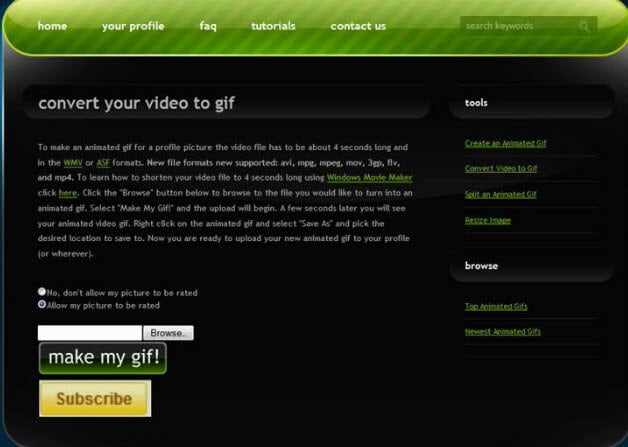
18. Gifup.com:
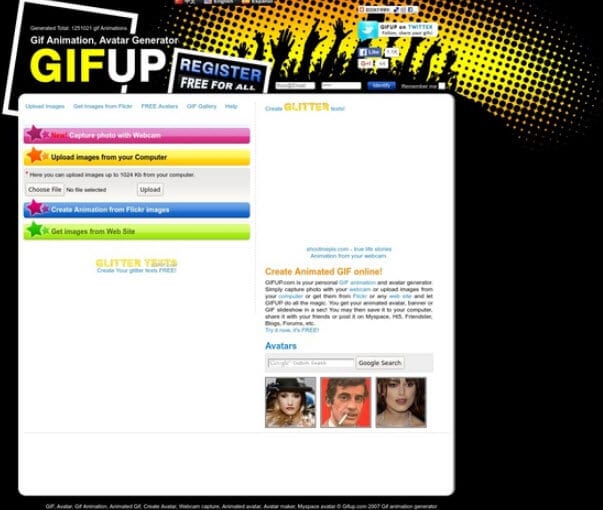
Here is your advanced yet personal GIF creator that can provide impressive results instantly. It allows users to upload 1024 Kb file size with ease and uploaded images can be easily processed for generation of classic GIFs. Its interface is easy to understand. If you like to make GIF like a pro, you can this one to make a GIF. Have a try!
19. IMGUR:
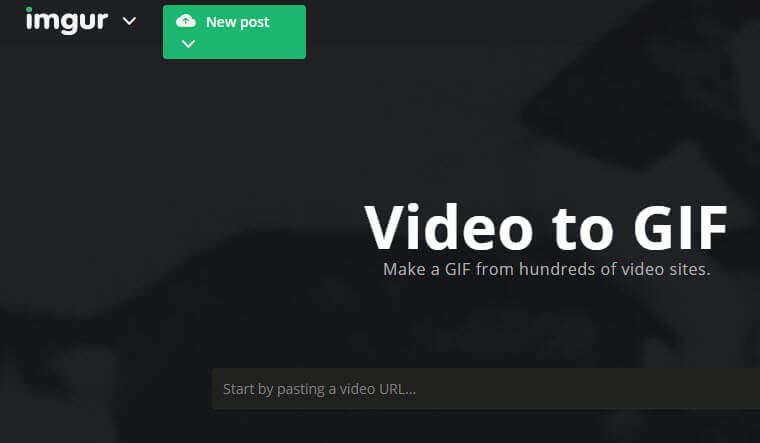
Here is one of the most widely used GIF image sharing center that can easily process raw content from computer or in form of provided URLs.
20. Meme Center:

This platform is being popularly used for development of meme with so many quick features. It is really impressive to add reactions to GIFs or select already existing videos/images to get desired results. You can still edit GIF thought it is a meme center.
21. Online Image Converter:

This tool works on your browser and can share resulting GIF files on other popular websites with ease. The process is smooth to edit GIF online.
22. Picasion:

It assists users to develop classic GIFs with images that can be uploaded from computer or using video URLs. One can also import images from webcam or try stills from Flickr or Picasa.
23. Toolson.Net’s GIF Maker:
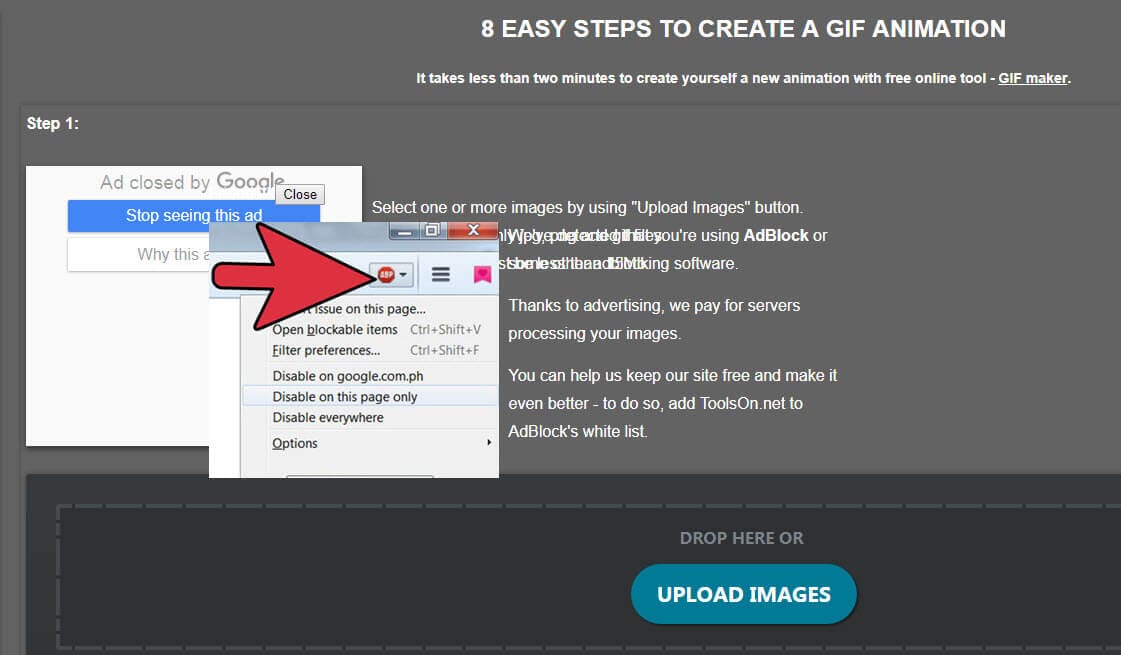
With this GIF maker tool you can easily arrange your uploaded images in any order and then apply GIF based animation effect to that sequence. One can also add borders, frames and filters to this content.
24. Zamzar:
This name is popular among professional image editors due to its wide set of features and impressive capabilities.
Conclusion
These free online GIF makers discussed above allows you to turning images or videos to looping and animated GIFs quickly. If you want to try more offline GIF creators, you can check our picks ofbest free GIF creators in 2019 , which includes both offline and online gif creators. Which one(s) will you use to make a GIF online? Share with us in the comment section below.
Download Mac Version ](https://tools.techidaily.com/wondershare/filmora/download/ )
Frequently Asked Questions about Making GIFs Online
1. How to make a GIF without a watermark?
You’ll need a GIF maker or a video editing software that allows you to export GIF files without a watermark. We recommend EZGIF or Filmora Meme Maker because you can use them for free and none of your GIFs are going to be watermarked, regardless of how many you create on a daily or weekly level.
EZGIF lets you combine up to 2000 images in a single GIF file, and it supports all common image files, so that you don’t have to worry about the format in which pictures you want to include in your GIF are saved. Filmora Meme Maker is the right choice for you if you want to add text to the GIFs you create.
2. What are GIFs made of?
GIFs consist of a series of pictures that simulate a movement, and they can either be comprised of still or moving images.
In case you want to create a GIF out of photos, you will have to take a number of consecutive photos with your camera and then merge them into a GIF. The number of photos you will have to take depends on the duration of the GIF you want to create, and it varies from just five to more than one thousand.
Optionally, you can also create GIFs from video files, but you should keep in mind that the sound is going to be removed automatically, as GIF files cannot contain audio.
Shanoon Cox
Shanoon Cox is a writer and a lover of all things video.
Follow @Shanoon Cox
Shanoon Cox
Mar 27, 2024• Proven solutions
GIF sharing images are gaining more and more popularity these days because of their lesser loading time and small file size. The best part is that they can be constructed with ease using a few editing tools online. Most of the online GIF editors are available for free and they allow users to develop customized interactive images with the advanced feature sets, which simplify the creation process of GIF images and videos. However, there are still some GIF makers online that are not easy to use.
We need an easy to use and free GIF editor online to use for quickly making a GIF and share it with friends to have fun. The following list are great makers to edit GIF from video or image. Check it out!
Recommendation – Filmora: Easy GIF Maker Software Free Download for PC and Mac
Wondershare Filmora is often recommended due to its rich feature set that allows easy customization, editing and conversion. If you are looking forward to working on GIF images and videos then probably Filmora can solve all your troubles. You can add text/title to edit your GIF. Besides, various stickers and overlays are also available to use. Below are few incredible features of Wondershare Filmora .
- This GIF editor can process all popular media file formats with ease and it works perfectly on Windows as well as Mac devices.
- Export images and videos to GIF format directly, or save the gif to the mobile device for sharing.
- Share the GIF Video to YouTube or Vimeo directly.
- It does not demand any active internet connection. Users simply need to download their tool and start working offline.
- It is possible to edit already created GIF images in Filmora and you can access inbuilt tools for this purpose. The list of commonly used editing tools includes overlays, elements and text etc.
- Users need not waste time uploading or downloading images because its drag and drop tools make everything much easier and laborious tasks can be completed within a fraction of seconds.
Check this video tutorial to know more details:
Download Mac Version ](https://tools.techidaily.com/wondershare/filmora/download/ )
The article below includes the list of best online GIF maker tools that you can use to make GIF from images or videos with ease online.
Top 20+ Best Free GIF Makers Online
1. Filmora meme maker
Filmora meme maker is your ultimate solution. It helps you make image, GIF and video memes directly without watermark. It is totally FREE to use and no sign up. You can change text size, color and position to create caption when you are using this online GIF editor. You can also put text inside or outside in GIF. Just with a few clicks, your GIF is done . Try it now!
How to make a GIF online?
Some people are wondering how do I make a GIF online? Well, don’t worry. We will let you know the steps to make a GIF online with Filmora meme maker. You just need to open it and then follow the steps below. Check it out!
1. Import video/image first
To make a gif online, you need to import your media and gif material to Filmora meme maker. You can make a GIF from video or image, and Filmora meme maker supports all. You can drag gif resource to the center of the page, or directly click it to upload.
2. Edit the GIF online
If you want to make GIF from video. Just import the video to this tool. The file size must be under 50MB size. After it is uploaded, you need to trim one part you like. Drag the slider to left or right to get it. If your uploaded file is image, you can flip and rotate it first. You can enter your text from inside and outside. Besides, you can change font type, size and color. Just position your text field to anywhere.
3. Export the GIF file
After selecting the format you want, click create to export this GIF. You can preview it online. Click download if you like it. It may take a while according to your file size.
See, make gif online with Filmora online maker is easy.
3. GIFMaker.me:
This photo to GIF online maker can easily process almost all media file formats like JPG, GIF and PNG so that interactive GIFs can be created. Users can also enjoy live preview of all changes before exporting created GIF image to device, so it is a great GIF editor online to use.
4. Giphy:
This popular GIF search engine and interactive design tool can develop results of your choice instantly. Giphy allows you to make GIF slideshow with images as well as videos. You can add multiple images or paste the YouTube, Vimeo or Giphy URL to upload the video. You can adjust the duration of each frame/image, and add captions, stickers, filters to the GIF file or draw on it. And you can choose different styles and animations when adding captions when editing GIF.
5. GIFMakerOnline.com:
You can use it to make GIF online. Those who are searching for a super quick way to develops GIFs with additional watermarks and image quality settings can prefer to move t GIFMakerOnline.com. It can directly upload your resulting GIF files on popular social media sites.
6. GIFMake.com:
If you have already collected images in png, jpeg and gif format and now want to create one interesting animated GIF image by merging them then GIFMake.com can help you better. You can this online gif editor to make a GIF with dragging and dropping.
7. ImgFlip:
This online animated GIF maker allows users to create GIFs from images, photos and videos. You can add a MP4/OGG video from computer or paste a video URL to upload the video footage. You can upload several images to make a GIF and adjust the width, height and quality.
It will help you to watch preview of your GIF before it is created and that is definitely important for generating good results. Users can alter quality of GIF with animations, photo order adjustments and resizing features. Besides that, you can also add text to GIF or crop and rotate GIFs.
8. MakeaGIF.com:
This GIF editor can help users to develop a high quality GIF from collection of images or from a video file. It can also process webcam recordings or YouTube videos for creation of GIFs.
9. Animated GIF Maker:
This animated GIF maker is a portable solution for all GIF creators with only 2MB file size. It is designed with intuitive and easier to use interface that can develop classic GIFs for you with better adjustments over quality, frame delays and size, though it still provides the Size and Speed preset. However, this GIF Maker only allows you to upload images to make GIF.
10. Convertio:
Convertio is an online GIF maker which is able to easily process all file formats so that users can easily upload any image or video for development of application specific GIFs.
This online GIF editor allows you to upload image or videos in several ways: uploading from your computer, from Dropbox, from Google Drive, or pasting the file URL or website URL. The maximum file size is 100MB. Besides converting image or videos to GIF, you can also convert GIF files to MP4 videos.
11. Convert Image:
This GIF maker tool is be used to convert png, jpg and many other images formats into animated GIFs with ease. However, you can upload one image at a time and the maximum file size is 24MB.
12. CreateGIF.net:
Here is a free and easy to use online GIF animator tool that helps users to select multiple images from computer. After manipulating details about speed and size of GIFs, it can help you to generate quality GIF images.
This online GIF Maker allows you to re-order the multiple images and compose several images into one GIF file. However, the biggest pixel is 450px wide. There is no indication about the maximum file size that you can upload, but when I upload a 700KB, it reports error.
13. EditPhotoForFree.com:
There are so many unique features and colour manipulation options on EditPhotoForFree.com. Users can easily access to many customizable features on this platform for development of application specific GIFs.
This online GIF creator allows you to add images in JPG and PNG formats, animated gif and video in Mp4, WebM and OGG formats to make a GIF. It also allows you to record webcam to make a GIF and add shapes in SVG format. You can add GIF effects like text and background. There are some editing features built in, such as flip horizontal and flip vertical, and shadow and opacity settings. But the preview window is not reacted timely.
14. GIFPal:
This creative GIF maker can show you effect of all changes that you made to your imported files before saving the final results. One can customize GIF content with hue, saturation, contrast, text and drawing tools. You also can edit GIF by adding text.
15. GIFNinja:
It can easily split or create animated GIF files as per user’s specifications. This online GIF editor can help you make GIF in a minute.
16. GIFGear.com:
GIFGear.com allows users to develop interactive GIF images with particular size and customization options. One can also decide duration of animation and several effects can be added in form of frames, overlays, pixelations and fade etc.
17. Gickr.com:
Gickr.com allows users to develop animated GIFs within few seconds and this platform can be accessed by anyone for free. Users simply need to uploaded images, add desired effects and convert project to GIF extension.
18. Gifup.com:
Here is your advanced yet personal GIF creator that can provide impressive results instantly. It allows users to upload 1024 Kb file size with ease and uploaded images can be easily processed for generation of classic GIFs. Its interface is easy to understand. If you like to make GIF like a pro, you can this one to make a GIF. Have a try!
19. IMGUR:
Here is one of the most widely used GIF image sharing center that can easily process raw content from computer or in form of provided URLs.
20. Meme Center:
This platform is being popularly used for development of meme with so many quick features. It is really impressive to add reactions to GIFs or select already existing videos/images to get desired results. You can still edit GIF thought it is a meme center.
21. Online Image Converter:
This tool works on your browser and can share resulting GIF files on other popular websites with ease. The process is smooth to edit GIF online.
22. Picasion:
It assists users to develop classic GIFs with images that can be uploaded from computer or using video URLs. One can also import images from webcam or try stills from Flickr or Picasa.
23. Toolson.Net’s GIF Maker:
With this GIF maker tool you can easily arrange your uploaded images in any order and then apply GIF based animation effect to that sequence. One can also add borders, frames and filters to this content.
24. Zamzar:
This name is popular among professional image editors due to its wide set of features and impressive capabilities.
Conclusion
These free online GIF makers discussed above allows you to turning images or videos to looping and animated GIFs quickly. If you want to try more offline GIF creators, you can check our picks ofbest free GIF creators in 2019 , which includes both offline and online gif creators. Which one(s) will you use to make a GIF online? Share with us in the comment section below.
Download Mac Version ](https://tools.techidaily.com/wondershare/filmora/download/ )
Frequently Asked Questions about Making GIFs Online
1. How to make a GIF without a watermark?
You’ll need a GIF maker or a video editing software that allows you to export GIF files without a watermark. We recommend EZGIF or Filmora Meme Maker because you can use them for free and none of your GIFs are going to be watermarked, regardless of how many you create on a daily or weekly level.
EZGIF lets you combine up to 2000 images in a single GIF file, and it supports all common image files, so that you don’t have to worry about the format in which pictures you want to include in your GIF are saved. Filmora Meme Maker is the right choice for you if you want to add text to the GIFs you create.
2. What are GIFs made of?
GIFs consist of a series of pictures that simulate a movement, and they can either be comprised of still or moving images.
In case you want to create a GIF out of photos, you will have to take a number of consecutive photos with your camera and then merge them into a GIF. The number of photos you will have to take depends on the duration of the GIF you want to create, and it varies from just five to more than one thousand.
Optionally, you can also create GIFs from video files, but you should keep in mind that the sound is going to be removed automatically, as GIF files cannot contain audio.
Shanoon Cox
Shanoon Cox is a writer and a lover of all things video.
Follow @Shanoon Cox
How to Liven Up Your Animate Website on Scroll
How to Liven Up Your Animate Website on Scroll
An easy yet powerful editor
Numerous effects to choose from
Detailed tutorials provided by the official channel
“I am looking for the information about animate website on a scroll and how to use the parallax scrolling on the website. Can I get some reference websites and a video editor for editing the parallax videos?”

The animate website on scroll is a new and latest feature offered by the developers in the new websites. Here, in this article, we are going to discuss the animate scroll websites.
In this article
01 [The Benefits of Scroll Animation That Few People Know](#Part 1)
02 [Top 5 Scroll-to-Animate Effects in Online Animation](#Part 2)
03 [10 Websites With Inspiring Scrolling Animation](#Part 3)
Part 1 The Benefits of Scroll Animation That Few People Know
01 What is Scroll Animation?
Scroll animation is a feature offered by the website developers on the website where you will see the elements when you move the cursor on the website or when you scroll the webpage of the website.

Previously this concept was not much popular because sometimes website visitors can get confused with this feature but as per a few kinds of research, it is observed that this feature is more user friendly than the common websites. This technique also helps people to make the content more visible at the time of scrolling the website.
02 Why Should You Use On-Scroll Animation Effects?
There are many positive aspects of using the On-Scroll animation effects for your websites. When you use this animation on your website then you will see a wow factor on your website and your visitors will be happy while browsing.
#1: Visitors Never Lost while Navigating
In the on scroll animation effects when the visitors scroll your website then they will never feel lost and they can easily understand that where they started and ended up.
#2: Animate website on Scroll can attract the Visitor Attention to Call to Action
If you use the animate website on a scroll then your website visitors can get direct attention to the call to action buttons available on your webpage. It can easily attract the attention of visitors to any specific place where you want. On scroll, the animation is just like pointing at anyone with a finger. The working of this technique is that when a user starts browsing and scrolling on your website then it starts loading the next steps.
#3: It keeps Visitors Engaged
With the animate website on scroll whenever a visitor scrolls down to the webpages then they will find the interesting content in every scroll. It gives a very good view to the user than the static website content. Users show interest in reading the whole page.
#4: Scrolling Decrease the Page Loading Time
In the scroll animation users slowly scroll the website to find the content which helps you to decrease the loading time of a webpage. Scrolling always loads the elements one by one when they need.
Part 2 Top 5 Scroll-to-Animate Effects in Online Animation
01 Scroll Through Image to Change Text Parallax Effect
In the Scroll through Image effect, you will see the content of the webpage after scrolling through the image on the website and developed by codemyui.

02 Hero Book Cover Slide to Intro – Mobile Friendly
In this animation effect when you move the cursor on the image then the image will turn upside and you will be able to see the content written on the webpage.

03 Marquee Page Border Effect On Scroll using GSAP
Marquee page border effect as the name of this scroll effect tells about it that in this effect you will simply see the moving border when you scroll from all 4 sides. It gives a great look to your videos.

04 Scrollable Agency Portfolio Grid Design
Scrollable Agency Portfolio Grid Design effect is specially designed for the agencies. It gives a very creative look to the web pages. You can simply scroll the web pages from the right to the left side and then finally select the content using the call to action buttons.

05 Change Text Color and Side across Image on Scroll
This scrolling effect allows you to give a text-changing effect on your web pages. When a visitor scroll on your website pages then they will see the changes in the colors of the text which gives a superb view to your viewers.

Part 3 10 Websites with Inspiring Scrolling Animation
01 Jessandruss
Jessandruss is a wedding website developed using scrolling animation. On this website mainly the wedding story of Jess & Russ is presented by the website developers. This is an awesome design of the parallax scrolling where you can see their relationship story.

02 Fire Watch Game
Fire Watch Game website is one of the best examples of the Parallax scrolling website. On this website, developers have used around 6 layers which can be moved and show the sense of depth. On this website, parallax scrolling is not used on the whole site so you can only find it on the top of the homepage. This helps the website to make it user-friendly for the visitors and they can easily read it without any issue of the constant parallax scrolling.

03 Diesel Bad Guide
Diesel Bad guide is a one-page website that was designed for the launch of Diesel’s bad Fragrance. When visitors visit the website then they will see an image with the call to action button with the name “Bad Guide”. When you move the cursor on the call to action button you will hear a sound and after clicking you will be redirected to the product page where you can buy the fragrances. You can view the direction on the website to use it. You can use your mouse to drag the products from up to down and down to upside. This is completely developed using parallax scrolling.

04 ToyFight
ToyFight is the most popular and award-winning website where you can find thousands of cool features. This website is designed with the use of parallax scrolling and 3D technology. When you move the cursor on this website then the toys move a little bit in the background which is the effect of parallax scrolling. All pages of this website are designed using parallax scrolling.

05 New York Times: Snowfall
Snowfall is a webpage designed on the New York Times website shows that how the parallax scrolling is used to show a story related to the snowfall. On this webpage, they used parallax scrolling on the images and videos which show the tunnel creek avalanche. This story is very old and published in 2012 but still, this is the best example of parallax scrolling usage.

06 Dog studio
Dog studio is an awesome website developed using the parallax scrolling effect. In the background, you will see a 3D animated dog that continuously moves when you scroll on the website. It also changes the color of the dog when you hover the mouse on the titles of the website. The do position also changes as you scroll down the website.

07 Delassus Group
Delassus Group’s website is the most popular example of horizontal scrolling. Mostly all websites work in vertical scrolling while using parallax scrolling but in the case of the Delassus group website, you will see the website display its products horizontally in a very attractive way.
08 Louie Sellers
Recapafteruse website is a portfolio website which is designed by Louie Seller and they always use a very clever parallax scrolling effect to keep interesting the webpage for their visitors. Recapafteruse is their business name. On the website when you first start scrolling then the pen will uncap and when you finish scrolling and reach the end of the page then the pen will be closed again. It reflects his business name “RecapAfterUse”. This effect is used on every webpage of the website.

09 The story of The Goonies
Goonies website is another example of parallax scrolling. On this website when you visit the first page you will see the image with the water and mountains and after starting the scrolling you will start seeing the images of kids and after that credits page and finally the gallery page. This is a one-page website and parallax scrolling is used on the whole webpage.

10 Wondershare Filmora
Wondershare Filmora is advanced video editing software that helps you to edit the videos for your parallax scrolling websites. It offers you several advanced video editing options with the easiest-to-use interface. The software is available for windows as well as Mac users to edit the videos. With the help of Wondershare Filmora, you can easily edit the videos with cool features such as motion tracking, color matching, audio ducking, split-screen, using premade templates, controlling the video speed, etc. The Wondershare Filmora offers you basic to advanced level options for editing your videos for parallax scrolling with the easy-to-use interface so you can use it even you are a newbie in video editing without any issue.
Key Takeaways from This Episode
● This is all about the parallax scrolling website and its examples.
● There are many different high-tech blog sites are available that use different types of parallax scrolling animation designs to keep their users engaged.
● These look very attractive and you get the chance to get more viewers for your website.
● If you are looking for making the best animation video to use with your parallax scrolling website then we would like to suggest the Wondershare Filmora software as it can help you to create the best videos for your parallax scrolling website.
“I am looking for the information about animate website on a scroll and how to use the parallax scrolling on the website. Can I get some reference websites and a video editor for editing the parallax videos?”
The animate website on scroll is a new and latest feature offered by the developers in the new websites. Here, in this article, we are going to discuss the animate scroll websites.
In this article
01 [The Benefits of Scroll Animation That Few People Know](#Part 1)
02 [Top 5 Scroll-to-Animate Effects in Online Animation](#Part 2)
03 [10 Websites With Inspiring Scrolling Animation](#Part 3)
Part 1 The Benefits of Scroll Animation That Few People Know
01 What is Scroll Animation?
Scroll animation is a feature offered by the website developers on the website where you will see the elements when you move the cursor on the website or when you scroll the webpage of the website.
Previously this concept was not much popular because sometimes website visitors can get confused with this feature but as per a few kinds of research, it is observed that this feature is more user friendly than the common websites. This technique also helps people to make the content more visible at the time of scrolling the website.
02 Why Should You Use On-Scroll Animation Effects?
There are many positive aspects of using the On-Scroll animation effects for your websites. When you use this animation on your website then you will see a wow factor on your website and your visitors will be happy while browsing.
#1: Visitors Never Lost while Navigating
In the on scroll animation effects when the visitors scroll your website then they will never feel lost and they can easily understand that where they started and ended up.
#2: Animate website on Scroll can attract the Visitor Attention to Call to Action
If you use the animate website on a scroll then your website visitors can get direct attention to the call to action buttons available on your webpage. It can easily attract the attention of visitors to any specific place where you want. On scroll, the animation is just like pointing at anyone with a finger. The working of this technique is that when a user starts browsing and scrolling on your website then it starts loading the next steps.
#3: It keeps Visitors Engaged
With the animate website on scroll whenever a visitor scrolls down to the webpages then they will find the interesting content in every scroll. It gives a very good view to the user than the static website content. Users show interest in reading the whole page.
#4: Scrolling Decrease the Page Loading Time
In the scroll animation users slowly scroll the website to find the content which helps you to decrease the loading time of a webpage. Scrolling always loads the elements one by one when they need.
Part 2 Top 5 Scroll-to-Animate Effects in Online Animation
01 Scroll Through Image to Change Text Parallax Effect
In the Scroll through Image effect, you will see the content of the webpage after scrolling through the image on the website and developed by codemyui.
02 Hero Book Cover Slide to Intro – Mobile Friendly
In this animation effect when you move the cursor on the image then the image will turn upside and you will be able to see the content written on the webpage.
03 Marquee Page Border Effect On Scroll using GSAP
Marquee page border effect as the name of this scroll effect tells about it that in this effect you will simply see the moving border when you scroll from all 4 sides. It gives a great look to your videos.
04 Scrollable Agency Portfolio Grid Design
Scrollable Agency Portfolio Grid Design effect is specially designed for the agencies. It gives a very creative look to the web pages. You can simply scroll the web pages from the right to the left side and then finally select the content using the call to action buttons.
05 Change Text Color and Side across Image on Scroll
This scrolling effect allows you to give a text-changing effect on your web pages. When a visitor scroll on your website pages then they will see the changes in the colors of the text which gives a superb view to your viewers.
Part 3 10 Websites with Inspiring Scrolling Animation
01 Jessandruss
Jessandruss is a wedding website developed using scrolling animation. On this website mainly the wedding story of Jess & Russ is presented by the website developers. This is an awesome design of the parallax scrolling where you can see their relationship story.
02 Fire Watch Game
Fire Watch Game website is one of the best examples of the Parallax scrolling website. On this website, developers have used around 6 layers which can be moved and show the sense of depth. On this website, parallax scrolling is not used on the whole site so you can only find it on the top of the homepage. This helps the website to make it user-friendly for the visitors and they can easily read it without any issue of the constant parallax scrolling.
03 Diesel Bad Guide
Diesel Bad guide is a one-page website that was designed for the launch of Diesel’s bad Fragrance. When visitors visit the website then they will see an image with the call to action button with the name “Bad Guide”. When you move the cursor on the call to action button you will hear a sound and after clicking you will be redirected to the product page where you can buy the fragrances. You can view the direction on the website to use it. You can use your mouse to drag the products from up to down and down to upside. This is completely developed using parallax scrolling.
04 ToyFight
ToyFight is the most popular and award-winning website where you can find thousands of cool features. This website is designed with the use of parallax scrolling and 3D technology. When you move the cursor on this website then the toys move a little bit in the background which is the effect of parallax scrolling. All pages of this website are designed using parallax scrolling.
05 New York Times: Snowfall
Snowfall is a webpage designed on the New York Times website shows that how the parallax scrolling is used to show a story related to the snowfall. On this webpage, they used parallax scrolling on the images and videos which show the tunnel creek avalanche. This story is very old and published in 2012 but still, this is the best example of parallax scrolling usage.
06 Dog studio
Dog studio is an awesome website developed using the parallax scrolling effect. In the background, you will see a 3D animated dog that continuously moves when you scroll on the website. It also changes the color of the dog when you hover the mouse on the titles of the website. The do position also changes as you scroll down the website.
07 Delassus Group
Delassus Group’s website is the most popular example of horizontal scrolling. Mostly all websites work in vertical scrolling while using parallax scrolling but in the case of the Delassus group website, you will see the website display its products horizontally in a very attractive way.
08 Louie Sellers
Recapafteruse website is a portfolio website which is designed by Louie Seller and they always use a very clever parallax scrolling effect to keep interesting the webpage for their visitors. Recapafteruse is their business name. On the website when you first start scrolling then the pen will uncap and when you finish scrolling and reach the end of the page then the pen will be closed again. It reflects his business name “RecapAfterUse”. This effect is used on every webpage of the website.
09 The story of The Goonies
Goonies website is another example of parallax scrolling. On this website when you visit the first page you will see the image with the water and mountains and after starting the scrolling you will start seeing the images of kids and after that credits page and finally the gallery page. This is a one-page website and parallax scrolling is used on the whole webpage.
10 Wondershare Filmora
Wondershare Filmora is advanced video editing software that helps you to edit the videos for your parallax scrolling websites. It offers you several advanced video editing options with the easiest-to-use interface. The software is available for windows as well as Mac users to edit the videos. With the help of Wondershare Filmora, you can easily edit the videos with cool features such as motion tracking, color matching, audio ducking, split-screen, using premade templates, controlling the video speed, etc. The Wondershare Filmora offers you basic to advanced level options for editing your videos for parallax scrolling with the easy-to-use interface so you can use it even you are a newbie in video editing without any issue.
Key Takeaways from This Episode
● This is all about the parallax scrolling website and its examples.
● There are many different high-tech blog sites are available that use different types of parallax scrolling animation designs to keep their users engaged.
● These look very attractive and you get the chance to get more viewers for your website.
● If you are looking for making the best animation video to use with your parallax scrolling website then we would like to suggest the Wondershare Filmora software as it can help you to create the best videos for your parallax scrolling website.
Adobe Animate Rigging’s PROPER Tutorial for You
Adobe Animate Rigging’s PROPER Tutorial for You
An easy yet powerful editor
Numerous effects to choose from
Detailed tutorials provided by the official channel
Character rigging involves some easy steps. And the best way for it is Adobe animate rigging. We have laid down the following discussion to help you learn the easiest method of character rigging. And along with it, we will also help you understand both 2D and 3D character designing most effortlessly.
Lastly, and most importantly, it is vital to opt for the simplest yet feature-loaded tool for any animation work. Thus, we will also mention the best tool for animation and video editing. So, without any further wait, let us start our discussion.
In this article
01 [How to Rig a Simple Character | Adobe Animate Tutorial](#Part 1)
02 [Step by Step to Help You Understand 2D/3D Character Design](#Part 2)
Part 1 How to Rig a Simple Character | Adobe Animate Tutorial
Character rigging in Adobe is effortless and straightforward. There are a few steps for rigging in adobe animate, and we will be discussing and explaining the different steps that will help you learn rigging characters for your animation works.
The following are the steps to help you create a rig in Adobe animate.
Step 1: The first step involves selecting the shape for rigging. Otherwise, you can also use bitmap on stage for it.
**Step 2:**Look for the “Asset warp tool” present in the tool panel. This tool will help you in the process of rigging.

Step 3: Create the first joint using the “Asset warp tool” by clicking on the image or the bitmap with the tool. You will see that a triangular mesh-like structure has been formed on your image or bitmap. And the part where you clicked on the image or the bitmap with the “Asset warp tool” forms the first joint.

Step 4: The next step involves making more joints on the image and instilling bones between the joints. For that, go to the “Warp Options” and choose the “Tools” tab. There you will see the option of “Create bones”. Ensure to enable the “Create bones” option; otherwise, you will not create bones between the different joints.

Step 5: Complete the rig formation by joining all the joints correctly with each other with the help of the bones.

The above steps would help you create the rig for the image or bitmap you want to animate. And now, the following steps will help you learn the steps for modifying the rig as well as tweening.
The first process for it is deformation. So, the following are the steps that help you perform the process of deformation in animation.
Step 6: You need to deform the mesh, and you can do so by holding and dragging the joint with the help of the “Asset warp tool”.

**Step 7:**You can also rotate a bone by clicking and dragging the bone you want to rotate when you drag a joint, the size of the joint changes, which is not the case when you drag a bone. Its size remains constant.

Now, we will help you learn to work with the different keyframes. The keyframes enable the image or the bitmap to acquire different poses, vital for animation. The “Edit Multiple Frames” mode helps you work with different keyframes.
You can readily create new keyframes and deform the image through joints or bones. Each keyframe retains its own set, and you can integrate different transforms after setting one pose for the image in the keyframe.

Part 2 Step by Step to Help You Understand 2D/Character Design
Animation is immensely enjoyable and takes the best of our creativity. And as we know, there are two major and most renowned types of it. One is the 2-dimensional animation, which we know as the animation. And the other one is 3-dimensional, better known as animation.
Now, there are different aspects that are essential for anyone aspiring to animate, whether in or 3D, to know. One of the aspects is designing characters for animation. And we have ideally put forth a discussion about the different factors you need to know about character designing in and animation.
01Animate Character Design
There are some steps involved in the designing a character for animation. And those steps are pretty diverse. So, we have enlisted all the required steps and factors to help you learn and understand character designing for animation. The list is as follows.
02Understanding your audience
To create the best character design, it is essential that you understand your target audience. If your target audience includes the kids and the children, your character design will primarily be based on cartoons.
Ensure which genre of animation does your audience prefer? If it is funny or mythological or any other genre, you design your characters accordingly.

03Understand the type of characters or animation you are going to create
There are different types of animation or characters in animation. Different types serve different purposes and genres. So, let us know about the different types of animations, and this will help you understand which one would suit your requirements.
● Pop-style Characters
The characters you see in the comics and superhero animation movies are pop-style characters. They are highly expressive, become the centre of attraction and always are dominant on the screen. They tend to deliver an energy that reaches the audience impeccably.

● Iconic design
These characters are less fancy but highly expressive. They usually have a block face yet connect to an audience of all types. They are generally best for the corporate videos and those with some messages to be delivered.

● Editorial Style Characters
These characters are highly elegant and bold. These are characters that we see in different publications. They consist of great style, realisticity and cleanliness. They are mainly used to express the quality of presence.

● Sketch and experiment
Now that you know about the different character types, it will help you understand which one would match the genre of animation you prefer to work on. So, start sketching your imagination in a draft.
Decide on the different poses your character might have. Track them down in a draft. It helps you become organised and put down your plan and creativity collectively.
Trial and error are one of the best ways to achieve perfection. So, it is crucial to sketch and then take feedback. If they do not appear praiseworthy, continue sketching and then get feedback again.
● Animate and execute
Lastly, it would be best to execute all your drafts and imaginations. Try using the animation tools that suit your skill capacity and genre of animation the best.
04Animate Character Design
There are five simple steps that will help you animate a character design in 3D. The steps are as follows.
● Contrivance the ideas
Try to include such characters that include several layers. It helps in better animation and also makes your creativity sphere widen.

● Designing the character
Your main character has a large to play. So, use all the necessary tools, starting from photoshop to all the other significant factors, to make your character attain all the features necessary for standing out. It also ensures that you can readily apply all the animation techniques and give your creativity shape.

● Modelling the environment
Adding props to the background is an option. You may choose not to include any props as well. You can add the required props and accessories to your main characters. It includes clothes, scars and the like.

● Animation
It is the main step. Use the best tool for animation and instill all the necessary animation processes. Use the different layers in your main character. Set up the primary constraints and animate the background and the props. Ensure proper light settings and set the handheld camera movements as well.

● Playblast settings
Here you choose the appropriate size of your animation video. It is also an important step, which completes your animation of the character in animation.

Now that we know about the different essential aspects of and animation and character design knowing which tool can help us in the most effortless yet best quality video editing. So, as promised before, we will now discuss the best video editing tool, Wondershare Filmora Video Editor !
Here are the best features of Filmora that can ideally help you in video editing.
● Professional quality video editing tools include video stabilization, noise removal, colour tuning, audio mixer, advanced text editor, editing support, scene detection, and an audio equalizer.
● Although it is ideal for professional use, the tool is simple and effortless ot use. You face no difficulties in understating the features of the tool.
● There are over 8effects available that you can use in your videos.
● You can download it for free!
● You can readily opt for its free trial that enables you to be sure of what you are using before buying it!

For Win 7 or later (64-bit)
For macOS 10.12 or later
● Key Takeaways from This Episode →
● A piece of general information about character rigging in animation and how it is beneficial.
● A simple tutorial for character designing in and animation
● The features of the best video editing tool- Filmora.
Character rigging involves some easy steps. And the best way for it is Adobe animate rigging. We have laid down the following discussion to help you learn the easiest method of character rigging. And along with it, we will also help you understand both 2D and 3D character designing most effortlessly.
Lastly, and most importantly, it is vital to opt for the simplest yet feature-loaded tool for any animation work. Thus, we will also mention the best tool for animation and video editing. So, without any further wait, let us start our discussion.
In this article
01 [How to Rig a Simple Character | Adobe Animate Tutorial](#Part 1)
02 [Step by Step to Help You Understand 2D/3D Character Design](#Part 2)
Part 1 How to Rig a Simple Character | Adobe Animate Tutorial
Character rigging in Adobe is effortless and straightforward. There are a few steps for rigging in adobe animate, and we will be discussing and explaining the different steps that will help you learn rigging characters for your animation works.
The following are the steps to help you create a rig in Adobe animate.
Step 1: The first step involves selecting the shape for rigging. Otherwise, you can also use bitmap on stage for it.
**Step 2:**Look for the “Asset warp tool” present in the tool panel. This tool will help you in the process of rigging.
Step 3: Create the first joint using the “Asset warp tool” by clicking on the image or the bitmap with the tool. You will see that a triangular mesh-like structure has been formed on your image or bitmap. And the part where you clicked on the image or the bitmap with the “Asset warp tool” forms the first joint.
Step 4: The next step involves making more joints on the image and instilling bones between the joints. For that, go to the “Warp Options” and choose the “Tools” tab. There you will see the option of “Create bones”. Ensure to enable the “Create bones” option; otherwise, you will not create bones between the different joints.
Step 5: Complete the rig formation by joining all the joints correctly with each other with the help of the bones.
The above steps would help you create the rig for the image or bitmap you want to animate. And now, the following steps will help you learn the steps for modifying the rig as well as tweening.
The first process for it is deformation. So, the following are the steps that help you perform the process of deformation in animation.
Step 6: You need to deform the mesh, and you can do so by holding and dragging the joint with the help of the “Asset warp tool”.
**Step 7:**You can also rotate a bone by clicking and dragging the bone you want to rotate when you drag a joint, the size of the joint changes, which is not the case when you drag a bone. Its size remains constant.
Now, we will help you learn to work with the different keyframes. The keyframes enable the image or the bitmap to acquire different poses, vital for animation. The “Edit Multiple Frames” mode helps you work with different keyframes.
You can readily create new keyframes and deform the image through joints or bones. Each keyframe retains its own set, and you can integrate different transforms after setting one pose for the image in the keyframe.
Part 2 Step by Step to Help You Understand 2D/Character Design
Animation is immensely enjoyable and takes the best of our creativity. And as we know, there are two major and most renowned types of it. One is the 2-dimensional animation, which we know as the animation. And the other one is 3-dimensional, better known as animation.
Now, there are different aspects that are essential for anyone aspiring to animate, whether in or 3D, to know. One of the aspects is designing characters for animation. And we have ideally put forth a discussion about the different factors you need to know about character designing in and animation.
01Animate Character Design
There are some steps involved in the designing a character for animation. And those steps are pretty diverse. So, we have enlisted all the required steps and factors to help you learn and understand character designing for animation. The list is as follows.
02Understanding your audience
To create the best character design, it is essential that you understand your target audience. If your target audience includes the kids and the children, your character design will primarily be based on cartoons.
Ensure which genre of animation does your audience prefer? If it is funny or mythological or any other genre, you design your characters accordingly.
03Understand the type of characters or animation you are going to create
There are different types of animation or characters in animation. Different types serve different purposes and genres. So, let us know about the different types of animations, and this will help you understand which one would suit your requirements.
● Pop-style Characters
The characters you see in the comics and superhero animation movies are pop-style characters. They are highly expressive, become the centre of attraction and always are dominant on the screen. They tend to deliver an energy that reaches the audience impeccably.
● Iconic design
These characters are less fancy but highly expressive. They usually have a block face yet connect to an audience of all types. They are generally best for the corporate videos and those with some messages to be delivered.
● Editorial Style Characters
These characters are highly elegant and bold. These are characters that we see in different publications. They consist of great style, realisticity and cleanliness. They are mainly used to express the quality of presence.
● Sketch and experiment
Now that you know about the different character types, it will help you understand which one would match the genre of animation you prefer to work on. So, start sketching your imagination in a draft.
Decide on the different poses your character might have. Track them down in a draft. It helps you become organised and put down your plan and creativity collectively.
Trial and error are one of the best ways to achieve perfection. So, it is crucial to sketch and then take feedback. If they do not appear praiseworthy, continue sketching and then get feedback again.
● Animate and execute
Lastly, it would be best to execute all your drafts and imaginations. Try using the animation tools that suit your skill capacity and genre of animation the best.
04Animate Character Design
There are five simple steps that will help you animate a character design in 3D. The steps are as follows.
● Contrivance the ideas
Try to include such characters that include several layers. It helps in better animation and also makes your creativity sphere widen.
● Designing the character
Your main character has a large to play. So, use all the necessary tools, starting from photoshop to all the other significant factors, to make your character attain all the features necessary for standing out. It also ensures that you can readily apply all the animation techniques and give your creativity shape.
● Modelling the environment
Adding props to the background is an option. You may choose not to include any props as well. You can add the required props and accessories to your main characters. It includes clothes, scars and the like.
● Animation
It is the main step. Use the best tool for animation and instill all the necessary animation processes. Use the different layers in your main character. Set up the primary constraints and animate the background and the props. Ensure proper light settings and set the handheld camera movements as well.
● Playblast settings
Here you choose the appropriate size of your animation video. It is also an important step, which completes your animation of the character in animation.
Now that we know about the different essential aspects of and animation and character design knowing which tool can help us in the most effortless yet best quality video editing. So, as promised before, we will now discuss the best video editing tool, Wondershare Filmora Video Editor !
Here are the best features of Filmora that can ideally help you in video editing.
● Professional quality video editing tools include video stabilization, noise removal, colour tuning, audio mixer, advanced text editor, editing support, scene detection, and an audio equalizer.
● Although it is ideal for professional use, the tool is simple and effortless ot use. You face no difficulties in understating the features of the tool.
● There are over 8effects available that you can use in your videos.
● You can download it for free!
● You can readily opt for its free trial that enables you to be sure of what you are using before buying it!
For Win 7 or later (64-bit)
For macOS 10.12 or later
● Key Takeaways from This Episode →
● A piece of general information about character rigging in animation and how it is beneficial.
● A simple tutorial for character designing in and animation
● The features of the best video editing tool- Filmora.
That Will Make Aesthetic Cartoon Drawing More Understandable
That Will Make Aesthetic Cartoon Drawing More Understandable
An easy yet powerful editor
Numerous effects to choose from
Detailed tutorials provided by the official channel
When you are trying to make an aesthetic drawings cartoon, the primary thing to focus on is the composition. Composition is the combination, arrangement, and organization of objects within the borders of drawing space. To have a great aesthetic cartoon drawing, you must focus on bringing the eyes of the viewer toward your center of interest within an aesthetically-pleasing composition. When we create illustrations, we are often concerned with putting in a lot of details that will overload the image and lose the meaning that we originally wanted it to convey.

We engage our audience and viewer more by composing a perfect aesthetic drawing. In addition, many rules define a good composition drawing, but these rules are mainly guidelines. Also pay attention to your personal preferences and instincts. In this guide, we’ll teach you how to make an excellent aesthetic cartoon painting more understandable.
In this article
01 [Canvas Aesthetic Painting Ideas](#Part 1)
02 [Blender Aesthetic Painting Ideas](#Part 2)
03 [How to Create Super-Detailed Aesthetic Cartoon Painting](#Part 3)
Part 1 Canvas Aesthetic Painting Ideas
There are times you do not need to be a famous painter or an art professional to create beautiful wall art. Canvas painting is an all-in-one application for all skill levels, from beginners to experts. It also provides you with different painting ideas ranging from beach scenes to abstract designs to create pieces that look stunning and professional.
We have compiled a list of canvas aesthetic painting ideas to help you begin your journey as an aesthetic cartoon painter. Look through the images to determine which ones match the style of painting you wish to add to your drawing and get inspiration to create your designs.
01Disney Canvas Art
These are aesthetic cartoon painting ideas relating to 2020 Disney Canvas Art. You can get ideas from this to begin your journey into the world of painting.

02Hippie Painting Canva Art
If you are also looking for other aesthetic cartoon painting ideas to choose from, you can select from this 2020 Cute Canvas Paintings “Hippie Painting” Canvas Art.

03Spongebob Painting
These painting ideas are a part of the Canvas Aesthetic Cartoon Painting ideas of 2020 called Spongebob Painting Disney Canvas Art.

04Babs Bunny Pa Et Mini Lerret
These are a painting about “Babs Bunny Pa Et Mini Lerret.” A 2020 Mini Canvas Art Hippie Painting Canvas idea that you can choose from

Part 2 Blender Aesthetic Painting Ideas
Blender is an accessible and open-source 3D creation suite that supports the entirety of the 3D pipeline modeling, rigging, animation, simulation, compositing rendering, motion tracking, video editing, and 2D animation pipeline. It is a fact that this is one of the best open-source software you can choose from to make your aesthetic cartoon drawing.
It is entirely free software, and various artists can use it to start digging in and playing with it. Here are some of the blender aesthetic cartoon painting ideas you can choose from:
01Princess Ira and Amina
This is a fictional aesthetic drawing cartoon of an African princess having gold gifted powers with her face painting inspired by Nigerian traditional face decorations. However, her crown is adorned with crosses, crystals, and chains which incorporate several elements from different cultural designs available from all over the world to portray unity.

02Survival Knife Weekly Drills 045
This was a design painting inspired based on BUCK KNIVES in pain texturing and focuses on making a practical game-ready asset.

03Radiance
This is a blender aesthetic cartoon painting idea of a graduation project made for the Concept Art specialized cursus at New3dge School.

04 The character looks dev
This blender cartoon painting’s inspiration came from Edward, the short film’s main character. It is a work in progress but a lovely painting that can inspire you.
Part 3 How to Create Super-Detailed Aesthetic Cartoon Painting
To create a super detailed aesthetic cartoon drawing, you do not need to be a trained artist, nor do you need a fancy cartoon picture maker. All you need to create a cartoon painting photo is a simple and Free picture from a cartoon editor to help you carry out the task more effectively.
However, you can also convert your cartoon paint into creative animation using Wondershare Filmora Video Editor . Filmora is a powerful all-in-one tool for editing that you can use to that can be used for free to animate your cartoon with its tons of effects, filters, and keyframing features that can help you carry this out effectively.
For Win 7 or later (64-bit)
For macOS 10.12 or later
Here is how to create a super detailed aesthetic cartoon painting:

Step 1: Open the Picsart editor on your desktop browser and click on the new project
Step 2: Next is to click on Upload to select the photo that you want to cartoon paint from the computer library of your hard drive
Step 2: Click on the toolbar, select the effect feature from the dropdown above your photo, and click on Magic to view all available one-click cartoon filters. However, almost all of the Magic effects on this editor will help you achieve an aesthetic cartoon photo effect.
Step 4: Click on Adjust and Blend above your photo workspace on the editor. This will help you manually adjust the effects (color burn, fade, saturation, brightness, etc.).
Step 5: Preview your result and once you are happy with the new cartoon photo painting, click on the Share button and download it from the top right corner of the editor to save it on your device.
● Ending Thoughts →
● This article explained creating and gave inspiration and ideas for the aesthetic cartoon painting you can choose from to make yours. In addition, the report also recommends Filmora as an influential editor if you intend to create an animation from your cartoon painting due to its tons of features.
● So, now you can start building your aesthetic drawings and cartoons!
When you are trying to make an aesthetic drawings cartoon, the primary thing to focus on is the composition. Composition is the combination, arrangement, and organization of objects within the borders of drawing space. To have a great aesthetic cartoon drawing, you must focus on bringing the eyes of the viewer toward your center of interest within an aesthetically-pleasing composition. When we create illustrations, we are often concerned with putting in a lot of details that will overload the image and lose the meaning that we originally wanted it to convey.
We engage our audience and viewer more by composing a perfect aesthetic drawing. In addition, many rules define a good composition drawing, but these rules are mainly guidelines. Also pay attention to your personal preferences and instincts. In this guide, we’ll teach you how to make an excellent aesthetic cartoon painting more understandable.
In this article
01 [Canvas Aesthetic Painting Ideas](#Part 1)
02 [Blender Aesthetic Painting Ideas](#Part 2)
03 [How to Create Super-Detailed Aesthetic Cartoon Painting](#Part 3)
Part 1 Canvas Aesthetic Painting Ideas
There are times you do not need to be a famous painter or an art professional to create beautiful wall art. Canvas painting is an all-in-one application for all skill levels, from beginners to experts. It also provides you with different painting ideas ranging from beach scenes to abstract designs to create pieces that look stunning and professional.
We have compiled a list of canvas aesthetic painting ideas to help you begin your journey as an aesthetic cartoon painter. Look through the images to determine which ones match the style of painting you wish to add to your drawing and get inspiration to create your designs.
01Disney Canvas Art
These are aesthetic cartoon painting ideas relating to 2020 Disney Canvas Art. You can get ideas from this to begin your journey into the world of painting.
02Hippie Painting Canva Art
If you are also looking for other aesthetic cartoon painting ideas to choose from, you can select from this 2020 Cute Canvas Paintings “Hippie Painting” Canvas Art.
03Spongebob Painting
These painting ideas are a part of the Canvas Aesthetic Cartoon Painting ideas of 2020 called Spongebob Painting Disney Canvas Art.
04Babs Bunny Pa Et Mini Lerret
These are a painting about “Babs Bunny Pa Et Mini Lerret.” A 2020 Mini Canvas Art Hippie Painting Canvas idea that you can choose from
Part 2 Blender Aesthetic Painting Ideas
Blender is an accessible and open-source 3D creation suite that supports the entirety of the 3D pipeline modeling, rigging, animation, simulation, compositing rendering, motion tracking, video editing, and 2D animation pipeline. It is a fact that this is one of the best open-source software you can choose from to make your aesthetic cartoon drawing.
It is entirely free software, and various artists can use it to start digging in and playing with it. Here are some of the blender aesthetic cartoon painting ideas you can choose from:
01Princess Ira and Amina
This is a fictional aesthetic drawing cartoon of an African princess having gold gifted powers with her face painting inspired by Nigerian traditional face decorations. However, her crown is adorned with crosses, crystals, and chains which incorporate several elements from different cultural designs available from all over the world to portray unity.
02Survival Knife Weekly Drills 045
This was a design painting inspired based on BUCK KNIVES in pain texturing and focuses on making a practical game-ready asset.
03Radiance
This is a blender aesthetic cartoon painting idea of a graduation project made for the Concept Art specialized cursus at New3dge School.
04 The character looks dev
This blender cartoon painting’s inspiration came from Edward, the short film’s main character. It is a work in progress but a lovely painting that can inspire you.
Part 3 How to Create Super-Detailed Aesthetic Cartoon Painting
To create a super detailed aesthetic cartoon drawing, you do not need to be a trained artist, nor do you need a fancy cartoon picture maker. All you need to create a cartoon painting photo is a simple and Free picture from a cartoon editor to help you carry out the task more effectively.
However, you can also convert your cartoon paint into creative animation using Wondershare Filmora Video Editor . Filmora is a powerful all-in-one tool for editing that you can use to that can be used for free to animate your cartoon with its tons of effects, filters, and keyframing features that can help you carry this out effectively.
For Win 7 or later (64-bit)
For macOS 10.12 or later
Here is how to create a super detailed aesthetic cartoon painting:
Step 1: Open the Picsart editor on your desktop browser and click on the new project
Step 2: Next is to click on Upload to select the photo that you want to cartoon paint from the computer library of your hard drive
Step 2: Click on the toolbar, select the effect feature from the dropdown above your photo, and click on Magic to view all available one-click cartoon filters. However, almost all of the Magic effects on this editor will help you achieve an aesthetic cartoon photo effect.
Step 4: Click on Adjust and Blend above your photo workspace on the editor. This will help you manually adjust the effects (color burn, fade, saturation, brightness, etc.).
Step 5: Preview your result and once you are happy with the new cartoon photo painting, click on the Share button and download it from the top right corner of the editor to save it on your device.
● Ending Thoughts →
● This article explained creating and gave inspiration and ideas for the aesthetic cartoon painting you can choose from to make yours. In addition, the report also recommends Filmora as an influential editor if you intend to create an animation from your cartoon painting due to its tons of features.
● So, now you can start building your aesthetic drawings and cartoons!
Before You Learn Facebook Slideshow: 5 Things You Should Know [How-TOS]
Before You Learn Facebook Slideshow Things You Should Know [How-TOS]
An easy yet powerful editor
Numerous effects to choose from
Detailed tutorials provided by the official channel
If you are looking for interesting solutions to create the most amazing slideshow on Facebook, rest assured, you are at the right place to get every help!
In this article
01 [Where Did the Facebook Slideshow Tool Go?](#Part 1)
02 [How to Create a Slideshow on Facebook?](#Part 2)
03 [Top 5 Facebook Slideshow Alternatives](#Part 3)
Part 1 Where Did the Facebook Slideshow Tool Go?
While almost everyone around you must be fascinated about the stunning and appealing slideshows that the Facebook community used to offer its users with, it is evidently sad to realize that the utility has become a story of the past. The creators of the tool have by now, took multiple rounds on removing, retrieving and again removing the utility from the official Facebook website as well as the smartphone application.
It is however relaxing to know that the Facebook developer team has worked efficiently to produce alternatives to the application’s slideshow tool after the latter’s permanent disappearance from the user account pages and app profiles. You can now work with the Facebook Ads Manager or Facebook Creator Studio to sort out the concern of creating slideshow on Facebook.
Part 2 How to Create a Slideshow on Facebook?
Facebook slideshows are incredibly awesome trends of making a concise, expressive and to the point delivery of diverse content varieties. Piping up your information through and extensive assortment of sound, text and motion, these short snippets are no less than a seamless video streaming of the same information.
If you are about to launch a new product for your business enterprise, consider working with the utility to create an elusive Facebook slideshow ad for a quick demonstration of your brand among different social media communities, turning the fun of slideshow creation into a smart and responsive product promotion strategy, without having to bother your wallet for the same.
If you are concerned about the quality of the final output, it is not a cause of worry, since the Facebook slideshow creator tool promises you of an appreciable slideshow result, that takes a quick loading time, is comparable to a high resolution video and works well with all your favourite devices.
Having talked enough on the usage credibility, let us now proceed to adhere to the concern of creating a slideshow on Facebook with a diversity of media files in the following section:
01Facebook Slideshows from Videos
Step 1: Launch the Tool
Start with opening the Facebook app in your device to launch the ‘Facebook Ads Manager’ utility and tap ‘Create’ in the latter’s welcome interface.

Step 2: Select Your Video
Browse through your device’s gallery to choose a desired video for slideshow creation. When you have made your choice, set a 16:9 aspect ratio for the same to avoid square cropping.

Step 3: Upload Your Video
Proceed with uploading your video to the Facebook tool by clicking on the ‘Add Video’ button and watch it getting split into still images frames, from where you can view a seamless slideshow display of the same.

Step 4: Select Multiple Frames
you can now select a series of image frames and arrange them in the correct sequence of appearance by clicking on each one of them to be included within the creator timeline.
Step 5: Add Captions Your Stills
Tap on the small ‘Pencil’ icon within the images to customize them with suitable captions. You can further add style to these image names by making appropriate selections of font, position color of every frame caption. Once you have finished naming all the frames, click on ‘Save’ to apply your changes.
Step 6: Preview Your Creation
When you are satisfied with your work, consider watching a preview of the same to be assured of the perfect placement of everything. To do this, navigate to the ‘Preview Pane’ at the top right corner of the program interface, and tapping the ‘Preview’ button.
02Facebook Slideshows from Images
Step 1: Launch the Tool
To begin with, open the Facebook app in any of your preferred devices and proceed to launch the ‘Facebook Ads Manager’ tool, followed by clicking on the ‘Create Slideshow’ button at the bottom of the tool’s welcome screen.

Step 2: Upload Your Images
As you complete Step 1, a ‘Video Creation Kit’ will appear, where you will need to click within the ‘Create Slideshow’ checkbox, followed by tapping on the ‘Continue’ button at the bottom right corner of the window.

Step 3: Upload Your Images
Clicking on the ‘Continue’ button will take you to the ‘Settings Box’ where you need to tap on the ‘Add Photos’ option. An image selection box will now pop up, allowing you to select and upload a maximum of 10 images from your Facebook account, stock and page galleries or your device collections. Prefer keeping all the photos within the same aspect ratio to escape the extra task of cropping the images.
When you have finished making your selections, navigate to the bottom right corner of the window and hit the ‘Confirm’ button. This will make your selections shows up all together in the ‘Settings Box’, in the sequential order of their appearance in the slideshow. If you want to introduce some changes, delete and re-upload the images.

Step 4: Customize Your Images with Captions
To add suitable captions to the slideshow images, tap the ‘Pencil’ icon within them. You are also allowed to customize the stills with transitions, effects, etc., and make adjustments to the screen time of each image frame.

Part 3 Top 5 Facebook Slideshow Alternatives
Having heard about the disappointment from the exit of the Facebook slideshow creator tool, it becomes naturally important to seek through the affordable alternatives of the same to set straight the issue of how to do a slideshow on Facebook. Working towards the solutions, let us learn about the top 5 most preferred Facebook slideshow alternatives in the following section:
03PowerDirector
One of the most suitable candidates of Facebook slideshow alternatives, PowerDirector easily lands among the highly preferred tools for creating stunning slideshows. Compatible with the MacOs and Windows operating systems, the software lets you create high end, top quality slideshow presentations with a classic and professional outlook.
Talking of the creator program’s most appealing features, this one is an upgraded slideshow creator suite that is capable enough to address your most diverse design requirements, like those of high resolution video effects, Hollywood inspired movies and personal content sharing. The software package is loaded with tons of elusive video effects, themed templates and transition effects to facilitate a compelling creation.
Working with PowerDirector’s exclusive slideshow program, you get the liberty to escape the notch of storyboard and timeline editing and start the creation process in the launch window of the program itself. The extremely user cohesive interface of the software guides you through each creation step via streamlined plug-ins, making the design process quick and super easy even for newbies.

04SmartSHOW 3D
When thinking of how to make a slideshow on facebook, this one is another top rated Facebook slideshow alternatives, that comes with an extensive toolkit to create amazing presentations from video clips and images, while complementing them with a plethora of effects and transitions. Some of the key features of the program include multiple slide layering, animating selected layers and fine tune the transitions with keyframe adjustments.
You can additionally uplift the slides with image masks, shapes, 3D animated texts and other forms of graphic arts. An additively appealing feature of the slideshow creator program is the ability to mix descriptive images with your favorite music to develop stunning masterpieces of entertaining slideshows, which you can conveniently share and enjoy with family and friends on a diversity of social media platforms.
Using the tool, you can work with applying motion graphic effects to still photos without having to be an over the top tech savvy user. The editor library of the tool is loaded with some of the most awesome transition effects, like, wipes, 3D motions, gradients and fade-ins, along with the facility of adding titles, voice comments and captions to the slides of your presentation. The tool is however, exclusively a Windows compatible utility.

05PhotoStage Slideshow Software
Next in the list of alternatives to the Facebook slideshow maker tool is the aforesaid software program, that allows you to create professional quality slideshows with as many videos and images as you can possibly think of and supplement them with a variety of texts, music, voiceovers and effects. You can further work on customizing the slideshow images with making suitable adjustments in color, brightness and saturation parameters.
The software comes with a Quick Create utility, which you can use to instantly create high resolution slideshows and spark them up with zooms, pans and fades, while getting a preview of the same in real-time. You can even proceed to burn your creation into a disk, make an online upload, or simply save it to your device.
Talking of the cost constraints of this amazing slideshow creator tool, you get to work with the software for a commercial use, free of cost for a definite time period and with a restricted number of features. However, you can always consider on buying the paid version of the program to avail an access to the latter’s entire range of features and utilities. The tool works well with all Windows and Mac supported devices.

06Kizoa
Moving ahead in the list you have the Kizoa slideshow maker for Facebook, which is a dependable alternative to the conventional Facebook slideshow creator. Choosing this tool to design your slideshow presentation, you are entitled to the amazing feature of displaying your presentation on almost any screen, including smartphones, television, computers and tablets with getting to choose from 7 types of aspect ratios. The tool is designed to have a Windows and MacOs compatibility.
The application further lets you add the most specific parts of your images within the presentation slides with its smart cropping tool, while keeping an account of the file formats and screen space requirements of the images with utmost convenience. You are also allowed to choose from a storehouse of preset templates to add your desired photos and video clips in the slideshow and entice them with GIFs, effects and texts.
When you are done with the creation process, just attempt to download and save the slideshow in any preferred file format, such as, AVI, GIF, MP4, MOV, MPEG2, etc., or even burn it to a DVD. You are now free to share your slideshow on various online media sharing platforms. Using the free version of Kizoa, you are permitted to create slideshows with a duration of 60 seconds, which can be upgraded to a limitless length with a paid subscription.

07SlideLab
If you are a newbie to the field of creating slideshows, and wondering about how to create a slideshow on Facebook 2021, this one is affordably the most perfect tool you can rely on. Packed with an extensive range of effects, music, transitions and filters, SlideLab is the smartest software choice to create slideshow presentations for family entertainment and personal use.
The tool consists of an in built sharing utility that allows you to design and share slideshows on social media platforms, like YouTube, Facebook and Instagram with a single click. Working on your slideshow within the program, you can escape the cringe of cropping the images, as they are automatically adjusted to the square fit alignment of the app’s working window. You can quickly rearrange the placement of the images in the slideshow as per your preferences.
As far as the sharing credibility of the presentation is concerned, the software grants you the liberty to export your creation in PPTX and PDF file formats, and view them later in Keynote and PowerPoint.
The app shows a convenient workflow with Windows and MacOs devices and limits the image play duration to 3 seconds, along with a permitting a restricted number of transitions and effects in its free version, which you can access by availing a paid subscription of the program.

08Creating Facebook Slideshows With Wondershare Filmora
When browsing through feasible alternatives on how to make a facebook slideshow, the IT market is indeed flooded with a hoard of creation utilities. If you have just begun trying hands at slideshow creation, consider using the Wondershare Filmora Video Editor slideshow maker application for addressing your slideshow design concerns. The extensive, feature rich library of the app lets you create attractive presentation masterpieces with a wide range of special effects, transitions, texts, titles and music tracks.
For Win 7 or later (64-bit)
For macOS 10.12 or later
Working with the Filmora slideshow creator, you can trim, crop or cut the video clips and images of your presentation to give them the best look. The tool comes with a unique Filmora Template Mode to create business oriented Facebook slideshows, is compatible to any windows and Mac supported device and lets you easily make a slideshow on Facebook.
● Ending Thoughts →
● Creating Facebook slideshows can be useful in addressing a variety of personal and professional data sharing needs.
● Browsing through design alternatives, you will land across a pool of software choices to create stunning slideshows for Facebook.
● When deciding on the best Facebook slideshow creator tool, Wondershare Filmora can be your smartest pick.
If you are looking for interesting solutions to create the most amazing slideshow on Facebook, rest assured, you are at the right place to get every help!
In this article
01 [Where Did the Facebook Slideshow Tool Go?](#Part 1)
02 [How to Create a Slideshow on Facebook?](#Part 2)
03 [Top 5 Facebook Slideshow Alternatives](#Part 3)
Part 1 Where Did the Facebook Slideshow Tool Go?
While almost everyone around you must be fascinated about the stunning and appealing slideshows that the Facebook community used to offer its users with, it is evidently sad to realize that the utility has become a story of the past. The creators of the tool have by now, took multiple rounds on removing, retrieving and again removing the utility from the official Facebook website as well as the smartphone application.
It is however relaxing to know that the Facebook developer team has worked efficiently to produce alternatives to the application’s slideshow tool after the latter’s permanent disappearance from the user account pages and app profiles. You can now work with the Facebook Ads Manager or Facebook Creator Studio to sort out the concern of creating slideshow on Facebook.
Part 2 How to Create a Slideshow on Facebook?
Facebook slideshows are incredibly awesome trends of making a concise, expressive and to the point delivery of diverse content varieties. Piping up your information through and extensive assortment of sound, text and motion, these short snippets are no less than a seamless video streaming of the same information.
If you are about to launch a new product for your business enterprise, consider working with the utility to create an elusive Facebook slideshow ad for a quick demonstration of your brand among different social media communities, turning the fun of slideshow creation into a smart and responsive product promotion strategy, without having to bother your wallet for the same.
If you are concerned about the quality of the final output, it is not a cause of worry, since the Facebook slideshow creator tool promises you of an appreciable slideshow result, that takes a quick loading time, is comparable to a high resolution video and works well with all your favourite devices.
Having talked enough on the usage credibility, let us now proceed to adhere to the concern of creating a slideshow on Facebook with a diversity of media files in the following section:
01Facebook Slideshows from Videos
Step 1: Launch the Tool
Start with opening the Facebook app in your device to launch the ‘Facebook Ads Manager’ utility and tap ‘Create’ in the latter’s welcome interface.
Step 2: Select Your Video
Browse through your device’s gallery to choose a desired video for slideshow creation. When you have made your choice, set a 16:9 aspect ratio for the same to avoid square cropping.
Step 3: Upload Your Video
Proceed with uploading your video to the Facebook tool by clicking on the ‘Add Video’ button and watch it getting split into still images frames, from where you can view a seamless slideshow display of the same.
Step 4: Select Multiple Frames
you can now select a series of image frames and arrange them in the correct sequence of appearance by clicking on each one of them to be included within the creator timeline.
Step 5: Add Captions Your Stills
Tap on the small ‘Pencil’ icon within the images to customize them with suitable captions. You can further add style to these image names by making appropriate selections of font, position color of every frame caption. Once you have finished naming all the frames, click on ‘Save’ to apply your changes.
Step 6: Preview Your Creation
When you are satisfied with your work, consider watching a preview of the same to be assured of the perfect placement of everything. To do this, navigate to the ‘Preview Pane’ at the top right corner of the program interface, and tapping the ‘Preview’ button.
02Facebook Slideshows from Images
Step 1: Launch the Tool
To begin with, open the Facebook app in any of your preferred devices and proceed to launch the ‘Facebook Ads Manager’ tool, followed by clicking on the ‘Create Slideshow’ button at the bottom of the tool’s welcome screen.
Step 2: Upload Your Images
As you complete Step 1, a ‘Video Creation Kit’ will appear, where you will need to click within the ‘Create Slideshow’ checkbox, followed by tapping on the ‘Continue’ button at the bottom right corner of the window.
Step 3: Upload Your Images
Clicking on the ‘Continue’ button will take you to the ‘Settings Box’ where you need to tap on the ‘Add Photos’ option. An image selection box will now pop up, allowing you to select and upload a maximum of 10 images from your Facebook account, stock and page galleries or your device collections. Prefer keeping all the photos within the same aspect ratio to escape the extra task of cropping the images.
When you have finished making your selections, navigate to the bottom right corner of the window and hit the ‘Confirm’ button. This will make your selections shows up all together in the ‘Settings Box’, in the sequential order of their appearance in the slideshow. If you want to introduce some changes, delete and re-upload the images.
Step 4: Customize Your Images with Captions
To add suitable captions to the slideshow images, tap the ‘Pencil’ icon within them. You are also allowed to customize the stills with transitions, effects, etc., and make adjustments to the screen time of each image frame.
Part 3 Top 5 Facebook Slideshow Alternatives
Having heard about the disappointment from the exit of the Facebook slideshow creator tool, it becomes naturally important to seek through the affordable alternatives of the same to set straight the issue of how to do a slideshow on Facebook. Working towards the solutions, let us learn about the top 5 most preferred Facebook slideshow alternatives in the following section:
03PowerDirector
One of the most suitable candidates of Facebook slideshow alternatives, PowerDirector easily lands among the highly preferred tools for creating stunning slideshows. Compatible with the MacOs and Windows operating systems, the software lets you create high end, top quality slideshow presentations with a classic and professional outlook.
Talking of the creator program’s most appealing features, this one is an upgraded slideshow creator suite that is capable enough to address your most diverse design requirements, like those of high resolution video effects, Hollywood inspired movies and personal content sharing. The software package is loaded with tons of elusive video effects, themed templates and transition effects to facilitate a compelling creation.
Working with PowerDirector’s exclusive slideshow program, you get the liberty to escape the notch of storyboard and timeline editing and start the creation process in the launch window of the program itself. The extremely user cohesive interface of the software guides you through each creation step via streamlined plug-ins, making the design process quick and super easy even for newbies.
04SmartSHOW 3D
When thinking of how to make a slideshow on facebook, this one is another top rated Facebook slideshow alternatives, that comes with an extensive toolkit to create amazing presentations from video clips and images, while complementing them with a plethora of effects and transitions. Some of the key features of the program include multiple slide layering, animating selected layers and fine tune the transitions with keyframe adjustments.
You can additionally uplift the slides with image masks, shapes, 3D animated texts and other forms of graphic arts. An additively appealing feature of the slideshow creator program is the ability to mix descriptive images with your favorite music to develop stunning masterpieces of entertaining slideshows, which you can conveniently share and enjoy with family and friends on a diversity of social media platforms.
Using the tool, you can work with applying motion graphic effects to still photos without having to be an over the top tech savvy user. The editor library of the tool is loaded with some of the most awesome transition effects, like, wipes, 3D motions, gradients and fade-ins, along with the facility of adding titles, voice comments and captions to the slides of your presentation. The tool is however, exclusively a Windows compatible utility.
05PhotoStage Slideshow Software
Next in the list of alternatives to the Facebook slideshow maker tool is the aforesaid software program, that allows you to create professional quality slideshows with as many videos and images as you can possibly think of and supplement them with a variety of texts, music, voiceovers and effects. You can further work on customizing the slideshow images with making suitable adjustments in color, brightness and saturation parameters.
The software comes with a Quick Create utility, which you can use to instantly create high resolution slideshows and spark them up with zooms, pans and fades, while getting a preview of the same in real-time. You can even proceed to burn your creation into a disk, make an online upload, or simply save it to your device.
Talking of the cost constraints of this amazing slideshow creator tool, you get to work with the software for a commercial use, free of cost for a definite time period and with a restricted number of features. However, you can always consider on buying the paid version of the program to avail an access to the latter’s entire range of features and utilities. The tool works well with all Windows and Mac supported devices.
06Kizoa
Moving ahead in the list you have the Kizoa slideshow maker for Facebook, which is a dependable alternative to the conventional Facebook slideshow creator. Choosing this tool to design your slideshow presentation, you are entitled to the amazing feature of displaying your presentation on almost any screen, including smartphones, television, computers and tablets with getting to choose from 7 types of aspect ratios. The tool is designed to have a Windows and MacOs compatibility.
The application further lets you add the most specific parts of your images within the presentation slides with its smart cropping tool, while keeping an account of the file formats and screen space requirements of the images with utmost convenience. You are also allowed to choose from a storehouse of preset templates to add your desired photos and video clips in the slideshow and entice them with GIFs, effects and texts.
When you are done with the creation process, just attempt to download and save the slideshow in any preferred file format, such as, AVI, GIF, MP4, MOV, MPEG2, etc., or even burn it to a DVD. You are now free to share your slideshow on various online media sharing platforms. Using the free version of Kizoa, you are permitted to create slideshows with a duration of 60 seconds, which can be upgraded to a limitless length with a paid subscription.
07SlideLab
If you are a newbie to the field of creating slideshows, and wondering about how to create a slideshow on Facebook 2021, this one is affordably the most perfect tool you can rely on. Packed with an extensive range of effects, music, transitions and filters, SlideLab is the smartest software choice to create slideshow presentations for family entertainment and personal use.
The tool consists of an in built sharing utility that allows you to design and share slideshows on social media platforms, like YouTube, Facebook and Instagram with a single click. Working on your slideshow within the program, you can escape the cringe of cropping the images, as they are automatically adjusted to the square fit alignment of the app’s working window. You can quickly rearrange the placement of the images in the slideshow as per your preferences.
As far as the sharing credibility of the presentation is concerned, the software grants you the liberty to export your creation in PPTX and PDF file formats, and view them later in Keynote and PowerPoint.
The app shows a convenient workflow with Windows and MacOs devices and limits the image play duration to 3 seconds, along with a permitting a restricted number of transitions and effects in its free version, which you can access by availing a paid subscription of the program.
08Creating Facebook Slideshows With Wondershare Filmora
When browsing through feasible alternatives on how to make a facebook slideshow, the IT market is indeed flooded with a hoard of creation utilities. If you have just begun trying hands at slideshow creation, consider using the Wondershare Filmora Video Editor slideshow maker application for addressing your slideshow design concerns. The extensive, feature rich library of the app lets you create attractive presentation masterpieces with a wide range of special effects, transitions, texts, titles and music tracks.
For Win 7 or later (64-bit)
For macOS 10.12 or later
Working with the Filmora slideshow creator, you can trim, crop or cut the video clips and images of your presentation to give them the best look. The tool comes with a unique Filmora Template Mode to create business oriented Facebook slideshows, is compatible to any windows and Mac supported device and lets you easily make a slideshow on Facebook.
● Ending Thoughts →
● Creating Facebook slideshows can be useful in addressing a variety of personal and professional data sharing needs.
● Browsing through design alternatives, you will land across a pool of software choices to create stunning slideshows for Facebook.
● When deciding on the best Facebook slideshow creator tool, Wondershare Filmora can be your smartest pick.
Also read:
- Popular Female & Male Disney Cartoon Characters To Empower You for 2024
- Updated 2024 Approved Best 15 Anime Fonts-Find Your Favorite One
- What Are Differences Between 2D And 3D Animation for 2024
- New Best 10 Animated DP for WhatsApp for 2024
- 2024 Approved 15 Horror Animes That Will Trigger a Heart Attack
- Updated In 2024, 4 Things You Should Know About Pinterest GIF
- Updated Ideas That Will Help You Out in Learning How to Send WhatsApp Animated Gifs for 2024
- 2024 Approved Ways to Create Animated Clipart in PowerPoint
- The Most Efficient Techniques to Make 3D Animation Character
- Updated Animated Business Logos and Tools to Create for 2024
- Top 10 Sketch Animation Video Makers for 2024
- New 2024 Approved Beginners Guide for Learning 3D Animation
- Updated Cartoon Fundamentals How to Learn Cartoon Characters Sketch Quickly
- Updated 2024 Approved 12+ Stunning Instagram GIF Stickers and How to Make & Find
- New Top 3 Ways to Create Gif with Great 3D Gif Maker
- Updated 2024 Approved Best Practices on Online 3D Avatar Creator
- New How To Animate Graphics in Canva for 2024
- New Top 20+ Best Free GIF Makers Online to Quickly Edit GIF for 2024
- Interesting Fundamentals and Ultimate Guide to Animated Characters Drawings
- New Why These 10 Top Text Motion Templates Are Worth Your Attention for 2024
- New In 2024, Whiteboard Animation Services Top 15 Animation Companies to Pick
- New Finding The Best Animated Profile Picture Maker for 2024
- New The Best 10 Sketch Animation Video Makers for 2024
- New 2024 Approved Whats Rigging Animation and Why It Matters
- Learn All About Lip-Syncing in Animation for 2024
- Updated Whats Music Video GIF & How to Add Music to GIF Files for 2024
- Updated 2024 Approved How to Create an Animated Sticky Navbar
- Updated 2024 Approved How to Make GIF Instagram
- In 2024, 8 Free GIF Animators to Make Your Own GIF
- 2024 Approved Popular Tips on Learning Animate Rigging
- Updated In 2024, Tips for GIF to Animated PNG You Should Know
- New 10 Classical Animated Cartoon Types With Examples for 2024
- 5 Must Try Ways to Add GIF in Text Message on Android
- New In 2024, 10 Must-Use MP4 to GIF Converters to Get Perfect-Made GIF
- New 2024 Approved How to Make Whiteboard Animation Videos
- Tutorials to Make Animated Images – Even if Youre Just Starting Out
- Updated Best Websites to Download Animated GIFs for Free
- New In 2024, Ways You Can Master to Find 10 Best Free Animated Text Generator
- Stuck at Android System Recovery Of Realme 11X 5G ? Fix It Easily | Dr.fone
- In 2024, How To Fix Apple ID Verification Code Not Working From iPhone 15
- Full Guide to Hard Reset Your Xiaomi Redmi Note 12T Pro | Dr.fone
- Want to Uninstall Google Play Service from Poco X6? Here is How | Dr.fone
- 3 Ways to Track Lava Blaze Pro 5G without Them Knowing | Dr.fone
- Easy Guide to Xiaomi Redmi K70 Pro FRP Bypass With Best Methods
- In 2024, How to Unlock Xiaomi Mix Fold 3 Phone Password Without Factory Reset?
- Will Pokémon Go Ban the Account if You Use PGSharp On Nokia XR21 | Dr.fone
- How to Unlock Vivo Y36 Phone without PIN
- How to Fix Life360 Shows Wrong Location On Apple iPhone 13 Pro? | Dr.fone
- Methods to Change GPS Location On Itel A70 | Dr.fone
- Title: Updated How to Convert Video to GIF Fast & Easy for 2024
- Author: Elon
- Created at : 2024-06-08 05:07:44
- Updated at : 2024-06-09 05:07:44
- Link: https://animation-videos.techidaily.com/updated-how-to-convert-video-to-gif-fast-and-easy-for-2024/
- License: This work is licensed under CC BY-NC-SA 4.0.
