
:max_bytes(150000):strip_icc():format(webp)/full-frame-shot-of-speakers-1138109687-33289baddc314b44ae87abc2fc8060cd-e7bccad6d81244509ed97ddf557f89e4.jpg)
Updated How You Can Turn Yourself Into Anime Character Using Anime Filter for 2024
How You Can Turn Yourself Into Anime Character Using Anime Filter
How You Can Turn Yourself into Anime Character Using Anime Filter
An easy yet powerful editor
Numerous effects to choose from
Detailed tutorials provided by the official channel
Everyone is looking for the Anime Filter that allows you to turn yourself into an animated character. All in an effort to join in on the TikTok trend that’s been awakening the inner anime enthusiast in everyone.

In this post, we’ll be sharing with you all that we know about this elusive anime filter (along with some bonuses along the way)
In this article
01 [Let’s Figure out What’s Anime Filter First](#Part 1)
02 [More Tutorials on Anime Filter That You Should Not Miss](#Part 2)
Part 1 Let’s Figure out What’s Anime Filter First
01What is the Anime Filter on TikTok?
Okay, first off What even is this anime filter everyone is talking about and how can you use it to turn yourself into an animated character? We’ve attached a helpful YouTube Video below from @Kapwing who has a more comprehensive explanation for you.
But, as for the basics? It works just like most filters in that it can be used in both video and picture mode (allowing you to also make your own animated profile picture if you’d like). All you have to do is turn it on, and it’ll turn you into the most fitting anime character of your style immediately
02How to Get the TikTok Anime Filter?
Now to finally get down to business How exactly can you get the anime filter for your TikTok? Well, here’s the trick Despite having earned its popularity on TikTok, the Anime Style filter actually comes from Snapchat So, if you do want to animate yourself like you’ve seen all the other popular TikTok-ers do, you’ll need to record the video (or take the picture) on the Snapchat App first and then upload it to TikTok.
03A step-by-step breakdown of this process has been provided below (pictures included)
Step 1Download the Snapchat App
Alright, to start off with, you’ll need to download the Snapchat app on your smartphone (it’s available for both Android and iOS devices)

Step 2Open Snapchat App on your mobile device
Once you have the Snapchat app downloaded and installed on your device, open it

Step 3Search for the Anime Style Filter on Snapchat
Once you have the Snapchat app open, click on the search bar at the top of the interface, type ‘anime style’, and search
You might find that there are multiple versions of the filter (like as is shown in the image below), but the one that you need to select is the one titled Anime Style and created by Snapchat (it should appear first, as it does in the example)

Step 4Turn Yourself into an Animated Character
Finally You should be moved to the video recorder or the profile picture taker, where you can see yourself animated once and for all

Step 5Upload your anime filter-ed video to TikTok
Now, in order to get your Anime-fied self on TikTok, all you need to do is upload your video creation (either on your mobile device or your computer) We’ve provided a URL for you below that will take you directly to the TikTok upload page.

Part 2 More Tutorials on Anime Filter That You Should Not Miss
The Anime Style filter that we introduced in the previous section isn’t the only ‘animated’ filter available, of course It’s the one that caught the attention of a lot of people, thanks, in large part, to the participation of a couple of some of the bigger TikTok-ers on the platform. However, you can always expand your selection a bit by checking out some of the other interesting anime filters in the market:
0112 Anime Filters to Turn Yourself into an Anime Character
Anime Filter #1: Anime Style Realistic

In order to fix some of the more glaring issues with the regular Anime Style filter, Snapchat created a second filter, called Anime Style Realistic This one has a distinctively less anime style when it comes to looks. But it does allow for more skin colors, better hair integration, and accessories
Pros
FREE Snapchat lens that you can use at any time.
Works with most skin tones.
Better hair/accessory integration.
Cons
The style is more realistic than anime.
It is not available anywhere else; you’ll need to be on Snapchat to use it.
Not great at capturing motion.
This is a fun filter to use for those looking to spice up their timeline with something a little different (OR for those having a bad day and would like the almost-anonymity the filter can provide).
Anime Filter #2: Cartoon Style

Next, we have another Snapchat original lens called Cartoon Style This filter is more reminiscent of the older animated cartoon styles (think Pocahontas, Lilo & Stitch, etc.), but it doesn’t make it any less fun
Pros
FREE Snapchat lens.
Works with all skin tones.
Works with accessories.
Cons
More of a cartoon animated style than anime.
Not available anywhere else, you can only use it with Snapchat.
Not great at capturing motion.
Again, just like the Anime Filter, this is good for slapping on just to have fun or to sneakily erase a couple of blemishes
Anime Filter #3: Anime Filter

Now, although we mentioned that TikTok doesn’t have any anime-style filters, the Chinese version of it (surprisingly) does You can see it being used in the image above, rendering the user into an animated (albeit not classically Japanese animated) character.
Pros
Free Chinese TikTok filter.
Great at capturing motion.
Chinese animated drawing style.
Cons
Only available for the foreign version of the TikTok app.
Not the best with skin tones.
It doesn’t use the classic Japanese-animation style.
This has seen a popularity boost recently, with many TikTok users using it to show a ‘before’ and ‘after’ (like the image shown above), of their dance being animated.
Filter URL: https://www.douyin.com/
Anime Filter #4: Anime Eyes

This next filter is the first unofficial anime filter on this list. It was created by one of the users of Snapchat and can be found there if you want to use it This one doesn’t animate the whole face of the user, but it does apply a sticker of various ‘anime eyes’ that you can use as a semi-animated profile picture maker (free)
Pros
FREE Snapchat filter
Anime-eyes sticker to cover the eyes
Useful as an animated profile picture maker
Cons
Only available on the Snapchat app
Does not capture motion
Does not animate the entire face
This really is best used for profile pictures only You’ve probably seen it around as such, although some users also find it useful for hiding tired eyes
Anime Filter #5: Wondershare Filmora

If you’re looking to step up your game ‘editing-wise’ and give your pictures and videos an even more anime feel, then you can also consider the anime filters that the video editing tool, Wondershare Filmora Video Editor , offers. (You can also skip the pre-made filters altogether and create your own animated video with stickers and other effects.)
Pros
Variety of anime filters for videos
Comes with advanced video editing tools
Creates high-quality videos
Cons
Premium Software
No face animation
This particular option is for those looking for something a step above what everyone else is doing. All while allowing a more flexible experience
For Win 7 or later (64-bit)
For macOS 10.12 or later
Anime Filter #6: MHA Anime Filter (Instagram)

Continuing on from our trend of ‘out-there’ options, there’s also the MHA filter from Instagram This one has been especially popular with the anime fanbase as it offers plenty of opportunities for hilarious, pointed responses
Pros
FREE with Instagram
Anime-themed sticker
Trending on TikTok
Cons
Not a face animator filter
Not a profile picture animator
Limited anime options
It’s definitely not what you might have initially been looking for. But its popularity on TikTok is undeniable
Anime Filter #7: Anime Filter

Our second recommended anime-themed filter is the basic Anime Filter on Instagram This one flicks through dozens of some of the most popular animes to find out which one suits you best And, just like the previous, is currently trending on Tiktok
Pros
FREE with Instagram
Anime-themed sticker filter
Trending on TikTok
Cons
Sticker, not face animator
Available only on Instagram
Limited options
Anime Filter #8: Cartoon

This next animation filter pick of ours brings us back to Snapchat It’s called the Cartoon lens. And, just like our initial picks, it will change your pictures to that of a cartoon This one is closer to the cartoon-style popular around the 2000s (think Frozen & Tangled)
Pros
Available on Snapchat
Animated profile picture maker (free)
Works for various skin types
Cons
Not the best at motion capturing
Only available on Snapchat
Doesn’t use classic Japanese style
It’s not quite the anime filter that you’re probably looking for, but it does still work if all you want is a way of cartoon-ifying yourself to spice up your timeline It’ll clear up any blemishes too
Anime Filter #9: Comics Style

Again, we’re moving towards a different kind of animation style with this next filter from Snapchat, but the Comics Style filter does have its own promises of fun as well Especially for those who are long-time fans of American comics (or, even, your average modern-day Avengers fan)
Pros
FREE on Snapchat
Video face animator
Works with a variety of skin tones
Cons
Awkward with some face shapes
Does not work with all face accessories
Available only on Snapchat
Anime Filter #10: Cartoon 3D Style

Now, this might get confusing, but for our last picks, we actually have a set of filters all called Cartoon 3D Style But trust us They’re all different This first version is one you would probably relate more to the DreamWorks motion picture, Ratatouille
Pros
FREE profile picture animator on Snapchat
Compatible with a variety of face shapes
Compatible with a variety of skin tones
Cons
Set features (i.e., pointed nose)
Non-anime drawing style
Not compatible with some facial accessories
Anime Filter #11: Cartoon 3D Style

For our next Cartoon 3D Style lens from Snapchat, we have a face animator that can help you turn into something very close to another dreamwork’s motion picture (think the Despicable me or the Minions)
Pros
Cartoon style animator that is FREE to use
Great for motion capturing
Compatible with a variety of skin colors
Cons
Available only on Snapchat
Not compatible with certain face accessories
Limited face warping effect
Anime Filter #12: Cartoon 3D Style

And finally, for the last of our recommended anime filters, we have the Cartoon 3D Style lens from Snapchat that makes you look like your favorite Disney character (In this case, the obvious inspiration comes from Disney’s Frozen or Tangled)
Pros
Disney face animator that is FREE on Snapchat
Compatible with all skin tones
Trending on TikTok
Cons
It can only be used on Snapchat
Not great at capturing motion
02Steps to Download the Anime Filter App and Turn Yourself into an Anime Character
Now, if those filters weren’t enough for you, we’ve also included this next tutorial on how you can find apps on your mobile device that will allow you to get the same effect without having to use Snapchat, TikTok, or Instagram
Step 1Go to the App Store
The first step, of course, is to go to the app store on your mobile device.

Step 2Search for Anime Filter App
Next, search ‘Anime Filter’ on your phone’s app store.

Step 3Select Anime Filter App
There are multiple types of anime filter apps available in the market. Pick the one that you think will work best for you.

Step 4Install Anime Filter App
Finally, once you’ve found the anime filter app for you, install it.

Step 5Open Anime Filter App
The app that we used for our example, Anime Camera, offers several different animation styles However, this app does come with a subscription fee, so keep that in mind.

03Anime Filter Has a Sadly Unsurprising Problem
You might have noticed this while we were introducing all the different types of anime-style filters available, but the popular Anime Filter has its shortcomings. Which includes:
PROBLEM 1: Dark Skin Tones
The anime filter’s inability to capture darker skin tones accurately is one of the biggest issues users have with the filter.
PROBLEM 2: Hair Style
Hairstyle options are also very limited. And, as for black hairstyles? Well, the options are pretty much non-existent.
PROBLEM 3: Face Accessories
Do you wear glasses? How about piercings? Well, this won’t translate for you either, unfortunately
Key Takeaways from This Episode
● The Anime Filter is a hot, trending topic in platforms like Tiktok, Instagram, and Snapchat It’s also a fun way of engaging with the anime community
● There are other, similar face-animation filters available (The Cartoon 3D Styles, especially, were quite popular for a time)
● Unsurprisingly, the anime filter does have its problems… And it left a big chunk of the TikTok community pretty flabbergasted — and disappointed. But that didn’t stop them from joining in the fun to provide some empowering commentary
Everyone is looking for the Anime Filter that allows you to turn yourself into an animated character. All in an effort to join in on the TikTok trend that’s been awakening the inner anime enthusiast in everyone.
In this post, we’ll be sharing with you all that we know about this elusive anime filter (along with some bonuses along the way)
In this article
01 [Let’s Figure out What’s Anime Filter First](#Part 1)
02 [More Tutorials on Anime Filter That You Should Not Miss](#Part 2)
Part 1 Let’s Figure out What’s Anime Filter First
01What is the Anime Filter on TikTok?
Okay, first off What even is this anime filter everyone is talking about and how can you use it to turn yourself into an animated character? We’ve attached a helpful YouTube Video below from @Kapwing who has a more comprehensive explanation for you.
But, as for the basics? It works just like most filters in that it can be used in both video and picture mode (allowing you to also make your own animated profile picture if you’d like). All you have to do is turn it on, and it’ll turn you into the most fitting anime character of your style immediately
02How to Get the TikTok Anime Filter?
Now to finally get down to business How exactly can you get the anime filter for your TikTok? Well, here’s the trick Despite having earned its popularity on TikTok, the Anime Style filter actually comes from Snapchat So, if you do want to animate yourself like you’ve seen all the other popular TikTok-ers do, you’ll need to record the video (or take the picture) on the Snapchat App first and then upload it to TikTok.
03A step-by-step breakdown of this process has been provided below (pictures included)
Step 1Download the Snapchat App
Alright, to start off with, you’ll need to download the Snapchat app on your smartphone (it’s available for both Android and iOS devices)
Step 2Open Snapchat App on your mobile device
Once you have the Snapchat app downloaded and installed on your device, open it
Step 3Search for the Anime Style Filter on Snapchat
Once you have the Snapchat app open, click on the search bar at the top of the interface, type ‘anime style’, and search
You might find that there are multiple versions of the filter (like as is shown in the image below), but the one that you need to select is the one titled Anime Style and created by Snapchat (it should appear first, as it does in the example)
Step 4Turn Yourself into an Animated Character
Finally You should be moved to the video recorder or the profile picture taker, where you can see yourself animated once and for all
Step 5Upload your anime filter-ed video to TikTok
Now, in order to get your Anime-fied self on TikTok, all you need to do is upload your video creation (either on your mobile device or your computer) We’ve provided a URL for you below that will take you directly to the TikTok upload page.
Part 2 More Tutorials on Anime Filter That You Should Not Miss
The Anime Style filter that we introduced in the previous section isn’t the only ‘animated’ filter available, of course It’s the one that caught the attention of a lot of people, thanks, in large part, to the participation of a couple of some of the bigger TikTok-ers on the platform. However, you can always expand your selection a bit by checking out some of the other interesting anime filters in the market:
0112 Anime Filters to Turn Yourself into an Anime Character
Anime Filter #1: Anime Style Realistic
In order to fix some of the more glaring issues with the regular Anime Style filter, Snapchat created a second filter, called Anime Style Realistic This one has a distinctively less anime style when it comes to looks. But it does allow for more skin colors, better hair integration, and accessories
Pros
FREE Snapchat lens that you can use at any time.
Works with most skin tones.
Better hair/accessory integration.
Cons
The style is more realistic than anime.
It is not available anywhere else; you’ll need to be on Snapchat to use it.
Not great at capturing motion.
This is a fun filter to use for those looking to spice up their timeline with something a little different (OR for those having a bad day and would like the almost-anonymity the filter can provide).
Anime Filter #2: Cartoon Style
Next, we have another Snapchat original lens called Cartoon Style This filter is more reminiscent of the older animated cartoon styles (think Pocahontas, Lilo & Stitch, etc.), but it doesn’t make it any less fun
Pros
FREE Snapchat lens.
Works with all skin tones.
Works with accessories.
Cons
More of a cartoon animated style than anime.
Not available anywhere else, you can only use it with Snapchat.
Not great at capturing motion.
Again, just like the Anime Filter, this is good for slapping on just to have fun or to sneakily erase a couple of blemishes
Anime Filter #3: Anime Filter
Now, although we mentioned that TikTok doesn’t have any anime-style filters, the Chinese version of it (surprisingly) does You can see it being used in the image above, rendering the user into an animated (albeit not classically Japanese animated) character.
Pros
Free Chinese TikTok filter.
Great at capturing motion.
Chinese animated drawing style.
Cons
Only available for the foreign version of the TikTok app.
Not the best with skin tones.
It doesn’t use the classic Japanese-animation style.
This has seen a popularity boost recently, with many TikTok users using it to show a ‘before’ and ‘after’ (like the image shown above), of their dance being animated.
Filter URL: https://www.douyin.com/
Anime Filter #4: Anime Eyes
This next filter is the first unofficial anime filter on this list. It was created by one of the users of Snapchat and can be found there if you want to use it This one doesn’t animate the whole face of the user, but it does apply a sticker of various ‘anime eyes’ that you can use as a semi-animated profile picture maker (free)
Pros
FREE Snapchat filter
Anime-eyes sticker to cover the eyes
Useful as an animated profile picture maker
Cons
Only available on the Snapchat app
Does not capture motion
Does not animate the entire face
This really is best used for profile pictures only You’ve probably seen it around as such, although some users also find it useful for hiding tired eyes
Anime Filter #5: Wondershare Filmora
If you’re looking to step up your game ‘editing-wise’ and give your pictures and videos an even more anime feel, then you can also consider the anime filters that the video editing tool, Wondershare Filmora Video Editor , offers. (You can also skip the pre-made filters altogether and create your own animated video with stickers and other effects.)
Pros
Variety of anime filters for videos
Comes with advanced video editing tools
Creates high-quality videos
Cons
Premium Software
No face animation
This particular option is for those looking for something a step above what everyone else is doing. All while allowing a more flexible experience
For Win 7 or later (64-bit)
For macOS 10.12 or later
Anime Filter #6: MHA Anime Filter (Instagram)
Continuing on from our trend of ‘out-there’ options, there’s also the MHA filter from Instagram This one has been especially popular with the anime fanbase as it offers plenty of opportunities for hilarious, pointed responses
Pros
FREE with Instagram
Anime-themed sticker
Trending on TikTok
Cons
Not a face animator filter
Not a profile picture animator
Limited anime options
It’s definitely not what you might have initially been looking for. But its popularity on TikTok is undeniable
Anime Filter #7: Anime Filter
Our second recommended anime-themed filter is the basic Anime Filter on Instagram This one flicks through dozens of some of the most popular animes to find out which one suits you best And, just like the previous, is currently trending on Tiktok
Pros
FREE with Instagram
Anime-themed sticker filter
Trending on TikTok
Cons
Sticker, not face animator
Available only on Instagram
Limited options
Anime Filter #8: Cartoon
This next animation filter pick of ours brings us back to Snapchat It’s called the Cartoon lens. And, just like our initial picks, it will change your pictures to that of a cartoon This one is closer to the cartoon-style popular around the 2000s (think Frozen & Tangled)
Pros
Available on Snapchat
Animated profile picture maker (free)
Works for various skin types
Cons
Not the best at motion capturing
Only available on Snapchat
Doesn’t use classic Japanese style
It’s not quite the anime filter that you’re probably looking for, but it does still work if all you want is a way of cartoon-ifying yourself to spice up your timeline It’ll clear up any blemishes too
Anime Filter #9: Comics Style
Again, we’re moving towards a different kind of animation style with this next filter from Snapchat, but the Comics Style filter does have its own promises of fun as well Especially for those who are long-time fans of American comics (or, even, your average modern-day Avengers fan)
Pros
FREE on Snapchat
Video face animator
Works with a variety of skin tones
Cons
Awkward with some face shapes
Does not work with all face accessories
Available only on Snapchat
Anime Filter #10: Cartoon 3D Style
Now, this might get confusing, but for our last picks, we actually have a set of filters all called Cartoon 3D Style But trust us They’re all different This first version is one you would probably relate more to the DreamWorks motion picture, Ratatouille
Pros
FREE profile picture animator on Snapchat
Compatible with a variety of face shapes
Compatible with a variety of skin tones
Cons
Set features (i.e., pointed nose)
Non-anime drawing style
Not compatible with some facial accessories
Anime Filter #11: Cartoon 3D Style
For our next Cartoon 3D Style lens from Snapchat, we have a face animator that can help you turn into something very close to another dreamwork’s motion picture (think the Despicable me or the Minions)
Pros
Cartoon style animator that is FREE to use
Great for motion capturing
Compatible with a variety of skin colors
Cons
Available only on Snapchat
Not compatible with certain face accessories
Limited face warping effect
Anime Filter #12: Cartoon 3D Style
And finally, for the last of our recommended anime filters, we have the Cartoon 3D Style lens from Snapchat that makes you look like your favorite Disney character (In this case, the obvious inspiration comes from Disney’s Frozen or Tangled)
Pros
Disney face animator that is FREE on Snapchat
Compatible with all skin tones
Trending on TikTok
Cons
It can only be used on Snapchat
Not great at capturing motion
02Steps to Download the Anime Filter App and Turn Yourself into an Anime Character
Now, if those filters weren’t enough for you, we’ve also included this next tutorial on how you can find apps on your mobile device that will allow you to get the same effect without having to use Snapchat, TikTok, or Instagram
Step 1Go to the App Store
The first step, of course, is to go to the app store on your mobile device.
Step 2Search for Anime Filter App
Next, search ‘Anime Filter’ on your phone’s app store.
Step 3Select Anime Filter App
There are multiple types of anime filter apps available in the market. Pick the one that you think will work best for you.
Step 4Install Anime Filter App
Finally, once you’ve found the anime filter app for you, install it.
Step 5Open Anime Filter App
The app that we used for our example, Anime Camera, offers several different animation styles However, this app does come with a subscription fee, so keep that in mind.
03Anime Filter Has a Sadly Unsurprising Problem
You might have noticed this while we were introducing all the different types of anime-style filters available, but the popular Anime Filter has its shortcomings. Which includes:
PROBLEM 1: Dark Skin Tones
The anime filter’s inability to capture darker skin tones accurately is one of the biggest issues users have with the filter.
PROBLEM 2: Hair Style
Hairstyle options are also very limited. And, as for black hairstyles? Well, the options are pretty much non-existent.
PROBLEM 3: Face Accessories
Do you wear glasses? How about piercings? Well, this won’t translate for you either, unfortunately
Key Takeaways from This Episode
● The Anime Filter is a hot, trending topic in platforms like Tiktok, Instagram, and Snapchat It’s also a fun way of engaging with the anime community
● There are other, similar face-animation filters available (The Cartoon 3D Styles, especially, were quite popular for a time)
● Unsurprisingly, the anime filter does have its problems… And it left a big chunk of the TikTok community pretty flabbergasted — and disappointed. But that didn’t stop them from joining in the fun to provide some empowering commentary
Techniques on Making After Effects 2D Animation
Adobe After Effects is probably the most versatile software you can add to your arsenal of skills on your journey to learn After Effects 2D animation. Both beginners and professionals can brush up their animation skills on After Effects with some help from tutorials and videos. When it comes to experimenting with visual effects, motion graphics, and 3D composting, Adobe After Effects is recommended as an industry-standard software. So it should come as no surprise that there is a surplus of After Effects tutorials and information on the internet. To help simplify things, here’s a compiled list of Adobe After Effects courses along with a few tips to get started.
In this article
01 [Practical Online 2D Animation Courses](#Part 1)
02 [How to Create 2D Motion Graphics with After Effects](#Part 2)
03 [5 Best Animation After Effects that you must know](#Part 3)
04 [5 Character Animation Tools for After Effects](#Part 4)
Part 1 Practical Online 2D Animation Courses
Learning After Effects need not be complicated. You can use this tool to help you create amazing designs from your sheer imagination. Here is a list of the best courses which are self-paced so you don’t need to worry about fitting them into your schedule. Some of these courses are primarily for beginners who are seeking to orient themselves to the basics. While other courses have recent insights into the latest techniques curated by the industry experts. The courses in this list are diverse and are from different platforms like Domestika, Coursera, Adobe, and YouTube.
1. Getting Started - Adobe
The official Adobe learning site has its own course for introducing After Effects. After all, the software is a product of Adobe itself. This tutorial is purely for complete beginners and is designed to briefly introduce the interface and basic functioning of Adobe After Effects. It takes you through the manual control and menu options which you will need to familiarize yourself with.
2. The Basics – YouTube
This free-to-watch After Effects tutorial is presented by a very passionate photographer and YouTuber Peter Meckinnon. He walks you through the various elements the Adobe interface puts at your disposal. These elements are quite artistically introduced by Peter as he animates a basic title project on Adobe.
3. How to Animate a line - YouTube
When you are introduced to a vast world of possibilities, it can be a bit overwhelming. Which is why starting from the very basics is always a good idea. This next YouTube tutorial shows you step by step how to animate a line on Adobe After Effects from one point to another.
4. Introduction and Advanced After Effects – Domestika
Domestika is an online learning platform that is great for freelancers and independent artists who can purchase self-paced lessons on topics like graphic design and animation. The Introduction and Advanced After Effects tutorials by Carlos Zensuke Albarran are a comprehensive bundle of lessons that quench your thirst for 2D effects animation a bit further.
5. Typography Animation – Domestika
The mark of a professional is his specialization. As you gain more experience in practicing Adobe After Effects, you can begin trying out more bold and stylistic animations with simple typographic techniques. It would not only make you more confident as a motion graphics designer but also equip you with fluid skills as a freelancer. Typographic motion graphics is a cash cow for many After Effect animators.
6. Vectorial Animation – Domestika
Cartoonist animated videos and motion designs are quite interesting to animate. Vectorial 2D animation is quite popular among YouTube tutorials and explainer videos. They make for excellent corporate animations. You can find an amazing Domestika tutorial on Vectorial that walks you through in simple steps on Frame by Frame style animations.
7. Getting Started with Motion Graphics - Coursera
Coursera is another amazing online learning platform for gaining access to Beginner to Advanced courses on Adobe After Effects. This one tutorial introduces you to Beginner level motion graphics where you can learn from short self-paced videos.
8. Getting Started with Motion Graphics - SkillShare
SkillShare is another amazing online learning platform for gaining access to Beginner to Advanced courses on Adobe After Effects. This one tutorial introduces you to Beginner level motion graphics where you can learn from short self-paced videos. It is guided by a leading professional in motion graphics and visual effects who covers all the bases alongside hands-projects.
9. Make Simple Logo Intro in After Effects – YouTube
Creating Intros for your videos is probably the most cost-effective marketing gizmos employed today. This free tutorial on YouTube from Tech Infusion is a simple-to-follow video that sheds some light on how to create eye-catching intros that instantly catches your audience’s attention.
10. Work with Composition - Adobe
Working with After Effects is all about creating gorgeous compositions that pop. This Adobe tutorial equips you with the basics of creating animation on Adobe After Effects with multiple layers and keyframes.
Part 2 How to Create 2D Motion Graphics with After Effects
The astonishing world of intriguing after-effects is vast. Whether you do it as a profession or simply as a hobby, learning how to add after-effects to your 2d motion graphics is always an amazing idea. Worried how you’d understand the tools to add after-effects to your animation? Well, we’ve got you covered! Today we’ll be looking at how you can add after-effects to your 2d animation.

●To make a new 2D graphics in after effects, you need to make a new composition. To do so, head to the composition menu in the menu bar. Upon clicking on the composition menu, a new drop-down menu would open up. From the drop-down menu, click on “new composition”.

●A new setting box would pop up, in this settings box you can alter the settings of the composition. If you do not wish to change any setting, simply click on “ok” and proceed ahead.

●Next, you need to find the tool panel in the main menu bar. Upon clicking on it, a new drop-down menu will appear, click on “star tool”. We’re simply taking the star shape, for instance, alternatively, you can select and another shape too…

●Once you’ve selected the shape you want, draw by clicking your mouse and dragging

●Click on the shape and the layers will appear on the left of your screen. From the popped up screen, click on “properties”. Here you can find multiple animation options and you can even edit frame by frame. Add frames at regular intervals and move according to your wish

Part 3 5 Best Animation After Effects that you must know
1. Stacking animation – YouTube
Stacking animation is an excellent and simple trick that can make any animation look cool and complex. The stacking animation is nothing but the use of the stacking template multiple times. To do so, you just need to duplicate a few of the base layers. Next, you need to offset the duplicated frames by a few frames and finally add some effects. The Adding of stacking animation will result in a slight extension of your animation layers. You can further customize your frames by adding effects or color to enhance the animation.

2. Light sweeps
An advantage of using the after effects software is that it offers several drag and drop features which you can simply drag and drop to your animation to enhance its looks. A light sweep animation is one such animation that can add great value to your animation. You can add this effect by following the steps given below
●Head to “effects” from your main interface
●Here you need to find “generate”
●Now from the list of drag and drop animations, drag and drop “light sweeps” onto your workspace
You can then change and customize almost any aspect of the animation simply by clicking on it and changing the settings

3. Quick shape animation
This is a very cool trick that you can use on your 2d objects! This includes the creation of your own layer(you can use any 2d shape). Further, you need to duplicate your shape and the stagger the animation. This gives the entire animation an interesting and engaging effect. The trick is very resourceful while dealing with 2d objects.

4. Animate your background
When your entire animation looks slightly basic and you wish to give your animation a zest, this trick is highly useful! If you’re working with colored backgrounds, this animation trick can help make it more attractive. This animation is simply just adding motion to your background making it look like it’s moving in or out.

5. Graphics reflection
Although this method is slightly complicated, it could enhance the animation by leaps and bounds. To do so, you need to write a fancy text of your choice, then you need to duplicate this text, and further, you need to flip it vertically. To make it look more realistic, you can add the blur effect. This will make it look like the duplicated text is a reflection of the original text

Part 4 5 Character Animation Tools for After Effects
1. Rubber hose 2
Rubber hose is one of the primitive tools for adding animations. This is mainly because it was found in the early 2000s and back then, animations had wobbly legs and an absurd body structure. This tool has several cool inbuilt functions that make the animation so much simpler. The robust tool. makes animation pretty simple and hassle-free. Rubber hose 2 is an advanced version of rubber hose, it has several advanced features. The plug-in is however not free, you’d need to purchase it at $45 in order to gain a lifetime access.
2. Duik
Duik is one of the most advanced and comprehensive character animation tools in the market. It was initially launched in 2008, but since then there’s been a vast improvement in the tool’s features and today it’s one of the picks to perform animation using rigging and other animation techniques. Duik has several tools that make the animation so convenient. The tool has features such as auto rig, which helps save time while animating. Other tools include effects such as bones, rigging, various filters, and effects.
3. Joystick ‘n sliders
Joystick’n sliders is another highly utilitarian tool for animators. Along with key animation features such as rigging and boning, the tool has other cool and highly useful features to make your animation interesting! The user interface of this tool is a big plus, the simplicity of the user interface makes the tool perfect for beginners and advanced level animators. The tool is simple to use and has a plethora of cool features which could help you make your animation highly engaging.
4. Puppet tool 3
Puppet tool 3 is an after effects plugin that could help you create character animations. The plug-in is different from the in-built puppet tool in after effects. The puppet tool inbuilt into after effects are the Rigging tool for animation, however using the inbuilt tool is slightly sophisticated. Puppet tool 3 is not an individual tool but works in coordination with the inbuilt the puppet tool. Since using the inbuilt tool was complex, puppet tool 3 made it simple. Apart from rigging, the plugin also allows you to work with a few additional features. You can buy the plug-in for only $39.95!
5. Adobe animate character
Adobe character animation is the in-house plugin of Adobe to animate characters. However, the tool is probably still in development. Adobe has been working on releasing this tool for a while now, and in the latest version of after effects, Adobe added the beta version of the character animator. Character animator is probably the most efficient and advanced animation tool. It uses facial recognition for animations and allows you to perform almost all basic animations. The software is perfect when you’re trying to create a complex animated character.
Key Takeaways from This Episode
● Today we’ve dwelled a lot into animation and the tools available for animation.
● We’ve seen how animation could be enhanced using the inbuilt tools available in Adobe after effects.
● We’ve also gone a step further and seen the external plugin tools that you can use to make character animations and highly advanced 2d effects ok animations.
● We’ve also taken an overview on how to create a simple basic 2d motion animation, all in all, we’ve gone from understanding the beginner level animation to understanding advanced animation
02 [How to Create 2D Motion Graphics with After Effects](#Part 2)
03 [5 Best Animation After Effects that you must know](#Part 3)
04 [5 Character Animation Tools for After Effects](#Part 4)
Part 1 Practical Online 2D Animation Courses
Learning After Effects need not be complicated. You can use this tool to help you create amazing designs from your sheer imagination. Here is a list of the best courses which are self-paced so you don’t need to worry about fitting them into your schedule. Some of these courses are primarily for beginners who are seeking to orient themselves to the basics. While other courses have recent insights into the latest techniques curated by the industry experts. The courses in this list are diverse and are from different platforms like Domestika, Coursera, Adobe, and YouTube.
1. Getting Started - Adobe
The official Adobe learning site has its own course for introducing After Effects. After all, the software is a product of Adobe itself. This tutorial is purely for complete beginners and is designed to briefly introduce the interface and basic functioning of Adobe After Effects. It takes you through the manual control and menu options which you will need to familiarize yourself with.
2. The Basics – YouTube
This free-to-watch After Effects tutorial is presented by a very passionate photographer and YouTuber Peter Meckinnon. He walks you through the various elements the Adobe interface puts at your disposal. These elements are quite artistically introduced by Peter as he animates a basic title project on Adobe.
3. How to Animate a line - YouTube
When you are introduced to a vast world of possibilities, it can be a bit overwhelming. Which is why starting from the very basics is always a good idea. This next YouTube tutorial shows you step by step how to animate a line on Adobe After Effects from one point to another.
4. Introduction and Advanced After Effects – Domestika
Domestika is an online learning platform that is great for freelancers and independent artists who can purchase self-paced lessons on topics like graphic design and animation. The Introduction and Advanced After Effects tutorials by Carlos Zensuke Albarran are a comprehensive bundle of lessons that quench your thirst for 2D effects animation a bit further.
5. Typography Animation – Domestika
The mark of a professional is his specialization. As you gain more experience in practicing Adobe After Effects, you can begin trying out more bold and stylistic animations with simple typographic techniques. It would not only make you more confident as a motion graphics designer but also equip you with fluid skills as a freelancer. Typographic motion graphics is a cash cow for many After Effect animators.
6. Vectorial Animation – Domestika
Cartoonist animated videos and motion designs are quite interesting to animate. Vectorial 2D animation is quite popular among YouTube tutorials and explainer videos. They make for excellent corporate animations. You can find an amazing Domestika tutorial on Vectorial that walks you through in simple steps on Frame by Frame style animations.
7. Getting Started with Motion Graphics - Coursera
Coursera is another amazing online learning platform for gaining access to Beginner to Advanced courses on Adobe After Effects. This one tutorial introduces you to Beginner level motion graphics where you can learn from short self-paced videos.
8. Getting Started with Motion Graphics - SkillShare
SkillShare is another amazing online learning platform for gaining access to Beginner to Advanced courses on Adobe After Effects. This one tutorial introduces you to Beginner level motion graphics where you can learn from short self-paced videos. It is guided by a leading professional in motion graphics and visual effects who covers all the bases alongside hands-projects.
9. Make Simple Logo Intro in After Effects – YouTube
Creating Intros for your videos is probably the most cost-effective marketing gizmos employed today. This free tutorial on YouTube from Tech Infusion is a simple-to-follow video that sheds some light on how to create eye-catching intros that instantly catches your audience’s attention.
10. Work with Composition - Adobe
Working with After Effects is all about creating gorgeous compositions that pop. This Adobe tutorial equips you with the basics of creating animation on Adobe After Effects with multiple layers and keyframes.
Part 2 How to Create 2D Motion Graphics with After Effects
The astonishing world of intriguing after-effects is vast. Whether you do it as a profession or simply as a hobby, learning how to add after-effects to your 2d motion graphics is always an amazing idea. Worried how you’d understand the tools to add after-effects to your animation? Well, we’ve got you covered! Today we’ll be looking at how you can add after-effects to your 2d animation.
●To make a new 2D graphics in after effects, you need to make a new composition. To do so, head to the composition menu in the menu bar. Upon clicking on the composition menu, a new drop-down menu would open up. From the drop-down menu, click on “new composition”.
●A new setting box would pop up, in this settings box you can alter the settings of the composition. If you do not wish to change any setting, simply click on “ok” and proceed ahead.
●Next, you need to find the tool panel in the main menu bar. Upon clicking on it, a new drop-down menu will appear, click on “star tool”. We’re simply taking the star shape, for instance, alternatively, you can select and another shape too…
●Once you’ve selected the shape you want, draw by clicking your mouse and dragging
●Click on the shape and the layers will appear on the left of your screen. From the popped up screen, click on “properties”. Here you can find multiple animation options and you can even edit frame by frame. Add frames at regular intervals and move according to your wish
Part 3 5 Best Animation After Effects that you must know
1. Stacking animation – YouTube
Stacking animation is an excellent and simple trick that can make any animation look cool and complex. The stacking animation is nothing but the use of the stacking template multiple times. To do so, you just need to duplicate a few of the base layers. Next, you need to offset the duplicated frames by a few frames and finally add some effects. The Adding of stacking animation will result in a slight extension of your animation layers. You can further customize your frames by adding effects or color to enhance the animation.
2. Light sweeps
An advantage of using the after effects software is that it offers several drag and drop features which you can simply drag and drop to your animation to enhance its looks. A light sweep animation is one such animation that can add great value to your animation. You can add this effect by following the steps given below
●Head to “effects” from your main interface
●Here you need to find “generate”
●Now from the list of drag and drop animations, drag and drop “light sweeps” onto your workspace
You can then change and customize almost any aspect of the animation simply by clicking on it and changing the settings
3. Quick shape animation
This is a very cool trick that you can use on your 2d objects! This includes the creation of your own layer(you can use any 2d shape). Further, you need to duplicate your shape and the stagger the animation. This gives the entire animation an interesting and engaging effect. The trick is very resourceful while dealing with 2d objects.
4. Animate your background
When your entire animation looks slightly basic and you wish to give your animation a zest, this trick is highly useful! If you’re working with colored backgrounds, this animation trick can help make it more attractive. This animation is simply just adding motion to your background making it look like it’s moving in or out.
5. Graphics reflection
Although this method is slightly complicated, it could enhance the animation by leaps and bounds. To do so, you need to write a fancy text of your choice, then you need to duplicate this text, and further, you need to flip it vertically. To make it look more realistic, you can add the blur effect. This will make it look like the duplicated text is a reflection of the original text
Part 4 5 Character Animation Tools for After Effects
1. Rubber hose 2
Rubber hose is one of the primitive tools for adding animations. This is mainly because it was found in the early 2000s and back then, animations had wobbly legs and an absurd body structure. This tool has several cool inbuilt functions that make the animation so much simpler. The robust tool. makes animation pretty simple and hassle-free. Rubber hose 2 is an advanced version of rubber hose, it has several advanced features. The plug-in is however not free, you’d need to purchase it at $45 in order to gain a lifetime access.
2. Duik
Duik is one of the most advanced and comprehensive character animation tools in the market. It was initially launched in 2008, but since then there’s been a vast improvement in the tool’s features and today it’s one of the picks to perform animation using rigging and other animation techniques. Duik has several tools that make the animation so convenient. The tool has features such as auto rig, which helps save time while animating. Other tools include effects such as bones, rigging, various filters, and effects.
3. Joystick ‘n sliders
Joystick’n sliders is another highly utilitarian tool for animators. Along with key animation features such as rigging and boning, the tool has other cool and highly useful features to make your animation interesting! The user interface of this tool is a big plus, the simplicity of the user interface makes the tool perfect for beginners and advanced level animators. The tool is simple to use and has a plethora of cool features which could help you make your animation highly engaging.
4. Puppet tool 3
Puppet tool 3 is an after effects plugin that could help you create character animations. The plug-in is different from the in-built puppet tool in after effects. The puppet tool inbuilt into after effects are the Rigging tool for animation, however using the inbuilt tool is slightly sophisticated. Puppet tool 3 is not an individual tool but works in coordination with the inbuilt the puppet tool. Since using the inbuilt tool was complex, puppet tool 3 made it simple. Apart from rigging, the plugin also allows you to work with a few additional features. You can buy the plug-in for only $39.95!
5. Adobe animate character
Adobe character animation is the in-house plugin of Adobe to animate characters. However, the tool is probably still in development. Adobe has been working on releasing this tool for a while now, and in the latest version of after effects, Adobe added the beta version of the character animator. Character animator is probably the most efficient and advanced animation tool. It uses facial recognition for animations and allows you to perform almost all basic animations. The software is perfect when you’re trying to create a complex animated character.
Key Takeaways from This Episode
● Today we’ve dwelled a lot into animation and the tools available for animation.
● We’ve seen how animation could be enhanced using the inbuilt tools available in Adobe after effects.
● We’ve also gone a step further and seen the external plugin tools that you can use to make character animations and highly advanced 2d effects ok animations.
● We’ve also taken an overview on how to create a simple basic 2d motion animation, all in all, we’ve gone from understanding the beginner level animation to understanding advanced animation
Samples of Cartoon Character Face
Samples of Cartoon Character Face to Inspire You
An easy yet powerful editor
Numerous effects to choose from
Detailed tutorials provided by the official channel
Being able to draw facial features is an essential skill for any animator. Whether you are a beginner at drawing faces or an experienced cartoon artist that has been drawing for years, this is a skill that can gradually improve with time. With the implementation and use of simple shapes, creating various facial features and cartoon styles can be done quickly.
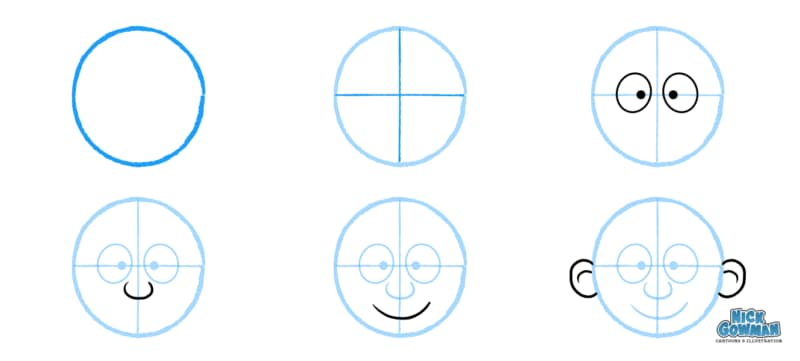
The methods of creating funny face cartoon characters are suitable for everyone, even if they do not have a single day of illustrating experience. These methods presented in this article are easily accessible to provide you with different results depending on your budget and your desired outcome.
The act of drawing cartoon faces can be effortless, and in this article, we will give you some fundamental samples of how you can draw cartoon faces of your own.
In this article
01 [Learn to Understand the Core of Cartoon Style](#Part 1)
02 [Top 12 Cartoon Face Examples](#Part 2)
03 [How to Draw a Cartoon Face - For Beginners](#Part 3)
04 [How to Easily Turn Yourself into a Cartoon](#Part 4)
Part 1 Learn to Understand the Core of Cartoon Style
First, you need to simplify the different parts of the cartoon character face to pick up on very subtle facial expressions and features. For example, the eyes’ shape and size will help determine if the person is feeling sad, excited, happy, excited, or sad. In addition, the amount of lift under a person’s eyebrows can help determine whether a person is mad or not.
These facial expressions are crucial to how a person communicates. It has got to the point that we can read someone’s face without truly understanding which parts of the face convey that emotion. However, these days we get exposed to everyday adaptations of facial expressions, especially with the invention of Instagram, Snapchat, and cartoon face filters.
Consequently, cartoons are a combination of different shapes that are being put together and are not difficult if the focus is on each shape individually and the process breaks down step by step.
Cartoons are a mixture of different shapes put together. It’s not difficult if you focus on each shape individually and break down the process step by step.
Finally, understanding these unconscious and subtle differences in facial expressions is crucial when planning out an animated character. Afterward, when understood, you can simplify the features to be recognizable by your audience.
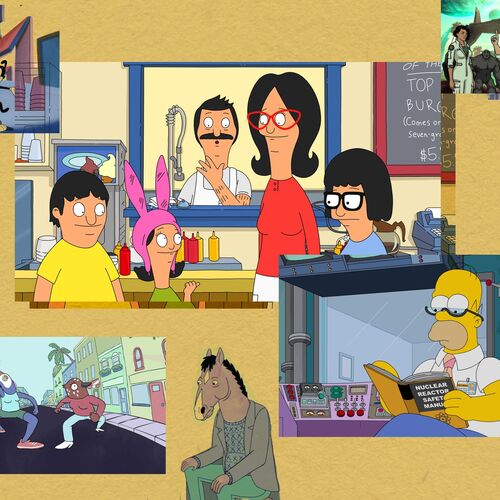
Part 2 Top 12 Cartoon Face Examples
Cartoon character faces are gaining immense importance in design art due to their universality. Cartoon faces can represent people in several situations and add a comic or satirical twist to dull topics by highlighting their importance. However, drawing cartoon faces require a lot of skill and differentiation, and graphic designers, while working on basic and universal templates, always try and introduce unique elements.
Here are the top 10 examples of cartoon character faces you can choose from when you want to make your designs:
01Men and Women
This sketch features different facial expressions made by older men and women.
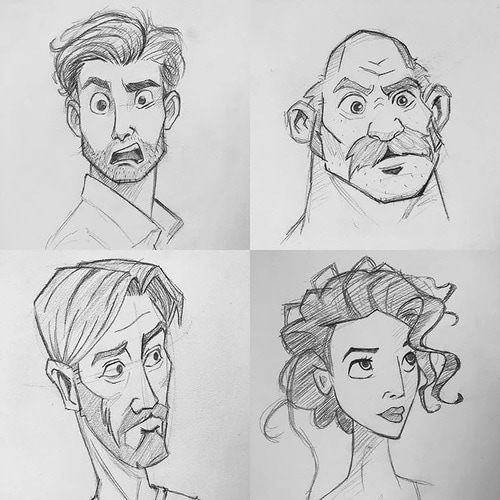
02Stretch and Squash
This photo shows the difference between squashing and stretching the face and provides references for extreme squash and extreme stretch.

03Dramatic Expressions
The expressions drawn here are super fun and dramatic. However, it is a great way to have fun and practice how to draw facial expressions simultaneously.
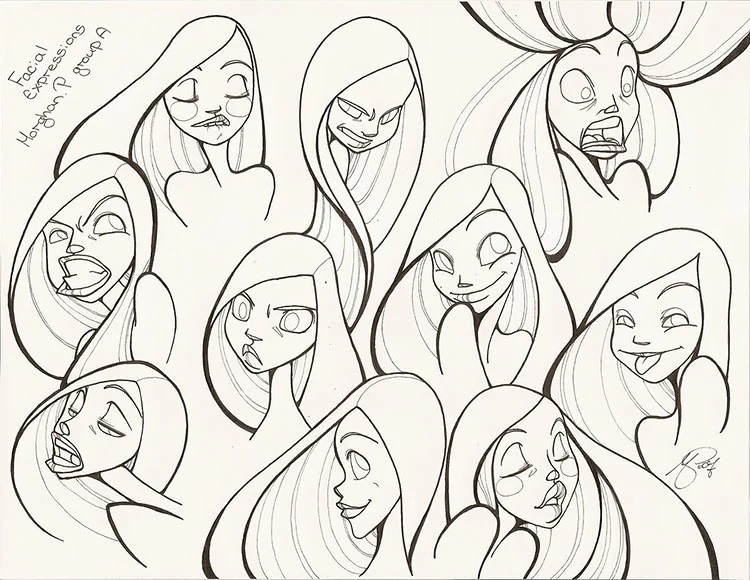
04Quick Expressive Sketches
With this, you can practice how to draw different facial expressions by doing quick sketches like this one. Perhaps you do not need to pay attention to perfection.
05This Is Good This Is Better
With this facial expression, you can see a good look and an even better expression. It shows the difference that subtle changes can make to your facial expressions**.**
06Male and Female Expressions
This includes both male and female expressions to express the facial reaction of both genders, like some funny cartoon characters face.
07Quick Sketches
This type of facial expression will help you get better at drawing cartoons, and you can use do some quick sketches every day.

08Jay Leno’s facial expression
Here, it is being exaggerated on a few of his most prominent facial features, including his chin. It is kind of a fat face cartoon character.
09Robert Pattinson Facials
In this photo, his head shape was distorted to show the thinness of his face, and his big hair also accentuates this prominent feature further.
10A,I,U,O,AE,M Facials
With this, you can practice how to draw your facial expression by pronouncing a, i, u, o, ae, m.

Part 3 How to Draw a Cartoon Face - For Beginners
Here, we have written down 7-step to follow on how to draw a cartoon character face as a beginner effectively.
● Step 1: Plan and Prepare
This is the first step is to plan out exactly what this character will convery through its expression while drawing a cartoon character.
● Step 2: Drawing A Cartoon Head
Next is time to start sketching out the shape of the head based on the plan you have made. Whatsoever shape you decide to use for your character, start with a circle to serve as the basic shape for the head.
● Step 3: Drawing Cartoon Eyes
Now, you need to draw the eye of the character, which is a crucial step because the eye is the essential part of their expression. To get the character’s eyes in the right place, you should carefully sketch the horizontal or vertical dimension lines.
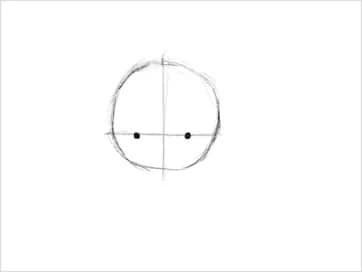
● Step 4: Drawing A Cartoon Nose
The simpler the nose is, the better it looks in a cartoon. Ensure to keep a proper ratio between the mouth, eyes, and nose so that it does not look too crowded together.
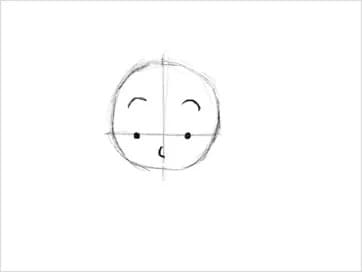
● Step 5: Shaping the Face
In shaping the face, one needs to be mindful of the character, which will help to determine how to shape the jawline and head. For example, for a girl, the face should be narrower and have the chin come to a bit of a point at the end, whereas, for a boy, it requires that the face is a bit bolder and focuses more on the definition of the jawline.
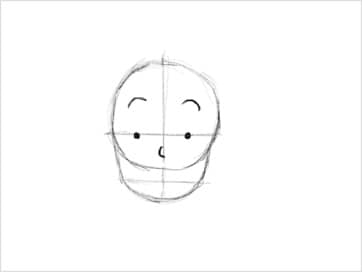
● Step 6: Drawing A Cartoon Mouth
The mouth is another essential part of the cartoon character’s expression and a key indicator of how the character is feeling. It portrays whether you want the character to smile, frown, yell, be nervous, or be neutral.
● Step 7: Drawing Cartoon Hair
Next, you need to draw the cartoon hair, and, in some cases, the cartoon hair is a significant part of their appearance as it is a way to convey your character’s personality, appearance, style, or gender.
● Step 8: Coloring
Another part requires you to paint your character to improve the texture and make it beautiful.
Part 4 How to Easily Turn Yourself into a Cartoon
Are you looking to turn yourself into a cartoon? This is very necessary as it provides you with a great way to integrate diverse characters into your brand’s marketing while simultaneously keeping your content personalized.
However, after converting a picture to a cartoon character face, you can decide to animate it, and the best tool is Wondershare Filmora Video Editor . Animation is a great way to advertise your business, especially during times like these. it is a clever way for leaders, CEOs, and managers to connect with their remote workers and boost engagement, company culture, and ultimately work morale. Filmora is also a great tool to create creative and powerful animation with tons of follow-come effect that enables you to carry it out effectively and efficiently. In this section, we will guide you on how to turn yourself into a cartoon easily:
Step 1: Visit Powtoon.com and sign up for a free account, then click on the “build your character” option from the dropdown menu.
Step 2: Next is to select the cartoon gender you want.
Step 3: Finally, you can customize your character’s facial features such as skin, hair, color, clothes, and animated gestures.
Step 4: Once you are satisfied with the result, you can save it on your device or share it on social media
For Win 7 or later (64-bit)
For macOS 10.12 or later
● Ending Thoughts →
● Thus, we saw how to easily cartoon your character’s face via some samples to help you out. With the method listed above, you can easily use it to create a square-faced cartoon character or draw a fat face cartoon character.
● This article also explained how to cartoon yourself. However, to cartoon your video or create a cartoon animated video, we recommend that you use Filmora, its keyframing feature to help you carry this out effectively.
Being able to draw facial features is an essential skill for any animator. Whether you are a beginner at drawing faces or an experienced cartoon artist that has been drawing for years, this is a skill that can gradually improve with time. With the implementation and use of simple shapes, creating various facial features and cartoon styles can be done quickly.
The methods of creating funny face cartoon characters are suitable for everyone, even if they do not have a single day of illustrating experience. These methods presented in this article are easily accessible to provide you with different results depending on your budget and your desired outcome.
The act of drawing cartoon faces can be effortless, and in this article, we will give you some fundamental samples of how you can draw cartoon faces of your own.
In this article
01 [Learn to Understand the Core of Cartoon Style](#Part 1)
02 [Top 12 Cartoon Face Examples](#Part 2)
03 [How to Draw a Cartoon Face - For Beginners](#Part 3)
04 [How to Easily Turn Yourself into a Cartoon](#Part 4)
Part 1 Learn to Understand the Core of Cartoon Style
First, you need to simplify the different parts of the cartoon character face to pick up on very subtle facial expressions and features. For example, the eyes’ shape and size will help determine if the person is feeling sad, excited, happy, excited, or sad. In addition, the amount of lift under a person’s eyebrows can help determine whether a person is mad or not.
These facial expressions are crucial to how a person communicates. It has got to the point that we can read someone’s face without truly understanding which parts of the face convey that emotion. However, these days we get exposed to everyday adaptations of facial expressions, especially with the invention of Instagram, Snapchat, and cartoon face filters.
Consequently, cartoons are a combination of different shapes that are being put together and are not difficult if the focus is on each shape individually and the process breaks down step by step.
Cartoons are a mixture of different shapes put together. It’s not difficult if you focus on each shape individually and break down the process step by step.
Finally, understanding these unconscious and subtle differences in facial expressions is crucial when planning out an animated character. Afterward, when understood, you can simplify the features to be recognizable by your audience.
Part 2 Top 12 Cartoon Face Examples
Cartoon character faces are gaining immense importance in design art due to their universality. Cartoon faces can represent people in several situations and add a comic or satirical twist to dull topics by highlighting their importance. However, drawing cartoon faces require a lot of skill and differentiation, and graphic designers, while working on basic and universal templates, always try and introduce unique elements.
Here are the top 10 examples of cartoon character faces you can choose from when you want to make your designs:
01Men and Women
This sketch features different facial expressions made by older men and women.
02Stretch and Squash
This photo shows the difference between squashing and stretching the face and provides references for extreme squash and extreme stretch.
03Dramatic Expressions
The expressions drawn here are super fun and dramatic. However, it is a great way to have fun and practice how to draw facial expressions simultaneously.
04Quick Expressive Sketches
With this, you can practice how to draw different facial expressions by doing quick sketches like this one. Perhaps you do not need to pay attention to perfection.
05This Is Good This Is Better
With this facial expression, you can see a good look and an even better expression. It shows the difference that subtle changes can make to your facial expressions**.**
06Male and Female Expressions
This includes both male and female expressions to express the facial reaction of both genders, like some funny cartoon characters face.
07Quick Sketches
This type of facial expression will help you get better at drawing cartoons, and you can use do some quick sketches every day.
08Jay Leno’s facial expression
Here, it is being exaggerated on a few of his most prominent facial features, including his chin. It is kind of a fat face cartoon character.
09Robert Pattinson Facials
In this photo, his head shape was distorted to show the thinness of his face, and his big hair also accentuates this prominent feature further.
10A,I,U,O,AE,M Facials
With this, you can practice how to draw your facial expression by pronouncing a, i, u, o, ae, m.
Part 3 How to Draw a Cartoon Face - For Beginners
Here, we have written down 7-step to follow on how to draw a cartoon character face as a beginner effectively.
● Step 1: Plan and Prepare
This is the first step is to plan out exactly what this character will convery through its expression while drawing a cartoon character.
● Step 2: Drawing A Cartoon Head
Next is time to start sketching out the shape of the head based on the plan you have made. Whatsoever shape you decide to use for your character, start with a circle to serve as the basic shape for the head.
● Step 3: Drawing Cartoon Eyes
Now, you need to draw the eye of the character, which is a crucial step because the eye is the essential part of their expression. To get the character’s eyes in the right place, you should carefully sketch the horizontal or vertical dimension lines.
● Step 4: Drawing A Cartoon Nose
The simpler the nose is, the better it looks in a cartoon. Ensure to keep a proper ratio between the mouth, eyes, and nose so that it does not look too crowded together.
● Step 5: Shaping the Face
In shaping the face, one needs to be mindful of the character, which will help to determine how to shape the jawline and head. For example, for a girl, the face should be narrower and have the chin come to a bit of a point at the end, whereas, for a boy, it requires that the face is a bit bolder and focuses more on the definition of the jawline.
● Step 6: Drawing A Cartoon Mouth
The mouth is another essential part of the cartoon character’s expression and a key indicator of how the character is feeling. It portrays whether you want the character to smile, frown, yell, be nervous, or be neutral.
● Step 7: Drawing Cartoon Hair
Next, you need to draw the cartoon hair, and, in some cases, the cartoon hair is a significant part of their appearance as it is a way to convey your character’s personality, appearance, style, or gender.
● Step 8: Coloring
Another part requires you to paint your character to improve the texture and make it beautiful.
Part 4 How to Easily Turn Yourself into a Cartoon
Are you looking to turn yourself into a cartoon? This is very necessary as it provides you with a great way to integrate diverse characters into your brand’s marketing while simultaneously keeping your content personalized.
However, after converting a picture to a cartoon character face, you can decide to animate it, and the best tool is Wondershare Filmora Video Editor . Animation is a great way to advertise your business, especially during times like these. it is a clever way for leaders, CEOs, and managers to connect with their remote workers and boost engagement, company culture, and ultimately work morale. Filmora is also a great tool to create creative and powerful animation with tons of follow-come effect that enables you to carry it out effectively and efficiently. In this section, we will guide you on how to turn yourself into a cartoon easily:
Step 1: Visit Powtoon.com and sign up for a free account, then click on the “build your character” option from the dropdown menu.
Step 2: Next is to select the cartoon gender you want.
Step 3: Finally, you can customize your character’s facial features such as skin, hair, color, clothes, and animated gestures.
Step 4: Once you are satisfied with the result, you can save it on your device or share it on social media
For Win 7 or later (64-bit)
For macOS 10.12 or later
● Ending Thoughts →
● Thus, we saw how to easily cartoon your character’s face via some samples to help you out. With the method listed above, you can easily use it to create a square-faced cartoon character or draw a fat face cartoon character.
● This article also explained how to cartoon yourself. However, to cartoon your video or create a cartoon animated video, we recommend that you use Filmora, its keyframing feature to help you carry this out effectively.
How to Create Picsart Cartoon in Simple Ways
How to Create Picsart Cartoon
An easy yet powerful editor
Numerous effects to choose from
Detailed tutorials provided by the official channel
Cartoonized images are a convenient source of fun and media entertainment in present times. Try hands at creating your own caricature masterpieces with Picsart!
In this article
01 [How To Edit Cartoon Picture in Picsart](#Part 1)
02 [How To Make A Cartoon On Your Phone](#Part 2)
03 [How to Cartoon Yourself on Picsart](#Part 3)
Part 1 How to Edit Cartoon Picture in Picsart
Cartoonized pictures as you must be aware of, are comic transformations of real-time images and are widely used on social media to add a funny angle to the diversity of conversation going on, or even just as a source of plentiful amusement.
If you often feel motivated to experiment with the art and are looking for a perfect solution, see through the following section for a detailed and stepwise guide to create and edit a Picsart cartoon with utmost ease and within a quick time span:
User’s Guide to Edit Cartoon Pictures in Picsart
Step 1: Download the Picsart Application
Visit the official Picsart website to download the desktop version of the app in your Windows or MacOs supported PC.
Step 2: Make a Selection
Launch the app in your system to reach the Picsart welcome screen. Navigate to the bottom and tap the ‘+’ symbol. You are now required to choose a desired image to create the cartoon edit. You can either browse through your system gallery or search a specific one from the Picsart photo library in the ‘Search Bar’ at the top of the app screen.

Step 3: Let’s Get Editing!
When you have made your choice, navigate to the toolbar at the bottom of the app screen and click on the ‘Effects’ tab. Make a side scroll to choose a specific effect category, like that of ‘Artistic’ or ‘Magic’ to open a library of effects in the selected category.
As an example, selecting the ‘Cartoonizer’ option in the ‘Artistic’ effects category can add an immediate caricature feel to your selected real-time image. You can further include manual adjustments to get the perfect cartoon look by pressing and holding the ‘Cartoonizer’ option. There are a whole variety of magical effects, such as, Neo Pop, Soul, Badlands, Animation and Paw in the ‘Magic’ effects category, that are just perfect in giving your edit a fantasizing look with a Picsart cartoon background.
If you are looking for a quicker editing process, prefer adding cartoonized elements, like ‘Picsart Stickers’ to your image instead of going for a complete caricature edit. To do this, open the ‘Picsart Photo Editor’, navigates to the ‘Sticker’ symbol and click on it, followed by searching ‘Cartoon Sticker’. You can alternatively search a specific keyword with the ‘Cartoon’ descriptor, if you are clear on what you want to add.
You can further, resize your selected sticker with a ‘Two Finger Pinch’ or use the ‘Eraser’ tool to ward off any unwanted portions from the same. You are free to take as many repetitions of the process as you wish, till you get the perfect result for saving to your device and sharing on your social media handles.

Step 4: Time to Save and Share!
When you are satisfied with your work, navigate to the right hand corner and tap ‘Apply’ to finalize your changes, followed by clicking on the ‘Next’ button at the top right corner of the app screen to save and export your creation.
Part 2 How to Make a Cartoon on Your Phone
After a detailed analysis of the cartoon editing procedure in your desktops, let us see thro ugh the method of creating cartoonized images on your MacOs and Android smartphones on the following section:
Stepwise Procedure for Creating Cartoonized Images on Phone
Step 1: Download the Application
When going to use the Picsart editor application on your smartphone, you will first require a download of the same in your concerned device. You can do this by visiting the ‘Google PlayStore’ for an Android device or the ‘Apple App Store’ for MacOs smartphones.
Step 2: Choose a Real-time Image
After a successful launch of the ‘Picsart Editor’ application in your smartphone, reach to and click on the ‘+’ icon at the bottom of the app’s working interface. This needs to be followed by selecting any specific real-time image, either from your smartphone gallery or the Picsart photo library using the top ‘Search Bar’ of the interface, for creating a cartoonized edit.

Step 3: Editing Begins!
Once you are done with selecting the image, proceed to add effects to your selection by clicking the ‘Effects’ tab in the bottom toolbar, succeeded by picking a desired effect type through a right scroll. Tap on any category, such as, Magic, Artistic, etc, to open the effect library of the same.
For instance, you can click on the ‘Cartoonizer’ option within Artistic’ effects to supplement your uploaded real-time image with an instant cartoonized effect. You are also granted the liberty to make manual changes to set the caricature image effects as per your preferences, which you can do with a ‘Press and Hold’ of the ‘Cartoonizer’ tab. If you have a diversion towards complementing your cartoonized images with magical effects, choose from Animation, Neo Pop, Paw, Badlands, Paw, and other amazing options in the ‘Magic’ category.

Step 4: Save and Export
When you have completed the editing process and the changes satisfy you, go to the ‘Apply’ tab at the right side of the editor screen to see the changes appear in your edit. You can now navigate to the upper right corner of the app screen and click on ‘Next’ to save your work locally to your device, along with exporting the same across different media platforms.
Part 3 How to Cartoon Yourself on Picsart
Having learnt about the interesting ways to edit cartoon pictures and create cartoons on your smartphone, you might like to try hands on creating a cartoon portrait of yourself in the Picsart editor for a variety of reasons, like that of creating cartoon profile pics of yourself. Let us have a look of the procedure for the same using the Picsart Online Image Editor tool in the following section:
User’s Guide to Create a Cartoon Portrait With Picsart Online Photo Editor
Step 1: Launch the Application
In any of your favorite internet browsers, search for and open ‘Picsart Desktop Editor’. In the app’s working interface, tap ‘Upload’ or ‘New Project’ to choose an image from your device or the free to use Picsart image library respectively, for proceeding with the cartoonized transformations.

Step 2: Edit Your Selection
Tap on the ‘Effects’ tab from the editing toolbar at the top of your image and select a desired effect category to access the diversity of cartoonifying filters. It is recommended to select the ‘Magic’ category for the most splendid cartoon effects, such as, Paw, Badland, Animation, Soul and Neo Pop among many others.

You can even make manual adjustments in the brightness, color, saturation, burn and fade, etc., of the image by clicking on the ‘Adjust’ and ‘Blend’ options at the top of the image workspace.

Step 3: Download and Share Your Work
When you are done editing, navigate to and click on the ‘Share’ option at the upper right corner of the editor screen to download your cartoonized image.

****Wondershare Filmora Video Editor Cartoon Image Creator**
For Win 7 or later (64-bit)
For macOS 10.12 or later
Picsart is certainly a dependable solution to create caricature images, but if you are keen on looking for an alternative application to cater to the need, Introduced to the software market by Wondershare, the Filmora Cartoon Image Creator can be a convenient rescue. The app promises you of a high quality cartoonized edit with a plethora of editing effects to suit your most specific editing preferences.
● Ending Thoughts →
● Creating cartoonized edits from real time images is a fun and entertaining activity along with being the latest media trend.
● The Picsart editor application allows making caricature images from actual stills through desktop, smartphone and online compatible image editing program.
● Talking of suitable Picsart alternatives, you can rely on the Filmora Cartoon Image Creator application for high quality cartoonized image creation.
Cartoonized images are a convenient source of fun and media entertainment in present times. Try hands at creating your own caricature masterpieces with Picsart!
In this article
01 [How To Edit Cartoon Picture in Picsart](#Part 1)
02 [How To Make A Cartoon On Your Phone](#Part 2)
03 [How to Cartoon Yourself on Picsart](#Part 3)
Part 1 How to Edit Cartoon Picture in Picsart
Cartoonized pictures as you must be aware of, are comic transformations of real-time images and are widely used on social media to add a funny angle to the diversity of conversation going on, or even just as a source of plentiful amusement.
If you often feel motivated to experiment with the art and are looking for a perfect solution, see through the following section for a detailed and stepwise guide to create and edit a Picsart cartoon with utmost ease and within a quick time span:
User’s Guide to Edit Cartoon Pictures in Picsart
Step 1: Download the Picsart Application
Visit the official Picsart website to download the desktop version of the app in your Windows or MacOs supported PC.
Step 2: Make a Selection
Launch the app in your system to reach the Picsart welcome screen. Navigate to the bottom and tap the ‘+’ symbol. You are now required to choose a desired image to create the cartoon edit. You can either browse through your system gallery or search a specific one from the Picsart photo library in the ‘Search Bar’ at the top of the app screen.
Step 3: Let’s Get Editing!
When you have made your choice, navigate to the toolbar at the bottom of the app screen and click on the ‘Effects’ tab. Make a side scroll to choose a specific effect category, like that of ‘Artistic’ or ‘Magic’ to open a library of effects in the selected category.
As an example, selecting the ‘Cartoonizer’ option in the ‘Artistic’ effects category can add an immediate caricature feel to your selected real-time image. You can further include manual adjustments to get the perfect cartoon look by pressing and holding the ‘Cartoonizer’ option. There are a whole variety of magical effects, such as, Neo Pop, Soul, Badlands, Animation and Paw in the ‘Magic’ effects category, that are just perfect in giving your edit a fantasizing look with a Picsart cartoon background.
If you are looking for a quicker editing process, prefer adding cartoonized elements, like ‘Picsart Stickers’ to your image instead of going for a complete caricature edit. To do this, open the ‘Picsart Photo Editor’, navigates to the ‘Sticker’ symbol and click on it, followed by searching ‘Cartoon Sticker’. You can alternatively search a specific keyword with the ‘Cartoon’ descriptor, if you are clear on what you want to add.
You can further, resize your selected sticker with a ‘Two Finger Pinch’ or use the ‘Eraser’ tool to ward off any unwanted portions from the same. You are free to take as many repetitions of the process as you wish, till you get the perfect result for saving to your device and sharing on your social media handles.
Step 4: Time to Save and Share!
When you are satisfied with your work, navigate to the right hand corner and tap ‘Apply’ to finalize your changes, followed by clicking on the ‘Next’ button at the top right corner of the app screen to save and export your creation.
Part 2 How to Make a Cartoon on Your Phone
After a detailed analysis of the cartoon editing procedure in your desktops, let us see thro ugh the method of creating cartoonized images on your MacOs and Android smartphones on the following section:
Stepwise Procedure for Creating Cartoonized Images on Phone
Step 1: Download the Application
When going to use the Picsart editor application on your smartphone, you will first require a download of the same in your concerned device. You can do this by visiting the ‘Google PlayStore’ for an Android device or the ‘Apple App Store’ for MacOs smartphones.
Step 2: Choose a Real-time Image
After a successful launch of the ‘Picsart Editor’ application in your smartphone, reach to and click on the ‘+’ icon at the bottom of the app’s working interface. This needs to be followed by selecting any specific real-time image, either from your smartphone gallery or the Picsart photo library using the top ‘Search Bar’ of the interface, for creating a cartoonized edit.
Step 3: Editing Begins!
Once you are done with selecting the image, proceed to add effects to your selection by clicking the ‘Effects’ tab in the bottom toolbar, succeeded by picking a desired effect type through a right scroll. Tap on any category, such as, Magic, Artistic, etc, to open the effect library of the same.
For instance, you can click on the ‘Cartoonizer’ option within Artistic’ effects to supplement your uploaded real-time image with an instant cartoonized effect. You are also granted the liberty to make manual changes to set the caricature image effects as per your preferences, which you can do with a ‘Press and Hold’ of the ‘Cartoonizer’ tab. If you have a diversion towards complementing your cartoonized images with magical effects, choose from Animation, Neo Pop, Paw, Badlands, Paw, and other amazing options in the ‘Magic’ category.
Step 4: Save and Export
When you have completed the editing process and the changes satisfy you, go to the ‘Apply’ tab at the right side of the editor screen to see the changes appear in your edit. You can now navigate to the upper right corner of the app screen and click on ‘Next’ to save your work locally to your device, along with exporting the same across different media platforms.
Part 3 How to Cartoon Yourself on Picsart
Having learnt about the interesting ways to edit cartoon pictures and create cartoons on your smartphone, you might like to try hands on creating a cartoon portrait of yourself in the Picsart editor for a variety of reasons, like that of creating cartoon profile pics of yourself. Let us have a look of the procedure for the same using the Picsart Online Image Editor tool in the following section:
User’s Guide to Create a Cartoon Portrait With Picsart Online Photo Editor
Step 1: Launch the Application
In any of your favorite internet browsers, search for and open ‘Picsart Desktop Editor’. In the app’s working interface, tap ‘Upload’ or ‘New Project’ to choose an image from your device or the free to use Picsart image library respectively, for proceeding with the cartoonized transformations.
Step 2: Edit Your Selection
Tap on the ‘Effects’ tab from the editing toolbar at the top of your image and select a desired effect category to access the diversity of cartoonifying filters. It is recommended to select the ‘Magic’ category for the most splendid cartoon effects, such as, Paw, Badland, Animation, Soul and Neo Pop among many others.
You can even make manual adjustments in the brightness, color, saturation, burn and fade, etc., of the image by clicking on the ‘Adjust’ and ‘Blend’ options at the top of the image workspace.
Step 3: Download and Share Your Work
When you are done editing, navigate to and click on the ‘Share’ option at the upper right corner of the editor screen to download your cartoonized image.
****Wondershare Filmora Video Editor Cartoon Image Creator**
For Win 7 or later (64-bit)
For macOS 10.12 or later
Picsart is certainly a dependable solution to create caricature images, but if you are keen on looking for an alternative application to cater to the need, Introduced to the software market by Wondershare, the Filmora Cartoon Image Creator can be a convenient rescue. The app promises you of a high quality cartoonized edit with a plethora of editing effects to suit your most specific editing preferences.
● Ending Thoughts →
● Creating cartoonized edits from real time images is a fun and entertaining activity along with being the latest media trend.
● The Picsart editor application allows making caricature images from actual stills through desktop, smartphone and online compatible image editing program.
● Talking of suitable Picsart alternatives, you can rely on the Filmora Cartoon Image Creator application for high quality cartoonized image creation.
How to Animate Image on Scroll and Text on Scroll?
How to Animate Image on Scroll and Text on Scroll?
An easy yet powerful editor
Numerous effects to choose from
Detailed tutorials provided by the official channel
Over the years, web designers have tried different tactics to make their websites visually engaging. From marquee tags to animated navigation bars, designers tried everything they could to enhance the overall visual appearance of their websites.
One such tactic - that even brands like Sony and Apple - followed was image-on-scroll and text-on-scroll animations.
In this article
01 [How to Make Scroll Image Animation Like Apple?](#Part 1)
02 [How to Create a Scrolling Text Animation (Infinite Loop)](#Part 2)
Part 1 How to Make Scroll Image Animation Like Apple?
First, let’s take a look at different ways to make scroll-image animation like Apple. An image-on-scroll animation is an animation playback that appears on images as you continue to scroll down a website. You can use multiple methods to implement scroll image animations on your website.
01Use Filmora
Wondershare Filmora Video Editor is a feature-packed video editing tool that’s designed to help video editors create high-quality videos in a hassle-free manner. The tool offers a timeline-based interface that streamlines the entire video editing process and helps professionals execute complex video editing tasks in no time. In addition to its basic editing features, Filmora also offers advanced editing functions including color grading, motion tracking, and keyframing. It means you can easily turn your RAW footage into high-quality videos without any hassle.
Using Wondershare Filmora to animate images on scroll will be an ideal solution if you want to integrate a visually appealing element to your website. Let’s walk you through the step-by-step procedure of using Wondershare Filmora to create image-on-scroll animations.

Wondershare Filmora - Best Video Editor for Mac/Windows
5,481,435 people have downloaded it.
Build unique custom animations without breaking a sweat.
Focus on creating epic stories and leave the details to Filmora’s auto features.
Start a creative adventure with drag & drop effects and endless possibilities.
Filmora simplifies advanced features to save you time and effort.
Filmora cuts out repetition so you can move on to your next creative breakthrough.
Step 1 - Launch Filmora on your system and import the video/image that you want to edit. Then, load the selected file to Filmora’s timeline to proceed further.
Step 2 - Now, double-tap the video/image. This will launch the editing panel on your screen. Here, switch to the “Animation” panel.

Step 3 - Here you can either select “Presets” or click the “Customize” tab to create a custom animation through keyframing.

Step 4 - If you want to save time, however, it would be better to choose the “Presets” tab. Then, select the preset that you want to use.
Step 5 - Now, drag the selected preset to the timeline. Again, double-tap the preset layer. An editing panel will appear on your screen. Here you can adjust different elements of the preset to customize its playback.

So, that’s everything you need to know about animating image-on-scroll using Wondershare Filmora.
02Use ScrollSequence
Now, if you are not a professional editor or don’t want to overcomplicate things, you can use ScrollSequence to add image-on-scroll animation to your website. For readers who don’t know, ScrollSequence is a built-in WordPress plugin that you can directly install in your WordPress manager. The tool offers hundreds of ready-to-use animation templates that you can integrate and customize without any hassle.
All the templates offer complete customization, which means you can adjust the animation playback, import your own media files, and even customize the text. It’s worth understanding that this method will only work if you are using WordPress as the CMS platform for your website. ScrollSequence is only available as a WordPress plugin and you won’t be able to use it with any other website builder
03Write Your Own JavaScript Code
Finally, you can also write your own JavaScript code to animate image-on-scroll. However, this method will be a bit complicated as you would require technical expertise to write dedicated JavaScript scripts to animate image-on-scroll. If you choose this solution, you’ll have to start with writing HTML and CSS codes. This will help you style your web page in the beginning. And, once the web design is up and ready, you can move towards writing the JavaScript code to animate image-on-scroll in your web page.
Part 2 How to Create a Scrolling Text Animation (Infinite Loop)
Like image-on-scroll, text-on-scroll is another popular way to add visually appealing animations to your web designs. Text-on-scroll animations work the same way as image-on-scroll animations - the only difference is that these types of animations focus on the text playback instead of images. Again, you can use different methods to animate text on scroll and make your website’s content run in an infinite loop.
Some of these methods include:
01Use Filmora
Thanks to Filmora’s advanced editing panel, you can also use it to animate text within the videos. This will be an ideal solution for users who want to add videos with dedicated text banners and titles on their websites. With Filmora, you’ll be able to animate the text and make custom transitions in a hassle-free manner. Let’s walk you through the detailed procedure of using Wondershare Filmora to add text animation to your videos.
Step 1 - Open Filmora on your system and load the video into its timeline.
Step 2 - Double-tap the video file, and switch to the “Titles” tab. You’ll see a list of different title templates on your screen. Browse through these results and drag the desired template to the timelines. Make sure to adjust the title layer right above the video layer.

Step 3 - Again, double-click the title layer and you’ll see a dedicated text editor on your screen. Here enter the text that you want to display within the video. You can also select text size, orientation, and font to personalize its appearance.
Step 4 - Finally, switch to the “Animation” tab at the left sidebar. Choose any of these animation templates and the text within the video will be animated automatically.

So, that’s how you can use Filmora to animate text-on-scroll to improve the overall visual appearance of your website videos.
02Scroll-Text-Animations for Single Words
Another way to implement scroll-text animations is to modify the HTML & CSS code of your website. Again, this method will only be feasible if you have prior coding experience and know how to write well-optimized code.

The easiest way to animate text scrolls is through single-line animations. In this situation, only one line gets displayed at any particular time, which automatically gets switched to the next one as soon as you scroll down the cursor. If you are planning to create simple text-based animations, this method will help you get the job done easily.
Key Takeaways from This Episode
● You can animate image-on-scroll and text-on-scroll to enhance the overall visual appearance of your websites and make them more engaging for the end-users.
● If you are planning to upload dedicated videos on your website, you can use Wondershare Filmora, a fully-functional video editing tool, to animate both images and text through an easy-to-navigate editing panel.
● You should only opt for the coding method if you are an experienced coder and have worked on HTML/CSS/JavaScript projects in the past.
Over the years, web designers have tried different tactics to make their websites visually engaging. From marquee tags to animated navigation bars, designers tried everything they could to enhance the overall visual appearance of their websites.
One such tactic - that even brands like Sony and Apple - followed was image-on-scroll and text-on-scroll animations.
In this article
01 [How to Make Scroll Image Animation Like Apple?](#Part 1)
02 [How to Create a Scrolling Text Animation (Infinite Loop)](#Part 2)
Part 1 How to Make Scroll Image Animation Like Apple?
First, let’s take a look at different ways to make scroll-image animation like Apple. An image-on-scroll animation is an animation playback that appears on images as you continue to scroll down a website. You can use multiple methods to implement scroll image animations on your website.
01Use Filmora
Wondershare Filmora Video Editor is a feature-packed video editing tool that’s designed to help video editors create high-quality videos in a hassle-free manner. The tool offers a timeline-based interface that streamlines the entire video editing process and helps professionals execute complex video editing tasks in no time. In addition to its basic editing features, Filmora also offers advanced editing functions including color grading, motion tracking, and keyframing. It means you can easily turn your RAW footage into high-quality videos without any hassle.
Using Wondershare Filmora to animate images on scroll will be an ideal solution if you want to integrate a visually appealing element to your website. Let’s walk you through the step-by-step procedure of using Wondershare Filmora to create image-on-scroll animations.
Wondershare Filmora - Best Video Editor for Mac/Windows
5,481,435 people have downloaded it.
Build unique custom animations without breaking a sweat.
Focus on creating epic stories and leave the details to Filmora’s auto features.
Start a creative adventure with drag & drop effects and endless possibilities.
Filmora simplifies advanced features to save you time and effort.
Filmora cuts out repetition so you can move on to your next creative breakthrough.
Step 1 - Launch Filmora on your system and import the video/image that you want to edit. Then, load the selected file to Filmora’s timeline to proceed further.
Step 2 - Now, double-tap the video/image. This will launch the editing panel on your screen. Here, switch to the “Animation” panel.
Step 3 - Here you can either select “Presets” or click the “Customize” tab to create a custom animation through keyframing.
Step 4 - If you want to save time, however, it would be better to choose the “Presets” tab. Then, select the preset that you want to use.
Step 5 - Now, drag the selected preset to the timeline. Again, double-tap the preset layer. An editing panel will appear on your screen. Here you can adjust different elements of the preset to customize its playback.
So, that’s everything you need to know about animating image-on-scroll using Wondershare Filmora.
02Use ScrollSequence
Now, if you are not a professional editor or don’t want to overcomplicate things, you can use ScrollSequence to add image-on-scroll animation to your website. For readers who don’t know, ScrollSequence is a built-in WordPress plugin that you can directly install in your WordPress manager. The tool offers hundreds of ready-to-use animation templates that you can integrate and customize without any hassle.
All the templates offer complete customization, which means you can adjust the animation playback, import your own media files, and even customize the text. It’s worth understanding that this method will only work if you are using WordPress as the CMS platform for your website. ScrollSequence is only available as a WordPress plugin and you won’t be able to use it with any other website builder
03Write Your Own JavaScript Code
Finally, you can also write your own JavaScript code to animate image-on-scroll. However, this method will be a bit complicated as you would require technical expertise to write dedicated JavaScript scripts to animate image-on-scroll. If you choose this solution, you’ll have to start with writing HTML and CSS codes. This will help you style your web page in the beginning. And, once the web design is up and ready, you can move towards writing the JavaScript code to animate image-on-scroll in your web page.
Part 2 How to Create a Scrolling Text Animation (Infinite Loop)
Like image-on-scroll, text-on-scroll is another popular way to add visually appealing animations to your web designs. Text-on-scroll animations work the same way as image-on-scroll animations - the only difference is that these types of animations focus on the text playback instead of images. Again, you can use different methods to animate text on scroll and make your website’s content run in an infinite loop.
Some of these methods include:
01Use Filmora
Thanks to Filmora’s advanced editing panel, you can also use it to animate text within the videos. This will be an ideal solution for users who want to add videos with dedicated text banners and titles on their websites. With Filmora, you’ll be able to animate the text and make custom transitions in a hassle-free manner. Let’s walk you through the detailed procedure of using Wondershare Filmora to add text animation to your videos.
Step 1 - Open Filmora on your system and load the video into its timeline.
Step 2 - Double-tap the video file, and switch to the “Titles” tab. You’ll see a list of different title templates on your screen. Browse through these results and drag the desired template to the timelines. Make sure to adjust the title layer right above the video layer.
Step 3 - Again, double-click the title layer and you’ll see a dedicated text editor on your screen. Here enter the text that you want to display within the video. You can also select text size, orientation, and font to personalize its appearance.
Step 4 - Finally, switch to the “Animation” tab at the left sidebar. Choose any of these animation templates and the text within the video will be animated automatically.
So, that’s how you can use Filmora to animate text-on-scroll to improve the overall visual appearance of your website videos.
02Scroll-Text-Animations for Single Words
Another way to implement scroll-text animations is to modify the HTML & CSS code of your website. Again, this method will only be feasible if you have prior coding experience and know how to write well-optimized code.
The easiest way to animate text scrolls is through single-line animations. In this situation, only one line gets displayed at any particular time, which automatically gets switched to the next one as soon as you scroll down the cursor. If you are planning to create simple text-based animations, this method will help you get the job done easily.
Key Takeaways from This Episode
● You can animate image-on-scroll and text-on-scroll to enhance the overall visual appearance of your websites and make them more engaging for the end-users.
● If you are planning to upload dedicated videos on your website, you can use Wondershare Filmora, a fully-functional video editing tool, to animate both images and text through an easy-to-navigate editing panel.
● You should only opt for the coding method if you are an experienced coder and have worked on HTML/CSS/JavaScript projects in the past.
You Can Turn a TikTok Into a GIF Now. Here’s How
You Can Turn a TikTok Into a GIF Now. Here’s How
An easy yet powerful editor
Numerous effects to choose from
Detailed tutorials provided by the official channel
Want to add sharing flexibility to TikTok videos? Convert them into GIFs!
In this article
01 [What is GIF TikTok?](#Part 1)
02 [How to Make a GIF From a TikTok Video](#Part 2)
Part 1 What Is TikTok GIF?
In today’s IT enhanced lifestyle, having a profound reach on social media is the new name of popularity. Everyone out there is profusely keen on creating and sharing a plethora of content varieties; memes, videos, animations and what not, across social communities. However, TikTok videos lag behind in this race; often lack the ‘Share’ flexibility.
To match up, there are solutions to convert TikTok video into GIFs. A TikTok GIF is a short, impactful and to the point clip that’s here to share fun and exciting content in the most interesting ways. If you have a bunch of TikTok videos to share with your peers, but missing out on an effective sharing solution, you can conveniently look forward to convert those videos into catchy and interesting GIFs that will definitely hold the attention of your viewers.
Feel motivated? See through the rest of this article to know some quick and easy TikTok to GIF conversion tools and software!
Part 2 How to Make a GIF From a TikTok Video
When looking through solutions to create GIF TikTok videos, you will find a pool of methods and tools available on the internet. All you need to do is select the best one for yourself and get started with converting TikTok Videos into GIFs. Given below are some of the best solutions adhering to the aforesaid concern:
01Filmora
Wondershare Filmora Video Editor is one of the best application software to create a TikTok GIF. This is a simple and smart converter application that caters to your concern in just a few minutes. What’s best is that this app is absolutely free to use and is compatible with your PC, smartphone and a variety of other devices. Here’s how you can use Filmora to convert your TikTok videos into GIFs:

Step 1: Import Your Video
Start with importing a desired TikTok video file to the Filmora timeline. You can also ‘Drag and Drop’ the video file to the editor timeline. Using this application, you have the flexibility to import your clip in almost any video format.

Step 2: Edit Your Clip
Suited to your content preferences, you can edit and enhance your clips with a variety of effects, like, cut, trim, rotate, split, etc., and make appropriate speed adjustments. You can even include text messages to make your GIF more impactful.

Wondershare Filmora
Get started easily with Filmora’s powerful performance, intuitive interface, and countless effects!
Try It Free Try It Free Try It Free Learn More >

Step 3: Let’s Save and Share!
When you are happy, save your work using the .gif file extension. That’s it! You are ready to share your creation with your social media peers.

02TikTok’s Inbuilt GIF Converter
TikTok allows you to directly convert its videos into GIFs. You can use the TikTok application in your smartphone to take up the conversion process. All you need to do is follow the steps given below:
Step 1: Select Your TikTok Video
To get started, open the TikTok application in your smartphone and select the video you want to convert into GIF.
Step 2: Share the Video
Click the ‘Share’ icon at the right of the video screen.

Step 3: Format Selection
Scroll down to the bottom of the screen and choose the ‘Share as GIF’ option. This will automatically convert your TikTok video into GIF in a few seconds.

Step 4: Save and Export
Click on the ‘Save Image’ option to save the GIF in your phone’s gallery. You can also export your creation to different social media platforms.
03Wondershare UniConverter
This one is a handy toolbox loaded with a variety of features that allow you to play with your video creativity. Using this tool, you can quickly create GIF for TikTok and also fix the size and duration of the same. This software supports almost all video formats and comes with an inbuilt editor that you can use to add effects and make your GIFs all the more interesting. This is compatible with your Windows or MacOS PC.
Take the following steps to create GIFs from TikTok videos using this software:

Step 1: Download and Launch the Application
Download the Wondershare UniConverter application to your PC from the software’s official website.
Step 2: Open GIF Maker
In the app’s welcome screen, navigate to the ‘Toolbox’ tab and select ‘GIF Maker’ from the panel that gets displayed.
Step 3: Upload Your TikTok Video
In the next pop-up window, select ‘Video to GIF’ and click on the (+) icon in the centre. You can also click on ‘Add Files’ in the top left and choose a saved TikTok video from your PC to upload.

Step 4: Trim Your Video
Trim the uploaded video to the desired portion from where you wish to create the GIF and set adequate time frames for the same. You can even drag the video thumbnail slider to trim the video.

Step 5: Let’s Get Creating!
Set the final size and frame rate from the ‘Output Size’ and ‘Frame Rate’ tabs respectively. To save your creation, browse and choose the desired system folder by clicking on the ‘Save to:’ tab. Lastly, select ‘Create GIF’ to start the conversion process.

04Kapwing GIF Maker
There may be instances where you cannot save or share TikTok videos. To cut the rush in such cases, you can use Kapwing’s GIF Maker to convert videos from TikTok to GIF online. This one is a free video editing tool that works with almost all internet enabled smartphones and supports almost all common video formats. Here’s what you need to do for making GIFs from TikTok videos using this tool:
Step 1: Copy a Video Link
Search your desired TikTok video and click on the ‘Share’ icon. In the drop down menu, select ‘Copy Link’ to save the video link in your device memory. Once this happens, you will get a confirmation message that says, ‘Copied’.

Step 2: Open GIF Maker
Open the GIF Maker tool in your browser and paste the saved TikTok video link in the editor’s URL bar. This will automatically redirect you to the Kapwing Studio, where you have the liberty to trim, crop or split your video clip to the desired time frame. It is better to set a play span of 3-5 seconds.
You can trim the clip by dragging its ends or introduce cuts at specific points using the split button above the editor timeline. To make volume adjustments, select the video layer and click on ‘Edit Video’ and move the adjuster circle to the left or right to decrease, increase and mute the video volume.


Step 3: Download and Share Your Creation
To save your work, tap ‘Export Video’ at the top and select ‘Export as GIF’ from the drop down menu. Wait for the conversion process to finish and click ‘Download’. This will save the GIF to your device.
You will find a watermark at the corner of your clip. Click ‘Sign In to Remove the Watermark’ to remove it. A workspace for the present and later projects will be created, where you can save you work for a couple of days with Kapwing’s free version. To export your work to social media, click ‘Share’. You can even host your creation on websites. Just copy the video link and select ‘Embed’.

05TT Downloader
This one is another online tool you can use to create GIFs from TikTok videos. This is a quick converter tool that transforms TikTok videos to GIFs in 5 easy steps within minutes. It is a browser tool and does not require a software download. All you need to do is explained in the following steps:

Step 1:
Visit the official site of the tool.
Step 2:
Select ‘TikTok to GIF’ to get redirected to the TikTok to GIF Converter home page.
Step 3:
Copy and paste the desired TikTok video link in the converter’s URL bar. To proceed further, click on ‘Get Video’.

Step 4:
Trim your clip within a time frame of 1-10 seconds.
Step 5:
Click ‘Done’ to initiate the conversion process. Once it finishes, you can download the converted GIF to your device.
06MiniTool MovieMaker
You can prefer this tool to convert TikTok videos in your PC into GIFs. This tool gives you the liberty to trim, cut, reverse and rotate GIFs and even add text and filters to them. Here’s how you can use this tool to transform TikTok videos into interesting GIFs:
Step 1:
Download and install this GIF maker tool in your PC. Launch the same when you are done with the installation process.
Step 2:
In the converter window, import and add your desired TikTok clip into the converter timeline.

Step 3:
You are now free to edit and add text to your video.
Step 4:
Once you finish, tap ‘Export’ and choose your output format as GIF.
Step 5:
Hit ‘Export’ to let the conversion process begin.
● Key Takeaways from This Episode →
● TikTok videos often lack the save and share features, which is an obvious necessity of today’s social outlook.
● Varieties of online tools and software are available for converting TikTok videos to GIFs to increase the sharing flexibility.
● Filmora is a quick and intelligent choice to take up the conversion process within a catch of few clicks.
Want to add sharing flexibility to TikTok videos? Convert them into GIFs!
In this article
01 [What is GIF TikTok?](#Part 1)
02 [How to Make a GIF From a TikTok Video](#Part 2)
Part 1 What Is TikTok GIF?
In today’s IT enhanced lifestyle, having a profound reach on social media is the new name of popularity. Everyone out there is profusely keen on creating and sharing a plethora of content varieties; memes, videos, animations and what not, across social communities. However, TikTok videos lag behind in this race; often lack the ‘Share’ flexibility.
To match up, there are solutions to convert TikTok video into GIFs. A TikTok GIF is a short, impactful and to the point clip that’s here to share fun and exciting content in the most interesting ways. If you have a bunch of TikTok videos to share with your peers, but missing out on an effective sharing solution, you can conveniently look forward to convert those videos into catchy and interesting GIFs that will definitely hold the attention of your viewers.
Feel motivated? See through the rest of this article to know some quick and easy TikTok to GIF conversion tools and software!
Part 2 How to Make a GIF From a TikTok Video
When looking through solutions to create GIF TikTok videos, you will find a pool of methods and tools available on the internet. All you need to do is select the best one for yourself and get started with converting TikTok Videos into GIFs. Given below are some of the best solutions adhering to the aforesaid concern:
01Filmora
Wondershare Filmora Video Editor is one of the best application software to create a TikTok GIF. This is a simple and smart converter application that caters to your concern in just a few minutes. What’s best is that this app is absolutely free to use and is compatible with your PC, smartphone and a variety of other devices. Here’s how you can use Filmora to convert your TikTok videos into GIFs:
Step 1: Import Your Video
Start with importing a desired TikTok video file to the Filmora timeline. You can also ‘Drag and Drop’ the video file to the editor timeline. Using this application, you have the flexibility to import your clip in almost any video format.
Step 2: Edit Your Clip
Suited to your content preferences, you can edit and enhance your clips with a variety of effects, like, cut, trim, rotate, split, etc., and make appropriate speed adjustments. You can even include text messages to make your GIF more impactful.
Wondershare Filmora
Get started easily with Filmora’s powerful performance, intuitive interface, and countless effects!
Try It Free Try It Free Try It Free Learn More >
Step 3: Let’s Save and Share!
When you are happy, save your work using the .gif file extension. That’s it! You are ready to share your creation with your social media peers.
02TikTok’s Inbuilt GIF Converter
TikTok allows you to directly convert its videos into GIFs. You can use the TikTok application in your smartphone to take up the conversion process. All you need to do is follow the steps given below:
Step 1: Select Your TikTok Video
To get started, open the TikTok application in your smartphone and select the video you want to convert into GIF.
Step 2: Share the Video
Click the ‘Share’ icon at the right of the video screen.
Step 3: Format Selection
Scroll down to the bottom of the screen and choose the ‘Share as GIF’ option. This will automatically convert your TikTok video into GIF in a few seconds.
Step 4: Save and Export
Click on the ‘Save Image’ option to save the GIF in your phone’s gallery. You can also export your creation to different social media platforms.
03Wondershare UniConverter
This one is a handy toolbox loaded with a variety of features that allow you to play with your video creativity. Using this tool, you can quickly create GIF for TikTok and also fix the size and duration of the same. This software supports almost all video formats and comes with an inbuilt editor that you can use to add effects and make your GIFs all the more interesting. This is compatible with your Windows or MacOS PC.
Take the following steps to create GIFs from TikTok videos using this software:
Step 1: Download and Launch the Application
Download the Wondershare UniConverter application to your PC from the software’s official website.
Step 2: Open GIF Maker
In the app’s welcome screen, navigate to the ‘Toolbox’ tab and select ‘GIF Maker’ from the panel that gets displayed.
Step 3: Upload Your TikTok Video
In the next pop-up window, select ‘Video to GIF’ and click on the (+) icon in the centre. You can also click on ‘Add Files’ in the top left and choose a saved TikTok video from your PC to upload.
Step 4: Trim Your Video
Trim the uploaded video to the desired portion from where you wish to create the GIF and set adequate time frames for the same. You can even drag the video thumbnail slider to trim the video.
Step 5: Let’s Get Creating!
Set the final size and frame rate from the ‘Output Size’ and ‘Frame Rate’ tabs respectively. To save your creation, browse and choose the desired system folder by clicking on the ‘Save to:’ tab. Lastly, select ‘Create GIF’ to start the conversion process.
04Kapwing GIF Maker
There may be instances where you cannot save or share TikTok videos. To cut the rush in such cases, you can use Kapwing’s GIF Maker to convert videos from TikTok to GIF online. This one is a free video editing tool that works with almost all internet enabled smartphones and supports almost all common video formats. Here’s what you need to do for making GIFs from TikTok videos using this tool:
Step 1: Copy a Video Link
Search your desired TikTok video and click on the ‘Share’ icon. In the drop down menu, select ‘Copy Link’ to save the video link in your device memory. Once this happens, you will get a confirmation message that says, ‘Copied’.
Step 2: Open GIF Maker
Open the GIF Maker tool in your browser and paste the saved TikTok video link in the editor’s URL bar. This will automatically redirect you to the Kapwing Studio, where you have the liberty to trim, crop or split your video clip to the desired time frame. It is better to set a play span of 3-5 seconds.
You can trim the clip by dragging its ends or introduce cuts at specific points using the split button above the editor timeline. To make volume adjustments, select the video layer and click on ‘Edit Video’ and move the adjuster circle to the left or right to decrease, increase and mute the video volume.
Step 3: Download and Share Your Creation
To save your work, tap ‘Export Video’ at the top and select ‘Export as GIF’ from the drop down menu. Wait for the conversion process to finish and click ‘Download’. This will save the GIF to your device.
You will find a watermark at the corner of your clip. Click ‘Sign In to Remove the Watermark’ to remove it. A workspace for the present and later projects will be created, where you can save you work for a couple of days with Kapwing’s free version. To export your work to social media, click ‘Share’. You can even host your creation on websites. Just copy the video link and select ‘Embed’.
05TT Downloader
This one is another online tool you can use to create GIFs from TikTok videos. This is a quick converter tool that transforms TikTok videos to GIFs in 5 easy steps within minutes. It is a browser tool and does not require a software download. All you need to do is explained in the following steps:
Step 1:
Visit the official site of the tool.
Step 2:
Select ‘TikTok to GIF’ to get redirected to the TikTok to GIF Converter home page.
Step 3:
Copy and paste the desired TikTok video link in the converter’s URL bar. To proceed further, click on ‘Get Video’.
Step 4:
Trim your clip within a time frame of 1-10 seconds.
Step 5:
Click ‘Done’ to initiate the conversion process. Once it finishes, you can download the converted GIF to your device.
06MiniTool MovieMaker
You can prefer this tool to convert TikTok videos in your PC into GIFs. This tool gives you the liberty to trim, cut, reverse and rotate GIFs and even add text and filters to them. Here’s how you can use this tool to transform TikTok videos into interesting GIFs:
Step 1:
Download and install this GIF maker tool in your PC. Launch the same when you are done with the installation process.
Step 2:
In the converter window, import and add your desired TikTok clip into the converter timeline.
Step 3:
You are now free to edit and add text to your video.
Step 4:
Once you finish, tap ‘Export’ and choose your output format as GIF.
Step 5:
Hit ‘Export’ to let the conversion process begin.
● Key Takeaways from This Episode →
● TikTok videos often lack the save and share features, which is an obvious necessity of today’s social outlook.
● Varieties of online tools and software are available for converting TikTok videos to GIFs to increase the sharing flexibility.
● Filmora is a quick and intelligent choice to take up the conversion process within a catch of few clicks.
Best GIF Croppers: How to Crop an Animated GIF
Best GIF Croppers: How to Crop an Animated GIF

Shanoon Cox
Mar 27, 2024• Proven solutions
Cropping an animated gif is quite different from cropping still images. Fortunately, there are also some free and easy to use croppers that can help you realize it. Read on to find the best 5 GIF croppers, and the how-to steps are listed in detail.
Top 5 Best GIF Croppers
#1 Wondershare Filmora
Wondershare Filmora is an easy-to-use yet powerful video editing software that allows you to edit GIF files, like cropping, reversing, rotating, splitting, cutting, add text and overlays, etc.
How to crop gifs with Filmora
- Import gif file into the program
- Drag it into the timeline
- Right click on the gif clip, choose “Crop and Zoom”
- Drag the rectangle frame to crop the gif
- Hit the play button to preview the result. Hit OK when you get the image you want
- Click “Export”, choose “GIF” as the export format. You can change the resolution, frame rate and bit rate of the gif
- Export and save
 Download Mac Version ](https://tools.techidaily.com/wondershare/filmora/download/ )
Pros:
- It allows you to adjust the cropping domain accurately, and you can preview the result before export.
- An all in one editor that not only allows you to crop your GIF image, but also to convert gif to video (video to gif), add text and effects to a gif file , correct color for gif images, etc.
- Share to Facebook directly
Cons:
- It might be a little bit heavy if you just want to crop a GIF image.
#2 GIFS.COM
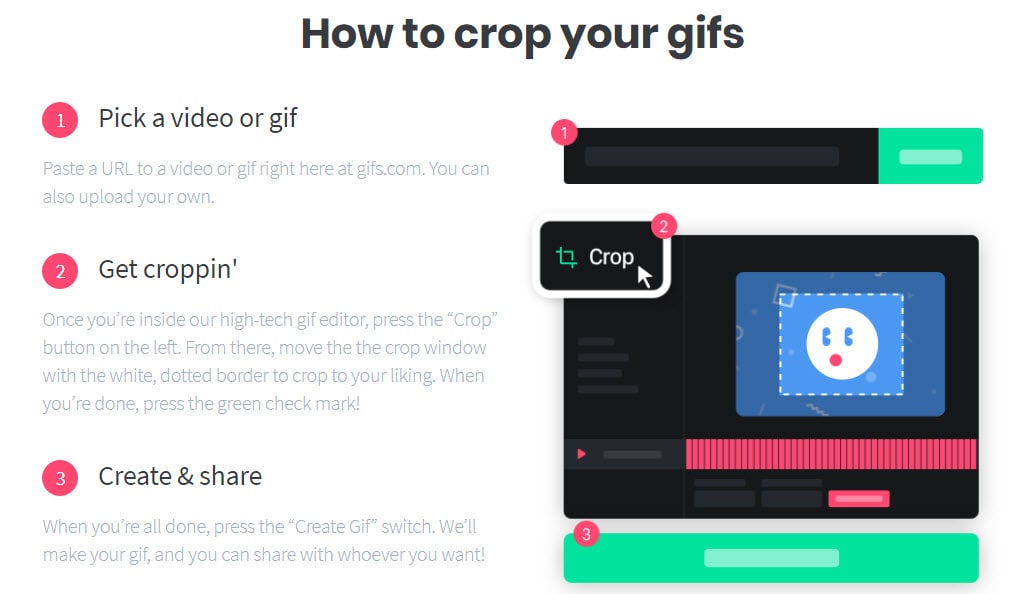
An online site designed for GIF editing, you can find lots of interesting gifs made by other users on this site.
How to crop gif with GIFS.COM
- Upload the gif file to the website, or paste the URL of the file
- Choose Crop
- Drag the highlighted area over the part you want to be in the final gif
- All the darker area will be removed
- Drag the left angle to resize
- Click Save, Create GIF
- Save or Share
Pros:
- Beautiful interface and easy to use
- Allow you to blur, flip the gif
- Allows you to post the GIF directly on Facebook, Twitter, Pinterest, etc
Cons:
- Some effects can’t be previewed
- You have to sign in to export the gif
#3 EZGIF.COM

Another simple online tool for cropping and slicing animated GIF, PNG and WebP.
How to crop gifs with EZGIF.COM
- Upload image from your computer or paste an URL, click Upload
- Choose the Crop tool, drag a rectangle over the image
- Set the image width, height and adjust the aspect ratio
- Hit “Crop it”
Pros:
- Allows you resize, rotate, adjust speed, and add text/overlays
- Can’t share on Twitter, Facebook directly
Cons:
- The final output result is not very accurate
#4 ILOVEIMAGE.COM
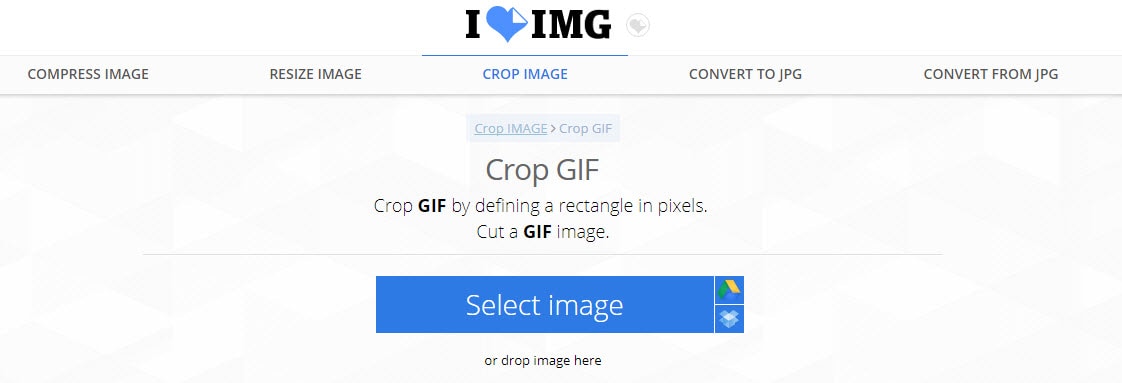
A very tiny online tool that can help you crop GIFs quickly and easily
How to crop gif with ILOVEIMG.COM
- Select a GIF file from desktop, Google Drive, and Dropbox
- Drag the rectangle to crop the image
- Hit “Crop image”
- The final result will be downloaded automatically, you can also copy the image link if you want to share it with others.
Pros:
- Very easy to use
- Light and rapid
Cons:
- Some editing options are missing
- Can’t preview the result before downloading
#5 GIFGIFS.COM
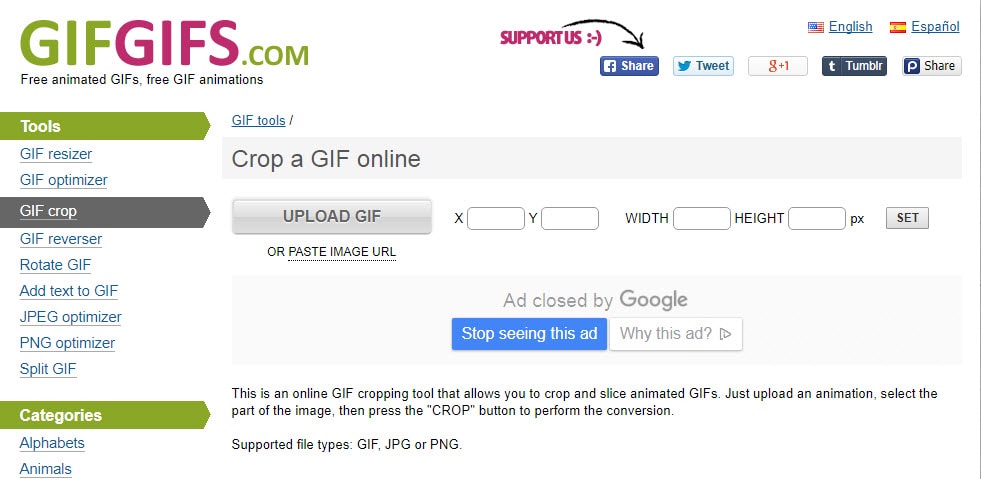
This is an online GIF editor that helps you crop and slice animated GIFs
How to use GIFGIFS.COM to crop gifs
- Select the part of the image that you want to crop
- Press the “Crop” button
- A second later, a preview window will appear under the original image. Click “Download the result” to export the cropped gif image.
Pros:
- No need to download a program, free
- You can also resize, optimize, reverse, rotate, add text, split the gifs
Cons:
- The final output result is not very accurate
- Progress can be slow due to internet connection
Frequently Asked Questions About Cropping GIFs
1. How To Crop A GIF?
Web and desktop-based GIF makers and video editing software products make cropping a GIF a routine action. However, the exact steps you will need to take in order to crop a GIF file, depend on the GIF maker or video editing software you choose.
In most cases, you will just have to click on the Crop option, specify the area of the image you want to remove and confirm that you want to create a GIF. It is essential to keep in mind that cropping a GIF can alter its aspect ratio.
2. How To Reduce A GIF’s Size?
Increasing or decreasing the size of a GIF takes only a few moments of your time. You need to go through a few easy steps to resize a GIF online, since you just have to upload a file to the platform of your choosing, specify by how much you want to reduce the GIF’s size and then wait for the task to be completed.
In addition, reducing the number of frames a GIF contains will impact the size of the file, as the size of a GIF file increases with each new frame, you add to a GIF.
3. How To Crop A GIF To A Circle?
Whether or not you can crop a GIF into a circle, depends on the cropping tools the app you are using offers. Some GIF makers allow you to choose the shape to which you are going to crop a GIF, while others don’t provide this option.
Using Filmora’s mask features is probably one of the easiest ways to crop a GIF to a circle, as you simply have to apply the mask to the footage and specify which parts of the GIF’s frames are going to be removed. What’s more, you can choose the shape of the mask in Filmora which enables you to crop GIFs into a variety of different shapes.
Conclusion
If you want to make a GIF online, Filmora meme maker is your ultimate solution. It helps you make images, GIFs and video memes directly without watermark. It is totally FREE to use and no signup. You can change text size, color and position to create caption when you are editing. You can also put text inside or outside in GIF.
Shanoon Cox
Shanoon Cox is a writer and a lover of all things video.
Follow @Shanoon Cox
Shanoon Cox
Mar 27, 2024• Proven solutions
Cropping an animated gif is quite different from cropping still images. Fortunately, there are also some free and easy to use croppers that can help you realize it. Read on to find the best 5 GIF croppers, and the how-to steps are listed in detail.
Top 5 Best GIF Croppers
#1 Wondershare Filmora
Wondershare Filmora is an easy-to-use yet powerful video editing software that allows you to edit GIF files, like cropping, reversing, rotating, splitting, cutting, add text and overlays, etc.
How to crop gifs with Filmora
- Import gif file into the program
- Drag it into the timeline
- Right click on the gif clip, choose “Crop and Zoom”
- Drag the rectangle frame to crop the gif
- Hit the play button to preview the result. Hit OK when you get the image you want
- Click “Export”, choose “GIF” as the export format. You can change the resolution, frame rate and bit rate of the gif
- Export and save
Download Mac Version ](https://tools.techidaily.com/wondershare/filmora/download/ )
Pros:
- It allows you to adjust the cropping domain accurately, and you can preview the result before export.
- An all in one editor that not only allows you to crop your GIF image, but also to convert gif to video (video to gif), add text and effects to a gif file , correct color for gif images, etc.
- Share to Facebook directly
Cons:
- It might be a little bit heavy if you just want to crop a GIF image.
#2 GIFS.COM
An online site designed for GIF editing, you can find lots of interesting gifs made by other users on this site.
How to crop gif with GIFS.COM
- Upload the gif file to the website, or paste the URL of the file
- Choose Crop
- Drag the highlighted area over the part you want to be in the final gif
- All the darker area will be removed
- Drag the left angle to resize
- Click Save, Create GIF
- Save or Share
Pros:
- Beautiful interface and easy to use
- Allow you to blur, flip the gif
- Allows you to post the GIF directly on Facebook, Twitter, Pinterest, etc
Cons:
- Some effects can’t be previewed
- You have to sign in to export the gif
#3 EZGIF.COM
Another simple online tool for cropping and slicing animated GIF, PNG and WebP.
How to crop gifs with EZGIF.COM
- Upload image from your computer or paste an URL, click Upload
- Choose the Crop tool, drag a rectangle over the image
- Set the image width, height and adjust the aspect ratio
- Hit “Crop it”
Pros:
- Allows you resize, rotate, adjust speed, and add text/overlays
- Can’t share on Twitter, Facebook directly
Cons:
- The final output result is not very accurate
#4 ILOVEIMAGE.COM
A very tiny online tool that can help you crop GIFs quickly and easily
How to crop gif with ILOVEIMG.COM
- Select a GIF file from desktop, Google Drive, and Dropbox
- Drag the rectangle to crop the image
- Hit “Crop image”
- The final result will be downloaded automatically, you can also copy the image link if you want to share it with others.
Pros:
- Very easy to use
- Light and rapid
Cons:
- Some editing options are missing
- Can’t preview the result before downloading
#5 GIFGIFS.COM
This is an online GIF editor that helps you crop and slice animated GIFs
How to use GIFGIFS.COM to crop gifs
- Select the part of the image that you want to crop
- Press the “Crop” button
- A second later, a preview window will appear under the original image. Click “Download the result” to export the cropped gif image.
Pros:
- No need to download a program, free
- You can also resize, optimize, reverse, rotate, add text, split the gifs
Cons:
- The final output result is not very accurate
- Progress can be slow due to internet connection
Frequently Asked Questions About Cropping GIFs
1. How To Crop A GIF?
Web and desktop-based GIF makers and video editing software products make cropping a GIF a routine action. However, the exact steps you will need to take in order to crop a GIF file, depend on the GIF maker or video editing software you choose.
In most cases, you will just have to click on the Crop option, specify the area of the image you want to remove and confirm that you want to create a GIF. It is essential to keep in mind that cropping a GIF can alter its aspect ratio.
2. How To Reduce A GIF’s Size?
Increasing or decreasing the size of a GIF takes only a few moments of your time. You need to go through a few easy steps to resize a GIF online, since you just have to upload a file to the platform of your choosing, specify by how much you want to reduce the GIF’s size and then wait for the task to be completed.
In addition, reducing the number of frames a GIF contains will impact the size of the file, as the size of a GIF file increases with each new frame, you add to a GIF.
3. How To Crop A GIF To A Circle?
Whether or not you can crop a GIF into a circle, depends on the cropping tools the app you are using offers. Some GIF makers allow you to choose the shape to which you are going to crop a GIF, while others don’t provide this option.
Using Filmora’s mask features is probably one of the easiest ways to crop a GIF to a circle, as you simply have to apply the mask to the footage and specify which parts of the GIF’s frames are going to be removed. What’s more, you can choose the shape of the mask in Filmora which enables you to crop GIFs into a variety of different shapes.
Conclusion
If you want to make a GIF online, Filmora meme maker is your ultimate solution. It helps you make images, GIFs and video memes directly without watermark. It is totally FREE to use and no signup. You can change text size, color and position to create caption when you are editing. You can also put text inside or outside in GIF.
Shanoon Cox
Shanoon Cox is a writer and a lover of all things video.
Follow @Shanoon Cox
Also read:
- How to Make a Video a Live Photo for 2024
- Updated Learn 3D Logo Animation and Templates
- Updated 2024 Approved Are You Ready to Animate Game Character From Scratch?
- How to Make Slideshow in LinkedIn
- Updated 2024 Approved 5 Must Try Ways to Add and Send GIF in Text Message on Android
- In 2024, Top 10 Video to GIF Converters Top Picks
- All About Types of Motion Graphics
- New Best 10 Animated Templates in Canva
- New Convert Animated GIF From Video
- New Top 7 Animated GIF Text Makers for 2024
- Updated In 2024, How to Make Well Done Animated GIF By Yourself?
- How to Create Benime Whiteboard Animation in Android
- New In 2024, How to Animate Image on Scroll
- What Is Anime? Anime VS Manga VS Cartoon
- Updated Popular Female & Male Disney Cartoon Characters To Empower You for 2024
- New Ready to Animate Game Character From Scratch?
- New 2024 Approved The Best 8 Places for High-Quality Royalty Free Gifs (Paid and Free)
- New The 10 Best Batman Anime Movies- 2024 Updated
- New In 2024, 12 Animated Slideshow PowerPoint Templates and Tools to Make Them
- Updated Whats Music Video GIF & How to Add Music to GIF Files
- Updated Adobe Animate CC Everything You Need to Know for 2024
- In 2024, Best Websites to Download Animated GIFs for Free
- Is It That Easy to Make My Animated Character for 2024
- Updated 2024 Approved 5 Different Animation Styles A Simple but Complete Guide
- Updated Convert Animated GIF From Video
- New A Roster of 15 Top Disney Channel Cartoons
- New Adobe Auto Rigger Is AWESOME for 2024
- Updated In 2024, The Best 8 Places for High-Quality Royalty Free Gifs
- Ways to Make Sure You Get the Most up to Date Cartoon Character Design Tips
- Top 10 Free Online Animated Logo Makers Everyone Should Know
- Updated 8 Best Motion Graphics Online Tools for Your Inspiration
- Learn What Are Differences Between 2D And 3D Animation
- New 10 Cartoon Photo Converters for 2024
- Updated How to Draw Cartoons Step by Step with This Guide for 2024
- New 2024 Approved Thousands Already Found 15 Best Sites to Watch Cartoons Online Free And So Can You
- A Roster of 15 Top Disney Channel Cartoons for 2024
- In 2024, How to Unlock Apple iPhone 12 Pro Max Without Passcode?
- Prevent Cross-Site Tracking on Vivo Y78t and Browser | Dr.fone
- All About Factory Reset, What Is It and What It Does to Your Sony Xperia 10 V? | Dr.fone
- In 2024, Complete Tutorial to Use VPNa to Fake GPS Location On Apple iPhone 15 | Dr.fone
- 4 Ways to Transfer Music from Samsung Galaxy S23 to iPhone | Dr.fone
- Complete guide for recovering call logs on Realme Narzo 60 5G
- In 2024, How To Remove iCloud From Apple iPhone XS Max Smoothly
- How do I reset my Oppo Find X6 Pro Phone without technical knowledge? | Dr.fone
- Advance Repair for Bad and Corrupt Video Files of Itel P55 5G
- Best 10 Mock Location Apps Worth Trying On Oppo Reno 10 5G | Dr.fone
- How to recover deleted photos from Android Gallery without backup on Honor Play 8T
- Top 10 AirPlay Apps in Infinix Hot 30 5G for Streaming | Dr.fone
- Hacks to do pokemon go trainer battles For Realme 11 5G | Dr.fone
- How To Fix Apple ID Verification Code Not Working From Apple iPhone 6
- In 2024, 3 Ways to Track Xiaomi Redmi 13C 5G without Them Knowing | Dr.fone
- Title: Updated How You Can Turn Yourself Into Anime Character Using Anime Filter for 2024
- Author: Elon
- Created at : 2024-05-19 03:05:40
- Updated at : 2024-05-20 03:05:40
- Link: https://animation-videos.techidaily.com/updated-how-you-can-turn-yourself-into-anime-character-using-anime-filter-for-2024/
- License: This work is licensed under CC BY-NC-SA 4.0.
