

Updated In 2024, Want to Make a Meme GIF?
Want to Make a Meme GIF?
Want to Make a Meme GIF? Here’s How to Do
An easy yet powerful editor
Numerous effects to choose from
Detailed tutorials provided by the official channel
You might know that mememe gif, are very much popular in the market of graphics developing on the internet. This kind of meme culture has got well developed in our life style so that you might have not imagined before. Even this topic was not too much exclusive on the web. Thus we have begun to employ memes in our daily life style. This was the one that started as a humorous topic and now during these days it became to be much talked in the form of freedom of speech.
Take for example the cat in grumpy form, a sandwich eating kid or a successful kid all these are the best tips for making a gif meme. Even today they are being used at a very wide scale. Finally you can see that memes of gifs have become a very valuable part of our lives. When you make use of such kind of technology then you will get benefit in the tasks related to media and the internet.
In this article
01 [Can Gifs Be Memes?](#Part 1)
02 [8 Must-Visit GIF Websites to Get Stunning Memes](#Part 2)
03 [How to Make a Meme GIF](#Part 3)
04 [Tips for Inspiring Meme Gifs Ideas](#Part 4)
Part 1 Can Gifs Be Memes?
01What’s Memes?
You will see that memes is a good element of any kind of system or culture. This kind of system could be passed from one person to the other one. This task can be also done well by non genetic methods. You can say when you make meme gif, then you have to use any kind of video, photo, image and piece of any paper showing some written text. This text can be used well by persons who use internet in a very extensive way. Memes generally has a humorous nature so most internet users will have a fine experience while using it.
02What Does Meme and GIF Stand For?
When we talk of meme then you will see that it stands for Multimedia & Electronic Music Experiments. This is a way with which you can develop many customizable electronic instruments in the long way. You will see that Meme was first of all developed by Richard Dawkins in the year 1976. He did it with replicating as well as transmission of meme. When we talk about gif then we will see that stands for Graphics Interchange Format. It was first of all made in the year 1987. With this kind of system you can decrease the size of animated pictures and images.
Part 2 Must-Visit GIF Websites to Get Stunning Memes
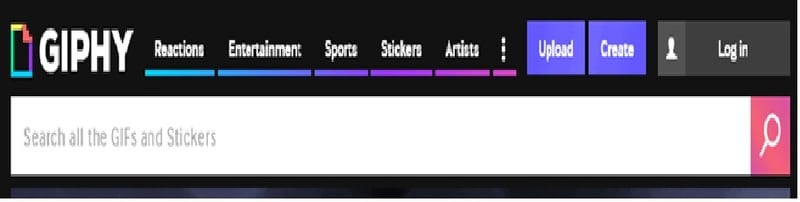
01GIPHY
Key Features-
When you make a gif meme then you will see that this website was first of all created by Jack Cooke and Alex Chung. They did it in the form of a GIF and even a sticker keyboard that was having unique characteristics**.** Here you have to simply plug inside a keyboard and click on the button of the search bar. In this way you can create many samples of gif and upload them from the sites of social media like Facebook and Instagram.
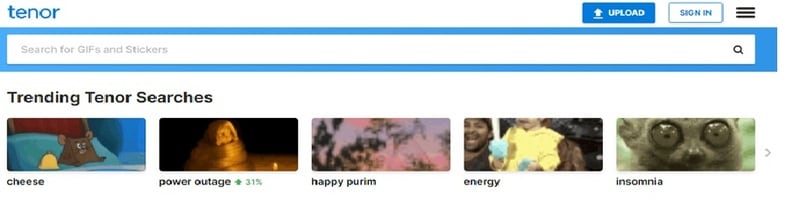
02 Tenor
Key Features-
The interface of Tenor is very much good looking and straight forward. With it you can type the keyword concerned with the homepage to your GIF to search it with the help of hit bar. With Tenor you can also make genius ideas related to making a meme gif. When you visit the site of Tenor then you will see that it does not have any scarcity of content when you want to upload graphics interface format with it on your website.
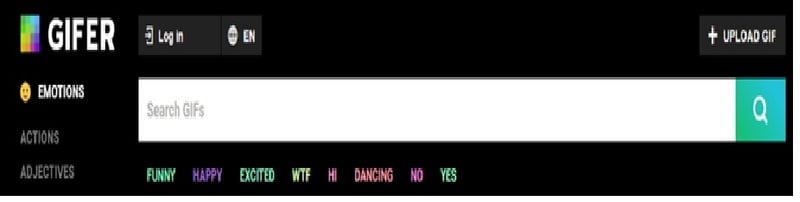
03 GIFER
Key Features-
When you ignore the meme gif site of GIFER then you will see that your list will be incomplete without it. This is one of the best resources for getting and making gif memes on the pin point. When you want to type anything or want to get some information about any subject then click on any of the emotion icons. You may also click on the search bar.
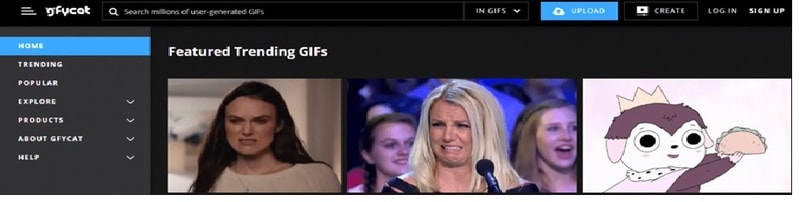
04 Gfycat
Key Features-
The site of Gfycat is the best when you want to so like the activities of making memes. This is the best way to make a gif meme so that you will get good results in the task of making graphic interface samples. Like all the websites of GIF this site will also enable you to seek search content. Just type specific keywords or you might simply click on the left side panel.
05Imgflip
Key Features-
When you want to make a meme gif then just land on the site of Imgflip. This could be a great option. When we compare it with other kind of GIF sites then we will see that they have a simple layout. You can click on the search icon that is at the top and get information about any of your target keywords.
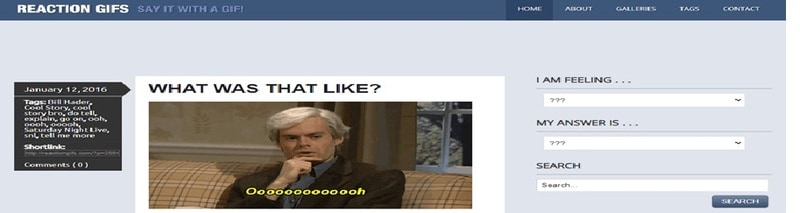
06Reaction GIFs
Key Features-
Here when you land on the site of Reaction GIFs. You can type your favorite keyword like make a meme gif on the right side of this search engine and hit on the search icon. You can also easily upload any kind of content even yet this procedure might take a bit more time. This kind of website is visible in a streamlined way. Here you can even make the entries related to FAQs.
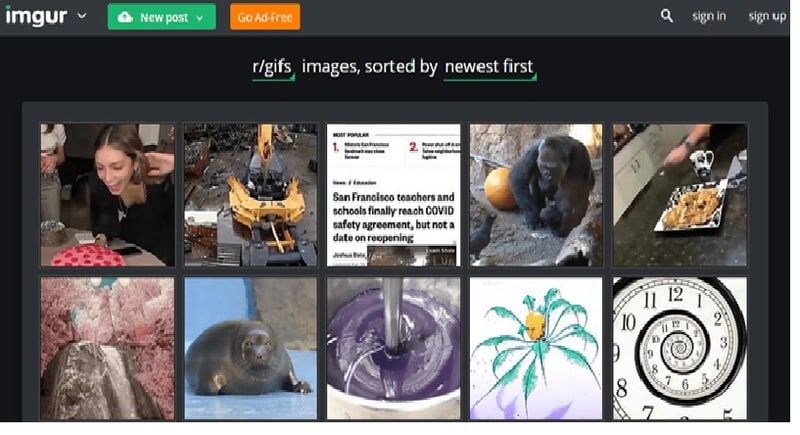
07Imgur
Key Features-
When you talk of Imgur then you will see that you can make and create static images with this kind of site. This is a genuine site with which you can make a meme gif. You can make any kind of theme related to internet graphics when you choose this site.
Part 3 How to Make a Meme GIF
01How to Make a Meme GIF on Ios &Want to make an Android Gift?
When you want to make a Meme GIF on Los then you can make use of Meme maker. Here you can get started well. Just take one such page and upload a GIF on it. You may even click on the text that is seen on the top left to make addition of the needed captions. Here you can add your needed images or audio options. When you want to make an android gif then just make the following steps:-
● Just open the gallery of your desired app and press the images that depict your needed photos.
● Tape the icon that shows the 3 vertical dots.
● Choose the create option and select the GIF option.
● You can create the GIF image and review it in a better way.
02How to Make a Meme GIF on Window? Here’s How to & Mac?
When you make a meme gif on Window then you have to see and take some steps:-
● Just land on the IMGFlip website.
● You have to click on the icon of GIF icon.
● Just import an image and video to make it converted to GIF.
● You may add a text to the GIF.
● You may also customize the speed and count the times that you have played it.
● Finally you may save it in animated form.
Part 4 Tips for Inspiring Meme Gifs Ideas
When you want to add and follow tips for inspiring more ideas for making meme gif then you can see that such ideas are even being used at TV shows and movies. You can even make attractive images with them. You can easily loop these images to create the best animated clips. After you make a meme gif then you will see that even you can use a pop reference in the long way. When you do the combination of meme and gif then you can also make humorous clips that are called as meme gif. Even you can make use of the content that is concerned with Wondershare Filmora Video Editor VII so that your graphics will appear well in the long way.

Wondershare Filmora - Best Video Editor for Mac/Windows
5,481,435 people have downloaded it.
Build unique custom animations without breaking a sweat.
Focus on creating epic stories and leave the details to Filmora’s auto features.
Start a creative adventure with drag & drop effects and endless possibilities.
Filmora simplifies advanced features to save you time and effort.
Filmora cuts out repetition so you can move on to your next creative breakthrough.
Brief summary
● When you make meme gif then you will see that with this technology you can create a fine system on the internet frame as far as meme is concerned with Filmora VII. On the other hand gif stands for graphic interface formats.
● You can visit more websites for gif and meme creation on the internet and here you will get many unique websites for gif creation. You can also take help from graphics experts who will give you the best output concerned with gif and making a meme in the long way.
● You can get more tips on the web when you want to make gif samples on the platform of android and Mac. Here you will have to take and follow certain steps and with it you will reach your goal to make the best graphical interface even on all kinds of smart phones etc. Here you will also get support to make a meme gif. Taking care about what you need for meme gif
● Key Takeaways from This Episode →
● When we talk about the final conclusion of this article then we will see that meme gif will be a nice way to develop advanced methods of media and graphics interchange format. Here you will see that this could be a free method with which you can make a perfect meme.
● You can also use GIPHY on the technology platform of iPad, iPhone and Android. You can also make the task of downloading of GIPHY on your phone that might be of any model. You can make memes gif for your app store in your phone. You can do this task easily on your search bar. Most of these apps are available in black color.
You might know that mememe gif, are very much popular in the market of graphics developing on the internet. This kind of meme culture has got well developed in our life style so that you might have not imagined before. Even this topic was not too much exclusive on the web. Thus we have begun to employ memes in our daily life style. This was the one that started as a humorous topic and now during these days it became to be much talked in the form of freedom of speech.
Take for example the cat in grumpy form, a sandwich eating kid or a successful kid all these are the best tips for making a gif meme. Even today they are being used at a very wide scale. Finally you can see that memes of gifs have become a very valuable part of our lives. When you make use of such kind of technology then you will get benefit in the tasks related to media and the internet.
In this article
01 [Can Gifs Be Memes?](#Part 1)
02 [8 Must-Visit GIF Websites to Get Stunning Memes](#Part 2)
03 [How to Make a Meme GIF](#Part 3)
04 [Tips for Inspiring Meme Gifs Ideas](#Part 4)
Part 1 Can Gifs Be Memes?
01What’s Memes?
You will see that memes is a good element of any kind of system or culture. This kind of system could be passed from one person to the other one. This task can be also done well by non genetic methods. You can say when you make meme gif, then you have to use any kind of video, photo, image and piece of any paper showing some written text. This text can be used well by persons who use internet in a very extensive way. Memes generally has a humorous nature so most internet users will have a fine experience while using it.
02What Does Meme and GIF Stand For?
When we talk of meme then you will see that it stands for Multimedia & Electronic Music Experiments. This is a way with which you can develop many customizable electronic instruments in the long way. You will see that Meme was first of all developed by Richard Dawkins in the year 1976. He did it with replicating as well as transmission of meme. When we talk about gif then we will see that stands for Graphics Interchange Format. It was first of all made in the year 1987. With this kind of system you can decrease the size of animated pictures and images.
Part 2 Must-Visit GIF Websites to Get Stunning Memes
01GIPHY
Key Features-
When you make a gif meme then you will see that this website was first of all created by Jack Cooke and Alex Chung. They did it in the form of a GIF and even a sticker keyboard that was having unique characteristics**.** Here you have to simply plug inside a keyboard and click on the button of the search bar. In this way you can create many samples of gif and upload them from the sites of social media like Facebook and Instagram.
02 Tenor
Key Features-
The interface of Tenor is very much good looking and straight forward. With it you can type the keyword concerned with the homepage to your GIF to search it with the help of hit bar. With Tenor you can also make genius ideas related to making a meme gif. When you visit the site of Tenor then you will see that it does not have any scarcity of content when you want to upload graphics interface format with it on your website.
03 GIFER
Key Features-
When you ignore the meme gif site of GIFER then you will see that your list will be incomplete without it. This is one of the best resources for getting and making gif memes on the pin point. When you want to type anything or want to get some information about any subject then click on any of the emotion icons. You may also click on the search bar.
04 Gfycat
Key Features-
The site of Gfycat is the best when you want to so like the activities of making memes. This is the best way to make a gif meme so that you will get good results in the task of making graphic interface samples. Like all the websites of GIF this site will also enable you to seek search content. Just type specific keywords or you might simply click on the left side panel.
05Imgflip
Key Features-
When you want to make a meme gif then just land on the site of Imgflip. This could be a great option. When we compare it with other kind of GIF sites then we will see that they have a simple layout. You can click on the search icon that is at the top and get information about any of your target keywords.
06Reaction GIFs
Key Features-
Here when you land on the site of Reaction GIFs. You can type your favorite keyword like make a meme gif on the right side of this search engine and hit on the search icon. You can also easily upload any kind of content even yet this procedure might take a bit more time. This kind of website is visible in a streamlined way. Here you can even make the entries related to FAQs.
07Imgur
Key Features-
When you talk of Imgur then you will see that you can make and create static images with this kind of site. This is a genuine site with which you can make a meme gif. You can make any kind of theme related to internet graphics when you choose this site.
Part 3 How to Make a Meme GIF
01How to Make a Meme GIF on Ios &Want to make an Android Gift?
When you want to make a Meme GIF on Los then you can make use of Meme maker. Here you can get started well. Just take one such page and upload a GIF on it. You may even click on the text that is seen on the top left to make addition of the needed captions. Here you can add your needed images or audio options. When you want to make an android gif then just make the following steps:-
● Just open the gallery of your desired app and press the images that depict your needed photos.
● Tape the icon that shows the 3 vertical dots.
● Choose the create option and select the GIF option.
● You can create the GIF image and review it in a better way.
02How to Make a Meme GIF on Window? Here’s How to & Mac?
When you make a meme gif on Window then you have to see and take some steps:-
● Just land on the IMGFlip website.
● You have to click on the icon of GIF icon.
● Just import an image and video to make it converted to GIF.
● You may add a text to the GIF.
● You may also customize the speed and count the times that you have played it.
● Finally you may save it in animated form.
Part 4 Tips for Inspiring Meme Gifs Ideas
When you want to add and follow tips for inspiring more ideas for making meme gif then you can see that such ideas are even being used at TV shows and movies. You can even make attractive images with them. You can easily loop these images to create the best animated clips. After you make a meme gif then you will see that even you can use a pop reference in the long way. When you do the combination of meme and gif then you can also make humorous clips that are called as meme gif. Even you can make use of the content that is concerned with Wondershare Filmora Video Editor VII so that your graphics will appear well in the long way.
Wondershare Filmora - Best Video Editor for Mac/Windows
5,481,435 people have downloaded it.
Build unique custom animations without breaking a sweat.
Focus on creating epic stories and leave the details to Filmora’s auto features.
Start a creative adventure with drag & drop effects and endless possibilities.
Filmora simplifies advanced features to save you time and effort.
Filmora cuts out repetition so you can move on to your next creative breakthrough.
Brief summary
● When you make meme gif then you will see that with this technology you can create a fine system on the internet frame as far as meme is concerned with Filmora VII. On the other hand gif stands for graphic interface formats.
● You can visit more websites for gif and meme creation on the internet and here you will get many unique websites for gif creation. You can also take help from graphics experts who will give you the best output concerned with gif and making a meme in the long way.
● You can get more tips on the web when you want to make gif samples on the platform of android and Mac. Here you will have to take and follow certain steps and with it you will reach your goal to make the best graphical interface even on all kinds of smart phones etc. Here you will also get support to make a meme gif. Taking care about what you need for meme gif
● Key Takeaways from This Episode →
● When we talk about the final conclusion of this article then we will see that meme gif will be a nice way to develop advanced methods of media and graphics interchange format. Here you will see that this could be a free method with which you can make a perfect meme.
● You can also use GIPHY on the technology platform of iPad, iPhone and Android. You can also make the task of downloading of GIPHY on your phone that might be of any model. You can make memes gif for your app store in your phone. You can do this task easily on your search bar. Most of these apps are available in black color.
Most Effective Tactics to Set WhatsApp Status
Most Effective Tactics to Set WhatsApp Status
An easy yet powerful editor
Numerous effects to choose from
Detailed tutorials provided by the official channel
People generally use images to be uploaded as their WhatsApp status and unknown to many, videos as well as GIFs can also be added as status.
This status remains on your profile for 24 hours and can be viewed only by people who are on your contact list. So, if you too looking for ways to add WhatsApp status GIF, keep reading.
In this article
01 [How to set an animated GIF as WhatsApp status from the phone gallery?](#Part 1)
02 [How to set an animated GIF as WhatsApp status using an app?](#Part 2)
03 [Setting WhatsApp GIF status using device internal camera](#Part 3)
04 [How to create an interesting GIF in a hassle-free manner using Wondershare Filmora](#Part 4)
Part 1 How to set an animated GIF as WhatsApp status from the phone gallery?
If the GIF that you wish to use as the WhatsApp status is present on your phone, you can add it directly from the phone gallery. The steps to get this task done are enlisted below.
Step 1. Launch WhatsApp on your phone and then click on the Status tab.
Step 2. Tap on the My status tab to add a new status. The camera app on the phone will open and you need to launch the phone gallery now.
Step 3. Choose the desired GIF from the gallery, click on it and then tap on the Send button to set it as your status.
The selected GIF will be set as your WhatsApp status.
Part 2 How to set an animated GIF as WhatsApp status using an app?
Another way to add an animated GIF WhatsApp status is by using an app and for this, we recommend Giphy as the best tool. The steps to use the app for setting an animated status are as follows.
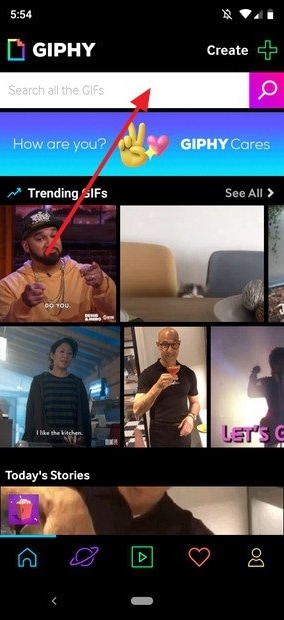
Step 1. Download, install and open the Giphy app on your phone.
Step 2. The main interface of the app will show multiple GIF options. You can also search your choice of animation based on categories or by using the search box.
Step 3. Next, click on the desired GIF to open it and see it in a larger frame.
Step 4. Under the selected GIF, click on the icon resembling a paper plane, and sharing options will appear.
Step 5. Choose the WhatsApp icon from the options available and then at the next menu, click on the My status option.
Step 6. Next, tap on the green arrow at the bottom-right corner to set GIF as WhatsApp status.
Part 3 Setting WhatsApp GIF status using device internal camera
Another way to add an animated GIF as WhatsApp status is using the internal camera of the device. The steps for the same are as follows.
Step 1. On your phone, launch WhatsApp and at the Status tab, click on the My Status option.
Step 2. The camera of the phone will get activated and now to start the video recording, you need to tap and hold the button that is used for taking the images.
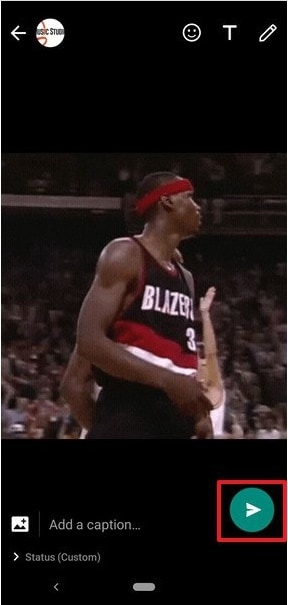
Step 3. Record the video for which you wish to make an animation (video cannot be longer than 5 seconds).
Step 4. After the recording is done, you can adjust the duration using the slider and then choose to play the recorded video as GIF. Click on the Send button to share the video as WhatsApp Status.

Part 4 How to create an interesting GIF in a hassle-free manner using ** Wondershare Filmora Video Editor
If you wish to set your WhatsApp status as interesting GIF videos, you would need to download such animations online. Another way is to get customized GIF files and this professional tool will be required. If you too want to create your own customized animation in a hassle-free manner, we suggest using Wondershare Filmora. Not only WhatsApp status, but you can also use software for creating GIF animations for web pages, social media sites, ad banners, and other uses.
Wondershare Filmora
Get started easily with Filmora’s powerful performance, intuitive interface, and countless effects Try It Free Try It Free Learn More >

Using Wondershare Filmora, artistic animations can be quickly created using an image as well as videos. The process is simple and does not require any advanced technical know-how. To create the desired GIF video, there are multiple options for customizations available like adding text, overlays, elements, and more.
Key features of the software
● Create GIF animations using videos and still images.
● Support all key video and image formats like FLV, MKV, MP4, and more.
● Allows customizing the animations by adding text, overlays, elements, and others.
● Quick and hassle-free tool for creating an interesting GIF.
● Windows and Mac support.
Steps to create GIF for WhatsApp status using Wondershare Filmora
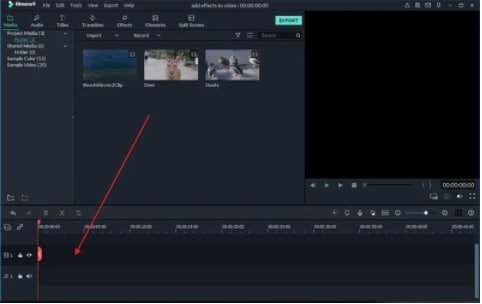
Step 1. Launch Wondershare Filmora and add video or images from which you wish to create an animated GIF.
Step 2. Drag and drop the added media file to the timeline of the software.
Step 3. Next, edit and customize the added files using features like combine, crop, split, speed-up, slow, and more.
Step 4. You can also add text or elements like sound and others to the added files.
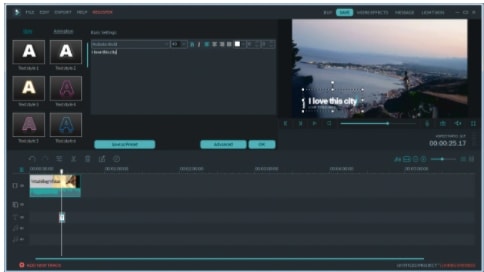
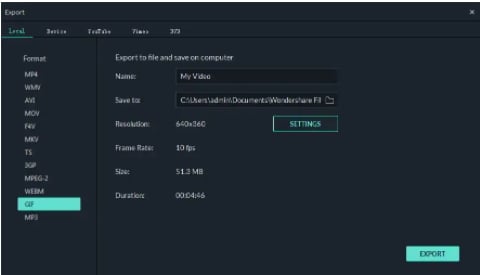
Step 5. Next, when all settings are done, choose GIF at the Local tab to save the media file as GIF. Choose the desired file name and the system location to save the file. Finally, click on the Export button.
The created GIF animation will save to your selected folder and can be used as WhatsApp status, on social media sites, or for any other use as needed.
● Key Takeaways from This Episode →
●GIF animations can now be used as WhatsApp status.
●There are multiple ways to set GIF animations as WhatsApp status.
People generally use images to be uploaded as their WhatsApp status and unknown to many, videos as well as GIFs can also be added as status.
This status remains on your profile for 24 hours and can be viewed only by people who are on your contact list. So, if you too looking for ways to add WhatsApp status GIF, keep reading.
In this article
01 [How to set an animated GIF as WhatsApp status from the phone gallery?](#Part 1)
02 [How to set an animated GIF as WhatsApp status using an app?](#Part 2)
03 [Setting WhatsApp GIF status using device internal camera](#Part 3)
04 [How to create an interesting GIF in a hassle-free manner using Wondershare Filmora](#Part 4)
Part 1 How to set an animated GIF as WhatsApp status from the phone gallery?
If the GIF that you wish to use as the WhatsApp status is present on your phone, you can add it directly from the phone gallery. The steps to get this task done are enlisted below.
Step 1. Launch WhatsApp on your phone and then click on the Status tab.
Step 2. Tap on the My status tab to add a new status. The camera app on the phone will open and you need to launch the phone gallery now.
Step 3. Choose the desired GIF from the gallery, click on it and then tap on the Send button to set it as your status.
The selected GIF will be set as your WhatsApp status.
Part 2 How to set an animated GIF as WhatsApp status using an app?
Another way to add an animated GIF WhatsApp status is by using an app and for this, we recommend Giphy as the best tool. The steps to use the app for setting an animated status are as follows.
Step 1. Download, install and open the Giphy app on your phone.
Step 2. The main interface of the app will show multiple GIF options. You can also search your choice of animation based on categories or by using the search box.
Step 3. Next, click on the desired GIF to open it and see it in a larger frame.
Step 4. Under the selected GIF, click on the icon resembling a paper plane, and sharing options will appear.
Step 5. Choose the WhatsApp icon from the options available and then at the next menu, click on the My status option.
Step 6. Next, tap on the green arrow at the bottom-right corner to set GIF as WhatsApp status.
Part 3 Setting WhatsApp GIF status using device internal camera
Another way to add an animated GIF as WhatsApp status is using the internal camera of the device. The steps for the same are as follows.
Step 1. On your phone, launch WhatsApp and at the Status tab, click on the My Status option.
Step 2. The camera of the phone will get activated and now to start the video recording, you need to tap and hold the button that is used for taking the images.
Step 3. Record the video for which you wish to make an animation (video cannot be longer than 5 seconds).
Step 4. After the recording is done, you can adjust the duration using the slider and then choose to play the recorded video as GIF. Click on the Send button to share the video as WhatsApp Status.
Part 4 How to create an interesting GIF in a hassle-free manner using ** Wondershare Filmora Video Editor
If you wish to set your WhatsApp status as interesting GIF videos, you would need to download such animations online. Another way is to get customized GIF files and this professional tool will be required. If you too want to create your own customized animation in a hassle-free manner, we suggest using Wondershare Filmora. Not only WhatsApp status, but you can also use software for creating GIF animations for web pages, social media sites, ad banners, and other uses.
Wondershare Filmora
Get started easily with Filmora’s powerful performance, intuitive interface, and countless effects Try It Free Try It Free Learn More >
Using Wondershare Filmora, artistic animations can be quickly created using an image as well as videos. The process is simple and does not require any advanced technical know-how. To create the desired GIF video, there are multiple options for customizations available like adding text, overlays, elements, and more.
Key features of the software
● Create GIF animations using videos and still images.
● Support all key video and image formats like FLV, MKV, MP4, and more.
● Allows customizing the animations by adding text, overlays, elements, and others.
● Quick and hassle-free tool for creating an interesting GIF.
● Windows and Mac support.
Steps to create GIF for WhatsApp status using Wondershare Filmora
Step 1. Launch Wondershare Filmora and add video or images from which you wish to create an animated GIF.
Step 2. Drag and drop the added media file to the timeline of the software.
Step 3. Next, edit and customize the added files using features like combine, crop, split, speed-up, slow, and more.
Step 4. You can also add text or elements like sound and others to the added files.
Step 5. Next, when all settings are done, choose GIF at the Local tab to save the media file as GIF. Choose the desired file name and the system location to save the file. Finally, click on the Export button.
The created GIF animation will save to your selected folder and can be used as WhatsApp status, on social media sites, or for any other use as needed.
● Key Takeaways from This Episode →
●GIF animations can now be used as WhatsApp status.
●There are multiple ways to set GIF animations as WhatsApp status.
How to Turn Yourself Into a WhatsApp Cartoon
How to Turn Yourself Into a WhatsApp Cartoon
An easy yet powerful editor
Numerous effects to choose from
Detailed tutorials provided by the official channel
Let me ask you a question - how much fun would it be if you could create your own animated stickers and send them to your friends and family members on Whatsapp? I mean, it would make the entire conversation more fun and also add a personal element to the entire chat. Right? Well, to tell you the truth, it is possible to create Whatsapp cartoons and stickers, and the best part is you don’t need any technical expertise to get the job done.
Of course, for a long time, Whatsapp didn’t allow its users to use third-party animated stickers within the messenger. But, recently the messaging platform introduced a custom “stickers pack” feature that now allows people to upload their own stickers and create a dedicated sticker app.
You can also rely on several third-party sticker designer applications to get the job done. So, if you have been looking for a way to use your own face as an animated sticker in Whatsapp, continue reading. In this guide, we’ll walk you through different ways to create and upload a custom cartoon sticker in Whatsapp and make your Whatsapp chats more fun.
In this article
01 [How to Create Your Own Custom Animated Whatsapp Stickers](#Part 1)
02 [How to Create Custom Animated Whatsapp Stickers on Android and iPhone](#Part 2)
Part 1 How to Create Your Own Custom Animated Whatsapp Stickers
Now, before we go any further, I would like to point out that Whatsapp doesn’t allow users to directly create a custom cartoon sticker. There’s no AR feature that’ll turn your face into a cartoon character. So, to use a cartoon Whatsapp profile picture, you’ll have to rely on a third-party tool to get the job done. Based on which platform you use to access Whatsapp, you can choose a wide variety of Whatsapp animated sticker creators and use them to design custom cartoon stickers to make traditional Whatsapp conversations more fun.
One of the easiest ways to create custom stickers for Whatsapp is to use Wondershare Wondershare Filmora Video Editor . Filmora is a full-scale video editing software that’s specifically designed to help editors unleash their creativity and create stunning movies for different platforms.
For Win 7 or later (64-bit)
For macOS 10.12 or later
Filmora is among the most popular video editing tools that many creators use to edit high-quality YouTube vlogs and other types of videos for other platforms. However, Wondershare Filmora is not just a video editing tool. You can also use it to create custom cartoon animations and export them in the desired format within a few seconds. Filmora has a timeline-based interface that makes it relatively easier for editors to streamline the entire editing process while ensuring that none of the shots go missing.

Filmora also has a built-in media store - known as FilmStocks - where you can find hundreds of video effects, animations, animated characters, etc. FilmStocks also offers access to copyright-free music, allowing creators to use high-quality music in their videos without worrying about unexpected copyright strikes.
So, if you are looking for an all-in-one tool to create Whatsapp cartoon stickers, install Wondershare Filmora on your computer and start turning your face into an animated sticker.
Part 1 How to Create Custom Animated Whatsapp Stickers on Android and iPhone
One of the tools that can help you do the job is “Toon Me”. As the name implies, Toon Me is an online platform that’s designed to help users turn their faces into respective cartoon stickers. It’s designed by the developers at Photo Labs - an online platform that makes photo editing a hassle-free task. Since the tool is designed by expert developers, you can expect to get the best results in the end. And, the best part is creating custom cartoon characters using Toon Me is a relatively easy process.

All you have to do is download Toon Me on your phone and use the camera to create a Whatsapp cartoon sticker for yourself. The app is available on both Google Play Store and Apple’s App Store. It means regardless of the smartphone you’re using, Toon Me will allow you to design a Whatsapp cartoon sticker without any hassle.
Like Toon Me, there are dozens of other applications you can install on your smartphone to create personalized animated stickers. One such example is Sticker Maker. Sticker Maker is an Android application that’ll allow you to capture your face and turn it into an animated sticker. It’s compatible across different Android versions and runs smoothly on all Android models. So, if you own an Android device, here’s the step-by-step process to use Sticker Maker to turn your face into an animated sticker.
Step 1 - Start by installing Sticker Maker on your smartphone and launch the application to get started.
Step 2 - On its home screen, click the “Create a New Sticker Pack” option.
Step 3 - Give the sticker pack a name and then, press enter to proceed further.
Step 4 - At this point, you can either select one of the existing pictures from your Gallery or open the camera to click a fresh selfie. Either way, upload the picture and let the app convert it into a corresponding sticker.
Step 5 - You can upload 8-10 pictures at once and create the entire sticker pack instantly. And, once you have successfully created the sticker pack, simply click the “Add to Whatsapp” button.

That’s it; the selected sticker pack will get added to your Whatsapp’s sticker collection and you’ll be able to use them right away. That’s how quick and easy it is to create custom Whatsapp cartoons using different tools on your smartphone.
● Ending Thoughts →
● Using personalized Whatsapp cartoon stickers is a great way to make Whatsapp conversations fun.
● Wondershare Filmora is a feature-packed video editing software that’s designed to help creators create stunning videos and Whatsapp stickers. Its timeline-based interface and built-in media store will allow you to create stunning Whatsapp stickers without any hassle
● You can also download dedicated sticker maker applications on your iPhone or Android devices and use them directly to create visually appealing animated stickers for Whatsapp.
Let me ask you a question - how much fun would it be if you could create your own animated stickers and send them to your friends and family members on Whatsapp? I mean, it would make the entire conversation more fun and also add a personal element to the entire chat. Right? Well, to tell you the truth, it is possible to create Whatsapp cartoons and stickers, and the best part is you don’t need any technical expertise to get the job done.
Of course, for a long time, Whatsapp didn’t allow its users to use third-party animated stickers within the messenger. But, recently the messaging platform introduced a custom “stickers pack” feature that now allows people to upload their own stickers and create a dedicated sticker app.
You can also rely on several third-party sticker designer applications to get the job done. So, if you have been looking for a way to use your own face as an animated sticker in Whatsapp, continue reading. In this guide, we’ll walk you through different ways to create and upload a custom cartoon sticker in Whatsapp and make your Whatsapp chats more fun.
In this article
01 [How to Create Your Own Custom Animated Whatsapp Stickers](#Part 1)
02 [How to Create Custom Animated Whatsapp Stickers on Android and iPhone](#Part 2)
Part 1 How to Create Your Own Custom Animated Whatsapp Stickers
Now, before we go any further, I would like to point out that Whatsapp doesn’t allow users to directly create a custom cartoon sticker. There’s no AR feature that’ll turn your face into a cartoon character. So, to use a cartoon Whatsapp profile picture, you’ll have to rely on a third-party tool to get the job done. Based on which platform you use to access Whatsapp, you can choose a wide variety of Whatsapp animated sticker creators and use them to design custom cartoon stickers to make traditional Whatsapp conversations more fun.
One of the easiest ways to create custom stickers for Whatsapp is to use Wondershare Wondershare Filmora Video Editor . Filmora is a full-scale video editing software that’s specifically designed to help editors unleash their creativity and create stunning movies for different platforms.
For Win 7 or later (64-bit)
For macOS 10.12 or later
Filmora is among the most popular video editing tools that many creators use to edit high-quality YouTube vlogs and other types of videos for other platforms. However, Wondershare Filmora is not just a video editing tool. You can also use it to create custom cartoon animations and export them in the desired format within a few seconds. Filmora has a timeline-based interface that makes it relatively easier for editors to streamline the entire editing process while ensuring that none of the shots go missing.
Filmora also has a built-in media store - known as FilmStocks - where you can find hundreds of video effects, animations, animated characters, etc. FilmStocks also offers access to copyright-free music, allowing creators to use high-quality music in their videos without worrying about unexpected copyright strikes.
So, if you are looking for an all-in-one tool to create Whatsapp cartoon stickers, install Wondershare Filmora on your computer and start turning your face into an animated sticker.
Part 1 How to Create Custom Animated Whatsapp Stickers on Android and iPhone
One of the tools that can help you do the job is “Toon Me”. As the name implies, Toon Me is an online platform that’s designed to help users turn their faces into respective cartoon stickers. It’s designed by the developers at Photo Labs - an online platform that makes photo editing a hassle-free task. Since the tool is designed by expert developers, you can expect to get the best results in the end. And, the best part is creating custom cartoon characters using Toon Me is a relatively easy process.
All you have to do is download Toon Me on your phone and use the camera to create a Whatsapp cartoon sticker for yourself. The app is available on both Google Play Store and Apple’s App Store. It means regardless of the smartphone you’re using, Toon Me will allow you to design a Whatsapp cartoon sticker without any hassle.
Like Toon Me, there are dozens of other applications you can install on your smartphone to create personalized animated stickers. One such example is Sticker Maker. Sticker Maker is an Android application that’ll allow you to capture your face and turn it into an animated sticker. It’s compatible across different Android versions and runs smoothly on all Android models. So, if you own an Android device, here’s the step-by-step process to use Sticker Maker to turn your face into an animated sticker.
Step 1 - Start by installing Sticker Maker on your smartphone and launch the application to get started.
Step 2 - On its home screen, click the “Create a New Sticker Pack” option.
Step 3 - Give the sticker pack a name and then, press enter to proceed further.
Step 4 - At this point, you can either select one of the existing pictures from your Gallery or open the camera to click a fresh selfie. Either way, upload the picture and let the app convert it into a corresponding sticker.
Step 5 - You can upload 8-10 pictures at once and create the entire sticker pack instantly. And, once you have successfully created the sticker pack, simply click the “Add to Whatsapp” button.
That’s it; the selected sticker pack will get added to your Whatsapp’s sticker collection and you’ll be able to use them right away. That’s how quick and easy it is to create custom Whatsapp cartoons using different tools on your smartphone.
● Ending Thoughts →
● Using personalized Whatsapp cartoon stickers is a great way to make Whatsapp conversations fun.
● Wondershare Filmora is a feature-packed video editing software that’s designed to help creators create stunning videos and Whatsapp stickers. Its timeline-based interface and built-in media store will allow you to create stunning Whatsapp stickers without any hassle
● You can also download dedicated sticker maker applications on your iPhone or Android devices and use them directly to create visually appealing animated stickers for Whatsapp.
Interesting Fundamentals and Ultimate Guide to Animated Characters Drawings
Interesting Fundamentals and Ultimate Guide to Animated Characters Drawings
An easy yet powerful editor
Numerous effects to choose from
Detailed tutorials provided by the official channel
Cartoon character have stamped their faces in our hearts from childhood. A cartoon artist represents a cartoon or a natural person’s unique features with simple shapes accurately to recognize the person with the drawing and does not require a lot of patience to do this. The goal of the cartoon is to attract, and the child should get attracted when they see a cartoon image as well as adults. Though the sparkle may appear a little dull, it remains unaltered.
Let us grab a chance to recreate our cartoon characters with easy tutorials about animated characters to draw. In addition to that, you will learn about basic drawing exercises to lead into cool animated characters to draw through this guide in a step-by-step manner.
In this article
01 [What Do I Need to Start Learning Animated Characters Drawings?](#Part 1)
02 [6 Cartoon Characters that Anyone Can Draw (Provided with Free Video Tutorials)](#Part 2)
03 [4 Best Drawing Exercises for Creating Cartoon Characters](#Part 3)
Part 1 What Do I Need to Start Learning Animated Characters Drawings?
There are many software’s available, and anyone can create an animated character drawing, but still, the art of creating a perfect character needs a master. You don’t have to be a Disney-grade animator to make it; start with simple minor characters. Animation is the art of bringing a 3D illustrated cartoon into life. It is created by projecting a sequence of images one after the other immediately. Let us discuss the essential things you need to note before animating characters.
●Timeline is the most important for animation. Depending on the software, you have various options to change the duration and add effects.
●Animation is generally preferable in 24 frames per second, which means the total number of people in the frame for one second.
●There are two types of working they are one’s and two’s. 2D Animation is usually done in two’s, whereas 3D Animation is in one’s.
●In hand-drawn animations, keyframes are more critical to maintain. The keyframe is the position for the cartoon as per animator has decided.
●Breakdowns combine one or two keyframes, which decide the motion in between the keys.
●In-betweens are all the frames that come between to smooth the motion—automatically generated by the computer to move from key to key.
●Composting is creating or joining two or more images to create a single cartoon frame.
Part 2 6 Cartoon Characters that Anyone can Draw (With free Video Tutorials)
We will discuss animated characters to draw in hand. There are many cartoon characters, but we will look into six cartoon character drawings with their tutorial videos.
01 Smurfette
Smurfette stands out as the lone female Smurf in the entire bunch of blue critters around the village area. One of the rare designs with long hair and a dress is hers. Her design is a lot of fun to sketch.
So, in general, it’s best to work through the lesson as is, then turn it into Brainy, Papa, Joker, or even Smurf.
01Angelica Pickles
Angelica Pickles is one of the most challenging characters to depict from The Rugrats. But her design is so intricate that getting it proper will give you a true sense of accomplishment. Her pigtails, like her leggings, might be challenging to master, so keep practicing.
03Yogi Bear
Yogi Bear is a cartoon character on the sweeter side of the comic animal variety. Yogi Bear is a beloved character from Jellystone Park. As long as you get his tie and collar just right, this guy is a breeze to draw.
04Magilla Gorilla
Magilla Gorilla is another bizarre creature from Hanna-catalog. Barbera’s Because he comes with a bow tie, a little cap, and suspenders, this design is a little more complicated. Not to mention his enormous clown shoes. These small details can be a pain to draw, but Magilla is a very charming gorilla.
05Top Cat
Even further back in time, in the 1960s, there was the ever-popular Top Cat. He’s wearing a cap and a button-down vest, and he’s making some reasonably fancy dances. Give Top Cat a shot if you like The Flintstones’ basic Hanna-Barbera art style.
<
06Helga. G. Pataki
Helga is another character with some wacky hair. There’s a lot that’s bizarre about her. And half the fun of drawing her is figuring out how to do it. Just keep an eye on her head since getting it correct, especially with her rectangle hairdo, can be a little odd.
These are some of the cool animated characters to draw.
Part 3 4 Best Drawing Exercise for Creating Cartoon Characters
You’ll learn how to create cartoon characters individually, including their faces, hair, and facial expressions.
01How to Draw Cartoon Characters
We’ll go through the fundamentals of human perception before getting into cartoon face drawing. Humans have a unique ability to synthesize the details that make up a structure or object in highly complicated ways into fundamental and simple ones. We can express everything with a few curves and geometric forms in this way. In cartoon face, we need to identify the character just by looking like looking at the below picture a girl and a boy.
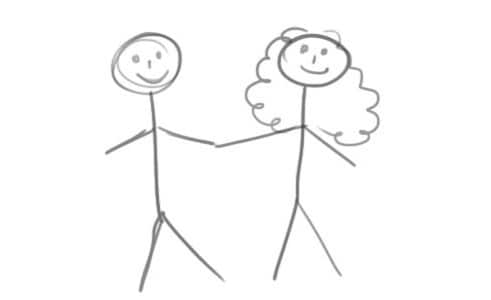
02Here, you will learn How to Draw a Cartoon Face
Let us begin with a sketch of a cartoon face. A circle is a basic cartoon shape. All you need is a circle. As seen in the image below, draw a vertical and horizontal line intersecting at the center.
Let us have a look at how to make cartoon eyeballs. Draw an oval shape with a slight lean to the side at the top for the eyes. Repeat on the other side.
Slightly thicken the characteristic to represent our character eyelashes at the top of the circle, place the brows above the eyelashes to create a shocking appearance, draw both pupils to the center in the same direction.
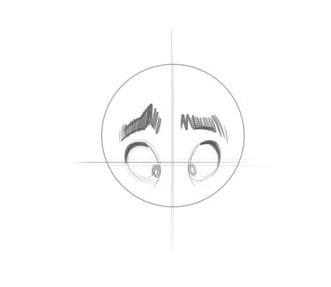
When creating a nose from the front, it’s typical to leave off many details. Even if you merely sketch its tip, it will likely provide a convincing impact. Drawing only one side of the nose is also quite frequent. Children’s mouths are extremely simple in cartoon style, regardless of gender.
The ears are viewed from the front; therefore, the internal holes are not visible. The circle has already established the shape of our head.
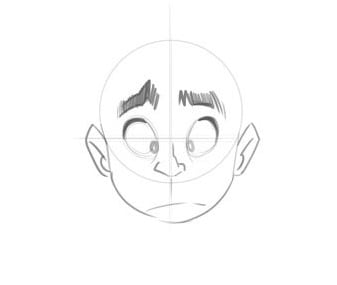
03Let’s learn about How to Draw a Cartoon Hair
Keep in mind that our characters’ hair is essential for identifying their personalities, and it can also indicate their age. So, all we need is an effortless and playful haircut to bring our boy to life. Because there is no particular method for drawing hair, you’ll have to experiment until you find the perfect look. Look for photo references on the internet! Take a look at a magazine shoot or a Google search.
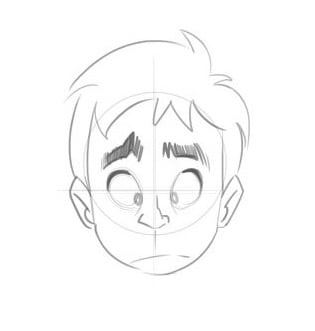
03How to Draw Characters with different Facial Expressions
By simply following the instructions below, you’ll notice that you can completely transform his expression: Lowering one brow and raising the other, eyelashes are used to cut the eyes in half, putting a smile on the face one side is higher.
To stay under the eyelashes, move the eye pupils up. That’s all there is to it! With just a few tweaks, we achieved the desired result. The circular form of the eyes, hair, ears, nose, chin and the circular shape of the ears are all the same! It’s that simple!
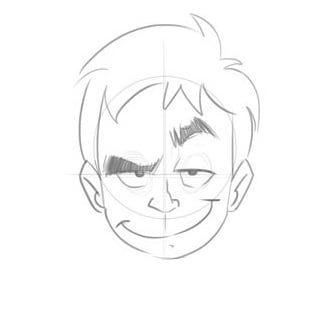
While working in cartooning or video making, Wondershare Wondershare Filmora Video Editor comes out with pros in mind, which can effortlessly convert conventional films into cartoon videos. If you want greater control over your cartoon video, you may also use keyframing to create it. You can fine-tune the parameters in Effects to achieve the best results. You can even change the Animation color after it has been created. It also allows you to use different text themes to showcase your videos.
We propose Wondershare Filmora Video Editor , in this case, to create animation videos by adding keyframes, resulting in a smooth and natural animation. To get started with Animation, all you need is a white plane. Aside from that, color correction and an audio mixer will take your animation video to the next level.
For Win 7 or later (64-bit)
For macOS 10.12 or later
● Key Takeaways from This Episode →
● Learn what are the key elements to make animation videos using software
● Tutorial on how to draw a cartoon character accurately
● In comparison, Wondershare Wondershare Filmora Video Editor is superior in making animation videos.
Cartoon character have stamped their faces in our hearts from childhood. A cartoon artist represents a cartoon or a natural person’s unique features with simple shapes accurately to recognize the person with the drawing and does not require a lot of patience to do this. The goal of the cartoon is to attract, and the child should get attracted when they see a cartoon image as well as adults. Though the sparkle may appear a little dull, it remains unaltered.
Let us grab a chance to recreate our cartoon characters with easy tutorials about animated characters to draw. In addition to that, you will learn about basic drawing exercises to lead into cool animated characters to draw through this guide in a step-by-step manner.
In this article
01 [What Do I Need to Start Learning Animated Characters Drawings?](#Part 1)
02 [6 Cartoon Characters that Anyone Can Draw (Provided with Free Video Tutorials)](#Part 2)
03 [4 Best Drawing Exercises for Creating Cartoon Characters](#Part 3)
Part 1 What Do I Need to Start Learning Animated Characters Drawings?
There are many software’s available, and anyone can create an animated character drawing, but still, the art of creating a perfect character needs a master. You don’t have to be a Disney-grade animator to make it; start with simple minor characters. Animation is the art of bringing a 3D illustrated cartoon into life. It is created by projecting a sequence of images one after the other immediately. Let us discuss the essential things you need to note before animating characters.
●Timeline is the most important for animation. Depending on the software, you have various options to change the duration and add effects.
●Animation is generally preferable in 24 frames per second, which means the total number of people in the frame for one second.
●There are two types of working they are one’s and two’s. 2D Animation is usually done in two’s, whereas 3D Animation is in one’s.
●In hand-drawn animations, keyframes are more critical to maintain. The keyframe is the position for the cartoon as per animator has decided.
●Breakdowns combine one or two keyframes, which decide the motion in between the keys.
●In-betweens are all the frames that come between to smooth the motion—automatically generated by the computer to move from key to key.
●Composting is creating or joining two or more images to create a single cartoon frame.
Part 2 6 Cartoon Characters that Anyone can Draw (With free Video Tutorials)
We will discuss animated characters to draw in hand. There are many cartoon characters, but we will look into six cartoon character drawings with their tutorial videos.
01 Smurfette
Smurfette stands out as the lone female Smurf in the entire bunch of blue critters around the village area. One of the rare designs with long hair and a dress is hers. Her design is a lot of fun to sketch.
So, in general, it’s best to work through the lesson as is, then turn it into Brainy, Papa, Joker, or even Smurf.
01Angelica Pickles
Angelica Pickles is one of the most challenging characters to depict from The Rugrats. But her design is so intricate that getting it proper will give you a true sense of accomplishment. Her pigtails, like her leggings, might be challenging to master, so keep practicing.
03Yogi Bear
Yogi Bear is a cartoon character on the sweeter side of the comic animal variety. Yogi Bear is a beloved character from Jellystone Park. As long as you get his tie and collar just right, this guy is a breeze to draw.
04Magilla Gorilla
Magilla Gorilla is another bizarre creature from Hanna-catalog. Barbera’s Because he comes with a bow tie, a little cap, and suspenders, this design is a little more complicated. Not to mention his enormous clown shoes. These small details can be a pain to draw, but Magilla is a very charming gorilla.
05Top Cat
Even further back in time, in the 1960s, there was the ever-popular Top Cat. He’s wearing a cap and a button-down vest, and he’s making some reasonably fancy dances. Give Top Cat a shot if you like The Flintstones’ basic Hanna-Barbera art style.
<
06Helga. G. Pataki
Helga is another character with some wacky hair. There’s a lot that’s bizarre about her. And half the fun of drawing her is figuring out how to do it. Just keep an eye on her head since getting it correct, especially with her rectangle hairdo, can be a little odd.
These are some of the cool animated characters to draw.
Part 3 4 Best Drawing Exercise for Creating Cartoon Characters
You’ll learn how to create cartoon characters individually, including their faces, hair, and facial expressions.
01How to Draw Cartoon Characters
We’ll go through the fundamentals of human perception before getting into cartoon face drawing. Humans have a unique ability to synthesize the details that make up a structure or object in highly complicated ways into fundamental and simple ones. We can express everything with a few curves and geometric forms in this way. In cartoon face, we need to identify the character just by looking like looking at the below picture a girl and a boy.
02Here, you will learn How to Draw a Cartoon Face
Let us begin with a sketch of a cartoon face. A circle is a basic cartoon shape. All you need is a circle. As seen in the image below, draw a vertical and horizontal line intersecting at the center.
Let us have a look at how to make cartoon eyeballs. Draw an oval shape with a slight lean to the side at the top for the eyes. Repeat on the other side.
Slightly thicken the characteristic to represent our character eyelashes at the top of the circle, place the brows above the eyelashes to create a shocking appearance, draw both pupils to the center in the same direction.
When creating a nose from the front, it’s typical to leave off many details. Even if you merely sketch its tip, it will likely provide a convincing impact. Drawing only one side of the nose is also quite frequent. Children’s mouths are extremely simple in cartoon style, regardless of gender.
The ears are viewed from the front; therefore, the internal holes are not visible. The circle has already established the shape of our head.
03Let’s learn about How to Draw a Cartoon Hair
Keep in mind that our characters’ hair is essential for identifying their personalities, and it can also indicate their age. So, all we need is an effortless and playful haircut to bring our boy to life. Because there is no particular method for drawing hair, you’ll have to experiment until you find the perfect look. Look for photo references on the internet! Take a look at a magazine shoot or a Google search.
03How to Draw Characters with different Facial Expressions
By simply following the instructions below, you’ll notice that you can completely transform his expression: Lowering one brow and raising the other, eyelashes are used to cut the eyes in half, putting a smile on the face one side is higher.
To stay under the eyelashes, move the eye pupils up. That’s all there is to it! With just a few tweaks, we achieved the desired result. The circular form of the eyes, hair, ears, nose, chin and the circular shape of the ears are all the same! It’s that simple!
While working in cartooning or video making, Wondershare Wondershare Filmora Video Editor comes out with pros in mind, which can effortlessly convert conventional films into cartoon videos. If you want greater control over your cartoon video, you may also use keyframing to create it. You can fine-tune the parameters in Effects to achieve the best results. You can even change the Animation color after it has been created. It also allows you to use different text themes to showcase your videos.
We propose Wondershare Filmora Video Editor , in this case, to create animation videos by adding keyframes, resulting in a smooth and natural animation. To get started with Animation, all you need is a white plane. Aside from that, color correction and an audio mixer will take your animation video to the next level.
For Win 7 or later (64-bit)
For macOS 10.12 or later
● Key Takeaways from This Episode →
● Learn what are the key elements to make animation videos using software
● Tutorial on how to draw a cartoon character accurately
● In comparison, Wondershare Wondershare Filmora Video Editor is superior in making animation videos.
How To Animate Graphics in Canva
Versatile Video Editor - Wondershare Filmora
An easy yet powerful editor
Numerous effects to choose from
Detailed tutorials provided by the official channel
Canva is a graphic design platform that allows users to create stunning designs for social media posts, presentations, assignments, recipe cards, birthday videos.
With the introduction of Canva’s animation feature, a whole new world of possibilities are open to the public. Also, with pre-designed templates from professional designers, content creation has never been easier than Canva.
Animations themselves have the option of being individually customized element by element. Canva animated graphics makes it easy to unleash your creative potential.
This article will explore how to animate graphics in Canva that can suit every occasion.
In this article
01 [Animate Your Graphic In Canva](#Part 1)
02 [Make A Moving Graphic In Canva](#Part 2)
03 [Pricing for Canva You Should Know](#Part 3)
Part 1 Animate Your Graphic In Canva
People can create animations in Canva in one of two ways. You can select an animation from one of the pre-existing animated templates. This is a time-saving option as it lets you customize ready-made templates to suit your needs
With the pre-set animation templates, you have the option to choose from among
● Invitations
● A4 Documents
● Instagram Post
● Facebook Post
● YouTube Thumbnails
● Presentation
● Flyer/Poster
● Instagram Logo
● Infographic
These options generate the ability to be presented in both portrait and landscape mode. The multitude of options makes it an ideal medium for you to create your animation. The animation options at Canva also come with the opportunity to animate an existing image.

You can choose to animate an existing design. With a few minor edits, you can have a polished and sophisticated post that’s bound to draw viewer attention and earn you kudos.
If this is the case, then you benefit from saving time and the expertise of a professional design team through Canva.
The second option is creating an animation by yourself. Creating your own animation offers you greater flexibility in executing your vision for the design. Without further ado, let’s look at how we can help this happen in the how to make a moving graphic in the Canva section.
Part 2 Make A Moving Graphic In Canva
Making a moving graphic in Canva is easy. Canva offers an “Animation” button that allows users to animate each element in the content. There are four areas that the graphic can touch upon for content. These areas are text, image, audio, and video.
Here’s how you can animate individual elements in Canva.
2.1 How to animate text in Canva?
With text, Canva offers three options. You can choose to create either a title text, a sub-heading text, or regular text for use. Play with different styles and fonts to find one that suits your design. You can also add details like stickers or illustrations to customize the design.
You are now ready to animate once you’re happy with the design. Text animations will help your text jump out from the background. Then choose the “Animate” option in the sidebar after clicking on the selected text.

Allow your font to move around your design with motion. Thanks to “animate,” you can choose between subtle, smooth movement and jagged and sudden motion. You can even mix and match animations for each word.
In Wondershare Filmora, a premier video editing software, the texts are available according to use. For instance, opening and ending credit texts as a template. With options for choosing subtitles, lower 3rds, and call-out templates.
Additionally, users can also save a particular setting as a “preset’. Which makes it easy to reuse the settings in future projects. You can also adjust the duration of the individual text display. It also has an animation option that allows animation of the text according to given presets.
2.2 How do you animate a picture in Canva?
Users have the ability to choose to animate just the image or animate other elements of the picture. They can also make use of options to edit the image using background remover. This allows seamless integration into the presentation.

Users can simply upload their photos. Choose a stock image or upload an image through your photo gallery to use in your design. You can also choose to use “frames,” which are available under the “Elements” tab in Canva.
Make your photo come alive by animating it. Choose from a variety of innovative animation possibilities by selecting the Animation tool. The duration of the animation can be changed using the stopwatch animation icon. It uses a slider to help in setting the duration of each animation. You can also adjust this manually.
2.3 How do you add music to animation in Canva?
Users can find a section dedicated to “Uploads,” allowing creators to use their audio content. The users can use a soundtrack from one of Canva’s audio libraries. This gives users control over their animation’s impact.
One difference between Canva and Wondershare Filmora is that Canva users can only use one audio per presentation. Filmora allows users to overlay multiple soundtracks to their timeline.
Users can also make use of the Audio Effects feature to create audio for “Echo,” “large room,” “small room,” “lobby,” and “phone.” The preview function can help users experience it live before applying the effect.
Filmora Pro’s Auto-Normalization of audio allows intelligent audio analysis and volume adjustment.
2.4 How do you animate video in Canva?
Canva offers presentations that are similar to the explainer-style videos on Youtube. With more modifications, you can convert the presentation to a video format. You can edit individual elements in the presentation to reflect the project details and outcomes.
You can also introduce transition effects to make the presentation a smooth video. Incorporating the three other elements will be a breeze to make a video with animation.

Another noteworthy thing in Canva is that users can upload their videos or use videos provided in the video library. You can also embed videos within a frame from the “Elements” section in Canva. You can trim the video input on the slide for time. It can be presented as a “loop” video.
Filmora offers all the essential video editing tools in addition to AI-powered features called Auto-Highlight and Auro-Reframe. Auto Highlight is a feature that extracts the highlights from a video clip autonomously.
This will save you time while cutting your movie. It also makes it easier to extract the best moments from the video.
Auto Reframe recognizes as well as crops the focal point of your footage, constantly retaining it in the frame. Your film’s primary action or object will never be out of focus within that technique.
Part 3 Pricing for Canva You Should Know
Canva can be used among a multitude of users and companies. The range of access is from a single person use to teams of fifty. It also allows for a custom selection of a number of people.
Canva can be used as free graphic design software. It does display all available options with a few possibilities marked off for Canva Pro users only.
Canva Pro allows up to 5 users per team. A subscription to Canva Pro costs US $119.99 per annum or US $12.99 per month. Pro users have access to unlimited content and newly released tools.
The only difference between Canva Pro and Canva Enterprise is that Canva Pro is for smaller teams. Canva Enterprise allows collaboration between larger teams and franchises.
Canva also offers free Canva Pro subscriptions to non-profit organizations. Students and teachers are offered a special discount for those in educational programs.
Wondershare Filmora
Get started easily with Filmora’s powerful performance, intuitive interface, and countless effects Try It Free Try It Free Learn More >
AI Portrait – The best feature of Wondershare Filmora for gameplay editing
The AI Portrait is a new add-on in Wondershare Filmora. It can easily remove video backgrounds without using a green screen or chroma key, allowing you to add borders, glitch effects, pixelated, noise, or segmentation video effects.

Final Words
We’ve covered how to animate graphics in Canva. You can animate individual elements in Canva or automate it on the whole. Canva’s animate button is an automatic tool that revolutionizes the way traditional animation works.
Wondershare’s Filmora is the video editing tool that is easy to use and offer various animation options.
Canva is a graphic design platform that allows users to create stunning designs for social media posts, presentations, assignments, recipe cards, birthday videos.
With the introduction of Canva’s animation feature, a whole new world of possibilities are open to the public. Also, with pre-designed templates from professional designers, content creation has never been easier than Canva.
Animations themselves have the option of being individually customized element by element. Canva animated graphics makes it easy to unleash your creative potential.
This article will explore how to animate graphics in Canva that can suit every occasion.
In this article
01 [Animate Your Graphic In Canva](#Part 1)
02 [Make A Moving Graphic In Canva](#Part 2)
03 [Pricing for Canva You Should Know](#Part 3)
Part 1 Animate Your Graphic In Canva
People can create animations in Canva in one of two ways. You can select an animation from one of the pre-existing animated templates. This is a time-saving option as it lets you customize ready-made templates to suit your needs
With the pre-set animation templates, you have the option to choose from among
● Invitations
● A4 Documents
● Instagram Post
● Facebook Post
● YouTube Thumbnails
● Presentation
● Flyer/Poster
● Instagram Logo
● Infographic
These options generate the ability to be presented in both portrait and landscape mode. The multitude of options makes it an ideal medium for you to create your animation. The animation options at Canva also come with the opportunity to animate an existing image.
You can choose to animate an existing design. With a few minor edits, you can have a polished and sophisticated post that’s bound to draw viewer attention and earn you kudos.
If this is the case, then you benefit from saving time and the expertise of a professional design team through Canva.
The second option is creating an animation by yourself. Creating your own animation offers you greater flexibility in executing your vision for the design. Without further ado, let’s look at how we can help this happen in the how to make a moving graphic in the Canva section.
Part 2 Make A Moving Graphic In Canva
Making a moving graphic in Canva is easy. Canva offers an “Animation” button that allows users to animate each element in the content. There are four areas that the graphic can touch upon for content. These areas are text, image, audio, and video.
Here’s how you can animate individual elements in Canva.
2.1 How to animate text in Canva?
With text, Canva offers three options. You can choose to create either a title text, a sub-heading text, or regular text for use. Play with different styles and fonts to find one that suits your design. You can also add details like stickers or illustrations to customize the design.
You are now ready to animate once you’re happy with the design. Text animations will help your text jump out from the background. Then choose the “Animate” option in the sidebar after clicking on the selected text.
Allow your font to move around your design with motion. Thanks to “animate,” you can choose between subtle, smooth movement and jagged and sudden motion. You can even mix and match animations for each word.
In Wondershare Filmora, a premier video editing software, the texts are available according to use. For instance, opening and ending credit texts as a template. With options for choosing subtitles, lower 3rds, and call-out templates.
Additionally, users can also save a particular setting as a “preset’. Which makes it easy to reuse the settings in future projects. You can also adjust the duration of the individual text display. It also has an animation option that allows animation of the text according to given presets.
2.2 How do you animate a picture in Canva?
Users have the ability to choose to animate just the image or animate other elements of the picture. They can also make use of options to edit the image using background remover. This allows seamless integration into the presentation.
Users can simply upload their photos. Choose a stock image or upload an image through your photo gallery to use in your design. You can also choose to use “frames,” which are available under the “Elements” tab in Canva.
Make your photo come alive by animating it. Choose from a variety of innovative animation possibilities by selecting the Animation tool. The duration of the animation can be changed using the stopwatch animation icon. It uses a slider to help in setting the duration of each animation. You can also adjust this manually.
2.3 How do you add music to animation in Canva?
Users can find a section dedicated to “Uploads,” allowing creators to use their audio content. The users can use a soundtrack from one of Canva’s audio libraries. This gives users control over their animation’s impact.
One difference between Canva and Wondershare Filmora is that Canva users can only use one audio per presentation. Filmora allows users to overlay multiple soundtracks to their timeline.
Users can also make use of the Audio Effects feature to create audio for “Echo,” “large room,” “small room,” “lobby,” and “phone.” The preview function can help users experience it live before applying the effect.
Filmora Pro’s Auto-Normalization of audio allows intelligent audio analysis and volume adjustment.
2.4 How do you animate video in Canva?
Canva offers presentations that are similar to the explainer-style videos on Youtube. With more modifications, you can convert the presentation to a video format. You can edit individual elements in the presentation to reflect the project details and outcomes.
You can also introduce transition effects to make the presentation a smooth video. Incorporating the three other elements will be a breeze to make a video with animation.
Another noteworthy thing in Canva is that users can upload their videos or use videos provided in the video library. You can also embed videos within a frame from the “Elements” section in Canva. You can trim the video input on the slide for time. It can be presented as a “loop” video.
Filmora offers all the essential video editing tools in addition to AI-powered features called Auto-Highlight and Auro-Reframe. Auto Highlight is a feature that extracts the highlights from a video clip autonomously.
This will save you time while cutting your movie. It also makes it easier to extract the best moments from the video.
Auto Reframe recognizes as well as crops the focal point of your footage, constantly retaining it in the frame. Your film’s primary action or object will never be out of focus within that technique.
Part 3 Pricing for Canva You Should Know
Canva can be used among a multitude of users and companies. The range of access is from a single person use to teams of fifty. It also allows for a custom selection of a number of people.
Canva can be used as free graphic design software. It does display all available options with a few possibilities marked off for Canva Pro users only.
Canva Pro allows up to 5 users per team. A subscription to Canva Pro costs US $119.99 per annum or US $12.99 per month. Pro users have access to unlimited content and newly released tools.
The only difference between Canva Pro and Canva Enterprise is that Canva Pro is for smaller teams. Canva Enterprise allows collaboration between larger teams and franchises.
Canva also offers free Canva Pro subscriptions to non-profit organizations. Students and teachers are offered a special discount for those in educational programs.
Wondershare Filmora
Get started easily with Filmora’s powerful performance, intuitive interface, and countless effects Try It Free Try It Free Learn More >
AI Portrait – The best feature of Wondershare Filmora for gameplay editing
The AI Portrait is a new add-on in Wondershare Filmora. It can easily remove video backgrounds without using a green screen or chroma key, allowing you to add borders, glitch effects, pixelated, noise, or segmentation video effects.
Final Words
We’ve covered how to animate graphics in Canva. You can animate individual elements in Canva or automate it on the whole. Canva’s animate button is an automatic tool that revolutionizes the way traditional animation works.
Wondershare’s Filmora is the video editing tool that is easy to use and offer various animation options.
How To Remove The Endless Loop From Animated GIF
How To Remove The Endless Loop From Animated GIF

Shanoon Cox
Mar 27, 2024• Proven solutions
People may discover for themselves a lot of eye-catching looping gifs on the Internet that is of great interest to them. But sometimes, you may want to give an ending for your gif for a special effect. Then, here this article will show you how to do it with ease.
How to Remove Loop From GIFs
The answer to the problem is very simple. Just open a GIF editor (or an editor that supports GIFs), then choose Remove loop option, and resave it. There are many freeware or online GIF editors that can help you achieve this. If you have no idea which one to choose and how to use it, this guide will help you a lot.
Do you want to convert video to GIF or do you want to edit your GIFs? Wondershare Filmora is the best choice for you to create GIFs from videos and photos, while you can add text, overlays, or combine multiple GIFs together easily with Filmora.
However, if you want to make a GIF online, Filmora meme maker is your ultimate solution. It helps you make image, GIF and video memes directly without watermark. It is totally FREE to use and no sign up. You can change text size, color and position to create caption when you are editing. You can also put text inside or outside in GIF. Just with a few clicks, your GIF is done . Try it nowDownload Mac Version ](https://tools.techidaily.com/wondershare/filmora/download/ )
Online Solutions to Stop Endless GIF Loop
1. Lunapic
How:
- First, you head over to the Lunapic website.
- Click the Browse icon to upload your GIF image from your home computer. You can also type out the URL, then select Open from URL and select Go. It is that simple.
- Select or click on the Animation icon from the top menu.
- Select Edit GIF Animation.
- Click the drop down menu and decide on the number of loops for the GIF image.
- Hit the Apply button.
Pros:
- User friendly and free
- Zooming, adding text, splitting and rotating are excellent tools to use on this application
Cons:
- Not being able to use it without Internet.
- Very slowly while uploading large files.
2. GIFCREATOR.ME:
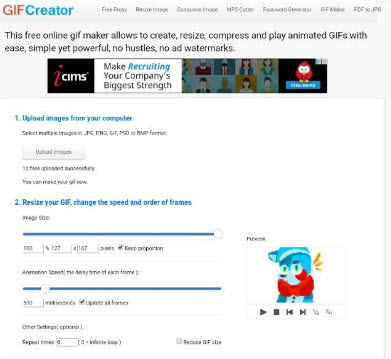
How:
- Upload the GIF pictures from your laptop computer.
- Compress the size of your GIF pictures.
- Set repeat times, 0=infinite loop
- Click Create Animation icon button
Pros:
- User friendly and easy to use. Free
Cons:
- Cannot be used without an internet connection.
- Cannot perform any other editing like correcting the color, adding additional text or cropping a GIF photo.
3. Ezgif.com

How:
- Choose the GIF image file that you want to use.
- Upload the image to Ezgif.com.
- Drag or drop your photos in the order that you desire.
- Set the Loop with the count of how many times you want it to loop. If it is empty, the loop is infinite.
- Select Animate It.
Pros:
- User friendly and free.
- Can do basic editing like adding new text, effects, cropping photos, splitting, and resizing your images. Cons: very slow, interface not intuitive
Cons:
- very slow, interface not intuitive Ask internet connection
Desktop Solutions to Removing Loops from GIFs
1. Photoshop

How:
- Open your file on the Photoshop.
- Select the File icon and press the Save for Web icon.
- Check if the Animation button on the bottom of the save dialog is no longer the color of grey.
- Set looping count and then click on the preview menu for the animation. Then, you click Save.
Pros:
- Professional, offers you many other advanced editing features
Cons:
- Pricy, complicated.
2. Beneton Movie GIF
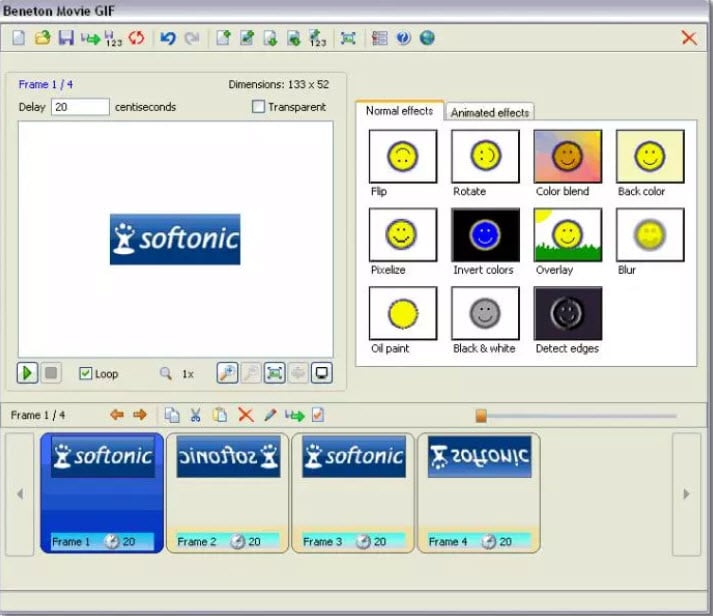
How:
- Open your GIF images.
- Uncheck the ‘loop’ box in the bottom left
- Save.
Pros:
- a very small program that can get the job done.
Cons:
- crash sometimes.
3. Falco GIF Animator

How:
- Open your GIF using the program
- Uncheck the “repeat forever” box in the bottom right
- Then “save as” from the file menu
Pros:
- Opens large GIFs without problems
- Simple and straightforward.
- A lot of useful GIF editing functions that you will like if you need to work with GIFs in general.
Cons:
- Bundled with some other software you might not need. So be sure to uncheck the options you don’t want.
4. GIMP
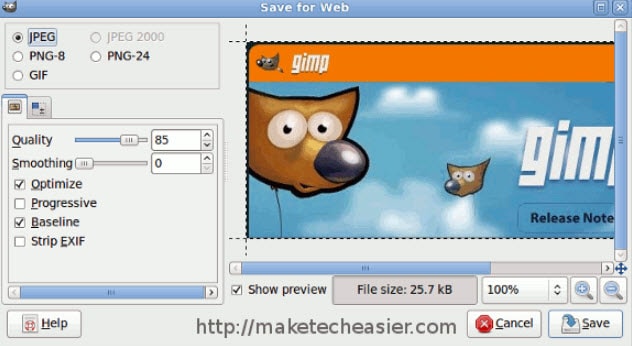
How:
- Open your GIF, then resave it.
- You will be presented with a number of screens during the saving process.
- Make sure to ‘save as animation’ and then uncheck ‘loop forever’ as shown in the screenshots above.
Pros:
- Upload large GIFs without problems
Cons:
- It may be too large if you just want to a quick solution for GIF
- Changes the color of white spaces in GIFs
Frequently Asked Questions About Removing Loops from GIFs
1. How To Stop A GIF From Looping?
Even though GIFs can be saved as infinite loops, this isn’t a mandatory option, as most GIF editors enable you to choose if you want a GIF to be a loop or not. Import a GIF into the editor you are using and then make sure that the Remove Loop option is selected.
This will effectively stop the GIF file from replaying once it reaches the end, so you can proceed to export the GIF from the editor. Keep in mind that some GIF editors don’t allow you to set the Loop count and leaving this box empty will create an infinite loop.
2. How To Set A GIF Loop Count?
Nearly all GIF editors allow you to specify how many loops a GIF is going to make before it comes to a stop. All you need to do in order to set the loop count for a GIF is import it into a GIF editor and click the Edit GIF option.
You will see the loop count box, among other options so you can simply insert the value you want and confirm the changes you’ve made. Afterward, you should export the GIF you edited and it will have the loop as many times as you specified.
Shanoon Cox
Shanoon Cox is a writer and a lover of all things video.
Follow @Shanoon Cox
Shanoon Cox
Mar 27, 2024• Proven solutions
People may discover for themselves a lot of eye-catching looping gifs on the Internet that is of great interest to them. But sometimes, you may want to give an ending for your gif for a special effect. Then, here this article will show you how to do it with ease.
How to Remove Loop From GIFs
The answer to the problem is very simple. Just open a GIF editor (or an editor that supports GIFs), then choose Remove loop option, and resave it. There are many freeware or online GIF editors that can help you achieve this. If you have no idea which one to choose and how to use it, this guide will help you a lot.
Do you want to convert video to GIF or do you want to edit your GIFs? Wondershare Filmora is the best choice for you to create GIFs from videos and photos, while you can add text, overlays, or combine multiple GIFs together easily with Filmora.
However, if you want to make a GIF online, Filmora meme maker is your ultimate solution. It helps you make image, GIF and video memes directly without watermark. It is totally FREE to use and no sign up. You can change text size, color and position to create caption when you are editing. You can also put text inside or outside in GIF. Just with a few clicks, your GIF is done . Try it nowDownload Mac Version ](https://tools.techidaily.com/wondershare/filmora/download/ )
Online Solutions to Stop Endless GIF Loop
1. Lunapic
How:
- First, you head over to the Lunapic website.
- Click the Browse icon to upload your GIF image from your home computer. You can also type out the URL, then select Open from URL and select Go. It is that simple.
- Select or click on the Animation icon from the top menu.
- Select Edit GIF Animation.
- Click the drop down menu and decide on the number of loops for the GIF image.
- Hit the Apply button.
Pros:
- User friendly and free
- Zooming, adding text, splitting and rotating are excellent tools to use on this application
Cons:
- Not being able to use it without Internet.
- Very slowly while uploading large files.
2. GIFCREATOR.ME:
How:
- Upload the GIF pictures from your laptop computer.
- Compress the size of your GIF pictures.
- Set repeat times, 0=infinite loop
- Click Create Animation icon button
Pros:
- User friendly and easy to use. Free
Cons:
- Cannot be used without an internet connection.
- Cannot perform any other editing like correcting the color, adding additional text or cropping a GIF photo.
3. Ezgif.com
How:
- Choose the GIF image file that you want to use.
- Upload the image to Ezgif.com.
- Drag or drop your photos in the order that you desire.
- Set the Loop with the count of how many times you want it to loop. If it is empty, the loop is infinite.
- Select Animate It.
Pros:
- User friendly and free.
- Can do basic editing like adding new text, effects, cropping photos, splitting, and resizing your images. Cons: very slow, interface not intuitive
Cons:
- very slow, interface not intuitive Ask internet connection
Desktop Solutions to Removing Loops from GIFs
1. Photoshop
How:
- Open your file on the Photoshop.
- Select the File icon and press the Save for Web icon.
- Check if the Animation button on the bottom of the save dialog is no longer the color of grey.
- Set looping count and then click on the preview menu for the animation. Then, you click Save.
Pros:
- Professional, offers you many other advanced editing features
Cons:
- Pricy, complicated.
2. Beneton Movie GIF
How:
- Open your GIF images.
- Uncheck the ‘loop’ box in the bottom left
- Save.
Pros:
- a very small program that can get the job done.
Cons:
- crash sometimes.
3. Falco GIF Animator
How:
- Open your GIF using the program
- Uncheck the “repeat forever” box in the bottom right
- Then “save as” from the file menu
Pros:
- Opens large GIFs without problems
- Simple and straightforward.
- A lot of useful GIF editing functions that you will like if you need to work with GIFs in general.
Cons:
- Bundled with some other software you might not need. So be sure to uncheck the options you don’t want.
4. GIMP
How:
- Open your GIF, then resave it.
- You will be presented with a number of screens during the saving process.
- Make sure to ‘save as animation’ and then uncheck ‘loop forever’ as shown in the screenshots above.
Pros:
- Upload large GIFs without problems
Cons:
- It may be too large if you just want to a quick solution for GIF
- Changes the color of white spaces in GIFs
Frequently Asked Questions About Removing Loops from GIFs
1. How To Stop A GIF From Looping?
Even though GIFs can be saved as infinite loops, this isn’t a mandatory option, as most GIF editors enable you to choose if you want a GIF to be a loop or not. Import a GIF into the editor you are using and then make sure that the Remove Loop option is selected.
This will effectively stop the GIF file from replaying once it reaches the end, so you can proceed to export the GIF from the editor. Keep in mind that some GIF editors don’t allow you to set the Loop count and leaving this box empty will create an infinite loop.
2. How To Set A GIF Loop Count?
Nearly all GIF editors allow you to specify how many loops a GIF is going to make before it comes to a stop. All you need to do in order to set the loop count for a GIF is import it into a GIF editor and click the Edit GIF option.
You will see the loop count box, among other options so you can simply insert the value you want and confirm the changes you’ve made. Afterward, you should export the GIF you edited and it will have the loop as many times as you specified.
Shanoon Cox
Shanoon Cox is a writer and a lover of all things video.
Follow @Shanoon Cox
5 Foolproof Amazing Anime Text to Speech Tips for Makers
5 Foolproof Amazing Anime Text to Speech Tips for Makers
An easy yet powerful editor
Numerous effects to choose from
Detailed tutorials provided by the official channel
Our topic for today’s article is on that exact same subject. Or, rather, more specifically, anime text-to-speech.
For those who want more than the usual robotic text-to-speech AI that you see in more professional software. Learn more about all this below, we’ve prepared an entire guide for you!
In this article
01 [What is the Most Realistic Sounding Text to Speech & How to Do It?](#Part 1)
02 [How to Make Your Own Text to Speech Videos for Youtube](#Part 2)
03 [How to Get More Voices for Text to Speech?](#Part 3)
04 [Top 5 Tips on Anime Text to Speech](#Part 4)
Part 1 What is the Most Realistic Sounding Text to Speech & How to Do It?
To start off, we’ve included this little second on need-to-know information regarding text-to-speech. Starting with:
01How did text to speech get popular?
Perhaps unsurprisingly, the text-to-speech function was developed to increase accessibility for those who have trouble reading on screen-text. Either as a result of visual impairment, are blindness. However, with its emergence came popular programs like Audible, which introduced even those without accessibility problems to its convenience for multi-tasking purposes.
02How to get the most realistic sounding text to speech?
There are several ways you can increase the natural sound of your text-to-speech:
● You can choose a tone that suits your taste.
● You can choose a voice gender that you are more comfortable with.
● And you can increase the speed of the text to reduce the awkward, and unnatural pauses that occur after each word.
In the end, though, the best way to get realistic speech is to find a tool that offers high-quality audio options. Which is what we’ll be introducing in the latter sections:
Part 2 How to Make Your Own Text to Speech Videos for YouTube
If you want to create your own anime text-to-speech for your YouTube videos (which is popular with a lot of YouTubers these days), the process is about the same no matter what text-to-speech option you end up choosing in the end. For our examples below, we will be using Natural Readers though, which is a FREE tool, making it a good choice for those who are just looking to try it out.
Step 1: Compose Your Text
The first step is to compose your text! You might prefer to do this on Google Docs or Word, but a lot of text-to-speech tools do offer you a way of composing your text along with them (like the online tool Natural Readers):

Step 2: Choose Voice / Reader
Next, it’s time to choose the reader that you want your text to be read by!
Usually, there are options for different types of accents and languages offered. So, if you want your text to speech to match that of your desired anime characters, you should play around with these options to get the right one.

Step 3: Choose Reading Speed!
Next, it’s time to choose your desired reading speed!
Most readers start off at 1X speed on average, but we personally recommend going for at least 1.25X - 1.5X for an instantly more natural-sounding text-to-speech anime characters.

Step 4: Choose Output Format
And finally, to finish us off, it’s time to choose what output format you want your text-to-speech audio to be! To keep this simple for uploading to YouTube, we recommend sticking with MP3, which most editors accept.

Part 3 How to Get More Voices for Text to Speech?
If you think that the available cartoon characters text-to-speech voices you have are not quite doing it for your project, then you can always explore alternative, third-party options! There are many of these available. Although, you’ll have to check with your text-to-speech reader or maker to make sure that it allows for such a feat:
01Method 1: Windows Text-to-Speech Voices
If you’re looking to change your computer’s text-to-speech voice, then the place to look for this is on ‘Control Panel > Speech’. There, not only can you choose from a variety of different voice options, but you can also change voice speed and voice pitch (how high or low the pitch is), which is a great way of getting a very specific kind of tone for your anime text-to-speech creations.

02Method 2: Third-Party Voices (Screaming Bee)
Next is the third-party resource, Screaming Bee , which offers a good variety of text-to-speech voices that you can try out as well! Using this method will, of course, require downloading and applying these voices for your chosen text-to-speech reader. For example, if you want to use the Windows reader, go to the Control Panel > Speech page for the option to apply it there.

03Method 3: Third-Party Voices (Cepstral Voices)
Another resource that you can check out is Cepstral Voices . Just like Screaming Bee, it offers a range of text-to-speech voices that you can try out to see which one suits your taste most. This includes text-to-speech cartoon characters and text-to-speech anime characters voices!

Part 4 Top 5 Tips on Anime Text to Speech
Now, onto some more anime text-to-speech options that you can try in order to make your text-to-speech script sound exactly like your favorite cartoon or anime characters! For this list, we’ve not only included a description of each reader but also why you might want to try it out:
01Flixier
Flixier is the first anime text-to-speech maker on this list! It is not a free solution. You can try it out for FREE, but if you want to use it for its full capacity, then you’ll need to pay for one of their subscription packages, which start at $10 per month (for access to longer audios, unlimited projects, and more advanced export options.)
● Flixier comes with many different voice options.
● It is an online tool, so no download or installation is required.
● It comes with advanced team functionalities.

02Woord
Woord is our next pick because it works very efficiently at turning text into speech. All you need to do is plug in your text and it will convert it immediately! Much like Flixier, however, it is a freemium tool. So, while you can try it out for free, if you truly want to use it for creating professional projects, you’ll need to unlock one of its subscription packages (which start at $25 per month!)
● Instant text-to-speech maker.
● An online tool, no need for download or installation.
● Lots of natural-sounding voices to choose from.

03Speechelo
Speechelo is a bit different from the two text-to-speech makers on this list. However, that may just mean that it is a more preferable option for some. More specifically, it’s really more of a ‘voice-over-maker’. It does still use AI in order to create human-like voiceovers, with several different options to voice and language. The difference then lies in the fact that it is a one-time payment software that normally costs around $100. In this way, you can avoid long-term ongoing subscription plans. But it is a heavier commitment from the get-go.
● High-quality AI voices for creating realistic voice-overs.
● One-time payment only! No Subscription fees are needed.
● Works in several different languages.

04Cartoon Animator 4
Cartoon Animator 4 is a good option if you’re really looking for that anime or character style for your audio. It works just like your average text-to-speech maker, generally, although it does also offer a couple of more advanced features for those who are looking into animation.
● Free-to-use text-to-speech anime character
● Adjustable volume, pitch, and speed voice parameters.
● A wide variety of voice options to choose from.

05TTS Reader
TTSReader, much like Cartoon Animator 4, is a FREE online tool that you can use in order to create quick and easy text-to-speech audio for your cartoon/anime characters. It doesn’t have as many advanced features as some of the other tools out there, but it can get the job done if all you’re looking for is something easy to use.
● Available to use online for FREE.
● Variety of different voice options.
● Adjustable speed for voice.

Key Takeaways from This Episode
● If you’re looking to increase conversions with better-sounding voiceovers for your video content, then it’s important that you’re aware of all the different options out there!
● Most of these text-to-speech tools work in the same way, but you’ll notice that some of them offer more advanced tools than others.
● In the end, you’ll have to find one that works with your budget and learn how to play around with its settings to make sure that you are getting the most out of your text-to-speech maker.
Our topic for today’s article is on that exact same subject. Or, rather, more specifically, anime text-to-speech.
For those who want more than the usual robotic text-to-speech AI that you see in more professional software. Learn more about all this below, we’ve prepared an entire guide for you!
In this article
01 [What is the Most Realistic Sounding Text to Speech & How to Do It?](#Part 1)
02 [How to Make Your Own Text to Speech Videos for Youtube](#Part 2)
03 [How to Get More Voices for Text to Speech?](#Part 3)
04 [Top 5 Tips on Anime Text to Speech](#Part 4)
Part 1 What is the Most Realistic Sounding Text to Speech & How to Do It?
To start off, we’ve included this little second on need-to-know information regarding text-to-speech. Starting with:
01How did text to speech get popular?
Perhaps unsurprisingly, the text-to-speech function was developed to increase accessibility for those who have trouble reading on screen-text. Either as a result of visual impairment, are blindness. However, with its emergence came popular programs like Audible, which introduced even those without accessibility problems to its convenience for multi-tasking purposes.
02How to get the most realistic sounding text to speech?
There are several ways you can increase the natural sound of your text-to-speech:
● You can choose a tone that suits your taste.
● You can choose a voice gender that you are more comfortable with.
● And you can increase the speed of the text to reduce the awkward, and unnatural pauses that occur after each word.
In the end, though, the best way to get realistic speech is to find a tool that offers high-quality audio options. Which is what we’ll be introducing in the latter sections:
Part 2 How to Make Your Own Text to Speech Videos for YouTube
If you want to create your own anime text-to-speech for your YouTube videos (which is popular with a lot of YouTubers these days), the process is about the same no matter what text-to-speech option you end up choosing in the end. For our examples below, we will be using Natural Readers though, which is a FREE tool, making it a good choice for those who are just looking to try it out.
Step 1: Compose Your Text
The first step is to compose your text! You might prefer to do this on Google Docs or Word, but a lot of text-to-speech tools do offer you a way of composing your text along with them (like the online tool Natural Readers):
Step 2: Choose Voice / Reader
Next, it’s time to choose the reader that you want your text to be read by!
Usually, there are options for different types of accents and languages offered. So, if you want your text to speech to match that of your desired anime characters, you should play around with these options to get the right one.
Step 3: Choose Reading Speed!
Next, it’s time to choose your desired reading speed!
Most readers start off at 1X speed on average, but we personally recommend going for at least 1.25X - 1.5X for an instantly more natural-sounding text-to-speech anime characters.
Step 4: Choose Output Format
And finally, to finish us off, it’s time to choose what output format you want your text-to-speech audio to be! To keep this simple for uploading to YouTube, we recommend sticking with MP3, which most editors accept.
Part 3 How to Get More Voices for Text to Speech?
If you think that the available cartoon characters text-to-speech voices you have are not quite doing it for your project, then you can always explore alternative, third-party options! There are many of these available. Although, you’ll have to check with your text-to-speech reader or maker to make sure that it allows for such a feat:
01Method 1: Windows Text-to-Speech Voices
If you’re looking to change your computer’s text-to-speech voice, then the place to look for this is on ‘Control Panel > Speech’. There, not only can you choose from a variety of different voice options, but you can also change voice speed and voice pitch (how high or low the pitch is), which is a great way of getting a very specific kind of tone for your anime text-to-speech creations.
02Method 2: Third-Party Voices (Screaming Bee)
Next is the third-party resource, Screaming Bee , which offers a good variety of text-to-speech voices that you can try out as well! Using this method will, of course, require downloading and applying these voices for your chosen text-to-speech reader. For example, if you want to use the Windows reader, go to the Control Panel > Speech page for the option to apply it there.
03Method 3: Third-Party Voices (Cepstral Voices)
Another resource that you can check out is Cepstral Voices . Just like Screaming Bee, it offers a range of text-to-speech voices that you can try out to see which one suits your taste most. This includes text-to-speech cartoon characters and text-to-speech anime characters voices!
Part 4 Top 5 Tips on Anime Text to Speech
Now, onto some more anime text-to-speech options that you can try in order to make your text-to-speech script sound exactly like your favorite cartoon or anime characters! For this list, we’ve not only included a description of each reader but also why you might want to try it out:
01Flixier
Flixier is the first anime text-to-speech maker on this list! It is not a free solution. You can try it out for FREE, but if you want to use it for its full capacity, then you’ll need to pay for one of their subscription packages, which start at $10 per month (for access to longer audios, unlimited projects, and more advanced export options.)
● Flixier comes with many different voice options.
● It is an online tool, so no download or installation is required.
● It comes with advanced team functionalities.
02Woord
Woord is our next pick because it works very efficiently at turning text into speech. All you need to do is plug in your text and it will convert it immediately! Much like Flixier, however, it is a freemium tool. So, while you can try it out for free, if you truly want to use it for creating professional projects, you’ll need to unlock one of its subscription packages (which start at $25 per month!)
● Instant text-to-speech maker.
● An online tool, no need for download or installation.
● Lots of natural-sounding voices to choose from.
03Speechelo
Speechelo is a bit different from the two text-to-speech makers on this list. However, that may just mean that it is a more preferable option for some. More specifically, it’s really more of a ‘voice-over-maker’. It does still use AI in order to create human-like voiceovers, with several different options to voice and language. The difference then lies in the fact that it is a one-time payment software that normally costs around $100. In this way, you can avoid long-term ongoing subscription plans. But it is a heavier commitment from the get-go.
● High-quality AI voices for creating realistic voice-overs.
● One-time payment only! No Subscription fees are needed.
● Works in several different languages.
04Cartoon Animator 4
Cartoon Animator 4 is a good option if you’re really looking for that anime or character style for your audio. It works just like your average text-to-speech maker, generally, although it does also offer a couple of more advanced features for those who are looking into animation.
● Free-to-use text-to-speech anime character
● Adjustable volume, pitch, and speed voice parameters.
● A wide variety of voice options to choose from.
05TTS Reader
TTSReader, much like Cartoon Animator 4, is a FREE online tool that you can use in order to create quick and easy text-to-speech audio for your cartoon/anime characters. It doesn’t have as many advanced features as some of the other tools out there, but it can get the job done if all you’re looking for is something easy to use.
● Available to use online for FREE.
● Variety of different voice options.
● Adjustable speed for voice.
Key Takeaways from This Episode
● If you’re looking to increase conversions with better-sounding voiceovers for your video content, then it’s important that you’re aware of all the different options out there!
● Most of these text-to-speech tools work in the same way, but you’ll notice that some of them offer more advanced tools than others.
● In the end, you’ll have to find one that works with your budget and learn how to play around with its settings to make sure that you are getting the most out of your text-to-speech maker.
Also read:
- New 2024 Approved 5 Foolproof Amazing Anime Text to Speech Tips
- Types of Cartoon Styles You May Use for The Next Marketing Project
- New In 2024, Ways to Create an Adobe Collage
- Updated Best 12 Video to GIF Converters High Quality to Check Out
- Updated In 2024, 15 Best Video to GIF App on iPhone and Android
- New In 2024, Best 12 Video to GIF Converters High Quality to Check Out
- Updated In 2024, What Is Still Motion Animation?
- New Popular Female & Male Disney Cartoon Characters To Empower You
- New 2024 Approved OBS Animated Lower Thirds Alternatives
- New In 2024, The Best 10 Sketch Animation Video Makers
- New How to Animate Image on Scroll and Text on Scroll, In 2024
- In 2024, The 10 Most Adorable Aesthetic Cartoon Characters
- In 2024, Most Popular Tips on Learning Animate Rigging
- New Popular Tips on Learning Animate Rigging
- New 18 Best Tools and Services to Create Animated Videos for Business 2023 for 2024
- Best GIF Maker Software for Windows and Mac
- In 2024, Beginner Tutorial on Making Unity 2D Animation
- New In 2024, The Top 20 Motion Graphics Companies & Studios
- New OBS Animated Lower Thirds Alternatives for 2024
- New Is It That Easy to Make My Own Animated Character, In 2024
- Updated 2024 Approved The Most Efficient Techniques to Make 3D Animation Character
- Updated 2024 Approved 15 Best Sites to Watch Cartoons Online Free And So Can You
- Cartoon Fundamentals How to Learn Cartoon Characters Sketch Quickly
- Updated OBS Animated Alternatives
- Updated 12 Aesthetic GIF Instagram for Marketers and Creatives
- Updated What Is A GIF for 2024
- 5 Photoshop Alternatives to Animate Logo
- Updated Amazing Ideas About Creating Personalised WhatsApp GIF Sticker for 2024
- Updated In 2024, Best 8 Tools Tell You How to Make Slideshows for Instagram
- Updated How to Combine Two/More GIFs Into One GIF Mergers Offered
- New 2024 Approved How to Find 3D Animation Studio
- New Handy Tips From Adobe Animate Rigging Tutorial for All Learners for 2024
- 2024 Approved Interesting Fundamentals and Ultimate Guide to Animated Characters Drawings
- In 2024, All About 3D Medical Animation And Its Uses
- Updated How to Make a Video a Live Photo 2023 for 2024
- New 10 Cartoon Photo Converters You Couldnt Do Without for 2024
- In 2024, Techniques on Making After Effects 2D Animation
- New Little Known Techniques of Motion Graphics in Premiere Pro for 2024
- In 2024, 5 Different Animation Styles A Simple but Complete Guide
- Tips on How to Get Awesome Background for Slideshow in PowerPoint for 2024
- In 2024, What Is the Best Collage Photo Grid Maker - Experts Choice
- Updated 2024 Approved 26 Cool Anime Girl Names and Their Meanings
- New Top 15 Male Anime Characters By Voting
- 8 Ultimate Fixes for Google Play Your Vivo X Flip Isnt Compatible | Dr.fone
- In 2024, Ways to stop parent tracking your ZTE Axon 40 Lite | Dr.fone
- How to share/fake gps on Uber for Vivo Y78+ | Dr.fone
- In 2024, CatchEmAll Celebrate National Pokémon Day with Virtual Location On Oppo A1 5G | Dr.fone
- In 2024, 10 Fake GPS Location Apps on Android Of your Realme C33 2023 | Dr.fone
- 2024 Approved Best 10 Chinese Video to English Translators
- Apple ID Locked or Disabled On iPhone 12? 7 Mehtods You Cant-Miss
- 2024 Approved Top 10 Hindi Video Translators with Step-by-Step Guidance
- How to Upgrade Apple iPhone 15 Pro to the Latest iOS/iPadOS Version? | Dr.fone
- How To Fake GPS On Tecno Pop 8 For Mobile Legends? | Dr.fone
- How to Sign a Word 2007 document online
- How and Where to Find a Shiny Stone Pokémon For Apple iPhone 15 Pro? | Dr.fone
- In 2024, 3 Solutions to Find Your Vivo S17 Pro Current Location of a Mobile Number | Dr.fone
- How To Get the Apple ID Verification Code From Apple iPhone 11 in the Best Ways
- Where Is the Best Place to Catch Dratini On Vivo V27 Pro | Dr.fone
- How to recover old messages from your Oppo A18
- Updated 2024 Approved A Detailed Review & Alternatives of VOCALOID6 Voice Generator
- In 2024, 15 Best Strongest Pokémon To Use in Pokémon GO PvP Leagues For Apple iPhone 12 Pro | Dr.fone
- Latest Guide How To Bypass Gionee FRP Without Computer
- What to Do if Google Play Services Keeps Stopping on Infinix Smart 8 | Dr.fone
- Factory Reset on iPhone 12 Pro | Dr.fone
- How Do You Unlock your Apple iPhone 6 Plus? Learn All 4 Methods | Dr.fone
- In 2024, How to Change GPS Location on Apple iPhone 11 Pro Max Easily & Safely | Dr.fone
- Fake the Location to Get Around the MLB Blackouts on Xiaomi 13T | Dr.fone
- In 2024, How to Watch Hulu Outside US On Apple iPhone 15 Pro Max | Dr.fone
- How to Screen Mirroring Tecno Spark 20 Pro to PC? | Dr.fone
- In 2024, How to Transfer Apple iPhone SE Data to iPhone 12 A Complete Guide | Dr.fone
- In 2024, How to Bypass Google FRP Lock on Itel Devices
- Title: Updated In 2024, Want to Make a Meme GIF?
- Author: Elon
- Created at : 2024-06-23 02:09:30
- Updated at : 2024-06-24 02:09:30
- Link: https://animation-videos.techidaily.com/updated-in-2024-want-to-make-a-meme-gif/
- License: This work is licensed under CC BY-NC-SA 4.0.
