
:max_bytes(150000):strip_icc():format(webp)/how-to-use-a-mobile-boarding-pass-eb61458058f44011ad7ed012566127e4.jpg)
Updated Learn Easy Blender Rigging in Only 2 Minutes
Learn Easy Blender Rigging in Only 2 Minutes
Learn Simple Blender Rigging in Only 2 Minutes
An easy yet powerful editor
Numerous effects to choose from
Detailed tutorials provided by the official channel
Blender is a FREE, open-source 3D Animation program that is very popular for beginner animators. It’s a good way of starting if you’re not yet sure about how far you want to go into animation as it won’t demand any immediate monetary commitment.
Now, as for its features, today, we’ll be focusing on Blender Rigging features.
In this article
01 [Why Use Blender Rigging?](#Part 1)
02 [The Art of Effective Rigging in Blender [TUTORIAL]](#Part 2)
03 [Introduction to Rigging in Blender Course](#Part 3)
Part 1 Why Use Blender Rigging?
Blender Character Rigging is a great way of creating truly beautiful and realistic animations. Despite being an open-source program, it’s capable of doing just as much, if not more, than some of the more premium Animation software out there.
So, if you want to create video projects for your audience’s entertainment or edification with animation, then Blender Rigging is definitely something that you should consider. With this tool, you can create the complex animations that you need and then polish it up in a video editor like Wondershare Filmora Video Editor (which is a premium, video-editing tool that you can use to perfect your finished Blender Rigging animations.)

Part 2 The Art of Effective Rigging in Blender [TUTORIAL]
For this next section, we’re going to be introducing a couple of tutorials that you can look into to teach you more about Blender Character Rigging, Blender Facial Rigging, Blender Muscle Rig, and so on.
These topics are each very long-winded on their own though, so we’ve linked appropriate video tutorials that you can learn more and reserved ourselves to a brief description of each technique so that you can determine whether it’s something that interests you (although, of course, our recommendation is that you check each one out so that you can get the full ‘Blender’ experience.)
01Blender Character Rigging
The main thing people usually look at Blender for is, Blender Character Rigging. And, because it was created to emulate professional animation software, Blender has this function down to pat. To give you an idea of what features you can expect: Blender comes with custom bone shapes for easy Blender character rigging, it also comes with envelope skinny, skeleton skinning, and automatic skinning. With these alone, you can be assured that you will be able to create complex animations without much trouble.
02Blender Facial Rigging
Facial Rigging is usually a more complex subject that is avoided by animators without much experience. But, with Blender, facial rigging is possible. The YouTube video should show you the process of going about Blender Facial Rigging from start to finish (from sculpting the character face itself and then making use of Blender Rigging tools for setting up a skeletal structure for your face’s character to become animated.)
03Blender Muscle Rigging
Creating a Blender Muscle Rig is exactly what it sounds like. It is, of course, much more complicated than normal rigging, but it is a good subject to familiarize yourself with anyway, as it will allow you to go to the ‘next stage’ as you say, with your Animations. The video that we’ve attached is from Pierrick Picaut, who has released a series of videos on the subject of Blender Rigging in general and has extensively explained how to create a Blender Human Rig from the general body, the face, the muscles, and so on.
04Blender Rigging
Although a lot of Animation relies on more ‘traditional’ methods of expressing movement, one can still make use of more modern animation practices, like rigs, to set up their animations for movement. It’s an especially good skill to learn if you’re more interested in content-friendly animations (rather than creating a film of your own.)
05Blender Rigging
This next tutorial is an introduction to basic Blender Rigging. It’s a good one to both start and end on, as it was created for beginners specifically, and uses an example that is perhaps easier to understand most. Make sure to give it a shot just in case.
Part 3 Introduction to Rigging in Blender Course
For this next part, we introduce two other resources that you can take advantage of to learn more about Blender Rigging. Whether it be about Blender character rigging, Blender facial rigging, free blender rigs, creating muscle rigs, and so and so forth. These resources have got your back.
01Where to Learn the Course?
The first major course that we think you might be interested in is Mark Masters’ blender rigging course. You can find this course at PluralSight (which is a website that is focused on helping users of software develop their skills). Mark Masters, the instructor for this course, is a professional animator and works as a Animator for the animation studio, Steelhouse Productions. So, you can be sure that there is much that you can learn from him.

02Other Tools to Learn Rigging
As for other places to learn? We suggest the “Blender Fundamentals” course that Blender themselves have posted on YouTube. They have several of these courses (for all of the more recent versions of Blender). So, you can pick out a course that works for you. One of their more recent series is “Blender Fundamentals 2.which currently has videos all on the subject of Blender rigging (including Blender rigging and Blender rigging videos.)

● Key Takeaways from This Episode →
● If you’re interested in trying out blender rigging yourself, you’ll probably want to study the subject a little before beginning.
● Blender Rigging is quite a complex subject for beginners but having something to start with should help you on your way.
● For that, we recommend checking out the videos that we mentioned in section two of this article, where we recommend some popular tutorials regarding some of the more common Blender Rigging subjects.
● If you’re looking for something more comprehensive or put together though. A course might be more up to your taste. For that, we recommend either Mark Master’s introduction to rigging and animation over at PluralSight or Blender’s own “Blender Fundamental” series on YouTube (which should introduce all the functions you’ll need to know.)
Blender is a FREE, open-source 3D Animation program that is very popular for beginner animators. It’s a good way of starting if you’re not yet sure about how far you want to go into animation as it won’t demand any immediate monetary commitment.
Now, as for its features, today, we’ll be focusing on Blender Rigging features.
In this article
01 [Why Use Blender Rigging?](#Part 1)
02 [The Art of Effective Rigging in Blender [TUTORIAL]](#Part 2)
03 [Introduction to Rigging in Blender Course](#Part 3)
Part 1 Why Use Blender Rigging?
Blender Character Rigging is a great way of creating truly beautiful and realistic animations. Despite being an open-source program, it’s capable of doing just as much, if not more, than some of the more premium Animation software out there.
So, if you want to create video projects for your audience’s entertainment or edification with animation, then Blender Rigging is definitely something that you should consider. With this tool, you can create the complex animations that you need and then polish it up in a video editor like Wondershare Filmora Video Editor (which is a premium, video-editing tool that you can use to perfect your finished Blender Rigging animations.)
Part 2 The Art of Effective Rigging in Blender [TUTORIAL]
For this next section, we’re going to be introducing a couple of tutorials that you can look into to teach you more about Blender Character Rigging, Blender Facial Rigging, Blender Muscle Rig, and so on.
These topics are each very long-winded on their own though, so we’ve linked appropriate video tutorials that you can learn more and reserved ourselves to a brief description of each technique so that you can determine whether it’s something that interests you (although, of course, our recommendation is that you check each one out so that you can get the full ‘Blender’ experience.)
01Blender Character Rigging
The main thing people usually look at Blender for is, Blender Character Rigging. And, because it was created to emulate professional animation software, Blender has this function down to pat. To give you an idea of what features you can expect: Blender comes with custom bone shapes for easy Blender character rigging, it also comes with envelope skinny, skeleton skinning, and automatic skinning. With these alone, you can be assured that you will be able to create complex animations without much trouble.
02Blender Facial Rigging
Facial Rigging is usually a more complex subject that is avoided by animators without much experience. But, with Blender, facial rigging is possible. The YouTube video should show you the process of going about Blender Facial Rigging from start to finish (from sculpting the character face itself and then making use of Blender Rigging tools for setting up a skeletal structure for your face’s character to become animated.)
03Blender Muscle Rigging
Creating a Blender Muscle Rig is exactly what it sounds like. It is, of course, much more complicated than normal rigging, but it is a good subject to familiarize yourself with anyway, as it will allow you to go to the ‘next stage’ as you say, with your Animations. The video that we’ve attached is from Pierrick Picaut, who has released a series of videos on the subject of Blender Rigging in general and has extensively explained how to create a Blender Human Rig from the general body, the face, the muscles, and so on.
04Blender Rigging
Although a lot of Animation relies on more ‘traditional’ methods of expressing movement, one can still make use of more modern animation practices, like rigs, to set up their animations for movement. It’s an especially good skill to learn if you’re more interested in content-friendly animations (rather than creating a film of your own.)
05Blender Rigging
This next tutorial is an introduction to basic Blender Rigging. It’s a good one to both start and end on, as it was created for beginners specifically, and uses an example that is perhaps easier to understand most. Make sure to give it a shot just in case.
Part 3 Introduction to Rigging in Blender Course
For this next part, we introduce two other resources that you can take advantage of to learn more about Blender Rigging. Whether it be about Blender character rigging, Blender facial rigging, free blender rigs, creating muscle rigs, and so and so forth. These resources have got your back.
01Where to Learn the Course?
The first major course that we think you might be interested in is Mark Masters’ blender rigging course. You can find this course at PluralSight (which is a website that is focused on helping users of software develop their skills). Mark Masters, the instructor for this course, is a professional animator and works as a Animator for the animation studio, Steelhouse Productions. So, you can be sure that there is much that you can learn from him.
02Other Tools to Learn Rigging
As for other places to learn? We suggest the “Blender Fundamentals” course that Blender themselves have posted on YouTube. They have several of these courses (for all of the more recent versions of Blender). So, you can pick out a course that works for you. One of their more recent series is “Blender Fundamentals 2.which currently has videos all on the subject of Blender rigging (including Blender rigging and Blender rigging videos.)
● Key Takeaways from This Episode →
● If you’re interested in trying out blender rigging yourself, you’ll probably want to study the subject a little before beginning.
● Blender Rigging is quite a complex subject for beginners but having something to start with should help you on your way.
● For that, we recommend checking out the videos that we mentioned in section two of this article, where we recommend some popular tutorials regarding some of the more common Blender Rigging subjects.
● If you’re looking for something more comprehensive or put together though. A course might be more up to your taste. For that, we recommend either Mark Master’s introduction to rigging and animation over at PluralSight or Blender’s own “Blender Fundamental” series on YouTube (which should introduce all the functions you’ll need to know.)
Top Tips for Effortless Unity 3D Animation
Top Tips for Effortless Unity 3D Animation
An easy yet powerful editor
Numerous effects to choose from
Detailed tutorials provided by the official channel
Unity 3D animation will be our topic in this article. This will help develop your knowledge of the animation systems in Unity.
Unity 3D character animation is an enlisted brand name of Unity Technologies and game creation. With its peculiar highlights, strong evaluating, and extraordinary abilities for computer games, it has stood out enough to be noticed by the game development community.
In this article
01 [What’s Unity 3D Animation and Why is It Popular?](#Part 1)
02 [How to Create Animations in Unity 3D?](#Part 2)
Part 1 What’s Unity 3D Animation and Why is It Popular?
Animation Unity 3D is the most popular and powerful tool to animate any animation you like.
● Unity provides a more creative iteration platform to realize your vision as fast as possible.
● Unity has broader integration. It works out of the box and creates a real-time workflow custom-made for a project.
● Unity supports a more comprehensive production to make it possible to render shorts, videos, and films to create in days instead of months.
● Unity has an intelligent decision-making feature to discover the errors while doing the process and make corrections soon before it is too late.
● Unity animation 3Dhas a high creation scale like building, reusing and integrating to create more new projects quickly.
● Unity delivers smooth collaboration, allowing the artist to share the project and see their changes immediately, reducing error and miscommunications.
01Do You Think You Know What Unity Animation Is?
Animation unity 3D is a very vast tool with many new things to learn. Everyone can know Unity with proper basics, training, and experiences. There are various tutorials by Unity and many other people sharing their knowledge through the internet.
02Is Unity Good for 3D Animation?
Unity is used chiefly for Unity 3D skeletal animations and complex 3D animations like videos and games. There would be a retouch of Unity when you notice any video games or animation videos. It contains excellent inbuilt coding like C# and JavaScript for scripting. Easy and quick importing for audio, video, and text format as a complete package.
Part 2 How to Create Animations in Unity 3D?
Unity 3D animation highlights incorporate animations, complete control of movements, the occasion of animation playback, refined state machine hierarchies, transitions, mix shapes for facial animations.
01Fix 1: How to Animate Characters in Unity 3D
This YouTube channel explains more about Unity 3D. He starts with an introduction about Unity, tools about Unity 3D character animation like animation controller, looping animation, root motion, and different modes in animation with Unity 3D.
He focuses on Unity 3D character animation fundamentals and lets us understand how and why it works.
02Fix 2: Creating Character Animation in Unity
This video is all about creating procedural character animations in unity by using unity 3D skeletal animation. An archery game is the concept of this youtube video. He focuses on the movement of the bow to the target with rigging techniques.
Unity 3D Character animation mainly focuses on the avatar. Some default avatars, or others, can be imported as files into Unity.
03Fix 3: How to animate in Unity 3D
In this Unity tutorial, you’ll figure out how to animate from top to bottom the whole way. It will cover every one of the basics you want to get everything rolling with activity in Unity 3D.
04Fix 4: Unity 3D Animation for Beginners
This channel teaches Unity animation 3D to beginners, starting with importing a cube into the field and oscillating it. A brief video of 6 minutes but covers most of the tools and ideas about Unity.
05Fix 5: The Animator Controller
This tutorial is from the official Unity themselves explaining about Unity 3D character animation controller. Animation controllers are tools that determine the animations currently being played and blended. Unity channel demonstrates how to make animation controllers and apply different animations to different states.
06Fix 6: Creating simple and easy Animation
This tutorial by Jimmy Vegas on creating simple and easy animation using Unity 3D animation is approximately 7 minutes which explains unity version 2018.3 but mainly applies to almost all the new versions. The tutorial talks about simple animations and controls that will be helpful to learn many tools in unity.
Are you still looking for some other better 3D animation software? If you want to have many controls of 3D animation videos here, we introduce Wondershare Filmora. You simply have to create a white keyframe to start making an animation. Filmora offers six different keyframes to perform smooth and natural animation. And also, tools like autocorrect and auto mixer bring the animation to the next level. Various tutorial videos available on YouTube and Wondershare Filmora Video Editor wesbite have posted different manuals to guide the users.
For Win 7 or later (64-bit)
For macOS 10.12 or later
This video explains how to make an animation video in Fimora with a step-by-step procedure for defining the tools clearly. A 16 minutes video explained every process in many other videos that teach Filmora better and more informative.
Key Takeaways from This Episode
● We learned that Unity animation 3D is a toolset that enhances physics, entertainment, audio, graphic, interaction, and networking and has fast integrated game development speeds. Excellent and easy 3D grounded platform and audio engine. The disadvantage of Unity is it does not provide any source code, and performance issues are hard to find. It fines additional cost for a mobile pro license for practical deployments.
● Although there are many software’s available in the animation market, only a few can be trusted. So, whenever there is confusion regarding which 3D animation software to use, you can blindly choose Filmora. It has a wide range of assistance like preset animation effects, interface access, multiple tracks to add various videos, and totally as a package make Filmora the best alternative to Unity 3D skeletal animation. Just a little practice and experience can make you perfect.
Techniques for Making After Effects 2D Animation
Blender is a widely popular animation tool that designers primarily use to create 3D animations. It offers a full-scale editing panel and a plethora of features that allow designers to create visually enticing 3D animations for videos, games, and marketing purposes. But, can you use Blender to create 2D animations? Even though the tool is marketed as a 3D animation creator, it’s worth noting that one can use it for 2D animations as well. Now, the process may not be as straightforward as using a dedicated 2D animation creator, you can still get the job done using Blender. This will be pretty helpful if you are already a Blender user and want to create 2D animations for a project.
To help you along the way, we have put together a detailed guide on how to create Blender 2D animations and use them in your videos to make them look more stunning. So, without any further ado, let’s get started.
In this article
01 [Is Blender 2D Animation As Awesome AS 3D?](#Part 1)
02 [How to Mix 2D & 3D Animation in Blender?](#Part 2)
03 [5 Amazing Blender 2D Animation Examples](#Part 3)
Part 1 Is Blender 2D Animation As Awesome AS 3D?
There’s no arguing the fact that Blender is a remarkable tool for 3D animations. Its worldwide popularity is clear proof of what one can achieve while creating a 3D animation with Blender. But, the real question is - are Blender 2D animations as good as their 3D alternatives. Well, the answer is Yes! Blender has a built-in feature known as Grease Pencil that’s specifically designed to create 2D animations. With Grease Pencil, you can create different 2D layouts from scratch and turn them into visually appealing animations to engage the potential viewers.
Part 2 How to Mix 2D & 3D Animation in Blender?
So, how can you create 2D animations in Blender? Well, it depends! The process to create a 2D animation in Blender mainly depends on what you want to design. You can find different Blender 2D animation tutorials on YouTube and use them to get started with 2D animations in Blender. But, we would like to point out that there’s a generic process that’ll remain consistent in every situation. If you are also getting started with creating 2D animations in Blender, here’s the step-by-step process that’ll help you start sailing in the right direction and make the 2D animation designing a hassle-free task.
Step 1
First and foremost, launch Blender on your system and set it up to get started. On the home screen, click on “File>New” and then, select “2D Animation”.

Step 2
Now, click on the Grease Pencil tool and use it to draw any shape on the canvas. If you want to add multiple objects to the animation, you can also draw multiple shapes.

Step 3
The next step would be to apply the array modifier to these shapes, considering you want to add a specific movement to them. So, add an array modifier first and then apply it over the desired shapes.
Step 4
After you have applied the array modifier, go ahead and start adding colors to the animation. Keep in mind the more colors you use, the better the Blender 2D animation will appear at the end.

Step 5
Now, through the editing panel, right-click on the shape you’ve drawn on the screen and then, select “Rotation and Scale”. A separate editing window will pop up on your screen. Here you can customize the movement of the object by changing its scaling options through keyframing.
That’s it; your 2D animation is now ready and you can save it on your computer.
Part 3 5 Amazing Blender 2D Animation Tutorials
So, now that you know how to create Blender 2D animations, let’s take a look at a few of the 2D animation tutorials that’ll help you get started with your first animation. All these tutorials are available on YouTube and share a detailed insight into different elements of using Blender to create 2D animation.
1. Blender Guru’s Donut Tutorial
If you search Blender on YouTube, this will be the first video you’ll see in the search results. With 11 million views on YouTube, this Blender 2D animation tutorial is one of the most sought-after tutorials on the platforms.
This 14-minute long video will walk you through the step-by-step process of creating a dedicated 2D animation for a donut using different elements of Blender. What’s more interesting is that there’s a second part to this video that’ll help you move a step forward and dive into advanced editing. Basically, if you want to get familiar with Blender’s 2D animation architecture, this video will help you embark on the right track.
2. Blender Lighting Tutorial
Gleb Alexandrov is undoubtedly one of the most talented animation experts who has created hundreds of stunning animations during his career. In this video, he has shared his years of knowledge and expertise and explained different ways to use lighting in your Blender 2D animation.
If you have ever worked on animation or even a regular YouTube video in the past, you may already be familiar with the importance of lighting. If the lighting is right, the subjects look more stunning and the overall frame becomes visually engaging. If you also want to know how to use lighting in a 2D animation, this 19-minutes long video is your answer.
3. Blender Fundamentals
If you are an absolute beginner, it would be better to first familiarize yourself with different elements of the software. Without knowing what a particular tool can do, you’ll most likely struggle to pour your creativity into the Blender 2D animation. So, before working on your first 2D animation, make sure to take your time to go through these Blender 2D animation tutorials uploaded by the tech giant itself.
Keep in mind that it’s not a single video, but a series of episodes that’ll walk you through the basics of Blender and how to start with your first 2D/3D animation. If you are serious about working with Blender, this series is your one-stop solution to get familiar with the application.
4. Character Creation and Rigging
Every 2D animation requires at least one character that would act as the main subject of the animation. And, in case you are planning to create a 3D animation with extensive movement, you’ll also have to incorporate Rigging to ensure that any movement looks realistic.
This video is for anyone who has a basic understanding of 2D animation in Blender and wants to step up their game. Here you’ll learn how to design a specific character on the canvas and how to use rigging to configure its movement. Again, this is not a single video, but a series of episodes, which means it would be better if you sit with your coffee in your hand.
5. CG Geek’s 2D Animation Tutorial in Blender
Now, if you are specifically looking for a video that only talks about Blender 2D animations and nothing else, this tutorial by CG Geek is the most suitable option. In this video, CG Geek goes on explaining how to use the Grease Pencil feature in Blender for 2D animation. He has also explained how to keyframe your 2D animation on Blender’s timeline so that any movement looks as realistic as possible.
6. Wondershare Filmora - A Reliable Alternative to Blender for Video Editors
Now, if you are a video editor and only want to create an animation for one of your videos, it would not be a wise decision to use Blender. Why? Because the tool has a steep learning curve and it’s not worth investing your time if you only want to create a 10-seconds animation. So, what’s the next best solution?
The answer is Wondershare Filmora Video Editor . It’s a full-scale video editing tool that’s designed to help editors enhance their productivity through ready-to-use templates. It has a built-in media library where you’ll find dozens of animation templates. You can simply drag these templates to your timeline and customize them to match the overall theme of your video itself.
With its timeline-based editing panel, you’ll be able to speed up the overall editing process and create visually stunning videos in no time. The tool also has a stack of ready-to-use transitions, special effects, and sounds that you can apply to the video and improve the overall production quality. In short, if your only goal is to add a 2D animation to your video, it won’t be a wise decision to rely on Blender. Instead, download and install Wondershare Filmora Pro on your system and use it to edit the video.
For Win 7 or later (64-bit)
For macOS 10.12 or later
Key Takeaways from This Episode
● Even though Blender is a3D animation software, one can use it to create stunning 2D animations as well..
● Blender has a dedicated feature known as “Grease Pencil” that’ll allow you to create your 2D animations and customize them to make them look stunning.
● Despite its advanced features, Blender is difficult to use. So, if you are looking for an alternative to Blender (only if you want to create 2D animations for your videos), Wondershare Filmora Pro is the right solution.
02 [How to Mix 2D & 3D Animation in Blender?](#Part 2)
03 [5 Amazing Blender 2D Animation Examples](#Part 3)
Part 1 Is Blender 2D Animation As Awesome AS 3D?
There’s no arguing the fact that Blender is a remarkable tool for 3D animations. Its worldwide popularity is clear proof of what one can achieve while creating a 3D animation with Blender. But, the real question is - are Blender 2D animations as good as their 3D alternatives. Well, the answer is Yes! Blender has a built-in feature known as Grease Pencil that’s specifically designed to create 2D animations. With Grease Pencil, you can create different 2D layouts from scratch and turn them into visually appealing animations to engage the potential viewers.
Part 2 How to Mix 2D & 3D Animation in Blender?
So, how can you create 2D animations in Blender? Well, it depends! The process to create a 2D animation in Blender mainly depends on what you want to design. You can find different Blender 2D animation tutorials on YouTube and use them to get started with 2D animations in Blender. But, we would like to point out that there’s a generic process that’ll remain consistent in every situation. If you are also getting started with creating 2D animations in Blender, here’s the step-by-step process that’ll help you start sailing in the right direction and make the 2D animation designing a hassle-free task.
Step 1
First and foremost, launch Blender on your system and set it up to get started. On the home screen, click on “File>New” and then, select “2D Animation”.
Step 2
Now, click on the Grease Pencil tool and use it to draw any shape on the canvas. If you want to add multiple objects to the animation, you can also draw multiple shapes.
Step 3
The next step would be to apply the array modifier to these shapes, considering you want to add a specific movement to them. So, add an array modifier first and then apply it over the desired shapes.
Step 4
After you have applied the array modifier, go ahead and start adding colors to the animation. Keep in mind the more colors you use, the better the Blender 2D animation will appear at the end.
Step 5
Now, through the editing panel, right-click on the shape you’ve drawn on the screen and then, select “Rotation and Scale”. A separate editing window will pop up on your screen. Here you can customize the movement of the object by changing its scaling options through keyframing.
That’s it; your 2D animation is now ready and you can save it on your computer.
Part 3 5 Amazing Blender 2D Animation Tutorials
So, now that you know how to create Blender 2D animations, let’s take a look at a few of the 2D animation tutorials that’ll help you get started with your first animation. All these tutorials are available on YouTube and share a detailed insight into different elements of using Blender to create 2D animation.
1. Blender Guru’s Donut Tutorial
If you search Blender on YouTube, this will be the first video you’ll see in the search results. With 11 million views on YouTube, this Blender 2D animation tutorial is one of the most sought-after tutorials on the platforms.
This 14-minute long video will walk you through the step-by-step process of creating a dedicated 2D animation for a donut using different elements of Blender. What’s more interesting is that there’s a second part to this video that’ll help you move a step forward and dive into advanced editing. Basically, if you want to get familiar with Blender’s 2D animation architecture, this video will help you embark on the right track.
2. Blender Lighting Tutorial
Gleb Alexandrov is undoubtedly one of the most talented animation experts who has created hundreds of stunning animations during his career. In this video, he has shared his years of knowledge and expertise and explained different ways to use lighting in your Blender 2D animation.
If you have ever worked on animation or even a regular YouTube video in the past, you may already be familiar with the importance of lighting. If the lighting is right, the subjects look more stunning and the overall frame becomes visually engaging. If you also want to know how to use lighting in a 2D animation, this 19-minutes long video is your answer.
3. Blender Fundamentals
If you are an absolute beginner, it would be better to first familiarize yourself with different elements of the software. Without knowing what a particular tool can do, you’ll most likely struggle to pour your creativity into the Blender 2D animation. So, before working on your first 2D animation, make sure to take your time to go through these Blender 2D animation tutorials uploaded by the tech giant itself.
Keep in mind that it’s not a single video, but a series of episodes that’ll walk you through the basics of Blender and how to start with your first 2D/3D animation. If you are serious about working with Blender, this series is your one-stop solution to get familiar with the application.
4. Character Creation and Rigging
Every 2D animation requires at least one character that would act as the main subject of the animation. And, in case you are planning to create a 3D animation with extensive movement, you’ll also have to incorporate Rigging to ensure that any movement looks realistic.
This video is for anyone who has a basic understanding of 2D animation in Blender and wants to step up their game. Here you’ll learn how to design a specific character on the canvas and how to use rigging to configure its movement. Again, this is not a single video, but a series of episodes, which means it would be better if you sit with your coffee in your hand.
5. CG Geek’s 2D Animation Tutorial in Blender
Now, if you are specifically looking for a video that only talks about Blender 2D animations and nothing else, this tutorial by CG Geek is the most suitable option. In this video, CG Geek goes on explaining how to use the Grease Pencil feature in Blender for 2D animation. He has also explained how to keyframe your 2D animation on Blender’s timeline so that any movement looks as realistic as possible.
6. Wondershare Filmora - A Reliable Alternative to Blender for Video Editors
Now, if you are a video editor and only want to create an animation for one of your videos, it would not be a wise decision to use Blender. Why? Because the tool has a steep learning curve and it’s not worth investing your time if you only want to create a 10-seconds animation. So, what’s the next best solution?
The answer is Wondershare Filmora Video Editor . It’s a full-scale video editing tool that’s designed to help editors enhance their productivity through ready-to-use templates. It has a built-in media library where you’ll find dozens of animation templates. You can simply drag these templates to your timeline and customize them to match the overall theme of your video itself.
With its timeline-based editing panel, you’ll be able to speed up the overall editing process and create visually stunning videos in no time. The tool also has a stack of ready-to-use transitions, special effects, and sounds that you can apply to the video and improve the overall production quality. In short, if your only goal is to add a 2D animation to your video, it won’t be a wise decision to rely on Blender. Instead, download and install Wondershare Filmora Pro on your system and use it to edit the video.
For Win 7 or later (64-bit)
For macOS 10.12 or later
Key Takeaways from This Episode
● Even though Blender is a3D animation software, one can use it to create stunning 2D animations as well..
● Blender has a dedicated feature known as “Grease Pencil” that’ll allow you to create your 2D animations and customize them to make them look stunning.
● Despite its advanced features, Blender is difficult to use. So, if you are looking for an alternative to Blender (only if you want to create 2D animations for your videos), Wondershare Filmora Pro is the right solution.
6 Types of Animation You May Like
6 Types of Animation You May Like

Shanoon Cox
Mar 27, 2024• Proven solutions
Playing around with different types of animation can be a great deal of fun and can help you decide which style is most suited to your skills and preferences. There are many computer animation software to help you experiment with, with new forms emerging all the time.
Read on to learn more about some of the most popular types of animated videos around and the steps you need to take to produce them. We will also tell you which software you need to create videos in all sorts of different styles. Let’s begin and look at six different types of animation you might like right now.
You may also like: 10 Classical Animated Cartoon Types With Examples
The list of 6 types of animation
1. Traditional animation
As you would expect, this type of animation is the kind of old classic animation drawn on paper. The characters, backgrounds and layout were normally committed to paper by hand, with each drawing being slightly different from its predecessor. The papers were placed on sheets called cels before paint was added to them. Advancements in technology mean animation can be hand-drawn before color is added via software.
Synfig Studio is a popular product for those wishing to produce videos that are traditional in look and feel. It supports a variety of layers and offers a bone system as well as sound support.
2. 2D animation
With 2D animation, movement is created in a two-dimensional environment. Characters and figures can move up, down, left or right but won’t move nearer or further away from the viewer. Many 2D animated video software can be used to make this kind of video. Pencil 2D is a leading solution noted for its simplicity and ease of use.
This type of animation is ideal for animating on the move and runs on various operating platforms. What’s also great about Pencil 2D is that it allows you to switch between raster and vector workflows quickly and is completely free to use, even if you need it for commercial purposes.
3. 3D animation
With 3D animation, you can represent real-world 3D images in a digital space. The main three processes of 3D are modeling, layout and animation plus rendering. There are many reliable solutions for 3D animation on the market, with Autodesk 3DS Max being a market leader.
This product offers simple, robust modeling, allowing you to create a wide range of environments with richly-detailed characters and enjoy high-end rendering. It is used for producing games, product design, architecture and more.
4. Clay animation
Clay animation is also called claymation and has been around for many years. In clay animation, clay pieces are used to create characters and background animation. The pieces are moved or deformed between frames so continuous motion can occur.
One leading solution for clay animation is Adobe Animate CC. With this product, you can create vector animations for apps, games, videos and more. You can publish the results quickly and can animate pretty much anything, allowing your characters to walk, talk, blink and more with ease.
It’s also possible to create illusions of depths via the enhanced camera tool, and new features are being added all the time.
5. HTML animation
HMTL5 allows you to do all sorts of things including elements of video and animation creation. You can create excellent animated content via a fusion of HTML5, JavaScript and CSS3. HTML5 is essentially the language of today’s most exciting websites and is used to add vast beauty and efficiency to them.
HTML5 Maker is a free solution ideal for beginners and pros that supports various leading text filters and offers a diverse library of images. You can use this tool to produce elegant animations with stunning transitions and create gorgeous Instagram-esque effects.
6. Kinetic Typography Animation
Typography animation as another type of animation enables you to do all sorts of exciting and thought-provoking things with letters and fonts. Kinetic typography is based on the concept of moving text and is often used for advertising purposes and to deliver important information including statistics and more.
Videos involving kinetic typography animation can help you demand the attention of your audience. One very popular tool for creating kinetic typography animation is Renderforest.
This solution is ideal even for those without vast technical expertise and helps you create animations, music visualizations, slideshows and much more in mere moments. Trailers, YouTube openings, logo animations are frequently created with the tool, as are explainer animations and whiteboard videos, to give you just a few more examples.
Conclusion
Once you have found the types of animated videos and tools that appeal to you the most and have created your content, you can put magical finishing touches to your videos by using Filmora.
You may be amazed to see how quickly you can get to grips with these different styles and tools even if your experience is relatively limited, so why wait any longer to start experimenting? More and more people are surpassing their expectations all the time by playing around with different resources for online animation.
Shanoon Cox
Shanoon Cox is a writer and a lover of all things video.
Follow @Shanoon Cox
Shanoon Cox
Mar 27, 2024• Proven solutions
Playing around with different types of animation can be a great deal of fun and can help you decide which style is most suited to your skills and preferences. There are many computer animation software to help you experiment with, with new forms emerging all the time.
Read on to learn more about some of the most popular types of animated videos around and the steps you need to take to produce them. We will also tell you which software you need to create videos in all sorts of different styles. Let’s begin and look at six different types of animation you might like right now.
You may also like: 10 Classical Animated Cartoon Types With Examples
The list of 6 types of animation
1. Traditional animation
As you would expect, this type of animation is the kind of old classic animation drawn on paper. The characters, backgrounds and layout were normally committed to paper by hand, with each drawing being slightly different from its predecessor. The papers were placed on sheets called cels before paint was added to them. Advancements in technology mean animation can be hand-drawn before color is added via software.
Synfig Studio is a popular product for those wishing to produce videos that are traditional in look and feel. It supports a variety of layers and offers a bone system as well as sound support.
2. 2D animation
With 2D animation, movement is created in a two-dimensional environment. Characters and figures can move up, down, left or right but won’t move nearer or further away from the viewer. Many 2D animated video software can be used to make this kind of video. Pencil 2D is a leading solution noted for its simplicity and ease of use.
This type of animation is ideal for animating on the move and runs on various operating platforms. What’s also great about Pencil 2D is that it allows you to switch between raster and vector workflows quickly and is completely free to use, even if you need it for commercial purposes.
3. 3D animation
With 3D animation, you can represent real-world 3D images in a digital space. The main three processes of 3D are modeling, layout and animation plus rendering. There are many reliable solutions for 3D animation on the market, with Autodesk 3DS Max being a market leader.
This product offers simple, robust modeling, allowing you to create a wide range of environments with richly-detailed characters and enjoy high-end rendering. It is used for producing games, product design, architecture and more.
4. Clay animation
Clay animation is also called claymation and has been around for many years. In clay animation, clay pieces are used to create characters and background animation. The pieces are moved or deformed between frames so continuous motion can occur.
One leading solution for clay animation is Adobe Animate CC. With this product, you can create vector animations for apps, games, videos and more. You can publish the results quickly and can animate pretty much anything, allowing your characters to walk, talk, blink and more with ease.
It’s also possible to create illusions of depths via the enhanced camera tool, and new features are being added all the time.
5. HTML animation
HMTL5 allows you to do all sorts of things including elements of video and animation creation. You can create excellent animated content via a fusion of HTML5, JavaScript and CSS3. HTML5 is essentially the language of today’s most exciting websites and is used to add vast beauty and efficiency to them.
HTML5 Maker is a free solution ideal for beginners and pros that supports various leading text filters and offers a diverse library of images. You can use this tool to produce elegant animations with stunning transitions and create gorgeous Instagram-esque effects.
6. Kinetic Typography Animation
Typography animation as another type of animation enables you to do all sorts of exciting and thought-provoking things with letters and fonts. Kinetic typography is based on the concept of moving text and is often used for advertising purposes and to deliver important information including statistics and more.
Videos involving kinetic typography animation can help you demand the attention of your audience. One very popular tool for creating kinetic typography animation is Renderforest.
This solution is ideal even for those without vast technical expertise and helps you create animations, music visualizations, slideshows and much more in mere moments. Trailers, YouTube openings, logo animations are frequently created with the tool, as are explainer animations and whiteboard videos, to give you just a few more examples.
Conclusion
Once you have found the types of animated videos and tools that appeal to you the most and have created your content, you can put magical finishing touches to your videos by using Filmora.
You may be amazed to see how quickly you can get to grips with these different styles and tools even if your experience is relatively limited, so why wait any longer to start experimenting? More and more people are surpassing their expectations all the time by playing around with different resources for online animation.
Shanoon Cox
Shanoon Cox is a writer and a lover of all things video.
Follow @Shanoon Cox
10 Best Photoshop Cartoon Effects For Creatives
10 Photoshop Cartoon Effects For Creatives
An easy yet powerful editor
Numerous effects to choose from
Detailed tutorials provided by the official channel
Whether cartoon lover or not, photo cartoon effects is admired by everyone nowadays. People want to use Photoshop cartoon effects.
Using Photoshop applications lets, you know that editing and applying effects are often time-consuming. Adjusting the color, resizing the image, applying effects is lengthy, requires focus, and sometimes may be boring. Thus, we have some Photoshop cartoon effects that will save your time and provide you with desired results.
In this article
01 [11 Best Photoshop Cartoon Effects](#Part 1)
02 [How To Create A Photo To Cartoon Effect In A Photoshop](#Part 2)
Part 1 Best Photoshop Cartoon Effects
If you prefer to download the cartoon effect app or want to edit the photo online without editing, here’s is a list of some of the best Photoshop or Premiere Pro cartoon effects:
01Vintage Comic Creator
Vintage Comic Creator allows users to add After Effects in cartoon effects in photographs and texts. This can be the best choice if you want to add some shape effects, color, and change texture.
Along with cartoon edit text, an individual can also download overlays, pattern styles, and layer styles to make it comic book text. All the downloaded versions of templates are popular and editable as per the user’s requirement.
02Ultra Realistic 3D Space effect
Are you a space lover and looking for space inspires cartoon edits? Here’s a Solution. Ultra Realistic 3D Space cartoon effect allows the users to create editable fun cartoon text and Space themes.
Since it provides a variety of themes and ideas doesn’t limit the user when it comes to editing.
It provides you with a file with an example to make it easy to apply the cartoon effect online according to your wish.
03Animated Zombie Grime Art Photoshop action
To the fans of all the zombie movies, here’s something you should try out!
Animated Zombie Grime Art provides features in which users can edit their photographs with zombie cartoon effects and experience how they will look like a zombie with zero effort. It also provides the option to create and save GIFs or videos. One can easily use them on their social media accounts.
04Cartoon art Photoshop action
A quick and easy online cartoon effect helps individuals edit their photographs into paintings or cartoon characters. With only a few simple actions, users can easily edit their pictures. It provides editing in paintings, cartoons, oil pastels, oil paintings, etc.
05Soft Photoshop cartoon effects
Soft Photoshop cartoon effects help the users edit the photos into cartoon effects and allow them to add smooth effects to them. With just one click, you can add different colors to your image can adjust the brightness, contrast, highlight, texture, etc. It includes layers and smart filters, thus providing various editing options.
06Gimp cartoon effect
It is one of the fastest methods to edit your photographs into cartoon effects. Within a single click, you can cartoonify your pictures. With the help of the Gimp cartoon effect, the user can readjust brightness, contrast, light, etc. You can try soft burn, burn and overlay and can invert colors. It provides different filters with special effects that users can use free of cost.
07Pop art Photoshop action
Pop art Photoshop action easily converts any photograph into a retro cartoon photo effect. It transforms the picture into a cartoon customized painting within one click. Users can enjoy the features of adjusting colors and can change the background according to their wishes.

08Cell shader Photoshop action
If you want to convert photos into cartoon effects and at the same time want to apply cell shading, then here’s a magic photo cartoon effect. Cartooning your picture along with cell shading can be time-consuming sometimes. Cell shader Photoshop allows the user to shade the image with a single click. You can try it on any picture.
093D cartoon text effect
This cartoon effect app helped change the text or the style of the text by adding specific animations or filters. It includes different forms and types in which users can edit the text and make it look fantastic. This 3D animation you can use in your document in animation or simple editing.
10Filmora cartoon effects
With Wondershare Filmora Video Editor , users can take a new picture or add a photo from their phone’s gallery. Once the image is ready for editing, you should tap on the Apply Cartoon Effect button. It contains 12 different cartoon photo effect styles; thus, users can choose any style they want to insert in their picture. You can also add motion to images, videos, and unlimited editing features with the latest updates.
For Win 7 or later (64-bit)
For macOS 10.12 or later
11 Caricature maker Photoshop action
You can turn your photographs into caricatures and make them look awesome. With the help of this After Effects, cartoon animation converts a simple picture into a fun carriage with just one click. You can adjust colors, size, and shape and add more features.
Part 2 How To Create A Photo To Cartoon Effect In A Photoshop
Below is a guide that will help you know more about Photoshop’s cartoon effect.
● Step 1: Select Image
Now, choose an image you want to cartoonize.
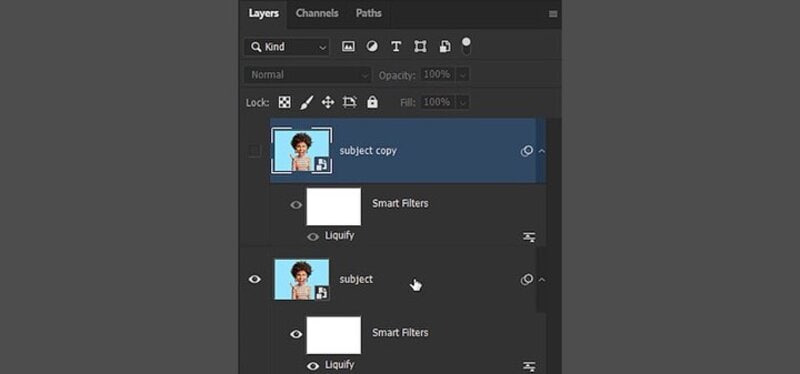
● Step 2: Apply Filter-Sharpen
Go to Filter to sharpen the image. Select the Gaussian Blur from the Remove drop-down list
Press OK.
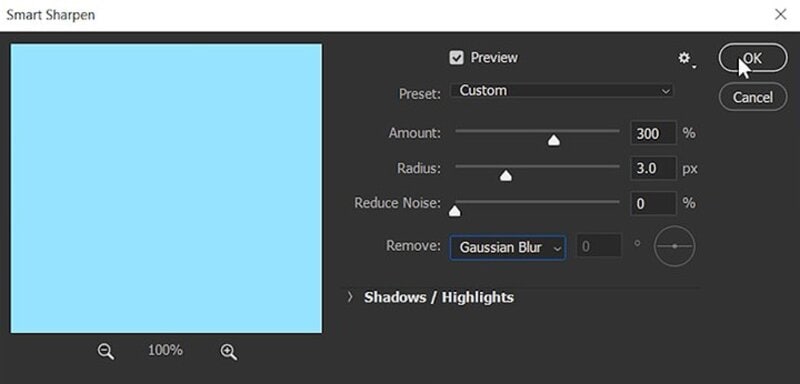
● Step 3: Apply Filter-Stylize
Go to Filter, then apply stylization and Oil paint.
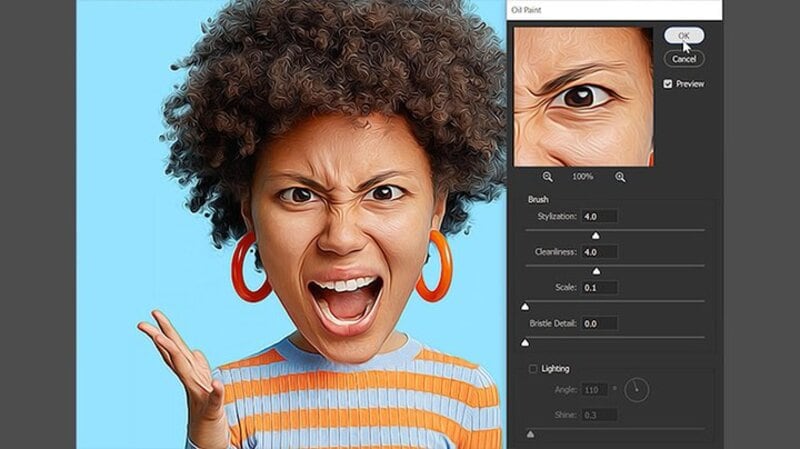
● Step 4: Choose Poster Edges
Choose from the list of effects on the filter gallery, click on Poster Edges and click OK.
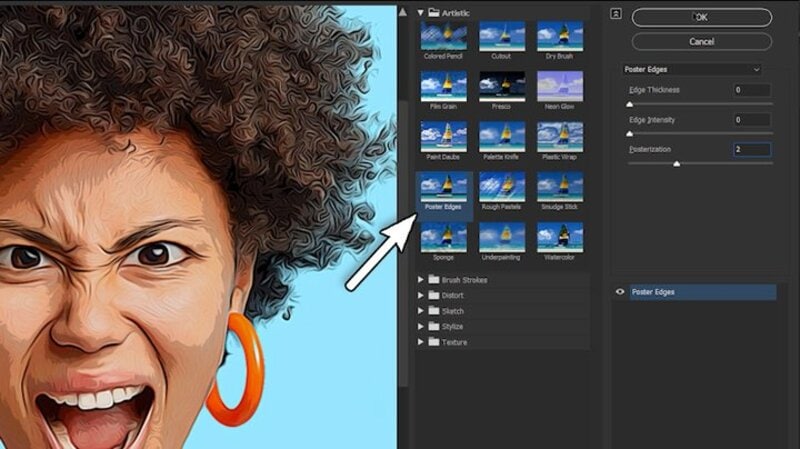
● Step 5: Blur
It will start to resemble a cartoon, but there’s still more to do, so use the Filter > Blur Menu to add a Surface Blur. Set the Threshold to 15 pixels and the Radius to 12 pixels. This effect gives the skin a considerably smoother and cleaner appearance. Select OK.
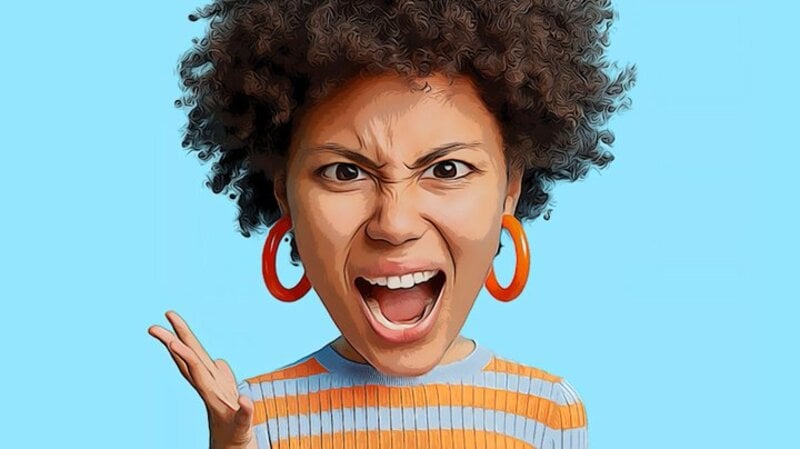
● Step 6: Unsharp Mask
You can add some sharpness and increase particular highlights by going to Filter > Sharpen > Unsharp Mask.
Unhide the second Smart Object layer and change its blending mode to Overlay. Then, reduce the layer’s Opacity to 55 percent.
Now, it will start to resemble a cartoon, but there’s still more to do, so use the Filter > Blur Menu to add a Surface Blur. Set the Threshold to 12 pixels and the Radius to 12 pixels.
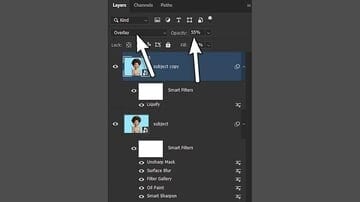
● Step 7: Apply the Oil paint filter again
Return to Filter > Filter Gallery and select Poster Edges once more. These will draw attention to certain aspects of the portrait.
Choose the Oil Paint Filter from Filter > Stylize. Select OK.
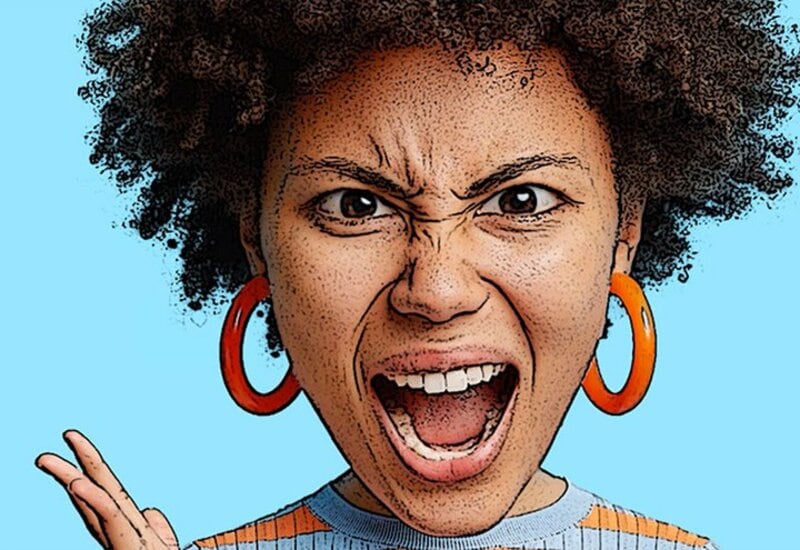
● Step 8: Double-click on Filter Gallery
Click OK after double-clicking the Filter Gallery Smart Filter already on this layer.
Carry on with the same steps for the Oil Paint Filter.
Select OK.
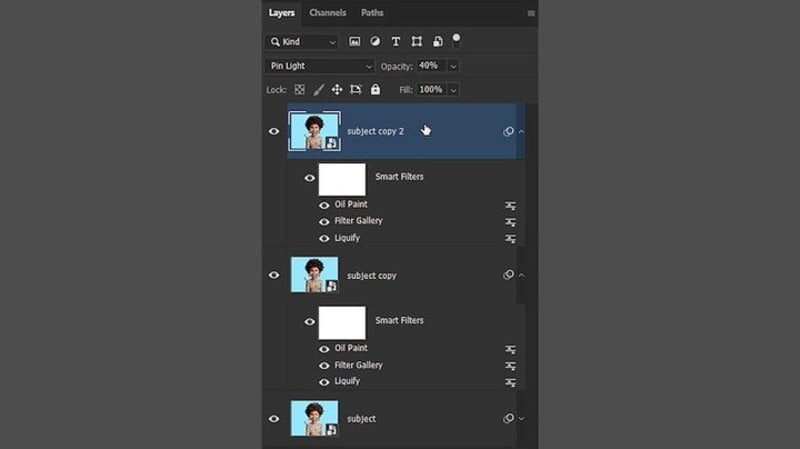
● Step 9: Choose the Raw filter option
Let’s take this photo cartoon effect to the next level with a simple method! To make a Stamp Visible Layer, choose the very top layer and press Control-Shift-Alt-E. When you wish to merge all the layers in a document onto a new layer, this shortcut comes in handy.
Lastly, convert the new layer to a Smart Object by right-clicking on it.
Select the Camera Raw Filter option from the Filter menu.
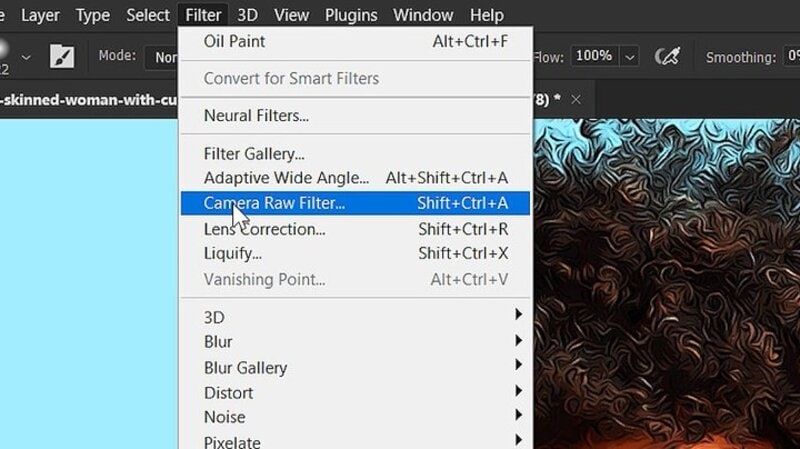
● Ending Thoughts →
● After visiting this article, I’m sure you have plenty of options for cartoon effects according to your choice. In this technological world, it’s hard to find the Photoshop cartoon effect of your desire, which helps save time.
● The above is one of the best After Effects cartoon animations you can use as a cartoon lover. Besides, you can also try out our recommended Filmora – the editor in vogue for its world-class editing features to help enhance your data.
Whether cartoon lover or not, photo cartoon effects is admired by everyone nowadays. People want to use Photoshop cartoon effects.
Using Photoshop applications lets, you know that editing and applying effects are often time-consuming. Adjusting the color, resizing the image, applying effects is lengthy, requires focus, and sometimes may be boring. Thus, we have some Photoshop cartoon effects that will save your time and provide you with desired results.
In this article
01 [11 Best Photoshop Cartoon Effects](#Part 1)
02 [How To Create A Photo To Cartoon Effect In A Photoshop](#Part 2)
Part 1 Best Photoshop Cartoon Effects
If you prefer to download the cartoon effect app or want to edit the photo online without editing, here’s is a list of some of the best Photoshop or Premiere Pro cartoon effects:
01Vintage Comic Creator
Vintage Comic Creator allows users to add After Effects in cartoon effects in photographs and texts. This can be the best choice if you want to add some shape effects, color, and change texture.
Along with cartoon edit text, an individual can also download overlays, pattern styles, and layer styles to make it comic book text. All the downloaded versions of templates are popular and editable as per the user’s requirement.
02Ultra Realistic 3D Space effect
Are you a space lover and looking for space inspires cartoon edits? Here’s a Solution. Ultra Realistic 3D Space cartoon effect allows the users to create editable fun cartoon text and Space themes.
Since it provides a variety of themes and ideas doesn’t limit the user when it comes to editing.
It provides you with a file with an example to make it easy to apply the cartoon effect online according to your wish.
03Animated Zombie Grime Art Photoshop action
To the fans of all the zombie movies, here’s something you should try out!
Animated Zombie Grime Art provides features in which users can edit their photographs with zombie cartoon effects and experience how they will look like a zombie with zero effort. It also provides the option to create and save GIFs or videos. One can easily use them on their social media accounts.
04Cartoon art Photoshop action
A quick and easy online cartoon effect helps individuals edit their photographs into paintings or cartoon characters. With only a few simple actions, users can easily edit their pictures. It provides editing in paintings, cartoons, oil pastels, oil paintings, etc.
05Soft Photoshop cartoon effects
Soft Photoshop cartoon effects help the users edit the photos into cartoon effects and allow them to add smooth effects to them. With just one click, you can add different colors to your image can adjust the brightness, contrast, highlight, texture, etc. It includes layers and smart filters, thus providing various editing options.
06Gimp cartoon effect
It is one of the fastest methods to edit your photographs into cartoon effects. Within a single click, you can cartoonify your pictures. With the help of the Gimp cartoon effect, the user can readjust brightness, contrast, light, etc. You can try soft burn, burn and overlay and can invert colors. It provides different filters with special effects that users can use free of cost.
07Pop art Photoshop action
Pop art Photoshop action easily converts any photograph into a retro cartoon photo effect. It transforms the picture into a cartoon customized painting within one click. Users can enjoy the features of adjusting colors and can change the background according to their wishes.
08Cell shader Photoshop action
If you want to convert photos into cartoon effects and at the same time want to apply cell shading, then here’s a magic photo cartoon effect. Cartooning your picture along with cell shading can be time-consuming sometimes. Cell shader Photoshop allows the user to shade the image with a single click. You can try it on any picture.
093D cartoon text effect
This cartoon effect app helped change the text or the style of the text by adding specific animations or filters. It includes different forms and types in which users can edit the text and make it look fantastic. This 3D animation you can use in your document in animation or simple editing.
10Filmora cartoon effects
With Wondershare Filmora Video Editor , users can take a new picture or add a photo from their phone’s gallery. Once the image is ready for editing, you should tap on the Apply Cartoon Effect button. It contains 12 different cartoon photo effect styles; thus, users can choose any style they want to insert in their picture. You can also add motion to images, videos, and unlimited editing features with the latest updates.
For Win 7 or later (64-bit)
For macOS 10.12 or later
11 Caricature maker Photoshop action
You can turn your photographs into caricatures and make them look awesome. With the help of this After Effects, cartoon animation converts a simple picture into a fun carriage with just one click. You can adjust colors, size, and shape and add more features.
Part 2 How To Create A Photo To Cartoon Effect In A Photoshop
Below is a guide that will help you know more about Photoshop’s cartoon effect.
● Step 1: Select Image
Now, choose an image you want to cartoonize.
● Step 2: Apply Filter-Sharpen
Go to Filter to sharpen the image. Select the Gaussian Blur from the Remove drop-down list
Press OK.
● Step 3: Apply Filter-Stylize
Go to Filter, then apply stylization and Oil paint.
● Step 4: Choose Poster Edges
Choose from the list of effects on the filter gallery, click on Poster Edges and click OK.
● Step 5: Blur
It will start to resemble a cartoon, but there’s still more to do, so use the Filter > Blur Menu to add a Surface Blur. Set the Threshold to 15 pixels and the Radius to 12 pixels. This effect gives the skin a considerably smoother and cleaner appearance. Select OK.
● Step 6: Unsharp Mask
You can add some sharpness and increase particular highlights by going to Filter > Sharpen > Unsharp Mask.
Unhide the second Smart Object layer and change its blending mode to Overlay. Then, reduce the layer’s Opacity to 55 percent.
Now, it will start to resemble a cartoon, but there’s still more to do, so use the Filter > Blur Menu to add a Surface Blur. Set the Threshold to 12 pixels and the Radius to 12 pixels.
● Step 7: Apply the Oil paint filter again
Return to Filter > Filter Gallery and select Poster Edges once more. These will draw attention to certain aspects of the portrait.
Choose the Oil Paint Filter from Filter > Stylize. Select OK.
● Step 8: Double-click on Filter Gallery
Click OK after double-clicking the Filter Gallery Smart Filter already on this layer.
Carry on with the same steps for the Oil Paint Filter.
Select OK.
● Step 9: Choose the Raw filter option
Let’s take this photo cartoon effect to the next level with a simple method! To make a Stamp Visible Layer, choose the very top layer and press Control-Shift-Alt-E. When you wish to merge all the layers in a document onto a new layer, this shortcut comes in handy.
Lastly, convert the new layer to a Smart Object by right-clicking on it.
Select the Camera Raw Filter option from the Filter menu.
● Ending Thoughts →
● After visiting this article, I’m sure you have plenty of options for cartoon effects according to your choice. In this technological world, it’s hard to find the Photoshop cartoon effect of your desire, which helps save time.
● The above is one of the best After Effects cartoon animations you can use as a cartoon lover. Besides, you can also try out our recommended Filmora – the editor in vogue for its world-class editing features to help enhance your data.
[Top 10] Best Photo to Animation Converters That Give You an Advantage
[Top 10] Best Photo to Animation Converters That Give You an Advantage
An easy yet powerful editor
Numerous effects to choose from
Detailed tutorials provided by the official channel
We do have a couple of recommendations to give. There’s a wide variety of tools out there that will allow you to make animated pictures. With some actually allowing you to add animation (or motion) to your photographs while others bring a pop-up of life to your pictures with artistic filters and effects.
Have a look at our list of the top ten best photos to animation converter tools below to see if one of them catches your eye.
Alright, let’s get straight to our list of the best photo to animation converter tools available. As mentioned, we’ve picked quite the variety — including both software and online photo animator tools so that you can find one that best suits the kind of projects that you’re working on.
For your convenience, we’ve included the pros and cons of each converter as well as the most common scenarios each application can be used.
01Filmora
Rating and Reviews: [Techradar: 4.5/5]
Wondershare Filmora Video Editor , while, first and foremost, is an advanced video editor, is the first photo animation maker on this list of ours. This software is highly-rated online and it comes with a bunch of presets, filters, and effects, that you can use in order to animate your photographs. Its more advanced video editing functions would no doubt prove to be useful in the future as well, allowing you to increase the complexity of your projects and achieve more and more things.
● With Filmora, you have access to a built-in library of Effects and Elements that you can use in order to make animated pictures.
● The advanced video editing functions can also be used to create more complex motion animations that you are unlikely to see in other alternatives.
URL: https://filmora.wondershare.com/
| PROS | CONS |
|---|---|
| ● Access to built-in effects and elements library.● Advanced editing functions.● A FREE trial is available to try out its many features. | ● As a downloadable software, Filmora will require downloading and installing.● Some of its features and functions are locked in the FREE version as well.● Payment is either subscription-based or one-time for a perpetual license. |
For Win 7 or later (64-bit)
For macOS 10.12 or later
02PicMonkey
Rating and Reviews: [G2: 4.4/5]
When it comes to online photo animator tools, PicMonkey is definitely one of the first that people recommend. It’s premium software, so you’ll have to pay to use all of its functions — with the cheapest plan worth $72 annually or $7.99 monthly. The best part about it is, undoubtedly, the fact that it was developed by Shutterstock, which is highly regarded in the photography industry. So, you can surely rely on stable support.
● Photo Animation maker with lots of built-in animation effects and templates that allow users to easily make animated pictures.
URL: https://www.picmonkey.com/design/photo-animation-maker
| PROS | CONS |
|---|---|
| ● A FREE trial is available to test out its functions.● Developed by a reliable company.● Packed with lots of built-in animated effects and presets. | ● Packed with lots of built-in animated effects and presets.● No software version for use without the internet.● Does not come equipped with advanced custom animation tools. |

03Adobe Creative Cloud Express
Rating and Reviews: [Creative Bloq: 4/5]
The Adobe Creative Cloud Express is both an online photo animator and an application that you can download and install on your phone. As is expected from any Adobe product, it’s quite premium in make and is better suited for more serious photo animations — especially as you’ll need to pay in order to be able to use it to its fullest extent.
● Comes with a veritable library of templates, effects, and filters for advanced photo editing and photo animation.
URL: https://www.adobe.com/express/create/social-media-graphic
| PROS | CONS |
|---|---|
| ● Advanced photo editing tool.● Available both online and as an app.● Reliable and trustworthy adobe product. | ● The FREE trial is limited.● The FREE trial is limited.● Advanced photo editing is not suitable for beginners. |

04ColorCinch
Rating and Reviews: [Crozdesk: 4/5]
ColorCinch, or Cartoonize, as it is also called, is another popular online photo animator that you might have heard about already. This one features quite a few presets that you can use to quickly change the look of your photographs.
● Photo editing functions for breathing new life into existing photographs.
● Presets, templates, filters, and effects are available for easy and efficient photo editing.
URL: https://www.cartoonize.net/
| PROS | CONS |
|---|---|
| ● Beginner-friendly UI.● Comes with lots of filters and effects built-in.● Cartoonizer effect for simple photo animation onlinep. | ● Paid tool Limited FREE trial.● Subscription-based packages.● Limited customer animation functions. |

05Photo Cartoon
Rating and Reviews: N/A
Photo Cartoon is an online photo animator that specifically alters your photos and ‘cartoon-izes’ it (with several effects to choose from as to the specific style that you want). This single-use, while definitely not the most advanced on this list of ours, offers the user an easy way to change the look of their photographs.
● Transform photos into cartoons, paintings, drawings, and caricatures.
URL: https://photocartoon.net/
| PROS | CONS |
|---|---|
| ● Quick and easy to use● Online software, good for all devices● The finished photo animation can be downloaded and shared. | ● Very basic functions.● Limited effects/filters to choose from. ● Not highly rated online. |
06BeFunky
Rating and Reviews: [G2: 4.2/5]
With BeFunky, we go back to somewhat more advanced online photo animator tools. This one works quite simply as well though. Similar to the previous tool we introduced, BeFunky is meant primarily for quickly and easily adding filters and effects to photographs to change its style to look more like a cartoon or animation.
● Create a cartoon version of your images easily and quickly.
URL: https://www.befunky.com/features/photo-to-cartoon/
| PROS | CONS |
|---|---|
| ● Easy-to-use and beginner-friendly● Easy-to-use and beginner-friendly.● Available online and thus compatible with most devices. | ● Limited photo editing scope.● Sign-up is required for long-term use.● No advanced custom animation functions. |

077. ASPOSE
Rating and Reviews: N/A
Although not very well-known, ASPOSE is an easy way of animating pictures online. All you really have to do is upload your file (in the way that is suggested) and you’re good to go. You’ll be given a choice in what kind of animations you want to put on your photograph thereafter. And, when the conversion is complete, it’ll be FREE to download and share.
● Easily make animated pictures online by uploading photographs to be animated.
URL: https://products.aspose.app/imaging/animation-maker
| PROS | CONS |
|---|---|
| ● FREE photo to animation converter● Easy-to-use and efficient.● Motion animations available. | ● Internet is required for use.● Not the most advanced filters/effects/animations are available.● No custom animation function. |

08TheCartoonist.me
Rating and Reviews: N/A
We’re approaching more and more obscure territory the further we go along this list, with many of the tools, including this next one, called ‘The Cartoonist.me’, not having been rated by the usual tech websites. But, that doesn’t mean that the tool itself is any less useful. This one, in particular, is akin to the other cartoon-izers that we introduced earlier — in that it changes the look of photographs into one similar to what is used in animations.
● Picture animator online that allows you to turn your pictures into cartoon versions of their former self.
URL: https://thecartoonist.me/
| PROS | CONS |
|---|---|
| ● FREE photo animation maker.● Basic cartoon effects available.● Upload and Download | ● No advanced photo editing.● No advanced photo editing.● Not highly rated. |

09Snapstouch
Rating and Reviews: N/A
Snapstouch is another obscure, but no less useful, photo editing tool that adds a touch animation to your photographs. This online tool offers sketch, painting, pencil sketch, outline, cartoon, and many other filters that you can apply to your photographs to directly change their look.
● Change the look of your photographs with an easily applied filter.
URL: http://www.snapstouch.com/
| PROS | CONS |
|---|---|
| ● Easy-to-use (upload then download)● FREE to use online tool.● Several effects to choose from. | ● A limited selection of filter effects.● Old and dated UI.● Not highly rated. |

10AnyMaking
Rating and Reviews: N/A
AnyMaking is a basic online photo editor that comes with a variety of photo effects that you can apply to your photographs to change their looks. Much like the previous tools, AnyMaking offers ‘animation’ style filters that can turn your photographs into something that looks like they came from one of your favorite animated films.
● Turn your photographs completely anew with fun photo effects.
| PROS | CONS |
|---|---|
| ● FREE-to-use photo effects tool.● Cartoonizer effect for animating photographs.● Easy-to-use (upload then download) | ● Limited photo effects.● No custom photo animation functions.● Not highly rated. |

● Key Takeaways from This Episode →
● Photo to Animation is quite a broad subject and, fittingly, that means that the tools that allow for it are varied indeed.
● Some photo to animation converters will allow you to completely change the look of your photograph with a single application of a filter. While others are more involved (and thus, more flexible) and require more careful customization.
● We’ve included both types (and all the types between) in our list of photo to animation converters. Hopefully, you’ll find one that can help you make the animated pictures that you want to make.
We do have a couple of recommendations to give. There’s a wide variety of tools out there that will allow you to make animated pictures. With some actually allowing you to add animation (or motion) to your photographs while others bring a pop-up of life to your pictures with artistic filters and effects.
Have a look at our list of the top ten best photos to animation converter tools below to see if one of them catches your eye.
Alright, let’s get straight to our list of the best photo to animation converter tools available. As mentioned, we’ve picked quite the variety — including both software and online photo animator tools so that you can find one that best suits the kind of projects that you’re working on.
For your convenience, we’ve included the pros and cons of each converter as well as the most common scenarios each application can be used.
01Filmora
Rating and Reviews: [Techradar: 4.5/5]
Wondershare Filmora Video Editor , while, first and foremost, is an advanced video editor, is the first photo animation maker on this list of ours. This software is highly-rated online and it comes with a bunch of presets, filters, and effects, that you can use in order to animate your photographs. Its more advanced video editing functions would no doubt prove to be useful in the future as well, allowing you to increase the complexity of your projects and achieve more and more things.
● With Filmora, you have access to a built-in library of Effects and Elements that you can use in order to make animated pictures.
● The advanced video editing functions can also be used to create more complex motion animations that you are unlikely to see in other alternatives.
URL: https://filmora.wondershare.com/
| PROS | CONS |
|---|---|
| ● Access to built-in effects and elements library.● Advanced editing functions.● A FREE trial is available to try out its many features. | ● As a downloadable software, Filmora will require downloading and installing.● Some of its features and functions are locked in the FREE version as well.● Payment is either subscription-based or one-time for a perpetual license. |
For Win 7 or later (64-bit)
For macOS 10.12 or later
02PicMonkey
Rating and Reviews: [G2: 4.4/5]
When it comes to online photo animator tools, PicMonkey is definitely one of the first that people recommend. It’s premium software, so you’ll have to pay to use all of its functions — with the cheapest plan worth $72 annually or $7.99 monthly. The best part about it is, undoubtedly, the fact that it was developed by Shutterstock, which is highly regarded in the photography industry. So, you can surely rely on stable support.
● Photo Animation maker with lots of built-in animation effects and templates that allow users to easily make animated pictures.
URL: https://www.picmonkey.com/design/photo-animation-maker
| PROS | CONS |
|---|---|
| ● A FREE trial is available to test out its functions.● Developed by a reliable company.● Packed with lots of built-in animated effects and presets. | ● Packed with lots of built-in animated effects and presets.● No software version for use without the internet.● Does not come equipped with advanced custom animation tools. |
03Adobe Creative Cloud Express
Rating and Reviews: [Creative Bloq: 4/5]
The Adobe Creative Cloud Express is both an online photo animator and an application that you can download and install on your phone. As is expected from any Adobe product, it’s quite premium in make and is better suited for more serious photo animations — especially as you’ll need to pay in order to be able to use it to its fullest extent.
● Comes with a veritable library of templates, effects, and filters for advanced photo editing and photo animation.
URL: https://www.adobe.com/express/create/social-media-graphic
| PROS | CONS |
|---|---|
| ● Advanced photo editing tool.● Available both online and as an app.● Reliable and trustworthy adobe product. | ● The FREE trial is limited.● The FREE trial is limited.● Advanced photo editing is not suitable for beginners. |
04ColorCinch
Rating and Reviews: [Crozdesk: 4/5]
ColorCinch, or Cartoonize, as it is also called, is another popular online photo animator that you might have heard about already. This one features quite a few presets that you can use to quickly change the look of your photographs.
● Photo editing functions for breathing new life into existing photographs.
● Presets, templates, filters, and effects are available for easy and efficient photo editing.
URL: https://www.cartoonize.net/
| PROS | CONS |
|---|---|
| ● Beginner-friendly UI.● Comes with lots of filters and effects built-in.● Cartoonizer effect for simple photo animation onlinep. | ● Paid tool Limited FREE trial.● Subscription-based packages.● Limited customer animation functions. |
05Photo Cartoon
Rating and Reviews: N/A
Photo Cartoon is an online photo animator that specifically alters your photos and ‘cartoon-izes’ it (with several effects to choose from as to the specific style that you want). This single-use, while definitely not the most advanced on this list of ours, offers the user an easy way to change the look of their photographs.
● Transform photos into cartoons, paintings, drawings, and caricatures.
URL: https://photocartoon.net/
| PROS | CONS |
|---|---|
| ● Quick and easy to use● Online software, good for all devices● The finished photo animation can be downloaded and shared. | ● Very basic functions.● Limited effects/filters to choose from. ● Not highly rated online. |
06BeFunky
Rating and Reviews: [G2: 4.2/5]
With BeFunky, we go back to somewhat more advanced online photo animator tools. This one works quite simply as well though. Similar to the previous tool we introduced, BeFunky is meant primarily for quickly and easily adding filters and effects to photographs to change its style to look more like a cartoon or animation.
● Create a cartoon version of your images easily and quickly.
URL: https://www.befunky.com/features/photo-to-cartoon/
| PROS | CONS |
|---|---|
| ● Easy-to-use and beginner-friendly● Easy-to-use and beginner-friendly.● Available online and thus compatible with most devices. | ● Limited photo editing scope.● Sign-up is required for long-term use.● No advanced custom animation functions. |
077. ASPOSE
Rating and Reviews: N/A
Although not very well-known, ASPOSE is an easy way of animating pictures online. All you really have to do is upload your file (in the way that is suggested) and you’re good to go. You’ll be given a choice in what kind of animations you want to put on your photograph thereafter. And, when the conversion is complete, it’ll be FREE to download and share.
● Easily make animated pictures online by uploading photographs to be animated.
URL: https://products.aspose.app/imaging/animation-maker
| PROS | CONS |
|---|---|
| ● FREE photo to animation converter● Easy-to-use and efficient.● Motion animations available. | ● Internet is required for use.● Not the most advanced filters/effects/animations are available.● No custom animation function. |
08TheCartoonist.me
Rating and Reviews: N/A
We’re approaching more and more obscure territory the further we go along this list, with many of the tools, including this next one, called ‘The Cartoonist.me’, not having been rated by the usual tech websites. But, that doesn’t mean that the tool itself is any less useful. This one, in particular, is akin to the other cartoon-izers that we introduced earlier — in that it changes the look of photographs into one similar to what is used in animations.
● Picture animator online that allows you to turn your pictures into cartoon versions of their former self.
URL: https://thecartoonist.me/
| PROS | CONS |
|---|---|
| ● FREE photo animation maker.● Basic cartoon effects available.● Upload and Download | ● No advanced photo editing.● No advanced photo editing.● Not highly rated. |
09Snapstouch
Rating and Reviews: N/A
Snapstouch is another obscure, but no less useful, photo editing tool that adds a touch animation to your photographs. This online tool offers sketch, painting, pencil sketch, outline, cartoon, and many other filters that you can apply to your photographs to directly change their look.
● Change the look of your photographs with an easily applied filter.
URL: http://www.snapstouch.com/
| PROS | CONS |
|---|---|
| ● Easy-to-use (upload then download)● FREE to use online tool.● Several effects to choose from. | ● A limited selection of filter effects.● Old and dated UI.● Not highly rated. |
10AnyMaking
Rating and Reviews: N/A
AnyMaking is a basic online photo editor that comes with a variety of photo effects that you can apply to your photographs to change their looks. Much like the previous tools, AnyMaking offers ‘animation’ style filters that can turn your photographs into something that looks like they came from one of your favorite animated films.
● Turn your photographs completely anew with fun photo effects.
| PROS | CONS |
|---|---|
| ● FREE-to-use photo effects tool.● Cartoonizer effect for animating photographs.● Easy-to-use (upload then download) | ● Limited photo effects.● No custom photo animation functions.● Not highly rated. |
● Key Takeaways from This Episode →
● Photo to Animation is quite a broad subject and, fittingly, that means that the tools that allow for it are varied indeed.
● Some photo to animation converters will allow you to completely change the look of your photograph with a single application of a filter. While others are more involved (and thus, more flexible) and require more careful customization.
● We’ve included both types (and all the types between) in our list of photo to animation converters. Hopefully, you’ll find one that can help you make the animated pictures that you want to make.
12 Aesthetic GIF Instagram for Marketers
12 Aesthetic GIF Instagram for Marketers and Creatives
An easy yet powerful editor
Numerous effects to choose from
Detailed tutorials provided by the official channel
Cute-Instagram story-stickers or in simple words GIFs are becoming one of the most handy ways to decorate your Instagram-stories with beautiful & distinctive ways – even in the case of not being an artist or having artistic mind. However, there are various Instagram GIFs present on the app which is quite difficult to weed by using the wacky & tacky ones to find-out, but don’t worry we will make the structure of your Instagram truly aesthetic.
Who doesn’t want to be attractive with their Instagram-Stories? Let’s find out the means of having aesthetic gif Instagram.
In this article
01 [What Are Aesthetic GIF Instagram?](#Part 1)
02 [How to Search to Find and Use Cute Gifs on Instagram](#Part 2)
03 [10 Stunning Instagram Story Gifs for Bloggers + Creatives](#Part 3)
Part 1 What Are Aesthetic GIF Instagram?
Making use of GIFs on the Instagram app is just a magnificent way to clutch your viewer’s interest as well as spotlight sure factors in the dedicated stories. Aesthetic GIF can let you discover new ways to put GIFs to the Instagram Stories of yours that’s for sure your followers are going to love.
In case you have been searching for some methods to apply the content material that is greater attention-grabbing, engaging, and creative, then making use of Instagram-Stories GIF’s would possibly be one of the most brilliant answers.
Initially, this year, the Instagram teamed-up with the GIPHY to construct a beautiful library of fantastic GIF’s on the Instagram Stories. It is now the time for you be fun loving, expressive and attractive through the use of GIF stickers for any of your pictures or videos in desired story.GIFs are additionally the exquisite device for an organizations to create flawlessly branded Instagram-Stories with assured satisfaction for all of your followers.
Are you ready to begin? Next you will learn about how to look after the cutest GIF’s on the Instagram for your stories.
Part 2 How to Search to Find and Use Cute Gifs on Instagram
You understand what’s truly hard? Well, being in the 2nd when actually you are spending the first-rate time with the cherished ones. You comprehend, what makes it even-harder? At the time of doing something adorable with your loved ones, &you’re making an attempt to just publish an equally adorable Instagram-story whilst nonetheless staying in attractive moment. So what typically happens?
You both probably:
● Save the content-material and strive to bear in mind to submit later or
● You throw some lovely GIFs, with a tag & then name it with a day, that is exactly we all think about.
However, it definitely can be so tough to discover an accurate GIF. Don’t trust us? Just search “fitness” the subsequent time, by doing so, you’re just making an attempt to put-up your ‘workout-of-day’ story. Tons of exceptional selections there are possibly, thankfully, we did one of the most challenging task for you. Tirelessly scoured & determined the fantastic GIFs is Instagram has for you to offer. Let’s begin what and how to search in order to perfectly locate lovable GIFs at the Instagram.
If you are not a regular user of Instagram, then here is one of the most brilliant way to speed up the process of applying stepwise solutions for finding or adding some creative gif Instagram aestheticfor your stories.
● First step is to head towards the Instagram profile & after that click on the profile picture to begin growing a latest style of story.
● Next thing for you to do is just click on the + (plus) sign available at the top-left corner. (In case you have already posted something in your story)
● On the third step, upload your recently selected picture or a video for that particular story.
● Hit the ‘square smiley-face’ icon.
● At last click on the “GIF”.
Voila, you are ready to discover the true essence of GIF aesthetic.
Now, is the time for you to find out an answer to your question of “How to search Cute Instagram-story GIFs’? As there are tons of GIFs are available at the Instagram app to use.
Part 3 Stunning Instagram Story Gifs for Bloggers + Creatives
If you are a blogger or a creative person who just want to get number of followers to your blog for finding right kind of product or service that you are delivering through your posts, then it is a better idea for you to consider adding stunning designed Instagram Story GIFs in your posts.GIF-section can be quite overwhelming & similarly a hard thing to sift as there are numerous options available for you to use and finding the aesthetic GIF Instagram story-stickers is a hard nut to crack.
Here is the compiled list of 10 stunning and the most lovable Instagram Story GIFsfor the artists or bloggers to search while considering aesthetic Instagram stickers.
01The Uncommon Place
Name any instantaneous place where you can easily publish your desired Instagram story & that too with “good times” by the use of relevant GIF? Yes, right from the dedicated polaroid of constellations to some adorable little leaves, ‘The Uncommon Place’ is where you can easily get higher acceptance of attractiveness through GIFs to make it looks better for all your upcoming posts, stories etc. it is very close to the heart and has many cheerful GIFs in the heat colors.
02Vipapier

We may also no-longer all be in a position to completely agree whether or not it is pronounced as “GIF” or “Jiff,” however one thing we all can genuinely agree that this pack of GIFs is absolutely adorable! Right from the scripts to colors, we could not assist any single one, however just “enjoy!” The Vipapier Instagram story-stickers are bit muted & comes with antique feels.
03Lidiaontheroad
With some truly inspirational as well as motivational pack of stickers the Lidiaontheroad has something warm, minimal and neutral in its tones.
04Ohlalalita
It is a cute pack of Instagram story-GIFs by which you can easily and in a pretty much confident manner for any kind of picture or video as per your preferences at the time of uploading.
05Queenbemonyei
Image Name: 12-aesthetic-gif-instagram-for-marketers-and-creatives7
As the name suggests, it makes use of attractive-rich jewel-tones in your Instagram stickers/GIFs with the true blend of beautiful stickers available for the African- American persons.
06Ilustralle
For you to clearly enjoy the true essence of romantic-novel or smoothening dream of frolicking inside the field of flowers, Ilustralle is the one you need today. The stickers here are whimsical & fashionable to give us major hat-inspiration!
07Inspiredbythis
You understand you be aware of we are absolutely going to start this off through a non-public plug. Attending one of the wonderful-occasions or even simply having the stimulation of way of something, the ‘Inspiredbythis’ is magnificent GIF set.
08Gladdest
For you to add cuteness and bubbly appearance in your picture/Posts, this GIF set is for you. Whether it is about a “Good Morning” GIF for your loved one with a cup of tea! Or a mix of balloons for your upcoming birthday-dinner, the Gladdest have it all. This is meant for giving absolutely anything as well as everything. It also brings cheerful-vibes with the warm-toned Instagram-stickers.
09Malenaflores
Whether you are a baking master, a thinker, a reader, or a blogger who is finding cute collection of GIFs on the Instagram, then with a fast searching of “Malenaflores” you can achieve this. Malenaflores absolutely brings softness and feminism to your stories with great varieties of stickers.
10 Chicayeye
In case you like the GIF pictures with warm-color options, then it has all the things to provide really amazing performance.
Filmora App to Apply Varieties in your Instagram Posts
If you desire to obtain greater varieties of services in your Instagram story then by being a little expert about the posts, the added software that can be helpful for applying amazing aspects of powerful features and at the same time being an identical among the followers in a friendlier way, the Filmora app is the brilliant solution you need today.It is one of the most brilliant video-editor and picture editor for all you to create interesting, fun loving and attractiveness in your posts for Instagram in an extraordinary manner. It is a handy way to make the most of it in an interesting way with fun loving features.
Features that you can enjoy the most with Wondershare Filmora Video Editor :
● Capability to beautifully construct the custom-animations
● Different varieties of Effects-pack to make the most out of it for your Instagram stories
● Attractive filters as well as GIFs pack to allow you focused around cute Stickers with right kind of suggestions.
● Additionally flawless features to crop, cut, trim, cut-up & mix the operations in a few-clicks.
● For the visualization, different effects, stickers, GIFs and smileys to be an outstanding creator
● You can also save your creations to your device
● Animations for your videos
● Options to share the same to many websites like Facebook, YouTube, and Instagram story quickly.
Instead of just making use of common, unrealistic and unattractive celebration tags, stickers that can depart a messy-watermark as soon as after the process of developing your story and then spreading it among your friends, you can easily utilise different characteristic of Instagram stickers or GIFs to apply visual appearance to your posts through many different types of Nama GIF Instagram yang aesthetic as per your preference and the types of moments to capture in your photo. Doing this can excellently put the option of being attractive among your followers through your posts. You can use this feature through your android or iPhone device with higher quality.
It is the time for you to try out the latest GIF-ideas for your Instagram-stories, and never forget to apply all of these in your stories for the desired posts and feel trending among your followers.
● Key Takeaways from This Episode →
● Instagram GIFcan be an interesting way to grab the attention of millions without any worries.
● Aesthetic story Instagram is the trend that has been following among the users for their posts to look fantastic.
● Through an Instagram, there are varieties of ways to club together many things in a single picture. Just use the same for adding better solutions to your stories.
Cute-Instagram story-stickers or in simple words GIFs are becoming one of the most handy ways to decorate your Instagram-stories with beautiful & distinctive ways – even in the case of not being an artist or having artistic mind. However, there are various Instagram GIFs present on the app which is quite difficult to weed by using the wacky & tacky ones to find-out, but don’t worry we will make the structure of your Instagram truly aesthetic.
Who doesn’t want to be attractive with their Instagram-Stories? Let’s find out the means of having aesthetic gif Instagram.
In this article
01 [What Are Aesthetic GIF Instagram?](#Part 1)
02 [How to Search to Find and Use Cute Gifs on Instagram](#Part 2)
03 [10 Stunning Instagram Story Gifs for Bloggers + Creatives](#Part 3)
Part 1 What Are Aesthetic GIF Instagram?
Making use of GIFs on the Instagram app is just a magnificent way to clutch your viewer’s interest as well as spotlight sure factors in the dedicated stories. Aesthetic GIF can let you discover new ways to put GIFs to the Instagram Stories of yours that’s for sure your followers are going to love.
In case you have been searching for some methods to apply the content material that is greater attention-grabbing, engaging, and creative, then making use of Instagram-Stories GIF’s would possibly be one of the most brilliant answers.
Initially, this year, the Instagram teamed-up with the GIPHY to construct a beautiful library of fantastic GIF’s on the Instagram Stories. It is now the time for you be fun loving, expressive and attractive through the use of GIF stickers for any of your pictures or videos in desired story.GIFs are additionally the exquisite device for an organizations to create flawlessly branded Instagram-Stories with assured satisfaction for all of your followers.
Are you ready to begin? Next you will learn about how to look after the cutest GIF’s on the Instagram for your stories.
Part 2 How to Search to Find and Use Cute Gifs on Instagram
You understand what’s truly hard? Well, being in the 2nd when actually you are spending the first-rate time with the cherished ones. You comprehend, what makes it even-harder? At the time of doing something adorable with your loved ones, &you’re making an attempt to just publish an equally adorable Instagram-story whilst nonetheless staying in attractive moment. So what typically happens?
You both probably:
● Save the content-material and strive to bear in mind to submit later or
● You throw some lovely GIFs, with a tag & then name it with a day, that is exactly we all think about.
However, it definitely can be so tough to discover an accurate GIF. Don’t trust us? Just search “fitness” the subsequent time, by doing so, you’re just making an attempt to put-up your ‘workout-of-day’ story. Tons of exceptional selections there are possibly, thankfully, we did one of the most challenging task for you. Tirelessly scoured & determined the fantastic GIFs is Instagram has for you to offer. Let’s begin what and how to search in order to perfectly locate lovable GIFs at the Instagram.
If you are not a regular user of Instagram, then here is one of the most brilliant way to speed up the process of applying stepwise solutions for finding or adding some creative gif Instagram aestheticfor your stories.
● First step is to head towards the Instagram profile & after that click on the profile picture to begin growing a latest style of story.
● Next thing for you to do is just click on the + (plus) sign available at the top-left corner. (In case you have already posted something in your story)
● On the third step, upload your recently selected picture or a video for that particular story.
● Hit the ‘square smiley-face’ icon.
● At last click on the “GIF”.
Voila, you are ready to discover the true essence of GIF aesthetic.
Now, is the time for you to find out an answer to your question of “How to search Cute Instagram-story GIFs’? As there are tons of GIFs are available at the Instagram app to use.
Part 3 Stunning Instagram Story Gifs for Bloggers + Creatives
If you are a blogger or a creative person who just want to get number of followers to your blog for finding right kind of product or service that you are delivering through your posts, then it is a better idea for you to consider adding stunning designed Instagram Story GIFs in your posts.GIF-section can be quite overwhelming & similarly a hard thing to sift as there are numerous options available for you to use and finding the aesthetic GIF Instagram story-stickers is a hard nut to crack.
Here is the compiled list of 10 stunning and the most lovable Instagram Story GIFsfor the artists or bloggers to search while considering aesthetic Instagram stickers.
01The Uncommon Place
Name any instantaneous place where you can easily publish your desired Instagram story & that too with “good times” by the use of relevant GIF? Yes, right from the dedicated polaroid of constellations to some adorable little leaves, ‘The Uncommon Place’ is where you can easily get higher acceptance of attractiveness through GIFs to make it looks better for all your upcoming posts, stories etc. it is very close to the heart and has many cheerful GIFs in the heat colors.
02Vipapier
We may also no-longer all be in a position to completely agree whether or not it is pronounced as “GIF” or “Jiff,” however one thing we all can genuinely agree that this pack of GIFs is absolutely adorable! Right from the scripts to colors, we could not assist any single one, however just “enjoy!” The Vipapier Instagram story-stickers are bit muted & comes with antique feels.
03Lidiaontheroad
With some truly inspirational as well as motivational pack of stickers the Lidiaontheroad has something warm, minimal and neutral in its tones.
04Ohlalalita
It is a cute pack of Instagram story-GIFs by which you can easily and in a pretty much confident manner for any kind of picture or video as per your preferences at the time of uploading.
05Queenbemonyei
Image Name: 12-aesthetic-gif-instagram-for-marketers-and-creatives7
As the name suggests, it makes use of attractive-rich jewel-tones in your Instagram stickers/GIFs with the true blend of beautiful stickers available for the African- American persons.
06Ilustralle
For you to clearly enjoy the true essence of romantic-novel or smoothening dream of frolicking inside the field of flowers, Ilustralle is the one you need today. The stickers here are whimsical & fashionable to give us major hat-inspiration!
07Inspiredbythis
You understand you be aware of we are absolutely going to start this off through a non-public plug. Attending one of the wonderful-occasions or even simply having the stimulation of way of something, the ‘Inspiredbythis’ is magnificent GIF set.
08Gladdest
For you to add cuteness and bubbly appearance in your picture/Posts, this GIF set is for you. Whether it is about a “Good Morning” GIF for your loved one with a cup of tea! Or a mix of balloons for your upcoming birthday-dinner, the Gladdest have it all. This is meant for giving absolutely anything as well as everything. It also brings cheerful-vibes with the warm-toned Instagram-stickers.
09Malenaflores
Whether you are a baking master, a thinker, a reader, or a blogger who is finding cute collection of GIFs on the Instagram, then with a fast searching of “Malenaflores” you can achieve this. Malenaflores absolutely brings softness and feminism to your stories with great varieties of stickers.
10 Chicayeye
In case you like the GIF pictures with warm-color options, then it has all the things to provide really amazing performance.
Filmora App to Apply Varieties in your Instagram Posts
If you desire to obtain greater varieties of services in your Instagram story then by being a little expert about the posts, the added software that can be helpful for applying amazing aspects of powerful features and at the same time being an identical among the followers in a friendlier way, the Filmora app is the brilliant solution you need today.It is one of the most brilliant video-editor and picture editor for all you to create interesting, fun loving and attractiveness in your posts for Instagram in an extraordinary manner. It is a handy way to make the most of it in an interesting way with fun loving features.
Features that you can enjoy the most with Wondershare Filmora Video Editor :
● Capability to beautifully construct the custom-animations
● Different varieties of Effects-pack to make the most out of it for your Instagram stories
● Attractive filters as well as GIFs pack to allow you focused around cute Stickers with right kind of suggestions.
● Additionally flawless features to crop, cut, trim, cut-up & mix the operations in a few-clicks.
● For the visualization, different effects, stickers, GIFs and smileys to be an outstanding creator
● You can also save your creations to your device
● Animations for your videos
● Options to share the same to many websites like Facebook, YouTube, and Instagram story quickly.
Instead of just making use of common, unrealistic and unattractive celebration tags, stickers that can depart a messy-watermark as soon as after the process of developing your story and then spreading it among your friends, you can easily utilise different characteristic of Instagram stickers or GIFs to apply visual appearance to your posts through many different types of Nama GIF Instagram yang aesthetic as per your preference and the types of moments to capture in your photo. Doing this can excellently put the option of being attractive among your followers through your posts. You can use this feature through your android or iPhone device with higher quality.
It is the time for you to try out the latest GIF-ideas for your Instagram-stories, and never forget to apply all of these in your stories for the desired posts and feel trending among your followers.
● Key Takeaways from This Episode →
● Instagram GIFcan be an interesting way to grab the attention of millions without any worries.
● Aesthetic story Instagram is the trend that has been following among the users for their posts to look fantastic.
● Through an Instagram, there are varieties of ways to club together many things in a single picture. Just use the same for adding better solutions to your stories.
Also read:
- Best GIF Croppers How to Crop an Animated GIF for 2024
- New In 2024, 6 Types of Animation You May Like
- 2024 Approved Top 10 Best and Fast Ways to Turn Image Into Gif
- Updated In 2024, 15 Best Apps to Turn Photos Into Cartoons and Sketches
- Updated All About 3D Medical Animation And Its Uses
- New 2024 Approved A Roster of 15 Top Disney Channel Cartoons
- The Top 20 Motion Graphics Companies & Studios for 2024
- Updated 2024 Approved How to Animate Picture Online Without Learning From Scratch
- Updated 2024 Approved How to Create Free Photo Collage Frame in Minutes?
- Updated 12+ Stunning Instagram GIF Stickers and How to Make & Find
- 2024 Approved 10 Best Photoshop Cartoon Effects For Creatives
- Updated Easy Shortcut to Convert Videos to Gifs on iPhone
- New 15 Best Apps to Turn Photos Into Cartoons and Sketches
- 2024 Approved Have You Seen the Facebook Cartoon App Everyones Using Lately
- Updated How to Animate Picture Online Without Learning From Scratch for 2024
- New In 2024, Whats Your No. 1 Maker to Animate Your Logo Online Free
- New Whiteboard Animation Services Top 15 Animation Companies to Pick for 2024
- Updated In 2024, 20 Free After Effects Logo Reveal Templates You Will Want to Know
- New 2024 Approved Secret Source to Make a Great Stop Motion Puppet
- 20 Free After Effects Logo Reveal Templates for 2024
- In 2024, Secrets to Make 2D Game Animation
- 5 Photoshop Alternatives to Animate Your Logo
- 2024 Approved Tips That Show Anybody How to Get Awesome Background for Slideshow in PowerPoint
- New How to Draw Cartoons Step by Step with This Guide for 2024
- Updated 5 Websites with Animated Logos That Catch Your Eyes
- Updated In 2024, 10 Cartoon Characters That Should Top Your List
- 15 Forgotten Cartoon Characters of All Time for 2024
- New Best Tips for Effortless Unity 3D Animation
- 2024 Approved Whats Rigging Animation
- Updated In 2024, Best Practices on Online 3D Avatar Creator
- Can Life360 Track Or See Text Messages? What Can You Do with Life360 On Realme GT 5 Pro? | Dr.fone
- How To Repair iPhone 13 iOS? | Dr.fone
- In 2024, Unlocking Made Easy The Best 10 Apps for Unlocking Your Oppo Find N3 Device
- Can't play MP4 files on Xiaomi Redmi K70 Pro
- How to Fake Snapchat Location without Jailbreak On Lava Blaze Curve 5G | Dr.fone
- Tips and Tricks for Setting Up your Vivo T2 5G Phone Pattern Lock
- How to Change GPS Location on Oppo A1x 5G Easily & Safely | Dr.fone
- In 2024, How Can You Transfer Files From Xiaomi Redmi Note 13 5G To iPhone 15/14/13? | Dr.fone
- How to recover deleted photos on Y78 5G
- In 2024, How To Change Infinix Note 30i Lock Screen Password?
- In 2024, 7 Top Ways To Resolve Apple ID Not Active Issue For iPhone SE
- How to Stop Google Chrome from Tracking Your Location On Honor 70 Lite 5G? | Dr.fone
- In 2024, Can I Bypass a Forgotten Phone Password Of Nokia C22?
- In 2024, Complete Tutorial to Use VPNa to Fake GPS Location On Xiaomi Redmi 12 | Dr.fone
- In 2024, Easy Methods How To Transfer Pictures From Apple iPhone 6s to PC | Dr.fone
- Easy steps to recover deleted pictures from Vivo X100.
- In 2024, How to Transfer Data from Realme C67 5G to Samsung Phone | Dr.fone
- How to Reset a Infinix Hot 40i Phone That Is Locked | Dr.fone
- Title: Updated Learn Easy Blender Rigging in Only 2 Minutes
- Author: Elon
- Created at : 2024-05-19 03:04:43
- Updated at : 2024-05-20 03:04:43
- Link: https://animation-videos.techidaily.com/updated-learn-easy-blender-rigging-in-only-2-minutes/
- License: This work is licensed under CC BY-NC-SA 4.0.
